Just 30 years ago, sound in a car was only provided by a standard radio. Nobody thought about sound quality back then. Today everything has changed, and car audio is already a common occurrence. And high-quality sound is an entire industry with a special culture in which high technology serves for the benefit of art and beauty. Many devices have been created: from inexpensive radio tape recorders to speaker systems. One of the most common methods of improving the sound quality in a car is installing an acoustic shelf on the Lada Priora.
Purpose and design features
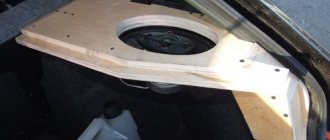
The element is located behind the row of rear seats, regardless of whether it is a sedan, station wagon or hatchback. On the Priora, both a regular and an acoustic shelf can be installed from the factory, although the latter can be called such a stretch. It is designed to secure speakers and other devices that reproduce sound. It has cutouts for standard elliptical-shaped speakers measuring 6x9 inches.
The factory shelf is in most cases made of plastic. Due to weak fastenings, it constantly rattles, which reduces the sound quality.
Installing an acoustic shelf solves several problems at once:
- sound quality becomes higher;
- when playing audio recordings, extraneous noises cease to be heard, this is especially noticeable at high volumes;
- you can install speakers of any shape and size (relevant for a homemade product);
- the ability to create a competent acoustic scene in the car thanks to the correct location of the speakers.
The only advantage of a factory-made acoustic shelf is that you don’t need to spend time and effort making it yourself. Otherwise, it has more minuses than pluses.
Review of popular shelves on Priora
Priora station wagon acoustic shelf
Let's look at the most popular shelves sold today in stores in our country. First, let’s find out what technical characteristics stand out for the shelves on the Priora that have sidewalls.
| Type | Rear acoustic shelf with sides |
| Automobile model | 2171 station wagon |
| Material | Plywood or MDF |
| Shelf/sidewall thickness, mm | 10/25 |
| Possibility of upgrading the shelf | Can be made directional (for an additional fee of 200 rubles) |
| Possibility of installing a subwoofer | It is also possible for an extra charge |
| Shelf cost | 1600 rubles |
It is clear that the main advantage of a shelf with sides is the location of the speakers (see How to choose speakers for a car radio on your own). They do not stand on the main plywood, but on the side parts. This provides a unique opportunity to conveniently load cargo into the trunk for transportation. Now you won’t have to remove the shelf with the speakers every time. In addition, it is possible to select the desired color of the polo, depending on individual preferences and matching the interior color.
Graphite shelf produced in Tolyatti
| Type | Acoustic shelf |
| Price | 1250 rubles |
| Possibility of reupholstery with imported fabrics | For extra charge |
| Suitable Speakers | 6x9/13 cm/16 cm |
| Shelf dimensions, cm | 130x50x30 |
| Shelf weight, kg | 7 |
Priora station wagon acoustic shelf
Shelf without sides Tolyatti
| Type | Acoustic shelf without sides |
| Speaker sizes | 13/16/20 cm |
| Price | 700 rubles |
| Shelf weight, kg | 8 |
| Dimensions, cm | 130x70x40 |
How an acoustic shelf works
Since the speakers are embedded in a shelf located in the trunk, the system is closed. In this regard, special requirements are imposed on such structures:
- All components must be rigidly fixed. Otherwise, it will not be possible to eliminate the effect of resonant sound. Powerful speakers weigh quite a lot, and the fragile material may not support them.
- Tightness. This will help avoid an acoustic short circuit, which negatively affects the quality and volume of car audio.
- Minimizing resonance. The structure should not rattle. Stiffening ribs must be installed on flat surfaces.
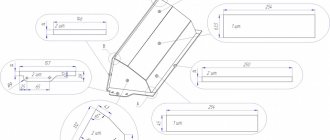
Acoustic shelf diagram
Taking into account all these requirements, most acoustic shelves are manufactured: both industrial and homemade. The product is upholstered with textile materials, which give it a finished and aesthetically attractive appearance. Carpet is most often used, less often - leatherette or leather.
Depending on the body type, the shelves are available in different designs:
- Single (solid) surface. Used in a sedan. This is a simple panel with holes for mounting speakers.
- Prefabricated structure. It consists of two side parts, which are fixed motionless, and a central one. Speakers are mounted in the first, and the second is folded up or completely removed to load the luggage compartment. Used in station wagons and hatchbacks.
The design allows you to install the speakers openly (top) or closed (bottom). During hidden installation, the casing is not cut out, since the carpet does not interfere with the propagation of sound and does not affect its quality.
Ways to refine the product
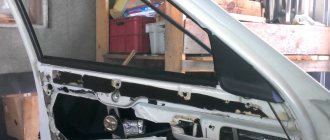
Removing the shelf from the trunk of a Lada Priora takes no more than a minute. In hatchback and station wagon you need to pull it up and then remove it. In a sedan body the removal process is more complicated:
- you need to disconnect the wire block from the additional brake light and from the speakers (if any);
- pull the locking strap up and remove the back of the rear sofa;
- lower the armrest down and unscrew the fastening screws of the luggage compartment hatch;
- press the 4 locking elements;
- lift the front part a little and pull it towards you, overcoming the force of the seals until the latter come out from under the rear window.
To put the shelf in place, repeat all steps in reverse order.
The process of finalizing the shelf in a sedan
The standard design is not of good quality and most often begins to rattle and creak. If it is not possible to make a shelf yourself, modify the factory one.
To work you will need:
- polyurethane foam;
- scotch;
- noise and vibration insulation material;
- glue, preferably epoxy;
- silicone sealant.
The upgrade looks like this:
- The standard shelf is removed from the car along with the speakers.
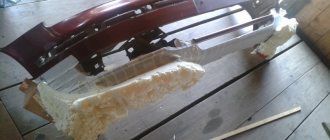
- All holes are sealed with tape - it is important to prevent polyurethane foam from getting into them.
- The bottom surface is moistened for better adhesion to the sealant.
- Polyurethane foam is applied to the lower part and after 40 minutes it is pressed down to increase rigidity. The sealant must be pierced in several places with a nail to expel excess air.
- You should wait until the foam has dried completely and treat all seams with silicone sealant.
- Noise-vibration insulation material is glued to the outside with epoxy glue.
- If desired, you can top the product with textiles.
This modification increases the rigidity of the structure, prevents squeaks, and improves sound quality.
To ensure that nothing interferes with the sound, no foreign objects are allowed on the acoustic shelf.
Improvement method without polyurethane foam
On Lada Priora hatchbacks and station wagons, using the method using polyurethane foam is undesirable. The thickness of the product is considerable, and for a large surface area this threatens sagging. For this reason, other materials are used for modification: modelin, anti-creak or vibroplast.
Rib compression
Compression is characterized by compression of the rib in the ventrodorsal direction. This can occur from microtraumas, with constant work loads on the sternum and ribs. As a result, the rib becomes shorter in the ventrodorsal direction and wider in the lateral direction.
Diagnostics: ventral displacement of the posterior angle of the rib - upon palpation, a “pit” is determined at the site of the rib angle; dorsal drowning of the anterior end of the rib - a depression is palpated at the junction of the bony part of the rib with the cartilaginous part; Laterally, along the axillary lines, the protrusion of the rib - the tubercle - is palpated. This dysfunction is possible on the 3rd-6th ribs.
Right rib compression
Advantages and disadvantages of homemade products
A DIY shelf has a lot of positive aspects:
- precise adjustment to the dimensions of the luggage compartment;
- the ability to use any acoustics connection scheme;
- you can use any material for manufacturing and upholstery - in order to increase durability, it is better to choose natural wood treated with moisture-proof compounds;
- Compared to a standard acoustic shelf, a homemade one does not rattle or vibrate;
- you can create a product according to your own drawings and increase the amount of usable trunk space.
Among the disadvantages, they note only the need to spend free time, especially if you have to develop everything yourself. You also need to have skills in handling various power tools, for example, a jigsaw.
Making an acoustic shelf with your own hands
To improve the appearance of the product, it is recommended to use artificial or natural leather. High-quality casing made of sound-permeable materials will help hide the speakers from prying eyes. If you choose the size and shape of the shelf wisely, you can achieve maximum effect when playing low frequencies using budget playback equipment.
You should create a layout after purchasing the speakers, since the holes in the finished product must exactly match the dimensions of the built-in devices.
Creating a Layout
To create a layout, you can use the shape of a standard acoustic or regular Priora shelf. Taking its dimensions as a basis, calculate the required dimensions. First you need to remove the shelf from the car and attach it to a previously prepared cardboard sheet. Next, use a marker to outline the product, including the slots for the seat belts. After this, you can select any location to install the speakers and mark it on the layout.
The excess part of the cardboard is cut off with scissors or a stationery knife, and holes for the speakers are also cut out. If there are podiums for speakers on the factory shelf, then they are also removed and used to create a layout.
To work you will need the following tools:
- material of suitable size and thickness - plywood, chipboard, OSB, MDF;
- jigsaw;
- wooden bars;
- self-tapping screws of different lengths;
- sealant;
- fine-grained sandpaper;
- epoxy resin based adhesive;
- stationery knife;
- sound-absorbing material for finishing.
First, you need to attach the cardboard model to the material that will be used for the future acoustic shelf, and trace all the lines with a marker. For manufacturing, it is advisable to use composite materials made of thick wood. Usually this is a panel up to 25 mm thick, for the manufacture of which a plywood sheet or MDF panel is used.
Making a shelf for a sedan
The creation process includes the following steps:
- The shape of the product is cut out with a jigsaw, and all unnecessary parts are cut off.
- Several wooden blocks should be attached between the holes for installing the speakers, using sealant and self-tapping screws. The bars will act as stiffening ribs, preventing rattling when playing music at high volume.
Podium templates are cut out on a separate piece of material using a jigsaw. They are fixed to the workpiece using mounting foam. After the sealant has completely hardened, excess pieces should be cut off with a stationery knife. Slots are cut for seat belts.
The workpiece is processed on all sides with fine-grained sandpaper until the surface is smooth, after which all seams are sealed with sealant. The shelf is covered with finishing material - you can use adhesive bases based on epoxy resins for this.
If non-vibroplast is used for finishing, then it is better to additionally apply any sound insulation.
Now all that remains is to install the structure in its original place. To secure it, it is better to use strong bolts that will not loosen over time. If you are installing a homemade product, it is important to adjust the dimensions correctly.
Creating a shelf for a hatchback and station wagon
The same materials are used for manufacturing and the algorithm of actions is also almost identical. The difference is that the standard shelf without sidewalls in cars with these body types consists of two parts. One of them reclines for easy loading of luggage.
There are two main manufacturing methods:
- Two parts are cut out of the material based on a template created according to the dimensions of a standard shelf. One part should be 2-3 cm shorter than the other. Using epoxy glue and self-tapping screws, both halves are fastened to each other.
- To make the part that folds up, a thinner sheet of plywood is used. If desired, you can modify the folding element from the old shelf, making it heavier with sound insulation. Fasteners can also be taken from an old product. Holes for speakers are cut out as desired on the folding or fixed part.
Reviews from Priora owners about the acoustic shelf
Standard acoustic shelves are clearly inferior in quality to homemade ones. Many car owners are forced to modify the factory version, since it copes with its functions very mediocrely. Many people come to the conclusion that it is not practical to pay for an element that still needs to be improved.
The way out is to create an acoustic shelf with your own hands. Such structures are strong, durable, do not creak or start to rattle. An acoustic shelf, even the simplest one, is found in almost every car today. Homemade products have become very popular. Whether to choose an acoustic shelf from a store or to make it yourself - everyone decides based on their financial capabilities and the availability of the skills necessary to create the product.
An acoustic shelf, which you will create with your own hands, will allow you not only to improve its decor from various materials, but also to accurately select the size and all the elements of the future acoustic system. Basically, Priora owners who are constantly engaged in tuning and want to significantly improve the interior design of their car tend to install acoustics in the trunk on the rear parcel shelf.
What happens in the end?
The rear shelf on the Priora, created with your own hands, will not be inferior in quality or appearance to standard models, which are sold in a wide range in any online store. In addition, creating a shelf for your own design from professionals or ordering it from an online store will cost you much more than you will assemble the option you like in your garage. The most important thing is that before starting work, be sure to read the photographs of the manufacture and installation of the shelf on the Priora.
What are the advantages of a homemade shelf in a hatchback compared to a purchased one?
Those who decided to equip not only the rear shelf, but also the sides of the car, highlight the following advantages of making all the components themselves:
- A homemade rear shelf will fit perfectly into the dimensions of the trunk,
- It is possible to choose the wiring diagram for the speaker system yourself, in which the sound of all musical compositions without exception will cause frantic joy,
Attention! If you decide to make a shelf manually, then it is best to choose natural wood for the body, which will be treated with a special moisture-resistant compound. This will significantly increase the durability of the structure.
What do you need to know before making an acoustic shelf for a Priora hatchback?
- For upholstery, experts advise using materials made from artificial and natural leather. This will give the shelf a solid look, and a high-quality finish will completely hide the new speakers from your fellow travelers.
- By choosing the right size and shape of the shelf, you can achieve maximum effect in sound and bass, even when purchasing budget speakers for Priora,
- When creating a layout for the rear parcel shelf, you must first calculate its dimensions according to the diameter and dimensions of the purchased speakers. Otherwise, at the installation stage you will have to redo the assembled circuit again.
Where does the creation of a rear shelf for a Priora hatchback begin?
The first step in creating a high-quality acoustic shelf is the selection of materials for the body and the box outline itself. Here, the most popular among Priora hatchback owners are inexpensive types of wood materials, such as chipboard, samples of thick plywood or MDF boards. Such materials tolerate moisture well and have good durability indicators - on average, an acoustic shelf on a Priora will last you 5-6 years. The next stage of choosing materials comes down to selecting a method for connecting the cut out parts of the shelf layout and covering it. To glue the parts together, it is best to use carpet. Working with it is quite simple and the end result should definitely please you. It does not leave marks or burrs at the joints. However, many Priora hatchback owners choose more expensive combinations of materials to implement their ideas - for example, covering a body made of natural wood with leather. The last stage in preparation is to create a sketch or layout of the future shelf for the trunk or sidewalls. Here you need to accurately measure all the corners and sides of the car and recreate the image of the future shelf, indicating the places for the speakers.
Attention! Often, the rattling of the shelf is associated not so much with the use of low-quality materials, but with the occurrence of vibration after improper fixation of the rear shelf in the trunk. That is why, before checking the operation of the system, be sure to ensure that the rear side of the structure is firmly secured to the corners of the machine using appropriate fasteners.
Layout development
First of all, you need to think about what kind of future shelf you imagine, how it will be attached to the body (or to the rear seat support), how much luggage space you will allocate for it, how many levels it will have (one- or two-story design) and etc.
The simplest option:
Attach a piece of chipboard on top parallel to the floor of the trunk, and attach a smaller piece perpendicular to the first to it using corners. Below, between the extreme horizontal points, there is a vertical part that will prevent objects placed inside from moving along the floor.
A more intricate option involves dividing the space horizontally with a shelf into two levels. The bottom floor is the trunk floor, the second is a measured piece of chipboard or thick, 10-12 millimeters, plywood. In this case, in the upper floor it will be possible to cut an entrance for the neck of the fire extinguisher, thanks to which it will be firmly held in a vertical position.
It is better to consider those that are already in the case as mounting holes, so as not to make new holes. The developed drawing is cut out on cardboard and assembled to check its compliance with the realities of your trunk. If everything went smoothly, all the details coincided with the contours of the surrounding space, you can start cutting.
