Restoring a plastic car bumper that has split into several parts, with missing fragments or broken fasteners is best left to professionals. Do-it-yourself repairs by soldering the bumper make sense for small cracks and chips with an area of up to 10 cm² , provided that most of the pieces have been collected. Before you solder a bumper on a car yourself, you need to find out what it is made of , select the appropriate tool and solder . In this article we will describe in detail how to solder a plastic bumper in different ways, depending on the material and the degree of damage.
Types of plastic bumpers
Plastic bumpers on modern cars are made from two main types of plastic - thermosetting and thermosetting. It is necessary to know the differences in these types of materials in order to choose the correct method for repairing and restoring a car bumper. To find out what kind of plastic a car bumper is made of, you need to look at its back side.
Thermoactive plastic bumper
Thermoset plastics can be recycled because they soften and become pliable when exposed to high temperatures. Easy to weld. These include:
- various polyethylenes (PET, PET, LDPE, HDPE) - used in the production of pipes, car tanks, bottles, children's toys, food containers and packaging, bags, rugs;
- polystyrene (PS) is used in the manufacture of containers for dairy products, audio and video cassettes, and various tableware;
- polyvinyl chloride (PVC) is used in the production of windows, flooring, bottles, packaging films, cable insulation, credit cards and medical products;
- polypropylene (PP) is used in the production of food containers, batteries, bottle boxes, and automotive parts.
Thermoset plastic bumper
This type of plastic is used much less frequently in production because it is not recycled.
When exposed to high temperatures, thermosetting plastics do not melt and break down. Very difficult to weld. But they are very durable and resistant to damage.
These are the following types of plastics:
- polyurethane (PU, PU) is used in coatings, trims, gears, membranes, cushions, mattresses and car seats;
- epoxy resin is used in adhesives, sports equipment, electrical equipment, and automotive equipment;
- Phenolic resins are used in ovens, cutlery handles, automobile parts, printed circuit boards;
- fiberglass (ABS/MAT) – used in car bumpers and other reinforced parts.
The bodies of modern sports cars are made from precisely these plastics – fiberglass and carbon fiber.
Summary table of types of plastic
IMPORTANT! Before starting repair work, you need to correctly identify the plastic in order to accurately select materials for repair.
Sealing rust
Remove one of the elements of the electrochemical reaction and rust will not form.
You can remove oxygen from the metal and corrosion will not spread. In theory, if the coating seals rust well and its integrity is not compromised, then there is no reason to allow it to spread further.
Rust Encapsulator is a primer-like coating that can be applied to any material. It seals off air and water to stop further corrosion. It can be used separately from or after the converter to stop minor rust and prevent its further occurrence. This rust sealant primer has a urethane base and inhibitors to stop corrosion.
Theoretically, epoxy primer can be used to seal rust residues that have been treated with a converter and represent a stable, non-flaking base, since it creates a dense film and “cuts off” the supply of oxygen and moisture to the applied surface. However, manufacturers of epoxy primers always write in the instructions to apply them to clean metal, without traces of corrosion. Still, there is a positive experience of using epoxy primer for a minimal amount of converted rust (residues of the converter acid must be washed off and neutralized, see above). It is better to use a sealant primer specifically designed for this purpose.
Is it important to remove all rust before applying sealer primer? This is quite important, since rust is a weak link, so the coating on it will not adhere very well. A poor foundation will cause heterogeneity and damage to the integrity of the soil, which will allow moisture to enter and corrosion will reappear.
The rust sealant reacts to rust residues, neutralizes it and leaves behind a polymer coating that can serve as a primer for further coatings.
Again, any coating is not completely waterproof. Theoretically speaking, oxygen and water have a propagation speed that is not equal to zero even through a very dense paint film. This way, the rust can continue to spread, but at a much slower rate.
Rust sealant should be used:
- On thin surface rust.
- On rust of medium thickness, when it is larger than surface and spreads slightly into the metal, but does not yet affect its strength. In this case, you must first remove as much rust as possible by sanding or sanding. Next, apply 2-3 layers of sealant for better penetration.
- On bare metal. A rust sealant primer can be used on bare metal to prevent corrosion.
- On a mixed surface. Rust sealant is good to apply on surfaces with varying degrees of corrosion, mixed with normal metal and old paint.
Rust sealant does not need to be used:
- Over the rubberized surface on the bottom or over existing rust protection.
- In hidden cavities or hard-to-reach places. Rust sealant requires preliminary preparation before application (cleaning off flaking rust). The product requires full coverage to stop corrosion. In areas where preparation is not possible, it is not advisable to use rust sealant.
- Heavily corroded metal is a poor candidate for sealing.
Types of damage to plastic bumpers
Scratches
Scratches are non-through damage to the bumper surface in the form of grooves. Bumper scratches are divided into two types:
- superficial scratches - only the paintwork of the bumper up to the primer layer is damaged.
- Deep scratches - damage grooves have a significant depth, and not only the paint layer and primer layer are damaged, but also the plastic of the bumper itself.
Don't take too long to remove scratches on the bumper; over time, they can turn into cracks.
Scratches on the bumper can be removed by sanding with sandpaper or a sanding machine. The surface of the bumper is sanded until smooth, then the surface of the bumper is puttied, primed and painted.
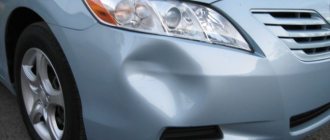
Dents
Dents are deformations of the surface of a plastic bumper due to local stretching of the plastic. Dents are formed due to strong mechanical impact on the bumper. Dents are often accompanied by scratches and cracks.
To remove the dent, the deformed part of the bumper is heated using a hair dryer or a gas burner. When the deformed section of the bumper softens, the dent is straightened, returning the bumper to its correct shape.
Cracks
Cracks are called through damage to the bumper, having different lengths and shapes. Cracks are the most common type of bumper damage. Cracks that are not repaired in time increase in length over time due to vibration. There are different ways to repair bumper cracks: welding with a hot air gun, gluing with fiberglass and liquid polymer, soldering in a metal mesh or metal brackets with a soldering iron. The choice of repair method depends on the material from which the bumper is made and the size and appearance of the damage.
Chips
Chips are end-to-end damage to the bumper with separation of individual fragments from the bumper. Chips most often appear along the edges of the bumper after a car collides with obstacles. The methods for repairing bumper chips are similar to the methods for repairing cracks.
Two-component bonding
To implement this method, you need to purchase the following bumper repair kit from the 3M brand:
- 2 FPRM components for preparing liquid polymer in 150 ml tubes (price - about 2500 rubles);
- special hard tape;
- self-adhesive reinforcing mesh made of fiberglass (otherwise known as fiberglass) 48 mm wide;
- adhesion initiator in an aerosol can;
- 2 spatulas - wide and narrow;
- stationery knife;
- gloves, safety glasses.
Reference. Similar sets are offered by other manufacturers, but the 3M brand is the most well-known and proven in practice.
Bonding with liquid polymer is suitable for most plastics and can be performed both with the body kit removed and on the car. True, the second option is quite inconvenient, plus you will need good lighting in the inspection hole. To cut a crack, you will need an electric drill (not a grinder!) with a mandrel for abrasive wheels. Repair consists of the following technological operations:
Features of repair of certain types of damage
In the process of restoring the integrity and appearance of the bumper, the work to be done will depend on the type of damage found. This is an important point, since one option is used for scratches and chips; to remove a dent, a completely different method must be used.
If you need to carry out repairs yourself, or the insurance is not valid, or you do not have the means or desire to contact a service center, you will need to carefully study the nature of the damage. If the driver realizes that the bumper is very damaged, you should not try to restore the part on your own, but it is better to purchase a new one. If relatively small chips or dents are detected, the problem can be eliminated independently, knowing how to act in a particular case. So, how can you quickly and effectively repair scratches, dents and cracks?
Scratches
This problem can be eliminated by using sandpaper. Material No. 50 is taken and grouting is carried out. In this case, you need to carefully eliminate all irregularities, working until the surface becomes completely correct in shape. During this process, the damage may become slightly larger in size, but its depth will become significantly less. Don’t be afraid of this; after thorough cleaning, all uneven areas will be filled with putty.
If you have the desire and certain skills, then instead of putty you can use a special liquid plastic that fully matches the type of material from which the plastic is made. After applying this composition, after it has completely dried, you will also need to clean the surface and thoroughly sand it, sanding it to the most even surface.
Dents
To remove a minor dent that has not damaged the paintwork, you simply need to heat the deformed part of the bumper. The concave part of the plastic must be heated with a previously prepared heat or technical hair dryer until the material becomes soft enough. After this, the dent is manually straightened, simultaneously giving the damaged area of the bumper the correct geometric shape.
Cracks and chips
If cracks appear on the surface of the bumper, you will need to use a previously prepared metal mesh and a soldering iron. The sequence of actions in this case will be as follows:
- The edges of the damage must be brought together and soldered to one side of the mesh. It is advisable to bury it as deeply as possible in the plastic, but you should not overdo it, as a hole may form.
- The end of the mesh is covered with molten plastic.
- In a similar way, you need to walk along the entire crack.
If the damage to the bumper is minor, you can use special construction staples instead of a mesh. When soldering them, it is recommended to use tweezers, which will prevent burns to your hands. Bonding actions should be spaced 2 cm apart and along the entire length of the crack.
Even if the cracks are not very visible, they still need to be carefully soldered. Neglecting this advice can lead to the appearance of various faults on the bumper.
To prevent the mesh and metal brackets from rusting after some time, the items must be covered with special liquid plastic. Upon completion of all work carried out on the inner surface of the bumper, its front side immediately acquires its original appearance.
Tips and life hacks for soldering a bumper
The tips below will help you properly repair a crack or hole in the bumper. Thanks to them, you can achieve high seam strength and durability.
- When choosing how to solder a bumper on a car with your own hands, consider the melting point of the material.
The lower it is, the more accurate the adjustment of the heating of the tool must be so as not to damage the part. For example, ABS can be soldered with almost any hair dryer, and polyurethane can only be soldered with a stable temperature of about 200 degrees. To prevent overheating, it is better to first set the temperature below the operating temperature, and then increase it gradually. Reinforcing a bumper crack with copper wire - As a reinforcing material, use mesh or brackets made of corrosion-resistant metal. The best option is stainless steel, copper or brass.
- Cracks with smooth edges that close tightly and do not reach the edge of the part can be soldered without an additive. The melted plastic will give a fairly strong seam.
- To repair polypropylene bumpers, you can use homemade filler tapes, cut from lockers (fender liners) using metal scissors. For other materials, fragments of similar bumpers that can be found at auto dismantling yards are suitable.
- If you want to do without dismantling the part, you need to carefully remove the chamfers on the crack, since it will not be possible to solder the bumper without removing it. This option is suitable for polypropylene bumpers, which are easily soldered without reinforcement.
- Focus on strength rather than beauty, and leave a raised area in the seam area, since it is possible to solder a bumper without painting only if it is originally unpainted polypropylene or polyurethane. Other materials will still have to be puttied and painted after repair, after leveling the surface.
When painting the bumper yourself after soldering, be sure to consider the type of plastic and use the appropriate primer. If the technology is not followed, the bumper will quickly peel off. It is best to give the bumper to professionals for painting, since without a spray-drying chamber and a spray gun, high-quality painting of the part is impossible.
Materials, equipment and facilities
When carrying out a process such as self-repairing a plastic bumper, you will need to prepare special tools and materials. Among the most important of them are:
- Special hair dryer for vehicles. This accessory is used for drying applied compounds. Unlike a conventional device used to dry hair, it produces hotter air, which, if necessary, can not only dry, but also melt the plastic.
- Soldering iron. Any device is suitable here, even one intended for use at home. If possible, it is better to buy or rent a more powerful device.
- Metal grid. The material is necessary for high-quality and durable fastening of individual parts of plastic. If it is not possible to purchase a mesh, you can use material from a previously used and no longer needed air filter.
- Primer. This is a special composition that is sold in ordinary cylinders. It is advisable to ensure that you have a special compressor or gun for convenient application of the primer.
- Putty. This product is necessary to eliminate cracks of different sizes and depths. You need to know that the composition can only be used in places hidden from outsiders.
- Sandpaper. Required for grouting the applied putty during the final stage of repair work. To work with the bumper, it is better to purchase sandpaper No. 800.
- Rags - you will need it for washing the bumper and for treating the surface with a hairdryer, preventing the risk of burns from the flow of hot air.
When preparing tools and equipment for bumper repair, you need to take care of your protection. It is worth purchasing a special respirator mask, safety glasses and gloves.
Well-thought-out protection will allow you to comprehensively protect your respiratory organs, eyes and hands from exposure. This automatically guarantees that the body will not be harmed by the spray of harmful substances in the air and from high temperatures.
In conclusion
Almost any car enthusiast can repair a bumper using glue at home, without causing damage to the family budget. In terms of reliability, a sealed part will not be inferior to a sealed one.
There are many options available on the market and everyone can choose the right adhesive composition.
We recommend watching another method for repairing bumpers in this video:
Having broken a plastic bumper on a VAZ car, the owner can relatively inexpensively purchase and install a new one, painted in a suitable color. Owners of foreign cars are not so lucky; plastic body kits for their cars are much more expensive. The solution is to repair the damaged part by repairing the crack with your own hands in order to save money. It is also useful for owners of Russian cars to know about methods for restoring broken plastic, so as not to buy a new element due to small cracks.
Preparatory stage
Along with purchasing the necessary materials and tools, during the preparation process you need to carry out certain work on the bumper itself. Among the most important points are:
- Removing the bumper from the car body.
- Thoroughly clean the part from dirt and dust. The surface must be dry and clean.
- Determining the material from which the bumper is made.
- In areas where restoration work will be carried out on the bumper, it is necessary to remove the applied paint. It is necessary to thoroughly clean and degrease not only the damaged area itself, but also the surrounding area.
- Before repairing, the crack must be drilled with small through holes at the ends. This will avoid the subsequent spread of the damage and its increase in size.
- Any crack has special joining edges. Therefore, before the crack is repaired, the joints will need to be filled with a special composite.
After completing all the above processes and manipulations, you can begin repairing the bumper yourself.
Welding with a hot air gun
This is a more effective way of joining polymer parts, used not only for repairing bumpers, but also for restoring a variety of plastic products. It allows you to more reliably fasten elements, spending much less time on work than with soldering. To use this technology, you need to prepare the same tools with materials as for soldering, excluding the metal mesh. In addition, for repairs you will need:
- hot air gun with a power of 1600 W with the ability to regulate the temperature of the supplied air from 100 to 700°C;
- Universal welding rods compatible with most plastics.
Advice. If you buy or rent a heat gun, make sure it has overheat protection with an automatic shut-off.
The technology for welding a broken bumper is very similar to soldering and differs only in the last stage:
- Having carried out the preparatory stage, align the edges of the cracks, secure them with clamps and grab them with a soldering iron, as described in the previous section. Reinstall the broken parts in the same way.
- Using a soldering iron, cut the crack along its entire length, making a recess where the welding rod will fit.
- Take a hair dryer heated to 400-600°C in one hand (depending on the type of plastic), and a welding rod in the other. Place its end at the beginning of the cut crack and heat it with a hairdryer at the same time as the surface of the bumper, holding the tool at an angle.
- When the rod begins to soften, begin to place it in the groove without stopping heating. Fill the cavity completely.
- For reliability, make several transverse seams, placing the softened rod directly on the inner surface of the body kit.
Note. To cut a crack, instead of a soldering iron, you can use a cutting or abrasive wheel mounted on an electric drill. But such work requires caution so that the potholders do not fly off.
If possible, use special welding nozzles for a hair dryer, into which a plastic rod is immediately inserted, so you do not need to hold it with your hands. Upon completion of the work, the repaired bumper must be repainted and polished.
Advice. If you were unable to get a hot air gun, you can use a special hot glue gun that welds plastic with thinner rods.
Photo of welding a bumper with a rod
DIY bumper repair
Repair using metal mesh.
The repair site is cleared of dirt. If you plan to solder the mesh on the front side of the bumper, then be sure to clean off the paint and primer in this place.
The edge of the crack is heated with a soldering iron and fused to hold the edges of the plastic in place. The soldering iron should not be very powerful, about 40-60 watts, preferably with a thermostat, so as not to overheat the plastic. Overheated plastic becomes brittle. If the household has a dimmer, then a soldering iron without a thermostat can be turned on through it and achieve the minimum temperature at which the plastic begins to melt.
We put a fine mesh metal mesh in place of the crack. The mesh can be made of ferrous metal, but it is better to be stainless, brass or galvanized. This mesh will not corrode if exposed to moisture. You can buy mesh at a hardware store or pull it out of an air filter or strainer.
We apply the heated tip of the soldering iron to the mesh and press a little on it. The mesh is heated and fused into the plastic. If the soldering iron has a replaceable flat tip in the form of a spatula, then it can be used to smooth out unevenness in the plastic.
Adherents of this method advise carrying out this procedure on the front and inside of the bumper.
Despite the fact that this method is quite common, it has a number of significant disadvantages.
Firstly, in the absence of a thermostat on the soldering iron, it is not possible to select the required minimum temperature. As a result, the plastic overheats and becomes brittle.
Secondly, metal mesh and plastic have different coefficients of thermal expansion. This leads to the fact that over time, pores and microcracks appear in the overheated plastic around the mesh, into which water enters. Water, freezing and expanding, contributes to further destruction of the bumper repair area. As a result, the putty begins to peel off along with the paint. This process is slow but inevitable.
Therefore, for high-quality repairs, it is better to use the plastic soldering method, which is described below in the article.
Repair with staples
Staples from a construction stapler are used as reinforcement for a soldered seam. The crack is welded using a soldering iron, and staples are placed in place of the crack and fused into the bumper material.
They also use staples to pierce the plastic and tighten the edges of the crack. After this, the staples are heated with a soldering iron and drowned in plastic. In my opinion, this method can be used as a temporary measure to keep parts of the bumper in place until a full-fledged high-quality repair.
Repair using a hair dryer
Repairing a bumper with your own hands using a hairdryer is not quite as simple as it seems at first glance. Since we will have to melt the plastic, that is, make a patch. In this method, it is necessary to select a material that is completely identical in composition to the plastic of the bumper. Since it is not realistic to solder two plastics of different composition to each other. Even if you succeed, this solder will fall off without much effort.
As a rule, there is a marking on the back of the bumper where the code is written. It is by the code that you can determine the type of plastic.
Heat repair
Repairing a bumper using heating yourself, this method is not suitable for everyone. I mean the case when the bumper does not burst upon impact, but is dented. Here, apart from a hair dryer and gloves, we don’t need anything. This procedure is as simple as “5 kopecks”. Using a hair dryer, evenly heat the damaged area of the bumper until it softens. Then, with a gloved hand, we begin to straighten the dent. It is advisable to take heat-resistant gloves. We repeat this procedure until we achieve the desired result.
Repair with a lanyard
Repairing a bumper using a cord is a rather strange method, but it exists. I could not pass up this type of repair, as I had encountered it more than once. Sometimes the question arose “what to do,” leave it as it is, change the bumper or solder it. Naturally, I myself do not approve or accept this type of repair, but sometimes it looks funny.
There is no trick here, we just find a lace or rope, the thicker the better. Next, we drill holes along the crack and tie the lace like on a shoe. I can’t say where this came from, but I see such repairs more and more often.
Repair using fiberglass
Bonding with fiberglass and epoxy or polyester resin is used to repair fiberglass bumpers, and in some cases, to repair bumpers made of hard, refractory plastics. The disadvantage of repairing a bumper in this way is the low strength and fragility of the repair site.
The bumper is glued using fiberglass and epoxy or polyester resin in the following order:
- Clean the front and back sides of the bumper at the point of damage using fine-grained sandpaper 5 cm from the edge of the crack, chip or hole.
- Cover the damaged area with tape on the front side of the bumper.
- Degrease the edges of the damage on the back of the bumper.
- Cut several patches from fiberglass measuring 5 cm larger than the damaged area.
- In a plastic container, mix the resin and hardener in the proportions specified by the manufacturer, mix thoroughly.
- Apply resin to the damaged area on the inside of the bumper with a brush.
- Place a fiberglass patch over the damaged area and smooth it out.
- Apply resin and apply the next fiberglass patch, repeat until the thickness of the layer reaches the approximate thickness of the bumper.
- After the resin has dried on the inside of the bumper, remove the tape from the front side, smooth the edges around the damage and form a depression.
- Degrease the surface of the repair area on the front side of the bumper.
- Apply the resin with a brush, apply a fiberglass patch, and smooth it out.
- Repeat brushing the resin and applying fiberglass patches until you are level with the bumper surface.
- Dry the bumper completely.
- Thoroughly sand the surface of the bumper with fine-grit sandpaper.
Repair using heat sealing
Repair of plastic bumpers can be done by heat welding. This is convenient when eliminating torn parts and large cracks. The algorithm of actions will be as follows:
- The tear seam must be softened with a hairdryer.
- The edges of the crack are connected and welded, simultaneously leveling them.
- A reinforcing mesh is laid over the seam and around it, soldering it to the bumper.
- Putty is applied to the surface to be repaired and sanded.
- Apply several layers of paint, then varnish. Dry the surface.
If you need to restore a surface with a destroyed piece of plastic, take a fragment of the same material and solder it together with a reinforcing mesh. Next, primer, putty and paint the bumper.
Bumpers are made from all kinds of plastic. Polyurethane, for example, has a fairly low melting point, so it should be welded carefully without overheating.
You can also use a heat gun as a welding tool, which has a special operating mode regulator and is therefore more convenient to use. In general, you must always remember that heating should not cause deformation. If the temperature is too high, the plastic softens and returns to its previous position. The heated deformed surface is given its original shape, fixed and cooled.
It is better to start restoring the bumper from the inside, while simultaneously studying the properties of the material, and then weld from the outside.
Sometimes it is easier to fasten the fallen pieces with glue or tape with wire, drilling holes and installing brackets.
Methods for sealing cracks
Depending on the amount of damage and the type of plastic, the following methods for cracked bumpers are practiced:
- cosmetic bonding using acetone and donor plastic;
- sealing with modern chemical compounds;
- fastening with epoxy resin using fiberglass reinforcing mesh;
- sealing the crack with a soldering iron reinforced with metal mesh;
- welding using a hot air gun and a plastic rod.
Reference. There is one simple method used by car enthusiasts who are not too concerned about the appearance of the car. This is connecting the edges of a crack with wire or staples. This is a simple matter, which means there is no point in considering this technology, everything is already clear.
The use of acetone, which can dissolve many types of plastics, for gluing is a temporary measure used for small cracks that appear in the middle of the body kit. Its essence is this:
- Pieces of plastic similar in composition to the bumper material are selected and dissolved in acetone to a thick consistency.
- On the back side of the bumper, the crack is degreased and also treated with acetone to soften the surface.
- Liquefied plastic is applied to the damage from the reverse side, after which it hardens for several hours. The outside of the defect can be touched up with a corrector tube.
Using thick two-component compounds, sold in two tubes, any single cracks in most types of plastic are sealed. The exception is fiberglass body kits; they are glued together with epoxy resin, and in case of serious damage, fiberglass mesh reinforcement is used.
With numerous large cracks, breaks and holes in the bumper, gluing methods become ineffective. In such cases, soldering or welding with a hot air gun using donor polymer material is practiced. After such repairs, the defect area is thoroughly cleaned and painted in the color of the car. At the end, it is necessary to completely polish the bumper so that the painted area does not stand out against the background of the old coating.
Advice. If you get into an accident or collide with a stationary obstacle and break the body kit, try to collect all the flying pieces, except for the smallest ones. This will allow you to use “original” plastic for repairs and not look for something similar.
Bumper painting
Painting a plastic bumper with your own hands is a simple procedure that almost any car owner can perform. To do this, you should purchase tools and materials:
- Drill with attachments, orbital sander.
- Adapter made of foam rubber.
- Sandpaper.
- Soldering iron.
- Solvent.
- Putty, primer.
- Paint, varnish.
- Spray gun. If desired, and for additional savings, you can do it yourself.
To prepare for painting the bumper, perform the following steps:
- Washing the bumper. Then they are treated with a solvent.
- Grinding. We clean the entire surface with a sander. Where there is no access to it, we clean it manually. The sandpaper used is P120.
- Putty. Apply fiberglass putty to the surface. After hardening, grind it (P120). Apply finishing putty. We grind P180-220.
- Next grinding with P220 abrasive: remove coarse sandpaper. Then standard procedures of air blowing, degreasing and anti-silicone treatment.
- Padding. The bumper is restored using a two-component acrylic primer. They dry it for a day. However, when using an infrared heater, the drying time will be much shorter and will be 3 hours. The dried primer is sanded. Before grinding, it is advisable to use developing powder to detect possible errors in the work. The sanding paper should be P320-400. After the next layer of primer, grind P400-500.
The painting procedure itself is preceded by degreasing. The paint is applied in two or three layers and dried for 10-15 minutes. Then several layers of varnish are applied, also with intermediate drying.
No driver is insured against road accidents. And if the bumper is damaged in an accident, you should not rush to the auto repair shop or rush to buy a new part. It is better to collect the fragments and try to repair the car bumper yourself.
Recommendations for preparation
The preparatory process differs little for different methods of gluing and welding polymer parts, so it is worth considering separately. The first question is whether it is necessary to remove the bumper to make repairs. In most cases, dismantling is not possible, since the plastic must be sealed on both sides. The exception is broken body kits, cracked in many places. They must first be fastened together and then removed. Otherwise, after repair, the part may lose its shape, causing the attachment points to not meet, and the gaps with adjacent elements will increase.
Reference. Often the bumper body comes off at the attachment points and small pieces of plastic remain on the screws. Before dismantling, such a part is securely welded to the torn fastener and only then removed.
To prepare a damaged body kit for repair, you need the following tools and materials:
- a set of keys and screwdrivers for removing the element;
- electric grinder;
- sandpaper of different grain sizes - from P180 to P320;
- degreasing liquid - organic solvent or white spirit;
- rags.
Note. Using a grinding machine, you can perform cleaning better and much faster than by hand. This and other power tools that will be needed for painting and polishing can be rented for 2-3 days.
Regardless of whether the work is carried out directly on the car or with the bumper removed, it must be thoroughly washed and dried. Then, using coarse sandpaper, you need to peel off the paint at a distance of 3-5 cm from the crack in each direction and sand the area with fine sandpaper. Whatever repair method you choose, the paint must be removed to the base, otherwise it will interfere with the adhesion of the glue or the fusion of polymers during welding. Finally, the area should be degreased.
Advice. The quality of body kit repair depends on the conditions in which it is performed. It is more convenient to repair damage in a garage equipped with an inspection ditch for easy removal of the part and soldering of the fallen fasteners in place.
Repair errors
The main mistakes during repairs usually relate to the final part of the processing - painting. If you make a mistake with the choice of materials and technology, then the repair simply will not take place.
There are four main mistakes that can result in a repaired bumper quickly losing its attractiveness:
- poor processing of plastic with cleaning agents. The cleaner should remove not only dirt, but all types of oils and fats;
- wrong type of putty. The putty should be specifically for plastic, not metal;
- The old paintwork has not been cleaned well enough. Before priming, the bumper must be sanded completely from the front side. This way the surface of the old paintwork will be “matted” and the primer will adhere equally well to the entire part.
They “forgot” to improve surface adhesion. The bumper must first be treated with adhesive primer. And then apply primer-filler for plastic, base and varnish.
Methods for repairing damage
Small scratches on unpainted plastic just need to be sanded out. This is done even with the paintwork of the body, but its thickness is disproportionately less.
Large scratches on the bumper are puttied. And here ordinary automotive metal putty is not suitable. For these purposes, two-component compositions based on polyester resins are needed.
Attention! When choosing a repair composition, you should pay attention to its grain size. There are leveling mixtures with coarse filler grains - they are difficult to grind. There are finishing compounds with the finest grains - they are used to seal small scratches and to apply a finishing layer over the leveling layer. And the most popular for do-it-yourself repairs are universal types of medium-grain putty.
The putty usually contains pigments to match the bumper.
But it’s unlikely that you’ll be able to get the color completely right. Therefore, when the scratch is large, it is better to paint the part after puttying, even if it was not painted. This stage follows standard technology: sanding, priming, applying two or three layers of paint. Repairing cracks in bumpers made from different materials is carried out in different ways: soldered or glued. Through breaks are also removed either by soldering patches or by gluing in a fiberglass bandage. And in order to properly repair a crack or break, you must first determine what material the bumper is made of.
Bumper protection
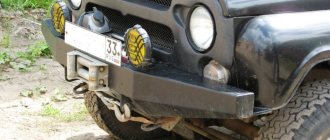
Getting on a steep descent or climb can seriously damage the bumper. Protecting the bumper yourself will reduce the likelihood of defects in this part of the car.
Such protection can be made industrially or with your own hands. With some skill and the availability of tools, it is possible to make yourself a so-called power bumper, which perfectly protects the car from all possible consequences of road accidents.
Before starting to manufacture the protection, you need to think about what the new part will look like: establish where the attachment points will be, whether arches are needed. It is worth constructing a protection drawing and calculating everything in such a way that changes are not considered a serious structural modification of the car. Attention is also paid to analyzing the weight of the bumper and its maximum load.
It is better to have a specialist weld the bumper frame and do the installation yourself. Reinforced bumpers are attached to the frame or side members. To protect the power bumper, a guard is used.
Making bumper protection with your own hands can have unexpected and not very pleasant consequences, because it is not known how such a part will cope with its task in the event of a car accident.
Features of finishing
If the bumper has a faint relief or noble roughness, then sanding and polishing will completely ruin it. Such parts can only be painted.
Painted areas may look alien, even if the color is matched tone to tone. The reason for this is the microrelief of the repaired area, which has a different refractive index of light. In this case, only multi-layer continuous painting of the entire part will help.
If differences in tone are caused only by burnout of the main element, you can try to refresh it by wiping it with a cloth soaked in acetone.
The bumper does not particularly affect the driving performance of the car. Its condition largely reflects the personality of the owner and his life philosophy. However, deteriorating aerodynamics increases fuel consumption, and pieces of plastic flying off while driving can damage surrounding cars. Therefore, even inveterate “don’t care” people should think about repairing this body element.
Advice from professionals
- To restore products made of thermoactive plastic, do not use metal mesh; it is used only when gluing the bumper.
- When preparing for painting work, apply the putty in a thin layer and wait until it dries completely. When processing the surface, finish polishing with finishing sandpaper.
- Use primer before painting - two coats of primer is normal. It is necessary to paint the entire surface of the repaired bumper so that the new paint does not fall off during use.
- Do-it-yourself bumper repair is best combined with other paint work on the car in order to save money on the selection and production of paint for the car.
Any more or less prepared car enthusiast will be able to repair the bumper with his own hands, without resorting to the services of professional car services, unless, of course, the bumper is an integral part of tuning with airbrushing. In this case, you cannot do without specialists.
Repairing a bumper with your own hands or seeking the help of professionals is a personal matter for each person, which depends on the choice - to do it yourself or pay money for repairs.
Sources
- https://remontautomobilya.ru/kak-provesti-remont-plastikovogo-bampera-svoimi-rukami-vse-metody-vosstanovleniya.html
- https://1autoguide.ru/detali-kuzova/remont-bampera-avtomobilya-svoimi-rukami
- https://autoexpertjournal.ru/remont-bampera/
- https://auto-gl.ru/remont-plastmassovyh-bamperov-4-vida-povrezhdeniy-i-7-metodov-ih-ustraneniya/
- https://proautobu.ru/remont-bampera-svoimi-rukami/
- https://delairukami.ru/avto/remont_bampera/
- https://topreit.ru/ru/%D1%80%D0%B5%D0%BC%D0%BE%D0%BD%D1%82-%D0%B1%D0%B0%D0%BC%D0% BF%D0%B5%D1%80%D0%B0-%D0%B8%D0%B7-%D0%BF%D0%BB%D0%B0%D1%81%D1%82%D0%B8%D0% BA%D0%B0-%D0%B2%D0%B8%D0%B4%D0%B5%D0%BE/
- https://nahybride.ru/kuzov/remont-bampera-iz-plastika-svoimi-rukami
Answers to frequently asked questions
How to solder the fastening (ear) of a plastic bumper?
In order to reliably solder the bumper fasteners without loss of strength, the repair site must be reinforced with reinforcement. You can use wire mesh, hot staples, or regular construction staples for this.
How to solder a large crack on a car bumper?
A large crack must be sealed, ensuring that its edges are tightened and reinforced. Large holes and breaks can be repaired using composite material (fiberglass or fabric + polyester resin).
Is it possible to solder a bumper with a metal rod?
It only makes sense to use a non-melting metal rod as a heating element. You should not solder plastic parts with metal solder.
How to remove a dent on a bumper
It is very easy to damage a plastic car bumper.
And the most annoying thing is that even the smallest dent spoils the appearance of the car and, at first glance, requires professional repair in a specialized auto repair shop.
It is worth noting that even minor repairs to dents on the bumper at a car repair shop can require significant financial resources. Do you think it is possible to remove a dent on a bumper yourself?
Many car enthusiasts like to maintain their car themselves, as well as perform minor routine repairs to their vehicle. But, unfortunately, not many people can boast of knowing how to repair minor damage to both the front and rear bumpers without outside help.
Fortunately, there are ways to remove a dent without the help of specialists. But first, you need to determine whether the bumper can be restored independently.
To do this, inspect the bumper for torn chips, cracks and similar defects. If the bumper has a crack and is generally badly damaged, then, unfortunately, you will not be able to restore it yourself.
In this case, you need to seek professional help.
If, as a result of an accident, the car's bumper only has a small dent, then you can try to fix it. Before proceeding with the restoration, it is necessary to remove (if any) any remaining foreign paint or dirt from the bumper. To do this, use various paint removers.
For example, nail polish remover (use with caution, as you can damage the paintwork of the car - for this, the cleaning process should be as short as possible). WD-40 cleaner can also help you remove dirt.
Another old proven method for removing paint or dirt from a bumper is the use of brake fluid, which, like nail polish remover, must be used for the shortest possible time
Despite the precautions taken when removing paint, you can still slightly damage the layer of varnish applied to your bumper
In order to restore the shine to the damaged area, you need to polish it using special products that are sold in many car dealerships.
Unlike dents on iron body parts, repairing damage to the bumper is not particularly difficult. We offer you a proven method that we found on the Internet that will help remove a dent on the bumper.
In order to start removing a dent you need: rubber gloves, a kettle of boiling water and a large bottle (or pan) of cool water.
Removing a dent on the bumper
- One of the well-known ways to remove dents is using a hair dryer.
- To remove a dent, you need to gradually start pouring boiling water from the kettle onto the damage.
Plastic is a flexible material and can easily change its shape when heated. As the hot water heats up the area where the bumper is damaged, the dent will decrease and subsequently disappear completely, and the bumper will return to its original appearance.
- At the moment when the dent completely disappears, it is necessary to fill the defect area with cold water so that the plastic cools down to ambient temperature, which will lead to the fixation of the bumper geometry.
- Remember that the process of cooling the bumper after restoration is extremely necessary, because if this is not done or the damaged area is not cooled sufficiently, the dent may be restored.
Unfortunately, dents on bumpers are different and not all defects can be repaired so easily. Bumper damage often occurs in difficult areas. For example, on a bend or on the edge of a part.
In such cases, using simple boiling water may not completely remove the dent.
To do this, you need to crawl with your hand from the inside of the bumper and press on the dent (you can use a wooden block if it is difficult to crawl with your hand) after or while treating a complex damaged area with boiling water.
Another less quick way to remove a dent from a bumper is to use a regular powerful hair dryer to dry your hair. But, as a rule, this method takes much longer (more than 20 minutes) and is not always effective.
- But even after removing the dent with a hairdryer, you must cool the damaged area in order to fix the plastic in this position.
- This way you can save several thousand rubles by using just a few liters of water to repair a dent on your car.
Materials from which bumpers are made
Before we talk about how to remove a crack on a bumper, you need to understand what materials these structures are made of. It should be noted right away that if the part is metal, then it will have to be repaired in a specialized workshop if the car enthusiast does not have the skills of a professional welder.
But on modern cars these parts are made of two types of plastic:
- thermoactive material, its cracks are sealed using a hair dryer or soldering iron, as well as the formation of a special metal frame; its characteristic feature is that it melts under the influence of a certain temperature;
- thermosetting material, seal cracks in it, better using special fiberglass or reinforcing plastic mesh, which should be impregnated with epoxy resin, since this plastic will not melt when exposed to high temperatures.
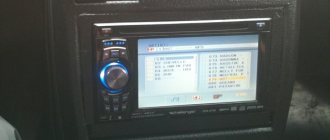
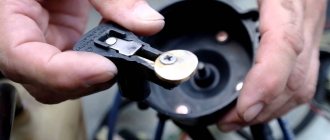
The marking of thermoactive plastic is usually as follows: PP, PPTV and other analogues. Typically, such designations are placed on the inside of the bumper.
The marking will tell you what material the part is made of.
The marking of thermosetting plastic is PUR, which classifies it as a polyurethane material, as well as PAG 6, GF, ABS, which classifies it as a hard plastic mass.
Based on these parameters, you will need to select materials for repairs.
It is important to understand that if there is no reliable information about the material from which the bumper is made, it is better to find out, since repairs can turn into buying a new one. This can be done at a service station or refer to the technical documentation for the car.
Tools you'll need to repair a thermoset bumper
Before you repair a crack on a bumper made of thermoactive materials, you need to prepare the necessary tools.
Their list is as follows:
- a powerful soldering iron or a special machine hair dryer, which will be needed to soften and solder the plastic;
- primer, which is needed for processing soldered surfaces;
- paint in a special can for painting the repaired area or the entire bumper;
- putty;
- a small diameter drill for drilling holes along the edges of the crack;
- gasoline for degreasing surfaces to be treated;
- metal fine mesh or staples of a furniture stapler;
- sandpaper, preferably zero, as well as one and two, for thorough rubbing and grinding of surfaces.
With everything you need at hand, you can repair cracks yourself
This is the list of tools you will need to ensure that the repaired bumper is like new.
Tools you'll need to repair a thermoset bumper
Before you seal a crack on a bumper that is made of thermosetting material, you also need to prepare the necessary materials and tools:
- a drill of small diameter so that you can drill holes along the edges of the crack;
- glue necessary for gluing joints, or simple tape;
- epoxy resin;
- sandpaper zero, one and two;
- putty.
This list of materials and tools will help you repair a cracked thermoset bumper.
Sealing process - preparation
Before sealing the bumper with fiberglass, we recommend conducting a trial compatibility test on a small area of the damage. To determine how to glue the body bumper, carefully study the manufacturer's instructions. The adhesive material must match the surface type of the part.
If there are body kits at the site of damage, they must first be secured and only then removed. At the same stage, accurately determine the material of the spare part to select the desired adhesive base.
This information is on a stamp on the inside of the product. When the mixture is selected, all that remains is to use it correctly in order to correctly restore the spare part after damage.
In order for the repair to last as long as possible, the bumper will have to be pre-treated. The part is disconnected in advance.
Carry out mandatory training:
- thoroughly clean the car buffer from dirt accumulations;
- remove residual oil and dust;
- let the parts dry;
- wipe it with a chemical to degrease it;
- grind the broken surface with an abrasive or a grinding machine;
- if the cracks are too deep, we recommend drilling them out, protecting the spare part from increasing damage.
With the listed procedures, you will achieve stronger adhesion of the glue to the surface, which will guarantee the quality and long service life of the part.
How to glue a bumper: let's get started
Once the surface has been pre-treated, it is time to begin the bulk of the restoration process. Cover the damaged area of the spare part with a primer and wait until the substance dries completely.
The second option: seal the crack on the bumper from the outside so that glue does not leak out of it. To do this, use foil. Once the adhesive has dried, the material must be removed.
Primary gluing from the inner surface of the buffer is carried out with a composition having reinforcing properties. To do this, we recommend using a composition based on epoxy resin with a high degree of adhesion.
If you have previously decided to abandon priming work, then carefully move the damaged areas towards each other
Sometimes the cracked parts are held together with metal staples. However, fixing the two parts from the outside is done with standard paper tape. He will carefully secure the edges of the surface at the same level before painting. After gluing the hole from the inside, the tape will be easier to remove than the staples.
When both parts of the car are securely fixed, apply the adhesive mixture to both parts of the damaged part. Before it dries, glue a metal or synthetic mesh to strengthen the seam.
This can be a painting mesh, which also needs to be treated with adhesive on top. It is impossible to predict the drying time, since each chemical composition takes its own time to dry.
Final stage
When the crack is glued and the adhesive solution is completely dry, the car buffer remains visually unattractive. There is no need to sound the alarm - this is natural, because there is still finishing work ahead.
Let's get started:
- Remove any excess compound on the plastic, carefully cut it off or sand it.
- Prepare the surface of the spare part for further painting. To do this, use a primer, putty or other materials for this purpose.
- The car buffer must be painted according to technology. Such paints are available in car dealerships.
Detailed work on painting a bumper with your own hands in the video:
Results
Repairing a buffer at home is not a difficult task. Therefore, if you have minimal experience in this matter and follow all the instructions, you can quickly restore the part. And you won’t have to spend money on paying a car mechanic.
Glue for car parts has significant advantages. It is cheap, its purchase will not affect the family budget. The method of sealing a cracked buffer with an adhesive mixture is in no way inferior to sealing.
We recommend watching the video instructions on how to glue a bumper with glue yourself:
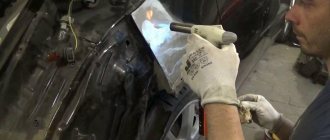
Hammer soldering iron
How to learn how to putty car body parts with your own hands
- Before starting work, the repair area, which has through corrosion, should be cleaned of rust residues;
- Because solder will not stick to a rusty surface;
- The most important thing is not to be lazy, when you are too lazy to tinker, then go back to the beginning, where it is recommended to purchase a new part;
- To remove the remaining rye you will need a pointed needle file, or a piece of hacksaw blade, or a knife with a sharp blade and abrasive sandpaper;
- Use coarse sandpaper (grain P60-80) to pass through the rust spot (if not brushed), this removes the surface layer;
- Then you should pick out any rust that has already set in from the metal;
- To make the places clearly visible, you need to apply a rust converter with a brush and wait a couple of minutes;
- The rust will darken and become clearly visible on clean metal; at this stage you will need pointed objects to pick out rotten metal;
- The process is the most tedious and time-consuming;
- You should constantly apply rust converter to these areas with a brush;
- This way you wash away the rust you've already picked off and see where you need to put in extra effort;
- After the place has been cleaned, you can begin servicing it;
Attention: When the diameter of the through holes exceeds 2-3 millimeters, it will no longer be possible to fill them with solder; this method is suitable when through corrosion forms in the form of a fine mesh
- Apply soldering acid to the surface before it dries, you need to apply tin solder with a heated soldering iron over the entire cleaned surface, where there are already and may appear holes from corrosion
- For better tin solder adhesion, constantly lubricate the evaporating acid
- When the metal of the case is thick and the power of the hammer soldering iron is not enough to heat the tin, then use an industrial hair dryer or a second soldering iron
Advice: Soldering must be done in the open air or in a ventilated room (or in a room with forced exhaust), since the evaporated acid is very harmful to the respiratory tract, and its smell is not pleasant.
Repairing corrosion damage to the body cannot be done carelessly; the price of careless work is that the body will rust again and very quickly; After completing the work, check again with a light to see if there are still any through holes; After the repair area has been tinned and the corrosion areas have been soldered, the treated surfaces should be cleaned of any acid and converter that may remain; As a rule, they are washed with water or a mixture of gasoline and alcohol; In order to increase the service life of a repaired body part, it is important to properly protect it from contact with the atmosphere; Apply acid primer to the tinned area of this body part using a paint sprayer, then acrylic primer on top of it, only after that can the surface be puttied;
Important: Putty cannot be placed on top of acidic primer, so acrylic primer is used
- If suddenly, when sanding the putty, you get rubbed down to the metal, there’s nothing to worry about, just blow it with acid primer again and cover the exposed areas with acrylic;
- When completing the restoration of a rusty car body, you should definitely protect the back side of that repair area;
- The condition is mandatory! Otherwise, all the work done will go down the drain;
- There are many ways to protect against corrosion, the main thing is to block the access of moisture and air to the protected area;
- The first option is to prime the back side with acid and acrylic primers;
- The second option is to apply a layer of good sealant, mastic, or fill it with Movil;
- The choice of option will depend on the ease of access to the surface being treated;
- If you can’t get to it with a sprayer, try applying the primer with a brush, and then cover it with Movil, to be safe, or a similar product;
- Now it is clear to you how to restore a car body from rust with small holes;
Which glue to choose for plastic
You can get high-quality results when working with plastic only by knowing what to use to glue the bumper. A properly selected solution will help to obtain a permanent bond. After drying, a polymer layer remains; glue for plastic bumpers should be similar to the material of the part itself.
Gluing can be carried out with a polyurethane compound or epoxy resin. This must be taken into account before sealing a crack in the bumper. The selection is based on the following parameters:
- Resistance to high temperatures. When painting, heating can be used, then the solution should not be subject to liquefaction;
- High level of adhesion to plastic;
- After gluing, the area will need to be painted, so you need to select a composition that can be coated with paint.
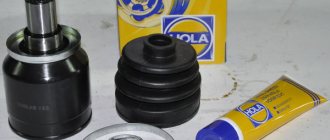
There are some popular brands of adhesives for repairing bumpers:
- Akfix, hardens the surface with high quality, no priming is required, spot application is possible;
Qualitatively hardens the surface. - Weicon Construction, the result is durable, the layer is elastic, withstands changes in temperature, humidity and other weather influences;
The layer is elastic and can withstand changes in temperature. - PowerPlast copes well with the task of gluing plastic src=»https://1ladapriora.ru/images/wp-content/uploads/2021/08/Klej-PowerPlast.jpg» class=»aligncenter» width=»800″ height=» 668″[/img] Copes well with the task of gluing plastic.
- Two-component 3M adhesive, used for fiberglass and other plastic parts in cars, can be sanded and painted;
Used for fiberglass and other plastic parts in cars. - Moment, a universal composition that can glue carbon fiber and other plastic materials. The advantage is the availability and quality of the clutch, but toxic elements are released during operation.
The advantage is the availability and quality of the clutch.
If it is necessary to close the holes, then usually this area is covered with a filling made of a similar material. An epoxy will be needed to help secure the mesh needed to create a more durable result.
Large damages can be processed with a soldering iron; this method is not suitable for minor defects.