How to disassemble the dashboard of a Lada Grant?
How to disassemble the instrument panel of Lada Granta and Kalina 2
- To remove the arrows, you will need to carefully insert the fork, using it as a lever, and pull the arrow up. ...
- All that remains is to remove the board from the case by disconnecting the LCD screen connector.
- The instrument cluster is assembled in the reverse order.
Interesting materials:
Where is the olfactory region of the nasal cavity located? Where is Lake Huron? Where is Lake Malawi? Where is Lake Nyasa? Where is the Dota 2 folder on Steam? Where is the Fortnite folder? Where is the office folder? Where is the fonts folder in Windows 10? Where is the parallel? Where is the period located in the periodic table?
About the console
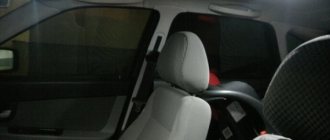
Lada Priora was produced with an interior in two color options: gray and black. It is worth noting that a light interior was installed on the first Priora models, starting in 2007, and later a black interior with black seats and upholstery was added to it. But the center console itself was not subject to changes in color, and many owners of this car repainted or covered the Priora’s center console with film.
Modifications to the center console allowed for a more formal look that would suit the tastes of every owner. Many installed 2DIN radios with a large screen or completely replaced the standard multimedia player with something more advanced and powerful.
2DIN radio in Priora
It should be noted that when installing a 2DIN radio in a standard Priora console, you need to work with a hacksaw and cut out a completely additional capacity for various kinds of small things. But with the console from the luxury Priora, such alterations do not need to be done.
see also
Comments 11
That is, in order to change the hazard warning button you don’t have to remove the console?
It is possible, but it will require great care.
Is it possible to get the watch out without removing the panel?
no, there's a latch on the back
Is it possible to fit through the slot for the radio? By the way, are there diodes?
You can't unless you're an octopus. yes there are 2 diodes
Is it possible to get the watch out without removing the panel?
You can get it without taking it off! Today I pulled it out because the watch has stopped! And the backlight works! Just pull out the radio! Bend over and you will see the latch! And use a small L-shaped piece of iron to bend the latch! No difficulties! Easy. Can anyone repair the watch? Inside there is a round magnet and a thin winding wire... is the winding resistance of 400 ohms normal? Perhaps the magnet has become demagnetized over time... and because of this the clock does not go...
Replacing the standard clock - logbook Lada Priora Sedan 2007 on DRIVE2
I sold the car back in September, my friend bought it. It was very difficult to part with the car, although even now I see it almost every day. Before the sale, the standard watch had a malfunction, i.e. In cold weather, the clock simply stopped; I had to reset it every morning. and in winter they just stood there. After thinking about the options for a long time, I decided to replace them with digital ones, and bought them from Aliexpress.
By the time it reached me, summer had come, and in the summer the staff worked, and there was no time to install it.
While I was getting ready to install the car, I had already sold it. Then my friend and I decided to install it anyway. Instead of glass, we took a transparent box from disks. On the second attempt, we managed to cut off the plastic glass instead of the standard ones. They cut it with a heated soldering iron and trimmed it with a file. It turned out better than the original. Since the buttons on the digital watch were on top and small, I had to unsolder them and put larger buttons, they were taken from a non-working monitor.
Full size
We attached it all to the glass with hot glue, tinting it from the outside.
Full size
And they assembled it into its original case; they did not remove the power connector from the stock, but simply soldered two plugs to the wires. After thinking for a long time about how to connect it to the car (there are 3 +-12V cables on the standard one and about 3-4V for the backlight), we decided to connect it to -+12V. those. the clock will always be on.
Full size
Everyone is here. And yet, in addition to the clock, here you can view the temperature in the cabin (with distortion, since the temperature sensor is not in the cabin but in the clock box) and the voltage on board.
Full size
We were pleased with the result, they stand like family
www.drive2.ru
Voltmeter selection
Of the domestic automobile voltmeters on the market, you can only find devices from UAZ and VAZ 2107. Both of them are poorly suited for installation in a Priora. The first one has a rough appearance and is more suitable for installation on a tank than in the interior of a modern car. The second does not have an external housing, and its dimensions do not allow the device to be neatly placed on the Priora panel. Therefore, it is better to find special tuned devices or use a digital car voltmeter made in China, inserting it into a button or instead of the dial of a Priora watch. Such devices are distinguished by good accuracy, low price and attractive appearance of the digital panel.
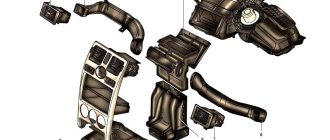
Types of tuning of the Priora central console
Below are some of the most popular examples of console modifications by Prior owners.
Painting
Painting is carried out in several stages. To begin work on modifications, it is necessary to dismantle the console and remove all attached electrical equipment from it, such as a clock, climate control unit and media system.
Then the factory paintwork on the plastic is sanded, primed and painted.
Pros and cons of this method:
Pros:
- Durability;
- Reliability;
Minuses:
- The impossibility of returning everything to its original appearance;
- Long and expensive work process;
Pasting with film
This type of modification is the most popular and widespread due to its speed and low cost. With such modification, as well as with painting, it is necessary to dismantle the center console and all attachments. After removal, the console is treated with a degreaser and a film is glued to the degreased surface and, using a hairdryer, stretched over all convex areas.
Pros and cons of this method:
pros:
- Cheapness;
- Rapidity;
- The ability to return to its original appearance;
Minuses:
- Not durable, the film quickly begins to sand and crack;
Installing a 2DIN radio
This modification involves sawing off excess parts of the console, which may interfere with the installation of a large two-din radio. Practically no modifications will be required if you install such a radio in the center console of a luxury Priora, since a larger multimedia system is installed there from the factory.
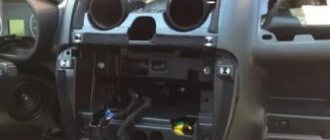
How to remove the center console of a Priora
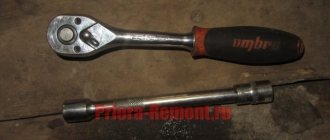
In order to remove the center console on a Priora, you need to prepare the tool that will be needed in the process of dismantling it. It should also be understood that the work is carried out with plastic parts and excessive force can damage them.
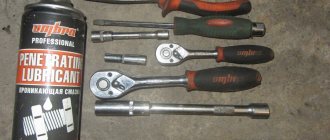
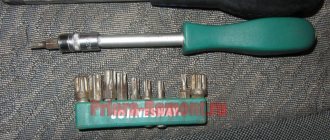
Required tool:
- Crosshead screwdriver;
- Flat screwdriver;
- Pliers;
Step-by-step instructions for removing the console
- We remove rubber mats from compartments for small items.
- We take out the radio and disconnect it from the power supply.
- We unscrew the two screws at the edges of the place where the radio is installed.
- Unscrew the two screws inside the compartment for small items.
- Unscrew the two screws at the bottom of the center console near the gearshift lever.
- We pull the center console towards us; as soon as it moves away from the seat, we disconnect the connectors for the clock, emergency lights and climate control unit.
- After the console is dismantled, remove all attachments from it by unscrewing the screws.
Why do you need a voltmeter in the Priora cabin?
Most modern car models do not have a voltmeter on the instrument panel. Manufacturers decided that information about the on-board network voltage is not needed by the driver. This indicator is monitored by the on-board computer, which signals problems in the event of an obvious malfunction of the charging system or the vehicle’s on-board network. At the same time, a voltmeter is one of the most popular additional devices installed by car owners. This is caused by the following circumstances:
- the device allows, if necessary, continuous voltage monitoring;
- analysis of voltmeter data allows you to determine the load on the generator and its operating efficiency.
Connecting a voltmeter to the on-board network
A digital voltmeter in a car must meet two main requirements:
- show the voltage on the battery as accurately as possible;
- turn off when the engine is not running so as not to discharge the battery while parked.
Accurate data on the voltage on the battery can be taken directly from its terminals. To do this, you need to connect the wire from the positive terminal to the installation location of the voltmeter. To prevent conductor resistance from causing a voltage drop across the device, the wire cross-section must be at least 0.5 mm.
The wire must have strong, good insulation so that a short circuit does not occur over time.
It is important that this way of connecting the wire bypasses the standard fuse box, so care should be taken to protect the circuit from overload. For safety, install a fuse between the battery and the wire going to the voltmeter
Otherwise, the wiring may even catch fire in the event of a short circuit.
It is best to lay the wire into the cabin to the place where the voltmeter is installed in the general wiring harness of the Priora. To do this, you will have to bring it into the cabin and stretch it under the dashboard.
It is ideal to dismantle the entire torpedo for this, but this is a complex and time-consuming job. The problem is solved by partial disassembly: removing the dashboard or center console. To do this, there is no need to disconnect the wiring harnesses; you just need to move the “tidy” a little to be able to pull the wire to the right place.
It is enough to connect the second wire of the voltmeter to ground where it is convenient. When connecting a voltmeter to the wires of the ignition switch, tape recorder or other wires located in the dashboard area, its readings will be lower due to the voltage drop across the contacts and connections.
In order for the voltmeter to turn off when the ignition is turned off, an electromagnetic relay must be inserted into the gap in the wire between it and the battery terminal. The relay winding should be powered from any wire on the ignition switch, on which voltage appears after turning the key.
If you have no experience or desire to tinker with laying the wire from the positive terminal of the battery to the car voltmeter
https://www.youtube.com/watch?v=YF1bygfROUw
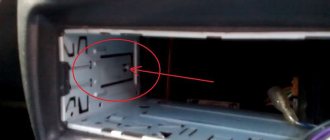
The first step, of course, is to dismantle them. This is quite easy to do on a VAZ classic, but not so much on a Priora. In order to remove the watch, you need to remove the plastic decorative panel. Then remove two screws, and we will find a couple more under the ashtray.
But it doesn’t end there, there are still screws waiting for us, we will find them after we remove the radio. And only then can you remove the panel by gently pulling it towards you. Take a knife or flat screwdriver and press on a fairly tight latch.
Now we need to disassemble the watch, and this is easier than removing it. We see four latches on the sides; we snap them off. Now carefully remove the arrows. If desired, the arrows can be replaced, if, of course, there are other more elegant ones at hand. But you don’t have to do this, since we are annoyed by the shade of the arrows, and not by the elements themselves. Therefore, they can simply be repainted, but this must be done carefully and efficiently. To do this, we degrease the hands, and at the same time remove the annoying orange color with a solvent. Then everything is simple: as paint, you can use ordinary office putty, or, as it is also called, a touch, because buying a can of white enamel for two arrows is not constructive. In addition, moisture will not get inside the watch anyway, so the touch will fit perfectly - it gives an even white color and dries instantly.
How much do watches cost?
Instead, you can put three options:
- Analog – original and with modifications;
- Conventional electronic;
- Voltmeter and various accessories.
Analog ones are available in parts stores and the aftermarket. Their price starts from 200 rubles - lovers of the classics can get themselves a new device to replace the faulty ones. A factory malfunction may be the result of a breakdown in the electrical wiring or the mechanism itself.
https://www.youtube.com/watch?v=YObsWXcZEJQ
The main options for improvements from craftsmen are the backlighting of numbers and hands, as well as a black bezel instead of the original gray
It will become easier to tell the time at night, but note: according to statistics, in order to tell the time, a person looks at an analog device much longer than at an electronic one. This can play a key role in a traffic situation, because according to traffic rules it is not recommended to be distracted from the road
Regular electronic watches are sold in 2 versions: assembled and in parts. Collected ones can cost from 450-500 rubles. They come in a variety of colors, with tinted glass, but most sellers only offer the original gray bezel, so aesthetes will have to paint this part black themselves. You can assemble this simple device yourself: tint the glass, connect the electrical, set the time. The whole set will cost about 400 rubles.
The voltmeter and various modifications are the result of an engineer’s wild imagination; these specimens deserve attention.
The procedure for working with the front wing of the Priora
In general, this entire action can be divided into 3 stages.
- Removing the bumper.
- Removal of sills and fender liners.
- Removing the directly required element.
Removing the bumper is a separate procedure that has been described more than once, so there is no need to elaborate. In general, unscrew the side and bottom screws on both sides and carefully remove the bumper.
The sills and fender liners are attached with self-tapping screws and can be removed without any problems. But the dismantling of the wing itself needs to be considered in more detail. So, first of all, move the side repeater a little to the side and, taking it out of the groove, remove it from the connector. Now the key to “8” is in your hands, and forward. In order. Bolts, one each, for the front and lower fastenings, through the wheel arch, two bolts for the rear fastenings, and, finally, the last four are the upper 3, connected to the body, and the headlight protection fasteners. That's it, the wing can be moved to the side.
What is the advantage of this model. The elements are not welded to the body as on previous cars, but are conveniently fastened with bolts. And they can be removed using just the keys.
Installation of a new or restored element
In principle, it is carried out completely in reverse order. Just a small caveat: you don’t need to tighten all the bolts at once. There are tolerances in the mounting holes. Therefore, you need to attach all the attraction points and align the wing so as to ensure minimal gaps with the body. Only after completely removing the gaps in the body, tighten the bolts and install the remaining parts. This completes the work.
The video below shows the final moment of replacing the Priora wing: