Approximately how much does it cost to weld this whole thing?
I have two holes from the interior, about 10x10cm, and rotten reinforcements... in the places where the jack is attached. new amplifiers + cutting of old ones + installation of amplifiers + installation of patches = approximately 2 kilorubles (Rostov region)
there are holes in the body - elements need to be welded/changed. this is the rigidity of the car.. your safety
if there is one small hole in the wing, then you can cover it up (after digging it out well, treat it with a rust converter)
doors, also, if there is not a big hole, then you can cover it up. cheaper than cooking or a new fur coat. but in this case, you need to clean the entire door, destroy all accessible pockets of corrosion. so that they don’t come out in a year, well, get ready for sex with putty and sandpaper).
Clean the metal around the hole and treat the surface with a rust converter. Take fiberglass, cut three patches out of it, and the first one should be 2-3 centimeters larger than the size of the hole, and each subsequent patch should be 5-6 centimeters larger than the previous one.
Impregnate the fiberglass on all sides with epoxy glue and apply to the back of the body. Glue these patches on, starting with the smallest one. Wait for each layer to dry completely. Afterwards, clean, prime, putty, and paint the exterior of the body. But the result of this method is short-lived and is suitable for small holes.
Fix the hole another way. Treat the area of the body surface to be repaired as in the first case. Cut a piece of metal that should be 25-30 millimeters larger than the hole. Apply a thin layer of tin to the patch and body to protect the metal from rust (tinning). Using a powerful soldering iron, attach a piece of metal to the back.
Hello to all conference participants. It is interesting to know YOUR opinion on the following question: VAZ-2107, if you look at the car from the front, then the front glass, the lower right corner, is rotten even lower, where the water flows, the metal is rotten to the hole, the wing is intact, under the rotten metal there is an even more durable car frame , also not yet rotten. So the question is, what is the best way to fill the resulting niche, about 5*7 cm in size and about 2-3 cm in height? Is it possible to apply putty in a thick layer. and will it fall off if the metal is treated with Movil? Or seal it with something else, BUT WITH WHAT. Tell me plz.
At one time on 04 in a similar place I did this. I attached a piece of fiberglass fabric to the hole on the inside, put a not very thick layer of putty on it, then laid another piece of this fabric on top of the wet putty (you can buy it on the market) I waited until this scab appeared. It dries, I smeared it again, then sanded it, primer, paint. It looked like.
Impregnate the fiberglass on all sides with epoxy glue and apply to the back of the body. Glue these patches on, starting with the smallest one. Wait for each layer to dry completely. Afterwards, clean, prime, putty, and paint the exterior of the body. But the result of this method is short-lived and is suitable for small holes.
Fix the hole another way. Treat the area of the body surface to be repaired as in the first case. Cut a piece of metal that should be 25-30 millimeters larger than the hole. Apply a thin layer of tin to the patch and body to protect the metal from rust (tinning). Using a powerful soldering iron, attach a piece of metal to the back of the body. After.
To seal the through holes in the driver's door, it was decided to remove it and do it much more conveniently with it removed. The door had already been repaired before me, it was welded along the bottom with strips of iron and putty first with putty with fiberglass, and then with ordinary putty, when I cleaned off the putty there was probably a centimeter.
Door before repair by me
Angle from the B-pillar side
But the previous repairs apparently failed to stop the corrosion. Taking a grinder, I cut off the plates at the bottom and part of the rotted piece of the frame, and from the corner I screwed part of the frame onto self-tapping screws
and the resin went in after degreasing everything, placing cardboard inside so that the fiberglass did not sag, and sealed the missing part of the door
The corner of the door on the side of the central pillar was bent, so it had to be made entirely of glass mat in 5 layers
Next will be putty with fiberglass and universal. It was decided to putty the strip on the door and make a surface.
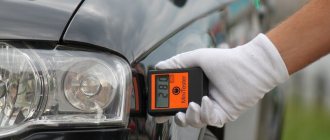
Owners of old cars often have problems with holes appearing in the body of the car. Such holes occur naturally due to rusting of old metal. Any manufacturer will not provide a guarantee against body corrosion for more than 12 years. Consequently, a 15-year-old car will definitely have traces of metal corrosion on the body, which will only increase over the years. So over time, in places of corrosion, the metal can rust through. In this article we will tell motorists how to repair a hole in a car body with their own hands, on their own.
Preparing to fill a hole in a car body
So, you have discovered a through hole in the body of your car. do not rush to turn to expensive craftsmen who guarantee the high quality of their work with a guarantee that rust will not appear in this place for many years. If you are limited in cash.
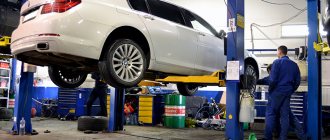
When getting your car in order, sometimes you have to find an unpleasant problem - a through hole in the bottom of the body. Some car owners immediately turn to a car service center for help, while others try to repair the hole on their own. In the second case, you have the opportunity to save time and money, and will also be able to master new car repair techniques, which is always useful and relevant.
Fiberglass and mesh
To repair more extensive damage, an aluminum patch mesh is used. A piece slightly larger than the hole is cut out of it and attached with masking tape. Next, sealing holes in the car body without welding is carried out in the following sequence:
- a thin layer of fiberglass putty is applied without touching the tape;
- after drying, the tape is removed;
- subsequent layers of putty are applied after the previous one has dried;
- the surface of the car is treated with sandpaper or a grinding machine until smooth;
- To strengthen the mesh, several layers of putty are applied to the back of the body.
Long-term auto patches are made from fiberglass and epoxy resin. Several overlays are cut from it, the first of which should cover the hole with a margin of 2 cm. The size of each subsequent piece is made larger than the previous one. The last overlay should cover all the metal stripped during the preparation process.
The cut pieces are impregnated with resin and placed on the hole in a sequence of increasing sizes. If you need to seal large holes on the back of the body, use linings to prevent the fabric from sagging. After laying all layers of fiberglass, wait for the resin to completely harden. The time required for this is indicated in the instructions.
How to repair through holes on a car body using putty without welding
Before repairing a hole in the car body, you should prepare:
- fiberglass and automotive putty;
- aluminum mesh;
- putty knife;
- sandpaper (if possible, it’s also worth looking for a sanding machine);
- primer, paint, varnish.
Fixing holes in a car body itself is distinguished by its simplicity. First of all, you should remove the rust using an angle grinder or any other suitable equipment. Next, we cut out the patch from aluminum, and then attach it to the body using masking tape. We apply a thin layer of fiberglass putty (here it is important not to touch the tape, because then you will have to remove it). When the putty sticks, peel off the tape and putty the remaining areas.
Car body soldering
This method is used to seal small and large holes without welding. To work, you will need flux, which will protect the metal from rapid oxidation. Soldering acid, sold in radio stores, can successfully cope with this task. To achieve the required temperature, you will need a soldering iron with a power of 1 kW or more, or a version heated with a blowtorch, but it is better to use a gas torch. The solder is chosen to be refractory, since it can be used to repair a hole in the car body more reliably.
Small holes are simply filled with solder, starting from the edges and gradually fusing to the center. A large hole in the body is covered with a patch cut from tin from a tin can. It provides:
- strong connection, almost like welding;
- significantly longer service life than putty, but less than welding;
- possibility of sealing large holes;
- ease of implementation, repairs are accessible even to beginners.
The work is performed in the following sequence:
- A patch is cut to fit the size of the hole. The larger the area of contact with the body, the more reliable the connection.
- The soldered edges of the patch and the damaged areas are cleaned with sandpaper until shiny.
- Using flux and solder, the cleaned surfaces are tinned.
- After applying the patch to the repaired area of the car, it is heated to the melting temperature of the solder. In this case, you need to ensure the continuity of the seam so that there are no missing sections.
- After cooling, the remaining flux is removed, and the soldering area is washed with hot water and soda.
The disadvantage of this method is that the patch swells due to heating. If checking with a ruler confirms this, the bubble is removed with light blows of a hammer.
The resulting depression is leveled with putty:
- Marks are applied to the surface of the patch, plus a few millimeters from each edge, with 120-grit sandpaper. This is necessary for reliable adhesion of the putty to the metal.
- The cleaned surface is cleaned of dust and degreased with a solvent.
- To prevent the metal from becoming rusty, the primer is applied no later than an hour after preparation.
- The first 2 layers are applied with a phosphate or acid primer with an interval of 15 minutes.
- After waiting another quarter of an hour, apply 2 - 3 layers of acrylic primer at intervals of 5 minutes.
- It takes 3 - 4 hours to dry completely. The drying process can be accelerated using an infrared heater.
Using a soldering iron
There is another way to repair a hole in a car body without welding. A soldering iron is required here. First of all, we clean the area from rust. We make the patch from a sheet of metal (you don’t need to worry too much about this; an ordinary can of auto chemicals will do).
It is important that the patch is slightly larger than the holes and also completely covers them.
Additionally, you can coat the metal surface with anti-corrosion compounds - this will increase the quality of our repairs. Then we service the edges of the patch, after which, using a fairly powerful soldering iron, we solder it with a continuous seam.
Next, you should check whether it turns out that the patch protrudes somewhat above the body. If there is a protrusion, we eliminate this deformation with several gentle blows of the hammer. We remove various dents with putty (it is important that its layer reaches no more than 2-3 mm, otherwise the material will crack). Before filling, clean the surface with a metal brush.
In order for the putty to adhere well, it is important that abrasive marks (small scratches) appear on the patch.
The next step is primer. Here it is necessary to complete everything as quickly as possible to avoid the possibility of rust occurring in the future. It is best to first apply a thin layer of phosphate primer, and when it dries, another two or three layers of acrylic two-component composition (the interval between applications should be about 5-10 minutes). Everything dries in about 3-4 hours; if there is infrared heating, you can reduce the procedure to 20 minutes.
It is worth noting that this solution is more durable than in the case of aluminum mesh, and it can be used to eliminate holes of almost any size.
So, in the article we discussed how to repair holes in a car body without welding. It is worth noting that these options are not the most optimal. Naturally, it is better to turn to professional vehicle repair specialists. At the same time, self-repair will help give the body an aesthetically attractive appearance and also prevent further development of corrosion. Both options are distinguished by their simplicity, so repairs can be performed even without special knowledge and skills.
Video on how to solder a hole in metal:
Rivets
This method not only repairs large holes in the car body, but also replaces parts (fenders, aprons) without welding. In terms of reliability, it is not inferior to welding. It is recommended to install rivets in an inconspicuous place. Since there is no splash of molten metal during operation, like welding, it is often used to repair car floors.
The riveter required for the job can be bought in a store (costs approximately 500 rubles). The technology is simple:
- The patch is cut so that it overlaps 2 cm around the edges of the hole.
- By attaching it to the body, it is given the desired shape.
- The locations of the holes for the rivets are marked.
- After drilling the patch with a drill according to the diameter of the rivets (4 - 6 mm), it is advisable to countersink the edges of the holes so that it fits more tightly to the surface of the car body.
- Having applied the patch again, the center of the first hole is marked and drilled.
- After riveting it and leveling it, the patches are tapped and the remaining holes are drilled in place.
- To ensure a tight fit of the patch to the car body, rivets are fastened from the center to the edges.
- To prevent moisture from getting inside, the joint around the perimeter and rivets is coated with sealant.
Putty work
Puttying procedures are divided into rough and finishing. If there is significant damage to the body, it is still better to entrust the work to a straightener so that the layer of material you apply does not turn into a real crack.
The rough layer should be applied with coarse putty; all work is done with spatulas; it is also used when creating the mixture. The more thin layers of material, the less likely it is to cause bulges and dips, so be patient.
The rough layer is sanded with fine- and medium-grain sandpaper. Your surface should become smooth without transitions or joints.
Use a ruler, applying it, you will immediately notice all the irregularities. Subsequent layers are applied in the same way until the desired effect is achieved.
Fine-grain putty will be used in the final stage. The processing can be completed with a grinder or abrasive wheels.
The material used at this stage does not require mixing or adding other substances. Due to the high shrinkage rate, this material must be applied in a thin layer.
When carrying out work, it is necessary to observe technical aspects, as well as listen to the recommendations:
— when purchasing material for work, you should pay attention that it is divided into professionals and amateurs. The latter is suitable just in our case.
- before buying the material, read the instructions, which will show whether preliminary priming and painting is necessary.
— in order not to get confused with adding a hardener, many people use a special dispenser and rent a dispenser. The exact combination of ingredients will help save on material and form the right coating.
- do not use cardboard as a material for preparing putty, this may affect the composition, because its components may fit in.
— cleaning off rust is an important procedure that cannot be skipped. You can remove rust with a brush attached to a drill, which will significantly speed up the process.
After treatment, apply rust converters to the required areas. In this case, work must be carried out with gloves. After removing the converter from the body, it will not be possible to do without the procedure of degreasing and putty.
- use a special substance to remove corrosion, which will turn the rust into dark spots, which are then easier to process.
Final stage
Regardless of how the car body was repaired, they all end with putty. However, it absorbs moisture, which leads to rapid destruction. Therefore, it must be coated on top with an anti-corrosion or epoxy primer. Body repairs are completed without welding by painting. To do this, use a spray gun or aerosol cans, after covering the adjacent surface of the car with plastic film. You should not use a brush, as drips are possible.
The proposed methods will help to repair a car without welding in case of single damage. However, if a large area is affected by corrosion, it will be easier and more reliable to contact a car repair shop to replace the rusted area by welding. Most often this happens to the floor, so it is recommended to regularly check it from underneath the car using an inspection hole or lift.
Putty principle, purpose
It is important to approach the issue of puttying seriously, because this stage directly affects the shape of the body and the quality of painting and application of the appropriate layers. This procedure is step-by-step and takes a lot of time; it is necessary to prepare for it.
Every car owner will sooner or later be faced with the issue of puttying - if he gets into an accident, gets a dent on the bumper, or a gap of rust appears on the body.
Body repairs cannot be carried out without puttying. Sometimes this labor-intensive process requires learning.
An ideal result can only be achieved with some experience in this procedure. Putty is used to level the surface, so it will have to be applied in a fairly large layer. The smoother the layer is laid, the less work you will have to do later to sand the surface of the car.
Depending on the purpose, the material has a different composition. Most putties are two-component. Fillers can be: chalk, talc, metal powder and much more.
Main binders:
- Low shrinkage and good adhesion of the material are ensured by polyester resins;
- Epoxy resin is less easy to process, but is ideal for use with plastic; it is quite toxic.
It is important that the material you choose for the work is applied evenly, can be used in the required areas, hardens quickly, and is easy to apply.
This will make it easier for you to carry out all the work and at the same time achieve the desired result. Remember, patience and adherence to all material application technologies are important.
A smooth and properly puttied surface is the key to long-lasting service of the subsequent paint coating.
But by what criteria to choose the best material, let’s consider the presented types of putty.
Cold methods of sealing holes in metal
There are two ways to repair holes in the underbody of a car without using hot work.
- Using composite materials - various types of polymer resins in combination with a reinforcing filler and a curing reaction accelerator. With high-quality surface treatment, in addition to restoring mechanical strength, they play the role of inhibitors - retarders of chemical and electrochemical corrosion reactions;
- Installing sheet material patches onto rivets.
General technological rules
Holes in the bottom are usually discovered from the outside, when inspecting the car on a pit or lift. Signs of through corrosion are local swellings, which, when you try to pick them out, crumble into dust.
If you find such troubles, you need to open and remove the pie of heat, noise and waterproofing on the floor in the cabin in the entire area where the sheet of iron forming the floor is welded to the power elements of the body - thresholds, tunnel and others. Then you will see the whole picture of the damage and will be able to take preventive measures in those places where corrosion has not yet become through.
Before the process of sealing the holes itself, you need to take measures to slow down the corrosion process (stopping it is an unattainable ideal to strive for). To do this, all iron rags are removed, and the edges that have residual strength are treated with sandpaper and a wire brush until shiny. The cleaned surface is treated with rust converters. For example, the “Tsinkar” composition. Work is being carried out inside and outside.
After completion of the work, the surface of the unprotected metal is covered with bitumen mastics, putty (acrylic, epoxy), paint or gun fat.
The work makes sense if the total surface of through holes does not exceed 15% of the floor area.
Fixing pinholes
If the source of through corrosion has a diameter of no more than 1 centimeter, it can simply be covered with a two-component polymer composition. Poxipol glue or a cold welding kit similar to plasticine gives good results.
A small hole makes it possible to use so-called cathodic electrochemical protection. Find an aluminum rod, make a rivet out of it and fill the hole with it. Within a radius of 20 cm from it, corrosion will stop. True, the rivet will gradually collapse on its own. But this may take five years.
Repairing large-scale damage
In this case, you will have to take care to restore mechanical strength. If the hole is on a flat area, then there is no point in messing around with epoxy and fiberglass.
A truly durable composite material is obtained only with absolutely precise adherence to technology - mixing proportions, drying mode and much more. Use ready-made material of this kind, for example, textolite. Having a thickness of 3 mm, it is not inferior in strength to sheet iron. The plate can only be installed with epoxy glue, but it is better to use a combined connection using rivets. The latter should be made of aluminum, then they will play the role of cathodic protection.
Long holes at the joints with power elements are eliminated with patches made of sheet iron or aluminum. They need to be bent according to the shape of the joint so that the width of the contact zone with the still living material is at least 2 cm. They are installed on aluminum rivets; the use of an epoxy compound would be useful. Especially if sheet metal is used. After all, you cannot know exactly its composition and in which direction electrochemical corrosion will go - whether it will destroy the patch or the body. The polymer resin will act as an inhibitor.
The final sealing of cracks and holes is carried out using, for example, the Novol Plus 710 kit. In addition to the epoxy filler and hardener, it includes a piece of fiberglass.
What does putty consist of, types
There are several types of putties on the modern market. Each of them meets a number of criteria and is used in individual cases.
Firstly , it must have high-quality connecting characteristics with a properly processed area.
Secondly , the solution must be spread evenly on the surface of the machine.
Thirdly , the putty must have excellent shrinkage, and this is possible with high-quality material.
In this procedure, not only the material is important, but also the high-quality processing of the body. The mixture you choose must be compatible with the future paintwork.
There are these types of putties:
- Rough putties are applied only if serious defects form on the body - sweeps, cracks. Such material often contains some kind of filler, for example, shavings.
- This material has a number of features - easy grinding, can withstand high temperatures, and is very elastic, which allows you to level large surfaces.
- Fiberglass putties are very durable. When applied, the solution transforms into a layer of hard fiberglass, which is easily sanded. This material is ideal for covering holes caused by corrosion.
- Thin putties are used to repair minor damage, such as scratches. The final stage of puttying is carried out with this material. These include fine and nitro putties, which are then easily processed.
- Liquid materials are applied with a device - a gun, but this results in the most even layer possible. It only takes a few hours for it to dry.
- Universal putty is a replacement for the above options; you definitely can’t go wrong with it. At the same time, it is durable, has a uniform structure and is easy to process.
Owners of old cars often use thermoplastic acrylic varnish; it is not compatible with all putties; for this you need to read the instructions.
Some manufacturers are trying to produce paints and putties that are compatible with each other. Be sure to take into account the instructions, try to find out these acts in advance, which will save time and money.
The putty also varies depending on the type of base:
Nitrocellulose putties , where most are dry substances, are therefore used to eliminate minor defects. Such a base can dry in a few hours at room temperature. Since the composition contains solvents, they are toxic. Polyester putties are the best option for eliminating defects in the car body. They are easily leveled and can dry within an hour only at room temperature.
Acrylic putties are created taking into account the latest technologies, therefore they are environmentally friendly. There are no solvents in the content, the material dries instantly. Used to eliminate deep pores.
It is important to use and combine mixtures correctly. For example, if you combine them with a hardener, the coating will be damaged and work will have to start from the very beginning.
Therefore, it is difficult to say exactly which putty is best suited; all circumstances must be taken into account. How the putty dries directly depends on its composition.
For example, if you add a hardener to a two-component putty, it will dry faster - in half an hour, and the work will have to be done faster.
Epoxy putties will dry within 24 hours at room temperature.
To reduce drying time, many people use hot drying. But this procedure must be carried out carefully, maintaining the putty coating at room temperature.
Is it worth soldering
You can also seal holes in the bottom using soldering. However, ordinary household soldering irons are not suitable for heating metal with a thickness of 0.5 mm or more. Most likely, a hair dryer will not help you with this. You need to use a portable gas burner, for example, Super-Ego R355, which fits into a small - volume from 400 to 700 ml - cylinder for camping stoves.
Solder and flux are required for soldering. The solder used is low-melting, with a predominant content of tin or lead. Flux can be replaced with electrolytic acid. The connection is strong and can withstand high vibration loads.
Soldering has two disadvantages.
- It involves hot work, which increases the overall complexity of the repair. This can be neglected if your hands grow from the right place;
- The main material of solder - lead or tin - is a substance that has a lower electronegative potential than iron. Therefore, upon their contact, electrochemical corrosion occurs, in which iron will play the role of a “sacrificial anode” and be destroyed.
Now you have an idea of how to seal the underbody of a car without welding. If you are careful and persistent in cleaning the surfaces, then treating them and protecting them, then the installed patch can outlive the car itself.
How to prepare a surface for puttying
Decide on the area to be painted and begin cleaning that surface. It is best to use a solvent that will help degrease body parts.
Remember, putty does not overlap the gloss, which is why cleaning work is so important. Many people use an orbital sander for this.
If the places are hard to reach, then you will have to get to them on your own; stock up on sandpaper. If you see the appearance of rust, then these places must be coated with a converter.
Only after this can you begin to create the basis of the machine; its appearance will depend on this. Dilute the rough putty with solvent, because it must be applied first.
There is no need to immediately begin eliminating the defect; it is better to apply the putty in several layers, waiting until the first one dries. The work must be done quickly and confidently, because the material begins to harden within 5-10 minutes.
If your putty begins to harden and you don’t like something, you shouldn’t level it, the situation will only get worse. Stop work, wait until it dries, and use a tool to remove the remaining putty.
If you haven't added enough mixture, it simply won't set in the right places, which will have a bad effect on the next surface sanding procedure.
You must understand that the evenness of the paintwork directly depends on the puttying work done. The better the material is fixed to the body, the longer the subsequent layer applied to it, namely the paint, will last.
The thickness of the layer depends on the recommendations of the manufacturer; try to follow the instructions. Some recommend applying a layer of 1 mm, and others 3 mm or higher, it all depends on the composition and level of damage.
For example, when applying liquid putty, a layer of 100-500 microns is formed. This issue must be approached individually.
Many craftsmen can afford to apply a larger layer of material when they see that it is necessary. This can often be done, the main thing is that it does not affect the strength of the repair.
Violation of recommendations in this matter may lead in the near future to its detachment from the body. The cause of detachment can also be a violation of the temperature regime.
According to the recommendations of many manufacturers, work must be carried out in a temperature range of up to +50°C. The better your work on applying putty, the less time you will have to spend on the sanding procedure.
Repairing cracks between floor slabs
If a gap has appeared between the concrete ceiling slabs, it is recommended to do the following:
- The joint between the slabs is cleaned, trying to remove as much old putty as possible.
- Before sealing a hole in the ceiling, cover the working area with a layer of primer and dry thoroughly.
- Fill the gap with putty and glue sickle tape.
- Putty is once again applied over the reinforcing material and also dried well.
- The dried surface is sanded, the resulting dust is removed and coated with a primer.
If cracks form on the ceiling without a gap between the plates, then it is recommended to glue the problem area with sickle tape, cover it with a thin layer of putty and cover it with a primer.
Can putty be applied to paint?
It is not recommended to apply putty to sanded paint. According to technology, putty must be applied to bare metal. It is allowed to apply putty to the old paintwork, but it must be factory-made. That is, the surface should not be repainted. Otherwise, it will disrupt the technology and quality of repairs.
p, blockquote 16,0,0,0,0 —>
What can happen?
p, blockquote 17,0,0,0,0 —>
What can happen if you apply putty to a repainted surface? Here we can give an example of a house on a foundation. A house is only as strong and good as its foundation. If the technology is violated, adhesion problems may arise.
p, blockquote 18,0,0,0,0 —>
Experts from 3M believe that putty should not be applied to sanded paint. This can cause contouring and further development of repair marks (subsidence). The putty's chemicals may react with the paint layers. This may cause the putty to lift up along with the paint.
p, blockquote 19,0,0,0,0 —>
What are the benefits of applying putty to paint?
p, blockquote 20,0,0,0,0 —>
When applying putty to factory paint, you get an advantage in speed of repair. There is no need to remove layers of paint and primer. This speeds up repairs.
p, blockquote 21,0,0,1,0 —>
Another benefit is that the zinc coating, if present, is not damaged. Also, no moisture gets on the bare metal. Factory coating is good protection against corrosion. Conventional filling primer does not provide anti-corrosion protection.
p, blockquote 22,0,0,0,0 —>
If applied to factory paint, you need to carefully prepare it by sanding it with p80 - p180 abrasive.
p, blockquote 23,0,0,0,0 —>
The advantage of applying putty to bare metal is that it ensures guaranteed adhesion to the surface.
p, blockquote 24,0,0,0,0 —>
When applying putty to paint, there is no guarantee that further adhesion problems will not occur.
p, blockquote 25,0,0,0,0 —>
Damaged the ceiling lining in the car. How to fix it?
I love being a father. This is how you become younger. This is also an opportunity to start life over again, looking at it from a different angle.
Kent's friend performed this alone ((holes from heels
Kent's friend performed this alone ((holes from heels
I love being a father. This is how you become younger. This is also an opportunity to start life over again, looking at it from a different angle.
Twice flame hero
I'm a family man, I'm much more prosaic)))
Knight of the Order of the Flame
I'm a family man, I'm much more prosaic)))
ask your wife to mend
Well, either carefully glue it, or drag the entire ceiling.
she doesn’t mind, but she doesn’t vouch for the result)
I love being a father. This is how you become younger. This is also an opportunity to start life over again, looking at it from a different angle.
What to glue it with? This needs to be somehow distorted from within. (
such things happen on the roads that it’s even scary to buy a license
Twice flame hero
I understand that I don’t have a Bentley, but there’s no way to forget about it; after all, the car is three years old. Here is a photo of the trouble on your phone
I love being a father. This is how you become younger. This is also an opportunity to start life over again, looking at it from a different angle.
Thrice hero of the flame
It may be possible to use what thread to repair the clothes, what kind of thread the tape will be slipped in and heated with an iron, but Boon is right that the glued one will be even more conspicuous.
Thrice hero of the flame
can sew with thread and a semicircular needle and so on.
Twice flame hero
I love being a father. This is how you become younger. This is also an opportunity to start life over again, looking at it from a different angle.
Yes, pull up the roof and that’s it, what are you doing?
That's it, I fixed it. aftar from you 100 bucks
That's it, I fixed it. aftar from you 100 bucks
Thank you! It turned out great! I won't even bargain, here you go.
Yes, pull up the roof and that’s it, what are you doing?
I love being a father. This is how you become younger. This is also an opportunity to start life over again, looking at it from a different angle.
Source
Drying automotive putty:
To dry the putty, the temperature in the workshop must be at least 20 degrees.
p, blockquote 13,0,0,0,0 —>
Putties do not harden at low temperatures. If you add more hardener than required, the excess hardener will not react with the putty, which will worsen the quality of the coating. Thus, it is important to observe the temperature regime and mix the putty with the right amount of hardener.
p, blockquote 14,1,0,0,0 —>
You can use infrared drying. At the same time, you get an advantage in the speed of hardening of the putty and reducing its further subsidence.
p, blockquote 15,0,0,0,0 —>
Applying putty to the repair area
You have 5 to 10 minutes (depending on the type of putty and ambient temperature) to apply the putty before it begins to harden. As soon as it begins to harden, immediately stop puttingty, as you will no longer be able to apply it normally.
p, blockquote 9,0,0,0,0 —>
The putty is applied in two stages:
p, blockquote 10,0,0,0,0 —>
p, blockquote 11,0,0,0,0 —>
- The unevenness itself is filled. Use a spatula to press the putty well. This will reduce further drawdown. Next, we wait for the putty to dry and sand it. After sanding, remaining irregularities are revealed.
- Apply a second layer of putty to the entire repair area.
Finishing layer of automotive putty
The finishing coat is applied to the entire repair area. This is a thin layer of putty. You can add some polymer from a fiberglass repair kit to the putty. Approximately the same amount is added as the hardener from the tube. Next, add putty hardener and stir. The resulting putty is easily applied in a thin layer and is well leveled. When curing, a slightly sticky layer may form on top of the putty surface. You can remove it with a solvent and start sanding.
p, blockquote 28,0,0,0,0 —> p, blockquote 29,0,0,0,1 —>
What mistakes do beginners make?
To carry out the work correctly and achieve the desired result, you should strictly follow the instructions, choose the right material and listen to some recommendations.
Beginners often rush and manage to create problems that are then more difficult to fix than applying the coating.
It is important to remember and follow these recommendations:
- Carry out all work on a dry surface, because moisture forms corrosion, which corrodes the surface. During preparatory work, when you wash the car, let it dry thoroughly;
- You cannot put putty on a glossy surface; it will simply peel off. Degreasing, cleaning and only then applying a layer of putty.
- Two spatulas are used in the work - for applying large and small putty.
- Before each application, stir your mass, because thick components form at the bottom, and resin on top.
- draw up a work plan for yourself, describe at what stage and what materials will be used, then you will definitely not confuse anything.
- You should not add hardener to the jar of putty material; try to follow the proportion specified in the instructions;
- Many people mix more putty, and then are left without material, because they forget that the material hardens in 10 minutes. During this time it is impossible to process all areas, so separate the material.
- hold the spatula at a 60 degree angle.
- acid primer, primer-filler is used in areas with corrosion, which cannot simply be left without treatment.
- To avoid the appearance of pores when applying the material, the material should be thoroughly mixed.
Applying automotive putty to the ground
The only primer on which it is recommended to apply putty is epoxy. It is recommended to do this if the car has been standing for a long time, stripped to bare metal. This is usually done during restoration work. Even indoors, with prolonged interaction with air, “bare” metal oxidizes. Epoxy primer provides good anti-corrosion protection.
p, blockquote 26,0,0,0,0 —>
If the repair is carried out in a short time, then it is not necessary to apply epoxy primer. It is necessary, as described above, to prepare the damaged surface, stripping it down to bare metal, degreasing and puttying.
p, blockquote 27,0,0,0,0 —>