Good health to everyone. In general, I’m tired of driving with headlights and constantly turning them on and forgetting to turn them off, and I don’t like the way the light sensor is designed. In addition, you need to turn off the light sensor when the car is on autostart in the winter. I decided to make DRLs. I started looking at aliexpress, went around on the car market and realized that this is not reliable, and troublesome, and not particularly budget-friendly. I didn’t want to bother too much about where to mount and pull the wiring from the bumper and also spend a lot of money. Since my car is at maximum speed, i.e. with PTF (which I don’t use), I decided to make them as DRLs, but still bother with their inclusion and turning off.
ESSENCE: DRLs turn on only when the engine is running and the handbrake is lowered. They turn off when the lights are turned on and the handbrake is up. There is absolutely no power when the car is parked. The circuit is at the very bottom, and if you want to make such a circuit for purchased non-standard DRLs, you need another relay and a positive cable from the Akum and to the front of course. My 4th relay is the standard one for turning on the PTF.
GOAL: Without unnecessary movements, start driving the car, and also without unnecessary movements and thoughts, calmly leave the car without ever returning to it due to attacks of forgetfulness (I think this is familiar to many). I apologize for the tautology. Also share a clear diagram with others who are looking for such an option.
Since I’m never an electrician, I had to study how the relay works, and also find out that the wires you and I need to the device go through diodes and they cannot be used in this circuit. Well, or so I didn’t understand anything. If anyone If you decide to do it, you don’t need it, but it’s useful to know. In general, the circuit consists of 3 relays. Two 5-pin and one 4-pin. All contacts are marked where and with which plus or minus sign. Further technical details and DIAGRAM at the very end. I’ve been driving for a month. I’m happy.
The advantages of my scheme: “Everything works without your participation (it turns on and off by itself), i.e. convenience (comfort). The entire circuit is de-energized when the car is parked, i.e. safe. Very inexpensive compared to buying an additional unit light controls, additional DRLs, and voltage regulators. Less energy consumption and various light bulbs and backlights. Ease of implementation.”
Cons: Cutting into the standard wiring (although this can be avoided by connecting and crimping everything into new terminals along with the standard wires and, accordingly, pushing it back into the mounting block). But normal soldering (not with tin, but with solder), correct laying of wires, as well as high-quality electrical tape and its winding, guarantees safety against short circuits! Tested! I don’t see any disadvantages anymore.
And so in order of actions: We buy one 4-pin and two 5-pin relays, 3 blocks for the relay, 12-15 female terminals, one terminal with a round tip with a 6mm hole, a red wire 4-5 meters (0.75 kV ), black wire 2-3 meters (0.75 kV), the thinnest corrugation 4-5 meters, electrical tape, cable ties, fuse holder and a 1-5 ampere fuse, solder (if you decide not to farm, but to do it efficiently)
The tools we will need are: a utility knife, a Phillips screwdriver, a 10mm wrench, a drill or screwdriver with a long 9mm drill bit, pliers with thin (optional) and regular jaws (or a special crimp, ideally).
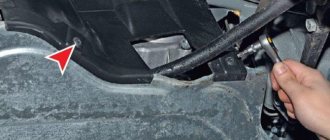
Preparation: remove the battery, remove the fuse cover, unscrew the light control unit and disconnect it, unscrew the screw at the bottom of the mounting block and pull out the mounting block, remove the plastic sill trim on the driver's side and bend the carpet with the noise to the side.
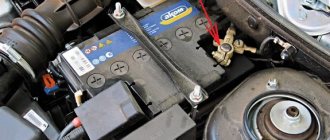
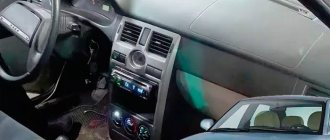
Let's start working with the wiring: (I mounted all 3 relays next to the mounting block, to the left of the light control unit, so we pull all the wires there) 1. The plus (+) from the excitation wire (white-brown) of the generator is taken from the standard wiring, which is located near the battery under the washer barrel (the most convenient place to solder the wire is there). Cut the insulation (braid protection) of the standard wiring (I had fabric tape there), find a white-brown wire in the braid (I tried to take this wire in the salon, but it was there already goes through the diode and you won’t be able to use it), clean it (but don’t cut it! Otherwise, the charge light on the device will blink! And in general, we don’t cut all the wires to which we solder!), solder (or twist) one end of the wire from the fuse holder to generator excitation wire (to the white-brown one), and the other to the purchased red one, insulate it, insert the wire into the corrugation. We lay it behind the battery and bring it closer to the clutch cable. Drill a hole next to the clutch cable (I drilled from the interior), push everything into the interior and cover with sealant on both sides of the engine shield.
What are the requirements for daytime running lights on the Priora VAZ 2170?
Almost all European-made cars are equipped with external lighting devices (DRL) for better visibility during daylight hours. However, not all domestic models have this option. Some motorists believe that they can get by with side lights, but their brightness is clearly not enough to indicate the car while driving. Thus, car owners will have to worry about light tuning of their vehicle.
DRL standards
According to technical standards, daytime running lights on the Lada Priora provide a glow angle of 30°, of which ten degrees are above the horizontal line, and 20° below. The light from DRL headlights should be visible from a distance of 150-200 m even in sunny weather, with a light spot area of at least 40 cm².
Some car enthusiasts, after installing DRLs, test the visibility of the car from 5 meters, and often in the dark, forgetting the true purpose of such lighting. The efficiency of the flashlights must be determined on a sunny day from a distance of 150-180 meters. Their functions do not include lighting the route - only indicating the presence of a vehicle on the road.
Functional tasks of DRL and GOST standards
Non-standard daytime running lights on Priora must be operated in a certain mode:
- The DRL switches on and off automatically simultaneously with the ignition key being moved to a certain position.
- The DRL should be turned off automatically after the headlights are turned on, with the exception of its immediate activation to signal other road users.
- It is necessary to provide the ability to turn off and activate the running lights using a separate control unit.
The order of placement of car daytime lighting elements is regulated by GOST 41.48-2004 standards:
- The outer edges of the optical device must be no further than 400 mm from the corresponding overall width of the vehicle.
- The distance between the inner edges of the lighting fixtures should be no more than 600 mm; this parameter can be reduced provided that the vehicle width is less than 1,300 mm.
- The height of the DRL is set no lower than 250 mm and no higher than 1,500 mm from the level of the road surface.
The installation of additional lighting system devices is individual in each case and depends on many factors. However, you should always comply with the requirements outlined above.
Switching on through dimensions or low beam
The second version of the DRL connection diagram involves using the power circuit of the side light bulb. To do this, the positive wire from the running lights is directly connected to the “+” from the battery. In turn, the negative wire is connected to the “+” of the side light, which is currently electrically neutral. As a result, the following current flow path is formed: from the “+” of the battery through the LEDs to the size, and then through the light bulb to the body, which serves as the minus of the entire circuit. Due to the low current consumption (tens of mA), the LEDs begin to glow, and the lamp spiral remains extinguished. If the driver turns on the side lights, then +12 V appears on the positive side of the side lights, the potentials on the DRL wires are equalized and the LEDs go out. The circuit goes into normal mode, that is, current flows through the side light bulbs.
This circuit solution has several disadvantages:
- running lights remain on when the engine is turned off, which is contrary to current regulations;
- the circuit will not work if LEDs are also installed in the dimensions;
- the circuit will not work correctly if the DRLs contain powerful SMD LEDs, the rated current of which is comparable to the current of a light bulb;
- For safety reasons, an additional fuse must be installed.
This connection method can be improved by connecting the positive wire of the LED module not to the “+” of the battery, but to the “+” of the ignition switch, thereby eliminating the first drawback. Some motorists use schemes for turning on running lights through a low beam lamp. That is, when the low beam is turned on, the DRLs automatically go out, but in other cases they work. In addition to the above disadvantages, this method does not comply with GOST R 41.48-2004 and traffic rules.
When parking a car at night, side lights are used to indicate it; the use of DRLs is prohibited.
What kind of daytime running lights can be installed on the Lada Priora: popular solutions
There are no standard places for the location of DRL on the VAZ 2170, but it is possible to install them instead of fog lights. The technology is simple and won’t take much time, but there are a few more options to consider:
Beacon DRL-UNE
This device is suitable for organizing daytime running lights on a Lada Priora car, and there is also a function for duplicating turns. The device is equipped with electronic overvoltage protection. White LEDs are used as a light source, which demonstrate the following characteristics:
- The glow temperature range is 6,000-6,500 K.
- Luminous flux is 5-6 lm for one LED.
- Power – 0.02 W per chip.
Connection via a 4-pin relay from a generator or oil sensor
The following two methods have a common basis and imply the operation of daytime running lights only after the engine is started. The circuit for switching on DRL from the generator is based on switching a four-contact relay and a reed switch. The DRL relay contacts are connected as follows:
- 30 – to the positive terminals of LED modules;
- 85 – to the positive wire to the dimensions;
- 86 – to any reed switch output;
- 87 and the second terminal of the reed switch - to the “+” of the battery.
After checking the reliability of all contacts, proceed to setup. To do this, start the engine and, by moving the reed switch near the generator, achieve its activation and a stable glow of the DRL. Then the reed switch is hidden in a thermal tube and fixed in the found place using nylon ties.
At the moment of starting the engine, and then the generator, the contacts of the reed switch and relay close, supplying power to the LED running lights. In this case, the side lamps remain turned off, since the current through the relay coil is small to light them.
In the absence of a reed switch, you can power the DRL from the oil pressure sensor. In this case, pin 86 is connected to the oil pressure lamp. The rest of the circuitry is duplicated. Both schemes have a common drawback. They cannot be used if LEDs are installed in the dimensions.
An alternative method of organizing DRL
Practical motorists have found a solution - the use of the DRL-30 electronic relay, which allows you to adjust the power of the high beam lamps and use them as daytime running lights during daylight hours on the Lada Priora VAZ 2170. The relay is mounted instead of the standard high beam microrelay.
This tuning allows you to use only 30% of the power compared to using low beam, which reduces the load on the generator and reduces fuel consumption. All lighting equipment operates as normal, the high beams blink as expected. To perform the replacement procedure, remove the dashboard and connect the wires according to the diagram.
I always liked the aggressive look of the new Priors, where the headlight lamps burn not near the wings, but closer to the radiator grille.
Later I found out that it was DRLs (
daytime running lights
). They work from the ignition and are installed in new headlights. There is not much point in buying new headlights because of the bulbs!
Later I began to notice recordings on D2
about
DRL-30
.
Relay with 3 wires. Connects instead of the high beam relay. After connecting, with the ignition on and the handbrake ( handbrake
)
, the high beam lamps light up at 30% power
, and the high beam icon on the instrument panel
lights up
dimmer than usual.
When the lights are turned on, the DRLs
go out.
DIY DRL
Before installing daytime running lights on a Priora, you need to get them somewhere. There are two options: make the lights yourself or buy ready-made ones designed for Priora. Let's start with the first one. Since there is no special place for installing DRLs on Priors produced before 2013, we are not limited by the shape and size of DRL headlights.
From LED strip
Perhaps this is the simplest option for the Priora. To implement it you will need:
- LED Strip Light.
- Sealant.
- Wires.
Since daytime running lights are not decorative lighting and must be clearly visible during daylight hours (this is their main purpose), the LED strip must be bright enough. Choose one that is assembled with LEDs of at least 0.5, and preferably 1.0 W. For example, LEDs 5630, 5730, 2835, 5050 have this power.
White LED strip 5050 Before cutting the strip, you need to determine the desired length. To do this, remove the headlights from the priors and disassemble them to get to the decorative trim. The glass of the Priora headlights is mounted on a sealant, which can be softened using a technical hair dryer. If after warming up the glass cannot be removed, cut the still hot sealant with a utility knife.
Warming up the glass of Priora headlights with hair dryers
The most convenient location for the DRL on a Priora headlight is the lower edge of the trim. Measure its length: this is exactly or approximately this length that the pieces of the LED strip should be.
Installation location of the tape on the Priora headlight reflector
Now you can cut the tape, but you need to do this only in strictly defined places. These places are marked on the tape itself.
Places for possible cuts of the LED strip
Of course, because of this, you won’t get exactly the required length of the segments, which means you have two options:
Installing DRLs (daytime running lights) on a Lada Largus with your own hands: video and connection diagram
- Make the segments shorter.
- Cut off more and fold the excess behind the trim.
I prefer the second one, since a segment that is too short will have low light output and is absolutely useless on the Prior as daytime running lights.
Cut it off? Now solder wires of different colors to the “+” and “-” contacts marked on the tape so as not to confuse the polarity of the connection. Then use glue or sealant to glue these sections into place. To check, connect your new daytime running lights to a battery or just a Krona battery. Do not mix up the polarity!
Checking DRLs from an LED strip (a uniformly glowing cluster strip was used)
All that remains is to assemble the headlights, placing the glass on the sealant, install them on the Priora and connect them correctly (see the “Connection to wiring” section).
Daytime running lights on the Priora from individual LEDs
If you don’t want to disassemble the headlights, then you can get by with little expense by installing daytime running lights in the Priora bumper, which can be easily drilled even with a wood drill or an ordinary brace. To implement this design, you will need powerful LEDs, which are popularly called “Eagle Eyes”. They do not have a specific purpose, but they are perfect for priors.
Eagle Eye LEDs
To provide the necessary brightness of daytime lights, you will need 6 LEDs. Installing them on the Priora is very simple. To do this, just drill holes of the appropriate diameter in the bumper and secure the LEDs in them in two groups using fastening nuts.
If you have no desire to do handicrafts, then you can purchase ready-made daytime running lights for the Priora. In this case, all you have to do is install and connect them. Since older versions of Priors do not have standard places for installing daytime running lights, a large field of activity opens up for your imagination. You can, for example, buy headlights with DRLs and install them in place of the standard ones. In my opinion, this is the simplest solution, but, alas, not the most budget-friendly.
Headlights with DRLs on Priora
You can purchase daytime running lights for the Priora or separately. There is a huge range of different shapes and sizes on sale. As an example, I give LED DRLs “MAYAK DRL-UNC”.
LED daytime running lights "MAYAK DRL-UNC" for Priora
If you place them next to the fog lights, then on the Prior it will look something like this:
Daytime running lights for Kalina
Daytime running lights "Mayak" installed on the Priora next to the fog lights
You can also find original DRLs for Priora, made in the form of so-called angel eyes. To install them, you will have to disassemble the headlight, but this, of course, will not stop fans of such tuning.
DRL on Prior in the form of angel eyes with turn signal repeaters
Special LED DRLs
Special LED lights designed for daytime traffic are the best option for any car. If they are not installed by the manufacturer, you can buy and install them yourself. The advantages of such equipment:
- High brightness LEDs with minimal power consumption.
- Long service life - 50 thousand hours, which corresponds to a period of 6 years.
- Extending the life of the energy supply system.
- Automatic turning on and off of lights.
Block headlight VAZ-2170 (Lada Priora) disassembled
What standard lamps are used in Priora headlights?
The Priora headlight unit is equipped with:
- low beam lamp;
- high beam/running light lamp;
- turn signal lamp;
- side light lamp.
Designations
- Low beam, for example, is marked 55H7, where 55 is the power in Watts, and H7 is the designation of the base;
- The main beam is designated 55N15;
- turn signal – 21PY21W;
- side light – 5W5W.
The lamps are in the headlights in a single unit, and the headlight unit is not always replaced - only the bulbs are changed. And not in vain - the factory headlight produces a cloudy light. Prior owners try to install the best lamps so that the headlights shine longer.
Installation of special running lights on Priora
Installing daytime running lights in standard places is quite simple. This procedure takes a minimum of time and does not even require the involvement of highly qualified craftsmen. Each DRL kit contains detailed installation instructions and the materials necessary for its implementation.
Installation process:
- Before installing the daytime running lights on the Priora in their regular places, you need to thoroughly degrease the surface, removing any contaminant particles from it. Do not use solvents or similar products containing aggressive substances; a detergent with a sponge is sufficient.
- The adhesive tape is glued to the bracket after removing the protective film from one side. The other side of the tape is pressed tightly against the installation site of the headlights, due to which the bracket is fixed in it.
- The wire must be threaded into the hole before the bracket is installed, but the flashlight must not be snapped into the bracket (otherwise it will be difficult to get it back later).
- If you don’t have adhesive tape, mount the daytime running lights like this: you will have to drill holes in the bracket, which should correspond to the location of the mounting holes, and secure the bracket with self-tapping screws.
- The headlights are fixed after the power supply is installed in the engine compartment. Fixation is carried out as follows: the flashlight is inserted into the bracket and snaps into place. Next, the wires are pulled under the hood and secured with the ties provided in the equipment kit.
Headlight reflector for VAZ-2170 (Lada Priora) with built-in LED DRLs
Replacing Priora high beam lamps
It all starts again with removing the battery - you can’t do without it now. The high beam lamp is located a little deeper and is not easy to get to. The sequence of actions when replacing a high beam lamp is as follows:
- We disconnect the rubber cover (it is larger than the one designed to protect the low beam lamp);
- Disconnect the block with wires;
- Unclench the spring clamp and disengage it from the reflector hooks. We release the light bulb.
- We remove the lamp socket from the headlight unit.
Installation of control
- The control unit is installed in the engine compartment. It is best to mount the control unit near the battery, as far away from the engine as possible. Excessive heat in the vicinity of the engine can lead to subsequent operational problems with the running light system. The unit is reliably protected by the housing from moisture or contamination, therefore there are no special restrictions on the choice of its installation location.
- The unit should be connected according to the usual diagram. The “plus” terminal has a red wire, and the “minus” terminal has a black wire.
- The orange wire is designed to automatically turn off the running lights when low beam is on or switch the DRL to the sidebar mode . If you neglect the functions of the orange wire and do not connect it. Daytime running lights will continue to shine even when the headlights are on, which can lead to dazzling of oncoming drivers and is a violation of the rules. The orange wire connects to the side lights or headlights.
- The headlights are connected to the unit using a special connector that is supplied with the kit initially . The wires are inserted into the connector and snapped there. Turn on the engine and check how the lights work - when the engine starts, if installed correctly, they turn on automatically, when it stops, they turn off.
- If the system passes the test, you can attach the control unit . After this, the lights themselves are fixed.
Nuances of using lights
There is a special GOST that defines and regulates installations, technical parameters and the connection itself of daytime running gears.
Alarm Starline: instructions for selection, installation and operation
Category: Auto gadgets
The regulations state that the circuit should be used in such a way that the drive wheels turn on automatically when the key is turned in the ignition switch. That is, when starting the power plant. But DRLs are also required to turn off automatically as soon as the main beam headlights come on. Here, as you understand, we are talking about the headlight unit (low or high beam). There is also a rule indicating that the head light should turn on only when the headlights turn on. The exception is short-term signals to warn other drivers.
Based on the above, we can safely say that you should not output the DRL through the button. The same as through the handbrake. But you can install it in turn signals, but you will need to connect 2 additional wires from each turn signal.
All this is extremely important to take into account when connecting the movers. After all, you should be concerned not only with the fact that the light bulbs do not burn out. Although this is an extremely significant point
Although this is an extremely significant point.
Without a well-thought-out and competent scheme, you will definitely not be able to install DRLs yourself. After all, everything should work with a shutdown when the high or low beam is turned on.
There are a number of schemes according to which, in theory, you can install DRLs on your car if they are not included in the standard configuration of your vehicle. The only question is which scheme is better to use.
An important role is played by the voltage stabilizer, which is a subject of much debate when using diode running lights. The DRLs themselves are equipped with resistors that act as a current limiter. But during voltage surges, they are not able to maintain the voltage at a single level. Therefore, it is correct to assume that the use of a stabilizer in such a scheme will be mandatory and necessary. Otherwise, the service life of the DRL will be significantly reduced due to regular voltage drops. Although some still believe that the connection can be made without a stabilizer.
It is worth considering several schemes separately, drawing appropriate conclusions from them and making a final decision for yourself.
Other solutions for daytime lights on the Lada Priora
According to traffic regulations, the installation of additional equipment is not required, and instead of DRLs, you can use low beams, side lights or connected Priora fog lights. However, such solutions in practice are not the most effective for increasing vehicle visibility.
Disadvantages of neglecting special running lights:
- The side lights, which have a power of 5 W, are clearly visible in the dark. During the day they become almost completely discolored and are almost invisible.
- The low beam headlights make it possible to clearly identify the car on the road; it becomes truly distinguishable. But this option, when driving frequently with the headlights on during the daytime, leads to their rapid wear and excessive fuel consumption. It is necessary to ensure the simultaneous consumption of electricity for the dashboard and side lights. More than 0.4 liters of gasoline are required to travel 100 km in a Lada Priora car.
- It is not recommended to use high beam headlights as daytime running lights, both for the reasons stated for low beam and because of the risk of dazzling the drivers of cars moving opposite.
- Fog lights do not provide a good range of light and vehicle visibility is insufficient.
Fog lights can replace running lights in Lada Priora
Connection to priors wiring
Now the main thing is to connect the DRL to the priors electrical circuit. In principle, you can simply connect them to the on-board network via a 10 A fuse and an additional button installed in the cabin, a place for which is reserved in the Prior. But using such a scheme will not be very convenient: when leaving, you will need to turn on the DRLs, and remember to turn them off when parking. Forgetfulness in both cases can lead to fatal consequences: if you didn’t turn it on, you’d end up with at least a fine, or even an accident. Didn't turn it off - threw away the battery.
It is much more convenient to connect the daytime running lights so that they turn on and off automatically. Let's consider the basic requirements for turning on DRL:
- light up when the ignition is turned on (optionally, when starting the engine);
- turn off when the high or low beam headlights are turned on;
- switches off when the engine stops;
- are switched off at the driver's request during long-term parking with the engine running (for example, in a traffic jam).
Chinese LEDs "Eagle Eye"
This is a fairly common way to install running lights on cars. It is often used on Lada Priora models. Since such LEDs do not have a clearly defined purpose, their equipment is not sufficient to be used for a complete DRL installation. Simple tips will help you get rid of problems that may arise during the installation process. You can do all this yourself:
- Plates are cut out of plexiglass and holes are made in them.
- On separately purchased eyelashes, the places where the plates will be installed are cut out.
- The plate in the eyelashes is fixed with hot glue, and epoxy is poured onto the joints.
- After the resin has dried, the eyelashes need to be puttied, trying to do it with your own hands as carefully as possible.
- Final work: filing, degreasing, priming and painting with varnish.
Chinese LEDs "eagle eye" for Lada Priora
- The excess length of the LEDs can be sawed off so that the threads do not rest against the headlights.
- Further installation can be carried out similarly to installing DRLs in standard places on a Lada Priora car.
Lada Kalina Hatchback Led › Logbook › DRLs in plugs PTF Kalina 1
Hi all. This idea arose a long time ago, but no matter how much I look for ready-made solutions, there are none for Viburnum 1 and there never will be. I wanted to do something unusual, like no one has done before. For viburnum 2 these plugs with DRL are complete, just like for other cars.
There is such a solution, but it seemed to me too expensive, I agree with a ruble, but not two. Well, I haven’t seen it on anyone yet, and there is no photo of such a grille on a viburnum on the Internet.
Begin. We use 21mm eagle eye diodes
The eagle eye diodes themselves have two designs. Some come on a board, others on a resistor. Both work well, but each one needs to be additionally sealed, as they are very afraid of moisture. I don’t know about others, but I’ve been using them for about 4 years and I can say that if they fail, they stop lighting altogether and don’t flicker like the others.
First of all, we create a layout
We’re doing a fitting, I wanted to install 3 diodes first, but 4 can fit, but with a little modification.
On two diodes we cut the leg, they will be on the top and the third from the top - this is necessary so that the plug becomes like its own and does not rest against the wall. The leg is aluminum, can be sharpened with a file.
We disassemble and seal the lens with sealant.
Next, we assemble the finished solution and additionally seal the wire output with sealant. Make the wires with a reserve so that if you replace the diode, you have access to them. 20 cm is quite enough.
All connections must be made through a driver and stabilizer for longer LED service. But I found a different solution for myself. This is an LED dimmer. Specifically, in my case, its use is relatively irrelevant, since the DRL is turned on from a button in the cabin.
These diodes are according to GOST, I checked it personally, if you doubt it, take a tape measure and measure
I have them together with the upper module, which according to GOST do not belong to DRLs, but I like it better. The dimmer allows you to turn the power to a minimum, and at night you can continue to drive them without creating a glare on oncoming traffic, although they are not blinding anyway. The placement of the diodes in the plugs at an angle does not affect visibility in the daytime, and at night it does not blind oncoming people.
READ How to connect fog lights directly
Actually examples
Do not take into account the UPPER MODULE (this is a separate post earlier) At the same time, fog lights. we have it in its place and the light is the same, the DRLs do not interfere at all
The diodes have been working for the second year now - no burnouts
We have it in its place and the light is the same, the DRLs do not interfere at all. The diodes have been working for the second year now - there are no burnouts.
Source
Why the headlights don't light up - reasons
The most common reason for headlights not working is a burnt out light bulb. Its service life is indicated in hours on the packaging. For a low beam bulb, this limit can be 400 hours of operation. The second extremely possible reason could be a wiring malfunction due to water leakage, or the wire simply frayed. This problem is already more serious, because you will have to fuss with it much longer than with a regular replacement of consumables.
Often, car enthusiasts are too lazy to change light bulbs, driving out onto the road in “one-eyed” cars. This is very unsafe - it is recommended that immediately after a malfunction is noticed, you go for a spare part to replace a new lamp.
Replacing lamps in Priora taillights
Replacing the rear light bulbs is complicated by the fact that the combination unit inside supports the operation of the parking lights and brake signal. But it all starts just as simply, when replacing the bulbs in the rear headlights of the Priors, as well as the front ones:
- Remove part of the upholstery opposite the headlights;
- Unscrew the screws that support the protective housing of the rear light. In Kalina, there were nuts in place of the screws, and unscrewing them was even more fun - they fell into a huge gap and were lost in the car body forever;
- Turn the brake light and clearance holders counterclockwise. Do not remove the socket, take it out together with the light bulb;
- It is easy to press down the lamp, turn it clockwise and remove it from the socket with a slight movement (it will almost fall out on its own);
- Carry out the operation in reverse order.
All you have to do is remember about the combination headlight - remember where each lamp was located, so that you don’t confuse anything during installation. With the rest of the light bulbs, everything is different - in addition to the ground (black wire), wires from the ECU are connected to them. Thus, the “foglights” correspond to the red wire color, the turn signal indicator – blue, the green light is assigned to the reverse lamp.