Body dimensions of VAZ 2109
The VAZ 2109 was first produced back in 1988. The five-door design allowed this car to be used as a successful family commercial vehicle. At the same time, the car is often used for transporting small-sized cargo, as it is equipped with a fairly simple luggage compartment.
Tools
Before moving on to the direct instructions for repairing the VAZ 2109 body, I would like to dwell on choosing the right tools.
Every professional, master of his craft will confirm that a good tool is half the successful completion of any repair operation. So, the list of necessary tools for body repair of the “nine” is quite wide, since the work is by no means simple and will require a considerable number of specific instruments:
- Special hammers are required, at least 3 types of them with different sizes for straightening work;
- A grinder with mounted circles (you need different discs that perfectly remove paintwork and rust);
- It is advisable that the garage have a carbon dioxide cylinder (about 10 cubic meters);
- Without welding during body work, it’s like having no hands (it’s better to choose a device with a maximum current of 150 A);
- Good chisels with hardened tips and several similar metal drills;
- Lift (it is better to have 2 jacks);
- A good metal brush (you will need it to clean rusty areas of the body);
- A standard set of motorist tools (keys, screwdrivers, etc.).
Technical condition assessment
Before repairing the body of a VAZ 21099, it is necessary to assess its technical condition and decide what body work needs to be done and whether it is advisable to carry it out from an economic point of view.
To do this, visually inspect the surface of the body for:
- dents;
- chips;
- scratches;
- peeling of the paint layer;
- presence of rust (pay special attention to the sills, wheel arches and bottom).
The problem with any Tolyatti-assembled car, including the VAZ 21099, is the poor quality of the metal, the low, insufficient level of anti-corrosion treatment of the main elements of the body structure.
If the car has been in an accident, the geometry of the body is checked. It is impossible to do this with your own hands; you need a special stand, which is available only at specialized service stations, after which the factory geometry of the load-bearing elements is restored.
Then we decide on a budget. Body repairs can be major or local, partial. For VAZ 21099, when rust appears and the paint layer peels off, a major body repair is recommended, because local repair is a temporary solution, a deferment of the sentence. It’s better to invest once and do everything yourself, including with your own hands, than to restore it gradually, which leads to a decrease in the performance characteristics of the car, the appearance of hidden defects and more significant financial costs in the end. After all, the build quality of domestic cars is extremely low, and the attempt to create a sedan based on a station wagon was a very dubious design decision, which is confirmed by the practice of operating the VAZ 21099.
How to check the result of work
Repair of the rear suspension of a Ford Focus 2. Repair of the rear suspension of a Ford Focus 2.
Without checking properly, if some error suddenly occurs, everything will have to be repeated again - all operations. Therefore, before reassembling, the carburetor cover is placed vertically. The ball should be sunk with a tongue on the float, and the stamping line should be parallel to the cover. If the conditions are not met, you will have to repeat the second stage, since you need to set the fuel level in the Solex carburetor as accurately as possible. And after the check has been completed, you can assemble the assembly as it was, in its original position.
Before cars with computer-controlled engines, cars had carburetors. A carburetor is a device that supplies the fuel-air mixture to the cylinders in an internal combustion engine.
Possible consequences
The correct geometric parameters of the car are the safety of the driver and passengers. Relative to the position of the power elements of the body, the angle of each of the wheels of the car is set. If the geometry is violated, the wheel alignment measuring system will never meet the standard. If the body moves relatively little, the technician will adjust the position of the wheels, but not for long.
Changes in geometry lead to the fact that the bottom is gradually deformed, folds appear in long body elements in the intervals between welding points, and the safety characteristics of the structure are noticeably reduced.
In a head-on collision, the engine should collapse underneath. If the dimensions of the body are violated, the engine will fly into the cabin, the risk of death for the driver and passenger increases by 50%.
Control dimensions of the VAZ 2109 body
Rear suspension shock absorber spacers
VAZ 2109 control body dimensions
The body has a rather short length - 4006 mm, which is an obvious advantage of the car, since compactness is important in urban environments. If we compare the manufacturer’s previous models, the body length of the VAZ 21099 was reduced by 120 mm, while there was 60 mm more space inside thanks to rational and correct design solutions
The first production VAZ 2109 cars had a body width of 1650 mm, however, after a few months, the developers managed to reduce it by 30 mm to 1620 mm, this further increased the compactness of the body.
Body dimensions of VAZ 2109 and VAZ 2108
The body height is approximately 1402, which is 30 mm comparatively less than the body of its predecessor models. But the designers were able to compensate for the free space by creating car windows in a convex shape. On the one hand, this made it possible to increase the amount of free space, on the other, it made the vehicle more presentable.
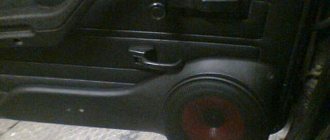
The luggage compartment of the VAZ 2109 deserves special attention, which at one time made a real splash on the passenger car market. Even today, this almost revolutionary design feature has not lost its practical relevance.
VAZ 2109 body sizes
The standard trunk capacity of the Nine is 330 liters, but if necessary, it can be expanded to 640 liters by folding the rear seats. All this can be done in a couple of minutes and does not require much effort.
The front wheel track is 1400 mm, and the rear wheel track is 1370 mm. The compact dimensions of the VAZ 2109 body make it possible to efficiently transport small-sized cargo around the city, even during rush hour when there are a lot of traffic jams.
Control body size VAZ 21099
Front strut
The most popular element, widely used by many owners of Russian cars, is the front cross brace.
Its installation is carried out in the area of the upper shock absorber supports, by securing it between the strut cups.
The main purpose of this part is to increase the angular rigidity of the body and improve the handling quality of the vehicle.
In addition, the presence of a spacer helps eliminate the “floating” geometry of the suspension arms, which occurs as a result of strong impacts on road potholes or uneven surfaces.
The main reason why many car enthusiasts, in particular owners of VAZ cars, make such modifications is due to insufficient body rigidity, which contributes to deterioration of handling, a feeling of “sluggish” steering and excessive roll that occurs when performing maneuvers.
This is detected only when driving at high speeds, mainly associated with trips on country roads.
Those drivers who spend most of their time within the city and are accustomed to a calm, leisurely drive may not notice these shortcomings.
The spacer is a fairly thick metal rod, either of a fixed length, intended for specific car models, or endowed with the possibility of spatial adjustment, facilitating the installation of the element on different cars.
Its installation is carried out when the machine is placed on a flat surface by screwing several nuts onto the upper studs of the shock absorber mounts.
If for some reason there is a mismatch between the mounting holes, the car body must be slightly “pulled” in the desired direction.
Installing a crossbar makes a certain amount of sense. You will not only significantly improve the car’s handling, but also extend the “life” of its body, thanks to improved torsional resistance.
Step-by-step instruction
Renault Logan Renault Logan repair and maintenance Replacement of silent blocks of rear suspension arms
Having prepared the car and all the necessary tools for changing the gearbox oil with our own hands, we begin to drain the old lubricant and clean the associated elements.
Drain the oil
Drive the car onto an overpass or inspection hole, prepare an empty container, keys and wire.
- Remove the rubber cap from the breather and clean it with a wire and a cloth.
- Using a wrench, unscrew the drain plug on the gearbox and place an empty container to drain the old oil. The complete cleaning process will take 15 – 20 minutes.
- Screw the drain plug firmly into place.
The gearbox is completely prepared for replacing the lubricant, which means you can proceed to the next stage.
Filling with new oil
If the gearbox is equipped with a filler neck, then the filling process is quite simple:
- Insert a funnel into the filler neck.
- Fill in 3 – 3.3 liters of oil depending on the number of gears in the box.
- Check the level with a dipstick.
If there is no filler neck, use an oil syringe after placing a flexible hose on it and securing the connection with electrical tape.
- Fill the syringe full (we track the final volume by the level on the canister).
- Insert the hose into the filler hole and use a syringe to pour in the required amount of lubricant.
- Tighten the filler plug tightly.
The process of changing the oil in a gearbox is complicated only at first glance and can take a long time during the first change; later you will be able to perform this operation in a matter of minutes and even with your eyes closed. The main thing is not to forget, or better yet, write down the mileage at which the last replacement was made.
After repairing the box, the question arose with oil, who can advise?
drain? LIQUI MOLY Hypoid-Getriebeoil TDL (GL-4/GL-5) 75W-90
stock... I'll put the box up today, I need to fill it with something
Good evening! I see you once discussed a topic about oil, and I had one or two questions. My swallow has this in the box: “Elf Tranself SYNTHESE FE 75W90 GL4/GL5 synthetic gear oil.” Now I need to top it up a little, but I have nothing, I can’t find the same thing, so the question is, can I top it up for others with exactly the same data and what can you recommend?
Well, why bring up three ancient topics?
If you need a small top-up, feel free to top up and drive, no big deal.
In short, can I add 200 grams of Castrol 75/90 so that there is more level?
Parameters of standard nuts
VAZ 2112 dimensions and dimensions
Fastening the cast disk to the hub involves the use of special bolts or nuts. It should be noted that nuts from stamped disks are unacceptable here. Firstly, because in cast specimens the conical or spherical part of the fastener is more pronounced than in stamped ones.
For example, the conical part of a bolt or nut has an angle of 60 degrees. This is done in order to increase the area of their contact with a material softer than steel. Secondly, the stamp is thinner than the casting, and when replacing the disk, the length of the bolt simply will not be enough.
It is better to immediately use the fasteners that correspond to the light-alloy wheel used, otherwise deformation of the holes, crumbling and scratches are possible.
By saving on the necessary nuts or bolts, you can irreversibly damage a more expensive element.
The softness of the metal also means regularly checking the tightness of the fasteners, especially at first and with new discs, when the material has not yet become compacted from work loads. Otherwise, under the influence of cyclic shock and vibration, the nuts may spontaneously unscrew.
Nuts must have conical or spherical washers. It is necessary to ensure that the profile of the washers exactly fits the corresponding recess in the hole of the disk being installed. Some disc models are designed to use cylindrical fasteners with flat washers.
1 year warranty Price is per set
| Product line | |
| Series | SS20 Hard Sport |
| Applicability | |
| Model | 2108, 2109, 21099 |
| Packaging dimensions | |
| Height | 10 cm |
| Width | 15 cm |
| Length | 30 cm |
| Guarantee | |
| Guarantee | 1 year |
The SS20 Hard Sport support has a ShS type bearing (spherical hinge), through which the shock absorber strut rod is secured. This bearing ensures that the strut swings when the wheels turn and the suspension moves. The ShS type bearing for the SS20 Hard Sport sports supports has a steel spherical liner that rotates in plastic bushings. The bushings assembled with the sphere are tightened into the support body using a threaded cap.
The ability to tighten the AL during operation is an original feature of the SS20 Hard Sport supports. The AL is covered on top with a rubber casing that protects against dust and moisture, and on the bottom with an O-ring.
The power scheme of the “SS20 Hard Sport” supports provides for the separation of loads from the weight of the car and from the shock absorbers. The loads from the shock struts are absorbed by the shock absorber, and the weight of the car is absorbed through the spring cup by a thrust bearing. This separation of power flows allows for high reliability, as in all SS20 supports.
A special feature of the SS20 Hard Sport supports is that the shock absorber rod does not have radial displacement under the influence of lateral loads.
The displacement of the rod in traditional supports with a damper leads to a change in the angle of transverse inclination and, accordingly, camber under the action of a lateral load. For example, when cornering a car with standard bearings installed, the wheel that is most loaded on the outside of the turn, the camber increases towards positive. And at the inner wheel - towards the negative. Consequently, the wheels can absorb less lateral force, which leads to the wheel sidewall breaking and slipping.
The SS20 Hard Sport (SHS) sports supports have no radial displacement of the rod, therefore there is no harmful change in the geometry of the wheels, which allows turning at higher speeds. With “SS20 Hard Sport” supports, the car moves stably along ruts and uneven roads and “yaws” less.
The SS20 Hard Sport mounts have an offset center of the rod mounting, which increases the caster angle and the lateral angle of the steering axis, which gives the car advantages in handling and stability.
The quality of the SS20 SS supports has already been tested at the “Hills of Russia” race, where a VAZ car equipped with a proprietary suspension with SS20 Hard Sport supports took first place in the first and second stages of the race.
Top 5 (By votes)
- home
- Articles
- VAZ 2108, VAZ 2109, VAZ 2110, VAZ 1117 Kalina, VAZ 2170 Priora
- Replacement top. Replacement top.
Description of design
The rear suspension is with 12 coil springs and 10 double-acting hydraulic telescopic shock absorbers.
The main load-bearing element of the suspension is a beam consisting of trailing arms 14 and a connector 13, welded together through reinforcements. At the rear, brackets 15 with eyes for attaching shock absorbers 10 and flanges for attaching the rear wheel axles and brake shields are welded to the suspension arms. At the front, the levers 14 are equipped with welded bushings with silent blocks 3 pressed into them. A bolt passes through the central bushing of the silent block, connecting the lever to the bracket 2. Three welded bolts are provided to secure the bracket to the body spar.
The suspension spring 12 rests with its lower end on a cup welded to the shock absorber reservoir, and with its upper end, through a rubber gasket 11, on a support welded from the inside to the body arch.
The lower eye of the shock absorber is bolted to bracket 15 of the suspension arm, and its rod is secured to the upper support of the suspension spring through two rubber pads 8 (one at the bottom of the support, the other at the top) and a support washer 7 (under the nut).
The rear suspension springs are divided into two stiffness classes according to their length in the free state and under load: A (more rigid, “high”) and B (less rigid, “low”). Springs of the same class must be installed on the front and rear suspensions. But in exceptional cases, if class A springs are installed in the front suspension, class B springs can be installed in the rear suspension (but not vice versa!). The quality of the springs can be fully assessed by the performance of the suspension on the car. If the suspension often “breaks through” to the bump stops on uneven roads or sags under load, stiffer springs should be installed. When replacing springs, do not forget to check the serviceability of the shock absorbers - after all, it is the shock absorber-spring pair that largely determines the characteristics of the suspension.
The hub has a double-row angular contact ball bearing, similar to the front wheel hub bearing, but smaller in size. The bearing fit on the axle is transitional (with slight interference or clearance). During operation, the bearing does not require adjustment or replenishment of lubricant. It is not allowed to eliminate the resulting play by tightening the nut; the bearing should be replaced. When dismantling the hub, the bearing is destroyed, so it is not recommended to disassemble the hub if the bearing is in good condition.
The VAZ 2109 was first produced back in 1988. The five-door design allowed this car to be used as a successful family commercial vehicle. At the same time, the car is often used for transporting small-sized cargo, as it is equipped with a fairly simple luggage compartment.
Features of the VAZ 2109 body
ATTENTION! A completely simple way to reduce fuel consumption has been found! Don't believe me? An auto mechanic with 15 years of experience also didn’t believe it until he tried it. And now he saves 35,000 rubles a year on gasoline! Read more". "Nine" is a front-wheel drive passenger car with a hatchback body type.
The car is equipped with 5 doors. It has several modifications released at different times and for different purposes - 21091, 21093, 21099
“Nine” is a front-wheel drive passenger car with a hatchback body. The car is equipped with 5 doors. It has several modifications, released at different times and for different purposes - 21091, 21093, 21099.
The body of the “nine” is made in a load-bearing structure and is 1-volume. 5 people can easily fit inside the car, although the hatchback does not have the comfort of a sedan. It was with the aim of increasing the convenience and spaciousness of the interior that one of the modifications of the “nine” was invented - the VAZ 21099.
The body of the “nine” is distinguished by a wedge-shaped shape, which is already a plus. The fact is that this form can significantly improve the AED* characteristics and reduce the resistance of oncoming air flows when the vehicle is moving.
Significant benefits in reducing the impact of air flow come from the smoothed outer surfaces of the hood, the greater slope of the windshield and rear window, as well as the unusually smooth connection of the front bumper to the body frame.
This body layout, coupled with a more economical power unit and new tire shapes, made it possible to significantly reduce fuel consumption.
In addition, this indicator is closely related to the reduction in body weight, which was achieved through the introduction of lightweight plastics and new composite materials. The plastic parts of the body and interior of the Nine, and there are a lot of them in the car, weigh about 80 kg.
To carry out tuning on the “nine”, it will be useful to know how much the body of the VAZ 2109 weighs. This will make it possible to strengthen the frame by adding as much extra weight as needed. According to the table below, we see that the weight of the VAZ 2109 body in its bare state is 450 kg. Designers call this mass useful.
Despite the light weight, the car owner is given the opportunity to easily transport from 50 to 275 kg of various cargo in the trunk, depending on the number of passengers inside the cabin.
Thanks to front-wheel drive and a special body structure, the “nine” is distinguished by enviable stability against lateral skidding. Good handling is ensured, again, due to the front drive wheels and the coincidence of the direction of the traction force with the direction of movement of the wheels.
The handling of the “nine” is especially good in comparison with other domestic cars, on icy roads, slippery roads, and so on.
In addition, the front-wheel drive design of the car allows for better use of the length of the body compared to rear-wheel drive models. This also makes it possible to reduce the weight of the car, make the interior and driving position more comfortable.
Due to the absence of intermediate transmission links in the “nine”, it is possible to increase the useful volume of the vehicle without increasing the dimensions of the body. In the “nine” the floor tunnel is short; only parts of the brake and exhaust system are located here.
The rear of the Nine is also very compact. The 20-litre fuel tank is located under the rear seat, and the spare tire is located in a niche in the floor of the luggage compartment. This helped increase the free space in the trunk.
More information about the structure of the VAZ 2109 body can be found in the table below.
Place 21093 in the AvtoVAZ model line
The prototype for the VAZ 21093 was the front-wheel drive hatchback VAZ 2109 “Sputnik”, with a 1.3 liter carburetor engine, produced in Togliatti since 1987. Its engine power was 64 horsepower. Externally, the 21093 Samara, which appeared in 1990, was not much different from the 2109. Dimensions, design, design - everything was almost like the nine. The main differences were hidden under the hood.
Modification 21093 received a new engine. The designers of the Volzhsky Automobile Plant increased the cylinder diameter from 78 to 82 mm with the previous piston stroke of 71 mm. This resulted in an increase in the working volume from 1288 cubic cm to 1499. The car's power increased, its performance characteristics improved (speed and acceleration dynamics), and fuel consumption decreased slightly. In general, the VAZ 21093 car has acquired noticeable liveliness.
The VAZ 21093 Samara was produced in Tolyatti until 2004, giving way to the model 2114, a five-door front-wheel drive hatchback from the Samara-2 family.
Bumpers on nine repair and replacement
Often the rear and front bumpers on the “nine” are removed to repair them or to restore other parts of the body. You will still have to learn how to remove them correctly and without problems, no matter how you look at them, if the owner intends to carry out body repairs on his own.
Dismantling
So, in order to remove the rear bumper:
- On the side we find the nuts that secure the bumper to the body and unscrew them (as a rule, there are 2 fasteners on each side);
- We find the nuts for the front bumper mounting and now unscrew them (it is recommended to hold the bumper so that it does not fall).
The front bumper is removed in the same way, only here you also need to remove the plastic fender liners.
Painting
The preferred color of bumpers on the “nine” is an eternal topic of discussion among fans of this car model. Many are on the side of the classic black color, although there are also those who believe that the color of the bumper should be in harmony with the color of the car.
Be that as it may, painting and decorative repairs are not difficult. The bumpers will need to be dismantled and thoroughly inspected for any deformations. If there are any, then you will have to straighten the elements and clean the remaining parts from old paint and rust.
Plastic bumpers can be easily removed from rust and paint using 200-400 grit sandpaper. If there are holes in the bumper, they can be closed with pieces of plastic removed from old bumpers or other plastic elements. As you know, plastic can be glued together well with a soldering iron with a power of 40-60 W.
In general, parts of a damaged plastic bumper can be fastened in 4 ways.
- By melting the plastic of the bumper itself or additional linings. In this case, the width of the soldered seam can be left at 1.5 cm, and as for the depth of the solder, it should depend on the thickness of the bumper.
- By connecting with parallel seams. In this case, ordinary wire, nails with the heads removed, and other improvised means will help. You just need to solder these peculiar fasteners on the back side of the bumper.
- A more complex option involves the use of flexible wire, preferably copper. It is already soldered in the same way as method 3, only with a zigzag, a snake from the inside. If it is not possible to carry out this method on the back side of the bumper, you can also make a snake from the front side.
- The grille will connect the bumper pieces together more firmly than anyone else. To do this, you need to arm yourself with a mesh (a piece of a decorative radiator grille will do).
If you cannot find similar pieces of plastic, you can use other materials:
- The same grille, bent to the shape of the bumper. After the mesh is soldered into the bumper, you need to take some plastic similar in elasticity to the bumper material, and melt it, apply it to the mesh. The boundaries of the standard plastic must be carefully aligned with the edges of the applied material. After the plastic has hardened, everything must be smoothed and sanded;
- You can build up the missing part of the plastic with putty. Only it will need to be mixed with epoxy. It is necessary to carry out grinding at the final stage;
- The putty is also mixed with fiberglass.
What drives can be installed
When planning to replace old steel wheels with alloy wheels, you should choose either original products or products from well-known manufacturers who care about the quality and safety of their products.
Alloy wheels combine the following useful properties: they are lightweight, practical to use, endowed with sufficient strength and have an attractive appearance, which is aimed at transforming the entire appearance of the car.
The most common among alloy wheels are aluminum products. This is due to the fact that they are resistant to corrosion, meet strength requirements and, in comparison with other alloy wheels, remain relatively inexpensive.
Titanium alloy is the most expensive option. It also meets all the technical specifications, but at the same time has a more attractive appearance. In third place is the option using a magnesium alloy.
The latest models from AvtoVAZ use wheels with a 4x100 mounting pattern. When installing them on a 4x98 hub, you should use studs with an eccentric to compensate for the difference of 2 mm. To install disks with other mounting patterns, you will have to use the appropriate adapters (spacers).
You must understand that installing wheels larger than 15 inches is impossible without interfering with the car’s design.
Features and body structure of the VAZ 2109
| Body type | 5-door hatchback |
| Peculiarity | All-metal, load-bearing, single-volume |
| Length/width/height, mm | 4006/1650/1402 |
| Wheelbase, mm | 2460 |
| Track front/rear, mm | 1400/1370 |
| Ground clearance, mm | 170 |
| Permissible weight, kg | 1340 |
| Curb weight, kg | 915 |
| Body weight (useful weight), kg | 450 |
| Weight of transported cargo with three passengers in the cabin, kg | 50 |
| Weight of transported cargo with one passenger, kg | 275 |
| Maximum speed, km/h | 148 |
| Acceleration time of a car with a driver and one passenger to 100 km/h, s | 16 |
| Front suspension | "MacPherson", independent with shock-absorbing telescopic struts with coil springs, lower wishbones with braces and anti-roll bar |
| Rear suspension | Torsion-lever, with coil springs, double-acting shock absorbers |
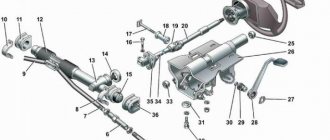
Rear suspension parts
1 – wheel hub; 2 – suspension arm mounting bracket; 3 – silent block; 4 – shock absorber casing; 5 – compression stroke buffer; 6 – casing cover; 7 – support washer; 8 – shock absorber cushions; 9 – spacer sleeve; 10 – shock absorber; 11 – rubber gasket; 12 – rear suspension spring; 13 – lever connector; 14 – lever of the rear suspension beam; 15 – shock absorber mounting bracket; 16 – lower spring support cup; 17 – rod; 18 – upper spring support cup.
Solex carburetor tuning
Tuning, that is, improvement, modification of the carburetor is carried out to increase engine power and improve driving dynamics.
If you sharply open the throttle valve with the Solex carburetor set at the factory, the air flow speed decreases, as a result of which less gasoline is supplied to the carburetor. Because of this, power drops significantly at low speeds.
The procedure for increasing engine power by tuning the Solex carburetor:
We carefully disassemble the carburetor. We wash and blow, and divide into two halves. Pay attention to the air damper axis. There are protruding screws on this axis, which creates additional resistance while the car is moving.
Any little things are important when tuning, so these protruding screws need to be smoothed out. Remove the axle and air damper from the top. The axle needs to be sharpened. From the lower part you need to pull out the throttle valves with their axles. At this stage, using a file we make the flaps larger. We hide the screw caps inside the axle. There are screws with conical heads, you can use them. The throttle valve needs to be assembled. Now we are tuning the diffusers. To improve the aerodynamics of the diffusers, it is necessary to make the legs in the shape of wings. We also check the protrusions of the factory casting; if there are any, they need to be ground off. The accelerator pump must have 2 tubes installed in one chamber. There is an opinion among some that when I use two tubes for each camera, “dips” may appear, that is, you press on the gas, but the car does not move.
In general, the basis of tuning is smoothing, erasing protrusions and irregularities. Any unevenness in the fuel and air mixing chamber creates resistance.
Structural diagram
As already mentioned, the layout is simpler at the back than at the front. Nevertheless, this cannot be said that it is not worth paying attention to its functioning. We will provide a design diagram of the device.
Knowledge about all the features and nuances of the structure of this important unit will simplify its care. At any time, minor breakdowns can be repaired independently, without involving specialists. There is also no need for special consultations on the selection of components. So, the main components of the suspension:
- central curved beam;
- longitudinal lever mechanisms;
- brackets for fastening;
- spring mechanisms;
- hydraulic shock absorbers.
Wings of nine
The fixation of the front wings on the “nine” was done quite well, if we mean ease of removal. Just a few bolts hold them in place. Therefore, no welding is required to dismantle them; you just need to arm yourself with a pair of good shaped screwdrivers and an 8-size socket with an extension.
- Remove the fender liners, which are held on by self-tapping screws;
- The fender bolt holding the body element from below at the threshold is unscrewed;
- Two more bolts hold the wing on the inside;
- You will have to completely dismantle the bumper or unscrew its side fastenings, and then move it to the side to gain access to another bolt securing the wing;
- Finally, it remains to remove a few bolts securing the wing from above.
It is also not customary to tinker with a wing if it is deformed. You can easily replace it with a new one, especially since it is inexpensive - 1200 rubles. If you use auto-disassembly, you can buy the part even at half the price.
If, however, the wing has received minor deformations or there are traces of rust on it, then it is easy to repair the part. Again, it can be removed and then finished to perfection on a garage workbench.
If you don’t want to remove the wing, you can repair it directly on the car using straightening hammers, pliers and a jack.
Painting
As a rule, after straightening work, painting of the wings is required:
- First, the part is degreased and cleaned to a metallic shine;
- Treat minor dents with putty mixed with fiberglass;
- Finishing putty is applied and sanded well;
- After drying, a primer is applied. Ideally, you should apply 2 layers and then paint;
- Apply epoxy varnish in 1-1.5 layers on top.
- Absolutely legal (Article 12.2);
- Hides from photo and video recording;
- Suitable for all cars;
- Works through the cigarette lighter connector;
- Does not cause interference to radios and cell phones.
Replacing the front wing on a VAZ 21099 is done within a few hours. Replacing the rear wing of a VAZ 21099 is more labor-intensive and depends on the type of body. In most cases, to replace the rear fender, it is drilled out, cut off, and the new fender is spot welded.
When replacing the fender on a VAZ 21099, you may need fender linings, attaching the fender to the body or bumper of the car. You will also need fastening elements (“bugs”). After replacing the front or rear fender, we will prep the fenders and paint them exactly to match the car's body color. Our service stations are equipped with modern paint booths and computer paint selection.
Cost of replacing the wing on a VAZ 21099:
| Replacement options | Replacement cost |
| Replacing the front wing of a VAZ 21099, without removing the bumper | from 800 rub. |
| Replacing the front wing of a VAZ 21099, with removing the bumper | from 1,500 rub. |
| Replacing the rear wing of a VAZ 21099, up to the pillar | from 2,500 rub. |
| Replacing the rear wing of a VAZ 21099, with a stand | from 3,000 rub. |
If possible, we can repair the rear fender. The cost and possibility of such repairs can be assessed at a service station.
Time frame for replacing the front and rear fenders:
— front fender replacement — from 2 to 5 hours; rear fender replacement — from 1 to 2 days.
When to replace the rear wing of a VAZ 21099:
— it is impossible to repair the wing; — the wing fastenings are broken; — the wing is deformed after an accident.
Warranty for replacement wing of VAZ 21099
- 3 years.
Addresses in St. Petersburg: Service station on Bolshevikov: st. Voroshilova, house 7, from 10 to 18, t., Sat, Sun - closed. Service station on Grazhdansky: st. Uchitelskaya, building 23, from 9.30 to 21.00, t. 8 (812) 603-55-05, seven days a week. Service station on Kupchino: st. Dimitrova, building 1, from 10 to 20.00, t., seven days a week.
1200 rub. for the photo report
We pay for photo reports on car repairs. Earnings from 10,000 rubles/month.
Write:
Repairing the rear wing on a VAZ 21099 should begin with maximal leveling of the damaged surface. Then, using sandpaper, we smooth the entire surface for painting.
Of course, it is better to see once than to read a hundred times. This instruction for repairing and painting the rear wing of a VAZ 2109 is quite suitable for clearly demonstrating this process.
Technical condition assessment
Before repairing the body of a VAZ 21099, it is necessary to assess its technical condition and decide what body work needs to be done and whether it is advisable to carry it out from an economic point of view.
To do this, visually inspect the surface of the body for:
- dents;
- chips;
- scratches;
- peeling of the paint layer;
- presence of rust (pay special attention to the sills, wheel arches and bottom).
The problem with any Tolyatti-assembled car, including the VAZ 21099, is the poor quality of the metal, the low, insufficient level of anti-corrosion treatment of the main elements of the body structure.
If the car has been in an accident, the geometry of the body is checked. It is impossible to do this with your own hands; you need a special stand, which is available only at specialized service stations, after which the factory geometry of the load-bearing elements is restored.
Then we decide on a budget. Body repairs can be major or local, partial. For VAZ 21099, when rust appears and the paint layer peels off, a major body repair is recommended, because local repair is a temporary solution, a deferment of the sentence. It’s better to invest once and do everything yourself, including with your own hands, than to restore it gradually, which leads to a decrease in the performance characteristics of the car, the appearance of hidden defects and more significant financial costs in the end. After all, the build quality of domestic cars is extremely low, and the attempt to create a sedan based on a station wagon was a very dubious design decision, which is confirmed by the practice of operating the VAZ 21099.
The geometry of a car body is understood as a certain set of distances between special control points. The latter make it possible to determine how accurately the body elements, components and mechanisms of the vehicle are located in relation to each other. The location of control points is indicated in the technical passport of the manufacturer. When determining the correct geometry of the car body, first of all, you need to pay attention to:
- front and rear track width;
- distance between front and rear axle (wheelbase);
- the distance between the side members, as well as their length;
- trunk and engine compartment dimensions;
- dimensions of door and window openings.
Not only the appearance of the car, but also the comfort and safety of its use depends on the correct adherence to these dimensions.
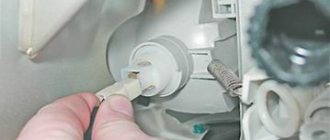
How to restore normal operation of the stove
First, let's look at the first case of defective operation of the heater of the "nine" with a high panel, when only cold air enters the side deflectors. The operation of the side nozzles is controlled by separate flaps with a polyurethane seal. In turn, the VAZ-2109 heater dampers are controlled using levers located on the control panel. Quite often there are cases when a significant gap forms between the damper and the walls of the gutter, which significantly reduces the efficiency of the stove. The problem is eliminated by forcing the damper to the optimal position.
So, get your pliers ready and remove the upper part of the dashboard. By the way, you can do without dismantling, but this way you can clearly see where the central damper of the VAZ-2109 heater is located, assess its condition and control the adjustment process. After removing the panel, find the fastening cable, which is located to the right of the accelerator pedal and, using pliers, carefully bend the wire. This creates additional tension, which reduces the free play of the spring. As a result, the damper will be able to tightly close the air duct, blocking the movement of cold air flows.
Engine dismantling
You can reduce the weight of the power plant if you remove it without:
- Gearbox (its weight is about 30 kilograms);
- a head weighing approximately 10 kilograms.
As a rule, at service stations, power units are removed assembled with the gearbox, while during self-repair, dismantling is carried out without attachments. Let's give an example of engine dismantling, which is described in the car's operating instructions. The peculiarity of the work in this case is that the engine is removed through the bottom of the car. The manufacturer recommends not to disconnect the box from it, but to install the car itself on a lift.
- Disconnect the terminals and then remove the battery.
- Drain the coolant and engine oil.
- Remove the crankcase protection.
- Disconnect the muffler and remove the air filter.
- Loosen the brake booster hose clamp that leads to the powertrain inlet pipe.
- Unhook the ground from the crankcase; to do this you will need to unscrew the fasteners.
- Remove the high-voltage wire from the central contact of the distributor cover.
- Using a screwdriver, turn the spring clip and remove the block with the wires coming from the contact socket of the distributor.
- Remove the fuel hose.
- Remove the clutch cable end from the clutch drive lever.
- Disconnect the wires from the traction relay, from the generator output and from the carburetor shut-off valve.
- Disconnect the air supply hoses to the throttle and the fuel hoses leading to the carburetor.
- Remove the spring from the throttle actuator.
- Remove the speedometer and accelerator drive cables from the valve covers.
- Unhook the block with the wire from the economizer, remove the oil pressure and liquid temperature sensors in the cooling system.
- Remove the heater outlet hose and transmission drive rod.
- Next, you will need to disconnect the remaining conductors from the box and move the drive shafts to the side.
- After the steering rod and other parts are disconnected, place a stand under the engine and unscrew the nuts of the rear mounting support, then the right front and left.
Before lowering the engine, check that you have disconnected everything from it. In order to remove the engine from under the car, you need to lift the front part of it.
Level control and required volume
While operating the vehicle, it is necessary to constantly monitor the oil level in the gearbox using a dipstick. There are two control marks (dashes) on the dipstick, indicating the minimum and maximum oil levels in the gearbox. The minimum mark indicates the need for topping up (usually the operation is performed every 4 - 5 thousand km), and the maximum mark indicates that there is no reason for concern.
Control is carried out as follows:
- At the gearbox, the dipstick is unscrewed or removed (the hole from it is usually used as a filler neck).
- Wipe the metal part with a dry, clean cloth.
- Insert the dipstick back and take it out again - you see the actual oil level in the gearbox.
The standard is considered to be the volume of lubricating fluid in the range between minimum and maximum, i.e. approximately in the middle of the marks.
Topping up oil
Oil is added to the “21099” gearbox only after checking the level and taking into account its tendency to a minimum. As a rule, from 0.5 to 0.8 liters are added to a 5-mortar, and up to 0.6 liters to a 4-mortar.
It is important to use for topping up oil of the same manufacturer and the same viscosity that is currently used in the gearbox of your car; mixing is unacceptable and can lead to complete failure of the gearbox or its individual parts. Add oil using an oil syringe or funnel, then measure the level using a dipstick
Typically, topping up is done in stages, periodically checking the level, since a volume in excess of the maximum will lead to squeezing out of the gearbox through gaskets, seals and drives, which will certainly lead to their replacement.
What is a trailer for?
Passenger cars are not well suited for transporting long or heavy loads, because their design is optimized for the comfortable transport of people, and the trunk can only accommodate a few large boxes. If you need to deliver bulk or dirty cargo from point “A” to point “B,” you can’t do without a towed vehicle, because it has a higher carrying capacity, and it’s much easier to wash it. Therefore, the trailer significantly expands the capabilities of a passenger car in the field of transporting any cargo, especially those that do not fit well with the upholstery of the passenger compartment or trunk, as well as those that exceed the carrying capacity of the vehicle.
Symptoms of a problem
There are several main signs of failure of the rear beam silent blocks, including:
- Unstable behavior of the car on the roads;
- Tires wear unevenly, which is not difficult to notice from the tread pattern;
- When driving on a bad road (that is, 95% of all our roads), unpleasant squeaks and impacts on the car body are observed.
These signs are indirect, since they may be associated with other failures of the vehicle’s chassis. For example, dull knocks are also a sign of a faulty rear pillar. Therefore, in order to make sure that there is a particular problem, you will need to fully diagnose the chassis.
Malfunctions
Often, replacing the rear beam bushings is due to the fact that defects arise in the design of the element. They are like this:
- The elasticity of the rubber element deteriorates;
- The rubber breaks;
- The central bushing is displaced;
- Rotations occur in the seat.
If problems are detected with the silent block of the rear beam, you will need to drive the car into the garage in the near future and replace the damaged components. Unlike foreign cars, changing the silent seal on a VAZ 2109 is quite simple and without outside help. Plus it costs almost pennies.
Choice
Before you start replacing the silent blocks of the rear beam, you need to decide what exactly you will replace the old, worn bushings with.
We figured out the markings and realized that for the VAZ 2109 you need to take only those that are suitable in size and diameter for the rear beam of the nine.
Today, for the VAZ 2109 they offer two types of silents, differing in the material of manufacture.
The choice should be made based on the available budget. Rubber elements cost several hundred rubles less. As for manufacturers, we recommend paying attention to the companies SEVI, BelMag, Boge and SS20.
Size difference
The main passport dimensions between the control points of the VAZ 2109 body
| Diagonal of the front doorway from the extreme point of the lower threshold to the middle of the roof | 1345 mm (plus/minus 5 mm) |
| Diagonal of the front door opening from the lowest point of the windshield to the middle of the lower threshold | 1000 mm (plus/minus 5 mm) |
| Distance between the front door hinge area and the pillar in a straight line | 963 mm (plus/minus 5 mm) |
| Diagonal of the rear door opening from the point where the lower sill meets the door center pillar to the roof | 1112 mm (plus/minus 5 mm) |
| Diagonal of the rear door opening from the top of the B-pillar to the lower sill | 860 mm (plus/minus 5 mm) |
| Long diagonal rear side window frame | 706 mm (plus/minus 3 mm) |
| Short diagonal rear side window frame | 383 mm (plus/minus 3 mm) |
| Hood diagonal | 1610 mm (plus/minus 5 mm) |
| Distance from the middle of the hood to the middle of the windshield | 712 mm (plus/minus 5 mm) |
Interesting video about the repair and straightening of the body of the “nine”
Second stage level setting
To determine how different it is from what is required, you can measure the depth of the gasoline: it should be 29 mm (plus or minus 1). You just need to do this immediately, as soon as the lid is removed: the fuel quickly evaporates, and after 5 minutes the data will become unreliable. Naturally, the measurements are not particularly accurate. The adjustment consists of 2 stages.
Float height
. The caliper is set to 34 mm. The upper measurement bar is the carburetor cover, the lower one is the top of the float. If the distance is greater (smaller), then by bending the tongue and levers you need to achieve the specified indicator. If you don’t have a caliper, you can take a ruler (preferably a metal one: a plastic one can dissolve in gasoline, but a wooden one can cause chips that will remain in the fuel).
Full float passage
. The measuring instrument is placed strictly vertically next to it; The number of centimeters to the bottom edge is noted. The float rises; the new altitude is measured. Both numbers add up - this is a full move. The same manipulations are performed with the second float. If the data does not match, the protrusion at the back is bent. There is a corresponding tongue there.
Replacing the rear wheel bearing of a VAZ 2108 along with the hub
Sometimes there is a situation when a new ball bearing fits into place too easily.
If there is at least some play, this means that the wear is too large and the dimensions of the diameter of the inner ring of the hub are already beyond the permissible limits. Even a serviceable element will give a runout in this state of affairs. If this is the case, replace the unit completely. If the thread is damaged, replacement is also advisable.
The process is exactly the same as mentioned above:
- Remove the wheel;
- We dismantle the brake drum;
- Unscrew the fastening nut;
- Remove the hub completely;
- There is simply no need to press out the bearing - just mount the new part in the reverse order of the first three points. The main thing is to lubricate the new elements and tighten the bolts according to the recommendations in the instruction manual.
Replacement of the ball bearing with run-out check:
Quick replacement in 15 minutes: