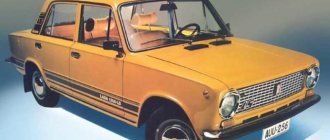
VAZ 2107
VAZ 2107 (seven) is a classic, in the past the pride and beauty of the Volga Automobile Plant. Currently, this morally and technically outdated car has ceased to be produced, but until recently it was not only sold by the car plant, but what is most surprising was that it found its buyers! In fact, the answer is simple - the simplicity of the design, the unique appearance and price of the car did not leave other models in this category much chance of winning the fight for a buyer. As a rule, the owner of the “seven” was a not very rich car owner, who with his own hands could not only go through all the “guts” of his iron friend in the middle of a field, “on his knees,” but also significantly improve its appearance and technical characteristics. That is, the owner, who was not indifferent to his car, sooner or later still began to tune his car to one degree or another.
What is this operation and what is hidden behind the word tuning?
- Firstly. Tuning is a change, an improvement to suit your personal needs, that is, in essence, adjusting the product to suit you;
- Secondly. Tuning is divided into 3 stages:
- Engine.
- Appearance.
- Salon.
This procedure was in demand more than ever in the domestic automotive market. Ask why? Yes, because a new domestic car is like a new apartment - no repairs, no conditions. Theoretically, you can use it, but is it convenient?
Usually all improvement work starts with the engine, this is:
- Carburetor improvement;
- Replacement of valves, spark plugs and armored wires with foreign ones
- Installing a zero-resistance air filter;
- Installation of lambda probe;
- Enlargement of the combustion chamber.
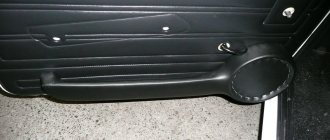
The interior of the Seven is so unattractive that you can redo literally everything here without hesitation or regret. Removing, reupholstering, and replacing the VAZ 2107 ceiling is a standard procedure for owners of used cars.
Also some of the most common jobs are:
- Reupholstery of seats, interior;
- Installation of electric windows;
- Improvement of the heater, in particular the left pipe;
- Noise insulation;
- Installation of a smaller diameter steering wheel, decent acoustics.
External tuning includes:
- Body painting;
- Installation of alloy wheels, body kits;
- Tinting.
Do I need this? Everyone decides for themselves.
In essence, tuning the “Seven” does not require large financial investments, but it brings enough “hemorrhoids” to the performer of this trick. In general, this activity qualifies as a hobby, a passion, much like collecting stamps... Most car owners pay too much attention to the external appearance of the “iron horse” while forgetting about the car’s interior. But the quality and materials of the interior directly affect the comfort of driving a car. Therefore, the entire impression of tuning the interior depends on the condition of the VAZ 2107’s ceiling upholstery . To get a taste for it, I would first suggest changing the steering wheel to a more modern model, after which you can move on to the interior itself. For example, purchase additional sets of accessories for the dashboard, since there is nowhere to put ordinary small things in the cabin, and these simple pockets and recesses are the best suited for storing various small things. Just looking at the classic Lada, I immediately have an irresistible desire to change something about it. And therefore, in this article I propose to analyze such a moment as tuning the ceiling of a VAZ 2107, which includes replacing the rear view mirror and sun visors. Next, we present to your attention detailed instructions - VAZ 2107 ceiling tuning.
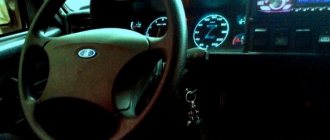
Tuning the instrument panel of VAZ 2106
The front panel is the main element of the cabin, which is able to attract the admiring glances of onlookers. Instead of the standard dashboard, you can attach a “tidy” to the “six”, which will have a stylish look.
For example, this is a part from a vehicle such as the BMW E-36. To do this, you need to know how to connect electrical wiring. Otherwise, you cannot do without the help of a qualified automotive electrician.
However, tuning a VAZ 2106 on your own does not end with just a complete replacement of the torpedo. It is possible to install a brighter indicator scale.
Tuning the instrument panel can be done simply by covering the “tidy” with some beautiful material. You can also replace the panel from another vehicle.
In general, you can change the appearance of the instrument panel:
- by reupholstering using high-quality materials;
- replacing the instrument panel with a more attractive tidy;
- by upgrading the standard lighting.
by installing a number of additional devices that will monitor certain indicators (in this case we are talking about a voltmeter, a tachometer, which is made in a sporty style);
Alternative way
In order to modernize the instrument panel in a different way, you will need plywood, tubes of “liquid nails,” plumbing and carpentry tools, fasteners and fabric material.
Tuning stages:
- First, the components of the tidy are marked on a sheet of plywood. Let's cut them out.
- Then we adjust a small block of wood to the place where the panel will be installed. We place it in the space between the plywood and fix it with self-tapping screws.
- We make holes in the plywood sheet for the radio or gearbox handle and other elements.
- The outer surface is treated with “liquid nails”.
Apply glue
The fabric material necessary to cover the carpet is applied.
Glue the trim
As you can see, upgrading the interior and dashboard of a VAZ 2106 is by no means a complicated process. The main thing is to follow the above recommendations.
Let's start with dismantling
Removing the sun visor
So:
- Pull the visor axle out of the holder by pulling it in your direction.
Stage 1
- Three self-tapping screws are unscrewed with a Phillips screwdriver.
Stage 2
- We remove the visor.
Stage 3
Removing the interior rear view mirror
- Stage 1.
Using a screwdriver, remove the decorative trim of the mirror bracket
- Stage 2.
Unscrew the two screws with a Phillips screwdriver
- Stage 3.
Removing the mirror
With a mirror, the issue is easily resolved - I bought a larger one and secured it on a standard mount, but the visors force me to make a choice - either re-tighten it with a carpet or buy tuning ones. For most, the second option is preferable; they both look and cope with their duties better than standard ones.
Removing a hard ceiling
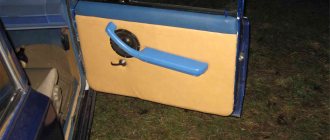
Many car owners have a question: how to remove the hard ceiling on a VAZ 2107? Most of the advice boils down to the need to dismantle the windshield, but I suggest trying a more gentle, although also labor-intensive, method. I wanted to post a video, but I think we’ll make do with instructions and photos. In a VAZ 2107, replacing the ceiling begins with dismantling the rear seats, removing the side plastics on the rear and front pillars, as well as dismantling the front passenger door. After unscrewing all the fasteners on the ceiling, it easily fits into the opening of the removed passenger door. And although this method seems very difficult, believe me, the new ceiling upholstery of the VAZ 2107 is worth the effort!
Advice! Buy four new plastic plugs that secure the ceiling to the roof.
Removing the rear seats
Unscrew all fasteners
We take you out of the salon
We pull out
Removing a soft ceiling
The soft ceiling lining of the VAZ 2107 can also be removed in two ways - both with removing the windshield and without dismantling it. In the second case, you will have to be a little nervous, since picking out the brackets holding the ceiling from under the windshield sealing rubber is not a pleasant task (it can be solved by using a screwdriver and some kind of mother).
In order to remove the ceiling of a VAZ 2107 with soft upholstery, you need to dismantle:
- Door seals;
- Handles above doors;
- Sun visors.
We begin to remove the upholstery from the windshield. And then step by step:
- We feel for the first arc (the first seam from the windshield);
- We push it by the middle, towards the trunk;
- The arc rotates around its axis, thereby weakening the upholstery;
- We remove the arc from the side niche of the roof profile, slightly squeezing it in the center.
- Further, with other arcs, in a similar order.
Now we are faced with the question of whether to stitch the leatherette so that we get hinges (a high-quality, but labor-intensive option with a big disadvantage - the seams are visible) or glue a new one directly onto the new skin.
In any case, having removed the ceiling from the VAZ 2107, you first need to wash it...
Old ceiling
...and cover it with material...
Sheathing
Result
...or cover it with vinyl.
Vinyl
How to reupholster a car ceiling
Car owners are aware of the short-lived lifespan of the interior headliner, which is subject to natural wear and tear. Light colors undoubtedly look more harmonious and pleasing to the eye, but such ceiling cladding requires special attention. On white and beige shades of the trim, burn marks from cigarettes stand out more noticeably. In addition, restless children can speed up the deterioration of light-colored upholstery, for example, by leaving traces of food or their own drawings on it.
Restoring the ceiling with improvised means will not bring much benefit or original appearance, so it is necessary to do the work efficiently. Alternatively, you can learn how to do this work yourself and update the car yourself.
Are there any reasons for a new reupholstery?
Let's consider some of the reasons leading to the replacement of the ceiling trim:
1. Contaminated areas (traces from hands and heads, from cigarette smoke, from street road dust).
2. Mechanical damage (traces of scratches, cuts, impacts).
3. Natural wear and tear from long-term use. Even frequent washing of the interior causes wear and tear on the surface from detergents and water.
4. The desire to change the design of the car, apply a new color scheme. Car enthusiasts striving for the ideal appearance of their car are trying to radically change its interior lining.
5. Change of scenery. A reason that has the purpose of refreshing the surface for a well-groomed and new interior appearance.
What kind of glue is needed?
A universal type of glue is not suitable for such work, since it does not provide for long-term exposure to direct sunlight. You will have to face the consequences of its negative effects when releasing toxic fumes.
To place the material on the adhesive surface, spray adhesive is used for quick and uniform distribution without excess, and quick drying.
Color scheme: choice and preferences
The best choice is pastel colors to create a calm environment that is pleasing to the eye. Absolutely pure white is best avoided if this machine is used frequently.
The discreet shades of the interior trim have proven themselves well.
Bright colors are beautiful, suitable for owners who want to stand out, but they can quickly become boring if you spend a daily stay in such a salon with constant eye strain and fatigue.
If you have a free minute, I recommend reading this useful article on how to install xenon yourself. Knowing the simple rules, you can easily install and adjust the headlights correctly.
Choosing upholstery material for cars
For upholstery, special automotive fabrics with the required set of characteristics are used: Alcantara and carpet, vinyl artificial leather and auto velor, leatherette and leather, etc.
Carpet
– noise-insulating acoustic fabric, has a non-woven texture of various shades. Used for covering audio systems and ceilings. Good tensile properties. There are waterproof types of coating.
Alcantara
– durable coating, has a dirt-repellent, soft surface. Convenient for long-term use.
Leatherette, vinyl leather
– inexpensive materials with good stretch, can emit odors when heated.
How to reupholster a car ceiling with your own hands
Dismantling old casing. Removing old glue and coating residues using white spirit, sanding irregularities. The new fabric is glued from the center of the matrix in stripes.
Glue is applied, rubbed to the sides, the fabric matrix is glued, the fabric is stretched on the sides from the center.
The edges of the canvas are trimmed evenly with an overlap, folded and glued. Holes for fastenings are made and all assembled parts are installed.
1. Automotive fabric for upholstery must be purchased with a reserve.
2. Prepare all the necessary tools.
3. Some coatings (velor) will require a hairdryer to dry.
Video. Car ceiling reupholstery
It is important to follow the step-by-step instructions and recommendations, watch the video, practice replacing small parts of the car's ceiling trim, and you will succeed!
Tools
Any work requires a tool, sound insulation in a VAZ, VAZ 2104 in particular, requires:
- Shoe knife and scissors for cutting materials
- Construction hair dryer, warm up vibration insulation
- Solvent – degrease surfaces
- Rags and a bucket of water - for cleaning surfaces from dirt
- A hard roller is used to roll vibration insulation; you can also use a hammer handle, but you’ll get tired quickly
- Screwdrivers and wrenches - you will have to remove the trim and seats
Seat belts
On early Zhiguli models of the fourth model there are no rear seat belts, although mounting holes are provided for them. But sometimes it becomes necessary to install them:
- for the safety of rear passengers;
- for installing a child seat.
To carry out such a modification, you will need classic belts (VAZ 2101), which are attached in the appropriate places: to the pillar behind the rear seat, at the bottom of the wheel arch and under the back of the rear seat.
To increase the level of safety, belts can be installed on the rear seats of the VAZ 2104