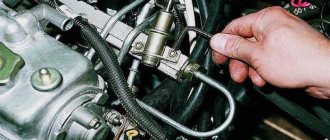
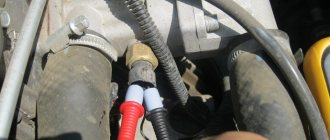
Cylinder head gasket failure leads to such unpleasant consequences as engine overheating, poor operation of the stove, the appearance of exhaust gases from under the hood of the car, the appearance of an emulsion in the engine oil, the appearance of white smoke from the exhaust pipe and some others. If the above symptoms or one of them appear, you need to check the cylinder head gasket. There are several ways to do this. Next, we will look at why the cylinder head gasket breaks, what consequences this leads to, and what to do if this trouble happens to your car’s engine.
How to understand what has broken the cylinder head gasket? Signs and causes of cylinder block gasket failure.
We all know that the engine is one of the most important parts of a car.
Engine malfunctions cannot be compared with chassis malfunctions or electrical equipment malfunctions, although, of course, each individual system and part plays an important role. It’s just that if with a faulty ball or strut you can still somehow move at your own risk, then with a faulty engine this is not always possible. Today we’ll talk about such an unpleasant phenomenon as a breakdown of the cylinder head gasket. About why this happens, how to understand what has broken the cylinder head gasket, and also how to check the cylinder head gasket for a breakdown.
To begin with, what is a cylinder head? The cylinder head is the cylinder head, in other words, a cover that hermetically covers the combustion chambers (cylinders). The cylinder head fits tightly to the cylinder block (BC), in which the cylinders in which the pistons move are actually located. Between the cylinder head and the cylinder head there is a cylinder head gasket, which acts as a sealant. In the event of damage (breakdown) of this gasket, various processes begin to occur in the engine, which impair its performance and lead to its destruction.
What is a cylinder head gasket?
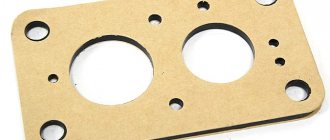
For each automaker, this gasket may differ significantly both visually and in the material from which it is made. The material for making the cylinder head gasket can be paranit and even thin sheet metal. Due to the fact that the gasket walls are quite thin, breakdowns, damage and burning of the cylinder head gasket often occur, after which problems with the engine are guaranteed. Often the cause of a breakdown or burnout is errors made during installation of the cylinder head.
Signs of a broken cylinder head gasket:
Shot to the outside. When exhaust gases come from under the head. It is difficult not to notice, and the sound will be such that it will be impossible not to hear.
If the cylinder head gasket between the cylinders has been breached, it is quite difficult to detect such a breakdown, but it is still possible. For example, you can measure compression, which will accurately detect problems with the cylinder head gasket. In addition, the motor will run unevenly (it may trip).
Exhaust gases in the coolant. Very often, just such an anomaly may indicate a breakdown of the head gasket. However, it is impossible to say unequivocally that the reason is in the gasket, since gases in the coolant can also appear through a crack in the cylinders or the cooling jacket. In such cases, the engine will “eat up” the coolant, and the exhaust will have a strange appearance and smell. As a rule, in such cases the exhaust becomes white and steamy. Also, bubbles that smell like exhaust gases may appear in the expansion tank.
Oil or water leaks on the engine. In this situation, we can definitely conclude that the cylinder head gasket is broken or the head itself is installed incorrectly. Unreasonable increase in engine temperature. The temperature rises due to the fact that the heat from the combustion of the fuel mixture penetrates the cooling system, causing the antifreeze to warm up.
Increasing engine oil level. We all know that some engines “take oil”, sometimes this is even provided for by the engine design and is not considered a malfunction. However, there are situations when the oil does not decrease, but rather increases... And believe me, there is very little funny here. In fact, the increase in level occurs as a result of coolant entering the oil. By the way, the consequences of such dilution can be very sad. The oil becomes less viscous, the engine is not lubricated enough, as a result of which the friction force between the parts increases. The wear of these parts also increases, and it is quite difficult to say exactly how long an engine that runs almost “dry” will last. One thing is clear - the engine will suffer serious damage, and its service life will be seriously reduced. If the coolant flows into oil, or vice versa, then most likely you will see oily spots in the coolant expansion tank.
Why is this happening? Blown cylinder head gasket - reasons
Engine overheating. As a result of overheating, the cylinder head gasket burns out. How? That's how! The metal-asbestos gasket is not able to withstand high temperatures that are formed when the engine overheats, therefore, as soon as the temperature becomes critical, the gasket burns out or swells. As a result, in areas of burning or swelling, the gasket becomes less durable and after several heating/cooling cycles, the problem area begins to leak.
The second reason for the breakdown of the cylinder head gasket is deformation of the head, or more precisely the plane in which it is adjacent to the block. As a rule, aluminum heads are subject to deformation; this does not happen with cast iron heads; they are more likely to crack. Deformation is treated by grinding on a special high-precision machine. Cylinder head mounting bolts. Incorrect tightening, when one bolt is tightened tighter and the other looser, leads to loss of clamping force in some places. It is in such places that gasket breakdowns occur. It is necessary to tighten the cylinder head bolts using a torque wrench, following all the rules of this procedure.
Poor quality of the cylinder head gasket itself. Everything is simple here; it happens that owners, saving money and repairing the engine, install non-original gaskets. As a result, after several thousand km. a breakdown of the cylinder head gasket or its burnout is quite possible.
Actually, that's all... I answered the question: “What is a cylinder head gasket failure?”, listed the signs of a cylinder block gasket failure and talked about the reasons that cause a cylinder head gasket failure. Perhaps we can end the article. Thank you all for your attention, and double thanks to those who completed the article “from cover to cover.” So it was not in vain that he tried. If you have any comments about the article or want to add to it, you can use the comment form to do this.
Source
Signs of a blown cylinder head gasket
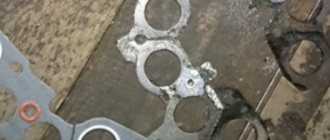
You can see the burnt gasket, the cylinder head gasket is broken
The importance and complexity of the sealed interface between the cylinder head and the cylinder block is that when fixing the heads it is necessary to isolate:
- Channels of the water jacket of the block and head.
- Oil-conducting channels.
- The combustion chambers of each cylinder are separated from each other, from the water jacket and the lubrication system.
This can be accomplished by installing a gasket with complex hole configurations. As a rule, it is made of reinforced paronite with shrinkage edging around each of the holes. Additionally, the gasket may be made of thin sheet metal depending on the engine model.
White emulsion in the engine due to burnout of the cylinder head
No matter what material the sealing gasket is made of, there is always a danger of it burning out.
However, if seal failure is diagnosed early, costly repairs can easily be avoided.
Early stage
In the early stages of depressurization, the engine may not show any signs of malfunction.
This is especially typical for engines after repair, when the cylinder head was installed in violation of the technology, namely:
- incorrect, uneven installation of the gasket;
- non-compliance with the tightening torque and sequence of tightening the head bolts;
- violation of the geometry of the block head due to overheating, curvature of the mating plane:
- poor quality gasket;
- cavities and microcracks in the mating planes of the head or block.
Thus, to identify gasket problems in the early stages, simply inspect the engine carefully after replacing the gasket or other repairs that involve removing the head.
Signs of oil leakage
At the first signs of oil leakage from under the head, it is better to try to tighten the mounting bolts using a torque wrench and a bolt tightening diagram. It is quite possible that the gasket simply sagged and after tightening, the tightness of the connection will be restored and oil leakage will stop. If this is not done, it is quite possible that you will have to deal with other signs of a broken gasket.
What is a cylinder head gasket, signs of its damage
The cylinder head gasket is a sealing element that serves to seal the connection between the cylinder head and the block itself. Thanks to it, the combustion chamber is separated from the cooling jacket channels through which the coolant circulates.
The main materials from which cylinder head gaskets are made are either thin sheet metal or reinforced paronite, which has additional metallized rings located at the locations of the combustion chamber openings.
It is for this reason (thin-layer material and very high loads) that situations where the cylinder block gasket is damaged or burns out are not so rare.
So, by what indirect signs can a car enthusiast find out that the cylinder head gasket of a VAZ 2114 has burned out? In fact, there are quite a few of them, and just one of them will not solve the problem (if the gasket damage is really to blame).
These signs are as follows:
If similar signs of burnout of the cylinder head gasket of a VAZ 2114 are found (and there are several of them at once), then the gasket is definitely damaged and should be replaced with a new one. If only one sign is present, then you can perform a check and accurately determine whether it is suitable for further use or not.
Let's sum it up
As you can see, it is quite possible to replace the cylinder head gasket yourself, but only if you have the necessary tools and skills. If you are not confident in your abilities, it is better to immediately contact experienced specialists. It is also important to follow the rules and recommendations and adhere to a strict sequence of repair work.
We also recommend reading the article about what to do if the engine block is cracked. From this article you will learn how to repair cracks in a cylinder block or cylinder head, as well as what subtleties and nuances you should pay attention to.
Finally, we note that untimely replacement of a damaged cylinder head gasket can lead not only to serious malfunctions in the operation of the vehicle’s internal combustion engine, but also cause serious engine malfunctions. As a result, operating a car with a broken/burnt-out cylinder head gasket will inevitably lead to severe engine wear and subsequent expensive repairs (including major ones).
Reasons leading to cylinder head gasket failure and checking it
There are not many main reasons leading to cylinder head gasket failure:
If the cylinder head gasket burns out, you can hear characteristic “gurgling” sounds that appear when the heating system is turned on.
But, regardless of the reasons, if there is a suspicion of wear on the cylinder head gasket, it should be checked. There are several main options here.
The first is based on indirect signs (the list of which was given above). If several of them are present, then the gasket is definitely to blame.
This can be determined more accurately by dismantling the cylinder head and performing a visual inspection of the gasket (second method). If there are ruptures, surface damage, leaks and other irregularities on it, then the gasket has failed and must be replaced with a new one.
Metal or paronite gasket - which one to choose?
It is difficult to give an unambiguous answer about which gasket to choose - paronite with metal spacers or a metal one. Each of them has both its pros and cons. Thus, a gasket made of pure sheet metal will last much longer (if no emergency situations occur, it can last the full life of the car engine before major repairs).
But it also has a number of disadvantages:
In turn, rubber-asbestos (paronite) gasket has a lower price, is less demanding on manufacturing accuracy, as well as on the uniformity of the surfaces being connected (it can be used without preliminary grinding).
True, due to lower performance characteristics than an all-metal gasket, it also has a significantly shorter service life, burns out more often, and is also more susceptible to mechanical damage.
How to properly replace the gasket?
If you notice signs of a broken cylinder head gasket on a VAZ 2114, and after inspection you are convinced that this is indeed the case, then the only way to solve this problem is to replace the gasket.
Of course, this can be done at a car service center, but this generally simple operation will be quite expensive. That is why you can replace the gasket yourself.
The very first thing you need to do for this is to disconnect all devices and instruments connected to the engine, remove belts, etc. It wouldn’t hurt to write down everything that was filmed (so that later there won’t be anything “extra”).
Then you need to unscrew the head mounting bolts.
To do this, we first clean them of dirt, rust and technical fluids, and then unscrew them one by one (first, each of the bolts must be turned slightly, and only after doing this procedure with all the bolts, unscrew them completely).
After this, we dismantle the worn gasket and install a new one in its place (you need to focus on the bushings and protrusions - they will help install the gasket in the correct position, without unevenness and distortions).
When the new gasket is installed, all that remains is to reconnect all the units, and then secure the cylinder head with bolts.
Special attention should be paid to the fact that this should not be done “by eye” - this will lead to very rapid wear of the gasket, and it will have to be changed again. For this reason, the bolts are tightened only with the use of a torque wrench and only to the amount specified in the passport.
Replacement of cylinder head gasket VAZ 2114 8 valves
Coolant or engine oil may leak at the junction of the cylinder block and the head. The cause of this may be a burnt gasket. The article provides detailed instructions for the VAZ 2114 8 valves: replacing the cylinder head gasket with your own hands, and also contains a video showing the replacement process.
When to change the cylinder head gasket
It is necessary to change the cylinder head gasket on a VAZ 2114 every time it is dismantled, regardless of the reasons that caused it. It is disposable and cannot be reused as this may damage the engine. The gasket must meet the following requirements:
✔ have elastic deformation; ✔ be water- and oil-proof; ✔ resistant to hot gases; ✔ resistant to chemical influences; ✔ retain its properties for a long time. If the gasket is burnt out, then it cannot perform its functions and should be replaced.
Burnt-out cylinder head gasket
There are several signs by which you can determine the need for replacement:
➤ The smell of exhaust gas or antifreeze in gasoline. ➤ Oiling the antifreeze. ➤ A large amount of emulsion on the cap from the oil filler neck into the engine. ➤ Increased oil level in the sump. ➤ Lots of white steam coming out of the muffler.
The process of replacing the cylinder head gasket (for an 8 valve VAZ engine)
It is better to carry out the procedure on an overpass or inspection hole. For work you should prepare: • a torque wrench; • spanners; • socket heads, including “Torx”; • screwdriver; • new gasket; • container for draining coolant; • clean rags. The procedure for replacing the cylinder head gasket on a VAZ 2114 with your own hands consists of the following steps: 1.
First you need to turn off the power to the car.
To do this, disconnect the negative terminal from the battery. 2.
Next, fix the piston of the first cylinder to the TDC position.
3.
Then drain the coolant into the prepared container.
4.
After this, you need to relieve the pressure in the fuel system if the car has recently been on a trip.
5.
In the next step, the exhaust pipe must be disconnected from the exhaust manifold.
6.
Remove the cylinder head cover.
Together with it, you can disconnect the receiver and throttle assembly, as well as the intake and exhaust manifolds. 7.
Having loosened the clamp holding the air supply pipe on the throttle assembly, remove it from the assembly along with the air intake hose and the air filter housing.
8.
At the left end of the VAZ 2114 head there are “mass wires” that need to be disconnected and the fuel frame with the fuel system elements removed.
9.
Having unscrewed the mounting screws that secure the front cover, remove it and the timing belt.
Be sure to secure the crankshaft and camshaft from turning. 10.
Next, remove the tension roller and spacer washer.
11.
After unscrewing the mounting bolt, remove the camshaft toothed pulley.
12.
At the next stage, remove the back cover: first unscrew the nut holding the cover, and then the remaining fastening bolts.
13.
Using a Phillips screwdriver, unscrew the screws, loosening the clamps and sequentially disconnecting all hoses from the outlet pipe of the VAZ 2114 cylinder head: radiator inlet pipe, thermostat with hose, as well as inlet hoses of the throttle unit and heating,
Use a Phillips screwdriver to loosen clamps
14.
After unscrewing the fastening nuts, you need to disconnect the drain and fuel supply hoses from the fuel pipes.
15.
Next, using a hexagon, you need to unscrew the 10 mounting bolts. It is advisable to turn them sequentially by half a turn according to a certain pattern. This relieves tension and prevents deformation of the lid. Then you should remove the screws along with washers.
We unscrew the 10 bolts
16
At the next stage, the cylinder head is dismantled along with the gasket.
17.
Next, be sure to clean the contacting surfaces from dirt and metal shavings.
In addition, you should check that there is no oil in the threaded holes of the head mounting bolts. 18.
We install a new gasket taking into account 2 centering bushings so that the hole with a copper edging, intended for the passage of oil, is located between the third and fourth cylinders.
We install a new gasket taking into account guides
19.
Before installing the cylinder head, you must check that both valves on the 1st cylinder are closed.
20.
Next, insert the screws into the holes and tighten them in four stages according to the diagram below.
Scheme for tightening the cylinder head head bolts for VAZ 2114 8 valves
At the first stage, the screws should be tightened with a torque of 20 N.m, at the second - 69.4–85.7 N.m, at the third stage the screws should be tightened by 90 degrees, at the fourth stage the screws should be finally turned by 90 degrees.
21.
Having replaced the cylinder heads, attach all the hoses in reverse order and connect the wires and sensor connectors.
When installing the camshaft pulley, make sure that the protruding part of the hub faces the engine. 22.
Next, it is necessary to check and adjust, if necessary, the clearances in the valve drive.
After installing the timing belt, check its tension. Conclusion
Thus, replacing the cylinder head gasket on a VAZ 2114 with your own hands is not difficult if you correctly follow the sequence of operations and follow the recommendations. For clarity, a corresponding video is attached. In order for the replacement to be carried out efficiently, the following rules must be observed: • areas of the block where sealing is required must be degreased and all remnants of the previous gasket removed; • threaded holes must be cleaned of dirt and oil; the contacting surfaces in the sealing areas should not have any unevenness; if there are small defects, they are removed using a whetstone. • If there are significant defects on the surface of the cylinder head, it should be ground; • when installing, the gasket must be carefully centered according to the guide elements, otherwise it will not ensure proper operation of the engine for a long period; • when changing the gasket, it is better to replace all the bolts on the block; • washers should be installed under the bolts. When installing the cylinder head on a VAZ 2114, special care should be taken to avoid scratches on the gasket and contacting surfaces.
Video “Replacing the cylinder head gasket on a VAZ 2114”
© 2016-2021 24techno-guide.ru
All rights reserved.
Use of site materials is possible only if you install an active direct link to our resource. FEEDBACK
Home
(Main page of the site)
Auto
(Reviews, reviews, test drives of cars)
Engines
(Description and design of various engines)
Techno
(Articles about equipment and mechanics)
Tuning
(Review of tuned cars)
Repair
(Do-it-yourself repairs)
Tractors
(Tractor special equipment)
Osago
(All about car insurance)
Car audio
(Music for the car)
Car LAWS
(Traffic rules, fines and car laws)
Lifehacks
(Tricks of life)
Photo/Video
(No comments)
All articles
(All publications that are on the site)
Symptoms of a blown cylinder head gasket
We have problems again... About a week ago the car started complaining about the low coolant level, I thought it was leaking again from under the expansion tank. I opened the hood and everything was dry. I was a little surprised, topped up the coolant and drove on. A couple of days ago, sitting in the car in the evening, I began to freeze, turned on the heater, and it blew cold air while the car was idling. o_O I start accelerating to about 2000, warm air begins to flow. Yesterday I was driving home along the highway, outside the city, and the on-board engine shows me 96-97 degrees of coolant, and this at a speed of 100 km/h! o_O I drove up to the house, stopped, turned off the car and heard the cap of the expansion tank whistling, releasing pressure, while the tank itself was quite swollen. I thought it was just because of the heat, somehow hoping for the best, believing that it was just an air lock. Yesterday evening I wanted to warm myself up in the evening again, and again the stove blew cold...
