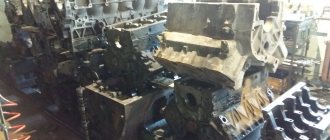
As you know, the engine cylinder block is the basis of any internal combustion engine. In fact, the block is a three-dimensional part, inside of which various components and mechanisms are located (pistons and rings, as well as CPG liners, crankshaft, crankshaft connecting rods, etc.).
Also, a cylinder head is installed on the cylinder block through a gasket, which is a “continuation” of the block. The timing belt is located in the cylinder head. At the same time, both the components inside the block and in the cylinder head are subject to significant mechanical and thermal loads during engine operation.
It is not surprising that damage to the cylinder block will not only impair performance, but will also disable the power unit. For this reason, the restoration of the unit and its repair must be carried out efficiently and in a timely manner.
Main defects and malfunctions of the engine cylinder block
Let's start with the fact that there are two types of cylinder blocks:
- cast iron BC;
- blocks made of aluminum alloys;
As a rule, blocks made of cast iron are additionally strengthened with graphite, and lightweight aluminum products are made sleeved (a cast iron sleeve is inserted into the block). There are also aluminum cylinder blocks without liners. The alloy contains silicon, which significantly strengthens the block.
When it comes to sleeved blocks, sleeves come in “wet” and “dry” varieties. In the first case, the coolant is in direct contact with the liner, while in the second case the liner is tightly pressed into the body of the block during manufacturing.
One way or another, each solution has its pros and cons, and during operation various damage and defects of the cylinder block or defects of the block liners occur (depending on the type of cylinder head).
Repair of the cylinder block must begin with identifying the cause of the malfunction and troubleshooting. Often the main problem on engines with high mileage is wear on the surface of the cylinder or liner. Scores appear on the surface (mirror) of the cylinder, cracks, cavities, etc. may form.
Also, cylinder wear often occurs along the crankshaft axis. As a rule, damage to the cylinders on a “fresh” engine is caused by engine overheating or water hammer, as well as a decrease in the level or significant loss of properties of the engine oil.
Less commonly, block defects are caused by unexpected destruction of piston rings and other unforeseen breakdowns. Let us also add that in the BC, deformation of the crankshaft bearing bed, etc. often occurs.
- As for the wear of the cylinder surfaces, in this case such wear is often “natural”, that is, it becomes the result of operating the engine in normal operating conditions. The cylinder repair itself in this case often involves boring and honing the cylinder (applying hone). This allows you to remove the ellipse of the cylinder, remove scratches and burrs on the mirror.
- A broken connecting rod can be considered a more complex case, since the damage is usually more serious. Also, the cause of block defects is valve breakage, destruction of the valve seat, etc. The result is scuffing on the cylinder surface and other damage. Also on the list of common faults are cracks in the block or liner.
- Let us also add that there are so-called “hidden” problems, that is, it can be difficult to determine defects visually within the framework of a superficial inspection. At the same time, unqualified repairs, which are limited to the banal replacement of worn parts, will still lead to the fact that the engine will need to be disassembled again after several hundred or thousand kilometers.
These “hidden” defects include, first of all, deformation of the cylinder block. Often, such deformation is a consequence of technology violations during the manufacturing process of the block. In simple words, if the internal stress in the block is not relieved, deformation will occur.
By the way, this problem is more typical for cast iron blocks. Also, deformation of the block (both cast iron and aluminum) can be caused by overheating of the engine or its uneven heating during operation.
BC grinding
Engine oil pump: device, principle of operation, diagram, repair
This operation is performed mainly on internal grinding machines. The stone on this equipment has a significantly smaller diameter than the size of the cylinder. The stone can move around the axis, along the circumference of the cylinder, and also along the axis of the combustion chamber.
The process of repairing an engine cylinder block performed in this way is very lengthy and complex, especially if a large layer of metal needs to be removed. The surface of the combustion chamber becomes wavy and may become clogged with dust. The latter penetrates into the pores in cast iron - after repairs, this can subsequently cause intense wear of the rings and pistons. Grinding of cylinders is now used extremely rarely.
Restoring engine cylinders
So, repairing the cylinder block and restoring the cylinders themselves involves:
- thorough cleaning of BC surfaces;
- then the cooling system channels in the block (cooling jacket) are checked for leaks;
- the oil channels are also washed and cleaned, and then checked;
- Next, the cylinders are inspected to identify various defects;
- then the block is bored/sleeved, surfaces are polished, etc.
For many engines, cylinder boring is a mandatory procedure as part of an engine overhaul. To perform the procedure, a special machine is used for boring engine cylinders. The boring of the block itself should be understood as the processing of the inner surface.
This treatment actually involves removing a layer of metal to level out unevenness, remove burrs, smooth out cavities, etc. The main task of processing is to give the cylinders a normal shape (cylindrical).
The next step after boring is honing. The application of hone to the internal surfaces of the cylinders is carried out using an abrasive fine-grained material (a honing bar on a honing head). The honing head itself is mounted in the spindle of the honing machine. This machine allows you to implement rotational and reciprocating movements.
Repairing the cylinder block may also involve liner re-lining or re-lining. In the first case, you should understand the installation of sleeves, although the factory design does not initially imply this. In the second, the worn sleeve is removed from the block, after which a new repair one is installed.
As a rule, the block sleeve can be made in two ways, when the sleeve is cooled with liquid nitrogen or the mating part is heated. In the first case, the cooled sleeve decreases in size and is easily placed (pressed) into the seat. The second method involves heating. Both methods of pressing sleeves allow you to achieve the desired tension.
Finally, we note that also as part of restoring the block, it may be necessary to repair the crankshaft bearing bed. Also in some cases it becomes necessary to eliminate the deformation of the block. For this, the method of artificial aging is used, when the block is heated to a certain temperature, after which various areas are processed.
We also recommend reading the article about what a cylinder block liner is. From this article you will learn about why this procedure is performed, as well as when it becomes necessary to line an engine that was not originally designed to install liners in the cylinder block.
Price list
Prices are valid from November 1, 2022 Download price list
Work with cylinder head (domestic production)
| Name of service | Unit change | Cars, rub. | Freight up to 70 kg, rub. | Freight above 70 kg, rub. |
| Installing a threaded bushing | PC. | 280 rub. | 340 rub. | 420 rub. |
| Replacing the spark plug hole | PC. | 650 rub. | 950 rub. | 1000 rub. |
| Replacement of MSK | PC. | 60 rub. | 60 rub. | 60 rub. |
| Replacing injector cups YaMZ-238 | PC. | — | 600 rub. | 600 rub. |
| Replacing injector cups YaMZ-236 | PC. | — | 600 rub. | 600 rub. |
| Removing the pipes | PC. | 135 rub. | 175 rub. | 205 rub. |
| Valve chamfer grinding with cleaning | PC. | 100 rub. | 120 rub. | 150 rub. |
| Valve end grinding | PC. | 60 rub. | 100 rub. | 100 rub. |
| Milling a cylinder head along a plane with pre-chambers | cyl. | 700 rub. | — | — |
| Cylinder head milling, removal of more than 0.4 mm | cyl. | 300 rub. | 780 rub. | 780 rub. |
| Parallel cylinder head milling diesel | cyl. | 230 rub. | 600 rub. | 600 rub. |
| Parallel cylinder head milling gasoline AL | cyl. | 225 rub. | 375 rub. | 500 rub. |
| Installation of diesel injectors | PC. | 100 rub. | 160 rub. | 180 rub. |
| Installing a temperature indicator | PC. | 130 rub. | 130 rub. | 130 rub. |
| Removing Broken Studs | PC. | 500 rub. | 500 rub. | 500 rub. |
| Removing diesel injectors | PC. | 150 rub. | 245 rub. | 275 rub. |
| Spark plug hole repair | PC. | 500 rub. | 800 rub. | 1000 rub. |
| Pre-wash 5-6 cyl. | PC. | 800 rub. | 900 rub. | 1000 rub. |
| Pre-wash 3-4 cyl. | PC. | 500/200 rub. | 500/200 rub. | 1000 rub. |
| Valve desiccation | PC. | 40 rub. | 50 rub. | 60 rub. |
| Drying with replacement of MSCs | PC. | 100 rub. | 150 rub. | 150 rub. |
| Machining the seat with a profile cutter on the AZ VV-80 machine | PC. | 150 rub. | 200 rub. | 200 rub. |
| Seat replacement without treatment | PC. | 400 rub. | 500 rub. | 700 rub. |
| Replacement of seat with processing | PC. | 500 rub. | 1000 rub. | 1000 rub. |
| Replacing the guide bushing with unfolding under the valve | PC. | 120 rub. | 200 rub. | 200 rub. |
| Replacing plugs | PC. | 300 rub. | 400 rub. | 500 rub. |
| Valve defect | PC. | 50 rub. | 70 rub. | 170 rub. |
| Turning out the studs | PC. | 50 rub. | 50 rub. | 50 rub. |
Crimping the block head
| Name of service | Unit change | price, rub. |
| A-01 | PC. | 2,500 rub. |
| A-41 | PC. | 2,500 rub. |
| VAZ | PC. | 1,200 rub. |
| VAZ | PC. | 1,200 rub. |
| D-160 | PC. | 2,500 rub. |
| D-65 | PC. | 1,500 rub. |
| ZiL | PC. | 1,500 rub. |
| ZMZ-402 | PC. | 1,200 rub. |
| ZMZ-405 | PC. | 1,200 rub. |
| ZMZ-406 | PC. | 1,200 rub. |
| ZMZ-407 | PC. | 1,200 rub. |
| MMZ-245 | PC. | 1,500 rub. |
| SMD | PC. | 1,500 rub. |
| Tractor and their analogues | PC. | 1,500 rub. |
| YaMZ-236 | PC. | 2,500 rub. |
| YaMZ-238 | PC. | 2,800 rub. |
| YaMZ-7511 (general) | PC. | 2,800 rub. |
| YaMZ-7511 (separate) | PC. | 1,000 rub. |
| YaMZ-840 | PC. | 1,000 rub. |
Work on the cylinder head (foreign cars)
| Name of service | Unit change | Cars, rub. | Freight up to 70 kg, rub. | Freight above 70 kg, rub. |
| Installing a threaded bushing | PC. | 300 rub. | 385 rub. | 440 rub. |
| Replacement of MSK | PC. | 135 rub. | 135 rub. | 135 rub. |
| Removing the pipes | PC. | 180 rub. | 230 rub. | 270 rub. |
| Valve chamfer grinding with cleaning | PC. | 150 rub. | 150 rub. | 200 rub. |
| Valve end grinding | PC. | 70 rub. | 80 rub. | 90 rub. |
| Milling cast iron | PC. | 600 rub. | 700 rub. | 880 rub. |
| AL milling | PC. | 500 rub. | 680 rub. | 880 rub. |
| Installing a temperature indicator | PC. | 135 rub. | 135 rub. | 135 rub. |
| Removing Broken Studs | PC. | 500 rub. | 600 rub. | 700 rub. |
| Checking the seat-valve interface with a vacuum tester | PC. | 40 rub. | 40 rub. | 40 rub. |
| Spark plug hole repair | PC. | 1000 rub. | 1000 rub. | — |
| Threaded hole repair | PC. | 400 rub. | 450 rub. | 500 rub. |
| Unfolding the guide bushing | PC. | 100 rub. | 100 rub. | 120 rub. |
| Pre-wash 5-6 cyl. | PC. | 500 rub. | 600 rub. | 800 rub. |
| Pre-wash 3-4 cyl. | PC. | 300 rub. | 500 rub. | 500 rub. |
| Valve desiccation | PC. | 80 rub. | 100 rub. | 100 rub. |
| Drying with replacement of MSCs | PC. | 100 rub. | 140 rub. | 140 rub. |
| Machining the seat with a profile cutter on the AZ VV-80 machine | PC. | 180 rub. | 200 rub. | 230 rub. |
| Replacement of seat with processing | PC. | 1000 rub. | 1100 rub. | 1300 rub. |
| Seat replacement without treatment | PC. | 800 rub. | 1000 rub. | 1000 rub. |
| Replacing the guide bushing | PC. | 200 rub. | 300 rub. | 300 rub. |
| Replacing plugs | PC. | 550 rub. | 750 rub. | 850 rub. |
| Modification of the guide bushing | PC. | 200 rub. | 150 rub. | 250 rub. |
| Valve defect | PC. | 70 rub. | 80 rub. | 80 rub. |
| Turning out the studs | PC. | 200 rub. | 250 rub. | 300 rub. |
Crimping of cylinder heads
| Engine cylinder head | Unit | Cars, rub. | Freight, rub. |
| Heat exchanger | PC. | 1000 | 2000 |
| Cylinder head 4-6 cyl. (in-line) | cyl. | — | 1500 |
| Cylinder head (large) | cyl. | — | 1500 |
| Cylinder head (cast iron) | cyl. | 600 | 1000 |
| Cylinder head (aluminum) | cyl. | 500 | — |
Let's sum it up
Taking into account the above, the cylinder block liner is a part of the CPG, which is largely exposed to high temperatures, vibrations and detonation loads. Therefore, the risk of various types of defects, which can lead to expensive engine repairs, is significantly increased.
As a rule, in cases where the owner of a vehicle is faced with the problems described above, it is strongly recommended to refrain from attempting independent or makeshift repairs (sleeving or re-sleeving the block in a garage).
In such a situation, it is optimal to use the help of qualified specialists and carry out troubleshooting, since non-professional repair or replacement of cylinder block liners without using technology can significantly affect the service life and stability of the internal combustion engine.
Main possible defects.
The most common block defects are: wear on the internal surfaces of the liners, wear on the surfaces of the main bearing holes; cracks/holes in the walls of the water jacket, crankcase and jumpers between the liners; thread failure in holes; flange breaks; violation of the coaxial arrangement of the holes of the main supports; deformation of seats for sleeve collars; cavitation wear of the block walls and liners near the sealing rings; warping of surfaces, especially those connected to the block head, scale deposits on the block walls and liners, etc.
The block cannot be restored if there are breaks on the internal partitions, two cracks 800 mm long passing through threaded holes on the treated surfaces.
N
Scale and possible deposits (coke, resins, varnishes) should be removed before repairs by boiling down the blocks and washing them in baths or machines.
Gilzy , _
As a rule, they are subject to wear in the area of movement of the piston rings.
D
The gap between the liner and the piston skirt that can be omitted without repair when it is positioned at top dead center (TDC) is set to:
None for SMD-60 engines – 0.44 mm;
for SMD-62 engines – 0.44 mm; for other diesel engines – 0.4 mm;
for engines ZMZ-53A and ZIL-130 - 0.20 mm (with an allowable ovality of no more than 0.09 mm for liners of all engines). Repair and restoration. Worn liners are bored out, then honed to an increased repair size and equipped with pistons and rings of the same size.
R
The repair size of block liners for most diesel engines has been increased by 0.7 mm, and for YaMZ, A-01M, A-41 – by 0.5 mm.
sleeves are bored in diamond boring machines of type 2E78P. Before boring, the largest diameter of the liner is measured and it is determined whether it is possible to bore it to the repair size Dts, using the formula:
Dts> Dcalc = Dmax + 2a + 2δ, where Dcalc is the calculated diameter of the sleeve, mm;
Dmax – the largest measured diameter of the worn liner, mm;
a – allowance for cutting the cutter (0.02-0.03 mm); δ – allowance for honing (0.02-0.03 mm).
ABOUT
The shaft and taper shape of the sleeve after boring is permissible no more than 0.02 mm along its entire length, and the surface roughness is Ra = 2.0-1.25 microns.
Bored liners are honed on 3G833 type machines with diamond or abrasive stones, which are fixed in a special head (honing).
IN
Kerosene or diesel fuel is used as a cutting fluid for honing.
Sh
The roughness of the inner surface of the liner after honing should be no more than Ra = 0.3 µm, and the ovality and conicality should be within 0.012-0.020 mm.
Z
The hardness of the inner surface measured with a 2018TR hardness tester should be within 40-50 HRC, except for the D-240 engine, where it is 207 HB.
X
Oning is performed in two steps:
1) preliminary - with bars with ASB diamonds with a grain size of 125/100 on a MK2 bond with a 100% concentration (abbreviated as ASB 125/100 MK2 100%); 2) final - MA bars with MK3 bond without diamonds, replaced with anti-friction filler (molybdenum disulfide) and soft abrasive.
D
To control the runout of the upper and lower seating belts relative to the inner surface of the sleeve, the KI-3340 device is used, and the runout is acceptable for all sleeves within 0.05-0.10 mm.
IN
In the boring area for automobile liners, the following technology (diamond honing) can be used: rough, semi-finish and fine honing. Rough honing is carried out using ASB 400/315 MK2 50% for gray cast iron and ASB 500/400 MK2 50% for hardened cast iron (HRC ≥ 40). Semi-finish honing is performed with ASB 160/125 MK2 100% stones, and fine honing is performed with ASM 28/20 MK3 100% stones.
The restoration of the sleeves is carried out by installing an elastic steel strip (steel U8A, U10A, 65G, lightened, cold-worked) with a thickness of 0.5-0.7 mm. A steel strip of a certain length is cut, rolled into a cylinder in a special device, then pressed into a pre-bored sleeve. The size of the sleeve bore for the tape is calculated so that after pressing, there is an allowance left for final grinding. Pressing is possible in two or three steps, depending on the length of the sleeve and the width of the tape.
U
monoblock cylinders are restored by installing a dry liner, which is made of manganese cast iron. A sleeve is pressed into the bored block with an interference fit of 0.08-0.12 mm, then it is processed again to a normal size.
R
Methods are being developed and implemented to restore the worn-out working surface of liners by adding chromium in a flowing electrolyte, thermoplastic compression using high-frequency heating and other methods.
P
When the surfaces of the holes in the main supports wear out or the block deforms, their coaxial arrangement is disrupted. The crankshaft experiences additional elastic deformation, which can lead to cracks or breakage, jamming and scuffing in the bearings. Blocks can be restored if they are worn or deviate from the alignment of the main bearings by more than 0.05-0.08 mm (for diesel blocks) or 0.02-0.03 mm (carburetor engines).
Deviation from the alignment of the main supports is checked using a pneumatic indicator installation KI-5508 for comprehensive control of blocks.
TO
The bearing supports of diesel engines such as SMD, D-50, A-41, D-37M are controlled by a pneumatic device KI-4862, and YaMZ-240B, A-01 by an optical-mechanical device KI-5506. A rolling pin with dial indicators is also used, fixed in the outer main supports of the block using stepped or conical support bushings. In the simplest case, a rolling pin with a flat is used, placed on the supports of the block. Deviation from alignment is measured with a feeler gauge between the rib and the support.
Worn surfaces of the main bearings and their disturbed alignment are eliminated in the following ways:
1) boring on special machines to an increased repair size (0.25 mm), followed by installation of liners of an increased repair size along the outer diameter; 2) applying and curing a composition based on epoxy resins filled with aluminum powder and subsequent boring to a normal size (carburetor engine blocks);
3) surfacing the surfaces of the main supports with low-carbon electrodes or nickel-based electrodes, followed by boring to a normal size and others. After boring, the main bearings in the engine blocks D-50, D-240, SMD-60, D-65 are honed using the 014-24 Remdetal installation.
ABOUT
Deviation from the perpendicularity of the location of the axis of the seating belts for cylinder liners relative to the axis of the main supports is allowed up to 0.05 mm over a length of 100 mm.
IN
Refurbished units are tested for leaks on stands (for example, Ki-5372A for diesel engines of many brands). When conducting a hydraulic test of blocks under a pressure of 0.4-0.5 MPa for 3 minutes, there should be no sweating of the seams.
P
breakouts on the walls of the water jacket or on the side wall of the crankcase that do not pass through the treated planes are sealed by placing a steel patch with epoxy on the bends.
T
Cracks in the bridges between the holes for the sleeves are eliminated by installing a reinforcing shaped insert.
AND
wear and tearing of threads in holes is eliminated by installing spring spiral inserts, threaded adapter bushings, stepped studs with oversized threads, or using anaerobic compounds “Unigerm-7”, “Unigerm-11”.
Sh
the files, screwed completely into the block, must have a normal length, with a permissible deviation from perpendicularity of no more than 0.5 mm along the entire length.
ABOUT
The deviation from the flatness of the surface of the block connected to the head is checked with a straight edge and a feeler gauge without unscrewing the pins (permissible deviation is no more than 0.15 mm). If the deviation is greater, you need to unscrew the pins and subject the plane to processing by scraping, flat grinding or milling. After this, the sleeves, which are installed in the block and pressed with a force of 9 kN, should protrude above the surface by 0.04-0.20 mm with a difference between them for one block of no more than 0.05 mm (otherwise the gaskets will burn out and water will seep through) . The protrusion of the sleeve less than 0.04 mm must be increased by placing a ring made of sheet brass under its belt.
And the worn surfaces of the grooves for rubber sealing rings are bored on a diamond boring machine and steel rings with an epoxy compound are pressed in or filled with this compound, inserting an o-ring and a sleeve pre-lubricated with grease into the block. After the composition has cured, the sleeve and rubber ring are removed, and the surface in the groove is cleaned with cutters using a special device fixed to the block.
And the worn surfaces of the holes for pushers in the block of more than 0.07 mm are expanded to an increased size.
B
locks and sleeves are repaired in specialized repair facilities. It is allowed in farm workshops to eliminate cracks in parts by installing shaped inserts, sealing with epoxy, and restoring threads in the holes of the block by installing threaded spiral inserts.
As you know, the engine cylinder block is the basis of any internal combustion engine. In fact, the block is a three-dimensional part, inside of which various components and mechanisms are located (pistons and rings, as well as CPG liners, crankshaft, crankshaft connecting rods, etc.).
Also, a cylinder head is installed on the cylinder block through a gasket, which is a “continuation” of the block. The timing belt is located in the cylinder head. At the same time, both the components inside the block and in the cylinder head are subject to significant mechanical and thermal loads during engine operation.
It is not surprising that damage to the cylinder block will not only impair performance, but will also disable the power unit. For this reason, the restoration of the unit and its repair must be carried out efficiently and in a timely manner.
[custom_ads_shortcode1]
Defect in the inner surface of the liner
When operating a vehicle on dusty roads and in industrial cities, dust particles enter the internal combustion engine cylinders through the air filter or leaky air duct connections, as well as with dirty fuel and poorly filtered engine oil.
The result is an impact on the sleeve mirror with the effect of sandpaper (scratches and nicks on the sleeve mirror). Over time, the scratches become more numerous, and then the tightness of the fit of the piston rings to the mirror wall of the liner critically decreases, which leads to a drop in compression in the cylinder.
It is possible to restore the mirror of the inner surface of the liner using the chrome plating method, and in cases of critical wear on the surface of the liner, which cannot be eliminated by this method, the damaged liner will need to be replaced.
In order to prevent abrasive from entering the internal combustion engine cylinders, the car owner must carry out maintenance in accordance with strictly defined regulations. When carrying out maintenance, you need to focus on checking the tightness of air duct connections, and also use oils and filters recommended by the manufacturer.
[custom_ads_shortcode3]
Under what symptoms should you think about crimping the cylinder head?
Even if you are not an expert in the automotive industry, you can guess from the primary signs that there is a malfunction in the engine cooling system, which may be associated with a failure of the cylinder head. These signs are:
- Constant decrease in the coolant level in the expansion tank of the engine cooling system. At the same time, there are no visible smudges or marks in the parking area.
- A characteristic white coating both on the oil dipstick and in the expansion tank. This occurs due to the engine oil mixing with the coolant to form an emulsion.
- White smoke from the exhaust pipe with a sweetish odor also indicates a malfunction in the cooling system. It manifests itself to a greater extent when the exhaust system heats up.
If any of these signs are detected, Oem-zap specialists recommend immediately contacting a technical center for a more detailed diagnosis of the cooling system and to check the cylinder head for leaks. And as practice based on many years of experience shows, a simple inspection of parts may not reveal a malfunction, which is why it is necessary to perform pressure testing of the cylinder head and remove it from the engine.
Traditional methods
So, closer to the topic. You can bore a cylinder block at home without special equipment using several traditional methods. They will require not only time, which goes without saying, but also patience.
Method 1
Although the method is “old-fashioned”, it also cannot do without a tool. A good electric drill set at low speed will work here. A worn piston with a gap in the liner (on the side) is also required. And you will also need a cylinder pin, as well as sandpaper with a different number of abrasive.
The piston in this case plays the role of the most significant element. It is the working fluid onto which the sandpaper is fixed. It is better to select an old piston that has expired, since after boring it will no longer be suitable for use.
In a car service, it is not paper that is used, but abrasive chips. Instead of a drill, as mentioned above, a special machine with a crank having the required diameter is used.
Repair process
- A hole is drilled in the middle of the piston for the cylinder pin.
- A nut is screwed onto the stud, and then the stud is inserted into the piston with its end up.
- The pin is tightened tightly.
- A cut is made on the piston with a metal hacksaw.
- The sandpaper is inserted into the resulting hole and then wrapped around the piston.
- This unique attachment is installed in the drill and tightened tightly.
- The cylinder is secured against turning.
- The drill turns on at low speed. Boring starts from top to bottom, and then from bottom to top.
Note. During this boring process, care must be taken to ensure that the skin does not come out of the piston. First, a large skin is used, then a finer one. At the final stage, grinding should be carried out with a zero.
Some experts also advise boring the cylinder block while using oil. Others do not agree with this opinion, because they believe that it bores well even dry. We are more impressed with the latter option, especially since you can feel the uniformity and smoothness with your hands if you have a certain skill.
A useful recommendation is: in order not to knock your hands off during grinding with an electric drill, it is recommended to firmly fix the cylinder, but try not to damage it in the process.
You may also find this video about honing helpful.
Method 2
In this case, a wooden mandrel will be used as the main tool. But you will have to contact a milling machine who will turn this very mandrel. The mandrel manufacturing technology is based on the following formula: if the cylinder being bored is 76, the bar mandrel should have a diameter of 74 mm. As for the length, it should be 200 mm larger than the size of the cylinder.
Preparing the fixture
- A hole is drilled in the mandrel.
- Using a hacksaw, a cut is cut along the mandrel, into which abrasive paper is inserted, as in the case described above.
Note. The approximate depth of the groove should be 10 mm. The skin, as in the first case, should be both large and small.
Let's get started
- The abrasive paper is wrapped around the mandrel.
- The skin is generously moistened with oil.
- The cylinder is bored by a mandrel. It is necessary to rotate the mandrel inside the cylinder with a large piece of sandpaper, trying to achieve free movement along the surface. Then change the paper to fine paper and continue.
Simple tips
The ideal option for boring cylinders that contain a car engine block:
The piston should sit tightly inside and not move downward due to its own weight.
The ideal option for boring cylinders that contain a motorcycle engine block:
The piston inside the cylinder should move easily, but not hang out too much, since when heated it will jam due to physical expansion.
Having learned how to carry out boring with your own hands correctly, you will no longer be concerned about the problem that arises for most owners of used cars. It is hardly possible to avoid low compression of internal combustion engines on used cars, but theoretically anyone can bore and increase compression.
Of course, as at the beginning of the article, we warn the reader. Most likely, it will not be possible to carry out boring correctly without the appropriate knowledge, but desire can overcome all doubts. Be sure to watch a few video instructions, study our recommendations and go ahead!
How to perform pressure testing of the cylinder head
Crimping of the cylinder head is carried out on a special stand equipped with all the necessary equipment, which includes:
- large bathtub with lid;
- heating elements that allow you to heat the cylinder head almost to operating temperature;
- lifting and turning mechanism of the plate to which the cylinder head is attached
- control panel with temperature and pressure sensors.
The cylinder head removed from the engine is washed from all contaminants, then fixed on a turntable, having previously plugged all channels of the cooling system with rubber plugs, which are pressed with a plexiglass plate (thick plexiglass) for better visibility of leaks. Immerse in a bath of water preheated to 60-70 degrees and leave for 30-40 minutes so that the cylinder head heats up; this is a prerequisite for more correct diagnosis, because When the part is heated, the cracks expand and it is easier for air supplied under high pressure (up to 6 atmospheres) to pass through microcracks, which may not appear on a cold part.
Based on the results of the cylinder head pressure testing, conclusions can be drawn about the advisability of further repair of the cylinder head. If air bubbles do not appear under the created conditions, then the cylinder head does not have significant cracks and its repair is advisable, and if air bubbles appear, then, to a greater extent, further repair of the cylinder head is not advisable and it will have to be replaced.
Oem-zap specialists do not recommend performing pressure testing of the cylinder head yourself at home, because the results of such tests are not always correct due to the impossibility of creating ideal operating conditions, which are created by temperature and high pressure. There is always the opportunity to bring your cylinder head to our technical center, our specialists will check it through the full technological process and offer further grinding of the cylinder head mating plane if it passes the crimp test.
Descaling
Scale in the water jacket impairs engine cooling, causing overheating and loss of power. To remove scale, all round holes in the water jacket are closed with wooden plugs, and plates with rubber gaskets are screwed to the shaped holes. Then a solution of the following composition is poured into the shirt:
- Caustic soda: 50 g.
- Kerosene: 10 g.
- Water: 1 l.
After 6-8 hours. the solution is released and the shirt is washed with water.
Blocks with aluminum heads (M-20 Pobeda, GAZ-51 cars) are washed with a 3% nm solution of hydrochloric acid, which is poured in for 30-40 minutes; After this, the solution is released and the cylinder jacket is washed with clean water.
Causes of crack formation
Welding a cast iron engine block with argon often works by sealing cracks. But they can also appear during the welding process. The main reason is a sharp drop in temperature, or a sharp increase. To avoid this, you should gradually heat up the cast iron before welding, and also do this after it, since otherwise it will cool down too quickly. Cracks may appear due to the active release of carbon from the composition when heated. To prevent this process, they use flux, which replaces the lost carbon, and also use protective gases, which will prevent the carbon from combining with oxygen.
It will be useful: Where is the oil drain plug from the engine?
Crack formation on a cast iron engine block
Voltage may also be generated due to hydrogen that has entered the seam from the atmosphere, or can get there in the electrode winding. Here you need to more carefully select the coating and protective environment to ensure reliable insulation for the metal. Insufficient carbon replenishment, which occurs with incorrectly selected flux, can also cause cracks. In this case, deformation occurs due to the unevenness of the internal structure of elements in which there is no carbon. They create deformation that leads to surface rupture or the creation of internal pores and cavities.
Modes and characteristics
There are different types and methods of metal welding. In order for the seam to be as reliable as possible, when creating it you need to be guided by proven parameters that can guarantee the successful completion of the work.
Welding process
In the previous paragraph, we discussed the preliminary preparation, and before starting welding, we need to consider the main technological points:
- Connection polarity is reverse;
- The power of the welding machine is minimal for a given electrode thickness;
- The length of one continuous weld should not exceed 30 - 50 mm;
- It is necessary to prevent overheating of the metal due to frequent breaks;
- The first and last layers of multilayers are hammered with minimal force.
The table below will help you decide on the welding mode:
We have considered the main preliminary points, but the main question remains: “How to cook cast iron using electric welding?” There are two ways: on studs or in layers. Let's look at each option separately.
Welding cast iron using an inverter using studs
After installing the studs, you can begin welding the seam. Metal is placed layer by layer around each pin to form a patch. You can prevent heating above 80 degrees by doing the work in a checkerboard pattern or alternately at opposite ends. The final point in this type of welding is the connecting seam, which connects the welded metal between the studs.
Multilayer welding
First you need to make sure that the chamfers are created correctly. Then, using a special electrode, observing the temperature regime, we begin to fuse the first layer. It is fundamental and will determine the success of further work. Each layer, while still hot, must be hammered. If there is access to the back side of the part, then after the first layer on one side you should turn the product over and fuse a similar seam on its back side and only then proceed to complete the multilayer welding of the upper and then the lower part.
Surfacing must be done from the edges, and many layers must be gradually created. The main thing is not to forget to forge each layer. If you don’t know how to check the temperature of a part, then use the random technique. It consists in forming a seam alternately at different joints. When the weld is completely ready, the surface deposited on the cast iron must be ground.
If you are faced with the need to weld cast iron and you only have an inverter, then at home you can repair cracks or apply patches to non-load-bearing structural elements. You will already have almost everything you need, such as a mask, protective gloves and clothing. You will only have to purchase special cast iron electrodes, or make them yourself. This article describes two ways to weld cast iron at home. Which one suits you best – decide for yourself. But remember - when there is a need to restore a product that requires heavy loads, it is better to turn to professionals.
Boring
Repair of cast iron engine cylinder blocks can also be carried out in this way. Boring stationary and mobile machines are used. Mobile vertical boring units are attached directly to the block during the process. In this case, to process the first and third cylinders, the machine is secured from above with bolts that are passed through the second cylinder. Before finally securing the machine, its spindle is carefully centered using cams. The cutter is adjusted to the required size using a micrometer or bore gauge.
The disadvantage of boring is the need for subsequent finishing - traces of the work of the cutting tool remain on the surface without finishing. Finishing when repairing the cylinder block of diesel engines and gasoline units is carried out in special or drilling machines. In simpler cases, you can get by with an electric drill and a finishing head with abrasive stones. During any finishing process, the cylinder being treated is generously watered with kerosene.
At the end of processing, the taper and ellipse should not be more than 0.02 mm. Diamond boring is performed with carbide cutters at low feeds and high speeds. It is better to work on special boring machines.
Stages of cylinder block repair
Below are the main stages of repairing such a unit. This is what the block looks like ready for the installation of sleeves. It can be seen that three sleeves on the left are already inserted, but the fourth is not yet:
This is what a bored cylinder looks like up close. The collar for the sleeve with the upper stop is visible from above:
Aluminum lock cylinder bored
And this is what the sleeve itself looks like with the upper stop:
This is what the sleeves look like when installed in the block:
Aluminum block sleeve inserted
Weldability of cast iron and other properties
Design and principle of operation of an internal combustion engine
Welding a cast iron engine block using a semi-automatic machine requires compliance with all the processing features of this material. Cast iron is highly saturated with carbon. But when exposed to temperature, it begins to evaporate and reacts with surrounding elements, which forms CO. When this compound gets into the metal, it leads to the appearance of cracks during welding.
Welding a cast iron block
It is also worth noting the property of rapid cooling of the metal. If we allow a sharp drop in temperature, which in this case can happen in a completely natural way, then pores and cracks may form in the metal, not to mention other deformations. During cooling, compounds of different crystal lattice structures are formed in cast iron. Accordingly, all these connections can have different volumes. This can cause internal pores to form.
It is also worth noting the low plastic properties, which leads to the appearance of overstresses in the metal, which also causes cracks to appear. This is especially true when welding thin metal with an electrode. The metal is highly brittle, which creates additional difficulties in processing and creates conditions under which cracks can form even with relatively small mechanical impacts.
