Driving a car with inoperative “dimensions” is prohibited by the rules - any traffic police officer who records such a violation has the right to issue a fine to the driver. To replace a side light bulb that has burned out and gone out, you do not need to visit a car service center - every car enthusiast can perform this operation. The following instructions describe how to make the replacement correctly.
Replacement process
The rear lights are attached to the body of a VAZ 21099, 2108 or 2109 car using 4 nuts.
To dismantle the lighting system you will need: The operating algorithm is as follows:
- To access the nuts, remove the 21099 luggage rack at the appropriate location (if the rack is installed).
- Disconnect the power plug that is attached to the board.
- Unscrew the 4 nuts using a wrench.
- When removing the last nut, hold the taillight outside to prevent it from falling and breaking.
- After removing all 4 nuts, remove the light.
When installing a new headlight on the rear of model 21099, do not forget to connect the wiring to ground, which is attached to one of the studs.
In such cases, the ride becomes quiet, calm and relaxed, but how everything changes when at least one light bulb burns out. This causes inconvenience and emergency situations, and you can also get a fine from a road service employee.
The dimensions on the VAZ 2109 do not light up, then look for the reason in the wiring. Even experienced drivers recommend carefully checking the functionality of all devices and components before leaving. The nine is no exception, in which optics can often fail for various reasons, including:
The rear lights (headlights) of the VAZ 2108, VAZ 2109, VAZ 21099 have the following bulbs: 1) Brake lights. 2) Dimensions. 3) Reverse. 4) Turns. 5) Fog lamp.
Rear light board for VAZ 2108, VAZ 2109, VAZ 21099
A wiring harness goes from the mounting block to the rear lights. The purpose of each individual wire in the harness can be understood by its color: 1) Brake lights - red 2) Dimensions - yellow 3) Reverse - green. 4) Turns - blue. 5) Fog light - orange-black.
We remove the connector from the rear light board of VAZ 2108, VAZ 2109, VAZ 21099
Naturally, you need to understand that if the car VAZ 2108, VAZ 2109, VAZ 21099 is old and there are a lot of people doing the wiring, then the color match of the wire to its purpose may be violated. That is, the red wire can be converted not to brake lights, but, for example, to dimensions. But in general this is a very important point: the developers of the VAZ 2108, VAZ 2109, VAZ 21099 specifically marked the functional purpose of the wires with a certain color to make it easier to use.
Flashlight board VAZ 2108, VAZ 2109, VAZ 21099
If some light signal in the taillight of a VAZ 2108, VAZ 2109, VAZ 21099 does not work, then before climbing into the mounting block and opening the electrical circuit, we check the following: 1) The reliability of fastening the mass of the taillight to the body of the VAZ 2108, VAZ 2109, VAZ 21099.2)
We check the reliability of fastening the wire connector to the headlight. 3) Integrity of the light bulb 4) Quality of contact between the light bulb and the flashlight board. It often happens that everything is intact, the light bulb and the mass are good, and 12 Volts come to the light bulb, but it does not light. The reason is poor contact between the light bulb and the board. In this case, you need to clean both the light bulb base and the area on the lantern with fine sandpaper.
As one smart person said: “Electrics is the science of contacts.” To disassemble the rear light of a VAZ 2108, VAZ 2109, VAZ 21099, first remove the protective plastic cover. Then disconnect the black wire of the flashlight from ground. Then we remove the connector from the flashlight board and remove the board itself with the bulbs from the headlight housing. If it is necessary to replace the headlight itself, then unscrew the remaining bolts securing the headlight to the car frame and remove it.
Flashlight housing VAZ 2108, VAZ 2109, VAZ 21099
There is one important point that many owners of VAZ 2108, VAZ 2109, VAZ 21099 do not know. This is the rear fog light. It is turned on by a button between the hazard warning button and the heated rear window. The rear fog light will only work if: 1) The ignition is turned on. 2) Low beam headlights are on. 3) The flashlight power button is pressed. The fog lamp lamp for VAZ 2108, VAZ 2109, VAZ 21099 is the only one that has a reflector inside the headlight. Thanks to this reflector, the glow of the lantern becomes brighter.
The clearance of VAZ 2108, VAZ 2109, VAZ 21099 is included
Rear fog light on VAZ 2108, VAZ 2109, VAZ 21099
Power of rear light bulbs VAZ 2108, VAZ 2109, VAZ 21099: Dimensions 5 Watt Fog light 21 Watt Reverse 21 Watt Stop light 21 Watt Turn signal 21 Watt
Reasons for frequent light bulb burnouts
The manufacturer indicates the working life of halogen and other lamps on the packaging - from 500 to 750 hours. But often elements do not fulfill the required deadline for the following reasons:
- The voltage level of the on-board electrical network does not correspond to the norm or constantly “jumps”.
- Water gets inside the headlight unit.
- In the power supply circuit of the lights, contact is lost due to oxidized terminals or broken wires.
For normal operation of lighting fixtures, a constant voltage of 12–13.5 volts is required. Exceeding the specified threshold leads to an increase in the brightness of the glow (imperceptible to the eye) and a reduction in service life. Frequent replacement of the low beam lamp is the result of constant operation at increased voltage provided by the car generator.
The reasons lie in the following malfunctions:
- problems with the electronic voltage regulator;
- drive belt slippage;
- problems with the generator.
It is quite easy to detect excess voltage - connect a voltmeter to the battery terminals, start the engine and take a measurement at idle. If the reading exceeds 13.5 volts, look for one of the following faults.
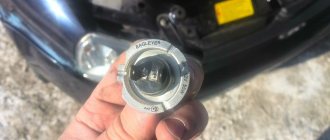
The following happened. A homemade diode size, 4-5 cm long, fell into the lantern. Those who have at least once independently changed the bulbs/diodes in the dimensions on the Accord CL7 know what a mess this is. And to get something out of a long headlight, you have to be an experienced gynecologist) ) ) )
There are some methods described on the Internet on how to get light bulbs in a similar situation, but they are all not suitable, I tried them.
Task: To get the diode without removing the headlight, much less opening it! I was thinking/reading/thinking... around 3 am an idea came to me...
You need to use a fairly flexible stick; in my case, a piece of stranded wire was ideal. A thin double-sided tape is glued to the end of the wire (very sticky, while pushing it into the hole to the diode, the tape stuck to everything it touched). At the end of the wire there is a strong synthetic thread. The process is as follows: We push the resulting fishing rod to the diode, trying not to touch it again headlight walls. When we have buried ourselves in the diode and glued it a little, we carefully rotate the wire, thereby winding the thread around the diode. It turns out that the diode is glued to the wiring and wrapped with thread. Now let's pull it all out.
Replacing Camry dimensions
Replacing a Toyota Camry's headlights, high-beam and low-beam headlight bulbs is a task that anyone with basic electrical skills can handle. If a light bulb burns out, it is quite possible to remove it and replace it with a new one yourself, having a simple set of tools at hand and knowing the peculiarities of the location of the dimensions of this foreign car. Contacting a car service center with such an insignificant problem as a burnt-out light bulb is unreasonably expensive and time-consuming. You can cope on your own and replace the dimensions of the Toyota Camry 40 and other cars of the Camry model range very quickly. You will only have to spend money on buying a new light bulb, which is not difficult to find.
Technically, replacing a Toyota Camry headlight bulb is quite simple. The most difficult thing in this task is to remove the headlight by reaching its mounts in the body. But the optics can be left in place, limiting access to the light bulb sockets from the back of the optical device. You can get to them in several ways.
Causes and actions in case of breakdown
Among the reasons for the breakdown of the rear parts of the lighting system on a VAZ 21099, 2108 or 2109, the most common are:
- Bulb burnout. It happens due to wear or power surges and is almost the most popular reason for replacing rear headlights.
- Oxidation of contacts. Occurs due to poor quality of terminal contact, electrolyte leakage, or cracks in the battery case.
- Fuse failure. This cause of failure is due to voltage surges.
- The reverse sensor is broken or its wiring is broken.
- Burnt out contacts on the headlight film.
- Lack of ground on the board.
To do this, you will most likely have to remove the trunk trim of the VAZ 2108 or 21099, which is located behind the lamp. After this, squeezing the latches (they are located on the sides), you need to take out the panel and unscrew the lamp, after pressing on it. To install a new rear lamp, reverse the process.
Replacing lamps in the rear lights of a VAZ 2109
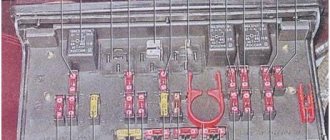
To clean the contacts from the white coating that accompanies oxidation, you need to clean them. To do this, remove the headlight unit. The ground must be returned to its place, and the nearby wiring must be tested for correct operation. Broken fuses on VAZ 2109 and 21099 are not difficult to find - their diagram is usually presented on the block cover.
When the car headlight switch stops working, you can get to it through the engine compartment or from underneath the car. You can diagnose the failure of this component of the lighting system as follows:
- start the VAZ 21099 and shift it into reverse gear;
- close the contacts. The rear lights should light up at this time;
- Use a multimeter to check if the contacts are closed when you turn on the rear headlight switch, having first removed the switch;
- make sure that the contacts are soldered securely, assemble the switch and check its operation again. If a normal short circuit is observed, replace it.
Replacing side light bulbs in pre-restyling models
To do this, you must first prepare the car as indicated above (place it on a flat surface and turn off the engine), and then begin installation work:
- Open the hood and disconnect the negative cable from the battery (to avoid a short circuit).
- Remove the plugs that go to the lamps, and then remove the element into which the plug is installed.
- Turn the light bulb clockwise 45 - 60 degrees, then remove the spare part. To remove the lamp, gently pull it towards you. The socket itself first rotates along with the light source, then it is removed.
- Install a new light bulb and carry out the reverse dismantling.
This is interesting: Design, purpose and 6 signs of a malfunction of the front wheel hub of a car
How to choose suitable replacement marker lights?
You can choose a suitable lamp both in car services and at car flea markets. At the same time, experienced drivers do not recommend purchasing cheap Chinese products, since the likelihood that they will burn out ahead of schedule is quite high
When choosing a light bulb, you need to pay attention to the following characteristics:
- Brightness. This is the most important characteristic of a light bulb, which is assessed by its luminous flux. Luminous flux is measured in lumens. For an incandescent lamp this value is approximately 50 lumens. Remember that the purpose of side lights is to inform other road users of the size of your vehicle. Light sources should not dazzle other road users, but at the same time they cannot be too dim. The upper threshold of luminous flux for side lights is 150 lumens, and the lower threshold is from 50 lumens. Traffic safety sometimes directly depends on the brightness of the side lights, since failure to inform in a timely manner that your vehicle is starting to slow down can lead to an accident.
- Design. In the design of cheap Chinese light bulbs, the base is made of plastic. In this case, there is a high risk of melting, since plastic is by no means a heat-resistant material. If the part gets very hot, the plastic begins to melt and, as a result, the light bulb fails too early. More expensive models feature high-quality plastic that is heat-resistant. With increased brightness, the incandescent lamp begins to produce heat, which heats the lampshade. Therefore, recently the most popular are baseless lamps, the contacts of which are made on the basis of a glass plate and a sand board. Incandescent lamps are also very energy-intensive. With increased electricity consumption, fuel consumption begins to increase. When choosing a light bulb, it is also worth remembering to save energy.
- Price. The side light bulb is one of those car parts that you definitely shouldn’t skimp on. By buying lamps at low prices, you run the risk of replacing such lamps too often, and in the end, such “savings” will only lead to more serious expenses. It is best to purchase lamps from trusted manufacturers such as Osram and Phillips.
This is interesting: Throttle position sensor: purpose, 2 main reasons and 6 signs of device malfunction
Selection of lighting fixtures
There are many types of light sources consisting of several elements in the automotive aftermarket.
The Renault company recommends using conventional incandescent external lamps in its Logan cars. As a rule, the power of the front elements is from 3 to 5 watts. Of course, there are craftsmen who install light sources with a power of more than 10, or even 15 Watts on their cars. Such lamps undoubtedly have a bad effect on the life of Renault Logan lighting devices.
For lovers of bright lighting solutions, manufacturers have created a special lamp with several LED sources. This solution actually has a good effect on the life of the main lighting element and does not put it at risk. The brightness of the LED lamps is quite enough to indicate the car in the dark.
There is one significant drawback, which lies in its fragility. Manufacturers are trying to increase the service life of their parts and solder in a special resistance that imitates a regular lamp. With the use of such technologies, the service life of LED elements has increased significantly.
If you have already made your choice and made a purchase, you are faced with the task of replacing old elements with new parts.
Repair
As already said, it is prohibited to drive a car in the evening or at night if the side lights are not on, so we will look for the cause and then eliminate it.
If you are sure that the paths through which electricity passes are in good condition, the first thing to do is check to see if the lamps have burned out. And if they need a replacement, do it.
For the head lamp, the replacement procedure is as follows:
- Open the hood;
- We disconnect the battery, or even better, remove it. After all, we are talking about electricity, which is unsafe;
- From the engine compartment, holding the lamp with your hand, disconnect the wires directly going to the light bulb from the block;
- Remove the rubber cover;
- We move the latch to the side, disengaging the spring from the hook;
- We take out the size bulb;
- We replace it with a new one and put everything back together.
When the replacement is made, we check whether the head lamps are on.
Light bulbs in the rear dimensions on a VAZ 2110 are installed as follows:
- We de-energize the car;
- From the trunk (open) side, remove the contact part of the rear light with lamps. To do this, you need to release the latches;
- Remove the headlight bulb and replace it with a new one.
Do not forget that you cannot touch the halogen lamp with your bare hands. Replacement must be done with gloves. The fact is that dark spots will appear where you touch the light bulb. In addition, it has been proven that such a light bulb burns out much faster.
Replacing the turn signal lamp:
1) In this case, everything is very simple, first of all, you will need to understand where this lamp is located, so that it is more clear to you, see the photo below:
Note! As you already understood, in the photo the arrow indicates only the chamber or, as it is also called, the lamp base, but the lamp itself is not visible, so in order for you to be able to see it and easily remove and change it, grab this base part with your hand and then turn it it clockwise by a small degree, and thereby remove it from there!
2) When the base together with the lamp itself is removed, grab the light bulb with your hand (Indicated by the arrow) and then slightly press on it and turn it counterclockwise and remove this lamp.
Note! When you install a new lamp, make sure that it fits into the grooves, one of them is indicated by an arrow in the photo, and when it fits in there all the way, turn it so that it locks, and after fixing, check that it doesn’t fly out of there!
Important! When you buy a new lamp for either low beam or high beam, be sure to look at the markings that are placed on the base of the bulb, because cars may have bulbs for low beam, for example H1, and for high beam, for example H4, and therefore if If you also install an H1 lamp on the high beam, then both headlight units will shine differently! (Different lamps can only be installed by the previous owner of your car, because from the factory, as mentioned a little earlier, the same H1 bulbs were installed on both the high and low beams)
By the way, before changing the lamp, check the fuse that goes to it; perhaps it has simply blown and because of this the lamp does not work!
Additional video: For more information on how to replace all lamps, see the interesting and instructive video below:
How to Choose Suitable Replacement Parking Lights
You can choose a suitable lamp both in car services and at car flea markets. At the same time, experienced drivers do not recommend purchasing cheap Chinese products, since the likelihood that they will burn out ahead of schedule is quite high.
When choosing a light bulb, you need to pay attention to the following characteristics:
- Brightness. This is the most important characteristic of a light bulb, which is assessed by its luminous flux. Luminous flux is measured in lumens. For an incandescent lamp this value is approximately 50 lumens. Remember that the purpose of side lights is to inform other road users of the size of your vehicle. Light sources should not dazzle other road users, but at the same time they cannot be too dim. The upper threshold of luminous flux for side lights is 150 lumens, and the lower threshold is from 50 lumens. Traffic safety sometimes directly depends on the brightness of the side lights, since failure to inform in a timely manner that your vehicle is starting to slow down can lead to an accident.
- Design. In the design of cheap Chinese light bulbs, the base is made of plastic. In this case, there is a high risk of melting, since plastic is by no means a heat-resistant material. If the part gets very hot, the plastic begins to melt and, as a result, the light bulb fails too early. More expensive models feature high-quality plastic that is heat-resistant. With increased brightness, the incandescent lamp begins to produce heat, which heats the lampshade. Therefore, recently the most popular are baseless lamps, the contacts of which are made on the basis of a glass plate and a sand board. Incandescent lamps are also very energy-intensive. With increased electricity consumption, fuel consumption begins to increase. When choosing a light bulb, it is also worth remembering to save energy.
- Price. The side light bulb is one of those car parts that you definitely shouldn’t skimp on. By buying lamps at low prices, you run the risk of replacing such lamps too often, and in the end, such “savings” will only lead to more serious expenses. It is best to purchase lamps from trusted manufacturers such as Osram and Phillips.
Criteria for selecting side lamps
Malfunctions of low beam lamps on Lada Kalina instructions for selecting and replacing light bulbs
To select the right lamps for side lights, consider the following parameters:
Lamp brightness. Rated by luminous flux and measured in lumens. An ordinary incandescent lamp has a luminous flux of 50 lm. Your parking lights are designed to indicate the dimensions of your vehicle. They must not blind road users. That is why the dimensions should not emit a luminous flux of more than 150 Lm. The optimal value is from 50 to 100 lm. Lamp design. Cheap Chinese lamps have a plastic base that can melt when the lamp heats up. More expensive models are equipped with a base made of heat-resistant plastic
Please note that at very high brightness, an incandescent lamp will generate heat that can melt the lampshade. There are new products in the form of lamps without bases
Their contacts are made on a glass plate of sand board. Price. Do not buy lamps that are too cheap, otherwise you will have to change them very often. Do not buy lamps from Aliexpress - you risk getting a fake that does not have current stabilization. Decent lamps are made by Phillips and Osram. Do not buy too expensive lamps: they have high brightness and a short service life.
In the VAZ 2114, as in any other car, the dimensions (another name for side lights or parking lights) are lighting fixtures that are located on the front and rear parts of the car (on the sides). They serve to indicate the dimensions of a particular vehicle in conditions of insufficient visibility. Another purpose of side lights is parking lighting.
Ensuring that the bulbs in the headlights and side lights of the car are in good working order is the direct responsibility of the driver. If the lighting fixtures in the car are faulty, then this is considered a violation for which the traffic police inspector can issue a fine. To prevent this from happening, it is necessary to periodically check the serviceability of the lamps and, if necessary, replace them with new ones.
How to change the side light bulb on a Kia Rio - selection and replacement
The method for replacing side light bulbs on a Kia Rio is simple and does not require the use of special knowledge or special skills.
How to do it
In the technical documentation for the car, replacing the parking light bulb provides the following options:
- Failed front parking light bulbs are removed from the engine compartment of the car, and:
- remove the casing from the back of the headlight;
- remove the light bulb holder located under the sockets of the low and high beam sources;
- remove the damaged one and install a new light bulb;
- the holder is placed in its regular place;
- check the side light; if the result is satisfactory, close the rear headlight casing.
- Removal and replacement of the combined lamp (brake signal and side lights) is carried out in the following sequence:
- lift the luggage compartment lid;
- lift the valve located on the trunk lining;
- turn the socket counterclockwise and remove it from the lamp housing;
- dismantle by pressing the lamp base and turning it counterclockwise;
- Having replaced, install the holder on the seat, ensuring that the shape of the combined lamp matches the grooves exactly.
For the front position lights, an incandescent or LED lamp with a W5W socket is used. The combined brake and side light lamp is marked P21/5W.
Special case of replacement
According to reviews from Kia Rio car owners, it is not always possible to remove the front side light bulb from the car's engine compartment for replacement, since it is located below the low and high beam holders, and the access hole is of insufficient size. If such a problem occurs, it is recommended to replace it by removing the headlight. For this:
- unscrew the bolt above the headlight, move two valves on the radiator side, pulling them up;
- release from the soft locking latch located at the bottom and closer to the car fender, directly during the removal process;
- pull out the side of the headlight located near the radiator a moment earlier;
- Having released the headlight, disconnect the electrical power connector;
- remove the holder and replace the light bulb.
Recommendations and tips
It is worth recalling that work related to the repair or replacement of electrical equipment requires disconnecting the power from the vehicle battery.
When working with car lamps, it is imperative to use cloth gloves. It is not advisable to touch the glass surface of light bulbs with your fingers, especially halogen ones. Minimal contamination or traces of fat will cause their rapid failure. If this cannot be avoided, you need to wipe the surface with an alcohol-containing solution and let it dry. Eliminate the possibility of mechanical impact on the light device in the form of impacts or compression. Do not use such lamps during installation even if there are no visible defects - we cannot predict their service life
To avoid damage due to negligence, it is recommended that after connecting the car to the network, immediately close the lamps in the lamps or headlights. The lamp is inserted into the socket with minimal effort; excess pressure is not allowed. Changing the horizontal position, much less using a lever, after installation in its original place is not recommended
Changing the horizontal position, much less using a lever, after installation in its original place is not recommended.
Let's sum it up
After reading the tips outlined in this article, the question “how to change the parking light on a Kia Rio” becomes irrelevant.
Instructions for replacing lamps
Inside the headlight units of different cars there are 2 types of lamps and connectors - old and new (restyling). Replacing a pre-restyling type side light bulb is performed as follows:
- Once you reach the back of the headlight, disconnect the power supply connector to the light element. There is no need to disconnect the sockets of powerful headlight lamps.
- Grasp the connector and rotate 45–60° counterclockwise. Remove the element from the slot.
- Carefully pull the light bulb out by the base without rotating it around its own axis.
- Insert the new one in its place, making sure that the contacts line up correctly.
- Connect the wires and check the functionality of the new part, then reassemble the unit in the reverse order.
Note. On different vehicle models, old-type elements can be rotated in different directions - clockwise and counterclockwise.
When installing a purchased lamp, you should not touch the base with your bare hands, as warned by the instructions included with each product. Before installation, wrap the glass flask with a soft rag or put on cloth gloves.
Updated versions of elements differ in overall dimensions and installation method. Replacing the lamp is done in the same way, only you do not need to disconnect the connectors and turn the socket - the part is removed from the socket along with the wires.
Another thing is that access to the light bulb is often limited - you cannot grasp the socket with your hand. In such cases, 2 options are practiced:
- use a special tool;
- First pull out the large headlight bulb, then take out the side light bulb.
The owners of some cars use the free space behind the headlights to install a gearbox that operates in liquefied gas engine power systems. Removing the unit to replace the lamp can be quite difficult.
Changing the light elements of the rear “dimensions” is much easier. The main work is removing the plastic and fabric trim from the luggage compartment side. The light bulbs are removed from the sockets in the manner described above.
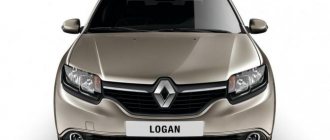
Replacing the Renault Logan side light bulb in the front and rear headlights with your own hands
16067.Mar.2015
Renault cars have won the hearts of Russians with their budget price, excellent suspension, specially designed for our roads and original engines from French manufacturers. The quality of lighting equipment is also at a high level, and replacing a marker light bulb will not be difficult.
Replacing the front marker light
All running lights on Renault are combined into a block headlight, which greatly simplifies the process of removing and installing both side and turning lamps. We recommend watching the video:
If the front lights do not light up, we recommend replacing the light bulb. To disassemble the front lamp, you will need a 10 mm socket with an extension and a screwdriver.
Sequencing
- Disconnect the negative headlight;
- We remove the front bumper and clear the approach to the body mount;
- We turn out the bolts of the headlight unit;
- Carefully disconnect the cable drive of the light corrector;
- We unscrew the three screws holding the headlight unit and tilt it to the side;
- Press the locking device and remove the cover;
- Carefully separate the wire connection block;
- Below the main lighting lamp we see the size socket. To change it, you can get to it without removing the bumper and headlight housing, but only by carefully inserting your hand between the headlight and the engine;
- On the left headlight we turn the socket clockwise, on the right - counterclockwise and remove it freely;
- Remove the lamp.
- Renault lamps have the article number W5W. We check the number and brand and put it in place.
- We put the headlight unit back together, connect the wiring block, install the light control cable and the bumper and fasten the housing.
Attention! Do not touch the lamp bulb with your hands - work with cotton gloves to avoid rapid failure of the lamp. If you are a fan of bright lighting solutions, we advise you to choose a new technology lamp made on the basis of LED elements, of which there are at least 15 pieces
They are sold in almost all auto stores, but their cost is high and ranges from 2,700 rubles. If there are no catalog options from 2012, 2013, 2014 and 2015, you can buy analogues from 2010, 2022 and 2022
If you are a fan of bright lighting solutions, we advise you to choose a new technology lamp made on the basis of LED elements, of which there are at least 15 pieces. They are sold in almost all auto stores, but their cost is high and ranges from 2,700 rubles. If there are no catalog options from 2012, 2013, 2014 and 2015, you can buy analogues from 2010, 2022 and 2017.
The headlights on all generations of Logan cars do not differ in size. On the 2006 and 2007 models, the turn signals had frosted glass, from 2008 to 2012 - ordinary transparent glass, and from 2012 to the present - an orange reflector.
Replacing the rear marker light
Sequencing:
- Disconnect the negative terminal of the battery;
- In the trunk we separate and remove the upholstery (see photo below);
- Disconnect the wiring for the rear lights;
- Using a Phillips screwdriver, unscrew the headlight mounting screws (on the Logan 2nd phase, the nuts are made of plastic);
- Pull out the rear light and remove the light panel from the latches;
- We remove the faulty light bulb from its seat by turning it and insert the new one with pressure, turning it until it stops;
- We put the panel back, return the lamp and trunk trim to their place.
Lamps used in Renault Logan/Sandero cars
Disconnect the power harness Removing the rear parking light unit This is what the location of the signals on the Logan taillight board looks like. When carrying out this work, you must be careful, as you will have to come into contact with other elements of the system. It is not recommended to touch the lamps with your fingers.
The work must be done with clean gloves. Conclusions Based on the above, we can conclude that replacing the side lamps in the front and rear headlights is quite simple, the main thing is to follow the sequence of actions. Replacing the valve stem seals Accent 16 Valve Replacement of the valve stem seals Marker lamp Renault Sandero Accent To replace the valve stem seals yourself, you will need a garage and the tools needed for repairs, and most importantly, stock up on a valve lock remover.
If the Renault Sandero marker lamp is not nearby, then contact your nearest specialist auto shop. There are several subtleties that need to be taken into account when replacing. Replacing the Golf Clutch Cable Replacing the clutch cable Fig. Removing the power supply from the turn signal socket on Renault Sandero I Now let's move on to replacing the front turn signal lamps. In both generations of Renault Sandero they are located in the headlights.
Let's start with the first generation.
We feel for the turn signal lamp socket and, having released the latch, remove the power supply from it. Turn the socket 45 degrees counterclockwise for the left headlight - clockwise and remove it together with the lamp.
We remove the burnt-out device by pressing on it and turning it 45 degrees counterclockwise, and install a new one in its place. We install the cartridge and connect the power supply to it.
Replacing the Renault Sandero Sidelight Bulb
Removing the socket and replacing the turn signal lamp The turn signal lamp hatch For the second generation Renault Sandero, the algorithm is almost the same, but the turn signal lamp is located in the hatch, which I marked with an arrow. We remove the cover from the hatch, remove the socket by turning it counterclockwise, change the lamp in it, and assemble it in the reverse order. Removing the side turn signal lamp for a Renault Sandero All that remains is to change the bulbs in the side marker lamps of the Renault Sandero turn signals.
Everything is much simpler here. We take a plastic plate, I took a telephone card and insert it into the gap between the lamp and the body, pressing the latch, which I marked with a green arrow in the photo on the right.
Replacing the parking light bulb in Renault Logan
Replacing the front light bulb on a Renault Sandero Stepway 2012 After this, the light will bounce off. Replacing the Renault Sandero side repeater side turn signal lamp with a Renault Sandero We still have the same familiar cartridge in front of us. We remove it by turning it counterclockwise and change the light bulb by simply pulling it out and sticking it in.
Bulbs installed in Renault Sandero recommended by the manufacturer
We install the cartridge in place by engaging the front latch first, lean the flashlight against the standard hole and press it until the rear latch engages.
Sometimes the failure of car lighting devices does not occur due to burnout of the lamps, and you need to be prepared for this. Below I will list problems that can cause failure of certain lamps, and briefly describe methods for finding and eliminating them: The fuse has blown. This can happen during voltage surges in the on-board network; poor contact at the terminal of the battery, generator or any powerful consumer when the engine is running, and also if the fuse itself is of poor quality or has the wrong rating.
The problem can be solved quite simply - check the quality of the Renault Sandero power side lamp and change the fuse. I will describe below where they are located and what they are responsible for.
The connecting blocks have oxidized. The malfunction is detected by disconnecting the pads and visual inspection. If there is a white or red coating on the contacts, they need to be cleaned. Short circuit of the power wire to the body. In this case, as a rule, the corresponding fuse burns out.
We install a new one of the same value. If it burns out immediately, then the reason is a short circuit.
It is revealed by visual inspection of the power harnesses
How to replace a low beam bulb in a Renault Sandero
Particular attention should be paid to the places where the wires pass through sharp corners and edges of the body, as well as through the Renault Sandero marker lamp in
It can be repaired using electrical tape and a PVC tube, cut lengthwise and placed over the damaged area.
Let's sum it up
On some modern premium cars, it is not possible to even change a light bulb yourself. Whether this is good or bad, we cannot say for sure. But on budget models this option is available. Moreover, it is advisable to carry out the replacement yourself, because there is nothing complicated or impossible here.
Visiting a service station to replace a marker lamp is not the best solution. This way you will waste much more money and precious time. And when you replace it yourself, you will gain valuable experience that will be useful in the future. It is recommended to take a burnt-out lamp to a car dealership and buy a similar one. You shouldn’t chase more powerful lighting devices, they usually only bring problems. On some brands of cars, like Renault Logan, replacing a lamp is more difficult than on others. But nothing is impossible, so it’s definitely worth addressing this issue.
Review of Chinese diodes
Many Chinese-made automobile parts enter the domestic market. Each modification is assigned its own brand, but this does not affect their performance at all. We offer to compare several types of w5w led in w5w dimensions.
Car parking lights w5w led
Thus, one can understand how large the differences are between the technical characteristics specified in the operating instructions and during use.
| Name | Technical features | Price, rub./piece | Conclusion |
| SMD3528 | Consists of 4 pieces, color Tc – 5,000K. The power indicator does not exceed 0.5W. It has built-in lenses, thanks to which the light is directed only forward, without illuminating the reflector. | 90 | An outdated option, preference should be given to more modern models. |
| SMD5050 | The set includes 5 pieces. Maximum color tС -6,000K. The manufacturer guarantees a power of 1W. However, they do not have a high level of brightness or a long service life. | 130 | Has average quality performance. For this price you can purchase newer modifications. |
| SMD7014 | 20 diodes with color Tc – 6,000K, power 2.5W. Guaranteed service life – 100,000 hours. | 170 | The product produces quite bright light. Recommended for installation. |
| SMD3020 | 68 units with a color temperature of 6,000-6,500K, with white-blue light. Lighting equipment for replacing front side marker light bulbs with a large number of diodes. | 200 | 68 low-power diodes are equal in performance to 8 high-power ones. This is most likely a marketing ploy. |
Device breakdowns
According to the traffic regulations (Chapter 19), it is prohibited to use a vehicle with damaged external lighting devices. It is also prohibited to drive a car at night with the headlights and sidelights turned off. If at least one device malfunctions, there is a high probability of receiving a fine, justified by the use of a car with breakdowns.
Like any other equipment, sidelights can fail. Novice drivers often wonder how to replace the side light bulb. The process is quite simple. To do this, you need to open the car hood, remove the cover from the inside of the lighting equipment, remove the base, and replace the lamp.
VIDEO: How to change the front side lights of a car
No less rare are cases when, when replacing a halogen part with an LED element, the control panel may display a malfunction of the sidelights. This is not scary, since the on-board computer is designed for high power of luminous components, and diodes consume significantly less watts, so the control panel simply does not see them. However, experts recommend not changing the classification of the source, since LED lights are not suitable for all vehicles.
Very often, drivers simply forget to turn off the sidelights, which leads to a rapid discharge of the battery. Some device manufacturers have been able to solve the current problem: when the dimensions are functioning and the door is open, the vehicle emits an audible signal, reminding the driver of a forgotten task. Also, new modifications of cars have already been “trained” to independently control the operation of the lighting device.
Often the installation has a long service life, but if a malfunction is detected or the need for urgent repairs arises, this procedure will not take much time.
VIDEO: Replacing the brake light bulb
How to replace side light bulbs on Renault Logan?
Mnemonics is one of the most important functional systems of Renault Logan. The dimensional signal lighting plays a particularly significant role. Side lights help neighboring vehicles maneuver carefully next to your car.
If there are no dimensions, then other road users may not calculate the size of the vehicle and ram the edge of the car. If the signal lights begin to malfunction, then the side light bulbs are replaced.
This procedure is simple and will not take much of your time and effort.
What do you need to repair Renault Logan yourself?
- Medical gloves (wear when handling new light bulbs)
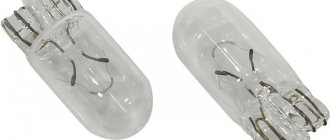
- Side light bulbs W5W (4 pcs) (as in the photo)
- Phillips head screwdriver (for removing rear markers)
Please note that if you handle the glass of the lamp with greasy or dirty fingers, the lighting will fail 5-10 times faster than the stated service life. Therefore, we take the lamps out of the packages and install them strictly wearing medical gloves.
Now we move on to our Renault Logan, replacing the lamp is carried out from the front side, and then from the back.
Related material: How to check the diode bridge of a generator on a VAZ. Multiple verification methods
Replacing front side lights
- Disconnect the battery terminal
- We reach into the headlight unit with our hand from inside the hood and try to feel the socket with the side light bulb (it is located immediately under the low/high beam)
- Unscrew the cartridge counterclockwise. To do this, you need to rotate the cartridge 90°
- We pull out the burnt out light bulb, put on gloves and take out a new light bulb from the packaging and insert it in place of the worn one.
It is highly desirable that the light bulb in Logan be replaced in the front headlight and on the back side.
By the way, here is the video instruction:
Replacing rear side lights
- Disconnect the terminal blocks on the battery
- Unfold the trunk trim (in the area of the headlights)
Unplug the headlight power connector
Unscrew the upper and lower fasteners with a screwdriver
Please note that when replacing the side light bulbs on a Logan II (2016 model), instead of self-tapping screws, plastic clips are installed; they need to be unscrewed by hand. Remove the headlight unit
- We replace a burnt out light bulb. To do this, you need to put a little pressure on the light bulb and turn it slightly. We take out the worn lamp and insert a new one (pressed and turned)
- Putting the headlight in place
- When servicing Renault Logan, lamp replacement should be carried out immediately from both sides
Check out the video tutorial on how to replace a rear light bulb:
Related material: How to replace the air filter on a Lada Lagrus
Light Source Recommendations
Some experts recommend using a diode analogue instead of the classic W5W light bulb. There are side light bulbs with 13 diodes. This is an energy efficient lighting option.
These two types of light bulbs are approximately equivalent in cost, but diode light is stronger and uses slightly less electricity.
I hope it has become clear to you how to replace a light bulb in Logan in the front headlight and on the rear side.
What lamps are in the dimensions of the VAZ 2114
The standard equipment of VAZ 2114 cars includes installation of the following lamps in the dimensions and front/rear headlights:
- Front dimensions – W5W;
- Stop lights/side lights – P21/5W.
Recently, users are increasingly replacing standard light bulbs in the dimensions of the VAZ 2114 with LED ones, since they have a much longer resource, consume less energy and shine with a beautiful color. In order for the diodes to produce spectacular side lights with a bluish tint, weak 1-5 diode lamps are not suitable. It is better to use 12-15 diodes.
They will give a bright white glow in the daytime, and in the dark this glow will be blue-white. It is advisable to replace all side lights, or at least the front or rear lights on both sides, with such lamps at the same time. In this case, the car looks organic, and the difference in the shades of the glow of the dimensions will not mislead other road users.