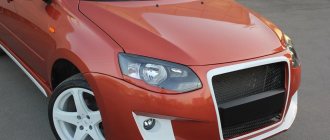
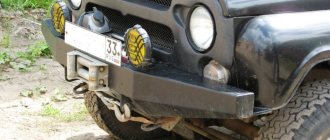
Mounting the rear bumper VAZ 21213
The durability of Niva bumpers will be the envy of many similar cars. But, unfortunately, as a result of a strong blow, even such a durable structure can be replaced.
In order to remove the rear bumper on a Niva, you need the following tool:
- Head 22
- Strong and long collar
- Extension
- Ratchet
You will need to remove it completely with the fasteners, since I personally was not able to unscrew it from them. Because it is impossible to reach from below with a long wrench, and with a short wrench it is impossible to unscrew such large nuts. Therefore, it is easier to remove it with the mounting brackets - that is, unscrew one bolt on each side where it is attached to the side members.
So, first of all, we spray grease on the bolts, since they are completely soured.
We wait a few minutes and, using a powerful and long lever, unscrew the bolts.
If the connections are a little loose, you can use a ratchet handle to do this much faster:
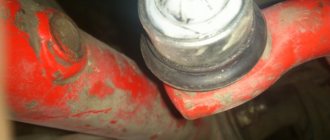
When the bolts on both sides are removed, the bumper no longer holds anything and you can try to pull it out. To do this, we take it seriously and try to remove it with brackets from the holes in the body on each side:
With the rear bumper removed from the vehicle, you can now detach it from its brackets. Since there are no other obstacles and access to the bolts and nuts is free, this can be done very quickly. Again, I recommend spraying it with WD or a similar lubricant first, since these connections will rust completely!
Installation or replacement with a new one is carried out in the reverse order of removal. The price of a new rear bumper assembly for a Niva is approximately 1,200 rubles, including the linings. And the brackets are sold separately, and they cost around 150 rubles.
CHEVROLET NIVA engine cooling radiator replacement (with air conditioning)
In this lesson we will repair a stock bumper
from
Chevrolet Niva
we produce flat electrodes BAMPERUS. material .
5. Open the hood. Remove the radiator trim. It is supported by four screws. Here you will need a screwdriver. We work slowly so that the screwdriver does not slip and damage the radiator.
6. We disconnect the terminal block of the front wiring harness and thereby turn off the fog lights.
7. Remove the headlights. Use a Phillips screwdriver to loosen the front and rear screws securing the headlights. Remove the headlight trim. Be careful not to catch the front optics with the screwdriver.
8. There are bolts at the bottom of the bumper, but to get to them you need to remove the headlight trim covers (also called "eyelashes"). Remove the decorative headlight cover (eyelashes under the headlights) to the right and left (it is held in place by double-sided tape). simply lift the "G" knife, curved at the top. Legoneko cuts the tape that holds the eyelashes. You can now remove the latch from the latches and access the two screws under the headlight (these hold the bumper in place). Unscrew them with a key.
9. Fog lights should be removed from the coupling using a bundle. This will make it easier to further dismantle the bumper.
10. Using a 10 wrench, loosen the top bolts of the bumper cover.
11. We are removing license plates. Under them there are 2 screws that should now be unscrewed.
12. Loosen the side fasteners (2 bolts) at the bottom of the car and remove the bumper.
13. Now unscrew 1 screw and 4 nuts from the side securing the beam to the body.
14. We remove the beam.
Reassemble or replace the bumper with a new one in the reverse order.
Subscribe to our feeds on , and : all the most interesting automotive events in one place.
Removal and installation technology
Before starting work, it is very advisable to spray all threaded connections with WD 40. This should eliminate problems with soured bolts. If the car has rear fender liners and mudguards, they must be removed first. Having done this, you can begin to unscrew the screws securing it to the car body. In addition to these screws, which are usually located at the bottom, as a rule, there are also upper rear bumper mounting bolts. They may be covered by the trunk sealing rubber. We lift it and unscrew these bolts. In addition, there should be lower bolts. They can usually be located on the underside of the car. You should bend down and feel them with your hand first. If possible, it is better to drive the car onto an overpass or pit. Then these bolts can be seen. We turn them away too.
Now only the bumper mounting bracket prevents removal. More precisely, brackets. Carefully remove the part from engagement with them. We take it by one end and slowly pull it towards ourselves. From this, the end should move slightly to the side. We do the same on the other side. As a rule, there are no problems with this. After completing this procedure, you can remove the bumper, since nothing should hold it anymore. We pull the part towards us, gently rocking it from side to side.
When the bumper is removed, its plastic reinforcement becomes accessible, which is attached to the car. If replacing the bumper became necessary after it was damaged in an accident, then it is likely that this amplifier was also damaged. In this case, it will also have to be removed and replaced with a new one. It is attached to the body with bolts that are visible and accessible. As a rule, there are only three of them. One in the center, and two more on the sides. We turn them away. Then we pull the amplifier towards us and remove it from the car. Installation of parts occurs in reverse order.
As can be seen from the above, replacing a bumper does not require special knowledge and skills, so even those who will be doing it for the first time should not worry. Almost nothing can be damaged or even broken. This takes little time, so there is no need to contact a car service center for help. You can also save money.
Removing the rear bumper
Removing the rear bumper is also quite easy. Before starting work, you need to gain access to the fasteners. The easiest way to do this is in a sedan car. You just need to remove the carpet from the trunk, and access is open. Things are somewhat more complicated with a “station wagon”; in this case, sometimes you have to remove the entire rear trim, and remove the side trim from its mounts and move it to the side. Next, you can begin removing the bumper fasteners.
- We find the fixing bolts, insert a socket wrench with a 5-6 cm extension and unscrew all the fasteners one by one.
- We disconnect the clamps connecting the rear bumper and fender liners, which are located on both sides. Usually these are self-tapping bolts.
- We press on the element until it separates from the brackets located on the body, and carefully remove it, while lifting it.
The process of removing both elements is not labor-intensive, and even a beginner can do it. Now the protection element can be replaced with a new one or the planned work can be carried out and the dismantled bumpers can be installed in their original places
The installation of these protective elements must be carried out carefully and slowly, otherwise you risk damaging the wings
If you are an inexperienced motorist and are afraid of doing something wrong, you can always enlist the help of more experienced friends. Everything is not as complicated as it seems at first glance.
Reinstallation
Installing the rear bumper is done in the reverse order. Here it is also worth using the services of an assistant, since the rear bumper is also partially attached to plastic latches. In addition, during such reassembly, it is necessary to change gaskets, washers and other consumables in order to replace worn out accessories with new ones. Also be sure to thoroughly clean the damper mounting points from dirt and rust.
Dent removal algorithm
Repairing a dent on a plastic bumper is carried out in accordance with the following algorithm:
the part is dismantled in order to have equal access to both its outer and inner surfaces; The dent area is thoroughly washed and dried, making sure that its entire surface is dry and clean on both sides. Traces of rust, dirt, and fungus that could interfere with the normal course of the restoration process are strictly excluded; After preliminary preparation, it is necessary to level the bumper with a hairdryer, gradually warming it up
The entire repaired area must be uniformly heated to a temperature at which the plastic bumper softens, but there is no need to bring it to the melting point and you should press on it carefully during the work process. If this rule is not followed, the bumper will have to be repainted; warming up the product with a hairdryer, or pouring hot water on it, pull out the dent with gradual circular movements, pressing on it from the side
It would be great if this type of dent straightening is done using a blunt metal object. After warming up the bumper, you should wait a few minutes before straightening the dent, since under the influence of high temperatures, it can begin to straighten itself, returning to its previous state; after the part has taken on the old or received a new shape, and the dent has been eliminated, the bumper needs to be cooled at the site of damage using a wet rag, as well as a can of compressed air.
Separately, it is worth noting that in the manuals devoted to the topic: how to remove a dent on a bumper, it is specifically stated that some types of plastics have “shape memory.” It lies in the fact that when repairs are carried out a relatively short time after the bumper has received damage, it can return to its previous shape somewhere in 10-15 minutes after the end of heating the product. If the bumper is cooled in time, it will be fixed in a new state and will never return to its previous state. As for putting it back in place, this can only be done when the damper has completely cooled down and is not afraid of serious mechanical impacts.
Creating the Right Drawing
The next stage of work is to create a drawing of a power bumper for the Niva 2121. It is imperative to remember that precise manufacturing according to the drawing will lead to a high-quality result.
You can create a drawing of a power bumper for a Niva in several ways:
- Pay specialists. The best option for a person who has no experience in working with auto structures and has never made drawings.
- Draw a drawing yourself. To do this, preliminary clear measurements should be taken.
- Download a ready-made drawing on the Internet for the VAZ 2121, but it is not a fact that you will be completely satisfied with its details.
- Use Internet programs such as “AutoCad”, “Katina” and “Compass”.
Then you can start preparing the car.
Letter of the law
Just recently, car owners were shocked by the fact that in Russia the government banned the use
metal kenguryatniks. This is what beginners call literally everything that protrudes from the front of the car and is made of metal.
But remember that there is nothing in common between a bumper and a power bumper. These are different concepts with their own nuances. Regarding legislation, there is no clear law that would prohibit you from putting a body kit on your car. But if you want to make such a change to the design, you will have to take care of the corresponding entry in the PTS. It's not that difficult, don't worry.
Just recently, car owners were shocked by the fact that in Russia the government banned the use
How to Install an Urban Bumper on a Regular Niva
We drove this car from Tolyatti to Naberezhnye Chelny, returned and drove with it to another city and country for another week. The latest new product from AVTOVAZ left us with a somewhat nostalgic, but overall very strange impression.
Could you tell me how I worked at VAZ RAM in the second half of the 1990s and assembled the same cars, VAZ-2131, albeit without plastic bumpers and city pillars in the back door? How then was this car perceived as some logical continuation of the line, despite the fact that the bodies were manually moved by mechanics, and the doors on these bodies were tapped? Or maybe to remind you of the “almost new city for Niva” mood that appeared in public a couple of years ago after the first presentations of Future Urban. all these stories about electronically controlled handouts, no lowering, new wheels, lowered suspension and, what the hell, a joke of a new engine?
Or, for starters, confess your love for Niva as a phenomenon in the domestic auto industry? With this sauce, I could drag you into the story of how the Niva became the first car for me that my dad allowed me to drive on my own, that is, without holding me on his lap or even wooing me from the passenger seat. Instead, my little brother sat next to me, screaming with delight as we cruised the white Niva through the snowy parking lot. And dad just stood at its edge and smoked thoughtfully. I have no idea why he did it then. we were very small and stupid, we could easily kill or injure ourselves, our own, and the state machine. but I am extremely grateful to him for this act. Seriously, I can tell this story very emotionally and maybe even squeeze a few milligrams of fluid out of you. I am confident that I can qualify for the grand prize for this basket of the International Writing Competition if the staff were qualified to participate.
But what if I list all my adventures in a Lada 4x4, tell you about all the cases when the car surprised, delighted and helped me and my colleagues during various test drives and runs? How did she always end up being the way even cynics in love fell in love with her when she made her way where other SUVs were passing? I will give you a bunch of links to early publications, so that the reader is convinced that this car is familiar to the author firsthand and that he is not going to dress and groan the car, but right now he will conduct a thorough and objective test drive, identifying all the pros and cons, ranking everything has its place on regular shelves: design, ergonomics, dynamics, handling, maneuverability.
But maybe I'd rather tell you about how a week ago I was driving a Lada 4x4 Urban 5d at about 90 km/h. It was a two-lane detour in each direction. There was quite a lot of traffic around me. The townspeople were in a hurry to flee the city. hmm. Citizens hastened to flee the city. Suddenly a downpour hit us. the whole crowd we passed under a huge cloud of incontinence.
Source
Post Views: 2
The process of making a new body kit
Key points on how to make a bumper for a Niva and Niva Chevrolet with your own hands:
- Strengthening the spar. Before installing the frame on the car, we advise you to study the endurance of the car's side members. You definitely can't go wrong if you enhance the rigidity of the structure with metal plates. They need to be welded onto the protruding parts of the side members. Before installation, it is also advisable to coat the plates with an anti-corrosion compound. Pre-identified mounting points in the standard bumper will help you install the power bumper correctly.
- Cut the metal. It is best to do it in the simplest way - attach the layout details to the metal and outline them with a marker. Using a grinder, cut out the parts and sand the edges with a sander. To ensure that the metal is reliable and welded efficiently, use sheets with a thickness of 5 mm or more. If you use pipes, buy them with a diameter of 50-60 mm.
Assembling the power bumper frame for Niva
Below we describe the process of manufacturing the base for the winch on the Chevrolet Niva:
- It is necessary to disassemble the front part of the car and remove everything that may interfere with the production of a new body kit, but the main thing is not to overdo it. Step one: dismantled the “face” of the car
- Next, it is necessary to strengthen the front side members, on which the new bumper will be mounted. For this purpose, special inserts are made that repeat the shape of the lounge. Now we need to strengthen the front side members.
- The next step will be the manufacture of side linings for the Chevrolet Niva side members, which are attached from the outside. It is necessary to mark and drill mounting holes in them. Next, the manufacture of side linings is required
- After preparing all the elements, you can carry out the initial assembly by installing amplifiers and linings on the side members. We install the inserts and screw on the outer covers.
- Next, a cross member is made between the linings, which is secured by welding. We make a cross member and weld it.
- After this, you need to think about where to install the winch on the Chevrolet Niva. To do this, it is recommended to have a traction mechanism available, from the base of which you will need to remove the template. We weld an additional mount for the winch.
- After taking the dimensions, you need to weld the platform. To install and attach the winch to the finished base, you need to drill holes in it for fixing with M12 bolts.
We attach a new body kit to the car and install the winch in the designated place. The manufacture of the base on which the winch will be installed is completed. All welds are removed from slag, and the entire structure is covered with anti-corrosion and primer. When the painted surface has dried, it is necessary to assemble everything for the further manufacture of the Chevrolet Niva bumper itself:
- First, you need to think about attaching the power body kit to the car frame. You can use a square channel that will be attached to pre-made amplifiers, taking into account the bending angle of the bumper.
- A pre-cut square pipe is welded to the finished fasteners. It is necessary to observe all the symmetry of this process, because if the size of the central and curved parts, as well as the bending angles, are different, the bumper will turn out to be beveled.
- Next, the same square pipe will be used to shape the new Chevrolet Niva bumper. All seams must be thoroughly welded, removed from slag and cleaned with a grinder.
- The guide jaws for the winch are installed, places for the hi-jack are cut out, and the installation location for the towing clamps is provided.
After the power bumper has been manufactured and installed, it is recommended to test it, since the entire structure may need to be strengthened.
Disadvantages of Chevrolet Niva
Installing a new bumper on a Chevrolet Niva car is entirely your decision, just like making it yourself or buying it at a car store. The main thing in this matter is to determine your capabilities, namely, the ability to work with metal and welding. This is the main part of the work you do.
Bumper manufacturing process
When starting to make their own bumper, many people worry about how to strengthen the bumper on the Niva.
Key points on how to make a bumper for a Niva and Niva Chevrolet with your own hands:
- Strengthening the spar. Before installing the frame on the car, we advise you to study the endurance of the car's side members. You definitely can't go wrong if you enhance the rigidity of the structure with metal plates. They need to be welded onto the protruding parts of the side members. Before installation, it is also advisable to coat the plates with an anti-corrosion compound. Pre-identified mounting points in the standard bumper will help you install the power bumper correctly.
- Cut the metal. It is best to do it in the simplest way - attach the layout details to the metal and outline them with a marker. Using a grinder, cut out the parts and sand the edges with a sander. To ensure that the metal is reliable and welded efficiently, use sheets with a thickness of 5 mm or more. If you use pipes, buy them with a diameter of 50-60 mm.
Assembling the power bumper frame for Niva
Self-production of thresholds
For some reason, store-bought products may not suit car enthusiasts, so some car owners make them themselves. To do this, take two tubes with the diameter you need; for greater reliability, a special insert is made on them, which can protect the driver from slipping during rain or snow. They are secured using a step and bolts, and the step itself is connected to the threshold by welding. As you can see, you can make thresholds for a Chevrolet Niva with your own hands without any problems.
For additional protection of the thresholds, as well as to give them a better design, special linings are installed, which come in several types:
- Plastic. This type is the most common. Their main advantage is low price, quality and aesthetics.
- Chrome plated. They are more reliable and attractive; when installing them, you can be sure of their durability.
- Decorative. As a rule, they are made of fiberglass and are very popular. Quite high quality products that are quite reasonably priced.
- With backlight.
To install door sill covers on a Niva Chevrolet, you need to study the instructions that come with them, then degrease the surface with acetone and attach the cover.
To summarize, we can conclude that there are a large number of accessories that can be used to further protect the car body. Since the choice is quite large, when choosing, you can rely on your personal preferences and financial capabilities.
Preparatory stage
The power bumper "Chevrolet Niva" and "Niva" can be bought almost everywhere, but you can also make it yourself. Personal production has its advantage - independent choice of material for the buffer, as well as the absence of overpayment for the manufacturer's brand when purchasing.
Also interesting: Niva tuning for off-road use from a professional
Before actually making a car buffer, be sure to answer the question of why exactly you need this design. This will allow you to think through all the necessary details of future work.
You can make a power bumper for Niva yourself
A do-it-yourself power bumper should contain:
- mounting location for the winch;
- "wind cutters";
- place for mounting license plates and headlights.
Restyled Niva-2009
The launch of the first Chevrolet Niva model occurred in 2002. Until 2009, about 300,000 cars rolled off the assembly line. Market analysis showed that the product of the united company “GM-AvtoVAZ” won the hearts of Russian consumers, but it was impossible to stop there. Although the “experience” of the new Niva was practically insignificant compared to the number of years that representatives of the classic family lasted in production. The company's management decides to modernize the model by changing the interior. They decided to leave the technical part without any major changes.
At the end of 2008, the GM-AvtoVAZ company submitted an order to the Bertone design studio. The performers had specific tasks:
- Create a modern design that matches the Chevrolet style, while minimizing financial costs.
- While maintaining the geometry of the body, emphasize the kinetic characteristics of the car. Modernize the interior.
- The headlights, taillights, and radiator grille have undergone changes. But the Chevrolet Niva bumpers played a key role in finding the style.
Required set of tools
- Sheet metal 3 mm. (dimensions depend on the chosen bumper shape and Niva model);
- Cardboard (will be used to make a template);
- A grinder saw with a sufficient supply of discs;
- Welding apparatus;
Also interesting: Where is the paint number on a Chevrolet Niva? Also interesting: Chevrolet Niva hubs: front bearing, advantages of non-adjustable Iveko
You can replace the metal with a 150 mm profile pipe. width with thickness 3-4 mm. It's a matter of appearance and personal preference. In addition to everything you will need:
- Scotch;
- Roulette;
- Scissors;
- Marker;
Such necessary tools can be found in any home, so there is no need to list everything in detail.
How to prepare a bumper before painting
In order for the part to be perfectly painted and look like new, it is not enough to select the paint according to the color scheme and paint the element. The outcome will depend on how the part was prepared before painting.
How to prepare a bumper for repair and subsequent painting
Dismantling and washing of the bumper
The first stage is dismantling. To avoid contaminating the tools with accumulated dirt on the bumper, the element must be washed with detergents and solvent.
Removing previous coverage
This procedure is carried out in two stages: initially it is necessary to remove large parts of the coating, the separation of which can be done without the use of complex tools, then rough cleaning is performed using special equipment - an orbital sander. When the paintwork is removed, all corners, steps and burrs on the bumper are smoothed out.
All faults and defects are welded, then the seams are covered with putty instead of fiberglass. Dents and irregularities are straightened by heating and treated with a simple finishing putty. When everything is dry, the putty is sanded. When this stage is completed and all problems have been eliminated, the element is ground with P220 abrasive.
Degreasing and cleaning
Before you start priming the surface, it must be cleaned of dirt and dust that has accumulated after puttying and sanding. Next, it’s worth degreasing and treating with anti-silicone.
Applying primer
After cleaning and degreasing, two coats of primer are applied to the bumper. Then coat with a layer of 2-component acrylic primer. A new layer is applied only when the previous one has dried and has a matte appearance. Finally, a final liquid coat of primer is applied to the surface of the bumper.
When all layers of primer have been applied, the bumper is dried (naturally or accelerated).
Final sanding and cleaning
The bumper is dry, which means you can start sanding it with an abrasive that has a fine grain. It is used to smooth out minor defects, relief after rough grinding and many other errors.
Then the bumper is blown and its surface is degreased. With new elements they do the same thing, but do not remove the old coating and do not resort to repairs.
Bumper painting
Before applying the paint (base/paint), you need to thoroughly wipe the surface to be painted with a sticky cloth. So, after such a maneuver you can achieve a perfectly clean surface for painting the bumper.
Next, you need to apply about 2-3 layers of paint to the surface of the bumper with intermediate drying of 5-10 minutes. In case there are stuck particles (debris) on the painted surface from somewhere, you should wait until the paint dries (this is about 20-25 minutes), and boldly use a special “interlayer” napkin to remove debris from the painted surface . But here you should act extremely carefully and not go too far with the force of wiping, so as not to tear off the painted layer.
The final steps of painting are pouring two layers of varnish onto the painted surface of the bumper with interval drying. If you get drips from very liquid varnish, then you need to dry it to the maximum, grind and polish the painted surface of the bumper. The average price of painting with straightening will cost from $50, depending on the car, and can reach up to $1000 per procedure.
Video on how to properly paint a bumper:
How to remove the rear bumper yourself
The durability of Niva bumpers will be the envy of many similar cars. But, unfortunately, as a result of a strong blow, even such a durable structure can be replaced.
In order to remove the rear bumper on a Niva, you need the following tool:
- Head 22
- Strong and long collar
- Extension
- Ratchet
You will need to remove it completely with the fasteners, since I personally was not able to unscrew it from them. Because it is impossible to reach from below with a long wrench, and with a short wrench it is impossible to unscrew such large nuts. Therefore, it is easier to remove it with the mounting brackets - that is, unscrew one bolt on each side where it is attached to the side members.
So, first of all, we spray grease on the bolts, since they are completely soured.
We wait a few minutes and, using a powerful and long lever, unscrew the bolts.
If the connections are a little loose, you can use a ratchet handle to do this much faster:
When the bolts on both sides are removed, the bumper no longer holds anything and you can try to pull it out. To do this, we take it seriously and try to remove it with brackets from the holes in the body on each side:
With the rear bumper removed from the vehicle, you can now detach it from its brackets. Since there are no other obstacles and access to the bolts and nuts is free, this can be done very quickly. Again, I recommend spraying it with WD or a similar lubricant first, since these connections will rust completely!
Installation or replacement with a new one is carried out in the reverse order of removal. The price of a new rear bumper assembly for a Niva is approximately 1,200 rubles, including the linings. And the brackets are sold separately, and they cost around 150 rubles.
voice
Article rating
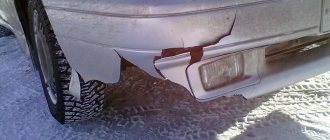
What to do if fasteners are broken
Modern bumpers are equipped with parts made of plastic; they are the ones that most often break during various repair work, as well as in accidents. In the case where the fastening elements are broken, it is absolutely not necessary to buy a new damper; it is enough to repair them yourself.
When you have purchased new plastic latches, all you need to do is install them on the dismantled bumper. To do this, you first need to install a new ear of such a fastening. This element must be glued to the surface of the damper, then secured with self-tapping screws and then checked for reliability of the entire connection. In addition, fastening the shock-absorbing device latch on the inner surface can also be done using rivets.
In the same case, when you could not find a suitable set of new latches, you will have to resort to handicraft production of such parts. Such a move is justified only in rare cases, since it is associated with a violation of the integrity of the damper, which can lead, in the future, to its rapid destruction. From a technical point of view, such a repair consists of cutting a rectangle of the required size from a sheet of metal. A hole is drilled in it for the mounting bolts that will now hold the bumper.
This is a barbaric method, so it is better to try to select standard fasteners in the kit. Such mounts do not have to be produced for a specific model; installation of suitable products from other cars is quite acceptable. This procedure ends with the installation of the bumpers in their original places.
Despite the fact that the car bumper mounts are made of fragile plastic, if they are properly dismantled and installed, they can be prevented from being damaged. In the same case, when this does happen, you can easily install new ones in their place. Thus, this element of the body structure will be restored and can serve you for a long time.
Step-by-step instructions for removing the bumper on a Chevrolet Niva
The bumper of any car sometimes has to be dismantled. This circumstance is due to the fact that this structural element is subject to frequent damage during an accident. In addition, performing various types of repair work also requires a similar procedure, since it creates obstacles to access to various components and assemblies of the machine during their repair. It will also need to be removed if the car owner decides to carry out tuning and replace the standard device with a non-standard one. That is why he must know how to remove the front bumper on a Chevrolet Niva.
Preliminary preparation for dismantling
Before you start removing the bumper on a Chevrolet Niva, you need to study all the design features of this structural element of the car. The fact is that it is made of 90% plastic. Such plastic may be reinforced in some cases, but not in others. It all depends on what kind of restaling the manufacturer carried out on the Chevrolet Niva. The plastic, in turn, rests on a metal cross beam. That is why errors during dismantling can lead to damage to the buffer itself and the energy-absorbing beam.
Before starting dismantling, it is necessary, in order to avoid electric shock, to remove the battery terminal. In order not to experience difficulties in finding fasteners during work, it is worth preparing their diagram in advance indicating the exact number of fastening elements. If you prepare for the work in advance, they can be completed within half an hour.
Necessary tool
In order to perform the necessary work as efficiently as possible, you first need to put the car on a lift. As a last resort, it can be sent to the inspection pit. In addition, you need to select the following set of tools:
- wrenches for "ten" and "twelve".
- hammer.
- screwdrivers, flat and Phillips.
- in the case when all the attachment points are rusty, you will need an angle grinder.
How to remove the front bumper of a Niva Chevrolet video
- Chevrolet Niva 4x4 Chevrolet Niva 2016 Replacing the front bumper
- CHEVROLET NIVA engine cooling radiator replacement (with air conditioning)
- repair bumper Chevrolet Niva. Lesson
- Front bumper of Chevrolet Niva "Bertoni".
- Niva Chevrolet how to remove the plastic sill trim
- Chevrolet Niva cutting bumper RSHN
- Chevrolet Niva moldings and door trims
- PART 2. (1st day installation of the front arch)
- Rear bumper of Chevrolet Niva “Bertoni”.
- Bertoni on Chevrolet Niva
Removing the front bumper. Lift the hood of the car, disconnect the negative terminal from the battery, remove the license plate.
Remove the radiator trim.
Unscrew the four bolts 4 (Fig. 8-10) of the upper fastening of the front bumper 3 and the four nuts of the lower fastening, unscrew the screws 1 and 5 of the side fastening.
- Disconnect the wiring harness connectors from the fog lights.
- Remove the front bumper.
- Install the front bumper in reverse order.
Removing the rear bumper. Open the tailgate of the car, remove the left arch and side panel trim.
Disconnect the license plate light wiring harness connectors from the rear accessory wiring harness.
Unscrew the bolts 7 (Fig. 8-10) around the perimeter of the rear bumper 8.
Unscrew the four nuts 9. Unscrew the four screws 5 and remove the bumper.
Install the rear bumper in reverse order.
Rice. 8-10. Removing the bumpers:
1 - screw; 2 — front bumper beam; 3 — front bumper; 4 - bolt;
5 — screw for the side fastening of the bumper;
The bumper on a Chevrolet Niva needs to be removed when it needs repairs (painting, putty) or replacement. Before dismantling it, you need to know that this part is made of plastic.
This means that it requires careful handling and can be easily scratched. In the Chevrolet Niva, like any other car, it is possible to remove the front and rear bumpers.
To carry out the work you will need:
- key 10*12;
- hammer;
- Screwdriver Set;
- grinder (required if the fasteners are rusty).
It is best to remove the structure with your own hands when the car is standing in a pit. Car service centers also use lifts for convenience. Self-conducted dismantling of the structure takes up to half an hour.
In order not to get confused in all the fasteners and not to lose them, draw up a diagram of the location of screws and nuts on the structure, indicating their size and quantity - this way you will carry out installation work faster.
Xray or Vesta Cross
Removing the front bumper
To dismantle the front bumper, follow the following algorithm:
- Disconnect the negative terminal from the battery to de-energize the Chevrolet (required so as not to short-circuit the electrical network).
- Remove the Niva wheels. This will be needed to provide access to the screws holding the front bumper.
- Remove the radiator trim by unscrewing the 4 screws. Be careful not to damage the radiator.
- Using a Phillips screwdriver, remove the trim on the headlights without touching the optics.
- Using a 10mm spanner, unscrew the top bolts securing the beam.
- Remove the license plate from the Chevy and remove the screws underneath it.
- Turn off the fog lights. To do this, you will need to disconnect the terminal block, unscrew the bolts, and remove the headlights so that they do not interfere with the removal of the buffer.
- Remove the fasteners and the bumper itself.
- Don't forget to remove the temperature sensor located in the beam - it can be easily damaged. After this, you can dismantle the beam itself.
After removing the product, it can be painted, puttyed or any other manipulation. It is necessary to attach it back only after the applied compounds have dried.
Removing the rear bumper
The rear bumper on the Niva is removed as follows:
- De-energize the Chevrolet in the same way as when removing the front bumper.
- Use a screwdriver to unscrew the screws holding the bumper trim to the body, as well as the nuts that secure the mudguards.
- Remove the cover fastening screws located at the top.
- After holding the clamps, remove the elements that reflect light.
- Using a 10mm wrench, unscrew the nuts on the Chevrolet Niva that secure the structure under the license plate and the reflective elements.
- Remove the nuts located on the bottom of the Chevy rear bumper beam trim.
- Disconnect the wiring responsible for the license plate illumination.
- Moving the trim to the side, remove the wiring harness through the body hole.
- Remove the trim, unscrew the upper and lower bolts with which the beam is attached to the Chevrolet Niva body. Remove the rear beam.
Knock when rocking the steering wheel in place
Installing the rear bumper is done in the reverse order.
Rear buffer: design features
Changing the described device installed on the rear of a Chevrolet Niva is also quite simple. It is worth noting the fact that recommendations like “unscrew three screws” will not be enough here, since the front and rear buffers differ significantly from each other in design. For example, there is no radiator grille, and parts of the bumper are attached differently. As a result, more effort will have to be spent on dismantling work.
Step-by-step dismantling algorithm
Removing the rear bumper of a Chevrolet Niva is also carried out according to a pre-developed algorithm:
- The car is de-energized by disconnecting its battery from the network.
- the screws designed to hold the trim, as well as the nuts used to secure the mudguards, are unscrewed.
- Unscrew the screws located in the upper part of the trim and holding the Chevrolet Niva buffer mount.
- clamp the clamps and dismantle the reflective elements.
- Using a ten key, unscrew the bolts and nuts holding the structure located under the state number and the reflective elements.
- Using the same key, unscrew the fastening bolts located in the lower part of the rear buffer beam trim.
- disconnect the wiring terminals of the vehicle license plate lighting fixtures.
- the trim is moved to the side and the bundle of wire is removed through the body hole.
- The lining is dismantled, for which the upper and lower bolts securing the beam to the car body are unscrewed.
- The Chevrolet Niva rear bumper mount is removed and it is dismantled.
Reinstalling the rear buffer
The rear buffer is installed in place, like the front one, in the reverse order. At the same time, if the decorative trims located under the headlights were removed during dismantling, it is recommended to put them in place without fully tightening the screws or bolts. Next, after installing the buffer and tightening the four screws located under the headlights, insert the pads with snaps into the holes under the bumper. After this, its edges are pulled down and the screws securing the nozzles are tightened. After all elements of the rear bumper are installed, the remaining fasteners are mounted and tightened
The energy-absorbing device of the car, both front and rear, has a rather complex design, but it is easy to remove and put them in place. To do this, you need to follow the algorithm laid down in the car’s operating instructions. In addition, it is necessary to approach such work responsibly, since the slightest inaccuracy can lead to damage to both the buffer itself and the entire car body.
Peculiarities
Before making a rear power bumper according to the drawing, you will need to consider the following features:
- color of the component. According to Russian traffic regulations, the amount of color that differs from the main color of the car must be less than 30%;
- the need for space to install license plates, optics on the field 21214. If you do not have them, you will face a fine;
- the need for a powerful winch.
You can make the rear power bumper for model 21214 yourself, following these recommendations:
- in order not to spend a lot of money on materials, take ordinary sheet metal and pipes;
- dismantle all mechanisms and connections on the car that may interfere with installation (linings, fog lights).
Bumper replacement
2.1. We replace the old bumper with a new non-original one, for example, made in Taiwan. Such bumpers are cheap, and after painting you can’t tell whether it’s Thai or Japanese. The gaps can give away the manufacturer. Yes, with non-original bumpers the gaps may differ slightly from, for example, the contour of the wing. Or there is something wrong at the junction with the hood. But Taiwan is now making better and better bumpers, and this discrepancy is only noticeable if you look closely. But if you need everything to be one to one, then the next point.
2.2. We replace the old bumper with a new original one. That is, we take the bumper of the manufacturer that is installed at the manufacturing plant. It is, of course, more expensive. Sometimes several times. Or is there another option.
2.3. Replacement with a used bumper. A “used” bumper is, of course, cheaper than a new one. They usually buy them at auto wrecking yards. Not a bad option if the bumper is not chipped and is generally in decent condition. It happens that bumpers are brought from a disassembly site and have already been repaired, and (this is often unnoticeable) with the fastenings torn off, or seemingly intact, but extremely shabby. At the same time, the sellers say something like: “the straighteners will do it, it’s okay.”
What's the point then? Why throw away one chipped bumper and install another chipped one from disassembly? Moreover, if the price of painting one used bumper is x, then another used bumper is already 2x, since it will still have to be repaired or all 500 chips will have to be removed before painting. Therefore: it is advisable for a specialist to select the bumper during disassembly or agree with the seller on a return “in case something happens...”.
Bumper repair is advisable if it (the bumper) has minor damage. Or: the new one is too expensive. Or if your bumper is a product of high tuning, the likes of which do not exist anymore. Well, this will have to be repaired. Replacing a bumper with a non-original one is cheap and not at all cheerful, especially if you don’t look closely. When replacing a broken bumper from disassembly, take only one in good condition, intact or with a minor defect. If someone needs it, there are no options - just replace it with the original one. On the other hand, it can cost 3 times more. Maybe then... – see point 1.”
How is a bumper repair done?
Why shouldn't you repair a plastic bumper yourself?
“The bumpers of modern cars have practically ceased to be made of steel - it has been replaced by lightweight and inexpensive plastic. However, it turned out to be more susceptible to various damages (scratches, cracks, dents, breaks, etc.). At current repair prices, this forces owners to try to repair a broken bumper themselves. Moreover, at first glance there is nothing complicated about this.
DIY bumper repair
To repair a crack in a bumper, the following set of tools and materials is usually used: a powerful soldering iron, wire mesh or wire, glue, putty, paint. The repairman's actions in this case are as follows: the crack is heated with a soldering iron, a wire mesh is pressed into the soft plastic, putty is applied to it, which is then dried, sanded and painted. Such repairs do not require any special knowledge, much time, or high expenses. But…
Literally after a month of driving (depending on the quality of the roads and driving style), traces of repairs will become noticeable or the putty will completely fall off. The fact is that the reliability of the seam obtained using the described technology is extremely low. Using a powerful soldering iron to heat plastic leads to strong local overheating in the seam area, causing it to become brittle and brittle. Adding wire mesh further degrades the plastic, causing internal stresses that gradually destroy the plastic. The use of glue also does not save the situation, since in garage conditions it is quite difficult to select the appropriate type of glue, prepare the plastic and provide conditions for good adhesion of the glue.
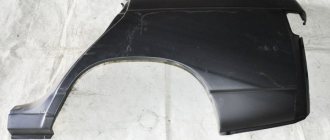
Replacing a part or part of it
If there is more serious damage, removing dents will not help restore the integrity of the part. In this case, the body element, or its most severely damaged part, is replaced with a new one. When replacing, it is necessary to find a part identical to the one being replaced. If a specific area is being replaced, the patch is cut from the same metal. Next, it is welded to the part being restored.
Minor damage to the body, chips, scratches and dents on the car can be repaired independently without repainting. Parts of the body that were not previously damaged are subject to restoration. If paint cracking, breaks or kinks appear, repairs without painting will not be possible.