The cotters are designed to fix the valve springs. The procedure for removing crackers is desiccation, and their installation is drying. Dehydration is very often required during cylinder head repair and maintenance. There are correct and incorrect methods for carrying out this procedure. The incorrect method was popular due to the lack of a special tool. The crackers were released using a hammer and pipe cutting - by hitting the upper plate of the valve spring. This method can be called barbaric, as it often leads to injuries, loss of crackers and disruption of valve geometry. Knocking out (especially without the appropriate skills and experience) can even bend the valve stem, keep this in mind! But the point is not that with the current range of special tools there is no need to use the knockout method. The most important thing is that this method simply cannot carry out the reverse procedure - drying! It is best to carry out drying and desiccation using special devices. After I chipped off a piece of a tooth using a VAZ desiccant, I thought not only about my health, but also about the convenience of work. And both on the removed cylinder head and on the engine. And a mandatory addition to its versatility is the ability to rearrange it on the cylinder head tilter (soon), as well as free hands when working. After researching the Internet on this topic, I liked this one:
Due to the presence of supports in the design for fastening to the cylinder head, the tool can be used for desiccation of various types of the most common engines. Hence the name - universal. We fix the supports to the cylinder head, and then install a rod on them, along which the pressure sleeve will move. Using the bushing, we apply pressure on the valve spring plate, which will allow it to dry out. Quite simple and effective, isn’t it? Advantages: desiccation without removing the cylinder head; Fits most 8, 12, 16 and 24 valve engines; Disadvantages: despite its name, it is not suitable for all engines, but I don’t need this - I’m not going to open a car service center and a garage one either.
Motorists faced with engine repairs are often interested in how to make a valve depressurizer with their own hands. After all, the presence of this device will not only speed up the work process, but also greatly facilitate it. Of course, some craftsmen use a spark plug wrench and a hammer to remove crackers from valves. This method is not ideal.
How to dry out engine valves?
The engine valves will have to be desiccated during engine repairs involving removal and disassembly of the cylinder head or when replacing valve stem seals.
There are at least three ways to desiccate valves. Two of them using a special tool and one - desiccation with a hammer. Using the example of engine 21083 of VAZ 21083, 21093, 21099, we will consider each of them.
What is valve desiccation?
The valve is fixed with two crackers inserted into the groove at its end.
Engine valve 21083 and two crackers pressing it
The crackers are pressed by the valve plate and springs resting against it. To dry it out, you must somehow press down (overcoming the resistance of the springs) the valve plate and remove the crackers. After which it will be possible to remove the plate, springs and replace, for example, the valve stem seal.
How to dry out car engine valves?
In relation to the 21083 engine of VAZ 21083, 21093, 21099 cars, valve desiccation can be done as follows.
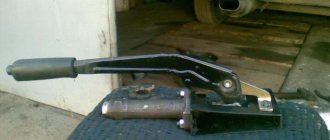
— Using a lever valve depressurizer 2108
This device is convenient to use when replacing valve stem seals, when dismantling the cylinder head is not required. There are several similar desiccants for different engines. We need exactly 2108, since its support is compatible in diameter with the valve disc.
The procedure for carrying out the work is as follows.
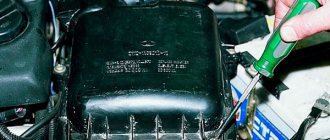
Desuction is carried out without dismantling the cylinder head: the valve cover and camshaft are removed, and a soft metal rod (for example, tin) is inserted into the spark plug hole under the desired valve.
Insert the rod under the valve
One end of the desiccant clings to a stud with a nut screwed onto it and the support is placed on a spring plate. Pressing the lever handle of the device, press down the valve spring plate, remove the crackers with tweezers, a magnet or your hands.
Working with a lever valve depressurizer 2108
— Using a clamp-puller
The clamp-like device can only be used on a removed cylinder head.
Clamp-shaped valve depressurizer
The procedure for carrying out the work is as follows.
On the removed cylinder head: one end of the clamp rests on the valve plate (from the bottom of the cylinder head in the combustion chamber), the other on the spring plate (from above). When the clamp screw rotates, the spring is compressed under the action of the stop pressing on it and you can safely remove the crackers. The clamp can have attachments of different diameters to rest on plates of different sizes, which allows it to be used not only on the 21083 engine, but also on many other car engines from different manufacturers.
— Using a hammer and a piece of pipe
This method of desiccating valves is suitable when there are no special devices at hand, but repairs need to be carried out.
The procedure for carrying out the work is as follows.
We take a heavier hammer and a piece of pipe with a diameter slightly smaller than the diameter of the valve plate. We install the tube on the valve plate and strike it accurately with a hammer. The tube moves the plate down, the crackers fly out of their grooves. If the crackers do not separate the first time, you can strike again.
The disadvantage of such work will be the unpredictable and uncontrollable trajectory of shooting (and they fly off as they shoot) crackers from the valve stem. After which they are either irretrievably lost, or time is wasted searching for them.
The disadvantage of such work will be the unpredictable and uncontrollable trajectory of shooting (and they fly off as they shoot) crackers from the valve stem. After which they are either irretrievably lost, or time is wasted searching for them.
Therefore, before the impact, measures must be taken to catch the crackers. For example, place a rag around the valve.
Thus, if you have a certain skill and experience, you can desiccate the valves even without special tools. But still, since such a procedure does not have to be done often, it is better to use a desiccant remover from those described above.
Source
Making desiccant
Universal desiccant diagram
a universal valve desiccant with your own hands using simple drawings. It is based on a lever with two brackets attached to it. These brackets are attached using screws and nuts to form a hinge joint. To assemble it you need to prepare :
- Bulgarian;
- Welding machine;
- Durable metal bar for lever;
- Two short strips for making brackets (one is approximately half as long as the other);
- A pipe with a diameter slightly larger than the plate covering the springs and approximately 3-5 cm long.
Weld a washer with a diameter of approximately 8 mm to the shortest strip. It will be used to attach the device to the unit. Its other end is attached to the edge of the lever using a hinge method. A prepared piece of pipe is welded to the middle bar, and also attached to the lever, only closer to its center. To put the structure into action, you need to attach the short bracket to the edge of the head, and install the middle part with the pipe on the plate. Pressing the handle of the structure allows you to press the spring down, freeing access to the crackers.
Replacing valve stem seals with your own hands
One of the circumstances due to which your VAZ 2109 or 2108 may begin to consume oil above normal is the wear of the valve stem seals, or as they are also called - valve seals! You can create their replacement with your own hands, but for this you will need not only a set of keys, but also special devices. A complete list of the required tools will be given below:
- valve depressurizer
- cap remover
- spark plug head with knob
- tin rod or coil of rope
- flat blade screwdriver
- long-nose pliers or tweezers
- magnetic pen is better
Before we get to the parts that suit us, it will be useful to perform a number of preliminary works, including:
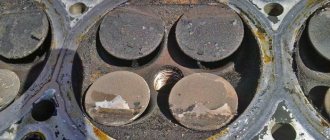
After everyone has done this, the following picture should open before you:
The top photo shows the valve lifters along with the shims. They also need to be pulled out, and be sure to be folded in a strictly defined sequence. In other words, so as not to confuse them in places during reverse installation. If this is not done, then later the thermal clearances of the valves will be incorrect, and you may not even be able to start the engine.
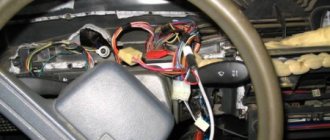
Then you need to secure the rail for installing the desiccant and secure it to the last camshaft mounting studs with nuts, as shown in the photo below:
Next, we install the lever in such a way that it can be used to recess the valve :
Now we unscrew the spark plugs from those cylinders where the valve seals need to be replaced, and insert the rod into the spark plug hole. It is important that it gets between the valve and the piston. To do this, it is necessary to bring the piston of the first cylinder to TDC.
Or you can stuff a rope into the hole until it completely fills the combustion chamber. Now you can recess the valve using the lever:
And at this moment, use a magnetic handle to pull out the valve cotters:
Then you can carefully release the lever and proceed to further actions. We take out the plate and two valve springs, and now we take the oil seal remover for the VAZ 2109 -2108, and use it to press the cap through the well into the cylinder head. Then you need to tap the weights several times from top to bottom to press the oil seal:
Pressing the weight down, we try to pull out the cap and remove it from the valve:
We take a new oil seal, first dip it in fresh oil and press it back onto the valve . When performing this procedure, you must be extremely careful not to damage both the valve and the surface of the head. You should put a special protective cap on top of the valve, which in theory should come complete with seals. You need to press it with the other side of the puller until it stops so that it sits in its place:
We perform a similar procedure with the remaining valves and do not forget to take precautions to avoid damage to the cylinder head. Upon completion of the repair, install all the removed parts in the reverse order.
Replacement
DIY valve seat replacement video
Replacing valve stem seals with your own hands:
- Remove the timing cover.
- Align the crankshaft and camshaft to the marks. Place the appropriate markings on the parts so that there are no difficulties with their placement after repair. Write down the location of the pipes and connectors to be removed.
- When removing the camshaft, loosen its drive tensioner.
Device for desiccation of valves. The photo shows the process of removing crackers
If the drive is chain, unscrew the drive gear and remove it from the camshaft. To avoid losing it, it is better to remove the key from the shaft groove and tidy it up. If the drive is belt driven, it is easier to remove the belt from the gear.
The correct tool for removing caps
Take a desiccant. Fix its bracket, which is attached closer to the edge of the lever, to the bed fastening stud, and attach it closer to the middle with a ring on the plate covering the valve springs. With one hand, press the desiccant lever so that the valve springs are compressed and the plate moves down the rod, and with the other hand, take tweezers and use them to remove the crackers from the plate.
Installation process
- Remove the springs from the seals.
- Insert the oil seal into the mandrel and place a drop of oil on the valve stem.
- Place the oil seal together with the mandrel on the valve stem and slide it down to the seating lug of the guide. Lightly tap the mandrel with a hammer to press it into place.
- Do not forget to put the springs on the installed caps before assembly.
- After this, install the valve components and dry using the method used to remove crackers.
- Repeat this sequence as many times as necessary and replacing the caps yourself will be done.
- Reassemble the disassembled components in the reverse order of removal. If your engine does not use hydraulic compensators, adjust the valves.
Now you know how to change valve stem seals with your own hands. No matter how many times you perform all the procedures before, be very careful.
How to adjust the valves of a VAZ 2109
Tell me how to adjust the VAZ 2109 valves, how critical the adjustment is, what will happen if this work is not done on time? What are the consequences? Do they exist at all? I recently purchased a second hand Nine, the previous owner said that the valves were fine, get in and drive. I have already driven 20 thousand kilometers and have never adjusted it.
Few owners of domestic cars are guided by the work regulations. But, if you are one of these drivers, then keep in mind - valve adjustments are carried out every 15 thousand kilometers. In practice, as soon as they knock...
Why are there crackers in the engine?
Simple question: how to fix the valve in an internal combustion engine? The question ceases to be so simple if we remember that each valve - both inlet and exhaust - opens and closes with a frequency of 20-25, or even 40 times per second. Under such loads, the simple task of securing a valve becomes very difficult.
Is it possible to screw the valve to the spring with nuts? It is possible, but with constant shock and vibration, the nuts will tend to unwind, and even cotter pins will not give a reliable result. In addition, the threaded connection will be quite complex. It is also impossible to weld the valves “tightly” - in this case repair will be impossible.
That is why a special solution was found for fixing the valves - a crayon connection, which is as simple as it is reliable.
The structure of a crack joint generally comes down to the following. In the upper part of the valve stem (stem) there is an annular groove into which the inwardly directed annular projections of two crackers, shaped like a cylinder cut along the length, are inserted. When the cracks fit into the groove, a cylindrical thickening is formed at the top of the valve, which cannot move along the stem. The crackers rest against the plate that holds the springs and fix the valve in the closed position.
However, the crackers must be fixed so that they do not fall out due to constant vibration, but can still rotate freely in the groove. This is achieved very simply: there is a recess in the upper plate in which the crackers are located, as in a well, and cannot fall out provided that the valve springs do not weaken.
When is valve adjustment necessary?
It is necessary to resort to adjustment if the car engine becomes unstable. A characteristic knocking sound appeared while the engine was running. Experienced drivers determine the need for adjustment work based on the following symptoms:
- the fuel consumption level of the car has increased sharply;
- there was a knocking noise while the car was running;
- at idle the power unit is unstable;
The valves need to be adjusted every 25-30 thousand kilometers. This is the optimal period; during this time, structural gaps increase due to wear of some parts. Next I will tell you about the procedure for carrying out adjustment work.
Depressurizing valves – Nonoblog
Depressurization of K6A Jimny valves.
The engine capitalization begins with the cylinder head. In the near future I will have to disassemble my K6A, so in advance a cylinder head with a burnt-out valve was found in the bins of the Jimny Club. I decided to completely prepare the head so that I could then remove mine and immediately install a new one.
First, remove the camshafts from the head.
K6A jimny cylinder head camshafts
There is no need to be afraid that the camshafts will get mixed up later, there are marks on them and at the time of assembling the head everything will still fall into place, if you don’t forget about it. The camshaft bed covers are also signed. E exhaust, I inlet.
Under the camshafts there will be washers that regulate the thermal gap, you can simply pry them off with a screwdriver and carefully pull them out, it is advisable to put them all in order, each washer has its own size, so if they do not get mixed up, then it will be easier for us to adjust the gaps.
valve shim
Under the adjusting washers there will be valve plates, which we need to dry out.
Depressurization of k6a valves
In order to desiccate the valve, we need either a special desiccant or a regular candlestick with a magnetic tip. The magnetic tip will not allow the crackers to fly away in an unknown direction, since they are very small, finding them later will be very problematic.
The essence of the process is simple, you need to press the magnetic part of the candlestick onto the valve plate, and not just press it, but with force, so that the cracker flies into the inside of the candlestick and becomes magnetized. There is no need to hit the candlestick with a hammer, as vase industry experts write, it is enough to simply press until the end of the spring stroke.
candle holder with a magnetic tip for desiccation of valves
Then all the plates, crackers and springs need to be carefully placed in a box so that nothing gets lost or mixed up.
valve plates with crackers and springs
intake valves k6a
Share with your friends:
nonoblog.ru
How to adjust valves on a VAZ 2109: instructions
On all VAZ models, the principle of valve adjustment is practically no different. You need to adjust the gaps in the order of operation of the cylinders: first 1 and 4, after 5 and 8. Set the piston of the first cylinder to TDC, then make sure that the marks on the pulley and the rear belt cover match. It should look like this:
Using the “17” key, we turn the camshaft by three teeth, this way we will ensure that the camshaft cams come out of the pushers. We take the dipstick and start checking the gaps. The probe should pass with little effort. If it moves freely or difficultly along the gap, adjustment is necessary.
Using a lever, fix the pusher in the desired position. Next, remove the old washer and set the gap we need. If necessary, install another washer after completing all the work. The procedure must be repeated for each engine cylinder.
What is valve desiccation?
The valve is fixed with two crackers inserted into the groove at its end.
valve 21083 and two crackers pressing it
The crackers are pressed by the valve plate and springs resting against it. To dry it out, you must somehow press down (overcoming the resistance of the springs) the valve plate and remove the crackers. After which it will be possible to remove the plate, springs and replace, for example, the valve stem seal.
What is a valve spring retainer?
The valve spring retainer is a small part that consists of two identical parts; if you put these parts together, you get a conical cylinder. On the inside of the crackers there are fastenings, with the help of which the cracker is attached to the valve stem. The valve stem must have grooves into which the fasteners for the cracker are inserted.
The valve spring is always compressed. Trying to unclench, she pushes the valve plate up. The valve plate compresses the nut around the valve stem. The cracker, which holds onto the grooves on the valve stem, prevents the plate from moving upward and thereby decompressing the valve spring. This is what secures the valve to the valve seat.
How to dry out engine valves?
The engine valves will have to be desiccated during engine repairs involving removal and disassembly of the cylinder head or when replacing valve stem seals.
There are at least three ways to desiccate valves. Two of them using a special tool and one - desiccation with a hammer. Using the example of engine 21083 of VAZ 21083, 21093, 21099, we will consider each of them.
How to dry out car engine valves?
In relation to the 21083 engine of VAZ 21083, 21093, 21099 cars, valve desiccation can be done as follows.
— Using a lever valve depressurizer 2108
This device is convenient to use when replacing valve stem seals, when dismantling the cylinder head is not required. There are several similar desiccants for different engines. We need exactly 2108, since its support is compatible in diameter with the valve disc.
Desuction is carried out without dismantling the cylinder head: the valve cover and camshaft are removed, and a soft metal rod (for example, tin) is inserted into the spark valve
One end of the desiccant clings to a stud with a nut screwed onto it and the support is placed on a spring plate. Pressing the lever handle of the device, press down the valve spring plate, remove the crackers with tweezers, a magnet or your hands.
Working with a lever valve depressurizer 2108
— Using a clamp-puller
desiccation of valves VAZ 2108-09-10. Kalina
The clamp-like device can only be used on a removed cylinder head.
Clamp-shaped valve depressurizer
On the removed cylinder head: one end of the clamp rests on the valve plate (from the bottom of the cylinder head in the combustion chamber), the other on the spring plate (from above). When the clamp screw rotates, the spring is compressed under the action of the stop pressing on it and you can safely remove the crackers. The clamp can have attachments of different diameters to rest on plates of different sizes, which allows it to be used not only on the 21083 engine, but also on many other car engines from different manufacturers.
— Using a hammer and a piece of pipe
This method of desiccating valves is suitable when there are no special devices at hand, but repairs need to be carried out.
We take a heavier hammer and a piece of pipe with a diameter slightly smaller than the diameter of the valve plate. We install the tube on the valve plate and strike it accurately with a hammer. The tube moves the plate down, the crackers fly out of their grooves. If the crackers do not separate the first time, you can strike again.
The disadvantage of such work will be the unpredictable and uncontrollable trajectory of shooting (and they fly off as they shoot) crackers from the valve stem. After which they are either irretrievably lost, or time is wasted searching for them.
The disadvantage of such work will be the unpredictable and uncontrollable trajectory of shooting (and they fly off as they shoot) crackers from the valve stem. After which they are either irretrievably lost, or time is wasted searching for them.
Therefore, before the impact, measures must be taken to catch the crackers. For example, place a rag around the valve.
Thus, if you have a certain skill and experience, you can desiccate the valves even without special tools. But still, since such a procedure does not have to be done often, it is better to use a desiccant remover from those described above.
The device of valve stem seals
The VAZ 2109 uses standard valve seals, and it does not matter whether a carburetor or an injector is used to control injection. Structurally, these parts are made of petrol- and oil-resistant rubber in the form of a cap. Inside it there is a steel sleeve for reinforcement and a damper spring, which is needed to press the cap against the valve stems.
The efficiency of these parts is characterized not only by design features, but also by the material used in production. A higher level of density is shown by products made from rubber or recycled rubber. Specifically, on the VAZ 2109 , the manufacturer most often installed caps made of polyethylene resin without a reinforced sleeve. In this case, sealing was achieved due to the wide area of pressing the edge of the valve seal to the stem. In fact, the production technologies of these parts do not affect wear. The service life of VAZ 2109 can be the same as that of a premium-segment Mercedes.
What you need to make your own desiccant
To make this device, you will first need suitable materials. For the clamp option you need to have:
- Metal profile or sheet metal 10-15 mm thick;
- A couple of large bolts or studs (screws will be made from them, so the length of each is at least 15 cm);
- Two nuts comparable to the bolts.
For the lever option, you must stock up on the following elements in advance:
- A metal pipe or rod with a diameter of about 15 mm and a length of up to 40-50 cm;
- Two steel strips 20-30 mm wide and 5 cm long. Thickness about 3 mm.
- Two strips 20-30 mm wide, up to 3 mm thick, 15 cm long;
- Two 6x25 mm bolts with nuts and washers;
- Two steel washers (you can make your own). The first has a diameter of 25 mm, a thickness of about 3 mm, and an internal hole of 8 mm. The second has a diameter slightly larger than the spring plates. Its thickness is at least 5 mm.
We recommend: Should you change the engine oil if it turns black?
Types and purpose of devices
2109 valve stem seals is to create a seal at the point of contact between the timing valves and bushings. This prevents engine oil from entering the cylinders (combustion chambers). Progress in the automotive industry has come a long way, but some parts still wear out greatly during the operation of the car. Therefore, such parts began to be called consumables. Consumables also include valve stem seals. But with only a stretch, because their location is difficult to access.
Replacing valve seals (part 1)
First, it’s worth determining what the purpose of the above-mentioned caps is. Everything is simple here - the caps are needed to prevent excess engine oil from leaking through. The seals must fit tightly to the valve and allow only the portion of oil necessary to lubricate it to pass through.
So why is it sometimes necessary to replace these same caps? The thing is that they are made of special rubber, which ages over time and loses its former elasticity. All this together leads to the fact that the cap begins to leak more oil, and as a result, the engine begins to consume more of it.
Well, you have determined that a replacement is necessary, let’s get to it! First you need to purchase new good quality valve stem seals and stock up on the necessary tools. After this, armed with courage and courage, you can move on to the replacement itself.
1. According to safety requirements, all automotive work related to the engine must begin with removing the battery terminals. Thus, de-energizing the car is the first step towards achieving the intended goal.
2. Disconnect the contacts from the ignition coils and remove them. The spark plugs should not be unscrewed at this stage, as this may result in dirt getting into the cylinders.
3. Disconnect two rubber tubes from the valve cover. Loosen the valve cover screws and unscrew them. TIP: All the removed parts, bolts, nuts must be put in one place, small parts are even better to be put in some kind of jar, so that later you don’t have to search for them for a long time and to no avail.
4. Using a little force, remove the valve cover along with two gaskets. By the way, most often these gaskets are also changed.
5. After this, according to auto repairmen, it is not at all necessary to remove the side cover of the cylinder head, the one that covers the sprockets and camshaft chain. So that it does not cause any special difficulties, during operation it will be enough to simply move the sprockets all the way into the cover and remove the shafts from them.
6. Remove the candles. First, you need to insert the oil dipstick into the spark plug hole so that its end rests against the piston. Then carefully turn the pulley until the dipstick freezes before lowering.
7. It is necessary to make marks on the chain and sprockets with paint, fixing the position of the teeth in the chain. This is necessary in order to install the chain during assembly in the same way as it was, i.e. on the same sprocket teeth.
8. The next step is to unscrew the sprockets; this can be done using an open-end or spanner wrench. To avoid turning the cylinders, you need to use a wrench with a head underneath the wheel to fix the large pulley.
9. We begin to remove the shaft mounting yokes. First the first one (near the stars), then the rest, following the order of weakening. All these parts must be placed on a pre-stocked cloth in the order they were installed.
Selection of valve stem seals
2109 cars, oil seals are selected whose operating temperature is on average 1,800 degrees. Whereas the material from which they are made can withstand no more than 1,500 degrees. Because of this difference, the service life of consumables is sharply reduced, but this was the case in the early and mid-90s.
Nowadays there are improved products of foreign and domestic production on sale, and at the VAZ plant they install valve stem seals made on the basis of fluorine rubber. This material has proven itself to be positive. Traditionally, foreign brands are characterized by higher quality. Domestic analogues are still inferior to them, except that their price is lower.
The result of worn valve stem seals
When the first signs of wear of parts appear, it is necessary to immediately diagnose the causes of malfunction of the gas distribution mechanism. Including checking the condition of the valve seals. Experienced car enthusiasts who know the structure of the engine are aware of how to check it themselves. Beginners are advised to address this issue to qualified car repair service specialists. Operating a power plant with all signs of wear on the valve stem seals is highly not recommended for a long period of time.
The consequences of operating an engine with such malfunctions are not the most pleasant:
- engine power is significantly reduced;
- unstable operation at idle (stalls);
- “floating” engine speed;
- reduction of compression in cylinders;
- coking (carbon deposits on pistons, spark plugs and cylinder walls).
The appearance of characteristic soot is a serious symptom. Further operation without identifying and eliminating the causes of its occurrence is fraught with engine failure and major (and therefore expensive) repairs.
Top 5 universal desiccants
How to make a car soundproofing yourself
If you occasionally work on the cylinder head and depressurize valves, then you definitely need a valve depressurizer. Below I will describe the most popular and cheapest universal desiccants.
Homemade desiccant.
This option has the right to life. A lever-type desiccant is usually taken as a sample. The most important advantage of such a desiccant is that you can customize the tool to suit your needs. You can make several pressure rings of different diameters and lengths, or use the holes in the lever to create a wider range of adjustment. All in your hands.
Autom-2
The cheapest and most common desiccant on the Russian market. Its price fluctuates around 250 rubles. Which, you agree, is quite a bit. Produced in the city of Voronezh. It has proven itself to be a reliable and convenient tool. The disadvantages include the fact that it was created specifically for VAZ car engines. The use of this desiccant is difficult on engines of other concerns.
Licota ATA-1404
Universal desiccant from the famous company Licota. A wide range of applications have made it very popular. Most often used at small and medium-sized service stations that specialize in engine repair. The kit includes an adapter for supplying compressed air to the cylinder. A depressurizer can hold the valve spring in a compressed position, which will free your hands. The disadvantage is the price. The average price on the market is 5,500 rubles.
Licota ATA-0014
A universal desiccant with a hook on the lower coils of the spring from the same company Licota. A very convenient and relatively cheap desiccant. Allows you to very quickly and practically without preliminary preparation carry out the procedure for desiccation of valves. Disadvantages include difficult use on twin-shaft engines, lack of an adapter for supplying compressed air to the cylinder. The average price on the market is 2,400 rubles.
Licota ATA-0035
Universal desiccant for engines with central spark plug wells. A very convenient desiccant. Ask service stations that specialize in BMW what desiccant they use? The answer, with almost 100% probability, will be Licota ATA-0035. Ease of use, everything you need in the kit, made this universal desiccant the best for engines with central spark plugs. The average price on the market is 5,000 rubles.
Malfunctions of valve stem seals
High quality materials do not guarantee the eternal operation of valve seals; sooner or later, under the influence of negative factors (high temperatures, aggressive chemical composition of oil, etc.), slight wear of a regular nature occurs, which ultimately leads to the fact that these parts can no longer perform their functions fully. The working surface is rubber and over time the structure becomes compacted, as a result of which elasticity is lost and cracks begin to appear. Long-term operation and exposure to an aggressive environment with high temperatures does not have the best effect on the damper spring. Ultimately, all this leads to the fact that the valve stem seals no longer effectively remove oil from the valve stems, and it ends up in the combustion chambers.
When is it recommended to replace valve seals?
how to dry out valves without special tools
The fact that it is necessary to change the seals is indicated by some characteristic features.
Operating principle of valve stem seals
These parts are included in the gas distribution mechanism, as they function in close contact with the valves, which are an important part of the timing belt. Valves are divided into exhaust and inlet. Their upper part is always in the zone of oil mist, which is created by the rotation of the camshaft. Their lower part is in the area of the fuel-air mixture (for the intake valve) or in the area of the exhaust gases (for exhaust valves). For the camshaft to function properly, it urgently needs constant lubrication, but oil getting into the combustion chambers negatively affects the operation of the power plant.
When a valve is raised or lowered, oil is removed from its stem each time. This work is performed by valve stem seals. These small parts prevent the poppets and valve stems from becoming coked.
Carbon deposits appear when the fuel-air mixture ignites. In this case, excess oil burns, which leads to coking. Engine wear increases, the fuel-air mixture becomes leaner, and the engine begins to operate unstably. The good condition of the seals is very important, and they are subject to serious quality requirements.
Signs of trouble
The following factors indicate that these consumables are badly worn:
- oil consumption has increased;
- dark carbon deposits on spark plugs;
- the appearance of bluish exhaust smoke (especially during cold start and warm-up).
The appearance of oil leaks due to worn valve stem seals is quite understandable. After all, engine oil enters the combustion chambers and is not used for its intended purpose for lubrication. As a result of the combustion of oil with fuel, the lubricant level in the crankcase gradually drops, and the car owner has to constantly add fresh oil.
When oil burns, blue-colored products are released. Accordingly, the exhaust gases are also painted the same color. As the engine warms up, the oil burns out completely, so there is no blue smoke from the exhaust pipe on a hot engine.
Oil entering the cylinder chambers during combustion settles not only on the walls, pistons and rings, but also on the electrodes of the spark plugs. Hence the black coating on them.
How to desiccate and dry valves without a desiccant, and so that it’s not difficult??
How to desiccate and dry valves without a desiccant, and so that it’s not difficult??
- It’s easy to replace a burnt-out valve yourself at home; the only thing you need to know is how to remove the head from the engine. And I will explain all the work involved in replacing and lapping the valve. I will assume that you have never replaced a burnt-out valve or you have changed the valve but not successfully (the valve does not hold and the engine suffers). This method of replacing and grinding in a valve is suitable for any brand of car, UAZ, Zhiguli, Gas, etc. all valves are basically the same and the only difference is in size and location in the engine head, and they all grind in the same way. The first thing you need to do before replacing and lapping the valve is to buy lapping powder (the powder can be different, dry and ready-to-use). The dry lapping powder will need to be diluted with any machine oil (it’s easier to take the oil that you pour into your engine), the ready-made lapping powder has already been diluted. To dilute the lapping powder for valves, pour it into any small container, even a bottle cap (you don’t need a lot of it, but you can always add it) and fill it with oil to make a medium-thick porridge. There are many types of lapping powder; in principle, any one will do, but it is better if it is smaller. Also, do not forget to buy a new head gasket and valve seals, even if you recently changed the valve seals, it is still better to install new ones after grinding in the valves. Usually exhaust valves burn out, I have never seen an intake valve burn out. Therefore, buy a replacement valve or valves; if there is a good working valve, then you can install it. Valves burn out for various reasons: the valve was pinched, a very lean fuel mixture (especially if the engine runs on gas), a lot of wear on the valve guide (the valve dangles heavily in the guide), or wear on the valve stem itself (abrasion of the valve stem). Let's start replacing the burnt-out valve. Advice, do not remove the carburetor and manifold from the head, they do not interfere and you have less hassle with disassembling unnecessary parts. The first thing you need to do is dry out the valve, most likely you don’t have a valve puller, if you do, that’s great, but you can do without a valve puller. Place the head on a flat surface, preferably a strong table or wooden shield; you can also lay a rubber mat under it. Place any piece of iron under the valve that needs to be dried, the main thing is that the valve rests against it, take a tube with an internal diameter of 13 mm or more, the main thing is that it is no larger than the valve spring plate (for Zhiguli), for UAZ and GAZ the tube should be at least 16 mm. Place this tube on the valve so that the valve crackers are inside the tube, and hit the tube with a hammer, usually on the 3rd or 5th blow, the valve cracks and the crackers remain in the tube and are not lost, just press the tube tightly against the valve plate so that it does not jump off the valve plate upon impact . I’ll tell you right away, don’t be afraid, the spring won’t fly away and won’t hit your hand. The valve is dry, pull it out, insert a new valve and shake it; if the runout is about a millimeter, then it is still tolerable, you can leave this valve guide, but if the valve dangles too much to the sides, it is advisable to replace the valve guide with a new one. How to Replace a Valve Guide
In order to knock out the valve guide, you need a special mandrel, which you most likely don’t have, well, we won’t knock it out without it, take a round piece of millimeters #510;12-13.5 or a long bolt #510;12mm for the Zhiguli head, for the UAZ and Strip round timber #510;15-16mm or bolt 16mm
But there is a very important point on which I want to draw your attention, you need to knock out the guide sleeve from the inside towards the camshaft (from bottom to top) and it is very important to knock it out with a very heavy hammer with a half-hammer, the blow should not be very strong, the main thing is it must be heavy (the guide sleeve is easy will come out and won't crumble). If you start knocking out the valve bushing with a light hammer, the bushing will crumble and you will only suffer
dry it out, set the socket wrench to about 17 and hit it sharply with a hammer. The crackers pop out. It’s more difficult to dry, I used a large screwdriver to press out the spring and put in the crackers with tweezers, some the first time, and some the same. You can dry it out... but put it back together. What a car. . ? No way
Valve adjustment process
If all clearances are normal, then you can move on to the next group of valves. You should turn the camshaft clockwise to the next mark, which was made with a marker, and turn it by 2-3 teeth.
If suddenly the gaps differ from each other, then you must do the following:
- It is necessary to install a special device on the valve cover mounts. With its help, valve pushers are recessed. This device must be tightened with nuts.
- You need to turn the pusher so that the slot in it is facing you. This must be done so that the adjusting washer can be pulled out more easily.
- It is necessary to write down the gap that was measured on paper, as well as the valve number
- Using the installed device, you need to push the valve down, and then secure it with a lock. It should be included in the valve adjustment kit.
- Then, use a screwdriver to pry the adjusting washer through the slot in the pusher and pull it out.
- On the other side of the washer, its size is indicated, which is also written down on paper. If the measurement is made with a micrometer, then the actual size of the washer may differ by several units from the marking.
- It is necessary to put the washer in place with the numbers facing down. After it has been pressed into the pusher, you need to check whether it is inserted correctly. The washer should rotate freely in the “saddle”.
- The valve is recessed and the retainer is removed.
- Only now does it become possible to move on to another group of valves and its measurements. To do this, the camshaft is rotated 90 degrees to the next marked mark. And we turn it another 2-3 teeth.
Tool for removing and installing valve cotters
The dry joint has a lot of advantages, but its simplicity is the main difficulty: disassembling such a joint (or, as they say, “de-breaking”) is not an easy task, and it is extremely difficult to cope with it without a special tool. To remove the crackers, you need to do a simple thing - compress the springs so that the crackers come out of the recess in the plate, and then they can be removed literally with your bare hands. But here’s the catch: compressing valve springs is difficult, and if you do it, for example, with two screwdrivers, you can fumble for several tens of minutes, injure your fingers, damage the valve stem, and ultimately achieve dubious success with difficulty.
For desiccation (as well as for installing crackers, which is done in the reverse order and is therefore no less simple), it is better to use a special device that helps to easily compress the springs and, holding them in this position, remove or install the crackers.
The working body of the device is an annular stop, which, when pressed on the springs, compresses them. In a number of designs, the stop consists of two semi-cylindrical parts, which, when compressed, form a cylinder - this is how devices are made in the form of tongs. JTC offers a whole set of pliers with stops of different diameters, which allows you to work with different engines.
Many devices also include another important tool - a magnet, which makes it easy to remove fallen crackers.
Adjusting valves on VAZ 2108, VAZ 2109, VAZ 21099
Welcome! There must be a valve clearance, but it must be minimal, otherwise, if there is no clearance, the valves will not be able to close reliably. In this case, depressurization will occur in the cylinders and the power will noticeably drop, and the exhaust valves will begin to burn out. On the other hand, the gap is increased - the valves will not be able to open completely while the engine is running, thereby the power will again drop, because the engine will not be able to supply the fuel-air mixture, because the valves do not open completely. Moreover, the valves can rattle when there is a large gap, and after adjusting them, when you start the engine, you will immediately feel how it will run quieter and in the future you will understand when it is time to adjust the valves on the car.
Valve desiccant - description, instructions with video
When repairing a vehicle, a mechanic uses a large number of tools. And in some situations it becomes necessary to use such a special device as a valve depressurizer. Its main task is already clear from the name - to help a specialist remove the valve cotter.
What is a valve desiccant?
Therefore, first of all, we will understand what a cracker is, where exactly it is located on the valves and why its removal can only be done using a special tool.
So, as you know, the main task of the exhaust and intake valves is to tightly close the engine cylinder window, as well as to open it at the right time.
The implementation of this process is possible thanks to two return springs: they press on the plate, which in turn is connected to the rod using crackers. They, together with the force of the springs, hold the valve firmly in the seat when performing its main function.
These crackers look like a small cylinder divided into two halves. Inside its surface there is a spike that fits into the valve groove. The outer diameter of the crackers is larger than the inner diameter of the plate. Consequently, they are held very securely and strongly - so strongly that they can only be removed with a desiccant.
The latter, by the way, is a fairly simple structure that you can build yourself. To do this, you only need 3 elements: a lever, a bracket for pressing on the plate and a holding bracket.
The first can be made from a metal pipe (its length should not exceed half a meter), with a diameter of one and a half to three centimeters, and the last two can be created according to the same pattern, only one should have a hole for attaching it to the head pin, and the second should have a persistent a washer with an internal diameter smaller than the valve plate, but larger than its internal hole.
How to dry valves correctly?
In fact, the technology for dismantling cracker cylinders is a simple task that any non-professional can handle. To do this, you just need to get a technological map and a desiccant.
So, in order to do desiccation, you will need to perform the following steps. First of all, you need to screw the desiccant bracket with the hole onto the head stud using a nut or screw it with a bolt. And install the second bracket on the valve plate and apply gentle pressure on the end of the lever. Thus, moving down the valve, the plate will release the crackers, which are then carefully removed. Next, after them, you can remove the spring and valve.
Of course, you can remove the crackers with any other handy tool, but you are unlikely to be able to put them back in their place without a special device. Therefore, before starting repairs, you need to prepare, that is, purchase or make your own desiccant.
Video
How to remove crackers incorrectly?
Many people use pieces of pipe or a spark plug wrench to dismantle the crackers: one end of the pipe is placed on the valve plate, and the other is hit hard with a hammer. As a result of the impacts, the crackers are released from the plate, and they jump out of their seats.
However, sometimes sticking may occur during this process, which can result in a bent valve plate or valve stem. Therefore, if you don’t want to “run into” extra financial costs, don’t tempt fate - use a valve desiccant.
I recommend reading:
autoepoch.ru
Necessary parts and tools for repair
Troubleshooting the cylinder head begins with the purchase of original parts and various consumables, the list of which is as follows:
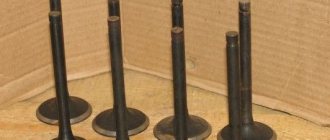
- Fuel intake system valve 8 pcs. (art. 21120-1007010).
- Exhaust gas valve 8 pcs. (art. 21120-1007012).
- Set of hydraulic compensators 16 pcs. (art. 21120-1007300).
- Gaskets for valve cover, cylinder head, intake manifold, exhaust manifold (all come as a set art. 21120-1002064-86).
- Bolts securing the cylinder head to the engine crankcase (art. 21120-1003271-018).
- Timing belt (art. 2112-1006040-02RU), timing tension roller (art. KT100507/100513), drive belt for mounted units (art. BP638).
- Engine oil and oil filter.
- Cooling system fluid.
Installation of valves on a VAZ 2112 is carried out using a standard set of tools, as well as several specialized types of keys:
- standard set of spanners from 8 to 24 mm;
- socket sockets in a set from 8 to 27 mm;
- end internal hexagons;
- mechanical valve retaining ring remover (depressurizer);
- torque wrench for tightening the cylinder head and camshaft bolts;
- paste for grinding valves (set for rough and fine grinding);
- metalworking cloth gloves to protect hands while working.
The work of replacing 16 valves on a VAZ 2112, the price of which as of this fall is about 50 thousand rubles at AvtoVAZ dealerships (or approximately 35-40 thousand rubles at ordinary car repair shops), is not a very complicated process. You can carry out the work yourself, for which it is enough to purchase the above-described spare parts and the necessary tools.
How to dry valves correctly?
In fact, the technology for dismantling cracker cylinders is a simple task that any non-professional can handle. To do this, you just need to get a technological map and a desiccant.
Installation Tips
Before installing the shafts, the piston of the first cylinder must be at the “top dead center”. To achieve this, rotate the crankshaft, grabbing it by the screw securing the generator pulley. Here you need a key “17”.
Alternator pulley and two timing shaft pulleys
The camshafts have spikes and the pulleys have grooves. Each pulley is equipped with a mark that should face up. The diagram shown in the photo corresponds to the upper position of piston 1. This is how the shafts are installed during installation.
You can set the crankshaft according to the mark located on the gearbox assembly (photo 1). This is done before installing the belt.
Various auxiliary elements
To set the tension correctly, use basic tips. Or you can do it simpler: when dismantling, note at what angle the tension roller was fixed. The key plate (photo 2) is set at the desired angle and the fixing nut is tightened (force 40 N*m).
How to screw the cylinder head
The threaded part of the screws is lubricated with engine oil. Then, maintaining a force of 20 N*m, the screws are tightened in the required order (see photo).
Recommended sequence (montage)
Second pass - each screw is turned at an angle of 90 degrees. On the third pass, the screws are turned another 90 degrees.
Chemistry
The bearing housing will be connected to the cylinder head cover. The connection itself must be airtight. A sealant is applied to the edge of the body around the perimeter: KLT-75M, Loctite-574, etc. During installation, the cylinder head gasket is not lubricated in principle - graphite or grease will only cause harm. Someone smears valve stems with graphite lubricant, which is also not correct. You need to use motor oil.
Before installation, the new valve is cleaned of factory grease. It is necessary!
Self-replacement of VAZ-2112 hydraulic compensators
A hydraulic compensator (or hydraulic pusher) is used to adjust thermal clearances in 16-valve engines.
Essentially, it is a “layer” between the camshaft and the valve, which adjusts its own thickness due to the plunger. That is, when the empty side of the distributor “fist” rotates, a space appears, which is compensated by raising the hydraulic pusher cylinder. In this case, the oil enters the compensator cavity itself. The reasons why hydraulic compensators may become faulty usually include wear and tear during operation, clogged oil channels, or plunger wear. In the last two cases, it is recommended to check the oil pump and the lubrication system as a whole for possible malfunctions. The main symptom of failure of the pushers is a typical knocking sound from the engine; an additional check - after removing the cover from the cylinder head - is that there is no resistance when pressed. It is better to replace hydraulic compensators comprehensively, since the reasons for the failure of one of them equally affect all the others. The cost of the kit for the VAZ-2112 is from two to three thousand rubles.
The replacement procedure itself is possible only after removing the cylinder head. After identifying the malfunction, you should remove the camshaft pulleys (if you have not already dismantled the entire block) and remove the oil pressure sensor. Next, the camshaft bearing housing is unscrewed (twenty bolts per piece) and the bracket securing the rod to the rear support is removed. Then the camshaft itself is removed, as well as the spark plug pipes and seals.
After dismantling the plugs, you can remove the defective hydraulic compensators using a magnet. Then new ones are installed, and after cleaning and lubricating the cylinders and bearings, the block is assembled (in reverse order).
Other cases in which dismantling of the cylinder head is required
Of course, it is not necessary to remove the cylinder head for every breakdown. This is only necessary if major repairs are needed. Such “major” cases include:
- Gasket wear.
- Formation of carbon deposits on parts.
- Valve deformation.
- Need to replace guide bushings.
- Failure of the camshaft, etc.
Of course, repairing it yourself or through a service in any case involves certain financial costs. To ensure smooth operation of the engine, regular diagnostics of the cylinder head are necessary. It is recommended to use high-quality fuel. In addition, try to prevent the car from overheating - because of this, the cylinder head may lead.
If some points remain unclear to you, then you can visually familiarize yourself with the process of replacing valves by watching the video: