Specifications
So, if we consider the factory design characteristics, then on all types of VAZ 2110 (and they were produced with sedan, hatchback and station wagon bodies), the ground clearance should be at least 165 mm - from the road to the oil pan, 140 mm - to the lowest point of the muffler. For 1.5 liter engines there is another indicator - the clearance to the catalyst must be at least 130 mm.
Dimensions of VAZ 2110
Parameters of Priora bodies
In any Priora body, the characteristics of its wheels and wheelbases will be the same, and therefore it makes no sense to indicate them separately everywhere. These are the parameters:
Meaning
These dimensions are valid for all bodies except the coupe. Hatchback parameters:
- The distance from the rear to the front point of the car is 4210 mm.
- The front overhang of the car is 770 mm.
- The rear overhang of the car is 660 mm.
Station wagon and sedan parameters:
- The distance from the rear to the front point of the machine is 4350 mm.
- The front overhang of the car is 740 mm.
- The rear overhang of the car is 830 mm.
- The distance from the rear to the front suspension of the car is 440 mm.
- The wheelbase of the car is 2492 mm.
Overhangs for cars of sportier variants are not specified by the manufacturer. Considering that the Priora's ground clearance is 165 mm, we can choose the best body type that allows us to use ground clearance more successfully than others. Having analyzed all the available characteristics, we will definitely come to the conclusion that the hatchback option is much better than all the others.
Dimensions of Lada Priora
The fairly large wheelbase of the body, despite its small length, allows us to call the car a cross-country vehicle.
However, it is necessary to remind Priora owners that, even if you own a hatchback, you need to be very careful when parking next to high curbs. This warning is especially relevant when your machine is fully loaded
But if the Priora hatchback can, with a stretch, be called the conqueror of forest roads and mountain peaks, then the coupe body cannot receive such a title. Such a car has too long a distance between the front and rear wheels and a very large front overhang. Whatever one may say, it will be difficult to drive along rural country roads. This car design is only good for asphalt surfaces.
However, even they will need to be driven very carefully where there are large potholes and there is a need to overcome artificial unevenness. But since there are no unnecessary or protruding parts from under the transmission on the Priora, you can confidently count on the quality of the available ground clearance.
Despite the absence of parts sticking out from under the bottom of the Priora, you can greatly reduce the ground clearance if you put a lot of people in the car and load the trunk with things. Reducing its length by only 20 mm will be enough for the bottom to touch the surface of the speed bump. It is necessary to force such obstacles with special care in order to eliminate the possibility of breakdowns in time.
"Lifting" the machine
In principle, as we have already noted, this is enough for a more or less comfortable ride. But, of course, many people want to “raise” the VAZ 2110 a little more, based on their realities.
“Raised” VAZ 2110
We will tell you how you can actually do this. But let us warn you right away: “raising” the car above the asphalt level entails a number of unpleasant consequences:
- Clamping the springs, firstly, will lead to a decrease in comfort while driving, and secondly, the shock absorbers will suffer as a result, which will not be able to cope with their responsibilities;
- The suspension also suffers from too stiff springs, as this leads to increased loads on it;
- Corrosion is inevitable when using aluminum spacers;
- By increasing the ground clearance of the VAZ 2110, car owners risk the stability of the car while driving. The fact is that the center of gravity shifts, the car can rock, and in some cases it can even roll over. Therefore, experts strongly recommend not increasing the ground clearance by more than 5 cm. That is, the maximum limit should be no more than 170 mm!
Materials used
Reviews from friends, online users and personal observations made it clear that it is extremely important what spacers you buy. When we install the first elements we come across, bought for pennies, we greatly risk our own health and the health of our car.
Go shopping, go to the same Aliexpress, look carefully at the drawing of the proposed spacers. But the most important thing is the material they are made from.
Today spacers are produced on the basis of three different materials.
- Aluminum. Aluminum spacers are quite reliable. By installing them, you will eliminate the process of deformation of the bushings, and also provide a fairly high level of comfort. Many spacers have a negative impact on the ride comfort and performance of the car. Aluminum, as a rule, affects these characteristics less than others.
- Polyurethane. Polyurethane analogues are deformed due to the impact of springs on them when you often drive on uneven roads. Therefore, over time, the risk of damage to the body by its own bushings increases.
- Polymer or plastic. Plastic products are the most reliable and high quality. But only on condition that you buy spacers from truly proven and well-established manufacturers.
Spacers
One way to increase the clearance is to install spacers - a kind of spacer supports that can be found in stores and car markets. They are installed between the body and the support of the VAZ 2110.
Spacers for the concept of the rear of the car
They come in three types:
- made of plastic – they have practically no flaws, are quite durable and last a long time;
- polyurethane ones are also wear-resistant, but when the car “flies” into a hole, it is strongly compressed, which is why the impact becomes very noticeable;
- aluminum ones “peel” the paint from the supports and body, thereby increasing and accelerating corrosion.
Conclusion
In general, the method of installing spacers under shock absorbers, on the one hand, is not such a difficult thing, however, there are nuances in this task that only a fairly experienced person can do. And of course, this part is designed specifically to reduce the costs that you might incur when replacing shock absorbers. At the same time, the car stops sagging due to increased weight and the fender liners no longer touch the wheels. So spacers are a worthy way to eliminate this problem, which has every right to life.
Shock absorber modification
When transporting large loads (and often VAZ 2110 owners do not listen too much to recommendations regarding load capacity), the car seriously “sits down” and its ground clearance is significantly reduced.
If you have to constantly carry heavy things, it makes sense to install springs with class “A”. Naturally, they will make the shock absorbers stiff, and you will only be comfortable in a heavily loaded car, and without a load it will shake like on a cart.
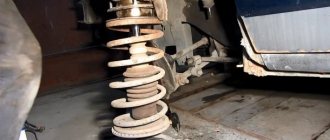
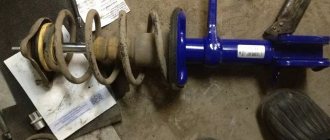
There are also s, which are installed between the spring coils and do not allow the shock absorber to compress too much.
Interturn spacers in the shock absorber spring
In principle, such a car will no longer sag significantly under load, as well as nod off, but the shock absorber stroke will decrease and it will fail faster.
"Houses"
Another method of increasing ground clearance is to install so-called “houses” on the rear suspension. The “houses” have special holes through which the ground clearance is adjusted, and they are installed between the eyes of the rear suspension beam and the bottom of the shock absorber.
But experts generally cannot come to a common opinion - whether the “houses” of the VAZ 2110 help or harm it. Some people believe that they are needed when the springs have sagged, and with their help it will be possible to lift the rear of the car. Others suggest replacing the springs and not “fencing up houses”.
How to properly increase a car's ground clearance
The vehicle's ground clearance is a parameter that does not happen much on our roads. Although, if you look from the other side, it is not uncommon to come across a car on the street with a lowered suspension.
Most often they decide to increase clearance due to the following cases:
- A loaded car hits the fender liners with its rear wheels or the mudguards on the ground, so they want to lift the rear of the car.
- It touches the bottom or crankcase protection on uneven roads, so they want to raise the front of the car.
In some cases, they decide to raise the rear and front suspension at the same time. It is no secret to many that after such actions some troubles may arise, wear of some components may increase, and the characteristics of the car may change. Let's try to find the answer to the question: how to increase ground clearance without negative consequences.
Safety
Whatever method of increasing the ground clearance on the VAZ 2110 you choose (if you need it, of course), remember that safety comes first. You want to get a car that will be more stable on the road, and not ready to roll over every minute even on a small obstacle?
Therefore, be sure to adjust the suspension to increase its elasticity. Swap out the regular tires on your car for low-profile tires. To ensure this, also install additional stabilizers.
How to Correctly Install Spacers on a VAZ 2110
In the case of rear wing wheels with full and sometimes partial load, we are ready to lift the rear of the car. There are several methods. The first is to replace sagging standard springs with similar or reinforced ones. But there is a second option, to put gaskets under the springs.
In this case, the length of the shock absorber structure practically increases, the connecting dimensions are maintained, that is, the spring spacer unit can be installed in a normal place in the car. The position of the rear brake pressure regulator needs to be adjusted. it is necessary to adjust the longitudinal inclination angle of the front wheels rotation axis (roller). If the first two parameters can be adjusted independently, the wheel should be set to 100, because this is practically the geometry of the wheel and without special ones.
To install the rear spring spacers, we hang up the rear of the car. With a 19 socket we remove the lower shock lug bolt while holding the nut from turning with a wrench of the same size. Remove the bolt. Please note that the struts are mirror symmetrical and can be installed on either side of the car.
The side of the spacer where the distance from the edge to the mounting bolt hole is greater (shown in the photo below) should be installed in the center of the car. To further determine which spacer to install, it is necessary to determine the shock absorber spacer taking into account the length of the building. Therefore, if the spacer is installed correctly, it is necessary that a line through the centers of the spacer holes is secured to the support and the bottom end of the shock is close to vertical and aligned with the shock nipple. the shock absorber is attached to the spacer. (see photos for both sides respectively). Install the spacer on the beam eyes.
Video: How to correctly place spacers on a VAZ 2110
Insert the lip gasket between the beam eyes and insert the bolt. We attach the nut to the bolt and tighten it to a torque of 7085 Nm. In this position, the spacer on the rear of the vehicle can be raised to the selected height.
To select the middle position during installation (see photo), you need to change the right and left spacers. We chose the bottom position. Insert the bolt into the spacer holes and shock absorber bushing. Tighten the nut to the bolt. Similarly, install a spacer for another shock absorber, of course, the selected height must correspond to the first case.
How to correctly install spacers on the rear pillars of a VAZ 2110
If you are the happy owner of a VAZ 2110, then you were able to fully appreciate the undemanding and easy operation of your dozen. But one day, if you have had the car for a long time or got it from someone, you will notice that it has begun to sag a lot. This can be noticeable even with a completely empty cabin and tank. The consequence of this subsidence will most likely be impacts from the tires into the fender liners. And, as a consequence, their mutual destruction.
You can solve this problem of your VAZ 2110 by using spacers for the rear springs by contacting the nearest car service center, but it will be much cheaper and more interesting for any real car enthusiast to solve the problem on their own. Moreover, the process of installing spacers will not take much time.
The procedure for installing spacers on the rear pillars of a VAZ 2110
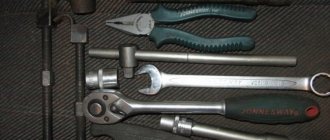
All you need for this operation are the spacers themselves for the rear springs for the VAZ 2110, a small set of tools and a little accuracy.
Let's look at the whole operation, breaking it down into 16 stages:
- First of all, using available tools, you need to hang up the rear part of your VAZ 2110 and remove the rear wheels;
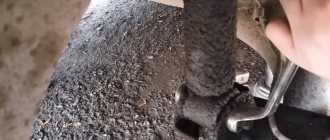
- Next, taking a 19mm wrench, you need to unscrew the bolt that secures the shock absorber from below. To prevent the bolt from turning, securely fix the nut with another suitable wrench.
- Remove the bolt.
- We take one of the spacers. Which one is not important, since they are symmetrical and equally suitable for any side of the VAZ 2110.
- We orient the spacer with the larger side facing longitudinally in relation to the length of the car.
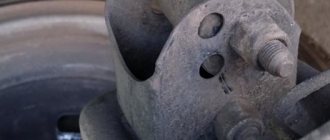
- The spacer has three holes that connect it to the end of the shock absorber. You need to select one of the holes depending on what lifting height of the VAZ 2110 you need.
- Remember which hole you chose, you will need to select a similar hole on the other spacer.
- We mark the longitudinal axis of the shock absorber and mentally draw an imaginary line through the centers of the holes with which the spacer is attached to the bottom of the shock absorber and the beam. This line must be vertical.
- Observing all of the above, you need to put a spacer on the eyes available in the beam.
- Between these same eyes we place a spacer sleeve.
- We fasten everything with the appropriate bolt.
- Tighten the nut. To do this, you should use a torque wrench. It will allow you to maintain the optimal, in this case, force - about 80 Nm.
- Next, the bolt is also inserted into the shock absorber bushing. Tightens his nut. The recommended force is the same as in the first case - about 80 Nm.
- Next, we proceed to install the pressure regulator. To do this, you need to press on the car trunk with a force of about 45 kgf.
- After this, loosen the pressure regulator bolt connecting it to the regulator drive lever.
- Using a suitable screwdriver, move the lever bracket until the gap between the lever and its spring is about 2.05 mm. Use a wire of suitable thickness to check the distance.
For a car with passengers and a payload of 320 kg (4 people) in the cabin and 40 kg of cargo in the trunk, the wheel alignment angles must be within the following limits:
| camber angle | 0°±30′ |
| convergence | 0°00'±10' (0±1 mm) |
| caster angle | 1°30’±30′ |
Angles of vehicle wheels in running order (without driver, passengers and cargo):
| camber angle | 0°30’±30′ |
| convergence | 0°00'±10' (1.5±1 mm) |
| caster angle | 0°20’±30′ |
C.O.D
Payment for the order upon receipt is possible if you choose the delivery method Russian Post
You can choose one of several forms of payment:
To pay for your order:
- Select product
- Add to Basket
- Select delivery method
- Fill in the recipient's details
We will quickly and reliably deliver goods throughout Russia, CIS countries and neighboring countries
Our logistics department was created specifically to provide the most profitable and convenient way to deliver our products to your warehouse. Depending on the parameters of the cargo being shipped, our specialists will choose the most suitable transportation option to your city.
Delivery throughout Russia We cooperate with various transport companies throughout our country. The goods are dispatched after payment for the goods within 1-2 working days or as agreed with the manager. You can calculate the cost of delivery to your city yourself using the calculators on the transport companies’ websites.
Delivery to the terminal is FREE.
Suspension adjustment after installation
This completes the installation of spacers on your VAZ 2110. Having returned the car to its normal position, you need to make a number of important adjustments. We are talking primarily about the pressure regulator for the rear brakes, headlights and front wheels.
In the case of the latter, we are interested in their longitudinal inclination angle, otherwise called castor. After installing the spacer on the rear pillars, the rear of your VAZ 2110 will naturally rise, and the castor, on the contrary, will decrease. This will negatively affect the vehicle's stability in motion and its overall handling. Obviously, these parameters are critical for your safety, so it is better to entrust castor adjustment to certified auto mechanics from a car service center.
The first two settings of the VAZ 2110 can be done independently.
Having picked up a speed of about 35 km/h in the car, we sharply brake. At this time, the assistant should observe how soon the rear wheels will lock. Normally, it lags somewhat behind the locking of the front wheel pair. If this does not happen, then return to point 16 of the plan discussed above and change the size of the gap upward.
Adjusting headlights after installing spacers
To adjust the headlights, you need a flat area where you place your ten and walls (preferably light in color) at a distance of 4-6 meters from the nose of your car. The vehicle must be fully fueled, have approximately your weight in the front seat, and have all tools and a spare tire in the trunk.
Having prepared everything described above, we turn on the headlights in low beam mode and, using their sequential shading with a piece of cardboard, begin the adjustment. By rotating the screws that secure the headlights, we, in a way, “raise” the light spot to the optimal level. Having done this, set the vernier of the headlight range control to the minimum load position of the VAZ 2110. In general, we wrote in more detail about adjusting the headlights in this article “Adjusting the headlights of the VAZ 2110”.
Important points
There is no need to completely unscrew the nut from the bolt securing the lower strut! Otherwise, there will be problems with removing the bolt and damaging the thread. You need to use a hammer - by carefully hitting the nut, the bolt can easily be knocked out.
- There is no need to tighten the springs!
- When using spacers for the rear springs, do not forget to check the quality of the springs - if they have shrunk from long-term use of your VAZ 2110 or are too soft, even though they are new, then replace them! Otherwise, the car’s control when cornering and at high speed will deteriorate sharply; it will begin to “scour” from side to side!
To summarize, we can say that using spacers on the rear pillars you will raise the body of the VAZ 2110, and its chassis will remain at the same height. The car's ground clearance parameters will also remain unchanged.
Spacers for rear pillars of VAZ 2110
Spacers for the rear pillars are recommended for use on uneven surfaces. They reduce the frequency of their impacts and snags on the car body. If the VAZ 2110 is used mainly when driving in a rut, then the spacers are virtually useless.
How to properly increase a car's ground clearance
The vehicle's ground clearance is a parameter that does not happen much on our roads. Although, if you look from the other side, it is not uncommon to come across a car on the street with a lowered suspension.
Most often they decide to increase clearance due to the following cases:
- A loaded car hits the fender liners with its rear wheels or the mudguards on the ground, so they want to lift the rear of the car.
- It touches the bottom or crankcase protection on uneven roads, so they want to raise the front of the car.
In some cases, they decide to raise the rear and front suspension at the same time. It is no secret to many that after such actions some troubles may arise, wear of some components may increase, and the characteristics of the car may change. Let's try to find the answer to the question: how to increase ground clearance without negative consequences.
How to Correctly Install Spacers on a VAZ 2110
In the case of rear wing wheels with full and sometimes partial load, we are ready to lift the rear of the car. There are several methods. The first is to replace sagging standard springs with similar or reinforced ones. But there is a second option, to put gaskets under the springs.
In this case, the length of the shock absorber structure practically increases, the connecting dimensions are maintained, that is, the spring spacer unit can be installed in a normal place in the car. The position of the rear brake pressure regulator needs to be adjusted. it is necessary to adjust the longitudinal inclination angle of the front wheels rotation axis (roller). If the first two parameters can be adjusted independently, the wheel should be set to 100, because this is practically the geometry of the wheel and without special ones.
To install the rear spring spacers, we hang up the rear of the car. With a 19 socket we remove the lower shock lug bolt while holding the nut from turning with a wrench of the same size. Remove the bolt. Please note that the struts are mirror symmetrical and can be installed on either side of the car.
The side of the spacer where the distance from the edge to the mounting bolt hole is greater (shown in the photo below) should be installed in the center of the car. To further determine which spacer to install, it is necessary to determine the shock absorber spacer taking into account the length of the building. Therefore, if the spacer is installed correctly, it is necessary that a line through the centers of the spacer holes is secured to the support and the bottom end of the shock is close to vertical and aligned with the shock nipple. the shock absorber is attached to the spacer. (see photos for both sides respectively). Install the spacer on the beam eyes.
Video: How to correctly place spacers on a VAZ 2110
Insert the lip gasket between the beam eyes and insert the bolt. We attach the nut to the bolt and tighten it to a torque of 7085 Nm. In this position, the spacer on the rear of the vehicle can be raised to the selected height.
To select the middle position during installation (see photo), you need to change the right and left spacers. We chose the bottom position. Insert the bolt into the spacer holes and shock absorber bushing. Tighten the nut to the bolt. Similarly, install a spacer for another shock absorber, of course, the selected height must correspond to the first case.
We tighten the nuts to secure the lower ends of the shock absorbers to the spacers in the position of the car on wheels with a torque of 7085 Nm. To properly install the pressure regulator, press the rear of the machine with a force of 4050 kgf. And move the bracket with a screwdriver so that the gap between the arm and the spring arm is within 2.02.1mm.
Check the gap using a drill or a piece of wire of the appropriate diameter, also this gap corresponds to a coin with two rubles, you can also use it. After setup, we conduct a road test. An observer outside the vehicle must fix the rear wheels, which should arrive a little later than the front ones, with hard braking at a speed of 3040 km/h. With very late locking we reduce the gap, and with the previous one (before locking the front wheels) we increase it by an indispensable check using the method mentioned above. To adjust the headlights, we place the equipped vehicle (with spare tire, tools and full fuel tank) on a flat horizontal platform 5 meters from a light wall of a building, garage, etc.
We check and adjust tire pressure on all wheels, and place an assistant in the driver's seat or load 75 kg. Mark the screen as shown (with all intersection points of lane 1 with lines A and B at the height of the center of the headlights). Turn on the low beam and cover the right headlight with a piece of cardboard. By turning the adjustment screws of the left headlight, we get that the upper horizontal boundary of the light spot on the display coincides with line 2, and the intersection point of the horizontal and inclined boundaries (E) with line A. Adjust the light beam of the right headlight in the same way.
Adjustment work
Once again, it is worth saying that if you are an inexperienced person, then it is better to find a familiar specialist who would help carry out everything planned, from installing the described part to calibrating all the values, or take the car to a service station.
If you understand the structure of your car, then you need to start by adjusting the position of the pressure regulator. To install it correctly, you need to apply a force of 45-50 kgf to the rear of the machine. After this, you need to unscrew the bolt that holds the pressure regulator and move the drive bracket using a screwdriver until the gap between the spring and the lever is about 2 millimeters. You can check the remaining gap by simply placing a piece of wire with a diameter of 2 millimeters into it or taking a similar drill.
Now you can start setting the desired light level. To do this, you need to place the car on a flat horizontal surface at a distance of 5 meters from any light wall, let it be the wall of a house or garage, it doesn’t matter. It is better to do this “trick” together, at the same time the tire pressure is checked and the companion sits in the driver’s seat. Now a horizontal line is drawn on the wall at a height of 60 cm from the floor and split in half in the center of the car. Now, from the center of the horizontal line, measure the distance of the car headlights and draw perpendicular vertical lines. There should be a beam of light at the intersection of the horizon and vertical lines.
