Many of us have heard about such a thing as car chip tuning. The thing is very good, it allows you to improve the characteristics of the car without resorting to any physical changes. Do-it-yourself chip tuning is possible, but in order to do it efficiently and not break the unit, you will have to buy some equipment, which, by the way, is not that expensive.
Of course, if you change the engine, install sports camshafts, forged pistons, etc. and at the same time perform chip tuning, then it will drive even better. In this article we will not consider this option, but will consider do-it-yourself chip tuning of a stock car.
How to flash a VAZ 2107 injector with your own hands
The Eternal Motion Center performed chip tuning of the VAZ 2107 car
.
It all started when a client complained about an error regarding the low efficiency of the catalyst
.
After performing diagnostics and making sure that there were no other problems with the engine, we offered the client firmware for Euro-2
(with catalyst control disabled) and physical dismantling of the catalyst. To which the client gave a positive response, and we got to work.
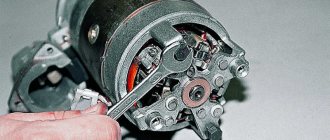
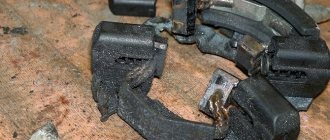
First of all, we determined which ECU is installed on this car. It turned out to be the Itelm M73
(it could also be
January 7.2
,
Bosch 7.9.7
or
M74
). This type of control units is programmed via a special cable connected directly to the ECU connector. This operation can be performed without removing the ECU from the standard mounts behind the car's glove compartment.
The second stage we considered the factory firmware, and using its identifiers we selected a tuned version of Euro-2
.
Loading the modified firmware file took approximately 15 minutes of working time.
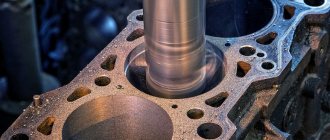
Once the electronics work was completed, we began the plumbing phase. The VAZ-2107 is perhaps one of the very few cars where, instead of a catalyst, you can weld a regular spacer pipe rather than a flame arrester. This is because the “classic” has such an exhaust design. At a minimum, on the “classic” there is no corrugation, which is located after the catalyst and constantly burns out in its absence. Therefore, on VAZ-2107 cars, instead of a catalyst, you can weld a spacer pipe. This is exactly what we did in the case described.
After an hour of plumbing and welding work, the exhaust became a little less environmentally friendly, but it became easier for the engine to “breathe”, due to which its traction and dynamic characteristics increased. Then we started the car and made sure that the error was P0420
no longer lights up and we went with the client for a test drive.
test drive results
the customer reported that he did not even think that simply removing the catalyst could give such a significant increase in power.
I was sitting here the other day and thinking: “Should I chip my car?” I looked down a bit and finally decided that I should ask the servers what and how much it costs... I traveled around, asked around, on average in my city this pleasure costs about 3 thousand, I put this thought aside for later. And then the day came when I purchased a diagnostic cable and began to scour the Internet in search of information.
So, how do you do chip tuning for VAZ cars? There is nothing complicated about this, I understand, a bunch of different unknown definitions on the forums will push you away from this idea, but whoever fights gets his.
Let's start in order: 1. We purchase a diagnostic cable (I have a KKL VAG-COM cable for 409.1 (usb), I bought it on Avito from a guy for 1000 rubles);
2. We will need a resistor of approximately 4 kOhm (you can find it almost everywhere), this is where the problems begin, I personally don’t have a special one in my city. stores where you can go in and calmly buy such gadgets, I had to fiddle with the boards, let’s consider this “without leaving the cash register”:
a) If the resistors that you found on the board or in some other place do not have digital designations (what resistance it is designed for), then take a multimeter and start measuring (I say right away, if the resistor is still completely soldered in, then there is no point in measuring, you need to unsolder at least one leg and do not forget that you cannot touch the contacts of the multimeter, because you also have resistance and it will lie, in general, at this rate you will be looking for the resistor you need for a long time);
b) You can take a resistor with a resistance from 3.5 kOhm to 5.7 kOhm (this is all approximately because at first I had a resistor higher than 10 kOhm and it worked, but it crashed when connected to the brain, then I set it to 5-something and everything became normal );
c) Regarding the colors on the resistor, enter in a search engine: “colors of resistors” and there will be a table on how to calculate the resistance by color, I counted, but apparently I don’t understand something, in short, I couldn’t do it (this is in case you don’t have a multimeter , but there is only the Internet).
3.Next you will need several short wires and female-type terminals for them, but again, in stores they are too large for the contacts of the ECU (brains), so I took an old power supply and began to remove the terminals from the power chips of the motherboard (the largest chip)
4. For convenience, most people install toggle switches (to simulate ignition), I did not install them, because I was too lazy to look for it, if you want you can take some kind of toggle switch