The water pump of the cooling system on classic VAZ 2101–07 models is not reliable. On average, the mileage of a part is 40 thousand km, after which it fails and must be replaced. But for the skilled Zhiguli owner there is another way - to remove and repair the pump, replacing worn or broken elements: oil seal, bearing or impeller. If this approach is close to you, then before starting work you should study the detailed instructions for restoring the “classic” pumping unit.
Pump repair
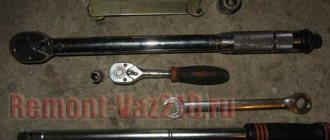
If it has been determined that the pump needs repair or replacement, you first need to prepare the necessary tools for work:
- a set of keys;
- container for draining coolant;
- flat or Phillips screwdriver.
Removal
After preparing everything you need, you can start disassembling:
- Open the hood and drain the coolant by unscrewing the corresponding bolt on the cylinder block and the plug on the radiator.
- Remove the generator belt by loosening the top fastening nut and reducing the tension.
Disassembly
Repair work will require disassembling the water pump. The procedure is carried out in the following order:
- Dismantle the impeller, having first clamped the pump in a vice.
- The shaft is knocked out.
- Remove the oil seal.
Bearing replacement
To replace the bearing, you will need to disassemble the pump and knock the shaft out of the housing. On the “classic”, the bearing and shaft are one part. Therefore, if one of the parts fails, the entire product is replaced. In order not to make a mistake when buying a pump shaft for a VAZ 2107, you need to take the old part with you, since the axles can differ in both diameter and length, which the seller does not always know about.
The shaft is changed in the following order:
- Using a puller, press out the impeller.
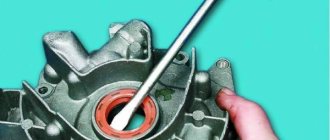
Replacing the oil seal
Due to constant contact with antifreeze, the oil seal sometimes fails, which leads to a leak. To replace the part, it is necessary to dismantle the impeller and knock out the shaft and bearing. To do this, you can use an old axle, which is inserted with the opposite end into the pump hole.
Then the shaft is driven in by striking with a hammer until the oil seal comes out of the housing. The new sealing element is inserted and pressed into place using a suitable adapter.
Replacing the impeller
If the impeller is damaged, for example, the blades are broken, then the part can be replaced. Damage usually occurs upon contact with the housing due to severe wear of the shaft or bearing. Regardless of the material of the impeller, the part is attached to the axle by pressing. To replace the plastic impeller you will need:
- Having secured the shaft on the reverse side in a yew, use an M18 tap with a pitch of 1.5 mm to cut the threads inside the impeller, having previously lubricated the tool with engine oil.
- Screw a special puller into the hole and tighten the outer bolt.
- By rotating the head of the inner bolt clockwise, press out the impeller and remove it from the shaft.
- The metal impeller has threads cut from the factory, so the part is simply pressed out with a puller.
When reinstalling, the part is pressed onto the shaft using a hammer and a suitable attachment, avoiding damage to the blades. You need to make sure that the lower part of the impeller rests against the ring on the oil seal, after which it needs to be seated 2-3 mm inward. This will ensure a tight fit of the rotating part to the ring.
Video: how to remove the impeller from the pump shaft
Installation
Assembly and installation of the unit is carried out in the reverse order
The only thing you should pay attention to is the gaskets - it is recommended to use new ones. In addition, the connections between the pump and the pipes are coated with sealant
When the part is installed, add antifreeze. In order to prevent the formation of air pockets, disconnect the thin hose of the cooling system from the carburetor (on a carburetor engine) and ensure that the antifreeze flows out of the hose and fitting, after which the connection is made. Start and warm up the engine, inspect the pipes for leaks. If everything is in order, the repair can be considered successfully completed.
Replacing or repairing the pump on a VAZ 2107 yourself is within the capabilities of every owner. The only thing is that in some cases special devices will be required. Otherwise, a standard set of tools will suffice. To ensure that the pump operates for a long time, it is recommended to select the part from trusted manufacturers.
Purpose
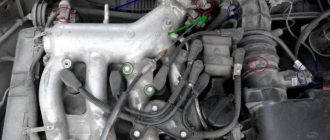
The pump on the VAZ 2107, as on other cars, is designed to pump coolant through the system through the cooling radiator, etc. Without a water pump, the car engine overheats and quickly fails. Quite often it happens that the alternator belt breaks and the pump stops driving coolant through the system, which leads to overheating and boiling of the engine. Therefore, it is necessary to carefully monitor this unit and its drive to protect the motor from overheating.
How to fix a pump leak with your own hands
If the pump on a VAZ “classic” leaks, then you can no longer drive such a car, because the engine can quickly overheat. It is necessary to separate the concepts of “the pump is leaking”, because the pump can leak only slightly, and the circulation will not be impaired. Or the coolant may leak heavily and it is no longer possible to put off repairing the device.
A pump leak can occur due to wear of the oil seal or cuff. That is, it will be necessary to remove the pump, disassemble it and replace the worn element. Replacement procedures are listed above.
If the pump has been in use for a long time, it is not advisable to carry out repairs. It is recommended to buy a new water pump and install it in place of the old one.
Thus, all the main work on restoring the water pump on a VAZ “classic” can be done with your own hands. However, Zhiguli owners prefer to repair the pump only in cases where the oil seal is leaking or the impeller is worn out. These are simple works that can restore the life of the pump. In other cases, it is easier to buy a new pump, since repairs can be very complicated.
Share:
Tags:VAZVideo
Symptoms of a problem
When the pump fails, the following malfunctions appear on the car:
- The coolant leaves the expansion tank and antifreeze (antifreeze) leaks are observed near the pump;
- The pump bearing noise appears, similar to a rumble;
- The car overheats quite quickly;
- Coolant boils out of the expansion tank;
If there are similar signs of a pump malfunction in your car, it needs to be replaced as soon as possible. It is highly not recommended to operate a car with a faulty coolant pump.
Repair of water pump VAZ 2107 (pump)
Everyone knows that any engine that has moving parts has friction as an integral characteristic. In an automobile engine, which is an internal combustion engine, the source of heat that needs to be removed is not only friction, but also flashes from the burned fuel.
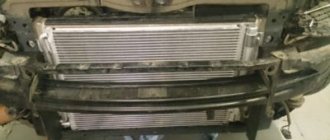
To reduce the temperature, lubrication of rubbing surfaces is used, which significantly reduces the temperature, and a cooling system, the main heat exchanger of which is the VAZ 2107 radiator.
But the radiator will be absolutely useless if no coolant flows through it. This current provides the “heart” of the VAZ 2107 cooling system - the water pump, or water pump.
The pump is essentially a multi-blade impeller, centrifugal type. It consists of a cover and a shaft. As a rule, water pump repair is associated with two malfunctions, which, in principle, are easily identified:
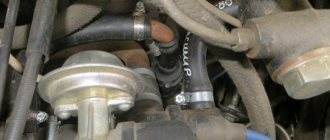
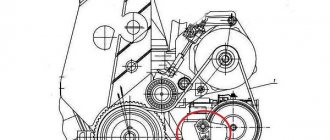
- There is a coolant leak. This can be seen by a puddle under the car in the hood area, by a rapid decrease in the level of coolant in the expansion tank, or even by a fountain splashing from the pump under the hood (if you open the hood while the engine is running). This situation is the most unfavorable, since if repairs are not carried out in time, you can short out the high-voltage wires, flood the breaker-distributor, and even cause a fire in the engine compartment of the VAZ 2107. This is most often due to the oil seal, which is leaking (8).
- Noise is heard when the pump is running. In this case, the bearings on the water pump shaft (7) are faulty, since it usually operates completely silently.
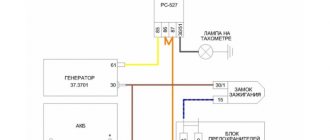
- There may be a situation where pump repair is not required. For example, the driver notices that the engine temperature is “getting into the red scale.” But it turns out that the sensor showing the output of voltage by the generator also shows that the generator is “dead”. It turns out that it is simply enough to tighten the generator drive belt, since both the pump and the VAZ 2107 generator are on the same drive.
To effectively pump antifreeze into the cooling system, the gap between the impeller and the housing wall must be within 0.9 - 1.3 mm. If the gap is too large, the pump will pump out antifreeze poorly. If the gap is small, the impeller blades may break.
Many car enthusiasts believe that it is better to change the water pump than to disassemble it. In any case, whether you decide to repair the pump or replace it, you first need to remove it from the engine.
How to remove the pump?
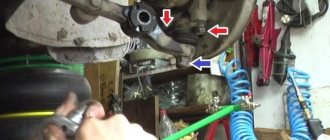
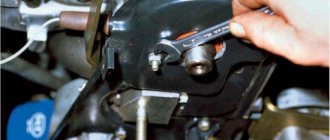
All work must be performed “dry”, that is, after the liquid has been drained from the cooling system of the VAZ 2107 (from the radiator and cylinder block); After this, remove the generator drive belt, take a 17mm wrench (a socket is better) and unscrew the fasteners of the generator bar, and then remove it from the generator: Then, holding the pulley with a screwdriver (so that it does not turn), using a 13mm wrench, first loosen it, and then turn it out three bolts securing it: We got to the pump. We take a 13mm socket wrench and unscrew the nuts from its cover. There are 4 of them: Now carefully, taking a mallet-type hammer (so that there is an elastic striker), tap the pump cover around the perimeter, and then remove the pump from the studs
The pump has been removed. Attention! It is recommended that after removing the VAZ 2107 pump, in any case, replace the cover gasket with a new one.
Installing a new pump (or an old one after the pump has been repaired) is done in the reverse order.
In conclusion, it should be said that the pump and its blades can become covered with “scale” from old antifreeze. You can remove it using phosphoric acid, or by shaking the pump in Coca-Cola.
Replacing the pump, belt, coolant and wheel
...I drove in fear that the pump might jam, but the car waited for repairs, losing a little coolant, but it didn’t let me down... (Yes, a year or two ago I heard how the bearings in the pump crunch in winter, it was necessary to lubricate it, fortunately there is a plug for a screwdriver for the oil can in the bearing, but I’m not an experienced pelvis fitter and I ruined the pump with bad antifreeze and lack of lubrication...)
AvtoVAZ’s motto is always wounded, never killed!
I climb under the car in the morning...what’s wrong with the wheel?
Air, where are you going?
And here it is, everything immediately became clear, I haven’t parked under the driveway for a long time, and last night for the first time in a couple of years I drove up for a couple of hours to load things, well, in general, everything was the same as before, many years ago, nothing has changed, the screw is good, brand new . Thank God I no longer live in this yard.
I removed the mudguards... drained the original antifreeze (antifreeze) which looks like used oil...
Oh, everything is leaking here, poor Gennady
And here's where it comes from...
The big difficulty is to unscrew everything that no human hand has touched for the last 10 years.
Unscrewing the nuts is an adventure...
Initially, I decided to remove it together with the pulley, well, it’s inconvenient to remove the pulley, but it didn’t work out, I had to remove the pulley using two 13mm wrenches, and then hit the body with a hammer so that the semi-pump would separate from the body.
Do you think it still fits?..
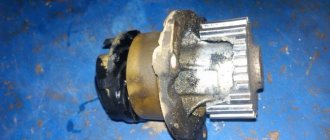
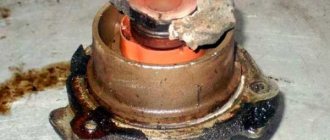
And here is the removed factory pump...
The seat has been cleared of the old gasket...
Old factory pump and new Luzar Turbo (God help us with quality)
We simply screw the new pump onto the gasket without sealant (nothing seems to be leaking)…
It’s probably time to send the factory belt to rest, in the trunk, in reserve...
Fortunately, I always have a new belt in the trunk, the old belt is noticeably thinner, a little cracked
Work environment
I couldn’t get the new belt to tighten, it wouldn’t fit, I put the old one back, tightened it, and the adjustment was already at the limit, I drove for a week on the old one, and today I integrated the new belt by removing the pump pulley and installing them at the same time...
The pump has been replaced, the system needs to be flushed, I was afraid to use chemicals so that nothing would leak... I poured in distilled water, warmed it up, cooled down, started it for a minute so that the dirt would rise and drained it.
Rinse distilled water of the first run
While the car is cooling down, you can change the tire...
I ran the water three times a day, each time it was much cleaner, but it still blended in with the black tint... I decided to ride on the water for a week... ... I drove for a week and 200 km on the water...
The water is now not dark, but yellow...probably it’s not worth driving on the water...
I run the water again, drain it, and it wasn’t there, fill it with antifreeze (antifreeze), otherwise distillation and fuel for half a day of warming up will soon cost more than antifreeze...
FELIX G12+, let's see...
Don’t forget to tighten the drain plugs...you need to purchase drain taps and screw them into the block/radiator before draining...
And a beautiful liquid poured into the bowels of the engine...
By the way, about air locks, in some manuals you need to remove one of the throttle valve pipes to let air out, in others you need to unscrew the sensor from the cylinder head... But I didn’t do this, I just added antifreeze (antifreeze) with the engine running and controlled the heating of the gas reducer and throttle valve, if it gets warmer then there is no plug...
10 liters of FELIX g12+, everything has just gone to the bottom, you still need to buy it for refilling