I think that at least half of all owners of VAZ 2110, 2111 and 2112 cars have 16-valve engines in their cars, since at one time they were simply incredibly popular. At first, cars with 1.5 liter engines were produced, and a couple of years later they began to make 1.6 liters. There is no need to explain once again that on the first ones the valves bent when the timing belt broke, but on the last ones there were no problems in this case.
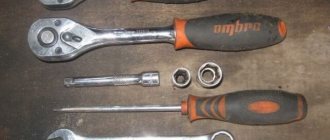
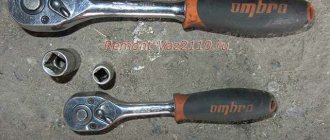
In order to independently replace the timing belt on 16-valve VAZ engines, we will need the following tool:
- Head for 10 and 17.
- Ratchet and wrench.
- Torque wrench.
- A special key for tensioning the belt (into the holes in the tension roller).
- The key is 13.
Replacing the timing belt for a VAZ with a 16 valve engine
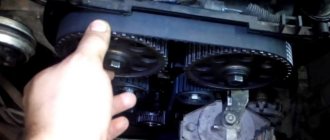
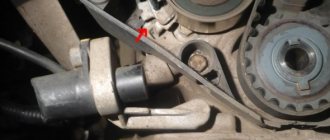
We put the car on a flat surface, raise the handbrake and put it in first gear. Remove the decorative engine cover and the protective cover of the timing belt. Using a 19 mm spanner or a wrench, turn the generator pulley until the mark on the camshaft pulley aligns with the “tendril” of the protective casing mounting bracket on its left side. We move to the right and remove the rubber plug in the clutch housing to make sure that the marks on the flywheel match the triangular cutout on the scale, which is located there.
After all the marks match, loosen the tension on the generator drive belt and unscrew the bolt securing the pulley to the crankshaft gear.
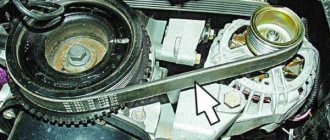
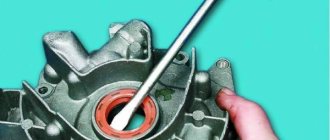
We remove the gear and check the alignment of the marks on the oil pump cover and the crankshaft gear. The generator pulley mounting bolt must be installed back in order to subsequently rotate the crankshaft to check the correct valve timing. Next, you need to loosen the bolt securing the tensioner (tension roller) and use a special wrench to turn it clockwise until the timing belt tension is released. Now you can remove the old belt.
We put a new belt on the crankshaft gear, then on the camshaft gear, tension roller and pump. Once again we make sure that the marks match. Let's move on to belt tension.
Attention! Due to inexperience, you may encounter the following problem: when trying to tension, the mark may “run away” from the crankshaft pulley and flywheel. This happens due to the fact that you do not tension the drive belt branch (the one that “enters” the camshaft gear) loosely.
Tension it as much as possible and, while turning the tension roller, guide the belt teeth with your fingers into the teeth of the camshaft pulley so that torque is transmitted to the crankshaft. There is another option - make an allowance of half a tooth - a tooth on the camshaft pulley. After putting on the belt, turn it until the mark coincides with the “tendril” on the bracket, and carefully tighten the loose branch of the belt (from the side of the tension roller and pump) by turning the roller counterclockwise
This happens due to the fact that you do not tension the drive belt branch (the one that “enters” the camshaft gear) loosely. Tension it as much as possible and, while turning the tension roller, guide the belt teeth with your fingers into the teeth of the camshaft pulley so that torque is transmitted to the crankshaft. There is another option - make an allowance of half a tooth - a tooth on the camshaft pulley. After putting the belt on, turn it until the mark coincides with the “tendril” on the bracket, and carefully tighten the loose branch of the belt (from the side of the tension roller and pump) by turning the roller counterclockwise.
How to change it yourself?
Before changing the timing belt yourself, you need to study the diagram of the gas distribution mechanism, stock up on the necessary tools, and also imagine the order of work in the form of a sequence of actions.
Before replacing, study the timing diagram
There are differences between modifications of the VAZ 2112, but the basic algorithm is approximately the same for all modifications. This algorithm can also be used on VAZ cars of other modifications, for example, 2110. It is necessary to have a good manual that explains the progress of work step by step. And if you have at least a little experience in car maintenance and minor repairs, we can calmly carry out timing belt maintenance ourselves and change the necessary parts.
Tools and materials
The set of basic tools is small:
- socket heads for 10, 15 and 17;
- spanner or open-end wrench 17;
- large flat screwdriver;
- key for the tensioner pulley (if power steering is installed on the car).
The materials required are a new timing belt.
Step-by-step instruction
- The work begins by removing the negative terminal of the battery.
- Using a 10mm socket, unscrew the six bolts and remove the gas distribution mechanism cover.
- The crankshaft sensor chip is disconnected.
- The crankshaft sensor mount is unscrewed. Then you need to remove the sensor.
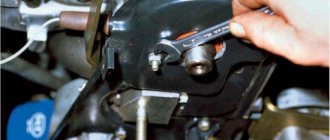
- The sensor hole must be aligned with the part of the pulley where there are no teeth. This is done so that the crankshaft sensor can detect TDC (top dead center). In addition, the area without teeth is used to block the pulley. After alignment, you need to put a 12mm hexagon in the hole of the sensor and fix the pulley.
- When the pulley is blocked, the generator nut is unscrewed.
- The belt tension roller bolt is loosened. After this, the belt is removed. Often during this operation the tension and support rollers and the pump are also changed.
- Installing a new timing belt. There are two ways to correctly install this part. First: put on the belt with the tension roller removed. The tension is adjusted after installing the roller. Second: install the belt by turning the exhaust camshaft pulley using a 17mm wrench.
- Next, you need to tighten the timing belt using the adjusting bolt. It rotates using a 10 key. Rotation clockwise increases the tension, counter-clockwise weakens it.
Replacing a belt on a car with power steering
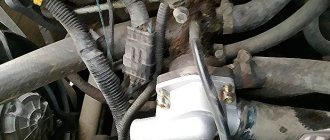
If your car has power steering. then the procedure for replacing the timing belt has some differences. Before starting work, it is necessary to remove the power steering reservoir, since it blocks access to the timing belt.
In addition, cars with power steering do not have an adjusting bolt. The belt is tensioned using a tension roller and a special key. If such a key is not available, you can use a homemade device consisting of two nails and a screwdriver. During operation, it is necessary to check the degree of belt tension and, if necessary, tighten it. Finally, you need to tighten the tension roller nut.
Features of labeling
Before tensioning the belt and tightening the bolts, you need to check the position of the marks. If the marks are set incorrectly, this will, at best, manifest itself in a decrease in engine power and traction characteristics. In the worst case, in those engines where valve bending is possible, it can occur even with a fully functional timing belt.
In order to avoid these problems, it is necessary to follow the order of placing labels:
- After installing the timing belt, but before tensioning it, the marks on the crankshaft pulley and the oil pump housing are aligned.
- Marks are placed on the intake and exhaust camshaft pulleys.
- The belt is tensioned, the tension roller nut is tightened.
- The crankshaft rotates two revolutions. If after this check the position of the marks remains the same, you can replace the crankshaft sensor, connect the power connector and replace the timing cover. Replacement of the VAZ 2112 timing belt is completed.
The stages of replacing the timing belt can be seen in the photo below.
Blocking the crankshaft pulley
Placing marks on the crankshaft
Marking valve pulleys
Replacing the timing belt of a VAZ 2112 with a hanging wheel
If you are changing a belt with a wheel hanging out, then while tensioning the belt, install the wheel and lower the car to the ground. Engage first gear. This will also prevent the crankshaft mark from running away. Having ensured that the tension is correct, the car will still have to be raised so that it is possible to rotate the timing drive to check the marks. But there is a way out! Ask a neighbor or assistant to simply depress the clutch pedal.
Checking the timing belt tension
A well-tensioned belt should bend 90 degrees from the force of your fingers. If you overtighten, there will be problems with the tensioner and pump bearings. If you don’t tighten it enough, the belt will either jump (which will disrupt the valve timing) or fall off altogether.
So, the belt is tight. We turn the crankshaft twice to make sure that the marks match. If the marks match, then return the generator pulley to its place, tighten its drive belt and install the protective and decorative elements of the engine back. After 2 - 3 thousand kilometers of the car, check the belt tension and its condition again. The optimal service life of the timing belt before it is replaced again is 40 - 60 thousand kilometers. The frequency of checking its tension is 15 thousand kilometers.
Dear friends, today we will tell you the basics of setting timing marks using the example of a VAZ 16 valve engine. It's no secret that correctly set timing marks are the key to proper engine operation. If the marks are set incorrectly, then normal engine operation is impossible.
It is also important to tension the belt correctly, this greatly affects its durability. So, when do we have to deal with the procedure for setting timing marks? When, according to the regulations, we need to replace the timing belt at the next maintenance, by the way, the rollers are also necessarily changed along with the belt in this case
Purpose of the crankshaft pulley
The crankshaft pulley on the VAZ 2110 serves the following purposes:
- Reducing the amplitude of crankshaft vibrations during resonance. In particular, for this purpose, some craftsmen install a lightweight version of the crankshaft.
- Reducing noise from the operation of the power unit.
- Rotation of mechanisms that are directly involved in the operation of the motor. This happens with the help of gears and a belt.
- The damper, in turn, addresses pulses corresponding to the number of crankshaft revolutions to the ECU.
Crankshaft damper pulley VAZ 2110
The VAZ 2110 car has a crankshaft damper pulley. The pulley itself transmits torque to additional units. The part is a flat ribbed wheel with a special hole for installing a belt. To improve performance, automakers equipped the pulley with a damper. Damper - a rubber layer to dampen vibrations that occur in cars. However, with this innovation, the life of the pulley has been reduced because the damper loses elasticity due to excessive loads. Sometimes the pulley breaks completely, which is why the VAZ 2110 stops moving.
Possible faults
The crankshaft pulley is removed in the following cases:
- In the case of a VAZ 2110 hub turning. In most cases, this occurs due to careless repairs. The VAZ 2110 car is equipped with a special fixing sleeve, which is pressed into the gear. If installed incorrectly, it may fall out, which will cause the hub to rotate.
- In case of lubricant leakage from under the crankshaft oil seal. It needs to be removed and replaced with a new one.
New oil seal
- In case of strong resonance.
- Incorrect pulley type installations.
- Incorrect damper installation.
- A split in the place where the damper is installed. In this case, replacement is necessary, and better yet, together with the crankshaft gear.
- When removing the crankshaft - for repair work, changing bearings, etc.
Replacing the timing belt Priora 16 valves
Replacing the timing belt on a 16-valve Priora is a little more difficult than on 8-valve engines, however, this procedure is accessible to almost every car enthusiast.
A belt in a car engine is one of the main parts for transmitting torque from one mechanism to another. But it is worth remembering that everything has an expiration date. We will outline the nuances of working and replacing the belt in the article below.
Tools and spare parts
Let's start with the fact that to replace the timing belt on a Priora 16 valves you will have to stock up on a very specific set of tools.
This is definitely a set of hexagons, a set of torx bits, and a set with a small 1/4-inch ratchet will not work, we’ll tell you why later.
In addition, you will need a device for tensioning the roller, but the usual one from 2114 will not work, you need a slightly wider one. If you have enough strength, you can tighten the roller simply by leaning against it with a mounting tool; many people do this.
The fact is that initially the 16-valve 21127 was designed without air conditioning. Everything was simple. The pump is driven by the timing belt, the alternator belt is no longer responsible for anything. In general, it couldn’t be simpler.
Crankshaft and generator with tensioner, without rollers.
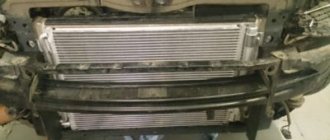
The designers were faced with an almost unimaginable task - to install an air conditioning compressor, which they accomplished. Yes, not perfect, but we did it. And therefore, two additional pulleys appeared here - a compressor and a tension roller.
By the way, many car owners later began installing these same brackets with a tensioner in order to dismantle this circuit.
Replacing the timing belt on a Priora 16 valves
Let's get to work. First, unscrew the oil filler neck, then pull off the plastic casing. Then there are two development options. We will look at a more complex one, with air conditioning. Its difference is in the additional video, this has already been said. The whole point is that it also needs to be unscrewed, because it simply interferes with removing the protective cover.
Here you need a 15mm head. Unscrew the roller and remove the alternator belt. On the way, we listen to the video so that it doesn’t buzz, otherwise we need to replace it. Next, the timing belt casing opens before us. Remove the front upper and lower parts of the casing. To do this, unscrew the 8 Torx bolts.
There is also a surprise here if you use a ratchet. One of the bolts, the one closest to the passenger compartment, will have to be unscrewed using a simple Torx wrench, because the head with a tip and a ratchet will not fit between the engine and the spar.
So, we removed the casing, in front of us is the timing belt and all the rollers.
It is best to rotate by the camshaft - it is easier than by the crankshaft. It is not advisable to rotate the camshafts separately from the crankshaft. A maximum of 10 degrees to correct the marks if they misalign by a tooth or two.
Then we turn the wheel all the way to the right, someone removes it, which is not necessary. We unscrew the 4 bolts securing the mudguard using a Torx and one using a Phillips screwdriver to gain access to the crankshaft pulley.
Articles
2108-1006120 – roller
Attention: parts 2108-1006120 and 2112-1006120 are not interchangeable!
2108-1006129 – pin for the roller;
2108-1006040-10 – belt;
2108-1006149 – seal under the casing;
2108-1006146 – plastic casing.
Analogs of belts
- GATES 5521 or 5521XS (heavy duty), recommended
- FINWHALE BD-111
- BOSCH 1 987 949 559
- LEMFORDER 58-111-19 or 14458 01
- CONTITECH ST-527
- GOOD YEAR G1474 (semicircular tooth) or G1485 (trapezoid tooth)
- DAYCO 111x190/1
Show all articles
- HANSE HZ 011 008
- BRTI 21080-1006040-10
- TOYOTA 13568-19035
- RENAULT 7701462019
- OPEL 636359
- ROVER GTB1124
- AYWIPARTS AW2110560
- PROCODIS FRANCE 05CD27
- FAI 40305
- GK 791170
- MAGNETI MARELLI 340018181434
- MAPCO 43080
- HEPU 29-0165
- OPTIMAL R-1113
- SCT G124
- WILMINK WG1151273
- VEYANCE G1474
- OPTIBELT ZRK 1123 (3 pcs.)
- TRISCAN 8645 5521 (2 pcs.) or 8645 5124 (2 pcs.)
- FLENNOR 4410 (2 pcs.) or F904410 (belt + roller)
- LYNXauto 111CL19 (1 piece) or PK-1236 (belt + roller)
Analogues of the video
- GATES T42042 or T42042A (2 pcs.)
- MAPCO 23081
- FLENNOR FS99018
- LUK 531 0671 20
- OPTIMAL 0N1917
Show all articles
- BREDA LORETT TDI3009
- TORQUE 830900AE2
- ESPRA 2108-1006120/ES0108
- INA 531075010
- CORAM C747
- VPZ-23 830900AE1
Causes of belt breakage
One of the common problems with the model is the failure of the timing belt. The reasons for this may be different:
- Simple wear and tear caused by a long period of use of the vehicle;
- Regular increased loads under which the engine has to work intensively;
- Mechanical damage as a result of improper operation or received during the repair of other components;
- Manufacturing defect.
Regardless of the causes of the problem, it must be eliminated.
Over time, it stretches so much that the gear teeth jump by 1-2 links. This disrupts the valve timing and causes interruptions in engine operation. But this is the best-case scenario for such a situation. The worst is when the strap breaks and the valves bend.
What can cause a timing belt to break?
In a VAZ-2112 car with 16 valves, rupture of a belt part can occur due to:
- Strong or, on the contrary, weak tension. To make sure it is tensioned correctly, it is recommended to use a special device called a frequency meter. Measurements should only be taken from a cold engine, the indicator should not exceed 155 Hz +/- 3 Hz.
- A rupture will be inevitable if the part has been in use for a long time and the replacement was not made in a timely manner. Since there is a constant temperature difference during the working position, the belt element gradually collapses, cracks appear on it, which leads to rupture.
- Due to improper placement of the bearing, which can jam and tear the timing belt.
- Due to leakage of the oil seal, which coats the part with oil.
- Due to a low-quality timing belt, which was installed in the 16-valve VAZ-2112 engine by the manufacturer.
These are the most basic reasons that lead to the rupture of the HMS belt. If you carefully monitor the technical condition of the machine and repair it yourself at the slightest sign of breakdown, you can avoid very unpleasant situations that can happen at any time.
Consequences of incorrectly setting timing marks
If the ignition is set incorrectly, the following negative aspects are possible:
- If the engine has 16 valves, then they become deformed or bent during operation, accumulating damage.
- The previous problem causes damage to the cylinder head.
- The guide bushings may also become unusable.
- Cracks may appear in other engine components.
Crack in the cylinder block
- The motor overheats.
- The engine piston mechanism can burn out.
- Oil residue may appear on the spark plugs.
Oil deposits on spark plugs
The fuel mixture loses its ignition moment.
After repairs, the following factors most often indicate an incorrectly set ignition:
- The car accelerates worse.
- Frequent overheating of the motor.
- The craving became much worse.
Belt replacement
Replacing the timing belt must be described separately, depending on how many valves your VAZ 2110 has - 8 or 16. Self-repair of the unit on an 8-valve engine is considered easier, although you should not have any serious problems with a 16-valve engine.
8 valve
The sequence of work will be as follows:
Disconnect the battery by removing the negative cable; Unscrew the bolts from the belt protective cover; Remove this protective cover; Remove the front wheel on the passenger side, while simultaneously removing the mudguards and engine compartment protection; Turn the generator pulley clockwise so that the marks on the cover and the pulley match; Remove the protective plug from the gearbox and check in the resulting hole to see how much the control marks match; Using a metal screwdriver or other object, you need to block the flywheel; After this, you can unscrew and remove the generator pulley; Make a few turns to loosen the nut that holds your belt tensioner pulley in place; Remove the old belt. You won’t need it anymore, so feel free to send it to the landfill; The space needs to be cleaned and degreased. White spirit is perfect for this; After rinsing, dry everything using a dry and clean cloth; Install a new roller, following the direction arrows
If they are missing, then take the inscription into account. It should be located from left to right, that is, you could read it without any problems; To tighten the belt, move the roller counterclockwise; Check that all marks and the degree of belt tension match correctly; The compression ratio should be checked on a cold engine and at an air temperature within 15-30 degrees Celsius; Turn on the motor and with the unit running, check whether you have installed everything correctly; If the sound is normal, then the installation was completed correctly; Reassemble the removed elements in reverse order.
Manufacturer's recommendations
- Your primary task as a car owner is to periodically visually inspect the unit.
- In addition to replacing the element, it is necessary to simultaneously replace the tension rollers.
- VAZ 2110 comes with 8 and 16 valves. The replacement process also depends on this. So, in an 8-valve valve, one tension roller is installed, and in a 16-valve valve, a support and a tension roller are installed.
Replacing the timing belt of a dozen is not difficult. It is not necessary to contact specialists. It is quite possible to do it on your own.
To complete the job of replacing the timing belt you will need:
- A set of spanners and open-end wrenches;
- Mount;
- Screwdriver Set;
- A special key with which to tighten the roller or simple pliers with curved rings;
- Car jack;
- Rags, protective gloves.
Many people ignore the advice on using gloves. Especially in the summer when it's hot. But they are needed to protect you from injury.
There is no need for an inspection hole. You will need to remove the right wheel to remove the timing belt if your Ten is equipped with power steering. So you can't do without a jack.
How to check the condition of the VAZ 2110 timing belt
To check the condition of the timing belt you need to:
- remove the front timing belt protective cover plug,
- remove the alternator belt so that it does not interfere,
- unscrew 6 bolts and remove the front protective cover,
- Having gained access to the timing belt, we inspect it.
If during your next inspection you notice:
- cuts on the timing belt, bulges,
- delamination, appearance of broken threads,
- numerous cracks, folds, severe abrasions,
- oil leaks on the belt,
it must be replaced immediately.
As a rule, young drivers perform such repairs in specialized auto repair shops or car repair centers. But, if you decide to replace the old belt with a new one yourself, prepare the tools and materials: heads “10”, “17”, a special wrench used to tension the belt, a screwdriver, a new timing belt, detergent, clean rags.
Honda GC 135 engine analysis
We directly disconnect the engine from the unit (remove the pulleys, starter flywheel, frame, etc.), we get the following:
We unscrew the cover bolts, pry the cover evenly around the perimeter (it sits on the sealant) and remove it, we get the following:
We remove the magneto and flywheel (lock the shaft, unscrew the nut and knock it off the cone by tapping). Don't forget about the keys, don't lose them.
Next is the crankcase. The plane of connection between the crankcase and the head is at an angle. We unscrew it around the perimeter of the crankcase (there are many of them), pry it along the seam with a strong screwdriver (it sits on the sealant). The direction of removing the crankcase is along the crankshaft, and not along the plane; the guide tubes are visible there in the photo.
We gained access to the crankshaft, later we will unscrew the two bolts with the numbers 12.
In order to avoid problems later when assembling and installing the timing belt in the correct position, we will make notes on the pulley and crankshaft gear relative to the marks on the belt. We remove the belt, unscrew the bolts on the crankshaft, remove the piston (here you will have to play around, since it comes out at a certain position. Remove the crankshaft. We received the following picture from the cylinder side
And then we are engaged in examining the problems. In my case, it was a ring on the piston (there were no scuffs on the cylinder). I bought the rings in a Honda brand store (on Google) for 1000 rubles, since the search for a cheap equivalent did not yield anything. Well, since the oil spilled through the air filter, then I carefully cut out the paper of the old filter, bought a regular filter for Lada cars (I don’t remember exactly which model for 100 rubles, the width and thickness were the same), removed the parallon, cut it to the required length and secured it with sealant. By the way, a native filter for GC135 costs approximately 500-600 rubles.
We received a new filter. When assembling, we clean anything, remove old silicone, degrease, apply sealants where necessary, check for unnecessary parts. After assembly, the engine does not start on the first try, so do not be alarmed