Where is the VAZ 2110 oil pump located?
The placement of the pump is a mystery to many; it is located in the engine oil sump, and in order to get to it you must drain the engine oil. The oil is drained into a clean canister and after the oil pump is replaced, it is refilled into the engine. Replacing the VAZ 2110 oil pump is necessary in case of its complete or partial failure. When replacing the timing belt on a VAZ 2114 car, one of the stages of work is replacing the pump - the cooling system pump. Repair work to replace the oil pump is carried out on an inspection pit or lift, using a standard set of tools. Manual replacement of the VAZ 2112 16 valve alternator belt. In this article I will tell you how to replace the oil pump on a VAZ 2110 at home if the need arises.
[custom_ads_shortcode1]
How to check the electrical circuit of the sensor
Malfunctions of the VAZ-2110 oil pump include the failure of the sensor, which, in fact, controls the operation of the entire system. If all the symptoms that we listed above have not disappeared, then you will need to do the following manipulations:
- Stop the engine and wait a while for it to cool down.
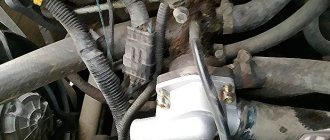
- It is necessary to disconnect the wire from the pressure sensor. On engines with 16 valves, it is located on the left side of the camshaft housing. On 8-valve engines it is located on the back of the head on the right side.
- Turn on the ignition, but do not start the engine.
- Connect the wire that goes to the pressure sensor to the power supply negative. If the lamp goes out, the pressure sensor circuit is working.
Purpose
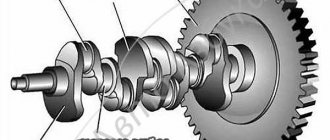
The purpose of the oil pump is to circulate oil through all engine components to lubricate them evenly and increase their service life. It is driven by an internal combustion engine (internal combustion engine) and is structurally divided into two different types, based on the principle of coupling with the crankshaft. In our case, it connects directly to the crankshaft, that is, it rotates with it.
This is the operating scheme of the unit for front-wheel drive VAZ cars. Cars with all-wheel drive, as well as classics, have a more complex system installed. There, the drive contains additional links: an intermediate shaft, a timing chain (gas distribution mechanism), and toothed gears, through which torque is transmitted from the crankshaft to this device.
[custom_ads_shortcode3]
Common faults
So:
- Most often, the pump of the VAZ 2112 and other VAZ models with front-wheel drive leaks through the seal, which has to be changed.
- The oil receiver also often fails, especially if you use low-quality oil, or missed replacing it in a timely manner, or the oil does not meet specifications (too thick).
- Too liquid simply will not be pumped and the pressure sensor will immediately light up.
- In this case, the oil receiver mesh becomes clogged, the circulation of oil through the engine becomes difficult, causes oil starvation, and as a result, the service life of the engine is significantly reduced.
- This includes a malfunction of the pressure reducing (bypass) valve: either it is stuck in the open position, and then the oil pressure drops. Either it does not bypass, and then the oil will squeeze out through the oil seal
[custom_ads_shortcode1]
Replacing valve stem seals without removing the head of a VAZ 2112, 16 valves, step-by-step instructions with photos
Dear friends, today we will tell you in detail and with photographs how to independently replace valve stem seals on VAZ-2112, 2111 and 2112 equipped with a 16-valve engine. The beauty of our story is that in order to replace the oil caps we will not remove the head from the engine, and this is a significant saving of time and labor costs, there is no need to drain the antifreeze, unscrew the manifold, etc.
At the same time, we will do this without using an expensive valve depressurizer, which allows us to do this, but will use a regular valve depressurizer for the VAZ-2110, which can be bought on the car market for 200 rubles. Even before starting work, I recommend purchasing this desiccant, if you have little experience in desiccaning and drying, then take a stock of heels of crackers, we will also need an anaerobic (do not use silicone) sealant, unlike conventional silicone, when in contact with oil, it does not clog the channels but dissolves in it, and also buy a key for tensioning the timing pulley for 50 rubles, since the belt will have to be removed and then set according to the marks. By the way, it wouldn’t hurt to replace the timing belt and rollers at the same time, ideally. If you are ready to do it yourself - no problem, if you lack determination - I can recommend turning to the guys to replace the timing belt in Minsk, they will definitely do it well and inexpensively.
Disconnect sensors, hoses, cables
Well, if you’re ready to do everything yourself, then let’s get started. First, remove the plastic cover from the engine and gain access to the “intake manifold”
Recommendations for choosing spare parts
So:
- The oil pump usually does not cause car owners much trouble, since it has a service life of at least 120 thousand kilometers. However, no one is immune from breakdowns
- If suddenly you still need to replace the oil pump on a VAZ 2112, it is better to take original spare parts and not save
- Among the well-known suppliers of parts for VAZ cars, the official one is the Tolyatti Automobile Assemblies Plant (TZA for short).
- It also produces oil pumps for the VAZ 2112
- This is one of four varieties of such units in the VAZ line, which fits all front-wheel drive fuel-injected cars
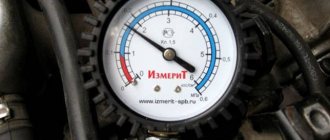
Helpful advice: To avoid serious consequences for the car and major engine repairs, it is important to monitor the indicators on the dashboard. If the oil pressure lamp flashes at idle speed, and replacing it does not solve the problem, the lamp lights up again - this means there is a breakdown. When the warning light suddenly comes on and the performance of your car’s engine is alarming, it is recommended to turn off the ignition and call a tow truck to a repair station. This will save money on subsequent engine repairs (continuing to drive the car under its own power in such a situation, you risk serious damage to the engine).
- Typically, removing the oil pump on any car occurs when disassembling the engine.
- Only if necessary, this work is carried out on the car without removing the engine from it.
- Before starting this procedure, first drive the car into the inspection hole.
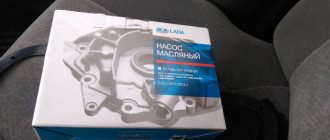
- And immediately purchase everything you need to carry out a full replacement, as shown in Photo No. 2.
Attention: The pumps of the VAZ 2108-1011010 and 2111, 2112-1011010 engines are almost the same, with the exception of point No. 5 - the sensor mounting bracket is different, do not miss this point! Tip: It is recommended to install only a factory-produced gasket under the pump, since a non-standard gasket may have a thickness that does not meet the specifications and cause problems with the operation of the pump.
[custom_ads_shortcode3]
Causes of oil pump failure
There are a number of typical breakdowns due to which the oil pump completely or partially fails:
- physical wear of the housing, rotor or driven gear. There is a gap of 0.2 mm between the pump gears and the housing. There is also a gap between the teeth of the pump gears - 0.5 mm. As wear occurs, these gaps increase, and the pressure created by the pump at the outlet pipe drops. Since replacing and adjusting worn gears is a very labor-intensive process and not everyone can do it, car enthusiasts follow the path of least resistance and simply change the entire oil pump;
- clogging of the oil receiver. If it becomes clogged, the pressure in the car's lubrication system drops sharply, and a red light comes on on the dashboard. A clogged oil receiver is a consequence of a completely clogged crankcase. The solution is to completely drain the used lubricant, remove the pan, crankcase, oil pump and thoroughly wash all these parts in kerosene;
- oil leak. Sometimes oil begins to leak directly from under the pump. Typically, the driver does not notice a leak immediately, identifying it by indirect signs, for example, by a sharply increased lubricant consumption and oil stains under the car. The cause of the leak is a leak in the pump gasket. Often, when replacing an oil pump, car enthusiasts do not change the gasket located under it, believing that it will serve for some time. This is an error that leads to leaks. The rule is simple: when changing the oil pump, you must also change the gasket, even if it does not look worn out.
Separate mention should be made of motor oil. Its quality also has a significant impact on the service life of the pump and its serviceability. The fact is that the oil pump is the only engine element that is lubricated with unfiltered oil (because the oil filter is installed only on the pump outlet). And if the car owner is used to saving on high-quality oil, then he may not count on long and uninterrupted operation of the oil pump.
Removal
Begin:
- First of all, disconnect the “-” (minus) wire from the battery, as with any other repair.
- Drain the oil (through the plug on the oil pan) from the engine
- We take out the camshaft drive belt
Attention: After removing the timing belt (timing belt), do not turn the crankshaft or camshaft, otherwise the pistons will bend the valves, and you will have more repair work and the PRICE will increase.
- We take out the crankshaft toothed pulley, then its key, using two flat-head screwdrivers.
- Now remove the oil pan
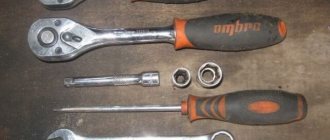
- Unscrew the oil intake fastener
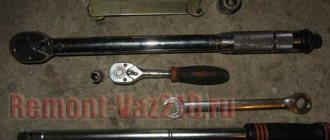
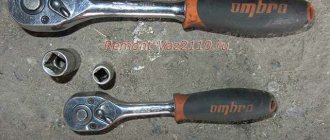
- Using a 10mm socket with an extension and a ratchet, unscrew the six bolts securing the oil pump to the cylinder block.
- Remove the unit from the engine.
Note: There is a gasket between the oil pump and the cylinder block.
- Be sure to wash the new oil pump with gasoline to wash off the preservation lubricant.
- We fill it with oil before installation so that it does not rotate dry when starting.
- It is also important to rotate the drive gear to install the pump on the crankshaft: so that the protrusions on the gear coincide with the groove on the crankshaft
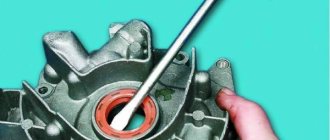
- Lubricate the lip of the oil seal before putting the pump back
- Carefully tuck the seal lip onto the shaft journal using a wooden stick.
- When tightening bolts, be careful and careful not to strip the threads.
- Install the remaining parts in reverse order.
So:
- We clamp the pump body in a vice, placing soft pads on the jaws and, using a 8-mm hexagon, unscrew the bypass valve plug.
- We remove the piston and spring of the bypass valve.
- We check the seat of the bypass valve - the presence of burrs and scratches is unacceptable
- Using a 5mm hexagon, unscrew the six bolts securing the pump housing to its cover.
- We take out the pump housing.
- We take out its drive gear from the cover.
- Behind it, we remove the driven gear.
- We wash all pump parts with gasoline, diesel fuel or kerosene, wipe the gears dry, and lubricate them with clean oil before installing them back.
- We carefully inspect the body for cracks, chips, and severe burrs, and if found, replace it.
Note: We check that the driven gear seat located in the pump housing does not exceed 75.10 millimeters in diameter. And the permissible minimum thickness of the partition between the driven and driving gears was no less than 3.4 millimeters. The permissible axial play for the drive gear should not exceed 0.12 millimeters, and for the driven gear - 0.15 millimeters.
- The same goes for pump gears; scuffing, chips, and cracks are not acceptable.
- We check the condition of the pressure reducing valve spring; if it is broken, cracked, or very short (compressed and does not match the dimensions), we replace it.
[custom_ads_shortcode2]
Engine diagram and structure
Many motorists know the structure of the main power unit, but not everyone remembers it. In order to understand how the process itself occurs, let us recall how the engine works.
Engine diagram
1 - channel in the cylinder block for supplying oil to the oil line of the cylinder head; 2 — channel in the cylinder head; 3 — pipe for exhausting crankcase gases into the air filter housing; 4 - oil filler cap; 5 — exhaust hose pipe; 6 — pipe for removing crankcase gases into the throttle space; 7 - oil line in the cylinder head; 8 - camshaft; 9 — oil supply channel to the camshaft bearing; 10 — oil pressure indicator sensor; 11 — pressure reducing valve; 12 — channel for supplying oil from the filter to the main oil line; 13 - oil pump drive gear; 14 — driven gear of the oil pump; 15 — oil supply channel from the pump to the filter; 16 — anti-drainage valve; 17 — cardboard filter element; 18 — oil sump; 19 — oil receiver; 20 - drain plug; 21 - bypass valve; 22 — oil filter; 23 — oil supply channel from the crankshaft main bearing to the connecting rod; 24 — oil supply channel to the crankshaft main bearing; 25 - main oil line
How does engine lubrication occur (diagram and explanation)
Engine lubricant circulation diagram
So, when the issue of engine design has been considered, we can proceed directly to the consideration of lubrication. The system itself is considered combined.
Using pressure, the following are lubricated: main and connecting rod bearings of the crankshaft, camshaft bearings, cylinder walls (using splashing), pistons and oil scraper rings, the camshaft itself, valves and pushers.
The oil pump is located inside the engine, and only the cover cap is visible from above. The oil pump drive is mechanical, forced.
Schematic representation of oil circulation
Replacing lubricant
In order to change the oil, you will need a tool, 5 liters of oil (about choosing oil here) and an oil filter.
Shel Helix oil recommended for filling into the 10 series Lada engine
So, let's look at the sequence of actions:
We remove the lower engine protection (if there is one, of course). Unscrew the oil pan drain plug.
We wait for the oil to drain. While the liquid is leaking out, it is necessary to replace the filter.
To do this, use a special tool to unscrew the filter element. You need to pour a little oil into the new filter and screw it in place of the old one.
It is worth noting that between the motor and the filter there is a copper o-ring, which also needs to be replaced.
We tighten the drain plug. Unscrew the filler plug.
Using a funnel, we pour new oil into the system until the fluid indicator on the dipstick is between the MIN and MAX indicators.
Assembly
Tip: When the pump is removed, we recommend replacing the front crankshaft oil seal located in the cover. We assemble the pump in the reverse order of disassembly. The driven gear inside the pump is positioned so that its side with chamfers and a mark is attached to the housing. The same with the drive gear. That's all. The pump assembly is completed, all that remains is to install it in place, as our instructions say. In addition to the instructions, we recommend watching a video on this issue. If a red indicator lights up on your instrument panel, signaling a lack of oil pressure in the system, then do not rush to run to the store and buy a new oil pump. The video discusses the most basic reasons why oil pressure may drop in a VAZ engine:
[custom_ads_shortcode3]
Dismantling
Depending on the situation, the oil pump can be completely replaced, or repair work can be performed - change gears, return the pump pressure reducing valve to functionality.
But let's talk about everything in order. In any case, work begins with dismantling the oil pump:
- Before you remove the pan to gain access to the pump, you will definitely need to drain the oil.
- To do this, warm up the engine to operating temperature, open the drain hole and wait until all the liquid drains out.
- Draining can also be done when it is cold, but due to its high viscosity, the oil can flow for a very long time and most of it will still remain inside the crankcase.
- After draining the oil, remove the three mounting bolts from the crankcase protection using an 8 mm wrench. The protection blocks access to the flywheel near the crankcase.
- Remove the flywheel guard and then remove the bolts from the crankcase. That's it, now the crankcase can be removed.
- In front of you is the crankshaft and the oil sump where the desired pump is located.
- By unscrewing the three mounting bolts, you can remove the intake from the pump.
- Let's move on to the engine compartment. Lift the hood and remove the plastic cover. This is a guard that covers the timing belt.
- Next, you need to remove the front right wheel to remove the pulley fixing washer, and then remove the pulley itself.
- Remove the timing belt and remove the six mounting bolts that hold the oil pump in place. Here you will need an 8 mm wrench.
- Remove the oil pump from the crankshaft.
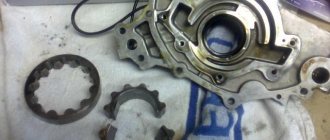
Disassembly
If you do not want or cannot yet purchase a new pump, you can try to repair it. Perhaps the problem is a malfunctioning valve or worn gears.
- Remove the gasket from the pump;
- Remove the bolt holding the crankshaft position sensor;
- By unscrewing the six mounting bolts, you can remove the cover from the pump;
- Using a pair of screwdrivers, lift the housing so that the pins on it come out of their holes freely;
- Remove the body, disconnect it from the cover;
- Now you need to remove two gears from the cover. The drive gear is removed first, and then the driven gear is removed;
- Next in line is the pressure reducing valve. You need to unscrew the plug under which the o-ring is located;
- Check the condition of this seal. If the ring shows signs of damage or is too squeezed out, be sure to replace it with a new one;
- Remove the valve spring;
- Now you can remove the valve itself. To do this, gently tap the case on a stand made of pure wood;
- The valve may be stuck. Do not worry. Take any thin, sharp object, pry it up and remove the element. It is better not to use metal objects so as not to damage the surface;
- Check the current condition of the aluminum cover. If there are deep scratches or signs of wear, replace it;
- If the pump body shows signs of wear, do not even try to repair anything. The only correct solution would be to completely replace it;
- You also need to make sure that the gears and the diameter of their sockets comply with the standards;
- The maximum diameter of the driven gear socket is 75.1 millimeters. If it is larger, the case must be replaced;
- Measure the width of the body in the middle. If the indicator is less than 3.4 mm, it is worn out and needs to be replaced;
- As for the thickness of the gears, according to the requirements, the thickness of the drive is at least 7.42 mm, and the driven one - 7.35 mm. In case of deviations from the norm, the gears are changed.
Assembly and installation
If you managed to repair the oil pump, then all that remains is to assemble it and install the unit in place. If you decide to completely replace the device, skip the first part of the further instructions.
- Install the driven gear onto the housing with the chamfers on the teeth.
- Also, the new pump drive gear is returned into place using chamfers on the teeth.
- Be sure to remember to lubricate the gears with oil so that they work more reliably and longer.
- Replace the pump cover and screw back all the fasteners.
- Lubricate a new or repaired old relief valve before installing it in its proper place.
- The valve fits into its seat. Make sure installation is done bottom down.
- Now it’s the turn of the spring and the plug, which is wrapped with an o-ring. Again, these elements are pre-lubricated with engine oil.
- Using the oil pickup tube, oil is poured back into the unit.
- Once assembly is complete, rotate the pump gears several full turns. This will ensure effective lubrication of all surfaces inside the pump.
The unit is assembled and can be returned to its place. For this:
- Return the timing belt to its place by pulling it onto the rollers. Don't forget to set according to the labels;
- Return the plastic belt protection to its rightful place, install the wheel;
- Now you need to crawl under the car to install the oil pick-up on the pump;
- Be sure to treat the crankcase with compounds, removing all fat. Treat with sealant;
- We recommend installing a new gasket on the crankcase, after which another layer of sealant is applied;
- The block is degreased, the crankcase is returned to its rightful place;
- To make it easier to attach it, tighten several bolts at different points, and then screw in all the rest;
- Protection is installed on the flywheel, the crankcase protection is returned to its place;
- Pour oil back into the system, start the engine, and allow the oil to distribute throughout the components.
If you carry out all the manipulations correctly and first determine that it is the pump that has failed, the warning light on the dashboard will go out.
The oil pump plays a huge role in the functioning of the engine’s lubrication system, so at the first sign of its breakdown, immediately go to the garage, or entrust the replacement to specialists from trusted service stations.
Didn't find the information you are looking for? on our forum.
We recommend reading:
Turning relay for VAZ 2107 diagram
VAZ 2114 signs of internal CV joint failure, diagnostic methods
VAZ 2107 with a Priora engine
How to remove the gearbox on a VAZ 2107
How to clean the breather on a VAZ 2106
The speedometer on the VAZ 21099 injector does not work
Lada Kalina, what kind of gasoline to fill in a car, 92 or 95
Similar articles
What kind of oil to pour into the VAZ 2115 engine
Choosing oil for VAZ 2110
VAZ color chart, codes, names, description
VAZ error codes - table with a list of all errors
Replacing the oil pump on a VAZ 2110, where it is located, removal and installation, repair Link to main publication
Replacing the oil pump
There is nothing difficult about replacing an oil pump. We drive the car into the pit, prepare the tools and get to work.
- Disconnect the battery.
- Drain the oil into the prepared container (stopper on the tray).
- We jack up the car, place it on a good stand (a stump will do just fine) and remove the right wheel.
- Remove the timing belt.
- Remove the crankshaft pulley and key (you will need an assistant to clamp the flywheel with a screwdriver).
- Remove the crankcase cover.
- We remove the oil intake itself.
- We clean the oil receiver grid (with solvent or kerosene).
- And directly remove the oil pump itself (6 bolts on the cylinder block).
Reassemble the oil pump in reverse order. The pan and oil pump gaskets must be replaced with new ones. Also, the new oil pump should be washed out of preservative grease and filled with oil (to prevent it from running dry during the first start after repair).
[custom_ads_shortcode1]
Why is an oil pump needed?
The oil pump in the engine is designed to build up pressure in the oil system, for the necessary lubricating effect of all rubbing parts of the internal combustion engine. If the pressure in the system is insufficient, the lubrication effect will be ineffective, which in turn will lead to the engine being unsuitable for operation. In this case, the low oil pressure warning light on the instrument panel should light up. Therefore, you should not delay repairing the oil pump. You are left with two options. Take the car to a service station and lose a lot of time and money, or change the oil pump yourself.
[custom_ads_shortcode2]