December 11, 2015 Lada.Online 152 956 2
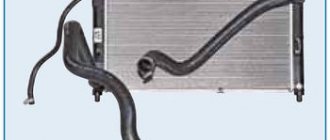
One of the reasons for poor heater performance is the heater radiator. During the operation of the car, it begins to leak and is no longer able to transfer the required amount of heat to the interior. Depending on the year of manufacture and configuration of the Lada Priora, the process of removing the stove (radiator) can vary greatly.
Diagnostics of climate control Priors luxury equipment
Like all electronic control units (ECUs), the heater/air conditioning computer is diagnosed either with a portable scanner or with a full-fledged motor tester. It should be borne in mind that this system is controlled through a separate ECU called the comfort unit.
Just like standard diagnostics, the climate control system scan is connected via the OBD-2 diagnostic connector under the glove box. In general, these tests are carried out in a similar way to diagnosing an automatic heating system. With air conditioning features. That is, checking the actuators and sensors of this device.
How to remove the heater radiator on a Priora without air conditioning
How to flush the heater radiator without removing it
Since the beginning of production, AvtoVAZ has installed a heater from the “ten” (catalog number: 21110-8101012) on Prioras. The disadvantage of this design was that the heater radiator is removed towards the vacuum brake booster, which allows this to be done. As a result, the heater assembly has to be dismantled.
The procedure is as follows:
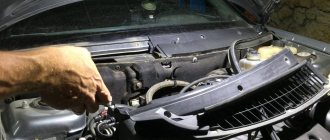
- Remove the wipers.
- Remove the frill (wind flap).
- Remove the soundproofing of the engine shield.
- Disconnect a bunch of connectors with wires.
- Unscrew the heater mountings.
- Divide the heater into two parts (left and right).
- Remove the right side of the heater (in the direction of travel).
- Move the left side to the side to gain access to the heater radiator.
- Drain the antifreeze.
- Replace the heater radiator.
The whole procedure took several hours. This is shown in more detail in the video:
There is another way to replace it. To gain access to the heater radiator, instead of the heater housing, it is necessary to remove the vacuum brake booster along with the brake pedal. This allows access to the left side of the heater (in the direction of travel) and to the radiator itself.
Video instruction:
Priora stove diagram
Before changing the stove on a Priora, buy new heater elements using the catalog numbers:
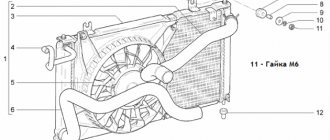
Priora heater 2111-8101012: 1 — heater inlet/outlet hoses 2170-8101200/208; 2 — additional resistor 2123-8118022; 3 — electric fan 2111-8118020; 4 — heater 2111-8101012; 5 — nut 1/07259/11; 6 - screw 1/51873/01
Priora heater parts: 1 - screw 1/76691/01; 2 — heater radiator 2110-8101060; 3 — left heater casing 2111-8101025; 4 — heater control damper 2110-8101538; 5 — right heater casing 2111-8101024; 6 — air duct housing 2111-8119124 intermediate; 7 — screw 1/76692/01; 8 — lower air intake housing 2111-8119026; 9 — bracket 2108-8101110; 10 — bracket 2111-8119102 right; 11 — screw 2114-5325388; 12 — air filter 2111-8122020; 13 — upper air intake housing 2111-8119025; 14 — filter cover 2111-8119116; 15 — screw 1/76702/01; 16 — screw 1/76691/01; 17 — additional resistor 2123-8118022; 18 — screw 2123-6302332; 19 — screw 2114-5325388; 20 — air supply pipe 2123-8118096; 21 — electric fan 2111-8118020 of the heater; 22 — bracket 2108-8101110; 23 — gear motor 2110-8127200 for the heater damper; 24 - screw 1/76691/01
By the way, do you know that the Lada Priora is also equipped with air conditioners (HALLA and Panasonic), so the process of replacing the Priora heater may be slightly different. For example, in order to replace the heater radiator on a Priora with HALLA air conditioning, it is not at all necessary to dismantle the heater assembly.
Replacing the heater radiator on a Prior
Chevrolet Cruze 2013 Heater Damper Repair Chevrolet Cruze 2013 Heater Blower Repair
replacing the heater radiator on a Prior
There was such a problem that antifreeze was leaking (under the hood, in the area of the interior heater radiator). Natural assumptions: a) the pipes are leaking b) the radiator itself is leaking. Once I already changed the heater radiator on a ten on my own.
The work was long and tedious, it seems that’s when I learned to swear. Now I had to do the same thing at Priory! And of course I went to the service center) in each one I asked how much it would cost to replace the heater radiator on a Priora with an air conditioner. In the first one they told me this: we’ll change it without any problems! aaaah! Heater radiator There, the floor of the car needs to be dismantled, we won’t take it on! In the second: it will cost 1500! and not now, but someday, when there is time! In the third: I won’t take it, although I’ll call you now (I don’t remember the name), maybe he’ll take it, he called, and he says I’ll take it! But it will be expensive, we’ll have to see what happens according to standard hours, we may have to defrost the air conditioner Aha! I filled it up at the beginning of summer! And I also decided not to mess with such specialists! And when my friend’s friend, a car mechanic and my penultimate hope, also moved away from the topic of solving my problem, saying no, I don’t want to go there, I had to despair)) First of all, I started looking for instructions on how to replace this device on the Internet! In between, I learned that Priors have 3 types of climate systems: 1) stove 2) Korean climate from HALLA 3) climate from Panasonic. So, each manufacturer developed the entire heater unit, including engines, filters, compressors, radiators, completely, turnkey! So even the cabin filter is different for everyone. I determined that my Conder belongs to the Halla company! Wherever I looked, I came across only one single instruction for replacing this thing in a heater without an air conditioner and printed it out! *First of all, I threw the instructions away! There are no coincidences in it! *The second one, after swearing a little, got to the radiator, disconnected the clamps and took it out! Even then I found out that the radiator was intact and it was dry and dry under it. So I just had to tighten the clamps! But I took it out, probably to amuse myself with the thought that all the work to replace it had been done! *The third one put everything back together! 2) Soft insulation of everything from the engine consists of 3 parts. Just remove the middle one! (it is held in place by 3 self-tapping screws on top / 3 screws along the edges / 2 nuts with a washer on the bottom (the work of unscrewing these nuts is the most difficult on the agenda! Although rather simply inconvenient!) hoses are attached to it with latches, we UNLOCK the pipes, we unscrew the screws and nuts 2.1) I removed the THICK PIPE (air filter pipe) going to the air filter so as not to interfere with photography.
It’s certainly more convenient without it, but you don’t have to take it off! 3) there is a foam rubber seal on the radiator pipes, remove it by pulling it up! 4) We see the radiator pipes; they have a plastic cap on them that covers the radiator. It is secured with 3 self-tapping screws (2 at the top along the edges / 1 at the bottom in the center) and unscrew it! 5) Now, to remove the heater radiator, you just need to loosen the clamps, remove the pipes (lift them up so that the antifreeze does not leak out) and PULL THE RADIATOR UP TO YOURSELF! Reassemble in reverse order! By the way, I added a couple more clamps! TOTAL: To change the heater radiator you need to unscrew 6 self-tapping screws, 3 screws and 2 nuts / loosen 2 clamps. For the first time and without rushing, it took 1.5 hours. AT THE SAME TIME I LUBRICATED THE GEARBOX (and the trapezoid mechanism) of the windshield wipers. To do this, I removed both top plastic covers (jabot) and removed the door wipers (if you are going to dismantle the trapezoid, you need to turn on the ignition + wipers and turn off the ignition, in the position when the wipers are raised up! I didn’t remove it) We unscrew the 3 screws on it, open it, remove the old grease / apply new one. Close it, tighten the screws, put on the protective bag.
Lubricate all the hinges of the trapezoid! (if, before removing, the wipers were left in the *up* position, the trapezoid can be removed by unscrewing only 2 nuts) Done. All that remains is to assemble it in reverse order. Article c. https://www.drive2.ru.
9-12-2013, 08:46, Category – Test drives
How to remake the stove on a VAZ 2110
The central corrugation from the vacuum cleaner (the inside is smooth, with a diameter of 40 mm, and the other two are ordinary ribbed inside, also 40 mm in diameter) Important: The diameter of the corrugation should not be less than 40 mm, and if the corrugation is long, then it must be smooth inside, otherwise there will be a whistle. In frost below -20, a problem arose: it is impossible to make air flow in all directions simultaneously
And then either your feet freeze or the side windows freeze.
Did you buy a new heater core, but after installing it, you began to notice that the heater doesn’t heat up like before? The fact is that the heat transfer of the old (factory) stove radiator was better, and the new stove radiator (even if it was from a “trusted” company) most likely turned out to be a fake. Do you know how to determine which heater radiator is better right in the store, without installing it in the car?
On the Internet you can find various tests and reviews of radiators that will tell you which manufacturer you should pay attention to when purchasing. But as practice shows, all these tests are in vain, because when buying a stove radiator from a well-known company, you risk in 50% of cases that you will buy a fake, which naturally will not meet your expectations
Therefore, it is important to be able to correctly distinguish the original from the fake, especially when it’s cold winter outside.
So, in order to distinguish an original stove radiator from a fake, you should pay attention to its cost. Usually the price of a good, high-quality heater radiator is within 750 rubles
If its cost is much lower, then you should think about it. Remember, the miser pays twice!
Ask the seller for a certificate and packaging (if the stove radiator is without it). Of course, it is impossible for an untrained buyer to distinguish original packaging from counterfeit packaging, but the lack of a certificate or radiator box is another reason to find a stove radiator elsewhere.
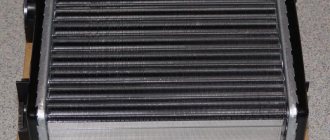
Now about how to choose a stove radiator according to the honeycomb. A good heater core should have honeycombs that are very close to each other. In other words, the smaller the distance between cells, the better. Also try to press a little on the honeycombs with your finger; if, after a little effort, the radiator honeycombs begin to sag - this is a bad sign.
About heater radiator fluid swirlers. Coolant turbulators or swirlers are plastic spirals that increase heat transfer from the radiator when the engine is running at low speeds. As Gennady Krivutsky, leading test engineer of the General Development Department of AvtoVAZ JSC, states: the absence of turbulators in the radiator reduces the efficiency of the heater by 27% at idle, by 17% when driving at a speed of 50.60 km/h, by 5% - at engine speed 5000 rpm. Thus, swirlers serve to increase the heat exchange of antifreeze with the radiator. If there are no swirlers, then the antifreeze “flies” through the radiator without having time to transfer heat, and as a result, the heater in the cabin blows cold air.
How to check if there are swirlers in the heater radiator? Just shake the radiator and hear something rattling inside – that means they are there. However, sometimes the “noodles” (as swirlers are called differently) will not rattle due to the peculiarities of its composition, in which case its presence will have to be determined visually. You are unlikely to be allowed to disassemble the radiator in a store, so we try to shine a flashlight inside the radiator; the swirl rings should be clearly visible.
The set of methods described will allow you to distinguish the original “hot” stove radiator from a fake, but you cannot be 100% sure of the quality of the product. There are known cases when the turbulators inside the radiator are spaced at intervals, or they are not the full length. If you come across such an “under-swirled” radiator, or there are no swirlers at all, do not rush to throw it away, because... There is an opportunity to modify the stove radiator with your own hands! To do this, it is enough to cut aluminum or copper strips 1-1.5 mm thick and 5-6 mm wide (select according to the diameter of the tubes), clamp one end into the drill chuck, fix the other and carefully curl it.
Replacement
Hyundai Accent silver Logbook Replacing the heater fan
As in the case of a conventional heater, a sign of a malfunction of the Priora stove with air conditioning that requires replacement of the radiator is fogging of the windshield and a strong smell of antifreeze (antifreeze) in the cabin. This is a clear sign that it is time to replace the radiator.
Radiator replacement
As with a regular Priora, it all starts with removing the frill and the walls between the stove and the engine compartment. This is the procedure already described.
Next comes a similar drain of the coolant. But then everything is a little simpler. There is no need to dismantle the entire heater to replace the radiator. It is enough to loosen the clamps securing the pipes to the radiator. Remove the hoses and unscrew the 3 fastening screws. And that’s all, the radiator of the Priora stove can be freely changed. He comes forward easily. Glue the foam seal and insert a new one into place. Secure the entire structure and install the protection in reverse order.
Removing and replacing the stove
For further work, we will need screwdrivers with Phillips and flat designs, as well as a 10-mm head. Replacing the stove on a Priora is carried out according to the following scheme:
- Very often, car repair work begins with disconnecting the negative terminal from the battery. Our situation is no exception.
- We disconnect the fasteners on the wiring harness from the shield. To do this you will need to deal with the clamps.
- Disconnect the wiring harness from the bracket on the brake pedal.
- Bend the bracket upwards.
- Unscrew the tightening on the two clamps with a Phillips screwdriver.
- Disconnect the hoses from the heater radiator.
- The electric motor, which is responsible for the operation of the fan, has blocks with wires attached to it; they must be disconnected.
- We also disconnect the wire block from the resistor.
- From the heater, unscrew the nut on the right mount and two nuts on the lower mount. For this work you will need a 10mm socket.
- The bracket that secures the wiring harness must be moved to the side.
- The self-tapping screw on the upper heater mount is unscrewed using a Phillips screwdriver.
- The block with wires is disconnected from the micromotor gearbox, and the heater is moved forward.
- We remove the hoses from the pipes on the radiator by reducing the degree of tightening on the clamps.
- It is now possible to remove the Priora stove.
Replacing the heater radiator on a Priora without and with air conditioning. This is AvtoVAZ
- The heat exchange device is represented by a radiator, through which the external air entering the cabin is heated;
- A fan driven by an electric motor promotes air circulation in the cabin;
- Damper that regulates the flow of incoming cold air;
- Dampers that regulate and distribute the flow of incoming warm air into the cabin.
- Disconnect the vehicle from the battery;
- Now you can start removing the windshield trim;
- The windshield wiper arms will interfere with operation, so they need to be removed;
- You also need to remove the plastic fluid supply tubes to the injectors;
- To remove the decorative trim of the windshield, you need to unscrew the seven screws that secure it;
- After this, you can remove the hood seal;
- There is a screw installed in the middle of the lining that tightens both halves of the lining;
- Next, use a screwdriver to pry off the plugs that cover the screws, unscrew them and remove the trim from the body;
- After this, you should begin to remove the sound insulation of the engine compartment; to do this, you should unscrew the screws that secure it, and then remove the left and right linings;
- Now let's move on to the pipes going to the heater radiator. You should loosen the clamps and remove the pipes. Place a container under them, as antifreeze may spill. The removed pipes should be plugged in an accessible way;
- Next, you should disconnect all connectors with wires that go to the heater;
- After this you will need wrenches. Using a socket wrench set to “10” you should unscrew three nuts, and one nut will be used for a wrench “8”;
- The wiring harness interferes with removing the heater. You need to remove the holder and take it to the side along with the wires;
- Now the work will continue inside the car. You will need a “13” socket wrench to remove the bracket with the brake pedal, which then needs to be moved to the side;
- The heater is accessible and can be removed for repair and maintenance;
- To remove the radiator, you need to use a Phillips screwdriver to use three screws, after which it can be easily removed. In many cases, it is dirty, so it should be cleaned with a brush and blown with compressed air.
- Installation is carried out in reverse order.
- Remove the rubber seal from the windshield lining;
- After this, they begin soundproofing the engine compartment. Some screws are not easy to get to, be patient, be careful and everything will work out;
- Now you can begin to remove the foam gasket on the pipes;
- After this, you can remove the plastic radiator cap; to do this, you need to unscrew three screws;
- Once access to the pipes is available, you can begin to remove them. You should not completely drain the antifreeze from the system; you can substitute a small container and drain it from the heater radiator and expansion tank, and then plug the pipes.
AutoFlit.ru
Replacing the radiator of a heating unit in a Priora that is not equipped with air conditioning
Replacing the heater radiator on a Priora without air conditioning may make sense if warm air has stopped flowing into the cabin, while the heater itself is working. If, in addition to the above problem, there is also a water leak from under the Priora stove, the motorist will have to remove the poorly functioning unit in order to solder the latter. Sometimes repairs are impractical and you have to replace the old device with a new one.
So, first of all, you need to start by removing the negative terminal from the battery. The fact is that the issue here is not only about the safety of the master himself, but also about additional insurance, which allows him to avoid several unpleasant surprises that, if handled carelessly, can arise not only with wiring, but also with electrical equipment.
If you are replacing the heater radiator on a Priora without air conditioning, after de-energizing the system, you can begin to dismantle the windshield trim. At the same time, the wiper levers, which can cause future discomfort during operation, should also be removed. After this, you should rid the unit of all plastic tubes through which the liquid located in the windshield washer reservoir goes directly to the nozzles. Only after all the above steps have been completed will it be possible to remove the decorative trim located along the edges of the windshield. In fact, it’s easy to carry out such a manipulation - just get rid of seven self-tapping screws.
Replacing the heater radiator on a Priora can only be done after removing the hood seal. Before dismantling, it should be noted that in the middle of the lining there is a screw that tightens both halves of the structure. Using a screwdriver or any knife, you can gently lift the plugs (this element serves as the “cover” of the screw) and unscrew them.
After this, you can begin to remove the sound insulation, which is located in the power unit compartment. To do everything correctly, you will have to unscrew the screws and remove the pads (there is no clear rule about which of them to remove first: left or right). Then you should get rid of the pipes that go directly to the radiator. A person who wants to understand how to get to the heater radiator on a Priora must loosen the clamps holding the structure itself.
After this, you can remove all the wires going directly to the stove from the connectors. You can remove them using two keys, in particular, one “10” and the other “8”. After unscrewing all four nuts, move the wiring harness to the side, which is held by the holder. The “13” key will help to dismantle the bracket located on the brake pedal. Only after this can you begin to remove the heater radiator on a Priora that does not have air conditioning. A regular Phillips screwdriver will help you dismantle the device, allowing you to remove 3 screws. All the rest of the work consists of installing a new unit and reassembling the system in the reverse order of the described actions.
In fact, there is another way to replace the system element of interest. To open free access to this element, dismantling not the stove body, but the vacuum brake booster will help. It is worth noting that this procedure will only be successful if the brake pedal is removed along with it. Such actions help to get closer directly to the left side of the stove and the desired device.
Fan doesn't work
But sometimes another problem occurs with the Priora stove. The driver turns the heater switch, and in response there is silence. The electric motor is not working. What is the reason. There may be several of them:
- The fan motor burned out.
- The heater control unit has failed.
- The fan speed resistor has burned out.
- Broken electrical wiring.
The easiest way to determine if a resistor is broken. In this case, only the maximum speed is turned on, and the stove does not respond to other positions of the handle.
The control unit is checked either by computer diagnostics or by a simple replacement. There are no other options.
The condition of the electric motor can be determined by checking with a test lamp. It is enough to remove the top frill and gain access to the motor connector. Disconnect this connector and insert a test lamp instead of the chip going to the fan. When you turn on the stove handle, the light should light up if the unit and wiring are working properly. If there is no signal, start checking the wires sequentially. If the lamp lights up, replace the electric motor.
Replacing the motor
Although Hallo and Panasonic fan electric motors differ in size and installation point, they have one thing in common. Their location is in a vertical position. This allows you to dismantle them without removing the entire heater. As with a standard heater, the heater fan motor on a Priora with air conditioning is secured with 3 screws.
So, replacement. As in the case of a radiator, first of all you need to open access to the stove. That is, remove the frill and protection. Then disconnect the electrical connector. Now just unscrew the 3 fastening screws and remove the fan with the motor. That's it, you can install a new unit in its place. But this is only for the Hallo heater. With the Panasonic compressor, everything is somewhat more complicated. The fact is that it is also separated from the engine compartment by a plastic casing. According to factory documentation, it is necessary to remove the entire heater to replace the electric motor. And this is draining and refilling freon. But our craftsmen found a way out.
Cut the protection at the narrowest point approximately in the middle of the compartment and remove it by unscrewing 2 fasteners. After this, access to the part being replaced is open. Sometimes, however, in most cases, the engine mount prevents you from pulling out the motor. Don't panic. This problem can be solved by disassembling the motor on site. That is, separate it into 2 halves and pull them out separately. Then insert a new one using the same method.
But still, just in case, before replacement, it is better to consult with car service specialists in advance about possible refilling of the air conditioner with freon in case of damage. This is to replace the motor. But with a radiator, such problems, as a rule, do not happen.
Video on the topic of replacing the radiator of a Priora stove with air conditioning:
Malfunctions
For normal operation, the heating system needs: tightness, integrity of parts and normal antifreeze. The first step is to check the relay and fuse - after all, this unit contains electrical appliances inside. If the unit's electrical network is not in contact with the ECU, there is no point in turning the controls on the heater control unit.
The heater fuse on Priora has the number F9. In order to get to it, you need to remove the plastic plug above the driver's left knee (under the headlight switch) by unscrewing three bolts around its perimeter.
Once the fuse has been inspected and no deficiencies have been identified, further diagnostics can begin.
Perhaps the most annoying thing in any car is the situation when, even at the hottest summer temperatures, the heater does not turn off. This happens because the damper does not block the air flow. The heater damper on the Priora is controlled by a gear motor, which stops after its operating life has expired - it will have to be replaced.
While driving a VAZ-2170, you should carefully look and listen to what you see and feel. If heat should come from the cracks, but it doesn’t, then something is wrong with the seal or the damper gear motor. For example, if the glass becomes greasy, as if it was smeared with your hands, it means that the heater radiator is leaking. However, these are not the only signs of a heater failure.
Priora: the stove blows cold air, does not heat - reasons
When cold air comes from the heating system and turns into the air conditioner, the following possible malfunctions are considered:
- The heater hoses do not supply coolant, or the radiator itself is not efficient enough and does not take heat from them.
- The air filter is dirty. If there is no new part nearby, try removing the filter and then starting the heating system without it.
- The damper gear motor is stuck.
- The control unit (switches) is broken.
- The temperature sensor in the cabin has broken (it is located under the roof).
The shutter does not move, and the modes: face, legs, glass do not work
Reasons for this problem include:
- Faulty air distribution gearmotor.
- Inoperative control controller (CU).
The stove blows hot air when turned off.
The most likely reason for this behavior of the heater is a failed damper gear motor.
It’s noisy – what to watch
When you hear an unknown noise, you need to check the heater motor bearing. The noise is caused not so much by the bearing, but by small debris that has gotten under the motor blade.
The main differences between the Priora stove with air conditioning and the standard one
The main feature of this device is the presence in the air duct of a heater, an air conditioner evaporator radiator, which cools the air passing through it.
Operating principle of the air conditioner
All cars equipped with these devices have approximately the same set of components. It includes the following elements:
- Control block.
- Relays and fuses.
- Air conditioning radiator with fan.
- Compressor with electric coupling.
- Evaporator.
- Aluminum tubes for connection.
- Sensors and wires.
The main feature of this gas is its ability to lower temperature when strongly compressed. That is, the higher the pressure in the system, the lower the temperature during evaporation. This is such an interesting thing. In general, when turned on, the compressor pumps pressure into the evaporator, located in the heater housing in the path of the air sucked in by the engine. The heated gas goes through the return pipe to the radiator, located in front of the main heat exchanger of the cooling system. And from there, under pressure, again into the evaporator. The air conditioner is turned on from the control panel of the unit, with a button built into the heater mode handle.
Differences
It is the presence of the evaporator that dictates the requirements for the location of the stove components. That is why the electric motor of the Priora heater is located not vertically, as on a standard stove, but horizontally. And the Priora cabin filter takes a vertical position instead of a horizontal one. There is a separate article about this on replacing the Priora cabin filter.
Radiator of the Priora stove with air conditioning
It was also positioned somewhat differently. The difference is that it does not go towards the vacuum brake booster, as on a simple Priora, but forward. That is, in the direction of the car engine. All this is done so that you do not have to dismantle the entire stove to replace the unit.
Heater fan
The engine on such stoves, as already mentioned, is located vertically. One detail. If a Panasonic air conditioner is installed, then its electric motor is located on the right side of the stove (along the direction of the car). But on the Hallo system, on the left. Next to the radiator. The Halo air conditioner motor is slightly smaller than the Panasonic motor.
Air conditioner evaporator
And, of course, the evaporator radiator. It is installed in the right half of the heater, right at the air inlet
It is its presence that requires special care when repairing and replacing any part of the climate control system
Changing the cabin filter
There are Lada Priora configurations that include air conditioning. It could be HALLA or Panasonic. Owners of such cars are also concerned about replacing the stove on a Priora with air conditioning. But first, it’s worth understanding the air conditioners themselves, which differ not only in the country of manufacture.
HALLA is made in Korea and Panasonic is made in Taiwan. You can find out which air conditioner is installed in your car by visual inspection.
Attention should be paid to the button, which is located in the center of the air conditioner control panel. Panasonic system has a button to turn on, but HALLA does not have such a button
Car owners should regularly change the filter to ensure that the cabin is free of foreign odors from the street and the air is clean. Before you find out how to change the heater filter on a Priora, you need to know the type of system that is installed in your vehicle. After all, each cooling system model has different filter elements.
The filter changes differently depending on whether the car has air conditioning or not. If the car is not equipped with an air conditioning mechanism, then proceed as follows:
- Open the hood.
- We dismantle the grill installed under the glass on the left. There are screws on it, closed with plugs. They need to be unscrewed. After completing this step, access to the filter will be freed.
- The cleaning component cover is held in place by four bolts that must be removed.
- We remove the cover, which will allow us to get the filter. We clean the vacated area from possible contamination and debris.
- We install a new filter element and assemble the car in the reverse order.
If the car has a cooling mechanism, the actions will be slightly different.
- Open the hood and find the required part.
- We bend the upholstery material.
- If Panasonic is installed, then the latch on the filter element must be unscrewed. With a Hull cooler, you will need to press the latch, which will open the lid.
- We take out a filter that has already served its purpose and in its place we put a new one, which will need to be twisted using the slots in the housing.
- We install the cover and all parts in their place.
Repairing the Priora stove may be associated with a number of problems that initially need to be correctly diagnosed. We will write several more articles on this topic and consider the main problems in detail. In any case, you need to know how to disassemble the stove on a Priora, because this is the basis.
Radiator replacement
To work, you will need a standard set of tools, which includes socket wrenches 10 and 13, side cutters, a Phillips screwdriver, and a wrench 8. In both cases, you will have to disconnect the heating system hoses; the remaining coolant will pour out of them, so immediately place containers under the pipes heater Then the liquid can be returned to the system.
With air conditioning
- First of all, we need to remove the rubber seal of the windshield to gain access to the parts;
- Let's move on to soundproofing the engine shield. We need to dismantle its middle part, having previously removed the hoses from the mounts. The sound insulation is secured at the bottom with 3 screws, 2 nuts and a washer, and at the top with 3 self-tapping screws. It is recommended to use a tool extension as some fasteners may be difficult to reach;
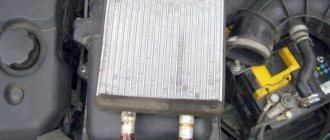
- After dismantling the protection, you will see a foam seal that covers the heater radiator;
- To remove the cover, we need to unscrew 3 screws - 1 you will find in the middle, and 2 others - along the edges;
- We reached the pipes. To remove them, we need to loosen the clamps and lift the pipes up. Be careful not to tilt the hoses down;
- Pull the heater core towards you until it comes out of the fastenings.
As you can see, dismantling the radiator in a Priora with air conditioning does not require draining the antifreeze. Coolant will only come out of the expansion tank and the heat exchanger itself. Removing the radiator in a VAZ 2170 with Panasonic air conditioning follows the same scheme, only a few fasteners may differ. Now you can replace your worn-out heater with a new one!
Without air conditioning
- Work begins by disconnecting the negative terminal of the battery. We remove the windshield trim along with the windshield wiper arms, as these elements will interfere with operation;
- The next step is to remove the coolant supply pipes to the engine injectors;
- The windshield trim is held in place by seven screws. Unscrew it to completely remove the element;
- Now we move on to the hood seal, in its center you will find a tightening screw - unscrew it;
- The engine noise insulation closes the passage to the heater system - pry up the plugs with a flat screwdriver and unscrew the plugs;
- We unscrew the screws and dismantle the sound insulation. Remove both covers;
- Let's move on to the radiator pipes. We loosen the clamps and dismantle them, having prepared a container for antifreeze in advance. Plug the pipes so as not to drain all the antifreeze;
- You need to remove all the wiring that goes to the stove;
- Next, remove the wire holder and take it to the side, now we go to the Priora’s interior;
- Armed with a 13mm wrench, unscrew the bracket fastenings along with the brake pedal. We move the details to the side;
- We unscrew 3 screws and gain access to the radiator;
- Replacement is carried out in reverse order.
Video instructions for replacing a leaking stove:
Removing the Lada Priora radiator
We remove the radiator to check it for leaks (if a leak is suspected) or replace it if damaged.
Remove the radiator fan (see “Removing the radiator fan”).
We disconnect the bracket for fastening the sound signal from the security alarm of the upper cross member of the radiator frame (see “Removing the sound signal of the security alarm”) and remove the sound signal from the radiator.
Using the “8” socket, we loosen the clamp securing the radiator supply hose...
...and remove the supply hose from the radiator pipe.
Using an “8” socket with an extension, we loosen the clamp securing the radiator outlet hose.
Remove the outlet hose from the radiator pipe.
Using a 10mm socket, unscrew the two nuts securing the radiator to the upper cross member of the radiator frame.
Radiator attachment points to the top cross member of the radiator frame (shown with engine removed for clarity).
Tilt the radiator towards the engine...
... use a screwdriver to loosen the ribbon clamp securing the steam exhaust hose... Remove the steam exhaust hose from the radiator pipe.
We take out the radiator, removing the pins of its lower mounting from the rubber pads. If it is necessary to replace the rubber bushings of the upper radiator mounting...
...remove the metal spacer sleeve...
...and a rubber bushing from the radiator bracket. Install the radiator in reverse order.
If the rubber cushions came out with the radiator, then when installing it, first insert the cushions into the holes in the lower cross member of the radiator frame. Cushions that are torn or have lost their elasticity should be replaced with new ones. We replace the ribbon clamp of the steam exhaust hose with a worm clamp.
Pour coolant into the cooling system and bring the fluid level in the tank to normal (see.
"Replacing the coolant").
How to replace a stove radiator yourself without an air conditioner
What will be needed for replacement? First of all, the following tools:
- Screwdrivers, figured and flat.
- Wrenches for 8 and 10. (preferably heads with a wrench.)
- Thin pliers for removing clamps.
And, of course, some materials and devices:
- Container for coolant from the system.
- New radiator.
- Foam rubber adhesive strips for the radiator of the Priora stove.
- 2 liters of coolant. (same brand as in the system.)
- Rags.
Having prepared such an arsenal, you can begin this interesting operation of replacing the heat exchanger.
Process description
Place the car level. This is necessary to completely drain the coolant from the radiator of the Priora stove. Place a container for liquid under the bottom of the car. It must be installed in the area of the radiator drain hole of the cooling system. On the right side (along the direction of the car, or on the left, if you stand near the hood). Next you need:
- Unscrew the screw cap and allow the liquid to drain. When the pressure weakens, open the cap of the expansion tank. Wait for the drain to drain and tighten the plug. Disconnect the negative battery terminal. You can begin dismantling the protection. It's called frill.
- First, the windshield wipers are removed. Using a 13mm wrench, unscrew the fastening nuts and remove the brush holders. After this, remove the rubber seal.
- Unscrew the fastening screws. There are 6 of them on top and 7 along the bottom edge. Now remove both halves of the plastic frill. After unscrewing the fasteners, remove the fabric protection of the glass niche in which the stove is installed.
Now comes the most crucial moment. Most craftsmen, when replacing this part, immediately disconnect the pipes going to the radiator of the Priora stove. However, there is a risk of dousing the heater parts with coolant. There is a more interesting and safer option.
Removing the stove
Now that the frill and protection have been removed, access to the heater is completely open. First of all, you need to disconnect the electrical connectors:
- Micromotor gearbox for damper drive. 2 connectors.
- Electric fan. 1 connector.
- Resistor. 1 connector.
Now unscrew the fastening of the heater body to the car body. One 10mm nut secures the eye on the stove body to the right wing. 8 secures the top to the stud at the top. And two nuts at the bottom.
Once the fasteners are removed, the fun begins. Using a flat screwdriver, remove the 3 screws securing the radiator to the body
You need to act carefully so as not to break off the side, thin pressure relief pipe. After that, unscrew the screws holding the 2 parts of the heater housing
Move the left part with the fan motor a little to the left, disconnecting them, and pull it out.
After this, you can begin to remove the second half with the radiator. Hold the pipes with your hand and begin to remove the body to the left. When it comes off, set it aside. After releasing the clamps from the pipes, remove them from the radiator.
Necessarily! Place a rag under the radiator, as there is always some liquid left and you should not pour it on the engine compartment.
Installation (replacement) of a new radiator
There are two options here. You can simply replace it by putting the part in place of the old one, before installing the housing. But it is better to install the radiator in the removed half before attaching the pipes.
Important! Be sure to cover the radiator with foam tape! This creates a safety cushion for the part. Having decorated the heat exchanger of the stove with foam, install it in the housing niche and secure it with screws
Place the half in place and secure all 3 pipes in place. Tighten the clamps
Having decorated the heat exchanger of the stove with foam, install it in the niche of the housing and secure it with screws. Place the half in place and secure all 3 pipes in place. Tighten the clamps.
Carefully reassemble the heater in reverse order. Add coolant to normal level. Start the engine and wait for the cooling fan to operate. Press the accelerator pedal and hold the speed at about 2,000 rpm for a couple of minutes. This is necessary to eliminate a possible air lock. Turn on the heater and check its operation in all modes. All! Well, the necessary work has been done.
Video on the topic of replacing the heater radiator on a Priora without air conditioning.
- Removing the CV joint
- How to determine a CV joint failure
- Computer diagnostics of the Priora heater control unit
- How to fix the stove in a Lada Priora car
The principle of operation of the stove - what it consists of on Priora, article numbers
For the VAZ-2170 restyling, two types of heaters were installed - with a Panasonic control controller or with an NSS control controller. The last type contains the following parts:
- air recirculation damper gearmotor (21700-8127300-10);
- Priora car heater fan (motor) (21700-8118020-10);
- air filter (21700-8122090-00);
- motor speed controller (2170-38127025-10);
- heating system damper motor (21700-8127200-10);
- heater radiator (21700-8101060-10);
- outlet hose (21700-8101208-00);
- outlet pipe (21700-8101200-10).
As for the second option from Panasonic, the device around the radiator of the heating system on the Priora is slightly different:
- recirculation valve (21700-811908-00);
- fan (stove motor) (21700-8118020-10; 21700-8118020-00);
- vacuum hoses with check valve (21700-8119100-00);
- solenoid valve (21700-8119130-00);
- air filter (21700-8122020-00);
- inlet pipe (21700-8101200-00);
- damper gear motor (21700-8127200-00);
- radiator temperature sensor (21700-8101250-00);
- radiator (21700-8101060-00);
- outlet hose (21700-810120800).
The pre-restyling car has a lot of parts from the “tens” - even the gearmotors are different. Much was inherited from the VAZ-2110, and the first cars before restyling were almost completely equipped with its heater. The assembled stove for the VAZ-2170 Priora pre-styling received catalog number 2111-8101012-10, a more updated version – 2170-81010-12. Price from 5500 rubles.
The device is as follows:
- air flow reducer (2170-81271-00);
- air temperature sensor (inside the car) (11186-81280-50);
- control unit (switches that are built into the central console to set operating modes) (21703-81880-20);
- resistor for setting the motor speed (2123-81180-22);
- heater motor (2111-81180-20);
- damper gear motor (2110-81272-00);
- air filter (2110-81220-20);
- radiator (2110-81010-60).
The heating radiator of the Priora car can operate in two modes: automatic and manual.
- The manual mode is performed when a person independently sets the desired temperature in the cabin on the control unit.
- The automatic mode operates almost constantly - the required and actual air temperature is checked and the control controller issues a command to change the damper angle, supply hot or cold air to bring the temperature to the set level.
When the driver adjusts the settings on the control unit, the resistor sends a signal with the necessary data to the motor. The fan can produce maximum power, although the resistor will not be used to its maximum. The same process with the direction of air - the driver sets it, and the gearmotor sets the desired position of the damper.
By its principle, the heating device “lies next to” the engine cooling system. When the driver turns it on, the heater tap opens, and hot coolant moves through the pipes, which passes through the radiator of the Priora car’s heater and returns back. This increases the distance over which the coolant circulates.
Therefore, turning on the heating is one of the ways to cool the engine. It will really become hot in the cabin, because all the heat will be directed there, and the engine will give off this heat more and more, the temperature of the coolant will drop.
Lada Priora Sedan ALTAIR Logbook Heater radiator leaking
Hi all! I haven’t written anything for a long time, and there wasn’t really anything, because I was happy with the machine and there were no problems with it! Until recently. One evening, while driving around the area, I smelled antifreeze. I opened the hood and didn’t notice anything special, just that the level in the barrel had gone down. I topped up the antifreeze and drove on, drove like this for several days, and the antifreeze kept leaving the barrel. I looked for a leak but couldn’t find it, and then one evening I was driving to friends, it started to smell like antifreeze again, I stopped, opened the hood, and there was a fountain! In short, it was leaking from the side of the stove, at first I thought the hose was a thin drip! But after disassembling all the casing I realized that this is not so! The leak was visible in small streams from the heater radiator. The next day, after printing out smart papers for the car, I went to the garage to remove the stove. It didn’t take much work for me, but it’s a lot for a patient to unscrew all sorts of little things! Having disassembled and removed everything, I was amazed by the amount of garbage! Having removed and washed everything, I saw the factory vibration isolation! I looked at it and looked and remembered that I had a sheet of vibra lying around in my garage, left over from gluing the floors and roof! Without hesitation, I rolled everything up with a vibrator, it won’t be superfluous! I disassembled the stove and washed it thoroughly, each part separately! Right now I’m still thinking about how to make a different cabin filter there, because I tried installing the original one on the removed stove and it’s of little use, because there are so many holes through which it’s not like dust can fly through, you can fill the stove full of leaves! And I almost forgot, I completely removed the wiper trapezoid, disassembled it and filled it with new grease, the wipers are installed on a bracket, having unscrewed both brackets, I decided to improve them too, because... They were rusty, without hesitation, I washed them of rust and sprayed them with gold paint, which had been lying around in my garage for a long time, you can’t see them there anyway, but they will rust less! Well, below is a photo of all this!
Which radiator should I choose, aluminum or copper?
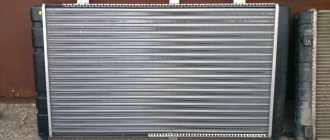
The VAZ 2110 after 2008 was equipped with aluminum radiators, which have a number of pros and cons. However, some car owners complain about cold interiors and foggy windows. Advantages of an aluminum radiator:
- They have a higher density compared to copper
- The width of the radiator channels is larger, which means more heat transfer
Minuses :
- If a leak occurs, it is not repairable
- Heats up quite quickly, but also cools down quickly
Initially, domestic cars were equipped with copper radiators. However, later, as we wrote above, they were replaced with aluminum ones.
Now it is quite difficult to find a high-quality copper radiator, since some manufacturers use impurities instead of pure copper.
Advantages of copper radiators VAZ 2110:
- Among the obvious advantages is its heat dissipation of 389.6 W/(m. deg), it is significantly higher than that of aluminum
- A copper radiator takes a long time to heat up, but also takes a long time to cool down.
- If it leaks, it can be repaired.
- The copper radiator can be soldered.
Minuses:
This type of radiator has fewer fins and thin channels that can become clogged.
Replacing the heater radiator VAZ 2110
- Old style heater (until September 2003)
- New model heater (after September 2003)
- You can drain some of the antifreeze from the engine block. Unscrew the cap of the expansion tank (so that the pressure drops) and unscrew the drain plug, which is located behind the ignition module (unscrew it and put it aside). About 4 liters of antifreeze should come out of the previously placed bucket (if it’s clean, you can refill it later).
- And you can only drain it through the expansion tank. We remove the hose from the stove and pour out about 1 liter of antifreeze. Next, remove this rubber pipe (so as not to interfere) by loosening the three clamps:
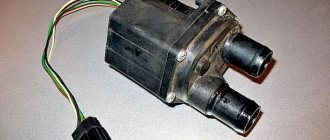
How to replace a heater gear motor
On a LadaPriora, replacing the heater gearmotor is done as follows.
- Remove the windshield wipers and frill of the car.
- Next, dismantle the antifreeze tank and its bracket.
- Using a screwdriver, unscrew the screws securing the motor and remove it.
The last step is to disconnect the contact group and remove the device from the machine.
Removing the stove Lada Priora VAZ 2170, 2171, 2172
| You will need: an “8” wrench, “10”, “13” socket wrenches (head), a Phillips-blade screwdriver, side cutters. |
| 1. Disconnect the wire from the negative terminal of the battery. |
| 2. Remove the windshield frame lining (see “Windshield frame lining”) and the soundproofing upholstery of the engine compartment (see “Soundproofing the engine compartment”). |
| 3. Loosen the clamps... |
| 6. ...and disconnect the heater fan wiring harness connector.
| 8. Cut the clamp securing the wiring harness to the heater.
| 11. Remove and move aside the wiring harness holder along with the harness.
| 13. Remove the heater from the vehicle.
| 15. Disconnect the heater housing...
| 17. ...and then the right side of the heater housing.
Body MalfunctionsWindshield frame liningsSoundproofing of the engine compartmentFront bumperRear bumperFendersFront fenderSill platesHood (removal)Hood lockHood lock cableTrunk lidTrunk lid lockFront door trimFront door lockDoor opening limiterFront door glassFront window lifterFront door removalRear door trimRear door lockExternal New rear door handle Rear door glass Rear window lift Removing the rear door Removing the seats Replacing seat belts Outside mirror Rear view mirror interior Sun visors Handrails Steering column trim Floor tunnel linings Body pillar linings Luggage compartment shelf Sill linings Removing the dashboard Disassembling the dashboard Heater Removing the heater Heater radiator Replacing the windshield and rear window How to polish the body Anti-corrosion treatment |
Removing the Lada Priora radiator
We remove the radiator to check it for leaks (if a leak is suspected) or replace it if damaged.
Remove the radiator fan (see “Removing the radiator fan”).
We disconnect the bracket for fastening the sound signal from the security alarm of the upper cross member of the radiator frame (see “Removing the sound signal of the security alarm”) and remove the sound signal from the radiator.
Using the “8” socket, we loosen the clamp securing the radiator supply hose...
...and remove the supply hose from the radiator pipe.
Using an “8” socket with an extension, we loosen the clamp securing the radiator outlet hose.
Remove the outlet hose from the radiator pipe.
Using a 10mm socket, unscrew the two nuts securing the radiator to the upper cross member of the radiator frame.
Radiator attachment points to the top cross member of the radiator frame (shown with engine removed for clarity).
Tilt the radiator towards the engine...
... use a screwdriver to loosen the ribbon clamp securing the steam exhaust hose... Remove the steam exhaust hose from the radiator pipe.
We take out the radiator, removing the pins of its lower mounting from the rubber pads. If it is necessary to replace the rubber bushings of the upper radiator mounting...
...remove the metal spacer sleeve...
...and a rubber bushing from the radiator bracket. Install the radiator in reverse order.
If the rubber cushions came out with the radiator, then when installing it, first insert the cushions into the holes in the lower cross member of the radiator frame. Cushions that are torn or have lost their elasticity should be replaced with new ones. We replace the ribbon clamp of the steam exhaust hose with a worm clamp.
Pour coolant into the cooling system and bring the fluid level in the tank to normal (see.
"Replacing the coolant").
Video on the topic “Lada Priora. Removing the radiator"
Replacing the PRIOR radiator replacing the PRIOR radiator HOW TO REMOVE ENGINE COOLING RADIATOR ON PRIOR LUX HALLA
The radiator must be replaced if a coolant leak is detected from it. In a workshop that has special equipment, the VAZ 2170 radiator can be checked and repaired. You will need: a 10" wrench (a socket head is more convenient), a screwdriver with a Phillips blade, and pliers with long thin jaws.
1. Drain the coolant (see “Replacing the coolant”). 2. Remove the electric radiator fan for the Lada Priora (see “Removing and installing the electric radiator fan with casing”). 3. Remove the horn (see “Removing, installing and adjusting the horn”).
4. Loosen the clamp securing the supply hose to the radiator.
5. . and remove the hose from the radiator pipe of the VAZ 2172.
6. Similarly, disconnect the outlet hose from the radiator.
7. Unscrew the two nuts securing the radiator to the body of the VAZ 2171.
8. Remove the steam hose holder from the hole in the upper cross member of the engine compartment.
9. Tilt the radiator towards the engine. Loosen the strap clamp of the steam exhaust hose...
10. . and remove the hose from the VAZ 2170 radiator fitting.
Helpful advice Tape clamps for fastening hoses are inconvenient to use and are difficult to re-ensure the tightness of the connection. When disconnecting the hoses for the first time, we recommend replacing the band clamps with commercially available worm-type clamps.
11. Lift the radiator up.
12. Remove the two lower mounting cushions from the radiator if they remain on the radiator mounting pins or remove them from the holes in the cross member if they remain on the body of the VAZ 2171. Replace the torn or lost elastic cushions.
13. Remove the rubber-metal bushings from the radiator brackets. Replace torn or loose rubber bushings. 14. Rinse the outside of the radiator with a stream of water and dry. If there are cracks in the plastic radiator tanks, replace the Lada Priora radiator. 15. Check the tightness of the Lada Priora radiator by plugging its pipes and lowering it into a container of water, supplying air to it at a pressure of 0.1 MPa (1 kgf/cm2). No air bubbles should appear from the radiator for at least 30 seconds. If the radiator does not fit completely into the container, check it sequentially from all sides. 16. Install the priora radiator in the reverse order of removal, first placing the lower mounting pads on the radiator pins and inserting the upper mounting bushings into the brackets.
Helpful advice To eliminate the possibility of coolant leakage in the future, before connecting hoses to the VAZ 2172 radiator, lubricate the radiator pipes with a thin layer of sealant.
17. Install the electric fan and all removed parts in the reverse order of removal. 18. Fill in coolant (see “Replacing Prior coolant”).