Replacing thresholds is a fairly common activity for owners of cars that are more than ten years old; these power elements are among the first to fail (but not always). And if you have a desire to start replacing the thresholds of your car with your own hands, I recommend that you read the theory of this operation and useful tips.
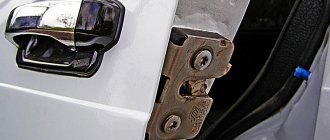
I would like to make a reservation right away that replacing thresholds must begin with checking the condition of the door hinges. If the door is loose, sagging, etc., then you must first repair the door hinges, and then start replacing the threshold frame. The fact is that if there is a lot of wear in the hinge, then the gap between the bottom of the doors and the threshold becomes uneven, in front it is larger, towards the back of the door it is smaller, and in some cases it even touches the threshold.
Stories from our readers
“Fucking basin. "
Hi all! My name is Mikhail, now I’ll tell you a story about how I managed to exchange my two-wheeler for a 2010 Camry. It all started with the fact that I began to be wildly irritated by the breakdowns of the two-wheeler, it seemed like nothing serious was broken, but damn it, there were so many little things that really started to irritate me. This is where the idea arose that it was time to change the car to a foreign car. The choice fell on the melting Camry of the tenth years.
Yes, I had matured morally, but financially I just couldn’t handle it. I’ll say right away that I am against loans and taking a car, especially not a new one, on credit is unreasonable. My salary is 24k a month, so collecting 600-700 thousand is almost impossible for me. I started looking for different ways to make money on the Internet. You can’t imagine how many scams there are, what I haven’t tried: sports betting, network marketing, and even the volcano casino, where I successfully lost about 10 thousand ((The only direction in which it seemed to me that I could make money was currency trading on the stock exchange, they call it Forex. But when I started delving into it, I realized that it was very difficult for me. I continued to dig further and came across binary options. The essence is the same as in Forex, but it’s much easier to understand. I started reading forums, studying trading strategies. I tried it on a demo account, then opened a real account. To be honest, I didn’t manage to start earning money right away, until I understood all the mechanics of options, I lost about 3,000 rubles, but as it turned out, it was a precious experience. Now I earn 5-7 thousand rubles a day. I managed to get the car buy after half a year, but in my opinion this is a good result, and it’s not about the car, my life has changed, I naturally quit my job, I have more free time for myself and my family. You’ll laugh, but I work directly on the phone)) If If you want to change your life like me, then here’s what I advise you to do right now: 1. Register on the site 2. Practice on a Demo account (it’s free). 3. As soon as you get something on the Demo account, top up your REAL ACCOUNT and go to REAL MONEY! I also advise you to download the application to your phone, it’s much more convenient to work from your phone. Download here.
- ? Old style. They are wider and fasten without screws (on pistons). Made of 2mm plastic (quite fragile).
- ? New sample. Attached with self-tapping screws. Made from thicker rubber-plastic material.
According to reviews from car enthusiasts, the new type of lining fits more tightly at the edges, which allows for better protection of the sills from dirt and, accordingly, increases the service life of the body.
Instead of the standard ones, you can install door sill covers on the Priora. They look great and are of good workmanship.
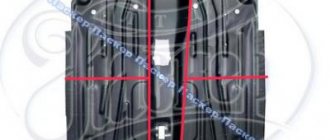
Installation of threshold overlays for VAZ 2170 on VAZ 2110
You will need: Priora thresholds, keys “7”, “10”, a screwdriver with a Phillips-shaped blade, plastic lining retainers, latches and Movil. You can buy decorative door sill trims for Priora at an average price of 1,200 rubles in online stores (accessories section).
The body of the VAZ 2110 has all the necessary holes for installing decorative thresholds; an exception may be older cars, in which case the holes in the thresholds will have to be drilled manually. Before installation, it is recommended to treat the thresholds with Movil.
Installation in order:
- We apply the trim to the threshold.
- Tighten the 3 screws securing the trim in the door opening.
- Tighten the front and rear mounting screws.
- Install the decorative trim mounting bracket.
We get a VAZ 2110 with door sill trims from Priora:
Conclusion
| The main purpose of decorative thresholds is to make the car look more attractive. Installing them yourself will not take you more than 20 minutes. To avoid problems with rust formation, make sure that there are no gaps between the linings and the threshold through which dirt can get in. If it does get there, then you can’t wash it at the car wash; there is only one way out - remove the thresholds and carry out preventive maintenance. By the way, to prevent rust, it is recommended to treat the entire car body with anti-corrosion agent. |
Are sill covers installed on your car?
Have you had problems with rust appearing under the thresholds?
Causes of rust and preventive measures
The first versions of the VAZ 2110 were characterized by the fact that their paintwork began to peel off in the area of the windshield frame. The problem began to develop from the seal and gradually spread to the entire body element.
Soon the manufacturer changed the painting and installation technology, but still the problem of a body that was not resistant to corrosion could not be completely overcome.
We will look at the main reasons for the probable appearance of rust on the sills, bottom, arches, and side members. We will also give some tips on how to deal with them.
To increase the service life of the underbody of your own car, periodically perform anti-corrosion treatment. Pay special attention to the hidden cavities of the side members and sills.
Problem Definition
It is not difficult to determine the presence of rust on the bottom. Although if you bought the car second-hand, these problems can be carefully disguised.
- Be sure to inspect the body from below. Traces of corrosion may be hidden behind a layer of anti-gravel coating or putty. Use a hammer or awl to hit these areas lightly. If rust is present, you will see it.
- Check the condition of the body along the thresholds, in the cabin at the feet of the driver and front passenger. It is these places that are quite weak in the case of the VAZ 2110.
- If the bottom is rotten, you can notice this by the sagging of the floor under your feet under load.
- When the driver's seat comes off or cannot be moved, a rotten body may also be the cause.
- One of the most unpleasant situations is rotten thrust pads designed for lifting a car on a jack. But this way you will immediately determine that there are problems and they need to be solved.
Replacement of thresholds VAZ 2110, 2111, 2112
By examining the condition of the thresholds and bottom of the VAZ 2110, you can easily determine the age of the car. It should be recognized that the factory anti-corrosion treatment is not of very good quality and without proper care, after 7-10 years, through holes may appear on the thresholds as a result of corrosion.
In this article, we will analyze the process of replacing VAZ 2110 thresholds, list the tools and materials for the work, and also talk about why thresholds rust and how to extend their life when there is no severe corrosion yet.
Tools you will need for DIY repairs
In order to save several thousand rubles, the car owner will need the following set of tools:
- Bulgarian.
- Electric drill with a set of attachments for stripping.
- Cleaning discs for grinders.
- Standard set of automotive tools.
- Semi-automatic welding machine and a couple of spools of wire.
- The new thresholds themselves, if they are planned to be replaced. It is strongly recommended to change the entire threshold at once, as this will help avoid problems in this place for 2-3 years;
- Primer, solvent, paint, putty and other materials that will be needed to process welds and paint new thresholds.
To carry out threshold repairs, you need a spacious garage with ventilation. This is especially true when carrying out painting work.
If the garage does not have good ventilation, then it is better to paint the car outside.
Preparation for repair
If there are holes in the threshold, it must be completely replaced.
Before you begin repairs, you need to carefully inspect the car's sills. It may be possible to get by with cosmetic repairs . For inspection, the car must be driven onto an overpass or pit.
If, in the case of local corrosion or damage to one section of the threshold, it is a spot repair, then if there are several holes, it is better to replace the entire threshold.
The process of removing the old threshold
It is recommended to dismantle the thresholds after removing the doors, seats and fenders of the car.
It is also recommended to remove the wheels. In practice, only a few do this. Most often, independent repairs occur without removing other body elements. Those elements that may be damaged during welding or painting are simply covered with suitable material.
Before dismantling the sills, the fenders, seats and doors must be removed.
The replacement process itself occurs as follows:
- First you need to disconnect the battery.
- Next, using a grinder, the old threshold is cut out, or the damaged part of the threshold is removed.
Using a grinder, we cut out the old threshold.
- After the threshold is removed, the body must be thoroughly cleaned of rust.
- Those places where welding will take place also need to be cleaned of rust, putty and primer.
We clean the body of rust, putty and primer.
We recommend: How to glue moldings on car doors?
Only careful preparation of the base for welding will help to avoid welding seams in the future.
Video about dismantling the old VAZ-2110 threshold
Installing a new part
Before installing a new threshold, you need to weld the connector of the new threshold to the subframe amplifier.
We weld a new connector to the subframe reinforcement.
Welding should begin from the center of the part , gradually moving towards the edges. After the connector is welded, you need to clean all weld points. The further installation process is as follows:
- The front panel of the new threshold is adjusted to the vehicle.
We adjust the outer panel to the connector.
- After the front part, the entire threshold is adjusted. Clamps are used for fixation.
- The welding area must be cleared of paint and primer.
- Holes are drilled at the bottom of the threshold panel.
- Next, the outer part of the threshold is hung on the car, after which it is secured with self-tapping screws.
- The lower part of the panel is welded through the holes made.
- The connector is welded to the bottom of the body.
We weld the connector to the bottom of the body.
- The metal must be carefully welded on top of the threshold.
- After this, the welding seams are cleaned and processed.
Next, the entire surface of the threshold is prepared for painting. Primer and putty are applied. After stripping the putty, several layers of paint are applied. If necessary, apply clear varnish.
The result of replacing the threshold.
Why do the thresholds of the VAZ 2110 rust?
There are several reasons:
- Irregular anti-corrosion treatment. On vehicles of the VAZ family, preventive treatments must be carried out before each winter season of vehicle operation.
- The car was damaged in the threshold area and poorly repaired. In this case, corrosion develops very quickly and after 2-3 years through holes may appear.
- Winter operation on roads where a lot of reagents are used. Salts settle on the thresholds of the car and after a short period of time “break through” the external anti-corrosion treatment, starting the corrosion process. If you operate a car in such conditions, you need to wash it once a month and preferably with warm water.
- Damage to the external protection of the threshold and its untimely restoration.
- Blockage of drainage elements in thresholds. Drains should be checked once a year throughout the entire body.
The final stage of work. Finishing and painting
After completing the welding work, all that remains is to process the seams with a cleaning disk and roll the lower part of the VAZ 2110 threshold (clamp it onto the connector). You can take a few breaths, then it will be easier. From the outside, treat the car with a primer. Inside the cabin, the bottom is initially treated with mastic, then a layer of polyethylene is laid down, then back with mastic, sound insulation and carpet.
All that remains is to collect all the other parts in their places and you can hit the road again. Be prepared that the total scope of work may take at least three to four days. As you understand, having certain skills and tools will allow you to save a considerable amount of money, but it also takes a lot of time, so it’s up to you to decide whether it’s advisable to restore the VAZ 2110 thresholds yourself.
Step-by-step replacement process
- First, remove the doors, seats, bumper and front fenders. Also remove carpets, seat belts and sound insulation.
- Protect your car windows. Sparks from grinders and welding can damage them. It is also advisable to cover the doorway with cardboard so that nothing gets into the interior.
- Disconnect the negative terminal of the battery.
- Place the vehicle on a pit or tipper.
- Attach the new threshold and use a marker to mark the lines along which you will cut the old one.
Use a grinder to cut through the previously marked areas.We core all the contact welding points along the edges at the top and bottom of the threshold. Next, we drill out the points, and then use a body knife to separate the metals from each other.
The sequence of actions for replacing the threshold box
- It is necessary to place the car on a level surface; a level garage floor, boards, etc. will do. This is very important, because when repairing rotten cars, the gaps of doors and other elements can slip away.
- By marking the positions of the hinges on the pillars, you can remove the doors, as they interfere with the removal and installation of the threshold.
- If the car is rotten and you are afraid that the body will “fold”, you need to fix the original position. This can be done by inserting guy wires into the door opening, guy wires from the projection of the rear sofa and in the A-pillar, placing a block about 1 m long and pressing it lightly with a jack. Thanks to these simple manipulations, you will keep the gaps of all doors in their old position.
- Experienced people on my favorite body forum divided the replacement of thresholds into two options: correct and not quite correct. Proper repair involves replacing both fenders and sills. At worst, the threshold and the hams of the wings. This is necessary because the threshold is welded to the front pillar and to the rear arch far under the wings, and replacing the threshold without dismantling the wings remains problematic, if not impossible. But if everything is in more or less normal condition, then you can resort to the second method - welding the amplifier and butt welding the threshold trim.
- Also, before sawing the threshold, it is necessary to inspect the condition of the inside of the threshold with the noise insulation removed; if it is rotten, then it is necessary to weld a curved piece of metal that needs to be used to connect the inside of the threshold with the floor panels.
- After you have fixed the car body, you can begin to dismantle the old threshold. This can be done as you prefer, starting from the front or the back. It is better to brighten the weld spots, use a chisel less, because the edge is deformed, which is then quite difficult to straighten. For additional rigidity of the boxes, you can leave a strip from the old amplifier and lining in the area of the rubber seal, or one of them, this makes it easier to weld the new threshold and increases its rigidity.
- The threshold consists of three parts - an amplifier, a connector, and a threshold cover. When replacing thresholds, the connector is often not a standard one, but is made from a suitable piece of tin a little wider than the standard one.
- After dismantling the threshold, it is necessary to clean the edges from rust and old welding residues.
- VERY IMPORTANT! Thresholds must be replaced as quickly as possible, within reasonable limits, of course. That is, you should not cut off the threshold and leave the car for 2-3 days, it may lose its geometry.
- If the hinges of your doors are in order, but the upper corners of the doors touch the pillars, then this can be fixed. It is necessary, with the doors open, to use a jack and an extension to rest against the ledge of the rear sofa and the upper curtain of the door. Then grab this distance with a pipe from inside the rack. Try on the door if you need to add or remove. After welding the thresholds, the pipes can be cut off.
- The new threshold is welded in the following sequence - amplifier-plate-connector. After cleaning all the surfaces that will be welded, you can begin welding the threshold amplifier. It must be cooked semi-automatically in a carbon dioxide environment through drilled holes with a diameter of 5-6mm. To make it easier to install the amplifier in the area of the B-pillar, provided that the old amplifier is more or less intact, you can leave a piece of the old one and weld the new amplifier to it. In the lower part, a threshold connector is also welded through drilled holes. The CONNECTOR is welded at this step only to the amplifier! It is welded to the floor last.
- Attention! Trying on the threshold overlay is carried out only with the doors installed! Otherwise you might miss :)
- After welding the threshold amplifier, it is necessary to clean the welding points and weld the trim through the drilled holes in the threshold trim. The pad is welded to the rack in several ways, depending on what is more convenient, the main thing is that the connection is strong.
- Lastly, the connector is welded. There's a little trick here. The connector is welded to the floor panel; this can be done from a hole or through holes drilled in the floor panel. In order not to catch scale on your head, you can drill holes in the floor and, pressing the connector from below with a jack, weld it through the holes.
We recommend: How to make heated wipers with your own hands
Description
Glass-plastic sills (tuning) on the VAZ 2110 give a sporty appearance and visually reduce the vehicle's ground clearance.
Plastic thresholds on the VAZ 2110 are made using composite materials.
The weight of the plastic thresholds on the VAZ 2110 is 4-5 kg.
General recommendations when installing fiberglass products:
1. The wall thickness of the original metal body part is generally 1mm, the wall thickness of the fiberglass body part is 3-4mm, so you may have to remove excess plastic from the inside with coarse sandpaper during the fitting process. 2. We are not a factory and we do not have a stamp, but manual labor, if the part consists of two parts, there may be a deviation during gluing of 1-2 degrees or a shift of 2-3 mm in one direction or another, which leads to additional adjustment work when installation. 3. If the geometry of the metal can be straightened “by hand” or with a hammer, then the geometry of the fiberglass product can be changed (within reasonable limits) using a hair dryer by heating the surface to 60-70 degrees (the main thing is not to overheat the excess...so that the resin does not boil!). When heated, the resin “withers” and the part becomes more elastic, the part is installed on the body and fixed in a new position, after cooling the part takes on the corrected geometry. 4. We kindly ask you to clarify the “competence” of your craftsmen in the installation of fiberglass body parts and coordinate with them possible additional work before placing an order! 5. If you have any questions during installation, call or write immediately and we will try to solve them together!
Recommendations for preparing for painting fiberglass products:
1. First install the unpainted part on the body, align everything according to the gaps and only then go to the paint shop!
2. We apply a small mark to the surface of the fiberglass part with “not rough” sandpaper, so that the primer will better cling to the surface (just without enthusiasm... just a little). The gray surface is not primer, but the first layer of composite materials with silver filler; it cannot be cleaned off; pores and cavities may form. 3. Before applying the primer, thoroughly degrease the surface with white spirit. 4. Apply primer for plastics, a two-component primer (it goes on thicker), then any paint coating.
5. Dry fiberglass parts only at room temperature, DO NOT USE heating elements, LAMPS or other heating devices, in order to avoid changing the correct geometry of the part. 6. It is recommended to PAINT fiberglass parts IN A HANGED CONDITION, in order to avoid changing the correct geometry of the part.
“by default, sending by KIT - the car is loaded and goes for shipment, if you need to send another transport - it is decided by registering the cargo pickup”
Conditions for returning fiberglass body parts:
1. In the event that the customer requests the return of fiberglass body parts with damaged integrity, the manufacturer has the right to refuse to process the return. 2. In the event that the customer requires the return of fiberglass body parts already coated with paint, the manufacturer has the right to refuse to process the return. 3. In the event that the customer requires the return of fiberglass body parts without carrying out full and comprehensive installation work, the manufacturer returns to the customer only the cost of the body part (excluding the transport component) upon its arrival and checks the parts for completeness and integrity, and pays transportation costs customer. 4. In the event that the customer requires a refund of fiberglass body parts after carrying out full and comprehensive installation work (the manufacturer has the right to request supporting video and photo materials) in accordance with general recommendations for working with fiberglass and obtaining an unsatisfactory result, the manufacturer returns the cost to the customer body part, taking into account the transport component upon its arrival and checking the parts for completeness and integrity, transportation costs are paid by the manufacturer.
Payment for delivery is made upon receipt of the goods
If you want to arrange delivery to your door in a shopping center, check with the managers in what packaging your cargo will be shipped in! If in a rigid package, then feel free to do so... If in a pallet board, then you shouldn’t do this, they will take your parts out of the wooden box, simply throw them on the side of the Gazelle and take them to you... We kindly request: immediately CHECK the integrity and completeness of the cargo at the terminal transport company upon receipt! In case of claims regarding violation of the integrity of the cargo, immediately call the manager and ALWAYS draw up an ACT regarding damage to the cargo! We always insure the cargo for the full value, the money will be returned 100%, only if you immediately issue a certificate of damage to the cargo. The report must describe the nature of each specific damage to a specific part. Just in case, take photos and videos of the damage on the TK terminal yourself. After completing the act, YOU CAN (your choice):
1) Pick up the damaged cargo from the transport company’s terminal 2) Leave the damaged cargo at the transport company’s terminal Be sure to FILE A CARGO DAMAGE ACT, don’t listen to anyone, this will only take 5-10 minutes!
In case of claims regarding the cost of delivery (too high), request that a control MEASUREMENT of the DIMENSIONS of the cargo be carried out immediately at the terminal to compare them with the data in your invoice!
Preparatory activities
To repair the bottom with your own hands, you first need to prepare in a certain way. You will need a set of tools, premises, a lot of time, experience and desire to do such things.
Of the tools, it is especially important to prepare the following components:
- Welding machine. In the case of repairing the underbody of a car, it is better to use a semi-automatic machine with wire and carbon dioxide. It is better, more efficient and more reliable than gas and electrodes;
- Angle grinder. It will be useful, if necessary, to remove rust from the floor, to adjust elements and patches, to clean seams and surfaces;
- Car stands. Here you can use various items. So look for what you have;
- The rest of the kit is standard and includes such components as anti-corrosion solution, mastic for seams, welding wire, sandpaper, primer, soundproofing sheets, paint, etc.
Now you need to drive the car into the garage or other equipment room and put it on stands.
The machine should be positioned in such a way that it is comfortable and safe to work under it.
Disconnect the battery, then remove the doors. In this case, experts advise providing spacers for doorways in order to maintain body rigidity and the necessary geometry.
Dismantling the interior
Since you need to repair the underbody not only under the car, but also from the inside, you will have to completely disassemble the interior. This is a difficult task that will take a lot of time. Be psychologically prepared for this. You will have to dismantle:
- Armchairs;
- Floor tunnel lining;
- Carpeting;
- Air ducts;
- Soundproofing layer.
Carefully collect all the wiring, combine it into bundles if they are not collected, so that later there will be no problems with assembly. Collect all fasteners, distribute them into boxes or bags, and label them. This is extremely important because you may face serious problems later.
If you plan to completely replace the bottom or weld a panel to the floor, then the dashboard and beard will have to be removed to create open access to the engine shield.
Welding
So, you have disassembled your VAZ 2110, so now you can really assess the condition of the bottom, as well as analyze the required amount of work. The most optimal situation is one that does not require replacement of elements. The rust spots are cleaned until high-quality metal is obtained, after which they are strengthened by patches. But not everyone manages to face such a situation.
If the holes in the bottom turn out to be through, this will lead to a loss of body rigidity, therefore it is strongly recommended to replace the element completely. In the case of the VAZ 2110, the following body elements are distinguished:
- Floor panels;
- Support platforms;
- Threshold extensions;
- Spar extensions;
- Crossbar;
- Connectors.
Now let's discuss a few basic nuances of welding.
- To replace a part that has “slipped” due to corrosion, it must be drilled out at the welded points or simply cut off using a grinder.
- Do not forget that the brake and fuel system pipelines pass under the bottom. It is extremely difficult to dismantle them, so the easiest way is to cut them off and install new pipeline elements during reassembly.
- If the floor panels are in critical condition, the entire bottom assembly should be replaced. But in this case, be sure to dismantle the exhaust system.
- If it is necessary to change the thresholds, they are dismantled and new ones are installed one by one. It is important to control the geometry.
- If the floor and thresholds are being replaced at the same time, the thresholds are replaced first, and only then the floor panels.
- Carefully mark the elements for welding. The old components must strictly correspond to the new ones being cut out.
- You cannot do without an assistant, so agree in advance with someone who can help you.
- Always start the bottom from the bottom, then grab it.
- Do not make the main weld using a continuous weld. Maintain a step of approximately 4-5 centimeters.
When welding work is completed, be sure to carry out anti-corrosion treatment.
Finishing
Now the condition of the new, or rather updated, body should be brought to perfection, providing the necessary high level of protection against corrosion, destructive rust, gravel and other troubles. To do this, perform several sequential operations:
- Clean the metal, removing scale and achieving shine;
- Lubricate the surfaces with joint compound;
- Treat metal elements with primer;
- Apply a coat of paint to match the body color;
- Treat the outside of the bottom with mastic and anti-gravel compound;
How to replace door sills for VAZ 2110 with your own hands
VAZ 2110 door sills
For the VAZ 2110 car, adjustments serve not only to improve the aesthetic appearance of the car, but have practical value when driving off-road and in everyday use. Door sills on the VAZ 2110 have practical benefits, which can be determined by some facts:
Important points
- All work on replacing thresholds should be carried out with the machine installed on a level surface, without distortions.
- Before welding the top edge of the new thresholds, you should definitely try hanging the doors on the car yourself. There are often cases when doors after welding either close with difficulty or do not close at all. And this can happen due to one slight misalignment of the thresholds, which is not always possible to notice with the naked eye.
- You should never skimp on anti-corrosion treatment of thresholds. If it is not carried out, all the work done will go down the drain in a few years.
- It is best to clean thresholds from rust and dirt using a solvent. When working with it, you need to follow safety rules: use gloves, wear safety glasses (this is especially important if you have to work on the bottom of the car while standing under an overpass - drops of solvent can easily get into your eyes), and apply the solvent itself only with a paint brush.
- Before welding the thresholds, a series of holes with a diameter of at least 3 mm should be drilled in the areas of metal to which the threshold is planned to be attached. This will greatly facilitate the spot welding process, and the threshold will be held more firmly.
We recommend: How to make a heated steering wheel with your own hands?
The main thing when replacing thresholds is accuracy and attention. It is very important to cut out all rusty and damaged metal from both the underbody and the sills. If even one small area of rust remains, the destruction of the structure will begin again. And, of course, anti-corrosion treatment when replacing thresholds is mandatory.
A few words about threshold protection
Door sill covers for Chevrolet Cruze are products made of plastic or chrome that are installed into the structure of the car. The locations of their installation are probably clear to everyone. They are the thresholds of the car, the view of which appears when the doors are opened. Such overlays perform two basic functions:
- Firstly, they decorate the car body if matched to its design.
- Secondly, they improve the protection of thresholds from adverse environmental factors.
Naturally, when installing door sills on a Chevrolet Cruze, car enthusiasts have the goal of protecting the car body from corrosion processes, but the addition of some modernization of the exterior is also pleasant for many of them. Moreover, the cost of such modernization is always low, and its implementation is primitive.
Covers for Chevrolet Cruze are represented in the automotive goods market in a wide range. The most popular types of products are:
- Chrome trims, which have considerable cost, beautiful design and the highest level of threshold protection.
- Decorative protection, selected individually for each model in order to improve its appearance and has minor protective functions.
- Standard trims that are simple in design and provide optimal threshold protection.
Note! Determining which option is best is not easy. It all depends on the goals pursued by the car enthusiast. If the desire to protect your car is paramount, you need to buy standard or chrome trims. Otherwise, you should choose from the decorative class of products.
Advantages and disadvantages
Accessories are divided into two categories according to the location of installation: internal element, external. For their manufacture the following are used:
- aluminum;
- chrome plated metal;
- stainless steel;
- plastic with a smooth surface or shagreen;
- fiberglass, etc.
External elements are attached with self-tapping screws or automotive glue under the main power sills of the car. Often parts are covered with enamel to match the body color. Internal or upper thresholds are installed in the cabin. More often these are plastic products that are used as a decorative element and to protect the interior upholstery during landing.
The advantages of overlays are obvious, but not many drivers are aware of the disadvantages of such a popular coating. 90% of car tinsmiths who specialize in body repair note that after dismantling plastic external body kits, increased corrosive wear of the body is observed. This is especially typical for the VAZ 2108 and 2109 trim levels and the restyled version of the Lada Sputnik 21099 - the most full-size trim level in the line.
There are several reasons why rust rapidly destroys a seemingly protected threshold:
- Incorrect installation of covers on screws. Moisture and aggressive anti-ice reagents penetrate into the holes and do not erode.
- Before installation, the threshold was not covered with anti-corrosive or anti-gravel protection. Primary rust received additional moisture under the lining and damaged the metal faster.
- External plastic linings for painting were glued to the uncleaned surface of the threshold.
Among the secondary disadvantages, drivers note skewed geometry and reduced ground clearance. This occurs if the thresholds were not treated and initially had a rusty surface of more than 65%.
Setting thresholds
Once you have decided on the choice of car door sill moldings, it's time to install them. First of all, prepare a set of tools:
- Wire cutters.
- Pliers.
- Soldering iron.
- Narrow flat screwdriver.
- Powerful Phillips screwdriver.
- The wire is two-core.
- Solder, rosin.
- Connectors.
- Electrical tape or heat shrink tubing.
- White Spirit.
- Water.
- Clean rags.
- Double-sided tape.
- Prayer book.
A prayer book will come in handy if this is your first time doing this procedure.
One example:
The main thing is to degrease the threshold with white spirit or its equivalent before starting installation and secure the result with a clean, dry cloth. Comfortable temperature for work from +20 degrees. In summer, such work can be performed in the fresh air, and in the cold season - exclusively in a heated room. Even a schoolchild can handle the installation - the moldings are sold on a self-adhesive basis. The technology is as simple as two and two:
- Open the package
- Degrease the threshold
- Rinse it
- Wipe with a cloth
- Stick on the strip.
- Let it dry.
- Admire the result.
Don't forget to secure the structure with bolts and a screwdriver. Installation of illuminated molding occurs basically according to the same scheme, only with a number of differences. At each stage, it is necessary to check the performance of the structure in order to quickly correct the situation with poor soldering.
Features of repair and replacement of thresholds at service stations
VAZ-2110 owners most often repair the sills of their cars with their own hands. Based on the cost of the car, repairing thresholds at a service station is impractical.
For those owners who are thinking about repairs at the station, we can give approximate prices for these services :
- Removing the threshold – from 500 rubles.
- Installation of a new threshold – from 6,000 rubles.
- Painting the threshold - from 1,000 rubles.
- Materials – depending on quality, from 900 rubles.
- Threshold repair, which consists of welding holes - from 1,000 rubles.
Replacing thresholds at a service station is quite an expensive procedure.
In total, it turns out that repairing or replacing the threshold will cost from 6 to 9,000 rubles . This amount will most likely have to be multiplied by two, since thresholds are usually changed on both sides. The total is 12–18,000 rubles . Given the price of a VAZ car in the amount of 60–90,000 rubles, carrying out this procedure at a service station is very expensive.
Most owners of domestic cars prefer to carry out repairs themselves, which helps to significantly save money.
The work of installing plastic door sills takes place in several stages
Preparatory stage
We free up space for maneuver. We partially remove the door seal - only in those places where we need it. You can pry it off with a flat-head screwdriver or just with your hands.
The plastic thresholds installed at the factory are secured with steel brackets to the carpet. However, if the latter has already been changed, then there are fewer problems - most likely, the fastening brackets are already missing, completely or partially.
Removing staples is done using a knife or screwdriver
Care should be taken, since a certain force will be required, and therefore it is better to use a knife that has not been sharpened for a long time
Often, factory thresholds are not worth a kind word, and even if they have been used for a couple of years, then, as a rule, there is not even a memory left of them.
Under the carpet (which easily lifts up after removing the staples, and which, quite possibly, is also better replaced on an old car) we find rectangular holes - five of them. They contain clips. Now you need to make holes in the carpet (old or new) corresponding to the location of the clips. The hole must be compact enough so that dirt, water and debris do not get under it, and at the same time wide enough so that the clips are secured properly, and the process of securing the clip with a self-tapping screw will be complicated (the clip will begin to “slip”). After this, you can return the bent seal to its place.
Stainless steel thresholds
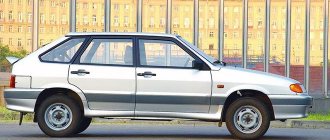
The iron additional threshold gained the greatest popularity with the release of the new Lada (VAZ) 2110-12 family. In 1995, the model was presented in sedan, hatchback and station wagon body styles, and was produced until 2014. The equipment annually participated in Russian rallies, was ordered by taxi companies and as official transport.
Taking into account the peculiarities of operation, the standard thresholds required replacement after 1.5 years. The stainless steel trim was produced by the car plant and offered as an additional accessory to the model. A set of 4 pads costs from 1000 rubles.
Alloy steel with a thickness of 0.7 mm is used for protective thresholds. The size allows you to install protection without replacing the seal on the door.
The name of the VAZ model is engraved on each trim - 2110, 2111, 2112.
They are fixed with 3M double-sided polyethylene foam tape. For each specific VAZ model, the manufacturer produces individual kits preserving the body parameters. Specifically for the VAZ 2110, the characteristics of stainless steel elements:
- front threshold – 2 pcs., 444x52x0.7 mm;
- rear threshold – 2 pcs., 300x52x0.7 mm;
- adhesive strip – 150 cm.
Installation takes up to 15 minutes; the body must be cleaned before installation. If there are traces of corrosion, treat the surface or repair the main element.
What are overlays for?
The main purpose of these means is to protect the car from the troubles of movement. In addition to the function of saving from mechanical and physical damage, they help improve the aerodynamic features of the vehicle and the exterior design. If a vehicle is driven regularly, over time its body becomes covered with defects and rust, corroding the metal, which is quite unpleasant. The situation is aggravated by poor roads and damaging precipitation. Repairing defective thresholds is very expensive. And if you don’t notice the problem for a long time, then you can be left without them at best. In the worst case scenario, the dirt will begin to corrode the vehicle body elements adjacent to the thresholds.
Types of overlays
The dirtiest plastic moldings for the environment also remain popular. They are economical and inexpensive. Plastic perfectly absorbs heavy loads and can take a strong blow. A cracked pad can be easily replaced without costly repairs. And the door sill trim itself can be easily disposed of in an appropriate container for household waste. Plastic is not without its drawbacks. Its service in our climate is short-lived. Since the moldings are outdoors all the time, they collapse in the winter. Recently, improved plastic door sill covers have entered the market. But their share is still small, and low-quality Chinese models predominate. New generations of moldings are equipped with lighting. This is an additional benefit for motorists. The vehicle is easier to find in the dark. There is a wide range of lighting types, which automatically uniqueizes the car and makes it easily distinguishable on the site.
Door sills for VAZ 2110 - useful tuning
VAZ 2110 door sills
For the VAZ 2110 car, adjustments serve not only to improve the aesthetic appearance of the car, but have practical value when driving off-road and in everyday use. Door sills on the VAZ 2110 have practical benefits, which can be determined by some facts:
- The main one is the reliability of protection of thresholds from metal corrosion. This is especially noticeable in winter and autumn, when there is mud and slush on the roads.
- Protecting the sills inside the body, protecting the car from accidental mechanical damage that occurs when boarding and disembarking passengers. These can be deep scratches caused by even a few grains of sand on the sole.
- The lower part of the wing arch is well protected by side skirts with “boots”.
Repair technology
When changing the thresholds on VAZ 2110 cars, thorough preparatory work must be carried out. You can't just pick it up and start replacing it. The technology requires dismantling the front and rear doors, locker; it is also necessary to remove the front passenger and driver's seats, and front fenders. The rear wheels and seat belts are also folded to the side, and the floor mats and sound insulation are removed.
Preparatory work alone can only take, with a fairly clear organization of work, about noon at best. The front and rear windshields of the VAZ 2110 should be reliably protected with cardboard curtains - since sparks flying from the cutting wheels of the grinder will inevitably leave indelible black spots on them, and you probably don’t want that at all. All other plastic and fusible materials must also be removed from the work area.
After which the time comes for the “operation” to save the VAZ. Beforehand, do not forget to completely disconnect the battery in order to prevent it from being affected by the potential of the welding machine. Now you need to pick up a grinder and cut a lot, a lot, removing the old VAZ 2110 sills, parts of the rotten bottom and the lower connector. The same fate awaits the upper connector in places where it has been eaten away by corrosion.
Afterwards the surface is thoroughly cleaned using a brush. Before installing new VAZ 2110 thresholds, we treat the metal with a rust neutralizer (converter) in order to prevent intense corrosion in the future. By the way, by default, the tens body technology does not provide a threshold amplifier. It is advisable to install it.
Then everything should go along the well-trodden path. The connectors are installed, then it’s the amplifier’s turn, and then the threshold itself is welded. The car may not yet look as kosher as we would like, but a good part of the main front of work on replacing the VAZ 2110 thresholds has already been completed.
Characteristics of door sills for VAZ 2110
Typically, plastic 2 millimeters thick, black, is used to make linings:
- For the VAZ 2110, manufacturers have mastered making door and sill trims from fiberglass.
- The more expensive door sill trim for the VAZ 2110 is made of aluminum or stainless steel sheet.
- Car enthusiasts often place plastic sill covers with mesh on top of metal thresholds.
- The thresholds are well absorbed and retain their appearance for a long time.
- Although they seem fragile, they are able to withstand a decent impact on an obstacle, which indicates not only protecting the car from scratches, but also protecting it from serious damage.
- The cost of repair, even from a strong blow when the pad itself is broken, will not be expensive. In this case, it is enough to straighten the curved part of the threshold and purchase a new trim.
Replacing door sill covers for a VAZ 2110 car
Thresholds on a VAZ that is more than ten years old require frequent replacement; they are practically the first to fail. The proposed instructions will allow you to learn how to properly remove and install the threshold trim on a VAZ 2110. These useful tips will help you do all the operations yourself:
- First, the condition of the door hinges is checked. If the door sag or becomes loose, you need to repair the hinges, and then begin replacing the threshold trims. If there is a lot of wear in the hinge, the gap between the threshold and the bottom of the door becomes uneven, which can lead to it touching the trim.
The front fender fairing is removed.
- To do this, the corresponding wheel is removed.
- Two bolts are unscrewed with a TORX T30 wrench, and a screwdriver is used to unscrew one screw that secures the engine mudguard.
- The shield is removed.
- Unscrew the screw that holds the front wing fairing to the threshold using a key set to “7”.
- The same key is used to unscrew the screws that secure the front fender fairing to the wing and fender liner, and at “10” the nuts securing it to the body are unscrewed.
- The fairing is removed.
- Unscrew the nut with a “10” wrench, and use a screwdriver to turn the screw on the fender liner.
- The fender liner is removed.
- Remove the screws that secure the fender guard to the bumper.
- The casing is released from its attachment to the bracket and bumper.
- The protective cover is removed.
- The bracket holding the decorative trim is removed from below.
Removing the bracket holding the trim
- The fastening screws in the openings of the front and rear doors and linings are turned out.
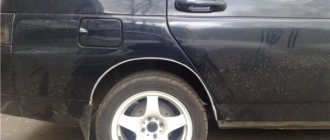
- The part is removed as shown in the photo.
Removing the door sill of the VAZ 2110
Installation of new sill covers
On the VAZ 2110 body, the installation of door sill trims is carried out on holes that are specially made at the factory for these elements.
Tip: Before installing the threshold trim, it must be treated with Movil.
- The trim is applied to the threshold.
- Three screws are installed and tightened to secure the part in the door opening.
- The screws of the rear and front fastenings are tightened.
- A bracket is installed to hold the decorative trim.
- Next, the assembly is carried out in reverse to the disassembly of the elements.
Tip: When installing, you need to make sure that there are no cracks where dirt can get in. If it gets into the threshold, you need to remove the threshold and carry out prevention. To protect against rust, it is better to treat the entire body with anticorrosive.
In this way, the installation of threshold overlays is carried out on a VAZ 2110; the process itself is well shown in the video. On older car models, the sill trim is welded:
- For this, semi-automatic welding is used in a carbon dioxide environment, through pre-made holes with a diameter of five to six millimeters.
- After welding, the weld points are cleaned. The surface is puttied, primed and painted.
Correctly installed door sills will increase the service life of the VAZ 2110 car body.
Average prices for work on replacing thresholds on a VAZ 2110
Specialized services carry out a complete replacement of threshold 2110 with painting in 2 days, the cost of work starts from 15,000 rubles, the customer’s repair kit is used. The work includes:
- checking the bottom, side members, jacks;
- complete dismantling of the interior;
- dismantling wings, front trim, doors;
- cutting out waste elements;
- installation of new ones using high-precision welding;
- complete anti-corrosion treatment;
- painting;
- installation of overlays, at the request of the customer.
It is recommended to additionally protect the parts with plastic or metal fairings: this will increase the service life of the main part. The cost of the cover starts from 150 rubles; you can install the fairing yourself in 30 minutes.