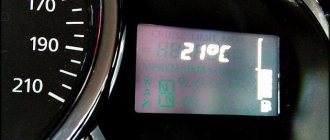
Good afternoon) One more detail in the “vegetable garden” Panasonic
'A.
Anyone who was interested knew that in the summer I never completed the installation of the air conditioner. Not installed: pipeline, pressure sensor, compressor.
The reason is the desire to install a 16kL 126 engine for the next season, so I didn’t bend the tubes or block the idler roller bracket. Let me explain, in the configuration of an 8kL engine with an aluminum receiver, the pipeline rests in the center of the green zone indicated in the photo below (receiver horns).
Electronic components of the system:
The composition includes: — controller of the automatic climate control system (SAUKU) – 21720-8121020-00;
Eat.
— gear motor for air flow distribution (MRVP) – 21700-8127100-00;
Eat.
— air mixing damper gearmotor (MZVS) – 21700-8127200-00;
Eat.
— solenoid valve for the recirculation damper drive (EKZR) – 21700-8119130-00;
Eat.
— rotation speed controller (RFV) – 21703-8127025-00;
Eat.
— evaporator temperature sensor (DTI) – 21700-8121030-00;
Eat.
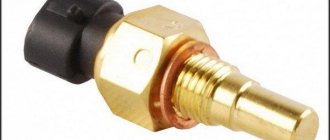
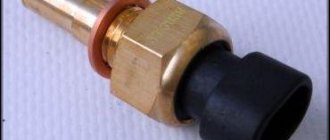
— heater radiator temperature sensor (DTRO) – 21700-8101250-00;
Eat.
— ambient temperature sensor (DTOS) – 21720-8121210-00;
Eat. — cabin air temperature sensor (DTVS) – 21720-8128050-00;
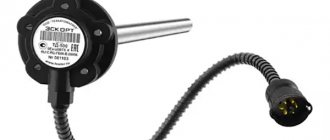
Let's install this component. — pressure sensor (PD) – 21700-8127310-00.
No
Cabin air temperature sensor (CAT).
Consists of a thermistor and an electric fan. The fuel combustion engine sends a signal to the controller, the value of which depends on the ambient temperature. The controller supplies the electric fan DTVS with a voltage of 5 V
In the Priora, the DTVS is located in the roof lining container housing; in the VAZ 2110-12, the temperature sensor is located in the center of the ceiling. Let's redo it.
Let's see what can be done. A good option is to preserve the outer cladding as much as possible, so as not to work on its appearance, while the Panasonic sensor with the fan will move a little higher (plus it is initially 2-3mm larger than the factory one). Otherwise, it will not fit in the box and modification of the decorative cover is inevitable.
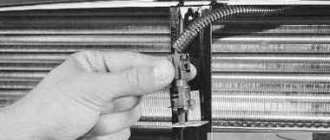
We disassemble, dismantle the board and motor.
Unnecessary parts have been removed, on the right is the inner cover with a ready-made hole for the Priora diesel fuel combustion engine:
I glued in the Panasonic sensor assembly.
I did not resharpen the air intake holes. The sensor is located almost opposite, which does not prevent it from being blown evenly and in a timely manner.
As I said, the design in the final version is higher than the tenth.
For the factory condition of the roof it is not critical, but additionally. Soundproofing will interfere. Installation in the car.
The connector will be original from the Priora harness, the number of wires is the same (4 pieces).
In the photo on the left are the original pads with two wires.
One for powering the motor, the second for the temperature sensor. Connected in advance to (SAUKU) – 21720-8121020-00! A new 4-pin block is soldered on the right. The purpose of the contacts is as follows:
We turn on the unit and check the operation of the sensor.
The start is successful, the motor rotates and the unit responds to temperature readings =) Someone asked about the rotation noise. Now, it works very quietly, you can’t hear it at all. (Part from 2013). Due to the larger volume, it was necessary to cut a square from shvi under the sensor (Accent 10mm before vibration isolation).
Surprisingly, the error indicator in the central button stopped blinking.
The climate control has started working, i.e. auto mode))) There is enough cool outside air for the required batch even without the air conditioner on. Previously, in the auto adjustment position, the stove switched to maximum speed and so on ad infinitum. Now the position of the heat-cold damper and the strength of the air flow are adjusted. For example, if the difference in the indicated temperature and the interior temperature is small, the air flow at the outlet is weak. If the difference is large, the airflow is more intense, after which the temperature stabilizes and the stove reduces the speed of rotation of the impeller. Very comfortably! After modification, I almost never removed the handle from the car position. I only adjust the temperature)
Checking the automatic control system
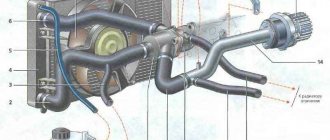
Diagram of the automatic heater control system : 1 – fan electric motor; 2 – additional resistor; 3 – controller; 4 – mounting block; 5 – ignition switch; 6 – cabin air temperature sensor; 7 – recirculation switch; 8 – recirculation valve; 9 – micromotor gearbox for heater damper drive; A – to the instrument lighting switch; B – to power supplies
How heating and ventilation work
There is supply and exhaust ventilation in the interior of the VAZ 2110. The windshield trim has holes through which air either spontaneously (when the car is moving) or forcibly - with the help of a heater fan - enters the passenger compartment. The supplied air exits through the provided slots - at the ends of the doors, between the upholstery, and door panels.
But you don’t need to think that the VAZ 2110 is all covered with cracks, and the air simply doesn’t stay in it.
In fact, all of the holes mentioned are equipped with valves that work “for release” and prevent (at least hypothetically) the spontaneous entry of air from the outside.
The design and operating principles of the heating system are discussed in detail here:
However, you can make high-quality tuning of the heating system, then the car will be truly comfortable.
Heating is done as follows:
- The air passes through the heater radiator, while warming up. The heating temperature is controlled by a relay;
- Next, the warm air is distributed through the air ducts;
- Special deflectors direct the main flow of hot air to the windshield and to the center of the cabin. The flaps can be used to block/open the flow to the side windows;
- There are two more flaps - for heating the front window and also for the feet of the driver and passengers. For this purpose, deflectors are provided for the front seats: one pair is at knee level, the other is almost on the floor. For rear passengers, there are air ducts under the front seats plus a pad on the floor tunnel;
- There are special handles to control air flows;
- The fuse located in the mounting block protects the entire electrical heating system from blowing.
Operating principle of the heater
If desired, you can carry out tuning, adjust the flow of heat to different parts of the VAZ 2110 interior, thereby improving comfort.
Stories from our readers
“Fucking basin. "
Hi all! My name is Mikhail, now I’ll tell you a story about how I managed to exchange my two-wheeler for a 2010 Camry. It all started with the fact that I began to be wildly irritated by the breakdowns of the two-wheeler, it seemed like nothing serious was broken, but damn it, there were so many little things that really started to irritate me. This is where the idea arose that it was time to change the car to a foreign car. The choice fell on the melting Camry of the tenth years.
Yes, I had matured morally, but financially I just couldn’t handle it. I’ll say right away that I am against loans and taking a car, especially not a new one, on credit is unreasonable. My salary is 24k a month, so collecting 600-700 thousand is almost impossible for me. I started looking for different ways to make money on the Internet. You can’t imagine how many scams there are, what I haven’t tried: sports betting, network marketing, and even the volcano casino, where I successfully lost about 10 thousand ((The only direction in which it seemed to me that I could make money was currency trading on the stock exchange, they call it Forex. But when I started delving into it, I realized that it was very difficult for me. I continued to dig further and came across binary options. The essence is the same as in Forex, but it’s much easier to understand. I started reading forums, studying trading strategies. I tried it on a demo account, then opened a real account. To be honest, I didn’t manage to start earning money right away, until I understood all the mechanics of options, I lost about 3,000 rubles, but as it turned out, it was a precious experience. Now I earn 5-7 thousand rubles a day. I managed to get the car buy after half a year, but in my opinion this is a good result, and it’s not about the car, my life has changed, I naturally quit my job, I have more free time for myself and my family. You’ll laugh, but I work directly on the phone)) If If you want to change your life like me, then here’s what I advise you to do right now: 1. Register on the site 2. Practice on a Demo account (it’s free). 3. As soon as you get something on the Demo account, top up your REAL ACCOUNT and go to REAL MONEY! I also advise you to download the application to your phone, it’s much more convenient to work from your phone. Download here.
SAUO pinout:
The SAUO receives information from:
- – cabin air temperature sensor (No. 6), which has a built-in small-sized fan.
- – MMR (micromotor reducer) (No. 9), information about the position of the heater damper.
Damper control : Based on the received information and the set air temperature, the controller controls the position of the heater damper, sending appropriate signals to the damper drive micromotor.
Dismantling
Removal principle
To install a new interior temperature element, you will first have to remove the old one. It can be removed quite simply:
- Four clamps, presented in the form of springs, are used as clamps;
- Be sure to park the car on a level surface and turn on the handbrake;
- For your own safety and comfort, do not forget to remove the negative cable from the battery;
- Using a slotted screwdriver, move the box slightly from its seat;
- Dismantling begins from the top of the sensor, which makes work more convenient;
- After removing the device from its fasteners, do not jerk it sharply. The fact is that it is connected to two wire blocks. They are the ones that connect the sensor to the car’s electronic system. Carefully disconnect the wires, after which the dismantling can be considered complete.
Adjusting the automatic control system
Place a regular mercury thermometer near the temperature sensor on the ceiling. Turn on the heater controller and set the fan control knob to position “A”, and set the temperature dial to 2C higher than the air temperature in the cabin. If, with the doors and windows closed, after 15 minutes the temperature in the cabin does not correspond to the set temperature, then the heater control unit should be adjusted.
To adjust, pull out the SAUO block from the socket and rotate the regulator on the left side of the controller:
- turn clockwise to increase temperature.
- turn counterclockwise to decrease.
Check the operation of the heating system again by repeating the above steps.
Symptoms of sensor failure
Despite the simplicity of the design of this element, the part still periodically fails. A sensor malfunction can be determined by the following symptoms:
- When the air supply temperature on the panel changes, the sensor begins to buzz. This indicates a breakdown of the fan in the sensor.
- The absence of a signal from the sensor is a clear sign of a break in the wiring to it. It is enough to visually inspect the connection points of the wires and identify the location of the break.
- Transmission of an incorrect signal is another sign of sensor failure. With such a breakdown, the stove does not maintain the set temperature parameters in the cabin.
Trying to repair a faulty sensor is a long and pointless task. The cost of a new unit for determining the temperature in the cabin is low, so it is much easier to read the instructions for replacing the sensor and carry out the work yourself.
SAUO repair
Before repairing the SAUO VAZ 2110 unit, you should make sure that the problems with the stove are associated with it. To do this, you should connect a known working heater control unit (borrow from a friend or from a store). If there are no problems with the stove with the working unit of the automatic control system, then we try to find out what the reason is. If the obviously working unit of the automatic control system did not help, then the problem with the stove is somewhere else.
Remove the buttons next to the SAUO block. We take out the stove control unit. Set the controls to position 0 and remove, and then remove the front cover and glass from the latches. Unscrew 2 screws in front and 1 in back.
We remove the board from the plastic case and check the integrity of all tracks, jumpers and resistors. In this example, a broken jumper was found. We solder it on one side and the other.
Reassemble in reverse order. Now all speeds of the SAUO block work .
FAQ on the operation of the VAZ 2110 stove
1st oven speed does not work
- All heater fan speeds (except the last one) are connected through an additional heater resistor, which is located under the frill (wind flap). One of the reasons when the first speed of the heater does not work is a malfunction of this resistor. Depending on the ACS unit, this additional resistor varies:
RDO 2108-8101081 is used on the oldest SAUO units, which have only 2 speeds. (0 A 1 2).
RDO 2110-8118022-01 is installed on a modified heater until September 2003, the SAUO unit has 3 speeds (0 A 1 2 3). The most common malfunction in this resistance is that all stove speeds stop working, except maximum 3. The reason is that the thermal fuse is unsoldered (indicated by a red arrow), and is treated by soldering it in place. But if it is unsoldered later, you need to look in the direction of the motor, the motor takes a very large current (not lubricated, wear on the brush assembly, etc.).
RDO 2123-2118022 has been installed on the latest heaters since September 2003, the SAUO unit has 4 speeds and does not have an auto mode (0 1 2 3 4).
- In addition to a malfunction of the additional heater resistor, the problem may also be in the contacts of the heater control unit board. Often, due to high temperatures, the board becomes very hot and the contact is soldered off. Carefully examine all contacts on the boards, especially at the power supply points.
- Clean contacts.
Checking the resistance resistor
The resistor of this car model has 2 spirals. The first has a resistance of 0.23 Ohm, and the second - 0.82. If both spirals are used at once, the heater electric motor is used at the first speed, and the second is turned on at the first spiral. The third does not need resistance, so it works without a resistor and is considered the most powerful. A lack of antifreeze can cause a malfunction, and a malfunctioning thermostat or pump will make the situation much worse. If the cause of the breakdown is a burnt out resistor, replace it with a whole one. You can purchase it at any car market or service center.
The fuse can also cause a breakdown. Despite the fact that it is as simple as possible to find, the problem is much more difficult to identify. We need a 25 ampere fuse F18. It is located in the main mounting block and is also partially responsible for the cigarette lighter and heated rear window. Check all circuits, perhaps the problem lies in a short circuit.
The cooling system of the VAZ 2110 is very capricious and unreliable, so it is strongly recommended to regularly check it for serviceability. This will contribute to a comfortable ride and allow you to be calm about your safety, because inappropriate conditions can cause an accident.
How does the DTV work?
The heating system in a car of this brand operates from impulses coming from the electronic unit. The unit itself receives information from the fuel combustion engine and compares these indicators with the heating intensity. There are certain temperature limits, the crossing of which is a trigger for the system to operate and the motor to turn on. There is a change in air flow and fan speed. All this serves to timely warm up the glass and the interior.
The sensor itself is a regular thermistor or semiconductor resistor. The relationship between resistance and heat is captured and sent to the vehicle's ECU as a specific measurement.
In addition to the obvious problems in measurements associated with a defect in the meter, there are a number of other malfunctions that one has to deal with:
- electrical wiring fault;
- mechanical damage to the sensor;
- operation outside acceptable limits.
Electrical wiring can be easily repaired by cleaning the contacts or reconnecting them more reliably. It happens that a break may not occur in the sensor itself, but somewhere along the line. Any malfunctions with the device itself are a reason to replace it, since repairing such a device is usually ineffective and more expensive than buying a new device.
Replacing diesel fuel assemblies in VAZ 2110
The cabin sensor is replaced when a malfunction is detected in its operation. The location of the device is easy to find near the lampshade. Most often, its replacement is entrusted to car service workers, but you can do it yourself, since there is no great difficulty or danger in this.
Before proceeding with replacement, you should once again verify its malfunction at the so-called test site. It is necessary to set the climate a couple of degrees higher. Seal the machine and place the thermometer near the converter. After about 10-20 minutes, you should check the readings of the device.
If there is a difference between the values of the thermometer and the set temperature, you can try to adjust the device. Using the adjustment screw on the controller causes the reading to change. So a clockwise rotation increases it, and a counterclockwise rotation decreases it.
2110″ width=”465″ height=”372″ /> Replacing the air temperature sensor in the cabin of a VAZ 2110
When the setting did not help, diagnostics must be continued in a different way. This will require direct dismantling of the device. This happens in a couple of steps:
- using a screwdriver, bend the latches securing the device;
- disconnect the wire connectors.
Taras Kalenyuk
auto RU
In the same way as the DTOZH, which is responsible for the climate of the coolant, you can also diagnose the internal combustion engine using a multimeter. Unlike DTOZH, which is immersed in water for diagnosis, DFAS should be placed in the refrigerator for a short time. After this, remove the device back and update the measurements.
Another minor malfunction of the device may be its buzzing. This is due to the fan installed on it, which accelerates the determination of the air temperature in the cabin. The buzzing only indicates that the fan lubricant has dried out and to fix it you just need to apply a couple of drops of new lubricant.
As already mentioned, the device, despite all the diagnostic procedures, should be changed immediately if the problem is not with lubrication or wiring. Since manually repairing the sensor does not make sense.
We recommend to buy
Checking components
Naturally, disassembling the stove on a VAZ 2110 and checking its components is necessary if you are dissatisfied with its operation, and also if it cannot be adjusted.
So:
- The first thing to do is check to see if the fuse has blown. And although, if this happens, the thought immediately arises - change the blown fuse, do not rush. This is unlikely to immediately solve the problem; most likely, it is not the cause, but a consequence of some kind of failure that needs to be found;
- First of all, you need to check whether the damper moves when the parameters of the heater sensor change. Carefully, so as not to break the wire going to the backlight, remove the deflectors. Now you can clearly see whether the damper is turning or not. If you need to replace the heater damper, then installing an aluminum one instead of a plastic one will be justified;
- Check the resistance of the temperature sensor. If the temperature in the cabin is 16°C, then its resistance should be 250 Ohms, at 22°C - about 200 Ohms. If this is not the case, then installing a new sensor should help;
- It is also advisable to check the controller: remove it from the socket, turn on the ignition and, using the handle to change the temperature parameters, measure the voltage on the long connector. If the voltage does not change, then it is faulty;
- To check the gear motor of the stove, you will have to do a little disassembly: remove the frill, get to the drive of the gear motor (brown and pink wires are connected to it). Apply current from the battery to the connector. If it spins, it means it’s working, if not, you may need to install a new one;
- If the heater only operates in one position, the additional resistance (resistor) through which the fan is connected may have burned out. Installation of a new one is possible only from the engine compartment;
- Check if the wires in the controller are burnt out. To do this, it needs to be disassembled;
- On the right under the hood you will find the relay box. It is very possible that a wire has come loose from the relay responsible for operating the heater. At the same time, check the relay that turns on the heated rear window. If you do not have such heating, when tuning the stove, you can include this relay in the system;
- If the air entering the VAZ 2110 interior does not warm up sufficiently, be sure to check the antifreeze level, as well as the absence of its leakage from the heater;
The main malfunctions of the VAZ-2110 climate control
Since a full-fledged climate control system contains many additional components and parts, it is not surprising that the reliability of such a complex system by default should be no more than that of the heater or air conditioner itself. In other words, to the problems with the functioning of the heating and air conditioning system are added those malfunctions that are characteristic of the operation of the climate system controller itself. The climate control scheme of the VAZ-2110 provides for the presence of an electronic control unit and a damper drive that regulates the mixing of warm and cold air flows to ensure the optimal temperature of the air flow entering the air ducts.
If the air conditioning system does not reach the required temperature, you need to start troubleshooting. The first thing to do is check the functionality of the temperature sensor. This is done by measuring the resistance of the sensor, which must satisfy the following conditions:
- at a temperature of 16º C be equal to 2950 Ohm;
- at a temperature of 22º C be equal to 2800 Ohm;
- at a temperature of 30º C be equal to 2600 Ohm.
If the values on the multimeter differ by more than 25 ohms, the sensor is faulty and must be replaced.
A malfunction of the micro-reducer drive shaft position sensor (which controls the operation of the air conditioner damper) can also be judged by the resistance's compliance with standard values. The test is carried out as follows: with a temperature sensor connected to the system, use the handle to set the minimum temperature value, disconnect the control controller from connector X1, start the power unit and measure the resistance between the input contacts of the gearmotor drive shaft position sensor with a multimeter. The multimeter should show 0.85 - 1.25 KOhm.
The same check should be carried out in the maximum temperature position - in this case, for the first group of controllers, the resistance should be in the range of 3.30 - 5.00 KOhm. If the resistance is zero or the same in both modes, the problem is in a faulty micromotor gearbox, which cannot be repaired. However, the reason may also be the incorrect operation of the controller itself - in this case, the supply voltage will not be supplied to the gearbox drive.
The problem with insufficient heating during the cold season may be due to a jammed heater damper. To make sure of this, you need to start the power unit and set the furnace fan speed to maximum. After this, the temperature regulator must be sequentially set to MIN and then MAX mode.
By listening to the sounds coming from the central vent located above the climate control unit, you can determine whether the damper is moving or not. If there is no characteristic click, it is likely that a foreign object has entered the heater through the glass blower deflector, which has caused the damper to jam. To eliminate the malfunction, it is necessary to disassemble the part of the stove located on the engine compartment side and replace or try to glue the gearmotor drive if it is broken.