Replacing valve seals on a VAZ 2110 8kl.
Changing the MSC is not a difficult task, let’s consider an engine with 8 valves of the VAZ 2111 brand; there is no need to remove the heads during this procedure, but you should prepare a tin rod with a diameter of 8 mm in advance.
We remove the air duct filter, after which the fuel pump is removed, then the ignition distributor is removed, we get rid of the filter housing, and we free the latter from the auxiliary units. Next, we get rid of the toothed pulley from the camshaft and put the cover from the bolt head aside.
PS to secure the crackers, we make blows, armed with a hammer, so that they sit in place, treat the camshaft journal and cams with engine oil, coat the surfaces of the support, the camshaft journal, and then the bearing housing themselves with oil. Changing the oil on removable caps on a car with a carburetor engine is similar to changing it on a car with an injection engine.
Next, remove the ground wires, unscrew the nuts numbered 1, then unscrew the nuts 2 and the bolt numbered 3, disconnect the cover located on the back of the bolt head.
Next, unscrew the 4 nuts located in front of the camshaft bearings, and the 6 nuts located behind the two bearing housings, and separate the washers. Disconnect both housings.
If the key is loose, remove it to prevent loss.
Separate the camshaft from the bolt heads.
Disconnect the oil seal from the camshaft.
We fix the crankshaft in accordance with the position of the piston so that it coincides with the top dead center of the engine. Having unscrewed the spark plug, armed with a tin twig, we place it in the space between the valve and the piston itself, but the main thing is to make sure that the valves do not fail.
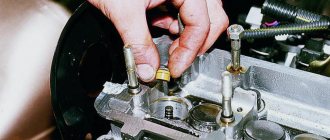
We are preparing the device required for pressing the valve springs; how to do this, pay attention to the photo. Armed with a nut that does not have a collar of teeth, we press the valve springs using the device.
Armed with tweezers, we remove two crackers, after which we remove the device itself.
We remove the plate from the spring located on top, as well as the valve springs inside and outside.
We direct the press of the oil scraper cap in the direction of the valve sleeve
For this procedure, we place a collet to install the oil seals. Armed with a striker, we apply mechanical force to the bushing and then knock on the handle of the device to press the cap off the bushing.
Taking simple pliers, remove the cap fixed in the collet. In this case, the force must be directed upward; it should not be subjected to scrolling; make sure that the bushing does not break or become damaged.
Before installing new MSKs, we remove the springs from them, the main thing is not to cause the springs to break, this usually happens when they move along the grooves under the crackers located on the valves. Apply engine oil to the removable caps and place it in the mandrel.
Fix the cap all the way down.
We place a spring on the cap if it was previously removed.
After which the remaining MSCs are replaced in the same way. We return the spring to its place, the plate is also installed back in the required order, and when they are removed, the crackers are installed so that they are firmly fixed in the grooves of the rod.
We remove the rod made of tin from the place for planting candles. We fix the block heads and place them in the supports; the main thing is to make sure that the direction is not opposite to the direction of the pushers from the valves.
Apply head sealant to the edge of the camshaft supports.
We return the camshaft bearing housing back, do the same with the washer studs, then tighten the fastening nuts following the indicated tips. We tighten them until the bearing housings touch the very surface of the bolt head.
It is worth remembering that when installing the guides, they must fit into the holes of the housings; fasten the nuts, following the prompts, install the camshaft seals. It is necessary to measure the gaps and then adjust them, then reassemble everything in the reverse order.
Source
Putting parts in place
First, the cap is dipped in engine oil, installed in the mandrel and carefully hammered into the lower plate. The spring is returned to its place. All existing caps must be installed in the same way. In the same order as was done during removal, return all the springs and upper plates to their places. Then install the crackers back so that they fit exactly into the grooves for the rods on the valve.
A tin rod is removed from the hole from which the candles were removed. After installing the crackers, you need to hit the ends of the valve with a hammer or heavy object using a steel rod. They should fall into place. Lubricate the distribution shaft journals, cams and the places under them in the heads on the cylinder block with engine oil.
Install the camshaft into the head supports. In this case, it is necessary to install the cams of the 1st cylinder in the opposite direction in relation to the valve tappets. The area of the last support of the distribution roller is covered with sealant. The housings of its bearings are returned to their place and the studs are fixed in two stages with nuts, which are first tightened until the bearings touch the head.
It is necessary that the bushings fit exactly into the holes on the housings, and only then tighten the nuts until they stop. An oil seal is installed on the camshaft. At the last stage of work, the valve clearances are checked and adjusted. After this, the previously removed parts and devices are returned to their place. If everything described above seems difficult to perform, then you need to contact a car service center - where this work will be done by professionals.
It's easy to replace the caps yourself. The main thing is not to deviate from the above recommendations and follow the order of operations to replace parts. With timely prevention, the car will serve its owner for a long time.
Characteristic signs of breakdowns
Before you begin repairs, you need to make sure that there really is a breakdown. Replacement of VAZ-2110 valve seals (8 valves) is required in cases where the following symptoms occur:
- Increased oil consumption.
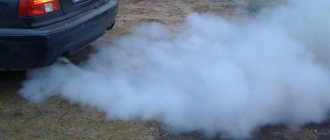
- Smoke when starting a cold car engine.
- The lower edge of the spark plug threads is oily.
- When opening the cylinder head, you can see oily black streaks on the camshaft.
All these signs indicate a malfunction of the valve oil seals. The edge on which the spring is located does not perform its functions - oil is not removed from the valves. If the oil seal completely fails, oil consumption will increase significantly. The amount of soot will also increase.
Why do rubber seals wear out?
When the engine is running, heavy loads occur.
This is understandable, since the valve performs over 1000 strokes in one minute. Additionally, it should be noted the effect of the chemical factor, which is caused by heated oil and exhaust gases. The following signs may indicate that the oil seal has worn out:
- The candle thread becomes coated with oil.
- Smoke appears from the neck where the oil is poured.
- The car's exhaust pipe itself smokes heavily.
- Soot appears on the spark plug electrodes.
- Fuel consumption increases noticeably.
- The recently filled oil is contaminated.
If such manifestations occur, it is necessary to replace the valve stem seals of the VAZ 2110.
Important! It is recommended to change the caps to those intended for this car model.
However, there are exceptions:
- the price of “original” caps is much higher than those offered to the buyer in the nearest specialized store;
- If the cap is damaged, there is simply no time to search for and purchase exactly the same part. This forces you to use some other options.
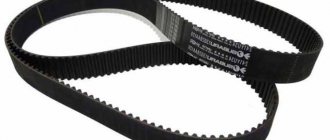
Which seals are best to buy?
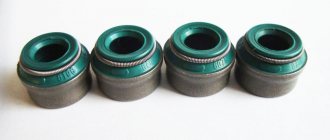
In order to replace the valve seals of the VAZ-2110 (8 valves), you will need to buy spare parts. On store shelves you can find parts produced by many companies. But the highest quality seals will be from the following manufacturers:
- "Elring". Produced in Germany, they are multi-brand elements (can be installed on the engines of any cars, including domestic “tens”).
- “Reserve” - produced in Samara, they perform well when used on domestic cars.
- “Götz” are manufactured in Germany, but there are many fakes on the Russian market.
- "Victor Rains" is also a German manufacturer, the elements have good performance qualities.
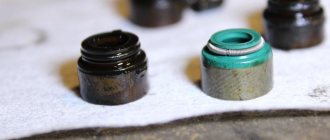
Please note that installing low-quality or counterfeit elements will result in their rapid failure. produces valve seals, they are only red. And if you come across elements from this manufacturer on the counter, but in green color, then this is an obvious fake.
Product selection
The choice of valve stem seals should be taken seriously, since the normal operation of the power unit will depend on this.
A visual inspection is required before installation.
Typically, the manufacturer recommends installing only original (factory-produced) parts. As for AvtoVAZ, for 2110 it will be under catalog number 2112-1007026 . The average cost will be 700 rubles.
Analogs
Motorists recommend paying attention to analogues!
But, as practice shows, most car engine repair specialists do not recommend using original caps. Valve seals manufactured by Elring with catalog number 825.050 . Their price will be 700 rubles , the same as the original ones, but the quality is much higher.
In addition to the presented companies, there are a number of analogues that can be used for installation on the VAZ-2110.
| Manufacturer | Catalog number | Cost in rubles |
| At program | AT 7026-008SB | 100 |
| Master-sport | 825-050-FPM-SET/16/-MS | 500 |
| Trialli | CV 057 | 500 |
| Corteco | 19030310 | 500 |
| Reinz | 12-26058-01 | 500 |
| Payen | HR662 | 600 |
| Elwis royal | 9056004 | 650 |
Preparatory work
Before replacing the VAZ-2110 valve seals (8 valves), you need to perform a few simple manipulations to prepare the car for repair:
- Disconnect the negative terminal from the battery.
- Remove the air filter housing.
- Remove the cover that covers the timing drive mechanism.
- Disconnect the air suction cable (on carburetor models).
- Unscrew the two nuts that secure the cover covering the camshaft.
- Install the camshaft and crankshaft pulleys according to the marks.
- Secure the camshaft pulley by installing a piece of tube into the slot. It is necessary that it fits onto the stud in the cylinder head.
- Loosen the bolt that secures the camshaft pulley using a 17mm spanner.
That's it, now the entire valve mechanism is before your eyes. If the work is carried out on a carburetor engine, you will need to remove the pump (fuel) and the ignition distributor. Work is carried out similarly to replace valve guides.
Replacing oil seals
Be sure to remove the camshaft pulley and unscrew the pastels on which it is located. Be sure to unscrew the bolts from the center to the edges. Remove the rocker and pastels and place them aside (be sure to remember their location). Further manipulations:
- Remove the rocker springs.
- Unscrew the spark plugs.
- Open the valves on the first and fourth cylinders. It is advisable to use a puller for this work.
- Remove the old oil deflectors using two screwdrivers or a puller. Be careful not to destroy the cermet parts of the guide bushings.
- New oil seals need to be soaked in oil.
- Install a special polyethylene sleeve on the upper part of the valve (where the slots for the crackers are located).
- Install a new oil seal and remove the bushing. The oil seal can be pressed in using a 10 mm tubular wrench.
After completing all manipulations with replacing the oil seal, install the springs, plates and crackers on the valve. In car services, prices for such services are quite high - about 1,500 rubles. And this is the case if the valve seals of the VAZ-2110 (8 valves) are being replaced. For 16-valve engines, this service is more expensive.
How to make your own devices
It is convenient to use a special device, since there is no need to hold it with your hands; it holds the springs compressed with a bolt. If you don’t have such a device, you can make it yourself. To do this, it is enough to have two steel square bars 10x10 mm, 300 mm long. They need to be fastened at three points, at the ends and in the middle, so that there is a gap of 12 mm between them, like rails, then the price will be much cheaper. So:
- You can attach it in any way; bolts, clamps, welding, in the fastening points between the rods you need to place metal plates 12 mm thick, which will provide the necessary gap between the rods.
- The valve stem will fit into the gap when the springs are released. To install valves, instead of a mandrel, you can use a steel tube 120 mm long, with an internal diameter of 14 mm, and a copper washer with a hole matched to the rim of the cap.
Preliminary preparation
Before starting work, it is advisable to watch the video, replacing valve stem seals on a VAZ 2106; you definitely need to thoroughly wipe the surface of the upper part of the block and the head cover. For convenience, you need to remove the air filter housing. Cover the carburetor with film or cloth to prevent dirt from entering during operation. Unscrew the spark plugs, remove the cover with the gasket.
- Set the fourth cylinder to top dead center on the compression stroke. To do this, the crankshaft rotates to a position where the intake and exhaust valves of the fourth cylinder remain closed before and after the piston passes TDC. This is determined by the clearance between the valve and the rocker arm.
- The position of the piston is determined by measuring with any rod through the spark plug hole. Check the alignment of the marks on the sprocket and the housing.
Checking whether labels match
- Use a screwdriver to bend the lock washer using a 17 mm spanner. Loosen, but do not unscrew, the nut securing the sprocket to the camshaft.
- Using a 13 mm spanner, unscrew the cap nut securing the tensioner two turns.
- Free up the chain as much as possible.
- Unscrew the nut completely and carefully remove the sprocket from the camshaft axis.
- To prevent the chain from falling off the sprocket, you need to tie it with wire and hang it together with the sprocket on the edge of the cylinder block.
Disassembly sequence
So:
- Unscrew the nine nuts holding the camshaft housing and remove it along with the shaft.
- Using a screwdriver, lift the pressure spring, pull out the pressure lever with a little force, push the spring out from under the stopper and pull it out.
- A soft wire is tightly inserted through the spark plug hole between the piston bottom and the valve so that the valve does not fall when the springs are pressed. The higher the part of the rod into which the fixing nuts are inserted, the less the springs will need to be pressed to install them.
- A nut is screwed onto the camshaft housing mounting stud closest to the valve, as in the photo, to which a special puller or the end of a homemade device clings with a grip. It covers the stud on both sides, rests against the lower plane of the nut and rests on the upper plate of the springs.
- The valve stem with crackers is passed between the rods of the device.
Squeezing the springs and removing the crackers with tweezers
We press the lever, the springs are compressed, the plate with the crackers goes down, the crackers fall into the area of the narrower part of the rod, and are able to come out of the hole of the plate. You need to select them with tweezers or pliers.
The device is released and removed sequentially:
- plate;
- outer spring;
- internal spring;
- inner spring lower washer;
- outer spring washer.
To remove the lower washers, you need to pry them off with a screwdriver.
- The cap is grabbed with pliers, rocked, and rises along the valve stem.
- Then a new valve stem seal is installed and the valve is assembled in reverse order.
- They are sequentially disassembled and reassembled with new valve caps for the fourth and first cylinders.
- After this, holding the sprocket, the crankshaft rotates until the pistons of the second and third cylinders reach TDC. Consistently, similar work is carried out on their valves. We can assume that the oil caps on the VAZ 2106 have been replaced.
Completion of work
Once all the new oil deflectors have been installed, you can begin assembly. It is quite possible to replace valve seals without removing the head. After all, dismantling the cylinder head is a labor-intensive process that will require replacing the gasket and draining the antifreeze. Motor assembly:
- Install the cover using only a new gasket.
- Install the camshaft pulley and tighten the bolt.
- Install the camshaft and crankshaft pulleys, install the timing belt and tension it.
- Install all attachments.
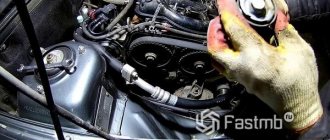
Replacing valve seals on a VAZ 2110 with an 8-valve engine without removing the cylinder head
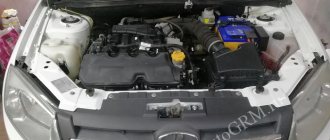
Recently a dozen came to us with a plume of bluish smoke from the exhaust pipe. As it turned out, 5,000 kilometers ago the cylinder head gasket was replaced, and a “overhaul of the head” was also done, accordingly the oil seals were replaced, also known as valve seals, depending on your convenience.
Knowing the quality of our spare parts, it was decided to change the valve seals. On an eight-valve engine, doing this without removing the cylinder head is not difficult, even in the garage. As it turned out, two seals fell off.
Causes of wear
When an internal combustion engine is running, the valve stem seals are subject to a large load. It must be remembered that each valve makes 1000 strokes or more per minute. And if we add the chemical impact from practically boiling oil and exhaust gas, then we can understand why the rubber part of the oil seal wears out. Based on such data, we can conclude that the oil seal, like any consumable, needs to be changed in a timely manner. After a run of 100 thousand km, you should pay attention to the condition of the engine, monitor the oil level and its consumption.
Necessary tool
The tool we need is a desiccant, it is sold on any auto market and looks like this.
Desiccant.
We will also need pliers for removing valve seals, finding them at any car market is not a problem, and any rod with a diameter of 5-7 millimeters.
Pliers for removing oil seals.
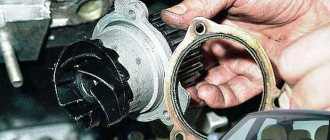
Preparatory operations
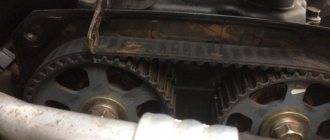
We unscrew the candles. We remove the timing belt and camshaft, then remove the cups, they are also valve pushers along with adjusting washers.
Be sure to arrange them in order or mark them with numbers so as not to confuse them during assembly.
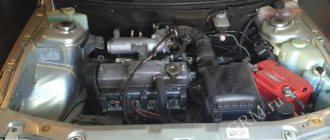
The picture should look like this. It’s unclear how the previous “masters” did the repairs, everything is dirty, so if they removed it, what should be washed?
cylinder head.
Replacing valve stem seals
Everything else is simple. We bring the piston of the cylinder where we are changing the oil seals to top dead center. We engage fifth gear so that when pressed the piston does not go down. We insert our rod into the spark plug hole so that it goes under the valve.
If this is not done, there will not be enough spring travel to pull out the crackers.
We compress the spring and take out the crackers, remove the springs with the plate.
Compress the spring.
Remove the valve seal.
Be sure to rotate the seal when we put it on the valve.
An extended 12mm head works well as a mandrel.
We install our mandrel and fill the oil seal with light blows of a hammer.
As soon as the sound of the blows changes from dull to ringing, the seal falls into place.
We visually check that everything is level, put the springs in place and, squeezing the spring, put the crackers in place. We repeat this procedure seven more times. Reinstall the camshaft and timing belt. The whole thing took about two hours including disassembly and assembly.
How to install
- Remove the springs from the caps.
- Place the cap in the mandrel and lubricate the valve stem with a drop of oil.
- Place the oil seal together with the mandrel on the valve stem and move it down to the special seating lug of the guide. Using a hammer, not hitting the frame too hard, press it into place.
- Place its spring on the installed cap.
- Install the valve components and dry it using the same action using a puller as you removed it.
- Do this with all the caps.
- If the motor design does not have hydraulic compensators, then after replacing the caps with your own hands, you need to adjust the valves.
Purpose and design of valve seals
A worn oil seal allows oil to enter the cylinder along the valve stem, causing it to burn along with the mixture, forming carbon deposits on the valve plates, as well as on the rings and cylinder walls. In advanced cases, coking leads to a drop in compression due to stuck rings and loose valve closure. It is generally accepted that the cost of timely replacement of oil scraper bushings is incommensurate with the repair of the piston group.
The design of the oil seal is quite elementary, it consists of only three basic elements:
- The base is a steel bushing, which represents the frame of the oil seal and gives it strength.
- Spring – ensures the tightest possible fit of the edge of the rubber seal to the valve stem.
- Oil seal - made of rubber or secondary rubber and serves to remove excess lubricant from the valve stem.
It is important to take into account that to replace valve stem seals on a VAZ 2110 8-valve car, it is better to buy appropriate high-quality consumables. First of all, this will affect the service life of the parts; they will not have to be changed ahead of time.
Symptoms
Over time, the caps are destroyed, subject to aging, delamination of rubber with loss of technical properties. This is noticeable by the appearance of bluish smoke from the muffler of a car operating under heavy loads during engine braking. Indirect reasons for oil seal wear are considered to be increased engine oil consumption.
Caps lose their technical properties during operation
Oiling of the spark plug electrodes is also a symptom of cap wear. Aggressive environments and high temperatures negatively affect the durability of rubber and its durability. As a result, the material of the product hardens, and the working edge cracks, wears out, and wears out.
How to organize the replacement of valve stem seals for a VAZ 2110 8-valve car in a garage?
Even an ordinary motorist can easily install new valve seals. If we consider that dismantling the cylinder head is not included in the technological list, then the repair does not present any difficulties at all.
When purchasing spare parts, it is important to pay attention to the internal profile of the seals. Quite often, parts that are not equipped with a reinforcing sleeve have an annular protrusion on the landing plane in their design. During installation it may be damaged, but otherwise the process is no more complicated than changing the damper support on a “ten”.
Preparatory stage
First of all, it is worth noting that replacing valve stem seals on a VAZ 2110 with an 8-valve engine uses the same technology for both carburetor and injection engines. Therefore, the tool set is similar in both cases:
- Set of wrenches and socket wrenches.
- Device for pressing valve springs.
- Mandrel and puller for valve seals.
- Tin rod with a cross section of 7-9 mm.
- Tweezers, hammer, screwdrivers and pliers.
Before starting work, it is advisable to clean the cylinder head with kerosene, after which the air filter, fuel pump and ignition distribution device should be removed. Next, use a No. 5 hexagon to unscrew the screw that secures the auxiliary device drive housing. Be sure to remove the negative terminal from the battery, as well as the toothed pulley from the camshaft.
Preparatory dismantling stage
- Unscrew the nuts securing the cylinder head cover and remove it.
- Unscrew the two nuts securing the ground wires and remove them from the studs.
- Unscrew the two nuts and bolt of the rear cylinder head cover and remove it from the head.
- Alternately loosen the four nuts securing the front camshaft bearing housing and the six rear ones. Remove both housings.
- The key should be removed from the camshaft groove immediately so as not to be lost.
- Dismantle the camshaft and remove the seals from it.
Removing the old seal
This stage of replacing deformed valve stem seals for VAZ 2110 8 valves includes installing the piston where the work is being done to the TDC position. Further actions are performed according to the following scheme:
- Remove the appropriate spark plug and insert a tin rod into the hole to prevent the valve from falling through.
- Using a special tool, compress the valve spring.
- Use tweezers to remove two crackers and remove the device.
- Install a collet to remove the caps and hit the fixture bushing with a hammer. This will allow the seal to be pressed off the bushing.
- Remove the oil seal from the collet. If you don't have a collet, you can use pliers. Do not rotate the seal; this will damage the valve guide.
Installation of a new seal
- Place the cap in the oil and install it in the mandrel.
- Carefully press the oil seal into the lower plate until it stops.
- Install the spring onto the seal. Carry out similar actions with the remaining parts.
- Install the crackers and hit the ends of the valve with a hammer through a metal rod. So the crackers will return to their normal place.
- Lubricate the camshaft cams and journals with oil, and treat the bearing surfaces under the journals in the same way.
- Place the shaft in the supports so that the cams of the first cylinder are directed away from the pushers.
- Treat the area of the outer shaft supports with sealant.
- Install the camshaft bearing housings, then put the washers on the studs and screw the nuts. They need to be tightened in two stages - first until they touch the bearing housings. Then check whether the guide bushings fit into the corresponding holes in the bearing housings. Only then finally tighten the nuts in order.
Final stage
The replacement of oil seals on a VAZ 2110 8-valve car is completed by installing camshaft seals. Be sure to check the clearances in the valve drive assembly. At the end of the process, all hoses and wires are installed in the reverse order.
If there is a suspicion that the car has been driven on faulty seals for quite a long time, then the experts recommend making repairs by dismantling the cylinder head. This will allow you to perform a full repair with thorough cleaning of engine components from carbon deposits.
Source
Removing the cuff
- the cylinder head cover is removed;
Note. In order for the replacement of camshaft seals on a VAZ 2110 to be successful, it is not necessary to dismantle the engine or the VAZ camshaft.
Camshaft oil seal VAZ 2110 16 valves
The cuff itself is located behind the toothed pulley. To dismantle it, you should arm yourself with a special tool - 2085. If this is not available, a regular hook can help remove the oil seal. So, let's start removing:
- first of all, loosen the clamps of the poly V-belt tensioner;
- remove the belt;
- now you need to dismantle the damper;
- we reach the safety shields - upper and lower;
- disconnect them from the end of the engine;
- Now you need to turn the crankshaft until the cylinder piston reaches top dead center.
Note. When performing the above operation, it is recommended to use the ignition timing mark.
- loosen the toothed belt tensioner;
- we remove it.
Note. This belt can of course be secured accordingly rather than removed. But, as you know, the belt cannot be tightened, otherwise it will become deformed. Therefore, it is still better to remove it.
Camshaft oil seal VAZ 2110 8 valves
From this point on, the crankshaft cannot be turned either, since one of the pistons is already at top dead center. Let's continue:
- block the camshaft pulley accordingly;
- First, use a wrench to unscrew the bolt, and use a pry bar to keep the shaft from turning.
You can also ask an assistant, if you have one, to hold the shaft from turning. In addition, to prevent the shaft from turning, you can pass a 10-mm head with an extension through the hole in the pulley, and then put it on the nut that secures the rear timing belt cover.
- The camshaft pulley is removed.
Note. In order not to lose the key, you should remove it from the camshaft groove.
- Now we should start removing the oil seal that will appear before us;
- take a screwdriver and remove the cuff.
The puller is screwed into the oil seal as far as possible. At the same time, press the slip ratchet.
- you need to loosen the knurled screw and rotate the inner part in the direction of the camshaft until the oil seal comes out.
Installing a new cuff on the camshaft
VAZ 2110 camshaft oil seal
Note. It is recommended to lubricate the new cuff with machine oil. In addition, the threaded head of the tool, which we use along the shaft, is lubricated. Only after this is the cuff pressed inside using a rubber hammer.
To easily install a new cuff, it is recommended to use a bushing of a suitable size instead of a handy tool. You also need to take a long bolt and a large washer.
Note. The bolt that is selected must be the same diameter as the camshaft pulley.
- install the bushing on the outer diameter of the oil seal;
- install them together using a bolt and washer;
- tighten the bolt until the cuff is in place (that is, flush with the cover).
Note. If you don’t have a bushing at hand, the cuff can be pressed in with hammer blows through the bit. We remember that you cannot press the cuff in completely, because this can block the hole from which the oil drains.