How to replace the steering gear, also known as the steering mechanism, on a VAZ 2101, VAZ 2102, VAZ 2103, VAZ 2106?
Note!
Before starting the operation, remove the front driver's wheel from the car! Removal: 1) First you will need to remove the steering shaft from the car. (For information on how to remove the steering shaft, read the article: “”)
2) Next, disconnect the middle and left side tie rods from the bipod, and after disconnecting, move both rods to the side. (For information on how to disconnect both rods, see the article: “”)
Note! You can watch another interesting way to disconnect rods in the video clip located at the very end of the article! (For disconnecting the rods or, as they say, knocking them out, see “0:00 to 5:10 min”)
3) Now take a wrench in your hands and, at the bottom of the car, use it to unscrew all the nuts of the bolts that secure the steering gear to the car body. (The operation is performed with the fender liners removed, so remove them if they are installed on your car)
Note! Unscrew the nuts carefully and use two wrenches, one of which will hold the bolt itself from turning, and with the other, unscrew the nuts themselves. There are washers underneath all of these nuts, so be careful not to lose them!
4) When the nuts are unscrewed, holding the steering mechanism itself with your hand, remove all the bolts and remove all the nuts, and then try to release the steering gear as it will hang on the car body.
Note! Adjusting shims can also be installed on the bolts, thanks to which the ratio of the two shafts is set, so if you have these shims, then be sure to mark them and when installing a new shaft, install them in the same places where they were before!
5) Then stand up and then move into the engine compartment of the car, and there remove the steering mechanism by grasping it with your hand and pulling it upward towards you.
Installation: 1) Installation of the new steering shaft is carried out in the reverse order of removal, but in order for the installation of the new shaft to be successful, you need to know a few things:
- When you tighten all the bolts and nuts, do not tighten them all the way, just screw them on and that’s it.
- After this, get into the car and turn the steering wheel first to the right by 2-3 turns, and then by the same amount to the left, thanks to which the shaft and the mechanism itself will take the correct position.
- But after the operations have been completed, tighten all the bolts and nuts until they stop and then install all the remaining parts in the reverse order of removal.
Note! Upon completion of the operation, check the oil level in the steering gear housing and, if necessary, bring it to normal! (For information on how to check the level, see the article: “Checking the oil level in the steering mechanism on a VAZ”)
Additional video: To make it more clear to you how to replace the steering mechanism on a car, in this case, watch a video in which the replacement process is clearly shown:
VAZ control tuning
Steering unit device
When thinking about modifying the steering, we must not forget that any interventions in this part of the machine are prohibited. Of course, replacing the steering gearbox with a newer modification may not cost anything. But with global changes, it will be impossible to pass a technical inspection. The design of the classics has been well studied; any expert knows it thoroughly. Therefore, it will be impossible to hide this without technical inspection. Nevertheless, for those who decide to do tuning at their own risk, we can advise several directions for creativity.
So, the most common thing is installing a steering column from a more modern VAZ model. The procedure is extremely labor-intensive, but as a result, the VAZ 2105 column gains the ability to adjust in height. For those who like to travel far and have a non-standard build, this is a very convenient option. The new VAZ 2105 column with height adjustment may only require an additional adapter. Such adapters are available in tuning stores.
The main drawback that the vast majority of owners of the “five” would like to eliminate is the heavy steering. It is very difficult and almost impossible to install power steering on a VAZ, but electric power steering is easy. Special kits are sold, even the VAZ 2105 column does not need modification. But electric amplifiers are not always reliable. There are known cases when, after their failure, the car began to be thrown into the oncoming lane, and even at full speed. Therefore, the installation is not very justified. And if you take the ESD from a foreign car, then you may have to install another steering gear and redo half of the car. You may also need to replace the VAZ 2105 steering shaft.
A well-lubricated, adjusted and serviceable steering mechanism of the “five” practically does not require additional strengthening or modifications. But if you want, you can modify it too. It is also possible to legitimize the alteration if you pass tests and receive a certificate from a research institute.
In the fall of 2012, the steering gearbox was pretty worn out; tightening the gearbox nut no longer brought any results. As a result, the question of replacing the steering gear was brewing. A friend with whom I was redoing the steering suggested redoing it through a cardan, the VAZ 2105 steering, reasoning that it would be easier to align everything and there would be no need to get more alignment. This is especially true if the spar has burst and a plate is welded there. You can also adjust the steering column in height and horizontally.
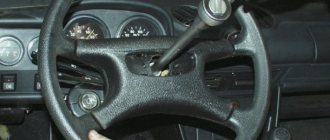
Repair of the VAZ 2101 steering column
Steering column VAZ 2101
- this is an important control element, if it is faulty, then a knock appears while driving, there is play on the steering wheel itself, and when the car hits a hole or bump, a blow is felt o hands.
The problem may lie in the following components of this part:
— damage or wear to the column — play in the steering shaft in the column bushings — universal joints are out of order
To accurately identify the cause, you need to remove the steering column. How to do it yourself is described below.
How to remove the steering column?
1. Disconnect the mass from the battery.
2. Place the wheels straight.
3. Open the hood and unscrew the bolt that secures the flange connecting the steering shaft to the drive gear.
4. Remove the steering wheel, the top and bottom covers, and the lower sound-absorbing panel from the instrument panel (if equipped).
5. Open the bolt that secures the lever that opens the hood from the passenger compartment, and move the lever itself to the side.
6. Open the switches from the steering column.
7. Remove the electrical connector from the ignition switch.
8. Remove the steering column, first removing the clamps securing it at the top and bottom.
9. Remove the ring that is located in the upper part of the steering column.
10. Pull out the steering shaft from the bottom of the column. Just first see if the PK lock is unlocked. Also keep in mind that a bearing with a spring will come out along with the column.
11. After this, inspect the steering column to detect defects. Change worn parts and put everything back together in reverse order, observing the following nuances:
— Place the spring that will come out together with the bearing so that the side with the larger diameter faces the lower bearing of the deformed element. — The steering shaft must be inserted into the PK carefully. After which you need to install the retaining ring of the upper bearing. — Place the cam that controls the switches so that its protrusion is up. — When you install the steering wheel, make sure that the protrusion of the cam falls into the groove of the steering wheel of the VAZ 2101. — When you install the column, make sure that the lower end of the shaft stuck to the drive gear axis. And only after this can you attach the clamps.
Is it possible not to remove the part in order to get rid of play and knocking in the steering wheel?
Sometimes yes. In general, when it hits the steering wheel, a knock and play appears, this is not always the fault of the steering column.
If the knock is loud and can be heard from under the panel, then the problem is there. In this case, try tightening the adjusting bolt first. There is no need to tighten too much, because the steering wheel of the VAZ 2101 will be difficult to turn.
If the play has decreased, but has not completely disappeared, then change the bearing, which is located on the side under the cover and is secured with four bolts.
If this doesn’t help, then it will have to be removed.
I hope our manual for repairing the VAZ 2101 steering column with your own hands
, I also advise you to look at how to change the engine oil correctly.
Source
9.3. Steering gear
Steering parts
| 1 – steering gear housing; 2 – bolt securing the steering gear housing to the body; 3 – adjusting washer; 4 – flat washer; 5 – nut; 6 – spring washer; 7 – bolt securing the tip of the steering gear shaft to the worm shaft; | 8 – shaft seal; 9 – screw securing the rubber seal to the body; 10 – steering gear shaft; 11 – bolt securing the steering shaft bracket; 12 – steering shaft bracket; 13 – steering wheel; 14 – steering wheel fastening nut |
Installing a steering gear on a car
| 1 – bolts securing the steering gear housing to the body; 2 – bolt securing the steering shaft to the worm shaft; 3 – bolts securing the steering shaft bracket to the body; | 4 – plastic bushing; 5 – steering shaft mounting bracket; 6 – adjusting washers to ensure alignment of the worm shaft and the steering shaft |
EXECUTION ORDER
1
Disconnect the wires from the battery and remove the signal switch cover by carefully bending first one and then the other end from the bottom with your fingers. 2. Remove the steering wheel
3. Remove both halves of the steering shaft casing.
Warning If it is necessary to remove only the steering gear housing, unscrew the bracket mounting bolts and the bolt securing the steering shaft to the worm shaft, and then slightly move the steering gear shaft with the bracket inside the passenger compartment and place a stand under the shaft so that it does not hang on the wires.
4. Remove the instrument panel and disconnect the turn signal switch and headlight switch plugs from the wiring harness plugs.
5. Loosen the clamp securing the pipe of the upper support of the steering gear shaft and remove it together with the turn signal and headlight switch, having previously unblocked the steering gear shaft from the anti-theft device.
6. Remove bracket 12 (see Fig.) securing the steering gear shaft, having first freed it from the ignition switch.
7. Remove the seal 8 of the steering mechanism.
8. Having unscrewed bolt 7 securing the steering gear shaft to the worm shaft, remove the shaft into the body interior.
9. Using puller A.47035, press the ball pins of the steering rods out of the hole in the bipod.
10. Remove the steering gear housing.
Warning When removing the steering gear housing, mark the number and placement of washers 3 between the side member and the crankcase in order to install them in their original place when installing the crankcase. This is necessary to maintain the alignment of the steering shaft and the worm shaft.
11. Install the steering mechanism in the reverse order of removal.
12. At the same time, before finally tightening the bolts securing the steering gear housing and the steering gear shaft bracket, temporarily put the steering wheel on the shaft and turn the shaft two or three times to the left and right. In this case, the shaft and other parts take the correct position (self-align) thanks to the oval holes on the crankcase and on the bracket.
Warning You can separately assemble the steering gear shaft with a seal, bracket, ignition switch, turn signal and headlight switch, steering wheel and install this unit on the car.
Symptoms of faulty steering rods VAZ 2101 - 2107
- A knock from the front suspension is a rather unpleasant symptom, especially noticeable when driving over small bumps at moderate speeds. Although the appearance of a knock from the front suspension may indicate a malfunction of other suspension elements - ball joints, stabilizer struts, silent blocks, etc.
- Increased free play of the steering wheel. Here I think it’s clear that this is visible when the wheels remain motionless when turning the steering wheel. This also makes it difficult to control at high speed; you often have to steer while maintaining the course.
So how can you determine if the steering rods are faulty? I will not consider the special devices that professionals use when diagnosing a malfunction; we will consider the old but true methods. The first of them is to place the car on a flat area, preferably in a hole, just take the rod with your hand and turn it along the axis - if you can turn the rod with your hand, then quickly replace the rod. Another method is to turn the steering wheel back and forth and at the same time rest your foot on the wheel - if the tips are faulty, you will feel clicks and gaps, this is difficult to explain, you have to try. The last method I know of is with an assistant, the assistant rocks the steering wheel in both directions, and meanwhile you take the joint being tested with your hand and feel the presence of a gap - adjacent rods do not move synchronously. If there is a gap, then the tips need to be replaced.
Replacing tie rod ends for VAZ 2101 - 2106
Replacement is not a very difficult operation, but requires certain skills. You can go two ways: use a factory puller; knock out cravings using improvised means. The puller is designed to make it easier to remove the steering tip pin from the swivel wheel bipod, which sticks and is clamped very tightly in the cone during prolonged driving.
Tie Rod End Puller
Using the puller is quite simple - it is put on the head of the tip and by screwing in the bolt, the pin of the steering tip is squeezed out. This process can be facilitated by pre-treating the joint with a liquid like VD-40 or by tapping the bipod through a powerful attachment at the point where the finger enters with a hammer.
The second option is to load the steering rod with force using a crowbar and sharply hit it with a hammer (possibly with an attachment, as it suits you) on the bipod of the steering knuckle. Do not overdo it, there is a possibility of damage to the bipod.
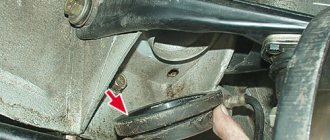
Hit here with a hammer
This knocks out both the inner and outer tie rod ends. After the rod is removed from the car, the necessary measurements must be made to avoid the need to adjust the wheel alignment.
Necessarily! It is necessary to measure accurately!!! the distance from the coupling to a certain point on the tip chosen by you, also, as an option, you can count the number of threads to the coupling. The main criterion is to ensure the same measured lengths on both the old tip and the new one.
Measuring tips
After measuring the tips, you can disassemble the rod, release the coupling clamps, and unscrew the tip from the coupling. To facilitate this process, you can pre-treat these connections with lubricant. After removing the tip from the coupling, a new one is screwed in its place, do not forget that it must be screwed in until the previously measured size is obtained. The second one is replaced in the same way.
After completing the replacement of the tips, you must carefully and tightly tighten the clamps, install the rod in place, tighten the nuts with the required torque and tighten them.
Typical breakdowns
The “Five” can notify its owner of problems with the steering not only by loss of controllability and the appearance of noticeable play, but also by knocking noises that appear when turning the steering wheel or crossing uneven surfaces. Most often, the steering column of the VAZ 2105 knocks, namely one of the worn-out crosspieces. Previously, there were smart people who pressed out the crosspiece and made repairs to it. Today the best solution is to completely replace the steering shaft, along with the cardan. It’s more reliable, faster and smarter. Replacement takes very little time, you literally need to unscrew two bolts. There is no need to worry when purchasing, because the shaft dimensions of the entire “classic” family are the same.
If knocking occurs in several places, then it is best to change the entire control, including the steering gear. Moreover, today they offer better quality spare parts than they cost initially. For example, the new VAZ gearbox has a more convenient system for changing the oil and disconnecting the bipod; there will be much fewer problems with it in the future than with the old one.
Methods for checking car steering
Checking the car's steering by ear
Drive your chosen car on flat and dirt roads, turn off the music, close the windows and listen to all the sounds. Extraneous rattles, noises, clanging, tapping, squeaks, crunches indicate machine malfunctions. If the steering is loose:
- the knocking of the rack is clearly audible - the front suspension parts are wearing out and becoming loose due to the poor quality of the roads;
- noise appears when turning the wheels - as a rule, the driver immediately repairs the steering elements, because it is impossible to drive with such a malfunction; if you find noise when inspecting the car for sale, this is a reason to think about your trust in the seller;
- noise due to a running pump (for cars with hydraulic boosters installed) means that the end of its service life has come.
↑ Adjusting the gearbox engagement
- Remove the protective cap from the adjusting screw. Using a 17mm wrench, loosen the nut so that you can lift the lock washer.
- We quickly turn the steering wheel left and right several times at an angle of about 10° and at the same time use a slotted screwdriver to tighten (unscrew) the adjusting screw until the free play and forces on the steering wheel are within acceptable limits. It is not recommended to over-tighten the screw.
After adjustment, tighten the nut, holding the adjusting screw with a screwdriver from turning.
↑ How to remove steering play on a VAZ 2106
If axial play of the pendulum arm axis is detected, then tighten the nut on the top of the axle. To do this, in the engine compartment, remove the cotter pin from the castle nut, use a 19-point socket wrench to turn it 60° (one edge) and check the play again.
If the play does not disappear, then tighten the nut again and install the cotter pin. If, after tightening the nut, the force required to turn the steering wheel increases significantly, then we repair the pendulum arm.
https://youtube.com/watch?v=%250Ahttps%3A
Steering device
In terms of its design, the VAZ steering is a fairly simple, but technically sophisticated mechanism. Its most interesting part is the steering linkage, which consists of a very large number of levers and rods. In appearance, the steering mechanism of the VAZ 2105 is quite flimsy, but in fact it can withstand even very difficult road conditions. The design is not so archaic; the VAZ steering column has a special plate, thanks to which the shaft, consisting of several stages, folds in the event of an accident, and the steering wheel does not injure the driver. The worm gear of the VAZ gearbox and the lever system significantly reduce the effort that the driver spends on turning the wheel. Despite this, driving a “five”, or any other “classic”, requires considerable physical strength.
Inside the steering column of the “five” there is a cardan transmission that leads to the gearbox. The VAZ steering shaft crosspiece is used for connection. The entire mechanism is quite reliable and can withstand very long runs. All parts are made from high quality steel and are carefully inspected before assembly or sale. Thanks to this, there are very few accidents of Lada cars due to complete failure of the steering, and repair of load-bearing parts is required only in case of serious damage.
This is the unit
The most complex part of the mechanism is the steering gear, which is based on a worm gear. Since the worm gear is initially characterized by gaps and is subject to wear, a special adjusting bolt is built into the gearbox housing. It presses the bipod shaft, preventing gaps from causing the wheel to wobble.
The steering gear mechanism is in an oil bath, thereby reducing its wear. Regular transmission oil, an analogue of TAD-17, is poured into the gearbox. The steering rods of the “five” are mounted on hinges protected by rubber boots. The steering does not require constant injection and lubrication, but it is necessary to periodically inspect the boots for integrity. To assemble or disassemble the rods, you will need special pullers; you can make them yourself.
Thanks to its simple design, the VAZ 2105 steering control can be repaired with your own hands in a garage.
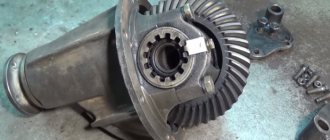
Steering gear design on Niva
But before we start shamanism with a tambourine, a few words about the design of that very steering gearbox. The Shaitan machine, although not cunning in its design delights, still requires ingenuity and understanding from anyone who decides to repair it.
A few dry terms:
The picture was stolen from the Internet (c) who knows?
- Carter
- Bipod
- Lower crankcase cover
- Shims
- Worm shaft bearing outer ring
- Ball separator
- Bipod shaft
- Adjustment screw
- Adjustment plate
- Lock washer
- Worm shaft
- Upper crankcase cover
- Sealing gasket
- Bipod shaft bushing
- Worm shaft seal
- Bipod shaft seal.
During the operation of the columns, worm and roller, namely during their combined operation (friction or rolling as is correct), the operating gap in this pair increases, play appears trivially and some strange knocks and sounds appear.
The appearance of play leads to an increase in the free play of the steering wheel and wobble. And this, in turn, is not normal. Is the steering wheel moving? Poor handling, sensitivity and speed of response are lost, which means safe driving can be kept silent.
I didn’t open America to you here.
This play, if not eliminated in time, namely by not adjusting the steering gear, leads to the appearance of chips, microcracks and subsequent mechanical damage to the main pair - the worm and the bipod.
Well, in the end there comes a complete paragraph and failure. And you, yes, exactly you, end up with your hard-earned tugriks, because a new steering gearbox is less than five, and for Chevrolets with and without power steering, up to a whole ten rubles, in local Chinese spare parts stores, will not cost... checked...
No, of course, not everything is so scary because the gearbox can be removed and disassembled. How to do this will be discussed below.
Steering gear operating issues
Any unit sooner or later fails for various reasons and, of course, the steering gear is no exception.
Most often, car enthusiasts are faced with the problem of leaking steering gear. Such a breakdown is quite easy to detect visually, since the main symptom is the presence of oil under the car. The cause may be either corrosion of the input shaft or a leaking oil seal. In this case, in the first case, you should grind the shaft, and then be sure to carry out gas thermal spraying to the required dimensions. And in the second case, during the repair it will be necessary to install new gaskets, cuffs and seals.
Another problem is the sudden feeling of a “tight” steering wheel. This feeling occurs due to an increase in the force applied to turn the steering wheel. To make sure that the steering gear needs to be repaired, it is necessary to measure the steering force level with a special torque wrench. The results obtained are compared with the data of the vehicle manufacturer. If the results do not meet the standards, then it is necessary to carry out diagnostics on a special stand. This will help you find out the flow rate, pressure of the working fluid and the presence of leaks in the steering gearbox. You should not attempt to repair the steering gearbox yourself. It is much better, more reliable and easier to give it to a workshop. Or, if funds allow, simply replace it with a new one.
The problem of play in the steering wheel is also a common breakdown. Such a defect may be a consequence of a malfunction of the steering column crosspiece, or it may be a sign of play in the steering gear itself. Such a breakdown requires complete disassembly of the device, examination of the condition of the elements and replacement of worn parts. After completion of work, the device must be adjusted on a specialized stand.
Also a fairly common problem is a knocking sound in the steering gearbox. This malfunction occurs due to wear of the thrust bearings.
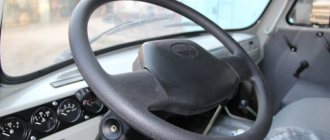
Replacing the UAZ loaf steering gear
Replacing the steering gear is carried out by sequentially removing it from the car frame and then installing a new mechanism. Our article has already described the step-by-step dismantling of the steering mechanism.
Installation of the unit is carried out in the reverse order and adjustment of the main characteristics of the gearbox.
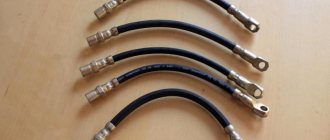
Repair of power steering shnkf 453461130 for UAZ 469
Problem: the power steering gearbox leaked, it started dripping, and then it started leaking like a bucket, I bought a repair kit for cuffs and decided to repair it.
I unscrewed all the bolts and all the connections and here he is on the ground
Patient. On the operating table, see what the autopsy reveals
To begin with, it was necessary to remove the bipod from the shaft; I had to make an improvised puller.
Disassembly is simple: unscrew two bolts with locknuts that secure the covers, remove the retaining rings of the covers and, using a hammer, begin to knock out the covers by hitting the shaft
Be careful, when they come out, a bunch of rollers will fall out, it is important not to lose them - these are shaft bearings
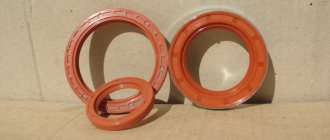
Here are the covers removed, we see inside a seal of three cuffs: two plastic, black and white, and a rubber ring between them
Here they are dismantled
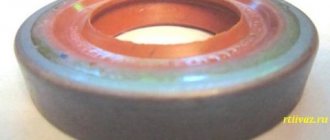
Removed shaft and cover seals
I replaced the cuffs and looking at the covers I saw that their holes were not in the center and realized that by turning them the backlash in the worm joint of the gearbox was adjusted.
Next, I disassembled the drive shaft cover (shaft on the steering wheel). There I replaced the oil seal and rubber rings in the cover. The main thing is not to unscrew the shaft from the piston, otherwise you will have problems for an hour. There are balls inside, which are difficult to put back in place later.
Steering shaft cover with oil seal
When disassembling, I saw why the leak started, due to the fact that the cover was not secured and the ingress of dirt and water caused corrosion and risks on the shaft, in short, it’s an ass, I don’t know if new cuffs will help
Without thinking for a long time, I decided to make a protective cap against dirt and, if I’m lucky, against oil leaks if that happens over time. To do this, I drilled two holes and cut threads for screws.
Here's the lid itself
I assembled everything, adjusted all the gaps, by eye of course, and put it in place. No leaks yet. The autopsy had almost no effect on the work of the GUR. Only by ear it seems to be buzzing less, but that’s how it is by ear. Operation will show.
Installation of ADS-Yubei power steering kit for UAZ 469
This procedure is perhaps the most long-awaited, because... I wanted comfortable steering. All those gearboxes that were in the past either played terribly, or crunched and turned the wheels very tightly. I settled on this set thanks to reviews on the internet. Among the Borisov and Sterlitomakovsky ones, you won’t find adequate and more or less reliable ones during the day, and ready-made kits cost over 32 kilorubles in our region. What was required for installation: 1) The kit itself; 21500 rub.
The contents of the box, but I forgot to put the pump in the frame.
The pulley and fasteners, but where there is so much of it is not clear. Will go into reserve
2) Pump from ZMZ-409 E-2 with “ADS” gasket; 1400 rub.
https://youtube.com/watch?v=eFPrT9GKHWs
Removing the steering gear
If the adjustment did not help solve the problem or it reappeared after a short period of time, then it is time to repair the steering gear. This is a complex process and first you need to purchase a repair kit, which will include oil seals, bushings, O-rings and other components. Repair is divided into the following stages: dismantling; disassembly, cleaning, replacement; installation back. The main problem and difficulty is removing the steering gear from the engine compartment. Remember, you should not try to remove the bipod from the gearbox while it is under the hood, it is sometimes tightened so that it breaks the keys. It is better to remove it together with the bipod, knocking out the steering rods.
And already at the workbench, punch it with a hammer and easily remove it. To remove the tie rods, you first need to remove the front wheels. Then turn the steering wheel to the extreme left position and knock out the right rod with several blows of a hammer, then turn the steering wheel to the extreme right position and knock out the left bipod. You need to hit not from above, but from the side of the bipod. For easier knocking out, soak everything with WD-40 the day before work. But it’s better to use a puller, it will simplify the task. Don't forget to loosen the nut a little. Next, unscrew the bolt on the steering column so that it comes out of the splines. Now you can unscrew the nuts on the steering gear and pull it out.
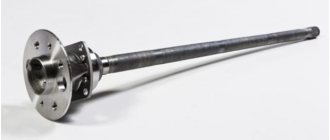
Replacing the steering column
The need to replace the steering column arises if the splines in the connecting pair are worn out, and this connection cannot be restored. To do this, you need to dismantle this mechanism. For this purpose, it is necessary to disassemble the “Shohi” steering column, which even novice motorists can do. The procedure for removing the steering column is not particularly difficult technologically, but preventive measures take a lot of time.
Information for car enthusiasts: when replacing the steering column of the “six”, a slight modernization of this unit is allowed. It is possible to install a steering column from a VAZ 2107, the design of which is complicated by two small cardan shafts, increasing the degree of safety of the mechanism. In addition, additional equipment of the system with needle-type bearings will allow significantly less effort to be applied to the rotation of the steering wheel.
The required replacement of the steering column is carried out in the following sequence:
- We de-energize the battery and carefully remove it from the car and put it aside so that it does not interfere with work.
- We dismantle the steering wheel and the protective coating of the steering column shaft.
- We turn off the steering column control complex and the ignition switch.
- We dismantle the bracket fasteners, and it is possible that individual fastener components will have to be removed using a drill.
- Unscrew the tie bolt connecting the splines to the steering mechanism.
- We dismantle the sealing mount of the steering column shaft, and it is pulled out into the interior room.
Additional information: after completing the repair of the steering column, it is necessary to adjust the wheel alignment of the wheel pair to restore the required conditions of the chassis. It is almost impossible to install the wheelset at the optimal angle yourself without special adjustment equipment and stands.
Important: long-term operation of the “six” with splined joints, subject to increased wear, can ultimately create an emergency situation that is dangerous to the health and life of the driver and passengers. The steering wheel may turn completely uncontrollably, and this can happen at high speed. This is very life-threatening!
This is very life-threatening!
Operating a vehicle in extreme environments or on surfaces that do not meet acceptable standards can cause the steering rack to quickly become loose. This is especially true for VAZ models of the 2108-2109 series. Therefore, the part has to be periodically corrected - tightened. When this no longer helps, you need to carry out repairs or completely replace the rail. Next, we will tell you in detail how to replace the VAZ-2109 steering rack.
To carry out repair work you will need:
- hammer;
- mount;
- extension;
- socket heads for 10, 13, 22;
- ratchet handles;
- collars.
Having prepared everything you need, stock up on additional free time and the desire to do everything as needed, and not carelessly, so that later you have to redo it or send the car to a service station.
Stiff steering on VAZ 2107
VAZ cars, which are classic models, are distinguished by pleasant reliability. This also applies to the steering mechanism.
It is quite complex, but its design allows you to maneuver and ensure reliable vehicle control even in the most difficult road conditions.
The modernization process led to the installation of a composite shaft and a safety column. Due to the size of the steering wheel, the driver makes the necessary maneuvers without any problems. From lock to lock, it takes 3.5 turns to turn the steering wheel completely. The force from the steering column is transmitted to the drive via a composite shaft.
The current steering mechanism on the VAZ 2107, a product of the Volga Automobile Company, is quite informative and does not allow the driver to get tired during long trips. There are certain difficulties when turning in a parking lot, but as soon as the car begins to move, the resistance weakens and turning the steering wheel becomes easier.
There is one more nuance - when the steering mechanism is working properly, there is a slight play. But its limit value complies with the traffic rules. This is due to the fact that there are steering rods on the VAZ 2107 and an impressive number of elements in the gearbox.
In general, the steering of the 7 can be considered reliable.
Mechanism design
To repair the steering column on a VAZ 2107, you first need to understand its structure, as well as the principle of operation.
The seven is in many ways similar to the “penny”. Therefore, the device and design received minor changes. The structure includes:
- A mechanism that transmits the driver’s force to the executive components;
- A steering drive that turns at an angle specified by the driver.
In turn, the steering mechanism consists of:
- Composite shaft with cardan transmission;
- Steering wheel (steering column together with a steering wheel with a diameter of 520 mm);
- Worm gearbox of the VAZ 2107 steering mechanism.
Adjusting the Steering Gear VAZ 2101 - VAZ 2107
So, take a look at the photo of Rulevogo Reductor - a; - Do you see the nut (by the way, it is 19-size), and the pin with a slot - coming out through exactly that nut? The nut is a lock nut that locks the one we need and directly performs the adjustment - the stud.
Let's assume that the steering gearbox of your VAZ 2101-2107 is too tight. Then, you should take a wrench or a 19-point socket, loosen the nut (which we mentioned above), remove the locking gasket, and Unscrew the Pin with the Slot. This reduces the load on the steering mechanism of the column. Did you unscrew it? — try the steering wheel now.
Did you unscrew it too much and there was some play? Then you should screw the pin back in.
I think this is all clear. I would like to add that when adjusting the steering gear of a VAZ 2101 and other classics. The play, which did not seem to interfere with turning the wheels in place, and at low speeds, is actually felt at high speeds; - over 80 km per hour.
Therefore, you need to tighten the steering column just enough to just remove the play, or leave it minimal. This way, you won’t ruin your car’s steering mechanism, and you won’t fly off the road when turning.
What else can cause your steering wheel to not turn?
Comments
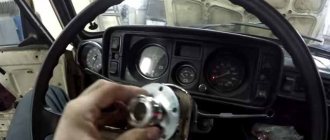
steering column
guys! That's the problem I have! I rebuilt the steering column myself and apparently I installed the shaft a little wrong. And that’s why my steering wheel turns to the right with a very small radius, and to the left with a large radius. Tell me how to install the shaft correctly, preferably in photographs.
Login to leave comments
And what’s important is mandatory
And what is important, be sure to lubricate the cardboard gasket, which is placed under the cover with the adjusting screw, with sealant.. You may also encounter the problem of worm play after tightening the side cover; the metal plates have different thicknesses
Login to leave comments
Gearbox
The bipod is stuck to the shaft like a dog, the puller flies off, that is, I sewed it with a hammer and a sledgehammer, the effect is 0, only the metal breaks. Do you think it’s possible to cut it down carefully?
Login to leave comments
Replacing the steering column
The need to replace the steering column arises if the splines in the connecting pair are worn out, and this connection cannot be restored. To do this, you need to dismantle this mechanism. For this purpose, it is necessary to disassemble the “Shohi” steering column, which even novice motorists can do. The procedure for removing the steering column is not particularly difficult technologically, but preventive measures take a lot of time.
Information for car enthusiasts: when replacing the steering column of the “six”, a slight modernization of this unit is allowed. It is possible to install a steering column from a VAZ 2107, the design of which is complicated by two small cardan shafts, increasing the degree of safety of the mechanism. In addition, additional equipment of the system with needle-type bearings will allow significantly less effort to be applied to the rotation of the steering wheel.
The required replacement of the steering column is carried out in the following sequence:
- We de-energize the battery and carefully remove it from the car and put it aside so that it does not interfere with work.
- We dismantle the steering wheel and the protective coating of the steering column shaft.
- We turn off the steering column control complex and the ignition switch.
- We dismantle the bracket fasteners, and it is possible that individual fastener components will have to be removed using a drill.
- Unscrew the tie bolt connecting the splines to the steering mechanism.
- We dismantle the sealing mount of the steering column shaft, and it is pulled out into the interior room.
Additional information: after completing the repair of the steering column, it is necessary to adjust the wheel alignment of the wheel pair to restore the required conditions of the chassis. It is almost impossible to install the wheelset at the optimal angle yourself without special adjustment equipment and stands.
Important: long-term operation of the “six” with splined joints, subject to increased wear, can ultimately create an emergency situation that is dangerous to the health and life of the driver and passengers. The steering wheel may turn completely uncontrollably, and this can happen at high speed. This is very life-threatening!
This is very life-threatening!
Operating a vehicle in extreme environments or on surfaces that do not meet acceptable standards can cause the steering rack to quickly become loose. This is especially true for VAZ models of the 2108-2109 series. Therefore, the part has to be periodically corrected - tightened. When this no longer helps, you need to carry out repairs or completely replace the rail. Next, we will tell you in detail how to replace the VAZ-2109 steering rack.
To carry out repair work you will need:
- hammer;
- mount;
- extension;
- socket heads for 10, 13, 22;
- ratchet handles;
- collars.
Having prepared everything you need, stock up on additional free time and the desire to do everything as needed, and not carelessly, so that later you have to redo it or send the car to a service station.