Principles of operation of the braking system
The model in question has service and parking brake systems. The working system includes a hydraulic drive. It, in turn, consists of several circuits. They work independently and, accordingly, use the mechanism of the entire braking system of the wheels (rear, front). The composition of the service brakes is as follows:
- amplifier (vacuum);
- pedal system;
- brake cylinders;
- brake fluid sensor;
- pipelines;
- front and rear disc brakes on a VAZ with all adjacent units.
The clutch pedal and brake pedal are located on the same axis. The brake pedal has a return mechanism. There is also a switch for signals that indicate the braking process. The vacuum booster is designed to reduce the force on the brake pedal when the engine is running. This is possible due to the fact that the intake pipeline is discharged.
When to change hoses
By regularly diagnosing the system, it is easy to understand when it is time to change spare parts:
- The appearance of cracks in the braid.
Cracks in the braid To see them, just bend it a little. The size of the crack does not matter; even the smallest tear length can quickly lead to serious wear. - The appearance of liquid near the tips.
- Violation of the integrity of the part, the appearance of frayed areas.
Integrity violation - If the brake fluid starts leaving the reservoir too quickly.
- If the car has just been purchased secondhand.
Any of these reasons is a good reason to replace old spare parts with new ones.
Brake hoses
DIY rear disc brakes on a VAZ 2107
Progress does not stand still and produces results. Our car enthusiasts are increasingly drawing ideas from new technologies. Modern cars are equipped with disc brakes both front and rear. Domestic cars are still equipped with drum brakes. Progress began in series, starting with the eighth model VAZ. But, as before, disc brakes are installed only on the front axle.
Rear disc brakes for the VAZ 2107. The effectiveness of disc brakes is already known to almost everyone. Therefore, car enthusiasts often convert drum brakes to disc brakes themselves. Such a replacement is accompanied by some difficulties, but this does not stop enthusiasts. What will you need? If you've decided to improve your brake performance, then let's figure out what we'll need. Firstly, two VAZ 2107 axle shafts, both old and new will do, it all depends on their condition, they have retaining rings, bearings and seals (they must be new). Secondly, the calipers and brake discs are from the V8. You will also need four lower caliper mounting bolts 21075, more nuts, bolts, washers and clamps. And lastly, front wheel spacers, 5 mm thick. You will also need to make caliper mounting brackets according to the drawing. How to install rear disc brakes on a VAZ 2107 with your own hands? How to remove rear axle axle shafts can be found in any instruction manual. If old axle shafts will be used, they need to be washed in gasoline. Since the changes will affect the brakes, drain the brake fluid and remove the entire brake mechanism down to the brake pipes. We will need to remove the hub bearing along with the retaining ring. The locking ring is designed for a tearing load of up to three tons; it is almost impossible to remove it without a press. Since we will no longer need them, we saw through them with a grinder, but not completely (damage to the axle shaft is unacceptable). Then we take a chisel and use it to split the bearing, being careful not to damage its seat. Now you need the help of a turner. It is necessary to machine the axle shaft with a spacer to the inner diameter of the brake disc. Due to the design of the disc, we grind the spacer to a slightly larger diameter. Then you can start assembling. We begin assembling the axle shafts. First you need to wash the parts from dust and dirt, then dry them. We install the boot, caliper mounting bracket and compensating ring. Next comes the bearing, also washed to remove process grease and dust. It is better to press it using a piece of pipe; its diameter should be equal to the diameter of the inner ring of the bearing. One end of the pipe is pressed against the inner ring of the bearing, and the other is struck. There is no need to rush this, as the bearing may be damaged. Hitting the outer ring of the bearing is strictly prohibited, since the working surfaces of the bearing can be broken, and it will very soon fail during operation. The bearing is pressed to the landing stop. After this, check whether the bearing is seated tightly. Next, using a gas torch, heat the retaining ring red-hot and very quickly throw it onto the axle shaft. The main thing is not to mix up the sides of the ring and make sure that it fits tightly, otherwise you will have to cut it down later and install a new one. By the way, insufficient heating can lead to a loose ring fit, so you also need to monitor this. It is impossible to hammer a cold ring into the seat. Final assembly. After the axle shaft has cooled, we proceed to final assembly. First, a bored spacer is installed, and the brake disc is placed on it. We install the entire structure on the car. Next we install the caliper, connect the brake hoses and bleed the brakes. To prevent the brake hose from fraying, we put a piece of rubber hose of a larger diameter at the junction of the brake pipe and the rubber hose and tighten it with a clamp. The main problem with this design is that for the handbrake you need to use a hydraulic drive or a caliper of a different design (such calipers can only be found from foreign manufacturers).
Rear disc brakes on VAZ Niva
Is it possible to install rear disc brakes on Niva 21213?
Rear disc brakes for Niva VAZ 2121 21213 21214
How to change rear pads on Kalina
The brake systems of different variations of the LADA Kalina are distinguished by the absence or presence of an anti-lock braking system. Changing the rear brake pads of a Kalina with or without ABS is equally simple. The only difference is that in the first case, before dismantling the pads, you must disconnect the wires from the sensors so as not to damage them. To prevent brake fluid from spilling out of the reservoir and getting on the paintwork or rubber parts of the Kalina when replacing the pads, it is necessary to take some of the fluid from the reservoir into a prepared container. This operation should be carried out only when the brake fluid level in the reservoir is close to the maximum level. Replacement of the rear pads is carried out one by one: first from the left, then from the right side (or vice versa, the order is not important here). Some operations, for example, loosening the tension of the handbrake cable or adjusting it, are more convenient to carry out from the inspection pit or using a lift. Therefore, the work must be performed in an equipped garage.
Replacement of rear brake pads of LADA Kalina is carried out as follows:
- install wheel chocks under the front wheels;
- lower the handbrake lever down as far as it will go in order to reduce the tension on the Kalina handbrake cable as much as possible;
- by rotating the adjusting bolt under the bottom of the car, loosen the handbrake cable;
- use a wheel wrench to loosen the wheel bolts;
- jack up the wheel;
- Unscrew the wheel bolts with a wheel wrench;
- remove the rear wheel;
- unscrew the pins that simultaneously serve as fastening of the brake drum and guides for installing the wheel;
- Use a wire brush to clean the rear wheel hub where the drum fits;
- treat the place where the drum fits on the hub with WD-40, wait according to the instructions; tap the drum with a rubber hammer to “break” it out of place;
- evenly screw the M8 bolts into the mounting holes of the drum, pulling the latter off the hub;
Attention: if you press the brake pedal with the drum removed, the piston of the brake cylinder may fall out, which will lead to depressurization of the circuit, the need to bleed the brakes or even replace the brake cylinder.
- check the condition of the brake drum: it should not have chips, uneven wear, cracks or marks;
- if necessary, replace the brake drum with a new one;
- bring together the rear Kalina pads using pry bars (mounting blades);
- pry the end of the upper spring, which tightens the pads, with a slotted screwdriver and remove it from engagement with the pad;
- remove the upper spring from the second block, put it aside;
- remove the lower tension spring using a screwdriver or pliers;
- remove the “front” block located closer to the front of the car;
- remove the spacer bar installed between the pads;
- remove the end of the parking brake cable from the hook of the rear shoe spacer lever;
- using pliers, disengage the spring holding the second block;;
- remove the block located closer to the rear of the car;
- undo the pin securing the spacer lever;
- remove the spacer lever;
- clean the brake mechanism parts from dirt;
- secure the spacer lever to the new block;
- pin the finger;
- install the “front” brake block;
- put the spacer bar in place;
- install the “rear” block by putting the lower tension spring on it;
- put the end of the handbrake cable on the spacer lever of the block;
- Using a screwdriver or pliers, hook the lower and upper tension spring onto the pads;
- reinstall the brake drum;
- tighten the guide pins holding the drum;
- secure the wheel with wheel bolts;
- lower the jack so that the wheel is on the ground;
- Use a wheel wrench to tighten the wheel bolts.
Then the same operations must be done on the second wheel. Now you know how to change the rear pads on a Kalina.
Remember: after replacing the rear pads, you need to adjust the handbrake of the LADA Kalina.
- Increased disc wear. For new ventilated discs it must be at least 17.8 mm
- Furrows and surface irregularities left by pads or foreign particles (stones, sand, etc.)
- Bent surface - does not happen so often, but this may cause such features as vibration during braking and runout
If you notice at least one of the above symptoms, you need to check the condition of the brake discs and, if necessary, replace them. To perform this DIY repair you will need the following tool:
- Balloon wrench
- Jack
- 7, 13 and 17 mm wrench
- Torx head t12
- Ratchet and extension
- Hammer
- Copper grease
Step-by-step replacement of rear brake pads of VAZ 2103
- Wheel removal wrench
- Open-end wrench or socket wrench 7
- Pliers
- Screwdriver
- Hammer
- Jack
- Supports
When everything is prepared, you can begin to independently replace the rear brake pads of a VAZ car.
Detailed process of replacing rear brake pads of VAZ 2104, 2105
WATCH THE VIDEO
- First of all, we remove the wheel bolts.
- Raise the rear side of the car on a jack.
- When the car is suspended and the wheel is off the ground, completely unscrew the bolts and remove the wheel.
- Using a 7 key, unscrew the 2 guides from the brake drum.
- We try to remove the drum by hand. If you cannot remove the brake drum, you must carefully tap the edge of the drum with a hammer (!) from the back side through a soft metal or wood attachment. In this case, the drum must be gradually rotated.
- After removing the drum, we begin to remove the pads themselves.
- Using a flathead screwdriver, remove the lower pressure spring.
- Remove the pads from the support posts. To do this, you need to press the spring and align the slot in the latch with the stand. Hold the post and spring so as not to lose them.
- Remove the adjustment bar.
- Now we open the pads from above, remove the spring and remove the pads.
- Next, remove the handbrake cable from the lever. Don't forget to loosen the tension on the handbrake cable using two 13mm wrenches, otherwise you won't be able to remove the cable from the lever.
- We remove the cotter pin from one block and remove the handbrake drive lever - it will be needed for installation on new blocks.
Diagnostics of the rear brake system of VAZ 2106
How to determine whether it is time to change the pads or whether they will still work? What about the other mechanisms in the rear brakes? Let's take a closer look.
- The condition of the brake pads is determined by the thickness of the friction linings on them. If their thickness is already small and approaches the metal body of the pad, they need to be changed.
- It is also necessary to check the condition and degree of wear of the brake drum. If there are cracks, chips or noticeable wear on the friction surface, the drum needs to be replaced.
- The condition of the wheel brake cylinder is determined by the presence of fluid on the brake pads and inside the brake drum. If the presence of brake fluid is detected, the cylinder is not sealed and must be replaced.
Assembly of rear brakes VAZ 2107
The following is a diagram of the installation of the rear brake pads.
- We install the removed handbrake lever on one of the pads.
- Next, you should install the rear brake pads one by one in the grooves of the cylinder, as well as the lower grooves. We fix them on the guide supports, while inserting an adjustment bar between them.
- Install the lower and upper springs using pliers.
- Once the pads are in place, press the top firmly into the slave cylinder to force the pistons deeper so you can slide the brake drum onto the new pads.
- Next we install the handbrake cable. More details about adjusting the handbrake will be discussed below.
- Reinstall the drum. Check the free rotation of the drum.
- Install two guides into the drum, aligning the holes in the drum with the holes in the axle shaft.
- Install the wheel and lower the car.
Remember that replacing the rear pads is a complete process - all four pads should be replaced at the same time.
Adjusting the hand brake
When installing the handbrake cable on the shoe lever, there is one simple but important step to take. Unwind about 6-7 turns of the spring and bite them off with pliers. This will allow you to achieve better handbrake tension and less adjustment with the tension bolt.
This will allow for better handbrake tension and less adjustment with the tension bolt.
Adjust the handbrake with the tension bolt so that with 5 clicks of the handbrake, the wheels do not rotate. Proper tension of the handbrake will not only allow the car to remain motionless when the handbrake is applied, but also the mechanism for supplying the rear shoes will work correctly.
Is it possible to mix brake fluids?
Theoretically, brake fluids that contain the same component, for example, DOT 3, DOT 4, DOT 5.1 contain glycol, must be mixed, however, due to the presence of a certain set of additives in them, this can only be done in extreme cases, after which a complete replacement of the brake fluid is mandatory. You cannot use TJ in a brake system that is designed for a certain type, for example, DOT 5, which is made on a silicone basis; in a system for DOT 3, DOT 4, DOT 5.1, rubber drive elements (cuffs, seals) may fail.
Key words: brake fluid, brake fluid replacement, VAZ brake fluid, brake fluid reservoir, what kind of brake fluid, brake fluid dot, brake fluid dot 4, brake fluid dot
Change the brake fluid on your car once every two years, regardless of mileage. Due to the fact that brake fluid is hygroscopic, it absorbs moisture from the air, which leads to corrosion of the working surfaces of the brake cylinders, which can lead to brake failure, which is fraught. When replacing brake fluid, it is always necessary to check the tightness of the hydraulic drive (see Checking the tightness of the hydraulic drive of the VAZ 2106). It is most convenient to change the fluid on a car with the wheels removed.
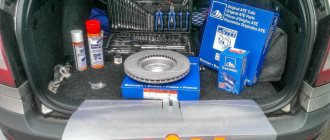
We will need: a wrench for “8”, “10”, a container for drained fluid, brake fluid, a bleeding hose, a spacer as a spark plug wrench, and we will also need the help of an assistant. Repair work must be carried out on an inspection pit or overpass.
- Add brake fluid to the top of the reservoir.
- Remove the front wheels.
- Now, using a clean wire brush and a clean rag, you need to clean all the fittings from dirt.
- If you are working on a lift, then you need to unlock the pressure regulator in the rear brake drive, thereby simulating the load on the car. To do this, you need to disconnect the rod from the torsion arm, unscrew the torsion arm itself from the rack, holding the head of the bolt and unscrew the nut. Between the rear axle housing of the VAZ 2106 and the end of the torsion arm, it is necessary to install a spacer 130-160 mm high; a spark plug wrench 145 mm long is perfect for this purpose.
Replacing the brake fluid must begin with the brake mechanism, which is farthest from the main brake cylinder; the order of the circuits does not matter.
- Remove the protective cap from the rear wheel fitting and place the hose on it.
- Ask your assistant to press the brake pedal several times and hold it down, while you lower one end of the hose into the fluid container, unscrew the fitting a quarter turn, brake fluid will come out of the hose along with air bubbles. At the same time, the brake pedal will lower and when it reaches its extreme position, tighten the fitting. Repeat this operation until clean brake fluid without air comes out of the hose.
When bleeding the brakes, do not forget to add new brake fluid to the reservoir. By constantly replenishing the tank, you ensure that the old fluid is gradually displaced and replaced with a new one.
Bleed the rear wheels (rear circuit) and the front wheels (front circuit) in this way.
After completing the work, tighten the lid of the hydraulic reservoir and check the quality of the work performed, to do this, press the brake pedal several times, while the pedal stroke and the force applied when pressing should be the same each time, if this is not the case, then it is necessary to bleed the brakes, since there is air in the system.
This completes the repair of replacing the brake fluid on the VAZ 2106.
Sources
- https://ladaservice.info/lada-kalina/raznoe-lada-kalina/zamena-tormoznoj-zhidkosti-lada-kalina/
- https://remontauto-vaz.ru/page/kak-i-kogda-nuzhno-menjat-toroznuju-zhidkost-na-avtomobiljah-vaz
- https://remont-vaz2106.ru/zamena-tormoznoj-zhidkosti-vaz-2106
Downloading a book
After successfully completing the payment (by any method) and returning to the KrutilVertel store from the payment system website, you will be taken to the successful payment page:
The book you purchased will be in your personal account, from where you can always download it.
Please note that after making the payment, you need to return back from the payment system website to the KrutilVertel website. If for some reason you did not return back to the site and closed the payment system tab with a message about the successful completion of the payment, please let us know - we will send you a letter indicating access to download the book
If for some reason you did not return back to the site and closed the payment system tab with a message about the successful completion of the payment, please let us know - we will send you a letter indicating access to download the book.
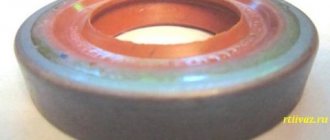
Tubes and hoses
Brake pipes and hoses of the braking system of the VAZ “kopek” are used both front and rear. Their purpose is to connect the GTZ and RTC to each other and supply brake fluid to them. Sometimes connecting elements become unusable, especially hoses, due to aging rubber.
Damage to the hose leads to fluid leakage and depressurization of the brake system.
The parts in question are attached using a threaded connection. There are no difficulties in replacing them. You just need to unscrew the fasteners on both sides, remove the worn element and install a new one in its place.
Video: replacing brake pipes and hoses on a “classic”
How to remove the GTZ?
Replacing the master brake cylinder on “sixes” is carried out according to the following scheme:
Use a bulb to completely drain the fluid from the expansion tank of the brake system. Loosen the clamps that secure the hoses coming from the brake fluid reservoir
Please note that if factory compression rings are installed, they may not need to be removed. It is enough to pull the hoses towards you with little effort. Using a special wrench, you need to unscrew the brake pipes from the master cylinder. Move these tubes so that they do not interfere with the work. Using a 13mm wrench, unscrew the two nuts that secure the device to the vacuum booster.
After all this work, you can completely remove the GTZ.
Replacement process
The machine for repair work is installed on a straight, level surface. Use a jack to lift the required side and remove the wheel. In the opened space we free the disk for dismantling. Press the piston of the working cylinder to remove the caliper. First loosen the mounting bolts on it.
There is no need to disconnect the hydraulic pipes of the brake system; just move the unit to the side and pull it with a wire to any beam or rod. We unclench the brake pads and block them with a clamp.
In some assembly designs, dismantling is hindered by the caliper frame. It is enough to unscrew its fasteners and get rid of the obstacle. In most cases, the mounting bolt sticks and prevents removal from the hub. To weaken it, use WD-40 or brake fluid. Some machines have a pair of these bolts.
Having freed yourself from problematic hardware, you need to remove the stuck brake disc. Here you can also pre-use special fluids for corrosive areas. Then you need to apply one of the proven methods:
- Tapping with a wooden tip on the back side. This should be done with short sharp blows so as not to create problems.
- Using a wooden or rubber mallet, tap the reverse plane. This method is more gentle on the parts than using a heavier metal hammer.
- Apply a reverse hammer. To do this, you will need to buy or borrow this relatively rare but effective instrument.
- You can use a puller. However, you should feel the effort so as not to break the tool or disk, because in some cases stronger pullers can damage a heavily stuck part. Then you can forget about restoring the latter.
After getting rid of the old disk, we clean the surface from contaminants in the form of scale or dust. To do this, we use a metal brush or an attachment for power tools. Later we clean the surface with special liquids. If cleaning is not carried out, the new part may sit on the surface with large runout, which will lead to undesirable consequences.
Using a reverse hammer
We install the restored or new brake disc in the free space. The bolts for fastening it will need to be tightened with a force of 20 Nm, which a torque wrench will help with. The caliper will require increased force, which should be in the range of 100...120 Nm. Do not over-tighten the fasteners to avoid radial runout of the hub. The remaining elements of the unit are assembled in the reverse order of disassembly. Be sure to check the position of the hoses so that they are in their proper places.
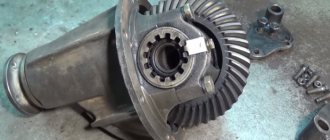
Front hub VAZ 2106
One of the important elements of the VAZ 2106 chassis is the hub. This part allows the wheel to rotate. To do this, a wheel disk is screwed onto the hub, and the rotation itself is carried out thanks to a pair of wheel bearings. The main functions assigned to the hub are:
- connection of the wheel disk with the steering knuckle;
- ensuring a high-quality stopping of the car, since the brake disc is fixed to the hub.
To know how hub malfunctions manifest themselves, as well as how to make repairs, you need to familiarize yourself with the structure of this element. Despite the fact that the part is designed to perform complex functions, it is structurally quite simple. The main parts of the hub are the housing and bearings. The body of the part is cast, made of durable alloy and processed on turning equipment. The hub fails quite rarely. The main malfunction of the product is the wear and tear of the outer bearing races at the installation sites.
The hub secures and rotates the front wheel
Ways to solve the problem
There are several ways to fix this problem. Perhaps you pressed the brake lever and the pads moved towards the disc. In this case you will need:
Remove the caliper. Select a suitable tool and use it to push the pads apart. Perform this operation carefully to avoid damaging the components.
The second option is suitable for mechanical disc brakes. It can be used as a temporary solution to continue using the bike. But in the future it is necessary to carry out full maintenance and replace failed components.
- Take a hexagon.
- Use it to move the pads apart and increase the clearance between them.
- Now you can continue moving.
This method is suitable for repairs in the field. You must understand that it does not solve the problem of a bent disk. But at least we manage to get rid of unpleasant sounds and get to the house to perform full service.
Another temporary solution is to adjust the position of the caliper. If you can’t straighten the disc and there’s no way to put the bike in for repairs, you can use a similar method. But keep in mind that in the future you need to take care of replacing the deformed component to ensure safe travel.
- Take the tool and loosen the two bolts that are used to secure the caliper.
- Press it against one of the pads.
- Adjust the caliper so that the disc does not contact the pads.
The best solution is to fix the disc and eliminate the distortion. To perform such an operation, it is recommended to use a specialized tool. But it is not always possible to purchase such equipment, so you can use a regular adjustable wrench.
The editing process is simple:
- Turn the bike over.
- Find the deformed area on the disk.
- Spin the wheel half a turn.
- In the place where the disk is bent, move it in the opposite direction.
- Continue correcting until you achieve the desired result.
You must understand that it is no longer possible to achieve a perfectly even disk structure. No matter how hard you try, a slight deformation will still be present. Therefore, experts recommend replacing the defective component by purchasing a suitable disk from a specialized store.
Wheel bearing diagnostics, causes and signs of failure
Let us briefly list the symptoms of this failure:
Noise when driving ahead (right or left), noise or howling can also be heard when turning. Vibration in the cabin. a sign that repairs are needed as the oil may have dried out or acquired a lot of dirt. Grinding or scraping sound. indicates that the front wheel hub bearing has already failed.
Before drawing conclusions, make a step-by-step diagnosis:
Lift up the side where the markings are, but remove the wheel first. Turn the disc manually if you hear a rolling sound or other noise that needs to be replaced. With the workpiece, rotation is smooth, without jamming or noise. Remove the brake disc and check the travel of the hub by moving it manually in the axial direction. If you feel movement without measurements, then you need to replace the front hub bearing.
Reasons for failure:
Uneconomical driving, over potholes and potholes on the asphalt. Frequent overheating of the mechanism. Damage to the barrel, contamination of the part from the inside. Depreciation of goods in accordance with the warranty period (60 thousand km stated). Malfunction of other elements (unbalanced brake disc, wear of the turning mechanism or unbalanced wheels, etc.).
Be sure to learn how to check a wheel bearing:
How to check a wheel bearing
Preparatory activities before replacement
Regardless of which replacement option you choose, you will need a minimum set of tools:
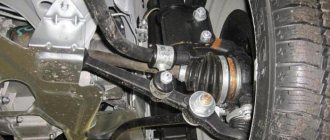
READ Replacing the VAZ 2110 External CV Joint with Your Own Hands
Large screwdriver. Keys: 17, 13, 10. Hex wrench 10. Hammer and chisel. The key is 30 long or the head is 30 with a handle. Hub puller for VAZ (photo). Mandrels (or heads) for knocking out the old part of the hub. Wrench.
We prepare the car, place it on a flat surface, and you will also need bright lighting. You will quickly complete all the work with an assistant, and also if you use an inspection pit (overpass). We put the car in first gear and be sure to install chocks under the rear wheels.
Disk replacement process
All work should be carried out on a flat surface that is free from dust and dirt. The machine must be raised with a jack and secured in this position with metal supports. After the car has been fixed at a certain height, the brake system is dismantled and the piston is pressed out of the working cylinder.
The next stage of repair work in the system is to remove the brake pads. If access to the brake disc is very difficult, the caliper should be dismantled. Usually the disc is connected to the hub with 1-2 bolts, so dismantling it is not difficult. The seating surface must be cleaned of dirt and dust, since the new part may be installed incorrectly or may not fit tightly.
Replacement process using the example of BMW E39 (video):
The brake mechanism is supplied with factory lubricant and therefore does not require additional lubricants. There is no need to wipe the surface of the disk before installation, since a lack of lubrication can affect the tightness of the part to the hub. Installation of brake discs requires extreme care. Over-tightening the bolts can lead to radial runout, as can under-tightening. When installing, it is better to use a wrench with a dynamometer. The normal value is in the range of 100-120 Nm. After installation, it is better to check the vibration level using an indicator. This indicator is individual for each car brand and can be found on the Internet. If the indicators are outside the norm, you should tighten the bolts again.
After installing the brake discs, you need to clean their working surface from grease. If necessary, the caliper can also be replaced. If you are installing an old part, you must make sure that there is no rust or other mechanical damage on the surface of the mating flange. It is better to tighten all fasteners also using a wrench with a dynamometer. It is recommended to replace the brake pads together with the installation of other parts of the system.
Damage and strange sounds
If any units are damaged during the occurrence of the problem, they must be replaced with new ones. If the brake disc produces runout with an increase of 0.15 mm, then it needs to be ground, and if it is already less than 8-9 mm thick, then it’s time to replace it. The next problem with the braking system is situations where the car pulls too far to the side when braking. This occurs in cases where there may be a leak from the cylinder.
To prevent brake fluid from leaking, you need to change the seals. To fully check the circuit requires bleeding. In this situation, the pistons themselves from the cylinder may jam. They need to be checked on time. Make sure the parts are intact. If the brake system units are clogged, it should be cleaned. It is imperative to check all drums, linings, discs, as they can become clogged. All parts of the system require timely cleaning.
If the regulator responsible for the pressure level is not adjusted correctly, then you need to adjust it and set it correctly. If its diagnostics and adjustment show that it is out of order, the unit needs to be replaced. If the cable is damaged, the handbrake may stick, which will affect the efficient operation of the entire vehicle, so the cable must be replaced. You need to completely replace the VAZ handbrake if the entire mechanism is damaged and the handbrake fails.
If you hear sounds (creaking) in the brakes, this may be caused by weakening of any parts, springs, wear, breakage, contamination, or too much beating of the brake disc. All these elements need to be checked, tightened, cleaned or replaced. Monitoring the operation of the braking system allows you to study the design and ensure safe operation of the vehicle.
Replacement steps
The entire replacement process can be divided into several stages:
- Removing wheels;
- Removing the old brake pad;
- Frame disassembly;
- Cleaning the hub and checking it;
- Removing coating from new disks;
- Runout check;
- Installation of new brake system elements.
Now let's talk about this in more detail.
Removing the wheel
In fact, dismantling the wheel for subsequent replacement of the brake elements is not difficult.
But a certain sequence of actions will have to be followed.
- Place a jack under the car.
- Lift it up so that it doesn't tip over, but still allows you to easily remove the wheels.
- Unscrew the wheel fasteners.
- Remove the hubcaps and the wheels themselves.
As you can see, the procedure is really simple, but it requires attention and accuracy.
Removing the pads
- Try to move the piston as far as possible from the brake mechanism. But do not exceed the distance beyond that which will allow you to comfortably remove the brake pads.
- Take out the block.
- To make the job easier, you can disassemble the brake frame. To do this, unscrew the two bolts securing the block and disconnect the device.
Hub
It must be cleaned, since all accumulated debris, dirt, and rust will negatively affect the effectiveness of the new brakes.
Dirty
For cleaning, alcohol-based solvents and metal brushes are used. If cleaning is not performed, the operation of the brakes will be accompanied by beating - this should absolutely not be allowed.
Be sure to check the hub for runout. Normally it does not exceed 0.1 mm. There is a special tool for checking. If the indicator is within normal limits, then a full assembly is performed.
Working with new disks
Many owners of the “Ten” are interested in which brake discs are best to choose for the VAZ 2110. The question is quite logical.
Choose certified replacements from reputable manufacturers such as Bosch, or stay true to factory parts. These are the two best options in terms of quality and compliance with the car itself.
New
Some take similar discs that partially fit the “ten”, sharpen them, and adjust the design. This is a dubious undertaking, since it requires serious skills in such a matter, additional time and financial costs. At the same time, it is far from a fact that such brakes will work better than those offered by the AvtoVAZ plant.
You've already figured out how to remove the brake element, so it's time to work on a new one. It’s not enough to just buy another brake disc and put it in place. First, it is prepared and a runout check is performed. Let's talk about this in more detail.
- The coating must be removed from a new disc.
- This coating serves as a kind of preservative.
- The layer is removed using any solvent.
- Clean thoroughly and wipe the part dry after finishing work.
- Now you can put the disk in a new place and check the runout.
- The permissible runout is no more than 0.15 millimeters.
- If the value is exceeded, this can lead to an increase in the sensitivity of the brake pedal, as well as the formation of vibrations during braking.
Installation and testing
Before changing brake discs, make sure that the problem with the brake system lies precisely in them. There are a number of other problems that are typical for the “ten” and all cars in general. A full diagnostic will be required so that the replacement is not in vain.
Adjustment
In fact, installation is performed in the reverse order of disassembling the brake discs. Therefore, there should not be any special problems.
But checking functionality is a more important and, to a certain extent, complex issue.
The first thing that experts advise is a full running-in of new discs. To do this, you need to travel about 500 kilometers. In this case, you need to brake smoothly, without making sudden impacts on the brake pedal. If this is not done, defects may form on the disks, and the cause will be simple overheating.
How to replace the speedometer cable on a VAZ 2101-VAZ 2107?
Note! The brake system has circuits, on the classic they are located transverse to each other, that is, the rear brake circuit (Both rear wheels) and the front brake circuit (Both front wheels), as we said above, if the rear circuit hose breaks, for example, then both the rear wheels stop braking (the circuit completely fails) and vice versa, but we’re not talking about that, we want to say a few words about pumping the brakes, when it comes to the brake system, pumping the brakes is always affected, for pumping you need brake fluid, so stock up on it in advance , also take into account the very contours of the brake system, based on them, when working with the front part (For example, you are changing the brake hoses in the front part), bleed only it, when working with the rear part (For example, you are about to change the rear brake hose), bleed the rear ones You don’t even have to get the wheels close to the front end, don’t forget about it!
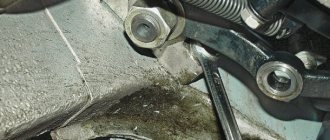
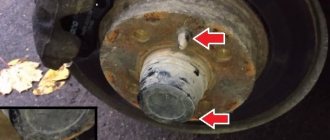
1. Let’s start with the front brake hoses, even if you have them intact and do not need to be replaced, you don’t need to immediately scroll further and look for information on replacing the rear brake hose (It’s given in paragraph 2), because the hoses (both front and rear) ) are replaced in the same way and after reading this paragraph, you will know what we did not indicate in paragraph 2, well, let's start! To replace the hose at the front, remove the wheel (How to remove a wheel, read the article: “Replacing wheels in a car”) and use a wrench to unscrew the bolt that secures the hose to the caliper (see photo below), then remove the bolt and there will be copper washers on it (Two, indicated by red arrows), they must be replaced with new ones, they play the role of some kind of seals, and when installing old ones (Compressed washers), it is possible that brake fluid will flow through the place where the hose is connected to the caliper.
Note! During operation, the brake fluid will still slightly pour out of the brake reservoir so that this is not significant (Be sure to do this operation), while unscrewing the bolt that secures the brake hose to the caliper, pinch it as shown in photo 1, thereby when the hose is disconnected, a small part of the brake fluid will pour out of it, all of it will not pour out since the hose will be pinched, after which you will need to unscrew the brake hose where it is attached to the brake pipe (This is the other end of the hose, for more details on how to disconnect it, read in point 2 below) and after that, you will simply need to disconnect the hose, but here too there is an incident, when the hose is disconnected, brake fluid will flow out of the tube, to prevent this from happening, plug the tube with something, for example, a bolt of a suitable diameter or a plug, See photo 2 for more details! (If you don’t need this, to pinch the hose, to plug the hole, then just take a rubber bulb and use it to take all the brake fluid from the brake reservoir, but after replacing the hoses, in this case you will have to bleed all 4 wheels, and by the way, this fluid don’t pour it back, it will already be spoiled)
2. We proceed to removing the rear brake hose, it is attached in exactly the same way as the front one, only in the place where the front hose is bolted to the caliper, the rear one is screwed on with a nut (see small photo), but at the other end, the brake hose in exactly the same way as the front one is attached (in paragraph 1 we did not describe the process of disconnecting the hose from the brake pipe, but only described how to disconnect it from the caliper), so in order to disconnect the hose from the brake pipe, you will need to unscrew it (Red arrow) but in While you are turning the tube with a wrench, hold the hose nut with the other (Indicated by a blue arrow) and as soon as the tube is slightly loosened, use pliers to remove the locking bracket (Indicated by a green arrow) and disconnect the brake hose from the tube; in the reverse order, the hoses are connected exactly like this when the work is completed, fill in the brake fluid and bleed the brakes in the car (How to bleed the brakes, read the article: “Bleeding the brake system on a classic”), then make sure that the fluid is not leaking from anywhere, and if possible, fix the problem.
Additional video clip: Watch two videos that clearly show the process of replacing the front brake hoses and the rear hose (about the front hoses, the top video, about the rear, the last one).
How to change the front pads on a Kalina
The pads are changed sequentially: first on one side, then on the other. The replacement procedure is as follows:
- Place the car on a level surface with hard surface;
- open the hood;
- use a syringe or syringe to take a little brake fluid from the reservoir into a prepared container (this is necessary if the brake fluid level is close to the maximum);
- place wheel chocks under the rear wheels;
- Use a wheel wrench to loosen the wheel bolts;
- place a jack and lift the car, hanging the front wheel;
- Use a pry bar or a powerful screwdriver to press the pads away from the brake disc, pushing down the piston of the brake cylinder;
- use a screwdriver to bend the plate on the guide for attaching the pads to the caliper;
- unscrew the guide using a 17 wrench, holding it with a 13 open-end wrench;
- fold out the brake caliper;
- remove old pads;
- completely recess the brake cylinder piston using a screwdriver or pry bar;
- Using a socket screwdriver, clean the contact points between the pads and the calipers;
- insert new brake pads LADA "Kalina";
- return the caliper to its original position;
- screw the guide and bend the locking plate;
- install the wheel, tighten the fastening bolts;
- Lower the car and tighten the wheel bolts with a wheel wrench.
After this, change the pads on the other side, check the brake fluid level and top up if necessary. This completes the replacement of the front pads on the Kalina. All you have to do is pump the brake pedal a few times to get the pads in place, check the brake fluid level and hit the road. For the pads to get completely used, you need to drive about 1000 kilometers with them.
Emergency procedures
- Wheel replacement
- Actions in case of engine overheating
- Starting the engine from an additional power source
- Circuit breakers
- Emergency pressure drop in the engine lubrication system
- Turning on the low battery indicator
- Turn on the brake warning light/parking brake warning light
Daily checks and troubleshooting
Operating a car in winter
A trip to the service station
Operation and Maintenance Instructions
- Technical information
- Controls, instrument panel and interior equipment
- Car care
- Vehicle maintenance
- Fuels and lubricants
Warnings and safety rules when working on a vehicle
Basic tools, measuring instruments and methods of working with them
- Basic set of necessary tools
- Methods of working with measuring instruments
Engine and its systems
- General information
- Car service
- Removing and installing the engine
- Timing drive
- Cylinder head
- Cylinder block
- Engine ignition system
- Supply system
- Lubrication system
- Cooling system
- Intake and exhaust system
- Service data and specification
Transmission
- General information
- Clutch
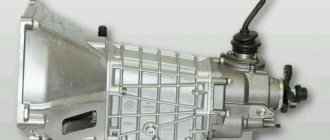
- Transmission
- Cardan shaft
- Rear axle
- Chapter Appendix
Chassis
- General information
- Front suspension
- Rear suspension
- Adjusting wheel alignment angles
- Chapter Appendix
Steering
- General information
- Car service
- Steering wheel and shaft
- Steering rods
- Steering gear and swing arm
- Service data and specification
Brake system
- General information
- Car service
- Brake components
- Front wheel brakes
- Rear wheel brakes
- Parking brake
- Service data and specification
Body
- General information
- Exterior
- Interior
- Body dimensions
Gas equipment
- General information
- Gas reducer
- Gas solenoid valve with filter
- Fuel valve
Car electrical equipment
- General information
- Generator
- Starter
- Accumulator battery
- Lighting devices
- Service data and specification
Electrical circuits
On-board network
Useful tips for car owners
Sources
- https://ladaservice.info/lada-kalina/hodovaya-chast-lada-kalina/zamena-perednih-tormoznyh-kolodok-lada-kalina/
- https://krutilvertel.com/zamena-tormoznyh-kolodok-perednih-koles-vaz-2106
Types of brake discs
Like any other automotive part, brake discs have undergone significant changes over time. Today, the auto parts market offers a huge range of discs, differing both in design and material. It is not surprising that the modern car owner gets lost among this diversity. Therefore, let's talk about disks in more detail.
About disc materials
The best materials for brake discs today are carbon and ceramics. A disk made from these materials has a high safety margin, and most importantly, it is extremely resistant to high temperatures.
In addition, carbon wheels weigh little (this is especially true for owners of racing cars, where every kilogram counts). Of course, such discs also have disadvantages, the main one of which is the price; not everyone can afford it. Additionally, these carbon wheels perform best under extreme loads and temperatures. And if the car owner’s driving style is far from aggressive, the wheels will not demonstrate all their advantages without preheating. Another popular material for brake discs is carbon steel. These are the discs that are installed on the “Seven” when it comes off the production line. The advantages of steel wheels are obvious: extremely low price. It's only cheaper for nothing. Disadvantages are also obvious: a tendency to corrosion, heavy weight and low wear resistance.
Design features of brake discs
By design, brake discs are divided into several large classes. Here they are:
- discs without ventilation;
- ventilated discs;
- solid discs;
- compound disks;
- radial discs.
Now let's take a closer look at each type of disk.
- A non-ventilated brake disc is a plain steel or carbon plate with no holes or recesses. In some cases, small notches may be present on the surface of this plate to improve air circulation near the surface of the rotating disk.
- Ventilated discs have holes. Most often they are through, but in some cases in their place there may be recesses of various shapes (so-called blind holes). The advantage of ventilated discs is obvious: they cool better, and therefore the brakes can work longer under extreme loads. In addition, such discs weigh little. But they also have a drawback: the strength of ventilated discs is significantly reduced due to perforation, which means their service life is also reduced.
- Solid discs are produced using casting. These are monolithic metal plates, which, after casting, are subjected to further heat treatment to obtain the required mechanical properties.
- A compound disc is a structure consisting of a ring and a hub. The ring can be either steel or cast iron. But the hub is always made of some light alloy, most often on an aluminum base. Recently, the demand for composite disks has increased significantly, which is not surprising. They weigh little, cool quickly, and are well ventilated. In addition, the operation of composite brake discs is cheaper for the car owner: if the ring becomes completely unusable, it is enough to simply replace it. In this case, the hub does not need to be changed, since it wears out much more slowly.
- Radial wheels began to be installed on passenger cars relatively recently. These are ventilated discs, but the ventilation system in them is not through holes, but long curved channels that start from the disc hub and diverge to its edges. The radial channel system provides strong air turbulence and maximum cooling of the brake disc. Radial discs are very durable and reliable, and their only drawback is their high price.
Replacement steps
The entire replacement process can be divided into several stages:
- Removing wheels;
- Removing the old brake pad;
- Frame disassembly;
- Cleaning the hub and checking it;
- Removing coating from new disks;
- Runout check;
- Installation of new brake system elements.
Now let's talk about this in more detail.
Removing the wheel
In fact, dismantling the wheel for subsequent replacement of the brake elements is not difficult.
But a certain sequence of actions will have to be followed.
- Place a jack under the car.
- Lift it up so that it doesn't tip over, but still allows you to easily remove the wheels.
- Unscrew the wheel fasteners.
- Remove the hubcaps and the wheels themselves.
As you can see, the procedure is really simple, but it requires attention and accuracy.
Removing the pads
- Try to move the piston as far as possible from the brake mechanism. But do not exceed the distance beyond that which will allow you to comfortably remove the brake pads.
- Take out the block.
- To make the job easier, you can disassemble the brake frame. To do this, unscrew the two bolts securing the block and disconnect the device.
Hub
Dirty Use alcohol-based solvents and metal brushes for cleaning.
If cleaning is not performed, the operation of the brakes will be accompanied by beating - this should absolutely not be allowed. Be sure to check the hub for runout. Normally it does not exceed 0.1 mm. There is a special tool for checking. If the indicator is within normal limits, then a full assembly is performed.
Working with new disks
Many owners of the “Ten” are interested in which brake discs are best to choose for the VAZ 2110. The question is quite logical.
Front hub VAZ 2106
One of the important elements of the VAZ 2106 chassis is the hub. This part allows the wheel to rotate. To do this, a wheel disk is screwed onto the hub, and the rotation itself is carried out thanks to a pair of wheel bearings. The main functions assigned to the hub are:
- connection of the wheel disk with the steering knuckle;
- ensuring a high-quality stopping of the car, since the brake disc is fixed to the hub.
To know how hub malfunctions manifest themselves, as well as how to make repairs, you need to familiarize yourself with the structure of this element. Despite the fact that the part is designed to perform complex functions, it is structurally quite simple. The main parts of the hub are the housing and bearings. The body of the part is cast, made of durable alloy and processed on turning equipment. The hub fails quite rarely. The main malfunction of the product is the wear and tear of the outer bearing races at the installation sites.
How to properly install pressure springs
This question has divided all professional car mechanics into two camps. Some argue that it is correct to install from the brake disc side, as shown on the left side of the screenshot below, others - from the brake cylinder side, as shown on the right.
The first ones say - there is no difference, the main thing is that they press the pads and do not let them “rumble”. The latter explain it this way: if you install “gulls” on the disc side, then with their edges they will press the brake element against the disc, increasing wear on the friction clutch. If you install it with the side facing the cylinders, they seem to move them apart; they do not come into contact with the disk, so there is no wear during movement.
If you think logically, then the second part of the people is right. The springs have a design in which they, with their rounded edges, attract the pads in the direction of their installation. Therefore, if you place the springs on the inside, their edges will slightly press them against the disk - they will wear out faster. If from the inside, then there will be no such effect.
Video on how to shoot a classic in a garage:
When product replacement is required
Both the front and rear wheels are characterized by the use of 4 brake pads to ensure effective braking. Only in design these products are very different, although the principle of operation is similar.
The rear pads of the VAZ 2107 are presented in the form of an arched steel structure, on the outer part of which a friction layer is applied. It is due to the friction of this layer against the inside of the drum that the car stops. If you do not replace the brake elements in a timely manner, this will be fraught with the development of unpredictable consequences, because the most important thing for any car is the serviceability of the braking system.
It will not be possible to determine this fact without removing the wheel and dismantling the drum. But this is one of the main ways to determine whether the brake system is faulty. There is a second option, which is more convenient and does not require dismantling the rear wheel. To do this, you need to listen for signs of squeaking of the rear wheels, as well as grinding and lack of braking effect, but this can lead to damage to the drum itself. You can squeeze the handbrake while standing on a slope and check that it is working correctly. Of course, the cable on the handbrake may become loose, but if you tighten it and still have no effect, then it’s time to start replacing the pads. If the rear brakes are not functioning, then it is time to change the pads. It is recommended to change them as a set on both rear wheels, since they are often worn out at the same time. What is the process of replacing rear brake pads on a VAZ 2107 will be determined further.
On a note! All four pads on the rear wheels need to be replaced at the same time, even if the friction linings are worn unevenly.
How often should the pads be changed?
The need to replace this part on a VAZ 2107 depends on a large number of factors, including:
- regularity of maintenance;
- general condition of the brake mechanisms and the system as a whole;
- driving style;
- manufacturer, etc.
These criteria are quite sufficient. In addition to this, you can find out about the need to replace the pads by the behavior of the brake system. For example, if during a stop, extraneous sounds are observed - grinding, creaking, and so on. Does it require significant force to slow down? It's time to worry about buying new pads.
If the machine is equipped with low-quality parts, wear will be quite rapid. Pads from Ferodo, Nippon, ATE - recognized quality and durability.
Using reliable products, replacement of this part will be required once every 25 thousand km.
It is important to note that installing the right or left block separately is strictly prohibited. These works are performed in pairs on each axis.