How to check the ignition switch of a VAZ 2114
There are several ways to determine the source of the problem:
- diagnostic;
- visual.
First you need to check the car's reaction to different positions of the key in the lock. To begin with, the key must be set to position number one, which is also the ignition. If the module is in order, all the car's electrics should work. However, in the case when all or part of the electrical system does not work, we can conclude that the lock is damaged.
In position number two of the key, the engine starts, for which the starter is turned on. If, when you turn the key, you do not hear the sounds of the starter operating (rotation), as well as the sound of the relay clicking, then either the ignition switch or the starter itself is broken. In this case, you need to run a diagnostic to get other details about the problem. In this case, you will need a multimeter set to ohmmeter mode. Also, before removing or installing the lock, you need to remove the steering column cover.
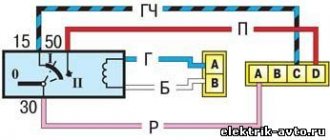
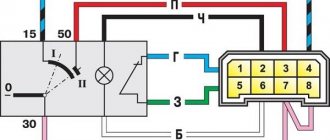
Pinout of the ignition switch VAZ-2114:
- +12V comes for the inserted key sensor microswitch;
- the mass comes when the driver's door is open;
- +12V goes to the starter (pin 50);
- +12V goes out after turning on the ignition (pin 15);
- +12V goes out when the key is inserted to pin 5 of the BSK;
- comes +12V to illuminate the lock cylinder;
- +12V comes from the battery (pin 30);
- not used.
- The first thing to do is disconnect the ignition switch power connector.
- After this, connect the multimeter to wires four and seven, and then do the same with wires fifteen and thirty, respectively.
- Turn the key in the lock to position number one. If during testing the node is not damaged, the multimeter should show a zero resistance value.
- Next you need to turn the key to position number two. The resistance on the multimeter screen, as in the case described above, should have a zero value.
In a situation where, after checking the lock with a multimeter, the resistance value in at least one of the cases was not equal to zero, it needs to be replaced. Otherwise, the lock is working properly and other components of the car should be checked for malfunctions.
Reasons for replacement
Replacing the camshaft oil seal on a VAZ 2113, VAZ 2114, VAZ 2115
Many problems associated with the ignition switch can be eliminated by replacing only individual parts, and not the entire switch as a whole. You can buy a contact group or a lock cylinder separately. That is why repairs should begin with high-quality diagnostics. Main malfunctions and their symptoms:
- The starter does not respond to turning the key. The reason is most likely in the contact group. To verify this, check whether power is supplied to the starter relay after turning the key to the On position (starter activation mode). If the relay clicks, it means that the system “sees” the key being turned and there can be no complaints about the components of the electrical circuit of the lock. On vehicles that are not designed to have a starter relay, the power should be checked at the corresponding terminal of the solenoid relay. For diagnostics, you can use a multimeter or a tester (one lead to ground, the other to the retractor contact coming from the ignition switch). If the retractor and wiring are in good condition, then the contact group has failed;
- the key moves with a wedge. The problem is in the lock cylinder, as over time the mechanism wears out and becomes clogged. In this case, aerosol lubricants can only temporarily eliminate the malfunction;
- The key does not turn to all positions. The reason is mechanical damage to the lock cylinder. It may also be due to jamming of the anti-theft locking mechanism of the steering shaft;
- the key turns, but power does not come to the corresponding groups of contacts. The reason is in the contact group. The pinout of your vehicle's ignition switch can be found in the repair and maintenance manual.
Installation and connection of a new lock
Now that the old ignition switch has been removed, you can begin installing the new one. In order to do this, you need:
- Take a new lock, insert the key into it and turn it to position number one. This is necessary so that the latch responsible for locking the steering shaft goes inside and does not interfere with the installation process.
Breakaway bolts to prevent the lock from being stolen
- Reinstall the lock and tighten the release bolts. There is no need to tear off the bolt heads right away, so that if something happens, you won’t have to work with a chisel again. This can be done later.
Do not immediately tear off the bolt heads
- Connect the electrics of the new lock to the mating part of the car; you should be careful when working with electricity.
Ignition switch terminal VAZ 2114
Tools
For this work you will need the bare minimum of tools. Everything you need can be found in any garage. To avoid running around the garage looking for the required equipment while working, prepare:
- A set of keys. It should include both regular keys and heads;
- Phillips and slotted screwdrivers;
- Pliers;
- Thin chisel;
- Hammer.
If you want to diagnose and repair lock components, you will need a multimeter. It will be needed to check the functionality of the contact group.
How to set the ignition yourself?
Precise ignition adjustment on the VAZ 2115 injector is performed using a special strobe light. If this is not possible, you can set the ignition on the VAZ by spark.
To do this, follow these steps:
- First of all, the engine is warmed up until it reaches operating temperature.
- The distributor does not need to be removed, but only relaxed.
- You need to remove the central wire from the distributor.
- The piston in the 1st cylinder must be at TDC (the marks are set differently on 8 and 16 valve engines).
- Now you need to hold the short-circuit wire with your left hand and turn on the ignition.
- Use your right hand to adjust the distributor counterclockwise, while keeping the high-voltage wires above the metal.
- Then similar actions are performed, turning the distributor clockwise until a spark appears.
- At this point, the alignment ends, and the distributor is fixed in its regular place.
With the ignition set correctly, the car will operate without interruption with optimal fuel consumption and maximum power.
Instructions for repairing and replacing the ignition coil
Replacing short circuits on valves 8 and 16 in an engine represents a sequence of steps:
- The module can be easily found by the high voltage wires coming from the SZ spark plugs.
- Before starting work, you must turn off the negative voltage on the battery.
- The next step is to disconnect the wire block from the short circuit and high-voltage wires.
- Next, you need to unscrew the bolts securing the MZ to the engine, and you can dismantle the device.
- Now you need to install a new or repaired device and perform the steps in reverse order.
When connecting, follow the connection diagram in the manual.
Let's summarize
From the step-by-step instructions we can conclude that replacing the ignition switch on a VAZ 2115 and other models is not difficult. The cost of replacing a lock at a service station will cost you from 500 to 700 rubles, so if you decide to replace the part yourself, you can save this amount.
Hi all! There have been no entries for a long time, and there’s nothing else to write about yet. Someone may ask why there is no record of installing an auto-corrector? The answer is simple, everything was installed a long time ago, BUT!
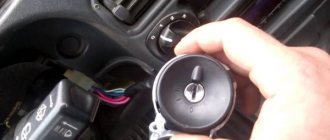
During operation, a small problem occurred regarding the ECM unit; spare parts are now of “very good quality.” And in the BUK itself the operational amplifier simply burned out or burst due to frost, one of these days the mikruha will come and make a recording. And now about the lock, about a month ago the ignition switch started acting up. The tape recorder began to cut out on bumps, why the tape recorder? Yes, because I made the power supply through the ignition switch, or rather from the sensor of the inserted key. At times everything was fine and I just thought that maybe snow got into the lock with the key, and that was what caused all this trouble. But as they say, the disease progresses. And it made me so sad that I decided it was time to solve this problem! I disassembled the steering column casing, picked up a chisel and a hammer and went ahead, tearing off the bolts. In principle, everything worked out quickly, then I disconnected the block and took it home.
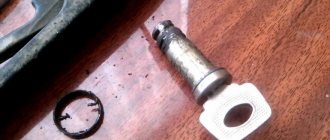
The lock can be disassembled quite easily; you just need to unscrew three screws on the back plate.
Next, I carefully halved the lock; whoever will occupy the same position, carefully halve it, otherwise you might lose the ball with the springs.
I studied the design and came to the conclusion that the microswitch of the lock is to blame.
I decided to take it apart, took off the cover and saw that the rocker was broken. The trouble is, the microswitch is not sold separately, and buying a new lock for 1k is a toad.
Here is the hero of the occasion. I called for disassembly to find out if there was a 10-point lock, they said it was possible, they would call me back a little later. 2 hours later he called and said yes, yes. I immediately went there and picked up an almost new lock.
But I didn’t want to install it, I just updated my lock with the missing part and went through the secrets in the cylinder, otherwise they had become a little worn out after such a long time.
In principle, that’s all, then I lubricated the cylinder with lithol and safely installed the lock in place. I also bought new shear bolts in advance; I didn’t want to install regular ones on a turnkey basis.
Thank you all for your attention and good luck on the road! I also want to congratulate all men on February 23! Issue price: 300 ₽
The lock cylinder (lock cylinder) is a type of lock security mechanism, in the form of a cylinder, the working part of which can be rotated in the body only when a key is inserted into the cylinder hole. The uninterrupted operation of the lock cylinder protects the car from unauthorized entry and protects the owner’s property. Therefore, a malfunction of the lock cylinder is a serious concern that requires an immediate solution, and many car enthusiasts are seriously thinking about how to change the lock cylinder of a VAZ 2114 with their own hands.
How to remove and install the part?
If the ZZ is not working, then it needs either repair or replacement. The ignition switch on a VAZ 2110 is replaced only if the device cannot be restored or repaired. In all other cases, you can and should try to repair it.
So, for repairs, do not forget to disconnect the battery and follow these steps:
- First of all, you need to unscrew the screws that secure the mechanism. First, the on-board network is de-energized; to do this, remove the “-” terminal from the battery. After the plastic cover is removed, the steering column switches are disabled. In this process, removing the bolts is one of the most difficult steps. This is because VAZ engineers initially thought through this point so that in the event of a vehicle break-in, an attacker would not be able to quickly unscrew the unit. Therefore, even at production, the edges of the screws are cut off, so you will have to use a chisel to dismantle the screw. Using a chisel, you only need to move the heads a little from their place, after which the bolts can be unscrewed without any problems using pliers.
- When the protection is removed, it is necessary to understand what the essence of the problem is. If you need to replace the backlight bulb, you should first disconnect the connector. Using small pliers, remove the lamp socket itself. Just replace it with a new one and install it back.
- If the problem lies in the operation of the contact group, then you need to either repair it or replace it. As practice shows, repairs often give the necessary results. However, the cost of new elements for a contact group is often not much lower than the price of the group itself. So, to prevent possible problems in the future, it is advisable to completely change the group. To replace using a screwdriver, you simply need to press the latches and remove the component. In the same way, only in reverse order, a new one is installed in accordance with the ignition switch diagram.
- If you need to change the key controller switch, use a Phillips head screwdriver to remove three bolts. Then the rod is removed from the structure, and then the latch is released and the switch itself is dismantled. Finally, you just need to install a new element in place of the old one.
- As for installation, in general there is nothing complicated about it - all steps must be repeated, only in reverse order. But during the installation there is one point that should be taken into account. Before starting reassembly, set the key in the lock to the first position. In this position, locking the steering wheel will be impossible. Therefore, the latch, located on the shaft itself and performing the function of a lock, should easily fit into the corresponding connector on the 3Z itself. Only after these steps can the device be installed. In addition, for installation you will need new 3Z fixing fixtures, since it will be impossible to install the old ones. When installation is complete, you need to make sure that the steering wheel will lock when the key is removed. If this does not happen, then you will also have to adjust the position of the ZZ on the column.
Replacing the ignition module yourself
So, first of all, we are looking for a module (for those who don’t know). The PVNs from the spark plugs go to it.
- Remove the negative terminal from the battery
- Disconnect the wire block from the module
- Disconnect the PVN
- Unscrew the module itself and remove it
- Now install the new module and reassemble in reverse order.
When installing, do not confuse the position of the PVN on the reel.
Helpful note! If you are installing a new coil and old wires, pay attention to them. If there are yellow stripes at the tips of the spark plugs and wires, then the wires need to be replaced. After replacing the module, you need to check its operation
We start the engine and enjoy the work done.
After replacing the module, you need to check its operation. We start the engine and enjoy the work done.
In the article brought to your attention, we will pay attention to an electronic device called the ignition module of the VAZ 2115 car. Or, more precisely, its description, circuit diagram and performance testing. This module includes two high-voltage transformers and two control units (electronic), enclosed in a durable plastic case with four high-voltage wire outputs
Electronic control units are also commonly called ignition coils, and one of them - “working” - is connected to the spark plugs of the first and fourth cylinders of the power unit, the other - “idle” - with the spark plugs of the second and third.
This module consists of two high-voltage transformers and two control units (electronic), enclosed in a durable plastic case with four outputs of high-voltage wires. Electronic control units are also commonly called ignition coils, and one of them - “working” - is connected to the spark plugs of the first and fourth cylinders of the power unit, the other - “idle” - with the spark plugs of the second and third.
The VAZ 2115 ignition module is controlled by a controller whose operating functions include processing data received from vehicle system sensors: coolant temperature, rotation speed and position of the crankshaft, air flow, presence of detonation, etc.
The circuit diagram and connection diagram of this electronic device is presented below.
The only negative point in the operation of this electronic device is its complete inability to repair. However, even a novice car enthusiast can replace it on his own.
- Unstable operation of the power plant when accelerating the vehicle.
- Decrease in engine power.
- “Intermittent” idle speed.
- Malfunction of paired (1/4 - 2/3) engine cylinders.
Main signs of failure
Drivers need to take into account during operation that breakdowns can occur both due to failure of the mechanical part and due to problems with the electrical system. Popular mechanical problems manifest themselves in the following factors:
- the lock is stuck in one position and there is no way to unlock it without using significant effort;
- the steering column is jammed;
- an attempt was made to gain unauthorized access to the lock using a master key or other object unsuitable for this purpose.
The electrical part may also fail. This can be determined by the following factors:
- the starter does not rotate after turning the key to the desired position;
- The dashboard indicator lights do not light up or go out after a short time;
- the operation of devices activated through the lock positions is unstable or absent.
Other factors that are less common among motorists may also occur. They are resolved according to the identified breakdowns.
Checking the Lada Samara ignition module
The correct functioning of the ignition module not only has a significant impact on the start of the vehicle’s power plant, but also ensures the stability of its operation in all modes. To carry out a complete diagnosis of this electronic device, you need quite complex equipment, available only in large specialized workshops. However, you can check the functionality of the ignition module yourself in an amateur garage. The only logistical support for this test will be a multimeter, or tester.
Attention! When using a donor car for testing, do not forget that only the first Lada Samara models were equipped with the ignition module, as a separate device. Cars of later releases are equipped with separate type devices (the switch is included in the electronic control unit). The procedure for replacing the ignition module includes the following measures:
The procedure for replacing the ignition module includes the following steps:
Another method involves measuring the resistance of individual module elements using a multimeter (tester). Using the tester probes, we close the “paired” terminals of the module, which provide connection to high voltage wires, and measure the resistance value.
There is another, so-called “folk” method, or the “shake-up” method. With the power plant running, lightly tap the module. Despite all the “technical non-scientific” nature of such manipulations, they are capable of producing results. True, only in the case when the contact of the elements inside the housing is broken.
Sources
- https://avtozam.com/vaz/2115/zazhiganie-remont-zamena-i-nastrojka/
- https://remontautomobilya.ru/modul-zazhiganiya-vaz-2114-princip-raboty-vozmozhnye-neispravnosti-i-zamena.html
- https://vipwash.ru/sistema-zazhiganiya/modul-zazhiganiya-vaz-2115
Characteristics Features
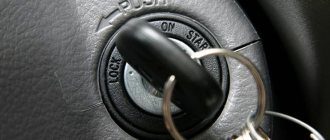
For the “fourteen” model range, VAZ designers chose the right-hand location of the lock. This option distinguishes the model range from the first “classic” cars of the plant. In this case, the switching zone remains under the steering column. The working part is hidden by plastic decor, so only the end of the cylinder is accessible to the driver.
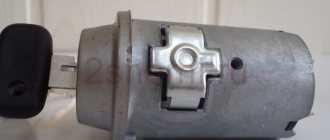
This unit consists of several components. The main ones are the following components:
- durable metal case;
- unique locking mechanism;
- locking block;
- electrical part in the form of a contact group.
The presence of a steel case is designed to protect against unauthorized access to internal components. The locking mechanism borrows its characteristics from a conventional door lock with a “secret”.
Thanks to the built-in locking mechanism, it is possible to fix the steering wheel, preventing it from turning, with a free “secret”. The contact group is connected from the back and is responsible for the timely connection of contacts at a certain position of the key in the keyhole.
We repair “Nine” locks ourselves
Let's say the key in the VAZ-2109 lock does not turn or, conversely, turns and does not unlock the door. Repairing car locks involves one of the following actions: replacing the cylinder (cylinder), replacing or repairing the internal lock. In official manuals, by the way, it is recommended not to repair the internal lock mechanism, but to replace it. Be that as it may, you first need to get to it, for which you remove the door trim. Each of the actions required for dismantling is further illustrated in the photo. The entire sequence must be considered in order.
"Nine" and the door lock device
Theoretically, the lock mechanism can be divided into 3 parts: a handle with a cylinder and a button, the main mechanism, and the inner door handle. All nodes and connections between them are shown in the diagram.
The node labeled “2” looks like this.
4 rods fit to it, that is, to this node. Two of them are connected to the external handle, and in order to dismantle it, the rods are disconnected.
If there is no electrical wiring inside the door, you do not need to disconnect the battery before performing repairs.
In other cases, that is, when power windows or locks are installed, the battery must be disconnected. To do this, as many people know, it is enough to remove the “negative” terminal. This means that before repairing locks, the hood is opened first, not the doors. Anyone who violates such a requirement will, at best, have to change burnt fuses.
Replacing the door lock cylinder
To gain access to the locking mechanism, you need to remove the trim. On the “Nine” it is quite simple to remove it - the casing is held in place by plastic pistons. These pistons are located around the perimeter; they are simply pressed out and, if necessary, replaced with new ones.
First, as is easy to understand, you need to dismantle three elements: the side handle, the window lifter handle, the socket of the inner handle of the lock. The “dog” must be pulled up, but it is better to remove the seal that protects the glass during the dismantling of the casing.
The structure of a car ignition switch
- Locking rod
- Frame
- Roller
- Contact disc
- Contact sleeve
- Block
- Protrusion of the contact part.
The lock mechanism is connected to many wires. They continue from the battery, connecting all the electrical devices of the car into a single chain. When you turn the ignition key, the electrical circuit is closed from the “-” terminal of the battery to the ignition coil. As a result, the current passes through the wires to the ignition switch, through its contacts it is directed to the induction coil, after which it returns back to the “+” terminal. As electricity passes through the coil, it generates high voltage, which it transmits to the spark plug. Therefore, the key closes the contacts of the ignition circuit, thereby starting the car engine.
Steering lock testing
Testing the steering wheel
If you do not check the operation of the steering wheel lock, you may encounter certain problems in the future. Therefore, do not waste your time on this event. It consists of removing the key from the ignition and turning the steering wheel at a slight angle.
- If there is no lock, you will need to slightly adjust the position of the lock. Make sure it fits into the groove located on the steering shaft.
- If the locking is effective, you will only need to tighten the four installed breakaway bolts until they stop. Twist until the heads break.
It is worth noting one very important nuance. Some people don't find it necessary to use breakaway bolts. Instead, the most common fixing bolts with a length of 20 millimeters and an M6 thread are used. On the one hand, this will make it easier to remove the device in the future, if such an event is required again. On the other hand, in the absence of a reliable anti-theft system, voluntarily giving attackers access to your car is not the best idea.
When the lock installation is completed and the test has passed, do not forget to connect the device to power and start the engine. If it starts, all systems dependent on the ignition switch are working, you can fully begin reassembly. Follow the reverse instructions for removing the casing and steering column switches. It would not be amiss to check the condition of certain nodes along the way. It is quite possible that some of them also need replacement or a little preventive maintenance.
Loading …
Replacement
The work of removing and installing the ignition switch on these models requires a lot of preparatory steps. This is perhaps the biggest difficulty. Be sure to open one of the windows before work. This will avoid problems if the central lock is accidentally activated. Also, you should disconnect the battery to avoid short circuiting. Put the car on the handbrake.
Replacement is carried out in the following order:
Now all that remains is to connect the battery and start the engine. This will ensure that the ignition switch is installed correctly.
Conclusion. All frequently operating components and parts of a domestic car are at risk. Therefore, the question of how to replace the ignition switch on a VAZ 2114 and 2115 is not surprising. The work is quite simple, despite the large number of operations required.
Tips for replacing the door lock cylinder on a VAZ 2114
Often, when repairing a door handle lock, it turns out that severe wear of the part leads to the need to replace several elements of the device. You can try to restore the lock, but such repairs will not help for long and after a while you will have to start solving this problem again.
When using the car for a long time, it is recommended to inspect the door locks from time to time and replace the part if necessary. Before removing the lock cylinder from the package or from the door handle, be sure to insert the key into the lock hole. Otherwise, this threatens the pins falling out of the lock grooves, which will be problematic to put in place.
On a VAZ 2114, replacing the door lock cylinder is a job that you can do yourself, if you have free time and the necessary tools. To change the lock cylinder you will need:
- open-end wrenches “8” and “10”;
- pliers;
- WD-40 lubricant;
- flat and Phillips screwdriver;
- new lock cylinders and springs for VAZ 2114.
The price for a set of door lock cylinders with a trunk lock for a VAZ 2114 manufactured by VAZ with article number 21140610004520 is 400 rubles, and its analogue with article number 21140-610004520 from the manufacturer DAAZ is 450 rubles. The cost is indicated for spring 2022 in Moscow and the region.
1Use a Phillips screwdriver to unscrew the three screws at the bottom of the trim.
2Remove the cover. We take the front shutter glass position switch out of the pocket along with the wiring harness block, disconnecting it from the wire switch.
3Using a screwdriver, remove the armrest handle cap.
4Use a Phillips screwdriver to unscrew the 2 screws securing the armrest handle to the inner door panel.
5Press the fasteners securing the inner lock handle trim to the door panel...
7 Carefully, using a screwdriver, remove the six pins from the holes in the door panel and remove the door card.
8Using an 8 wrench, unscrew the two nuts securing the outer lock handle. First one...
10 Disconnect the outer handle rods and the lock switch from the internal lock.
11Remove the outer lock door handle with rods.
12Then remove the pin from the end of the rods.
14Remove the plastic rod end from the door lock cylinder.
15Remove the locking spring by removing its ends from the slots on the cylinder and on the lock handle.
16 We take out the old lock cylinder along with the key.
17Unpack the new set of larvae. Having previously lubricated all the rubbing parts with grease, we insert the lock into the door handle.
18Install a new cylinder return spring.
19When turning the key, the key should return back from any position.
20Install the pin on the tip of the rotary rod. The handle is assembled. We carry out further assembly in reverse order.
The larva has a cylindrical shape, which is activated when the key is turned in the well. If the mechanism jams and makes it difficult to open/close, then one day the driver simply will not be able to get behind the wheel of his car. Therefore, if the device does not operate correctly, it is recommended to replace the door lock cylinder with a VAZ 2114.
Step-by-step instruction
- Remove the negative terminal.
- Unscrew the six screws securing the lower plastic casing under the steering wheel.
- After unscrewing the screws, remove the lower and upper casings.
To see the process of replacing the lock, watch this video:
The other day the ignition switch began to jam, having looked at the drive for a solution to the problem - everyone has a problem with the spring in the lock. I didn’t disassemble the lock and change the spring; I simply bought a factory lock as a replacement.
I WARN YOU IMMEDIATELY! FIRST WE DISMOUNT THE OLD LOCK, AND NOT BUY A NEW LOCK IN ADVANCE! Locks may differ, they are installed in two types from 2110 and 2114. (When installing a lock from 2108 it will be “generally fun” www.drive2.ru/l/288230376152458953/)
First of all, remove the terminals from the battery.
We're filming. steering column cover. From the bottom, unscrew the 3 screws and 3 self-tapping screws with a “plus” screwdriver.
Lower the handle and position the steering wheel.
Remove the lower and upper casings.
Disconnect the ignition switch wiring harness.
For convenience, I removed the wiring block of the steering column switch, the switch itself and the horn terminals (otherwise, they would suffer with the upper bolts).
Now the most interesting thing is to unscrew the 4 fastening bolts using a chisel. Loosen the tension with a chisel and unscrew the bolts with your fingers.
We remove the lock and look at the markings.
From the first 4 digits it is clear that the switch is from 2110. We go to the store for a new lock and bolts. Just in case, I took the old lock with me.
Original - (without bracket) - 730 rub. 4 bolts with detachment. Goal. — 40 rub.
To compare the old and new castle. The rooms are identical.
Anti-vandal bolts with break-away heads.
Then we install everything in reverse order. I didn’t buy a new bracket for the lock; the old one worked just fine. When installing a new lock, you need to find one specific seat so that when connecting the bracket and the lock itself, there are no gaps and backlashes at the bottom and top.
Tighten the bolts until the heads come off.
Then everything is in reverse order. We connect the ignition switch wiring harness block. We install the steering column switch and block in place. Connect the horn terminals. Install the steering casing. We fix the terminals on the battery.
Compared to the old lock, turning to the first position (ignition) has become much softer, like on a foreign car.
It is impossible to start the engine, its systems and other main devices of the Samara family without the ignition key. Those motorists who have encountered a malfunction of this device know what causes its sudden breakdown. Particularly if it becomes a pass.
Further in the text of the article we will talk about what the VAZ-2114 ignition switch is, consider its main malfunctions and ways to eliminate them. In addition, we will try to figure out how to change this ourselves and connect correctly.
In VAZ-2114 cars, the ignition switch, unlike the “classic” one, is located not on the dashboard, but on the right, on the control column. The top is covered with a plastic shell, so in our opinion only the highest part of the “larva” is exposed.
The VAZ-2114 ignition switch consists of 5 main parts:
- iron body;
- locking mechanism;
- blocking device;
- contact Group;
- key.
The device is housed in a metal case, which is designed to protect against burglary. As for the locking mechanism, it is practically no different from a regular door lock.
The locking device allows you to lock the control shaft in the absence of a key. In this simple way, it protects the car from theft. The contact group is the element responsible for starting the engine and its systems. The VAZ-2114 ignition key is used to unlock the locking device and activate a group of contacts. Without it, starting the engine makes it impossible to disassemble the device.
This is how the lock works. When the key is in the well, its locking mechanism is disabled. This is due to the reverse movement of a special rod. Turning the key to position 1 will give contacts “15” and “30”. This will prevent (unfortunately, not enable) the following:
- ignition system;
- headlights;
- external light signal;
- electrical equipment of the dashboard;
- windshield washers and washers;
- lighter;
- heated rear window;
- field generator winding.
In this case, turn the ignition key to position 2 in the VAZ-2114, in addition to the listed equipment, the starter will start. As you can see, a lot depends on the performance of the device.
What are the symptoms of a broken ignition switch? The first issue is that its failure can be either mechanical or electronic. At the beginning it is:
- lock jamming in one of the positions;
- inability to unlock the control shaft;
- turning on the ignition with a non-original key in accordance with another object.
If you have electronic faults, you can easily see the following symptoms:
- Warning lights on the dashboard do not light up, do not light up and sometimes go out;
- the starter does not start;
- some do not work, or our clients are left with electrical devices whose circuit is powered by ignition (cigarette lighter, lights, washer, windshield wipers, etc.).
My device got stuck due to wear on the larvae in a different way due to problems with the contact group. When faced with a problem like this, you don't need to use force to turn the key in the right direction! There is no need to “rip” the steering wheel if it cannot be unlocked in the aisle. The best thing to do is to carefully disassemble the lock and find out why. Unfortunately, this is one step later.
Having noticed that the ignition in the car, of course, is turned on at least with the help of some kind of key or foreign object, hurry to replace the “cylinder” or assembly of the device. This way you will protect your car from possible theft.
Quick replacement of VAZ 2108 2109 2110 2114 2115 ignition switch. Or simply change the contact group.
If the ignition switch works normally on a VAZ-2114, but when turned on the unit panel does not light up, the starter does not start, the instruments do not work, which means that, most likely, the group of contacts has failed. This problem can occur due to normal wear and tear. The contacts are erased after some time, which leads to an open cycle. Burning caused by overvoltages and constant overloads can also occur due to the use of additional electrical appliances and improper connection.
In principle, if you want to install additional electrical equipment in your car, connect it only to the on-board network via a relay!
Diagnostics of the contact group consists of measuring the resistance between certain terminals on the wiring harness of the unit.
To check this you need:
- Remove the plastic cover of the control panel (to do this, unscrew three screws).
- Disconnect the VAZ-2114 ignition interlock wires (disconnect the unit).
- Turn on the ohmmeter (if you have a multimeter, set it to resistance mode).
- Connect the device sensors (polarity does not matter) to terminals “4” (top right) and “7” (2nd from bottom right), corresponding to terminals “15” and “30”.
- Turn the ignition key to position 1.
- Read the ohmmeter.
- Turn off the ignition, connect the device sensors to terminals “3” (2nd from the right) and “7”, corresponding to terminals “50” and “30”.
- Turn the lock to 2nd.
- Measure the resistance between the terminals.
If the VAZ-2114 ignition key (injector) is working, the resistance between the contacts will be zero. Otherwise, the contact group of the device may be faulty.
What if the ignition switch is faulty? There is such an option, try turning it on. Unfortunately, this is only in a situation where, of course, you have some experience here, the device is relatively new, and you suspect it is a contact wear error. Otherwise, it is better to replace the lock. Fantasy is not that expensive. no more than a thousand rubles, well, this procedure will not keep you waiting long.
When planning to replace the ignition switch, be sure to choose the right one. Part number for Fourteen. 2114-3704010. However, other modifications are also suitable, for example, for the ninth model of Samara. 2109-3704010 or for VAZ-2110. 2110-3704005. By and large they are all interchangeable, the only thing that matters is that the device is of good quality and can last a long time.
Before changing the ignition on your VAZ-2114, iron it so that you need tools at home. Because it's good for you:
Now let’s figure out how to remove the ignition switch on a VAZ-2114. The procedure looks like this:
- We de-energize the on-board network by disconnecting the negative terminal from the battery (loosen the screw on the terminal using a key 10).
- Remove the plastic housing of the control column by unscrewing the three screws securing it.
- For convenience, you can remove the control wheel with switches, but many do without it.
- Disable the emergency shutdown button of the wiring block.
- Disconnect the ignition interlock unit.
- Inspect the retaining bolts. If you are changing a lock for the first time, you might be surprised that they don't have a head. This is such a typical concept of complete theft.
- Using a chisel and hammer, loosen these bolts and loosen them with pliers.
- Remove the lock.
- Remove device.
Removing the ignition switch, VAZ 2114.
The method for installing the lock and connecting it to the on-board network is as follows:
- We insert the key into the well and return it to the first place. This way we hide the rod that blocks the control shaft.
- Install the new lock on the column by throwing the shackle.
- Tighten the lock mounting bolts, but not completely. You will need to adjust the position of the device.
- Check the operation of the locking device. To do this, remove the key from the “larva” by pulling it to the side. The steering wheel must be locked. If there is no lock, adjust the control shaft lock position. The shaft should simply fit into the groove on the control shaft.
- After this, insert the key and return it to the 1st position. The steering wheel must be unlocked. We will check a couple of times to make sure the device is working correctly.
- Now we usually tighten the locking bolts. Rotate until their head falls off.
- Connect the ignition unit to the handle.
- Connect the wires of the alarm button.
- We connect the “negative” terminal to the battery. We test the device in numerous possible modes.
- Install the plastic housing onto the control column.
If you still decide not to take the entire castle, the best solution is for working “larvae”. this is to change the contact group. This is done as follows:
- After removing the ignition, we remove the retaining ring from the end of its housing, which holds the core of the device.
- Remove the contact group from the housing.
- Install the last part in the old place. In this case, the position of contacts “15” and “30” must correspond to the position of the rod that closes the control shaft.
- Make sure that the wide protrusion of the contact group is inserted into the wide groove in the housing.
- Produce and test the device as described above.
Everything can be done in the garage with a minimum set of tools. The whole work takes about an hour, if you decide to repair the old one instead of installing a new switch, then the work will take a little longer.
The ignition switch on VAZ 2114 and 2115 is replaced in cases of its malfunction. The most common cause is failure of the contact group. Thus, the lock simply does not turn on the ignition. An equally common malfunction is the problem with the cylinder; it often gets stuck in one of the positions.
Installing a new part
The removal and assembly algorithm is the same, although the instructions for installing the cylinder mechanism have its own nuances. Before inserting a new cylinder into the core, the part is lubricated with a silicone substance and only then inserted into the handle. Further algorithm of actions:
- The return spring is inserted next to the cylinder.
- The functionality of the key is checked. It should turn easily in all positions.
- A pin is installed on the tip of the rotary rod. Connection is being made.
- The inner and outer panels are screwed on, the handles are fixed, and the plug is returned to its place.
- The main three screws are tightened from the inside.
- autorn.ru
- www.drive2.ru
- etlib.ru
- infokuzov.ru
Troubleshooting Methods
There are two methods for detecting faults:
- Visual;
- Diagnostic.
Ignition switch circuit
We suggest studying a visual method for determining a malfunction or breakdown of the contact elements of the ignition switch using the table.
| Action | The device is working properly | The device is faulty |
| Turn the key to the right position (ignition) | All electrical equipment turns on | All or part of the electrical equipment does not work |
| Turn the key to the second position | The starter is spinning | The starter does not work, the traction relay does not click under the hood |
But diagnostics allows you to get a more detailed answer. In addition, a visual inspection will not give you the opportunity to find all the reasons that could cause the ignition switch to break down.
To work, you will need a mini-tester and a multimeter in ohmmeter mode:
- Disconnect the power supply from the ignition switch. To do this, you need to remove the skin from the steering column;
- Switch your multimeter to an ohmmeter;
- On the block coming from the lock you need to find pins 7 and 4, which correspond to pins 15 and 30;
- Connect the multimeter probes to them;
- Turn the key to the “Ignition” position;
- On the block, find pins 7 and 3, corresponding to 50 and 30. Also connect a multimeter to them;
- Turn the key to the second position - Start the engine;
- If serviceability is present, the device will show zero resistance in both test cases.
How to identify a lock malfunction?
You can visually see how the components behave in different positions of the ignition key. For example, in the “ignition on” position, all electrical equipment should work. If you turn the key to the "starter" position, it should work and start the engine.
To be sure that the problem is in the lock, you need to carry out simple diagnostics. To do this, we need a multimeter with a resistance measurement function.
We perform the following actions:
- Remove the negative terminal from the battery.
- We dismantle the plastic casings around the lock.
- We disconnect the power connector from the lock and remove it to gain access to it.
- Place the multimeter in the resistance measurement position.
- We connect the probes to pins seven and four, corresponding to pins 30 and 15.
- Turn the key in the lock to the “ignition on” position and remember the resistance readings.
- Turn off the ignition and connect the probes to contacts three and seven, corresponding to contacts 30 and 50.
- Turn the key in the lock to the “starter” position and remember the readings.
The resistance will be “zero” in both cases if the lock is working properly. If there is any resistance, we do not recommend replacing the contact group of the ignition switch on VAZ 2113, 2114, 2115. It is best to change the complete lock.
Replacing the ignition switch on a VAZ 2115, 2114
Replacing the ignition switch of a VAZ 2114, VAZ 2115 may be necessary in the event of a malfunction of the contact group, jamming of the mechanism, or simply wear.
The procedure is not complicated, so let's get started.
Before the replacement itself, it is necessary to purchase bolts with break-away heads. It is not recommended to replace them with regular ones with M6 thread, because... In addition to you, car thieves can easily remove the lock.
Before replacing the lock, turn the key to the “I” position so that the latch locking the steering shaft mechanism can enter the lock body.
- It is necessary to disconnect the battery by removing the wire from the “—” terminal
- Next, remove the steering wheel. To do this, remove the decorative trim on the steering wheel and unscrew the horn cover.
- Then, having unscrewed the steering wheel fastening nut not completely, we knock the steering wheel off the splines. After this, finally unscrew the nut.
- Remove the plastic covers from the steering column.
- Disconnect the block with the ignition switch wires.
- Use a chisel to knock the heads off the old bolts holding the ignition switch in place.
- Remove the old lock and install a new one in its place. Before installation, press the locking tab into the new ignition switch.
- Check that the steering shaft is locked correctly.
- Once you have completed adjusting the position and checking the functionality of the locking mechanism, tighten the bolts until the heads are completely free. Do this using the 10 key.
- Connect the wiring harness of the new ignition switch.
- Start the engine, make sure that the ignition switch is working correctly and that there are no problems with starting. If everything is in order, then we can conclude: the replacement of the ignition switch of the VAZ 2114, 2115 was carried out successfully!
Previous posts from the category: VAZ 2114
If engine oil or coolant appears around the perimeter of the connection of the cylinder head with the cylinder block itself, it is necessary to replace the cylinder head gasket of the VAZ 2114, VAZ 2115. A leak can also occur due to a change in the shape of the cylinder head after the engine overheats.
After prolonged use of a VAZ-2114, VAZ 2115, for no particular reason, an extraneous sound may arise from the front axle area in the form of a whistle.
Typical malfunctions of VAZ 2114, 2115 injectors: -difficulty starting the engine; — unstable engine operation; — the engine stalls at idle; — increased crankshaft rotation speed at idle; — the engine does not develop full power; — jerks and dips in engine operation when the car is moving; — increased fuel consumption; - increased content of CO and CH
The clutch briefly disconnects the engine and transmission and then smoothly connects it to start moving and change gears.
Replacing the stove fan of a VAZ 2114, 2115 may be necessary if it completely fails, or if it constantly operates only at 3rd speed.
*Add article to bookmarks:
Source
https://remontysvoimirukami.ru/remont-vaz-svoimi-rukami/remont-zamka-zazhiganija-vaz-2115-svoimi-rukami.html
Step-by-step replacement of the ignition relay
Ignition switch malfunctions: do-it-yourself repair and replacement
If during the inspection it turns out that the ignition switch relay has failed, then experts do not recommend repairing this element, as was previously said. To buy a new relay, minimal cash costs will be required, and every car enthusiast can make a replacement if all operations are carried out in stages:
- The most important thing to do first is to disconnect the battery from the power supply; to do this, simply disconnect the negative terminal from the battery.
- When using a screwdriver, it is best to use a slotted tool. You need to unscrew the 4 fasteners from the steering column casing to simplify the process of removing the “relay”.
- The latch holding the lower part of the casing is most conveniently unscrewed using a Phillips screwdriver.
- The casing, loosened from the fasteners, is carefully removed from its place.
- The ignition relay is connected to wires that are located at the bottom of the block. To replace an element that has become unusable, you simply disconnect the wires from the block and install a new one in place of the old relay.
After this, you need to check the result of your own work by starting the engine of your car. If the fault does not show itself, it means that the replacement process was completed correctly, and the car owner can be proud of his next, albeit small, but still achievement.
After reading this article, everyone should understand that the process of replacing this device is simple and straightforward. And since the “relay” rarely fails, VAZ-2114 owners do not constantly have to perform such an operation. But if difficulties arise when replacing the ignition switch relay, you should never despair, because you can find the answer to any question in a training video on the Internet resource, which you can watch both day and night.
Where is the valve for the VAZ-2114 stove located?
The training video lesson was prepared and conducted by true professionals who thoroughly understand all stages of car repair. Therefore, everyone will be able to obtain additional information on replacing the relay and determine its exact location from the photo. Well, after watching the training video, the replacement process will become even simpler and you can be sure that every car enthusiast can handle this task.
Recommendations
Reassembling and lubricating individual parts will not work if the fragments are heavily worn. It is better to remove the cylinder from the core and install a new one. Recommendations for replacing the VAZ 2114 door lock:
- Partial repairs or lubrication will only temporarily restore life to the closing mechanism. If problems arise, it is better to replace the entire cylinder.
- After installation, it is necessary to periodically lubricate the mechanism. Experienced motorists use silicone substances for this.
- The repair procedure is carried out in a well-lit room at a comfortable temperature.
- To change the element, you will need a set of screwdrivers, pliers and lubricant.
- Sometimes the springs have to be replaced along with the cylinder. They are purchased separately.
The cylinder fragment is sold as a set. The price depends on the manufacturer. If you buy a cheap Chinese version, it will cost about 150 rubles. It is better to give preference to VAZ spare parts. The cost of such a kit is 400-500 rubles.
How to determine the malfunction?
Lock failures can be mechanical or electrical.
In the event of a mechanical breakdown, the key rotates with force in the lock and in the future may break off or jam. You can extend the life of the lock a little by lubricating the cylinder with WD-40 penetrating lubricant. Of course, this is a temporary measure and will not save you from replacing the lock in the near future.
In the event of an electrical breakdown, a group of contacts breaks or burns out. The most common problem is burnout of the contacts that supply power to the starter solenoid relay. You turn the key to start the engine, but the starter is silent. If the contact group breaks down, you should not replace the entire lock. There is a separate group of contacts for sale and below we have described the replacement procedure step by step.
Replacing the contact group
To replace the contact group of the ignition switch of a VAZ 2107, do the following:
- Disconnect the battery terminal with the minus sign.
- We put the key in the lock in position “0”.
- We unscrew the screws securing the steering column housings and dismantle them.
- Disconnect the wires from the ignition switch. We advise you to remember or take a photo of how the wires were connected. If you forgot to do this, see the diagram below.
- Using a small slotted screwdriver, we pry up the spring ring that holds the contact group in the lock body.
- We dismantle the contact group.
- We mount a new group of contacts and secure it with a spring ring.
- We connect the wires and mount the steering column covers.
- Connect the negative terminal.
Ignition switch and features of its replacement
ZZ plays an important role in the vehicle's SZ, both for an 8-cl and 16-cl engine. It is activated when the starter is working, thanks to it the lighting, turn signals, and power windows work.
Replacement or repair of the VAZ 2115 ignition switch may be required if:
- lost or broken keys;
- the lock was damaged during an attempted theft;
- the 3Z cylinder is faulty;
- The contact group does not work.
Ignition switch VAZ 2115
To replace you will need: a set of keys, a hammer, screwdrivers, a thin chisel.
- The car's power is turned off by disconnecting the negative terminal from the battery.
- We remove the steering wheel.
- Next you need to remove the steering column switches.
- Then you need to loosen the bolts securing the clamp that holds the ZZ on the steering column. If the heads are cut off, the bolts should be carefully knocked out using a hammer and a thin chisel.
- Now you need to disconnect the wiring harness.
- Next, you need to completely unscrew the bolts from the 3Z housing and you can remove it.
- A new device is installed in place of the old one.
- Assembly is carried out in reverse order.
