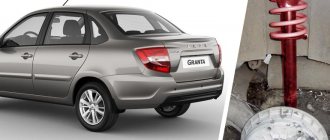
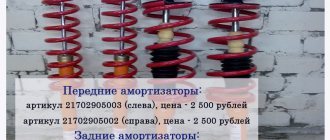
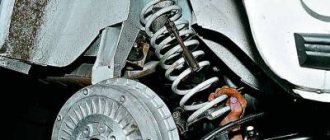
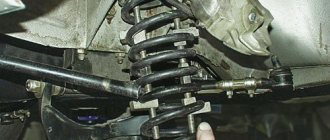
The principle of operation of the rear struts differs little from car to car. The station wagon leaves the machine with a two-pipe hydraulic design that absorbs shock loads due to oil resistance to the cylinder piston. From the outside, these elements look like a pump, only instead of air there is a viscous liquid.
What are rear struts?
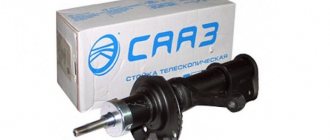
The design and principle of operation of the rear shock absorber struts of the Lada Priora are practically no different from other cars. From the factory, the machine is equipped with SAAZ shock absorbers, which have a two-pipe hydraulic (oil) design.
It provides damping of shock loads due to oil resistance to the piston inside the cylinder. In fact, this design resembles a conventional pump, only oil acts as air.
At the front of the Priora there are also oil struts that work on the same principle. They differ from the rear ones only in the size and design of the body. In addition, the front struts have brackets for attaching tie rod ends.
Oil shock absorbers are quite reliable and durable, and in addition, they provide maximum comfort, as they are considered the softest. However, they also have their drawbacks. The fact is that oil is very susceptible to the influence of temperatures, both high and low. When heated, it becomes too liquid, which causes the shock absorber to “soften” even more.
When exposed to low temperatures, the oil hardens, making the racks as rigid as possible. Naturally, this cannot but affect their condition, and it often happens that after a hot summer or cold winter, shock absorbers begin to “sweat”. This is the first sign of their failure.
Removing the shock absorber and spring of the rear suspension of Lada Priora (VAZ-2170)
We remove the shock absorber for replacement when it loses its working properties, as well as when replacing a spring or failed rubber pads for attaching the shock absorber or compression stroke buffer.
To ensure that the performance characteristics of the left and right shock absorbers do not differ, both shock absorbers should be replaced. It is also necessary to replace the springs in pairs. Removal is shown on the left shock absorber, the right shock absorber is removed in the same way.
Inside the car, we recline the back of the rear seat and move the carpet away from the socket of the upper shock absorber mounting to the body.
Using a 17mm z-shaped wrench, unscrew the nut of the upper shock absorber mounting, holding the shock absorber rod from turning with a special wrench with a 6 mm wide slot. Remove the spring washer from the shock absorber rod...
...a support washer and an upper rubber pad.
From the bottom of the car, using a 19mm wrench, unscrew the nut of the bolt of the lower shock absorber mounting to the beam arm bracket, holding the bolt from turning with a spanner of the same size. We hang out the back of the car.
We take out the bolt (if there is difficulty, knock out the bolt with a soft metal drift). We remove the shock absorber from the eye of the lever bracket...
...and remove the shock absorber along with the spring. The spring gasket usually sticks to the body, from where it must be removed and ensure that there are no deformations or tears.
Remove the spring gasket.
Remove the spring from the shock absorber.
Remove the spacer sleeve with the lower cushion from the shock absorber rod... ...the cover with the cup and the compression stroke buffer.
If there is damage to the cushions, cover or buffer, replace them with new ones.
We assemble and install the shock absorber and spring in the reverse order.
For ease of assembly, we recommend attaching the gasket to the spring with adhesive tape or insulating tape. In this case, the end of the spring coil should rest against the protrusion of the gasket.
When installing the shock absorber rod cup, the flange of the 1st cup should fit into the recess 2 of the boot.
We put the compression stroke buffer on the shock absorber rod so that the buffer grooves are located at the bottom.
The end of the lower coil of the spring should rest against the protrusion of the lower shock absorber support cup.
When installing the shock absorber, we install it so that the shoulder of the support cup with a smaller height (shown by the arrow) faces the wheel, while the end of the lower coil of the spring on the left side of the car will be directed towards the rear of the car, and on the right side - towards the front.
To facilitate installation, you can put a piece of plastic tube (with an outer diameter of no more than 14 mm) on the threaded section of the rod... ...which will allow you to direct the rod into the hole in the upper spring support cup on the body.
We secure the lower end of the shock absorber, but do not tighten the bolt nut.
Using a jack to lower the car onto a wheel...
... using a tube, insert the tip of the shock absorber rod into the hole in the body. Having removed the plastic tube from the shock absorber rod, install the upper rubber cushion and support washer (convex downward) on the rod and secure the upper end of the shock absorber.
The nut of the shock absorber lower mounting bolt is finally tightened to the prescribed torque in the “car on wheels” position.
Video on the topic “Lada Priora. Removing the shock absorber and rear suspension spring"
Replacing rear struts on a Priora
Replacing rear struts on a VAZ Priora
Replacing rear struts (shock absorbers) on a Priora
When to change
Factory SAAZ rear struts usually withstand 70-80 thousand kilometers, after which, according to the factory’s recommendations, they need to be replaced. But there is no point in changing shock absorbers if they do their job perfectly, unless you want to change the characteristics of the suspension.
It is not difficult to determine the serviceability of the racks yourself. As already mentioned, the first sign of their malfunction is a visible oil leak. In addition, faulty shock absorbers give themselves away with a characteristic dull knock in the area of the rear arches. This is also evidence of their depressurization and oil leakage.
You can verify that the racks are faulty in a simple way. Try rocking the left or right rear of the car. If it swung once and froze rigidly, it means that everything is in order with the shock absorber from which you rocked the body. If the car continues to rock, the shock absorber is faulty, and the body lowers and rises due to the spring.
practical guide
It is convenient to carry out the work in an inspection ditch. The work is shown on a car with a hatchback body. On a station wagon, the work is performed in the same way. On a sedan car, access to the upper shock absorber mount is through the luggage compartment.
Replace shock absorbers and springs in pairs.
To complete the work you will need:
— inspection ditch or overpass;
— a device for disassembling suspension struts.
We carry out the work with an assistant.
Removal
1. Prepare the car for work and hang the rear of the car on stands.
If there is no inspection ditch or overpass, remove the rear wheel of the car from the side of the shock absorber being replaced.
2. Remove the luggage compartment shelf.
3. Fold down the back seat.
4. In the luggage compartment, use a Phillips screwdriver to remove the four screws securing the upholstery.
5. Use a screwdriver to pry off the trim of the seat back lock.
6. Using a 19 mm wrench, unscrew the lock and remove it.
7. Using a Phillips screwdriver, unscrew the screw securing the luggage compartment lining.
8. Bend down the luggage compartment upholstery.
9. Use a Phillips screwdriver to unscrew the top screw securing the cladding.
10. Using a Phillips screwdriver, unscrew the two lower screws securing the cladding.
11. Move down the luggage compartment lining.
12. Using a 13 mm socket wrench, unscrew the two nuts securing the seat back clamp bracket.
13. Remove the retainer bracket.
14. Using a slotted screwdriver, remove the plug.
15. While holding the shock absorber rod from turning with a 6 mm wrench, unscrew its nut with a 17 mm wrench.
16. Use a magnet to remove the spring washer and the upper support washer from the shock absorber rod.
17. Remove the upper rod mounting pad from the shock absorber rod.
18. Using two 19 mm wrenches, unscrew the nut of the bolt securing the lower end of the shock absorber to the rear axle beam and remove the bolt.
19. Move the lower end of the shock absorber towards the rear of the car and remove the shock absorber.
20. Remove the spring and its gasket from the shock absorber, and also, if necessary, remove the lower cushion and spacer from the shock absorber rod.
Installation
Springs of the same class (with the same color marks) should be installed in the rear suspension of the car.
1. Before installing the shock absorber, secure the rubber gasket 4 to the spring 2 with insulating tape or tape.
2. Install the spring on the shock absorber and fully extend the rod. We put a buffer 1, a protective casing 3 with a cover, a spacer sleeve 5 and a lower cushion 6 (if they are not on the rod) onto the shock absorber rod.
When installing, the shock absorber must be oriented so that the end of the lower coil of the spring faces the wheel.
3. We insert the shock absorber rod into the hole in the body cup, at the same time an assistant puts the upper cushion and support washer on the rod and tightens the rod nut a few turns.
4. Raise the lever until the holes in the shock absorber and beam bracket align. Install the lower shock absorber mounting bolt and tighten its nut (without tightening).
If you don't have an assistant, you can first attach the shock absorber to the rear suspension beam. Then, placing a stop under the rear lever, smoothly lower the car on the jack, making sure that the shock absorber rod enters the hole in the body, and after that, put on the upper cushion with the support washer and tighten the nut.
5. Install the removed wheel (if the work was carried out without an inspection ditch) and lower the car onto the wheels. We press the rear of the car several times to self-install the suspension elements.
6. Tighten the shock absorber rod mounting nut to a torque of 50-61.7 Nm (5.1-6.3 kgcm).
7. Tighten the nut of the shock absorber lower mounting bolt to a torque of 66.6–82.3 Nm (6.8–8.4 kgcm).
Which ones to choose and their price
Having decided to replace the rear struts, you will have to choose among today's abundance of original spare parts and their analogues on sale. You can, of course, not bother and buy stock oil shock absorbers from the SAAZ plant, exactly the same as those installed on the Priora on the assembly line.
Part numbers:
- 217002915002;
- 217002915003;
- 217002915004;
Their prices vary from 1200 to 1400 rubles (for one rack) .
If you want to change the characteristics of the suspension, namely make it softer or stiffer, you can purchase alternative struts. The most popular shock absorbers among Prior owners are SS20.
They are distinguished by high reliability, and in addition, a variety of designs that allow you to change the stiffness of the suspension. There are four modifications of SS20 for Priora on sale: “Comfort”, “Standard”, “Highway” and “Sport”, differing in rigidity in ascending order. The cost of a pair of such racks is about 3,700 rubles.
"Technology System" – SS20
As for foreign analogues, the best shock absorbers are Japanese products. They also differ in rigidity and size, which also allows you to adjust the ride height. You can buy such racks at a price of 2,700 rubles per piece.
"Kayaba"
Important: it is recommended to replace shock absorbers in pairs, i.e. if you change it, then change it on both sides of one axis!
Preparation
1. Remove the upholstery and all adjacent plastic;
- First of all, we remove the lampshade and the entire adjacent plastic block with the rear-view mirror;
- Unscrew the sun visors;
- Remove the front plastic covers on the struts;
Carefully remove the side pillar panels; Remove the rear plastic panels from the racks; We unscrew the handles for passengers; We take out the rear 3 clips.
2. Clean the ceiling from dirt, degrease the prepared surface with a regular solvent and let it dry.
3. Purchase in advance the materials necessary for sound insulation:
- Vibration insulation - 3 sheets, I used Bimast Bomb (there are many alternatives);
- BitoPlast – 2 sheets;
- SPLEN – 1.5 sheets;
- scissors;
- construction hair dryer;
- hard roller.
Replacement
To replace the rear struts yourself, you do not need to go to a service station. This process can be done at home and will not take more than an hour.
Tools and tools you will need:
- jack;
- a “shoe” or an ordinary brick to block one of the wheels;
- wrenches at “6”, at “19”, at “22”;
- rust remover like WD-40;
- small mount.
Work order:
- Place the machine on level ground.
- Secure one of the front wheels with a “shoe” or brick.
- Open the luggage compartment lid, move the trim on one of the rear “glasses” at the place where the pillar is upper mounted.
- Using a wrench set to “22”, unscrew the nut securing the strut, holding the shock absorber rod with a wrench set to “6”.
- Using a jack, lift the car body from the side of the wheel where you plan to replace the strut.
- Having climbed under the car, unscrew the nut securing the lower part of the rack to the rear beam bracket with a “19” wrench.
- If the nut does not budge (soured), treat the threads around it with WD-40, let it penetrate the joint for about 20 minutes, then try again.
- When the nut is unscrewed, remove the bolt and remove the lower part of the shock absorber from the bracket. To simplify this process, you can use a small pry bar.
- Remove the shock absorber.
- Go to the trunk and remove the support washer and strut pad from where the upper part of the shock absorber is mounted.
- Remove the lower spring, cushion, bushing, boot and compression buffer from the shock absorber. If the boot, buffer, or shock absorber pads show signs of damage, they also need to be replaced.
- Carefully inspect the shock absorber spring. There should be no cracks, chips or other signs of destruction on it. If they are present, the spring must be replaced.
- Reassemble the new rack in reverse order.
- Install the new rack by first inserting its rod into the upper mount, and then securing the lower part into the bracket with a bolt.
- It is recommended to finally tighten all connections after the car body has been lowered, i.e. after you remove the jack.
- Upon completion of the work, rock the car body several times on the side where the rack was installed.
- After 100-150 km, tighten the shock absorber mounting nuts.
Assembling a new shock absorber
1. Set the rack rod to the upper position.
2. Place the boot and compression buffer on the new front strut.
3. Install the spring, spring cup and damper
Pay attention to the lower shank, it should fall into place
4. Install the small washer from the new Acomi kit, the large washer and the support with the bearing installed.
5. Install the rod mounting nut.
6. The nut is tightened using a hexagon to “6”, hold the rod with it. It is better to do the final tightening after installing the front struts in place.
7. Remove the spring clamps.
8. Turn the support so that the indicator on it looks forward and slightly inside the car body.
9. After this, install the rack assembly in its place of further service.
10. Tighten the support bolts from above, then put the stand on the steering knuckle, install the eccentric bolt with a washer in the upper hole, and a simple bolt down and tighten.
11. Install the steering tip pin into the rod on the rack and tighten the nut.
12. After this, pin the finger, spreading the antennae.
13. Thread the brake hoses into the holder bracket on the rack.
Done, now we can say that the front strut has been replaced. Install the wheel and lower the jack. When the car is on wheels, go through all the fastenings and tighten them. It would be a good idea to rock the body on the side where the strut was changed for additional pumping.
Now all that remains is to repeat the same thing on the left side. The second time things will be “more fun”, since you will already know what is what and why...
After replacing the front struts, be sure to do a wheel alignment; don’t rush on the way to the service station - the wheels are not adjusted and the car will “drive” a little on the road, so be vigilant and careful.
The result of the work done:
After several weeks of using the new racks, I can note the following:
- The knocking has disappeared;
- The suspension has become more elastic;
- The laxity and swaying have disappeared;
- The car began to take turns better, the roll decreased;
- It has become more comfortable to drive off-road;
- The steering wheel began to return noticeably faster after a turn - the result of increased castor;
- Improved handling at high speeds;
- Speed bumps are less painful to overcome.
In short, I am very pleased, the impressions are only positive, if I had known that such a result would be achieved, I would have changed the front struts even before they failed, immediately after the purchase.
Which struts to take: oil or gas?
Since each person’s concept of good is different, each motorist has his own criteria for “good racks.” For example, some install only high-tech gas shock absorbers on a vehicle. Although they cost a little more than oil ones, they also have a longer service life. Some people prefer oil shock absorbers, which are softer. But these elements have one drawback - at low temperatures the racks become rigid. We have already talked in more detail about replacing struts on Lada Kalina here.
SAAZ oil struts were installed on Kalina from the factory. Some people immediately after purchasing a car purchase new racks of imported or domestic production. This could be, for example, ss-20 or Kayaba.
Shock absorber manufacturers
Today, many manufacturers make racks for cars that can also be installed on Kalina
Among the variety of racks and their manufacturers, attention should be paid to the following:
- SAAZ. Installed on the car at the factory. They are not reliable and have a long service life.
- Kayaba. Manufacturer – Japan. The racks have good performance. When choosing shock absorbers of this brand, you need to be careful, since most of them are currently produced in China, and therefore they are of worse quality compared to the original Japanese ones.
- ASOMI. Domestic manufacturer of racks for VAZ and GAZ cars. The manufacturer makes good racks, but the disadvantage of the product is that the warranty on it is one year, and then only on condition that the racks were installed at a specialized service station.
- SS. Domestic manufacturer. Makes spare parts for the chassis of domestic cars. Most Lada Kalina owners prefer to install shock absorbers from this particular manufacturer on their cars. With such struts, the car will be moderately rigid, and it will also hold the road well when maneuvering. Warranty – 2 years. You can install the racks yourself. In this case, the warranty also applies to them.
Currently, the following types of racks are sold for Kalina:
- Highway 1118.
- Standard 1118.
- Standard 1119.
- Sports 1119.
- Optima 1119.
Standard racks from these categories are practically no different from the factory ones. Highway and Sport are narrowly targeted, and therefore few people choose to install them on their car. The last option is the most common and popular. They are installed on cars that are used under normal conditions. They performed well when driving both on bad roads and on the highway. The driver will also find a warranty card in the package along with the racks.
It is recommended to buy all parts and spare parts for the chassis only from trusted sellers, and preferably from an official dealer of the manufacturer.
Disassembly of the structure
1. Take the spring tie prepared earlier and install it on the second coil of the spring from above and below as shown in the photo. The second screed is installed on the other side symmetrically to the first. The process of bringing the spring together is carried out as follows - tighten the bolts of the first tie until you feel that the second one begins to move freely on the coils, then tighten it until you remove the load from the previous one. That is, in turn on each side.
2. Take the “22” socket and hexagon and unscrew the fastening nut that secures the strut rod to the support.
3. Remove the limiter (bump stop), support bearing, support, and compression limiter.
4. Replace the old rebound limiter washers with those that came with the Acomi struts
Please note - the bottom one is smaller than the top one
5. Next, remove the spring cup with rubber damper, compression buffer, spring and boot.
Now it is necessary to carry out a visual inspection of the dismantled rack.
The first test of swinging the rod to the top point demonstrated the cause of the malfunction. The resistance in the upper part of the working area quickly disappeared, after which the piston hit the upper part of the cylinder. As you understand, this was the source of the dull knocks.
Basic faults
10 best manufacturers of gas-oil struts
Failures of a part of the Priora suspension can be judged by the following signs:
- Oil leaks under the wheels. The shock absorber consists of a cylinder, valves, a piston with a rod - all parts actively move, so they need lubrication. If there are leaks, it means the device has become depressurized and will work less efficiently.
- Mechanical damage. If possible, visually inspect the parts - if there is any deformation or rust, it means they have “worked their best.”
- Rock the front (and then the back) of the car in different directions - away from you, to the left, to the right. When you release the car, one or two vibrations are considered normal - it is “damped” by a normal shock absorber. If the car stops immediately, the part is jammed; if it continues to wobble, replace it.
- When traveling, the car begins to wobble, the braking distance increases, and when turning, the car wobbles greatly. Also, when driving over speed bumps, or ordinary potholes, broken shock absorbers do not dampen vibrations at all, that is, the car sways as if on waves, and a knock will be heard.
Service station employees check the suspension with a vibration stand or a special stand. The check goes down to small units - they can even tell you how long it will take to approximately replace them.
Now the roof soundproofing is prior.
It needs to be glued and insulated so that it is not so cold in winter and not so hot in summer. I bought 4 sheets of STP for the ceiling. In this case, about 3.5 sheets are needed for sizing. I also bought transparent liquid glue in a liter container and carpet - two linear meters.
So. We remove the headliner by first removing the sides of the windshield, the sides of the rear triangular windows, the trim of the center pillars and the three clips above the rear window. We also unscrew the mirror and the central lamp. And that’s it, the ceiling is in your hands, but it’s a little difficult to pull it out given its size. I lowered the front seats back and did it through the front passenger door. I didn’t glue STP onto the ceiling in whole pieces, but cut it into squares, which is why I do this, I wrote earlier and more than once.
I sealed the ceiling with one layer of STP 2mm. Next is one layer of 4mm splen. It took about an hour to do everything.
The next step was to lay the ceiling upholstery on the floor, roll out the carpet over it, and look at where to cut how much needed to be cut. then applying glue in strips from the center and first to one edge, then to the other, slowly and carefully applied the carpet.
How to disassemble the structure itself
When the structure is removed from the machine, it remains a single piece that still needs to be worked on. It should be done like this:
- We take the clamp for the springs that we prepared earlier, fasten it to the second turn from above and below, so as not to allow the possibility of changing the position without the owner’s desire.
- We bring the spring together, tightening the bolts of clamp number 1 until it becomes obvious that number two has begun to move freely on the coils. After this, we tighten until the load is removed from the previous one. In other words, we approach each side one by one.
- Next, you will need a 22-diameter ring wrench and a hexagon. With their help, we unscrew the holder nut that secures the strut rod to the support.
- It's time to start removing the bump stop, the support bearing, the support itself, plus the compression limiter.
- We take the rebound limiter washers and replace them with new parts, sometimes they come complete with the struts.
- Now we remove the cup with the damper from the spring, we also get rid of the compression buffer, the spring itself and the boot.
A stand is in your hands - a structure that requires visual diagnostics. We repeat the same on the second side of the machine. To install a new part, you will need to do the same, only in the reverse order. New components will be needed.
How to understand that the replacement goal has been achieved
As a result, everyone wants to get the perfect sound and softness of the ride, however, replacing the front struts with your own hands usually has specific features and inaccuracies. Although the main goal can be considered achieved if:
- Knocks, periodic or constant, are no longer observed while driving.
- It became noticeable that the suspension was more elastic than it was before.
- The car began to give the feeling of a more stable car, there is no former swaying.
- The roll has decreased, the car is easier to control when turning and turns more smoothly.
- There is greater comfort off-road and at high speed.
- The speed of steering return increased due to the rise in castor level.
- The car overcomes obstacles on the road surface more smoothly.
If most of the changes described above did not affect the repaired car, there is a high probability that mistakes were made. Or there are reasons that have not yet been identified. It is advisable to consult with a specialist for other problems.
FakeHeader
Comments 9
hi. what kind of springs did you use? not from the hatch by any chance. Judging by the photos, the springs you have installed have 12 turns. They gave me the original (not sawn) springs from the new priors, but there are 10 turns (yellow mark). I compared them with the original VAZ 2110 - there are 11 turns and they are longer than the Prior ones. Now I'm itching :).
I don’t even remember what they are from. The store just said stock springs for the Priora. And on the market there were ones with variable pitch pitch, but everything was in the red, and I don’t want an understatement.
hi. what kind of springs did you use? not from the hatch by any chance. Judging by the photos, the springs you have installed have 12 turns. They gave me the original (not sawn) springs from the new priors, but there are 10 turns (yellow mark). I compared them with the original VAZ 2110 - there are 11 turns and they are longer than the Prior ones. Now I'm itching :).
I also took springs. I took the Priora catalog and ordered the part from Lada using the number; there were only one of them. 12 turns arrived. with black mark. The label emphasized hardness class B. and who knows what that means.
Symptoms: the front suspension breaks, the front of the car is skewed, knocks, squeaks and rattles when the car hits an uneven surface.
Possible cause: the spring of the front suspension shock absorber strut is damaged or the strut itself is faulty.
Tools: socket set, wrench set, flat-head screwdriver, vice, zip ties, hex wrench.
1. Install wheel chocks under the rear wheels.
How to change the front struts of a Lada Priora - detailed instructions
1. First of all, remove the mounting bolts on the wheel, then install the jack on the side from which you are going to make repairs.
2. Next, unscrew the bolts completely and remove the wheel.
3. It is necessary to disconnect the brake hoses, and then remove them from the holder located on the rack.
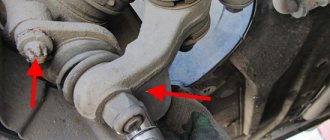
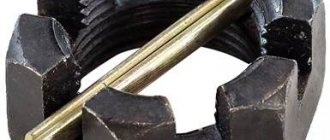
4. Take pliers and carefully unscrew the locking cotter pin on the steering end pin, then you need to take it out and unscrew the nut with a “17” key.
5. Now it’s the puller’s turn, install it on the steering end as shown in the photo and press it out of the socket.
6. Unfold the support and start unscrewing the fastening nuts on the steering knuckle. If you followed my recommendations and treated all connections with WD-40, there should be no problems with unscrewing.
7. If necessary, use a hammer to knock out the bolts, being careful not to damage the threads!
8. The top eccentric bolt is used to adjust the camber and has a washer on it that often likes to stick to the strut. Do not throw away the bolt itself; it will be reinstalled during the replacement process. There is no point in remembering the position of the eccentric along the axis, since in any case you will have to go to the wheel alignment.
9. Let's move on. Using a wrench set to “13”, unscrew the fastening nuts that secure the front strut to the body; they are located under the hood.
10. We take out the front strut from the wheel well assembly.
6 pin cn2 connector
1. Purple wire: pulse output for alarm (12V, 10A)
This wire provides the flashing alarm from the processor unit. Connect the purple wire to the left hazard light circuit where 12V appears when the left turn signal is turned on.
2. Purple wire: pulse output for alarm (12V, 10A)
This wire provides the flashing alarm from the processor unit. Connect the purple wire to the right hazard light circuit, where 12V appears when the right turn signal is turned on.
3. Yellow wire: positive output (12V, 15A) or negative output (-250mA) for unlocking the central locking
This output can be designed to unlock electric door locks with a negative pulse or a positive pulse (see diagram 3). The duration of the signal on this wire is programmable (programmable function 1-3).
The central lock unlocking signal appears on the yellow wire:
- When disarming the STSTS from the security mode
- After stopping the engine (programmable function 1-5)
- In VALET mode, when you press button I of the key fob
- When the car owner approaches less than 15-35 m, if the “Hands-free” mode is used
This is a transistor low-current or high-current relay output. It can be used to control an optionally installed relay or for direct connection to electric door lock actuators.
Connect the yellow wire to pin 85 of the relay or to the corresponding unlocking wire of the central locking unit. Connect the remaining relay contacts according to the diagrams below (Scheme 4-13).
4. Green wire: positive output (12V, 15A) or negative output (-250mA) for locking the central locking
This output can be intended for locking electric door locks with a negative pulse or a positive pulse (see diagram 3). The duration of the signal on this wire is programmable (programmable function 1-3).
New Lada: Pumping ABS brakes
The central locking signal appears on the yellow wire:
- When setting the system to security mode
- After 30 sec. after engine start (programmable function 1-5)
- In VALET mode, when you press button I of the key fob
- When the car owner is more than 15-35 m away, if the “Hands-free” mode is used
This is a transistor low-current or high-current relay output. It can be used to control an optionally installed relay or for direct connection to electric door lock actuators.
Connect the green wire to pin 85 of the relay or to the corresponding unlocking wire of the central locking unit. Connect the remaining relay contacts in accordance with the diagrams below (diagrams 4 - 13).
5. White wire: (12V, 2A) siren output
This wire is intended for connecting a siren. In alarm mode, a constant voltage of 12V, 2A appears on it for 30 seconds.
Pull this wire through the rubber bushing into the engine compartment to the location where the siren is installed. Connecting to a non-autonomous siren:
- Connect the white wire to the siren power wire
- Securely connect the black wire of the siren to GROUNDS.
Connecting to an autonomous siren:
- Connect the white wire to the positive trigger wire of the siren
- Connect the negative unused siren trigger to the siren power wire.
Power for an autonomous siren can be taken from the red power wire in connector CN1 after the fuse
Securely connect the black wire of the siren to GROUNDS.
6. Black wire: pulse output for controlling the trunk lock (12V, 10A)
The black wire supplies 12V voltage to unlock the power trunk lock when pressed and held for 2 seconds. buttons III of the key fob.
This output works in any state of the system (in armed mode and in disarmed mode). In security mode, unlocking the trunk lock disarms the system and unlocks the car doors.
This is a relay power output (12V, 10A). It can be used for direct connection to the trunk lock drive (diagram 14).
If your car is equipped with a trunk release button, then connect this wire to the button contact, which produces 12V voltage when the trunk is unlocked.
practical guide
It is convenient to carry out the work in an inspection ditch. The work is shown on a car with a hatchback body. On a station wagon, the work is performed in the same way. On a sedan car, access to the upper shock absorber mount is through the luggage compartment.
Replace shock absorbers and springs in pairs.
To complete the work you will need:
— inspection ditch or overpass;
— a device for disassembling suspension struts.
We carry out the work with an assistant.
Removal
1. Prepare the car for work and hang the rear of the car on stands.
If there is no inspection ditch or overpass, remove the rear wheel of the car from the side of the shock absorber being replaced.
2. Remove the luggage compartment shelf.
3. Fold down the back seat.
4. In the luggage compartment, use a Phillips screwdriver to remove the four screws securing the upholstery.
5. Use a screwdriver to pry off the trim of the seat back lock.
6. Using a 19 mm wrench, unscrew the lock and remove it.
7. Using a Phillips screwdriver, unscrew the screw securing the luggage compartment lining.
