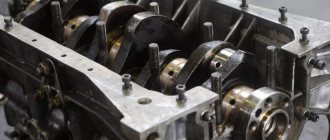
Wear of liners leads to a decrease in the efficiency of the engine lubrication system, which, in turn, can lead to significant wear of individual parts of the power unit, as well as a reduction in its service life. Therefore, if even slight wear of the connecting rod and/or main bearings is detected, corrective measures must be taken.
Typically, wear and tear is caused by natural aging. However, in some cases, dirt or debris gets on their working surface, corrosion occurs, insufficient lubrication, axle misalignment and other reasons. As a rule, the liners cannot be restored, so they must be replaced with new ones. The procedure is quite complicated, so doing it yourself makes sense only if the car owner has the appropriate experience in performing the work and the necessary tools.
Wear of engine bearing shells and replacement.
Wear of the liners leads to a decrease in oil pressure in the engine lubrication system. We can notice this when reading the engine oil pressure gauge. When the connecting rod or main bearings wear out, they must be replaced with new ones, as this can lead to significant wear of the shaft elbows.
If the crankshaft is damaged due to wear, it must be removed and sent for grinding on a machine. The most common causes of liner wear are metal shavings, dirt, debris, normal aging of the liner, poor oil lubrication in the system, etc.
The inserts cannot be restored; they are simply replaced with new ones. You can replace the liners yourself if you have experience in engine repair and the necessary tools for this.
Liners are plain bearings, there are two types of them, main and connecting rod. They withstand heavy loads when the engine is running. The inserts consist of aluminum and tin alloys.
Conclusion
Crankshaft bearings are simple and, at first glance, incredibly durable elements of modern engines. Experience has shown that you only encounter the need to replace liners once or twice during the entire period of using a car. But don’t think that this is the part that shouldn’t break. In contrast, bearings are sometimes called crankshaft protectors because they are one of the first to absorb the impact. If you are faced with the need to replace the earbuds, do not hesitate. Contact an engine specialist and trust him to do everything, or try to do some of the work yourself.
The insert consists
The steel base gives the liner rigidity and a tight fit in the bed; it keeps its shape at high temperatures.
The intermediate layer consists of lead bronze, is intended for the substrate of the anti-friction coating, and also serves to prevent scuffing of the working coating of the liner.
The nickel sublayer is placed on top of the intermediate layer. Its thickness is 1-2 microns. The nickel underlayer has anti-corrosion functions so that the liner does not rust.
The antifriction coating is the working surface of the liner where friction occurs between the surfaces of the shaft elbows and liners. This coating has a low coefficient of friction. It is made from lead alloy.
Purpose
The crankshaft is constantly exposed to high physical and thermal loads during operation, connecting rod bearings hold it on the axis, while the functioning of the crank section is supported only by the elements indicated above. The mechanism of action of the journals is represented by internal races; as a result, the crankshaft liners are external. Lubricant is supplied to them through a special oil pipeline network in which the liquid moves under high pressure. This creates the thinnest film that is so necessary for the crankshaft.
Determination of bearing wear
To determine the wear of thin-walled bearing shells, use a brass plate to check the gap between the bearing shells and the crankshaft journals. Remove the cover from the bearing being tested and clean it of grease, and place an oiled brass plate on the bearing.
Then the cover is put in place and bolted until tight. The bolts of the remaining covers must be loosened and the crankshaft is turned using the starting handle. With a gap of normal size, the shaft turns with difficulty or does not turn at all.
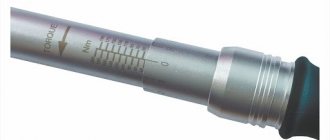
If the shaft rotates easily, then the liners are suitable. replacement. After replacing the liners, the bolts are tightened with a torque wrench. The permissible gap between the shaft journal and the liner is ensured by selecting the liner according to the size of the journal. It is impossible to reduce the gap by sawing off the bearing caps or placing gaskets between the liners and sockets.
It is also impossible to increase the gaps by scraping the liners; this may expose the liner steel strip and cause damage to the crankshaft journal. The taper and ovality of the crankshaft journals, as well as the presence of scratches and burrs on them above the permissible value, are eliminated by grinding them to repair sizes and installing liners of the corresponding repair sizes.
Install everything you removed
Everything that was removed must be put back in place. First the pushers and lifters. Then the timing mechanism, timing chain and cover. Then the water pump and additional equipment. After that - the radiator. Find the sequence and tightening torque of the intake manifold bolts in the engine service manual. Install all heater and radiator hoses, as well as vacuum and electrical line connections. Lastly, connect the drive cable to the throttle valve and install the air intake pipe.
If you have the appropriate tools and engine service instructions, the engine bearing replacement procedure can be completed in half a day.
Signs of bearing wear
Entry of foreign bodies. Foreign matter can get into the engine most of the time we repair it, and we don't see when something accidentally gets into the crankcase. This usually gets dirt, sand, and debris. Dirt will quickly spread throughout the engine and cause great damage to it. Sand particles will scratch in all rubbing areas of the engine, and the engine can quickly fail.
Elimination methods.
If dirt gets on the surface of the liner, scratches form; if it gets scratched, it is necessary to drain the oil and change it. Check oil and air filters for integrity. Flush the engine with flushing fluid to remove all dirt particles.
Corrosive abrasion
There is corrosion wear on the back surface of the liner. In this case, there may be several reasons.
1 When repairing the engine, the mounting bolts were loosely tightened
2 The engine often ran at high speeds
3 Foreign bodies are on the bearing surface of the liners
4 The wrong size earbuds are installed
corrosive abrasion
Methods for eliminating the causes of problems are also varied
1 Tighten the bolts with a manometric wrench according to the required force.
2 Try to take care of the engine and not squeeze the last juices out of it at high speeds.
3 Always check the cleanliness of the liner assembly.
4 Use the appropriate size earbuds.
Metal fatigue
Signs. If the metal is fatigued, the detachment of metal particles in the middle of the liner, where the maximum load occurs, will be clearly visible on the liner. With long-term use the same thing will happen.
There are several reasons.
1 Uneven load on the bearings when the engine is running.
2 The inserts do not meet the manufacturer's requirements (defective).
3 Engine troubles and uneven operation.
4 Engine vibration.
Elimination method
1 Check the visual condition of the liners.
3 Eliminate the causes of uneven engine operation.
4 Measure the compression in the engine cylinders.
WATCH THE VIDEO
Source
Crankshaft loose
The crankshaft driller may make a mistake and loosen the crankshaft, then the engine will not have good oil pressure, and also because of this the engine may knock quickly.
Photo. This way you can turn the crankshaft on a VAZ engine with a key.
You can check for weakness in the crankshaft like this. Tighten the cushion and spin the crankshaft; if it spins very easily, it doesn’t hurt to check whether the crankshaft is loose or not.
Usually, after a good boring, the crankshaft does not clamp and turns easily. Remove the cushion, take out the liner and place chocolate foil under the liner, tighten the liner, if the crankshaft gets tight or starts to turn noticeably more difficult, it means that this crankshaft journal is bored perfectly, pull out the foil from under the liner and check the next pillow.
Photo. It is shown how to place foil under the liner, and be sure to cut off the excess foil with the tip of a knife; it is shown here that the foil is cut off on one side and not on the other.
If, after placing foil under the liner, the crankshaft does not turn more difficult, it means that this crankshaft journal is weakened, place more foil under this cushion between the liner until the crankshaft begins to turn more difficult. After all the pillows have been checked and found to be loose, and if more than one foil had to be placed under the liner, then you will have to completely remove the crankshaft and under those journals that had to be placed more than one foil, you will need to divide the foil strips into two and place half of the foil under the liner in the block. Install the crankshaft, tighten it, that's it, you have perfectly adjusted the liners, and the crankshaft will work perfectly in the engine.
Be sure to put a nail in the foil under the liner and make a hole through the holes in the liner for the oil to pass through.
Quality Motors › Blog › Rotating the liners
Reasons for rotating bearings
The engine is the main unit of a modern car. It is he who, due to the constant combustion of the fuel-air mixture, produces energy that allows the vehicle to move. Part of it is spent on powering attachments and the on-board network, as well as charging the battery. Power plants may differ in the type of fuel, combustion chamber volume, number of cylinders, and the presence or absence of supercharging (turbine or compressor). However, the basic principle of operation remains unchanged - fuel and air mass enter the cylinder in the required proportions. A fire occurs (due to a spark or high temperature), resulting in the release of energy. It forces the piston to move downwards (from top dead center to bottom).
The pistons are connected to connecting rods, which are mounted on the crankshaft. Thanks to their movement, this element rotates, converting energy into torque. Of course, modern engines contain a large number of parts, without which their operation would simply be impossible. However, it is the crank mechanism that is the basis of any internal combustion engine. It is also worth noting that these elements are the most loaded. They are subject to both thermal influences (for example, the average operating temperature of a gasoline power unit fluctuates around 100 degrees) and mechanical influences - when parts interact, friction occurs, which cannot but negatively affect the condition of the system components.
To ensure free movement of the crankshaft, special plain bearings are used, which are called liners. There are two types of such elements - connecting rod and main. The first are installed between the shaft journals and connecting rods, the second - in those places where the shaft comes into contact with the internal combustion engine block. These parts are also supplied with lubricant, which avoids increased friction between the components and, as a result, avoids their accelerated wear. However, of course, it is impossible to say that the impact has been completely neutralized. And, even despite a very serious margin of safety, such parts have a limited resource.
However, there are factors that can seriously shorten the life cycle of these parts. First of all, of course, it is worth noting the incorrect choice of lubricant. Oil that is too thick or too thin cannot create the necessary film that can protect elements from increased friction. Note that we are not talking about specific characteristics of the composition, but about the fact that each internal combustion engine requires a certain type of lubricant. It is also impossible not to mention the low oil level - with constant starvation, wear of the moving elements occurs much faster.
It is worth mentioning mistakes when performing engine overhauls. For example, the earbuds may simply not be tightened correctly. In this regard, under serious load they are torn from their seats. In general, this is precisely the situation that is called among car enthusiasts the rotation of the liners. A clear sign of such a problem may be a knocking sound when the internal combustion engine is running, as well as a refusal to start. Of course, if you detect any extraneous noise, you should immediately stop using the car, as it can significantly worsen the situation. In this case, the correct solution would be to transport the car to the repair site on a tow truck.
Symptoms of rotating bearings
Unfortunately, turning the liners is a breakdown that occurs instantly. That is, any manifestations of defects are usually not observed until the parts fail. Therefore, it will not be possible to prepare (even morally) for such an incident. Perhaps the exception is a situation in which you own a car with very high mileage. In this case, the elements may break due to reaching maximum output. You need to understand that not a single unit, even the most reliable, can work forever.
When turning the liners, a strong knocking sound appears, which accompanies the operation of the motor. It comes from the bottom of the internal combustion engine (block). However, the crankshaft often jams or the connecting rod breaks. This situation is, of course, much more serious. The engine will not start in this position. However, there is no need to rush to purchase spare parts - first you need to conduct a thorough diagnosis. Note that knocking during operation of the power plant may have other reasons. For example, the same symptom is characteristic of a stretched timing chain. However, in this case it will come from the top of the internal combustion engine.
Accurate diagnosis requires partial troubleshooting of the internal combustion engine. Unfortunately, it is not possible to see the condition of the liners otherwise. Of course, this is not an easy operation in itself, so experienced craftsmen first rule out all other possible causes of such knocking noises. Competent specialists also act if they suspect a jammed crankshaft, because failure to start the engine can also be caused by other defects.
Consequences of rotating bearings for the engine
The actions of the driver play an important role in the event of serious breakdowns. Firstly, you need to monitor the behavior of your car and be attentive to the occurrence of emergency situations. Secondly, if the presence of errors in the operation of the system is obvious, the operation of the vehicle must be stopped. If this is not done, the consequences can be much more serious, since in this case the load on both the damaged part and those associated with it increases many times over.
In any case, the consequences of such a breakdown will be very serious, since we are talking about the main parts of the engine. However, it should be noted that failure of the connecting rod bearings is less of a problem than the appearance of main defects. In this case, it is possible to replace the element with a new one and continue operation. However, it is worth mentioning that with this solution, the service life of the connecting rod-liner pair will be significantly lower than when replacing both elements. But when turning the insert, the lock may also be damaged. In this case, unfortunately, you cannot do without boring the crankshaft and installing repair liners.
However, such an operation requires dismantling and troubleshooting the internal combustion engine. Naturally, this is a very complex and expensive process. Often, owners of older cars prefer not to carry out major engine repairs, but purchase a used unit assembled. Of course, it is impossible to determine its exact residual resource, but when choosing reliable suppliers there is a high probability of finding a worthy copy.
Self-repair. Procedure for replacing connecting rod bearings
If you have enough experience and time, as well as a professional tool at hand, it makes sense to take on such work yourself. Under other conditions, such attempts will only lead to aggravation of the situation. It is also, of course, necessary to purchase a set of spare parts and consumables. Note that you should prefer the original elements, since if you save money, this complex undertaking will have to be repeated soon enough. Consequently, all the work done will be useless.
Let's consider the main stages:
• Draining the lubricant • Removing the protection • Partial or complete dismantling of the subframe • Disconnecting the engine cushions • Dismantling the oil pan • Installing the connecting rod to bottom dead center • Dismantling the liner • Cleaning the surfaces • Installing new elements • Assembly • Refilling the lubricant
!Important! Before installing new bearings, they must be generously lubricated with oil. Otherwise, damage may occur even when the internal combustion engine is started for the first time.
When performing operations, serious difficulties are encountered:
• Dismantling of chassis elements. On some cars, this process can be completely separated into a separate event due to its scale and complexity. • If the car has serious mileage, bolts and other fasteners may stick. • After dismantling the liner, it is necessary to carefully inspect the condition of the crankshaft. If there is serious damage to the surface, sanding will not be possible.
!Important! Grinding the crankshaft involves removing it. And this operation will require dismantling and troubleshooting the internal combustion engine.
There are also some subtleties of such work:
• Inserts are replaced as a set. Firstly, they all have approximately the same level of wear. Secondly, the work is too labor-intensive, so doing it again will be much more expensive. • After completing the operations, it is worth replacing the lubricant and filter element. There is a high probability that wear products managed to get into the composition. • It is also necessary to install new gaskets (eg pan seal) as these items are disposable.
Cost of replacing connecting rod bearings
If serious internal combustion engine repairs are necessary, there are two main ways - try to save money by purchasing cheap spare parts and entrusting the work to garage workshops, or perform the operation in accordance with technical requirements. Note that the first option has a right to exist, for example, if you are going to sell the car immediately after the repair. Otherwise, it is recommended to involve competent mechanics. Please note that contacting official dealers will be a waste of time. Most often, they simply refuse to perform such operations, insisting on replacing the unit.
Naturally, this does not mean that even competent repairs give only a short-term effect. The dealer makes good money on other services, so he often does not want to burden his specialists with such complex tasks. Therefore, the optimal solution would be to entrust this work to experienced professionals from a large technical center. For example, you can turn to the specialists of the specialized car service center Quality Motors for help. Here such an operation costs from 8,000 rubles, and after its completion a long-term guarantee is provided, which will not give you any reason to doubt the quality of the work performed.
Source
Engine knocking when cold
A knock when starting a cold engine, which disappears after it warms up, is associated with the natural wear of its parts, which after warming up take on standard sizes, clearances, etc. A knock in a cold engine differs from a knock in a hot engine in that it goes away after the engine warms up.
Any spare parts that may be required when repairing an engine, including those from leading manufacturers MAHLE and ADDAX-Q, can be found in IXORA stores. Managers will always help you when choosing a product. * Please check the applicability of parts specifically for your car with our managers by phone (calls within Russia are free).
| Manufacturer | Detail number* | Part name |
| ADDAXQ | CZB003 | Inlet valve |
| ADDAXQ | CZC004E | Exhaust valve |
| MAHLE | 029FX31174000 | Valve guide |
| ADDAXQ | CJC045S | Connecting rod bearing STD |
| MAHLE | 03319N0 | Piston rings |
| MAHLE | 02202N0 | Piston rings |
| ADDAXQ | CJC044A | Main liner 0.25 |
| MAHLE | 08316N0 | Piston ring set |
| MAHLE | 029FX31173000 | Valve guide |
| MAHLE | 0116902 | Piston |
| MAHLE | 0122100 | Piston with pin and rings |
| ADDAXQ | CJA026B | Connecting rod bearings |
| ADDAXQ | CJA034S | Connecting rod bearing STD |
| MAHLE | 001AS18750000 | Axial displacement semi-ring |
| MAHLE | 00249N0 | Piston rings |
| MAHLE | 0045900 | Engine piston |
| MAHLE | 01195N1 | Piston ring set |
| MAHLE | 011VE30337000 | Inlet valve |
| MAHLE | 01317N0 | Piston rings |
| MAHLE | 01337N2 | Piston rings |
Wear of liners
Calculator for converting kilowatts to horsepower (kW to hp)
Converting horsepower to kilowatts (hp to kW). Conversion using an online calculator
Wear of the liners leads to a decrease in the efficiency of the engine lubrication system, which, in turn, can lead to significant wear of individual parts of the power unit, as well as a reduction in its service life. Therefore, if even slight wear of the connecting rod and/or main bearings is detected, corrective measures must be taken.
Typically, wear and tear is caused by natural aging. However, in some cases, dirt or debris gets on their working surface, corrosion occurs, insufficient lubrication, axle misalignment and other reasons. As a rule, the liners cannot be restored, so they must be replaced with new ones. This procedure is quite complex, so doing it yourself makes sense only if the car owner has the appropriate experience in performing the work and the necessary tools.
Boring
All connecting rods are removed after sequentially checking the clearances, and the crankshaft is also dismantled and ground. Boring is possible only on special equipment - a centripetal, which is rarely found among ordinary car owners. Therefore, here you will need to contact specialists. After grinding, the crankshaft liners of the appropriate size are selected. Here you cannot do without a tool such as a micrometer and trying on selected elements. Next, all crankshaft parts are installed in the reverse order and the caps on the main bearings are screwed on.
It is worth noting some features of the reverse installation of connecting rods and bearings. The latter are pre-lubricated with oil, and the lids must also be screwed on. Compared to the preparatory work carried out, installation takes much less time. At the same time, we should not forget about the operation of the crankshaft, which is characterized by high loads, as well as its high cost. Everything possible must be done to increase the period of operation. The main role here is played by grinding carried out at the appropriate time. This procedure ensures the smoothness of the necks and prepares them for further use.
Description of how the earbuds work
Before we move on to describing the signs, causes and methods for eliminating wear of liners, it is necessary to understand their purpose, types and principle of operation.
There are two types of crankshaft liners - main and connecting rod . In essence, the liners are plain bearings, and their task is to withstand significant loads that occur between the connecting rod and the crankshaft journal. In modern machines (in most cases), the liners are made of ductile aluminum alloys (usually aluminum and tin). They are coated on top with an anti-friction compound.
The main bearings are located between the crankshaft and the place where the crankshaft passes directly through the engine body, in seats called “beds”. The main bearings have holes in their design designed for better oil drainage. That is, the main bearings are sliding bearings for the main journals of the crankshaft. But in fact, the crankshaft rests and rotates on the main bearings.
The connecting rod bearings are located at the bottom of the connecting rod head. And the connecting rods, in turn, are secured using connecting rod bearings on the connecting rod journals of the crankshaft. The function of the connecting rod bearings is that they act as plain bearings for the lower ends of the connecting rods and the crankpins of the crankshaft.
Wear of the liners implies a significant increase in their gaps (the greater the increase, the worse). As a result, the pressure in the engine lubrication system drops. Usually in such cases, a light (oil can) lights up on the dashboard, symbolizing that the oil pressure has dropped significantly. This is especially common on a hot engine, when the oil viscosity is minimal. In such cases, drivers say that “the bearings do not hold oil.” Wear of the liners is a very dangerous problem that can lead to great wear and tear on other engine parts and the engine as a whole. And this can lead to a significant reduction in their resource and damage.
The sound from the knocking of the main liners is usually dull, with a metallic tint. It is easy to detect when the engine is idling, and after that the speed increases sharply (sharply press the gas pedal). At the same time, a large load is placed on them and a knock appears. The same should be done with the connecting rod bearings.
It is not difficult to find out which cylinder the liners are knocking on. To do this, you need to turn off (unscrew) the spark plugs on a gasoline engine or the fuel injectors on a diesel engine one by one. If the mentioned knocking noise disappears when a spark plug is unscrewed, it means that there is a problem in this cylinder.
More details about the part
Liners are essentially sliding bearings, which are needed by the connecting rods that rotate the crankshaft, and individual parts of the shaft itself. Rotation is ensured by a mixture of air and fuel burning in the engine cylinders. Of course, the engine operates under heavy loads and strives to spin the crankshaft as much as possible. The problem of possible friction of parts is especially acute here, and the emergence of the so-called. dry
(oil-free)
friction
can damage the engine very quickly. The solution is simple: ensure that a thin oil film is always present. It turns out that the crankshaft liners are only a kind of protection that maintains an oil film in friction areas. Ideally, the liners should fail for adequate reasons. Let us immediately note that the crankshaft liners are as follows:
- Indigenous
. Such liners are placed between the shaft itself and the places where it passes through the engine housing; - Connecting rods
. They are installed between the connecting rods and journals of a car crankshaft.
As mentioned above, crankshaft bearings do not look like classic roller or ball bearings - they look like ordinary half rings. The fact is that ordinary bearings will not withstand the loads generated by the car’s power unit. Only some low-power motors have rolling bearings installed, while the most common are plain bearings. To summarize, the purpose of the crankshaft bearings is as follows:
- Ensure normal transmission of forces and moments that arise during operation of the power unit;
- Minimization of friction forces that arise at the contact points of the crankshaft, cylinder block supports, and connecting rods;
- Centering of parts, correct positioning;
- Oil distribution.
It is worth noting here that the geometry of the liners changes over time. not always as a replacement
The original inserts installed at the automaker's factory are suitable.
It is recommended to install liners of repair sizes
, which are thicker. If non-repair bearings are installed on an old engine, the gap between the parts will be too large, which can result in knocking noises and intense wear of the crankshaft.
Signs and causes of wear
Now let's move directly to the types of damage that contribute to wear of the liners and their failure.
Entry of foreign bodies
Signs . A sign of foreign bodies or dirt ingress is a situation where local damage to the working surface on the liner occurs. In some cases, there may also be some (less) damage on the back of the part. Typically, debris or dirt on the surface of the liner is the root cause of further wear. Therefore, it is necessary to identify this malfunction as early as possible. Otherwise, the wear will spread further and a significant surface area will be damaged, up to 100%.
Causes . As stated above, this situation is caused by dirt or debris getting between the liner and its support. This also causes the formation of places with high oil pressure, in which the oil film is destroyed. In turn, this leads to destruction of the surface of the liner during its operation.
Elimination methods . First of all, it is necessary to check the bearing surfaces of the liner and shaft for damage. If they exist, they must be eliminated. After this, you need to make sure that the surfaces are clean. This is especially true when new liners are installed.
Mud erosion
Signs . A sign of mud erosion is the presence of burrs or inclusions of dirt. Sometimes both. In particularly advanced cases, mud erosion can move to areas near the oil holes.
Causes . The reason in this case is low-quality oil, which contains dirt impurities or abrasive materials.
Elimination . It is necessary to check the operation of all moving engine parts. The lubrication system must be checked especially carefully. It also makes sense to check the oil and air purification system (primarily the filters). When assembling the engine, you must prevent dirt from getting into it. After all this, you must definitely change the oil to a new one.
Corrosive abrasion
Signs . We are talking about the presence of corrosive abrasion on the rear steel surface of the liner. As a rule, traces of corrosion are located closer to the connection of the halves of the liner body.
Causes . In this case, there may be several reasons. Among them:
Elimination . According to the different causes of the problem, the resolution methods may also be different. In particular:
Metal fatigue
Signs . Fatigue can be caused not only by prolonged use of the liner, but also by excessive load on it. Signs of its failure will be a situation when particles of material are literally torn out of its body, especially in places of significant load.
Causes . There may also be several of them:
Elimination methods . Accordingly, elimination methods may also be different. Need to check:
It also makes sense to install a new high-quality liner that fits in size.
Wear due to tin penetration
Signs . A significant layer of tin at a specific location on the surface of a steel base. This is usually accompanied by very severe local wear in that area.
Causes . The occurrence of small movements of the liner in its seat, which arose due to the low pressing force.
Elimination methods . Typically, you need to do the following: The first thing is to check the bore diameter of the liner support. Second, check the cleanliness of the mating surfaces of the liner and support. Third, check the tightening torque of the bolts and adjust it in accordance with the manufacturer's recommendations.
Surface corrosion
Signs . Corrosion, depending on its degree, always damages the surface of the liner. It becomes porous and loses its color.
Reason . As a rule, the described phenomenon is caused by the use of low-quality oil, during the decomposition of which acids are released, which cause corrosion.
Elimination methods . It is necessary to inspect the engine, and especially the lubrication system. If there is significant damage to the shaft and liner, they must be repaired. At the end of the repair work, it is imperative to change the oil to a high-quality new one recommended for this machine.
Insufficient lubrication
Diagnostics of wear of liners
Signs . A small amount or absence of oil can lead to abrasion and/or melting of the working surface of the liner. And this in turn causes metal fatigue and damage.
Causes . Destruction of the lubricating film between the liner and the shaft. Because of this, friction increases significantly during operation and the temperature increases. Materials melt. The cause may also be a failure of the engine lubrication system. If the bearing of the liner is deformed or the surface of the shaft journal is damaged, there is a high probability of destruction of the lubricating film.
Elimination methods . It is necessary to inspect the engine lubrication system, including oil cleanliness. It also makes sense to check the condition of the surface of the shaft journal and bearings of the liners. If necessary, repairs must be made. It is also possible to install new liners.
Incorrect machining of the crankshaft journals
Signs . The inner surface of the liner is in contact with the shaft journal on one or both sides of the liner body. It is also possible that the material of the inner surface is very worn from the ends around the circumference.
Causes . The reasons for this situation may be:
Elimination methods . Elimination methods may also be the following, you need to check:
Scratches on the surface
Signs . There are isolated scratches that do not look like working abrasions from the operation of the mechanism.
Causes . For some reason (most often due to lack of cleanliness during installation), there are small foreign particles on the working surface of the liner. Perhaps their formation is caused by casting or drilling technologies.
Elimination methods . Flush the engine with new, clean oil using an external oil pump. It is better to perform flushing after assembling the engine and before the car is run-in.
Excessive erosion due to cavitation
Signs . The material from which the liner is made has local washout points. They are usually located symmetrically or centrally on the working surface of the liner. It is also possible for them to occur on the reverse side of the oil channel.
Causes . There are several possible reasons:
Elimination methods . Elimination methods may be as follows, you need to check:
Misalignment
Signs . If misalignment occurs, excessive wear occurs only in the area of the top of the liner body towards the edge. In this case, the wear zones are located diametrically opposite on the circumference.
Causes . Misalignment of the central axes of the liners and neck.
Elimination methods . The following options are possible:
Why is this happening?
During operation, the engine liners are constantly subject to frictional force, which is why it gradually wears out. But natural wear of the plates is only one of many reasons for the bearings to turn.
Errors in the selection of spare parts, when assembling the engine, and simple negligence of the master can lead to a sad outcome. Unskilled engine repairs often result in the selection of liners of the wrong size or defective ones, their incorrect installation and tightening. When the tension of the liner is insufficient, the loads are distributed unevenly, the plate begins to vibrate, and the oil film is disrupted. As a result, the crankshaft “catches” the liner and pulls it out of the stock.
An unscrupulous and insufficiently experienced mechanic may install a substandard crankshaft, forget to lubricate parts, fail to notice or eliminate defects and malfunctions of the system, such as broken bearing seats and connecting rod caps, wear of the oil pump, etc.
In addition, mechanical damage from an accidentally introduced foreign body can provoke rotation of the liners. During the production of motor oil, especially if it does not meet the requirements and specifications, metal particles from the rubbing elements of the system, carbon deposits, sludge and other hazardous debris may enter it.
Finally, cranking torque depends on the characteristics and amount of lubricant.
More viscous oil provides not only increased friction, but also an increase in the thickness of the oil wedge that separates the rubbing pair. But as the rotation of the crankshaft accelerates, the temperature of the parts increases, and the lubricant between them is liquefied by heating, becoming thinner. The lubricant layer can also decrease naturally - when the oil level drops, for example, as a result of a leak. Thinning of the film while maintaining high loads leads to its rupture, the appearance of dry friction and, as a result, cranking of the engine liners.
Prevention methods
As mentioned above, partial failure of the liners entails increased wear of the engine, and in particular, its lubrication system. Therefore, in order to prevent such a situation, it makes sense to carry out periodic preventive measures. So, first of all, you need to use the engine oil recommended by the car manufacturer . This is especially true for its viscosity. You should not buy very cheap oil, since there is a high probability that it will contain abrasive particles that negatively affect the engine as a whole, and the liners in particular.
It is also worth periodically checking engine parts, their condition, geometry, and cleanliness. When performing repair work, you must always ensure that no dirt gets into the engine and/or lubrication system (oil). There is a so-called “golden rule” for mechanics, which states that a gap of 0.03 mm more is better than a gap of 0.01 mm less. In this case, the liner is guaranteed not to fail, not melt or rattle. Keep your car's engine in good condition and it will serve you for many years.
It is better not to wait until the light on the dashboard lights up indicating low oil pressure. Ideally, you should periodically check the pressure value yourself or at a car service center. After all, the oiler light turns on (that is, the emergency sensor is triggered) only in extreme cases, when the pressure has dropped to critical. It is better to avoid this, especially on engines with significant mileage.
Conclusion
It is necessary to periodically check the condition of the liners, since these seemingly insignificant details can lead to major problems with the engine oil system, thereby significantly reducing its service life. And the sooner the breakdown can be identified and repaired, the lower the costs the car owner will have to face in the future to carry out engine repairs. The replacement procedure can be carried out either independently or at a service station. However, if you decide to carry out the repair yourself, then you must be 100% sure that you will be able to complete the job, since replacement involves a large amount of both dismantling and installation work.
Source
How to choose
Regardless of the reason for repairing the engine and replacing the liners, boring the crankshaft is a must. Installation of new parts is only possible on a polished or new mechanism. If there is damage and potholes on only one neck, all elements are processed to achieve a single overall size. Standard parts are installed during the engine assembly line. For example, repair crankshaft liners for VAZ cars are sold in four versions. That is, boring can be done a maximum of four times. Motors for cars such as Moskvich and GAZ have an additional fifth and sixth grinding of up to 1.5 and 1.2 mm, respectively. The best option would be for the person who did the grinding to select the required sizes. Boring may lead to the need to select elements whose size will significantly exceed the previous one. This depends on the depth of the potholes on the necks and their number. The inserts are sold as sets for both types of necks.
Shaft heat treatment
Heat treatment of the shaft can be carried out in an oven at a temperature of about 180°C. After heat treatment, you need to check the part for deformation and, if necessary, eliminate it. Most methods for restoring (welding, welding, heating) of worn surfaces always cause very significant deformation. The stronger the heating during surfacing, the greater the residual deformation. It is possible that after some restoration methods (surfacing, welding, heating), the shaft should be straightened and heat treated. Let us dwell in more detail on the methods of applying metals to worn surfaces of shafts. Any application of metal to a worn surface is a last resort when other restoration methods have been exhausted. For example, you should not “cook” the entire worn surface in order to use standard bearing inserts; in most cases, you can find inserts of the required size. It's another matter when the necks have very large wear. In this case, it is necessary to weld and fuse only these journals, and process the entire shaft to the next repair size, focusing on slightly worn surfaces. When the shaft already has a large repair reduction in the journals, then in this case it can be welded entirely to the standard or first repair size.
At the same time, there are no known cases of failure after restoration of crankshaft journals; crankshaft shanks; camshaft bearing journals, if their diameter is less than the diameter of the cams (Figure 3.3.15)
The specified features of the behavior of shafts after repair must be taken into account before choosing a repair method in order to prevent a significant decrease in the reliability of the repaired engine. Let us now consider how a shaft that has quite significant runout can be repaired using various straightening methods.
The shaft installed in the centers is checked by an indicator for runout at the edges of the shank - the pulley seat, or a runout of the shank of more than 0.05 mm requires welding (welding) of a layer of metal onto the surface of the shank, since the shank receives an additional runout of 0.08- after grinding in the front center. 0.60 mm.
Figure 3.3.15 — Reducing the runout of the bearing journals by editing the center chamfer of the shank to the minimum runout of the first bearing journal:
a - before chamfering; b - after chamfering, the runout of the bearing journals is small, but welding and grinding of the shank is required
As a result, it is possible not only to significantly reduce the balance of the shaft, but also to reduce the removal of metal from the journals (repair size reduction). Thus, with an initial runout in the center of the middle journals of the order of 1.2 mm, this method can ensure a reduction in the diameter of the journals by only 0.75 mm, and it is clear that without correcting the center chamfer, the reduction in the diameter of the journals should be no less than the runout.
However, this technology cannot be used for shafts with special surfaces. So, if there are guide splines on the shank for driving the oil pump, then correction of the front center chamfer is necessary, and must be ensured from the condition of small runout of the splines. For shafts with gears, any repair of the shaft must prevent distortions and runout on the gear. In fact, this means that without straightening such a shaft, if it is deformed, cannot be repaired. Gear runout, if left, will lead to rapid wear and, possibly, destruction of the mating parts.
Repair of a deformed shaft
When repairing deformed shafts, it is necessary to perform a number of preparatory operations: process all end surfaces associated with mating parts; grind the welded shank with a minimum layer from the new base to the previous size; process all supporting surfaces to the repair size. Thus, repairing deformed shafts without straightening turns out to be much more difficult and requires a large number of additional operations.
Figure 3.3.16 — Scheme for straightening the center chamfer with runout of no more than 0.05 mm (without subsequent straightening of the shaft)
a - before chamfering; b - after straightening the chamfer, the runout at the edges of the shank is reduced, but directed in different directions
Installation algorithm
The most common method for solving the problem among many people is to contact a car service. But replacing crankshaft liners can be done by any person who has even the slightest experience in carrying out repairs and has a certain set of tools. To simplify the task, it is worth following a certain procedure.
First you need to check the gap located between the liner and the crankshaft. The test is carried out using a calibrated plastic wire, which can be found on the required neck. Then the cover is mounted together with the liner, they are tightened with a certain force corresponding to a value of 51 Nm. It is worth using a torque wrench to measure. After removing the cover, the size of the gap will be similar to the degree of compression of the wire. Using the nominal gap, you need to evaluate the resulting parameter, the value of which is different for each individual brand. If it becomes clear that the gap exceeds the nominal value, that is, the degree of compression, then you cannot do without installing repair parts.
