How to replace the bearing on the front hub of a VAZ 2110 (ten), VAZ 2111. VAZ 2112 with your own hands
02/11/2019 mr.Podshipnik 0 Comment
HOME »
- Car brands » Replacing wheel bearings
»
A VAZ car of modifications: 2110, 2111, 2112 is a strong option for use. However, with mileage up to 60,000 km, some parts are subject to wear. This article will talk about the front hub of the “tens” and describe step-by-step do-it-yourself repairs.
VAZ 2112: when the bearing on the front hub needs to be replaced
- 1 Diagnosis of a knock that occurs in the front suspension of a VAZ 2112 car 1.1 How to replace the front wheel bearing on a VAZ 2112 car
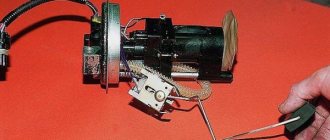
General view of the front suspension
The front hub bearing is designed to allow free rotation of the wheel on the axle. The element is mounted inside the hub body, and is put on the axle using an internal race. Plastic plugs are fixed between the clips, which reliably protect the ball mechanism from moisture and dust getting into it. On the VAZ 2112, the front hub bearing ensures long-term operation of the unit under significant loads. This article offers instructions on how to replace the bearing on the front hub on a VAZ 2112 car with your own hands.
Diagnosis of a knock that occurs in the front suspension of a VAZ 2112 car
The VAZ 2112 car is equipped with a telescopic, independent front suspension with coil springs (see We do our own replacement of the front springs of the VAZ 2110), with hydraulic shock absorbers on the struts. In order to determine if there is a knock in the front suspension on a VAZ 2112, it is necessary to perform the following work:
- Make a trip by car, which will make it possible to identify the presence of a defect and determine the mode of its manifestation.
- Determine the tightening torque of the nuts that secure: the upper support of the strut to the body, the upper support of the strut to its rod.
- Make an exit by car.
- If the defect is not eliminated, you need to check the play of the ball joint on the front suspension.
- If necessary, adjust the gap between the steering rack and the stop.
- Departure by car again.
- The defect has not been eliminated, so the play of the bearing, which is located in the upper support and in the bearing of this strut support itself, is checked.
- If deviations are detected, the front wheel bearing of the VAZ 2112 or other damaged part is replaced.
- Check out the car, the knocking noise remains.
- The telescopic stand is being replaced. Depending on the malfunction, left or right.
- After all operations on the VAZ 2112, knocking in the front suspension will be eliminated, which is checked when driving the car.
How to replace the front wheel bearing on a VAZ 2112 car
The double-row ball bearing installed in the hub does not require adjustment or lubrication during operation. Pressing out the hub leads to destruction of the bearing, so only when replacing the bearing can the hub be pressed out of the steering knuckle.
Tip: when pressing in the hub bearing, you need to take a mandrel from a set of the appropriate size. If they are missing, you can use the old bearing rings.
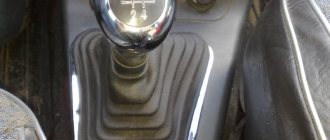
- On a VAZ 2112, replacing the front wheel bearing begins with removing the protective cap.
- The hub nut is loosened. The hub nut and the bolts that secure the wheel to the car are loosened.
Tip: The nut is tightened with a large torque, so it is better to use a lever when unscrewing it, for example, a piece of pipe.
- The wheel and brake disc are removed.
- The nuts holding the bolts fastening to the steering knuckle stand are loosened.
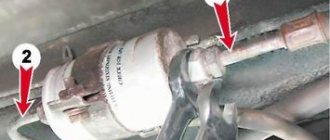
- Unscrew the two bolts that secure the ball joint to the steering knuckle.
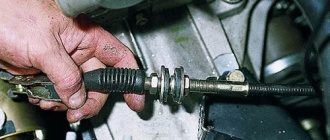
- Unscrew the nuts and remove the bolts holding the steering knuckle of the strut.
- The hub nut is unscrewed and the thrust washer is removed.
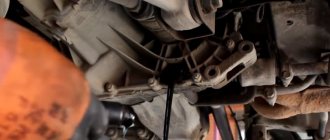
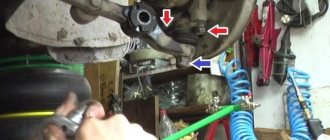
- The steering knuckle is removed from the strut bracket, as shown in the photo.
The fist is pulled out of the stand bracket
- The hub located in the inner ring of the bearing is pressed out using a drift.
Tip: A puller is used to compress the outer part of the ring located inside the bearing that remains on the bearing. Two special recesses on the hub serve for ease of dismantling.
- The retaining rings are removed from both sides of the steering knuckle.
- The bearing is pressed out of the steering knuckle, for which you need to use a mandrel.
- The outer retaining ring is installed.
Installing the Outer Retaining Ring
- Replacing the front wheel bearing of a VAZ 2112 is carried out by pressing it in with a press or in a vice using a new bearing mandrel. The operation must be carried out very carefully, otherwise the bearing may collapse.
- The inner retaining ring is installed.
- The hub is pressed into the inner ring of the bearing.
Replacing the front wheel bearing on a VAZ 2112
- The steering knuckle is mounted back to its removal.
Tip: When assembling the unit, you need to take a new hub nut.
- The hub nut is tightened and secured in two places, and the wheel mounting bolts are tightened.
- A protective cap is installed.
You can watch the video to see how to properly replace the front wheel bearings on a VAZ 2112. Timely replacement of the VAZ 2112 front wheel bearing will increase the reliability of the vehicle and the period between major repairs of the front suspension, and will reduce the cost of repair work.
Reliable simple do-it-yourself bearing puller - Do it yourself
How can you tell if a wheel bearing has failed? By the sound! The main symptom is a hum that gets worse during acceleration. If it occurs only occasionally, it means the bearing has just started to fail.
A constant suspicious sound as the load increases means that this part of the car requires immediate replacement. In any case, to carry out repairs you will need a bearing puller.
You can buy it or make it yourself.
How a puller makes life easier for a car owner
Using this tool, you can dismantle bearings, bushings, pulleys, flanges and other components, remove or fix rings and gears, and repair chassis elements.
It greatly facilitates the process of maintenance and repair of various parts of the vehicle. Using the right puller, you can quickly and easily replace a damaged element without the risk of damaging the machine elements connected to it.
In addition, the tool can be used to work with hard-to-reach parts of the car, in a convenient position.
Products can have different designs, but the most common is the following - several gripping arms, which are shaped like hooks, and a threaded rod between them. Thanks to this structure, you can easily grab the required element and press the bearing out of it.
Kinds
Tools are divided into two groups.
- Hydraulic. When they operate, hydraulic traction is used; removal and landing are performed in semi-automatic mode. The main part of such a puller is a hydraulic nut, the internal cavity of which presses on a special piston. This, in turn, transfers the force to the desired part. The hydraulic model is in demand among owners of trucks and other large vehicles - with its help you can easily remove the most massive internal parts.
This is what a hydraulic bearing puller looks like
- Mechanical. They operate from human muscular strength and are in demand for mounting/dismounting wheel bearings. There are two-jaw, three-jaw and internal ones. Two-grip ones are the simplest. They are used where maximum process control is needed. Three-jaw machines are equipped with three paws and are used for working with the front hub and generator. Internal options are useful for removing ball and needle roller bearings; in addition, they can be used to dismantle various brass couplings.
: How to add another driver to OSAGO? Mechanical three-arm model
Bearing pullers can come in different sizes, but the most popular are universal ones. Their parameters can be adjusted manually, adjusting them to any diameter.
You can make different tools with your own hands, but it is best to make a universal three-jawed version - it is convenient to use.
Diagram of a two-jaw puller
Making a universal three-gripper with your own hands
To make a universal three-jaw puller designed for working with bearings ranging in size from 202 to 308, you will need:
- sheet metal (10 mm wide);
- round metal with a diameter of 30 mm.
If you plan to remove large bearings, take sheet metal 15 mm wide and round timber 30 mm in diameter.
- The first stage of production is sketching. Calculate the length of the legs - it should be 200 mm. Sketch the sheet metal according to the drawing and cut out the tabs with a gas cutter that runs on propane and oxygen.
- Sand the workpiece with heavy sandpaper. The dimensions of all paws should be approximately the same, but absolutely perfect parameters are not required - a difference of approximately 1 mm is allowed. When this part of the work is completed, you need to drill two holes in the top of each tab - these will be used to expand the tool. The diameter of the holes must correspond to the diameter of the 8 or 10 bolts. If you plan to work with large bearings, drill 3 holes for 12 or 14.
- Making the core. It is made of round metal with a diameter of 30 mm and a length of 35 mm (50 and 45 mm if it is necessary to work with massive bearings). We take the workpiece and drill a hole in it for a 16 mm thread (30 if necessary in a larger product), cut the thread with a fine pitch. We apply marks on the sides every 120 degrees, to which we then weld the paw holders. The distance between them should be equal to the width of the foot. Now you need to drill holes in the holders. They should be positioned at a certain distance from the center so that the foot can grip the large bearing. This is what the parts of the future puller should look like
- The final part of the work is making the screw. For a standard puller you will need a screw 350 mm long with a thread length of 280 mm, for a large one - 500 mm with a thread of 420 mm. We process the workpieces on a lathe and cut the threads. We leave the upper part without threads - there you need to drill through holes located perpendicular to one another, having a slight offset in height.
: About the sale of used cars from AmericaAppearance of the finished product
A simple way to make a homemade removal device
This option is easier to implement, but the product will not be as convenient. You will need the following tools and materials:
- steel pipe, the internal diameter of which will be greater than the diameter of the bearing;
- metal plate more than 5 mm thick;
- Bulgarian;
- stud with nut or bolt with long thread;
- a few nuts.
- Cut a piece of pipe with the required parameters. Cutting off part of the pipe
- We mark all the necessary elements on a metal sheet, outline the pipe and bearing. Marking out future details
- We cut out the parts with a grinder and grind them to meet the exact parameters. Cut parts
- We drill holes for the bolt in the obtained washers. Drilling holes for bolts
- That's it, the remover is ready!
Ready puller
How to make a two-jaw wheel bearing puller: video
Making a bearing puller with your own hands is not at all difficult - you don’t need either expensive materials or specific skills. Using the instructions, you will easily cope with the task and get a useful tool for car repair.
Do-it-yourself puller for tightening bearings - Construction Blog
Homemade pullers
When repairing electric motors, in addition to open-end wrenches and a set of heads, you definitely need to have in your arsenal several pullers for tightening (removing) bearings. One universal one simply won’t do. If you have electric motors on your site from 1 kW.
and up to 100 kW, then 2-3 are necessary. I have in my arsenal two pullers for removing bearings. At the moment, there is a large selection of pullers in the markets and can be purchased there.
But at the same time, if you have the material, a lathe, gas and electric welding, and the desire, then you can make a puller yourself. And I assure you, it will serve you for decades. It’s better to make three-legged ones, the most comfortable ones.
I will also indicate the dimensions of my own pullers, which have long been tested during repairs. Let's start with a small one, with which you can remove bearings from sizes 202 to 308, large 317 and more. We will need sheet metal 10mm wide and round metal 30mm in diameter.
(for huge metal 15 mm and round timber with a diameter of 50 mm). First we make a sketch (pattern) of the puller legs. We make the length of the legs 200mm.
Next, we draw a sketch on the sheet metal according to the pattern. You need to cut the legs with a gas cutter (propane and oxygen). After cutting, we process the workpieces using large sandpaper.
Homemade pullers for removing bearings
Evenly adjust the sizes of the 3 legs to the same size. There is no need to achieve very perfect dimensions, the difference is 1mm.
the negative role will not be included in the design. When the paws are made and adjusted, in the upper part we drill two holes (for a small expansion of capabilities) with a diameter of 8 or 10 mm for bolts (for a huge 12 or 14 mm, 3 holes) for attaching the paw to the core of the puller.
We do the same with the remaining 2 paws. Drill holes in them along the first leg using it as a template. Here you need to try to prevent the difference in size from allowing the bearing to be removed to be captured immediately.
Puller disassembled
The next detail is the core. For the core for a small puller, we need round metal with a diameter of 30 mm and a length of 35 mm (for a huge one, respectively, 50 mm by 45 mm). In the workpiece, we drill a hole for a 16 mm thread (for a huge puller, there is a hole in its workpiece with a diameter of 30 mm) and cut the thread, preferably with a small pitch.
In the prepared part for the core, apply markings, three marks at 120 degrees. And to these places we weld them using electric welding, two per mark - the foot holders (the distance between the holders should be the width of the foot). I think there is no need to describe in detail how to prepare them, because there is no point in adhering to any serious rules and dimensions.
After welding, we process this part in the same way using large sandpaper.
Now, having tried on the paw, we drill holes in the holders. Drill the holes at a distance from the center, so that the installed foot has good movement to the side to capture larger bearings. And the 3rd part of our puller is a screw.
For the 1st puller we make a length of 350mm, thread length 280mm, for the 2nd - length 500mm, for a thread 420mm. Next, on a lathe, we process the workpieces and cut the threads. In the upper part of the screw, where there are no threads, we drill through holes with a slight offset in height and perpendicular to each other.
Disassembly
Required : engage first gear and place shoes under the wheels. Prepare a narrow chisel, a 30mm socket, pliers, a needle file and a standard set of tools. The wheel bearing can be replaced on a level surface, but it is more convenient to do so on an inspection ditch or a lift.
Procedure:
- Remove the hub cap.
- Straighten the dented shoulder of the wheel bearing nut in two places using a narrow chisel.
- Loosen the hub bearing nut using a 30mm socket. The head and driver must be strong enough to transmit the required force.
| If while driving you notice that there is something humming in the front suspension, then most likely the problem is in the front wheel hub, in the bearing. You can replace the front wheel bearing yourself, but this will require some experience. |
Loosen the wheel mounting bolts, and then hang both front wheels, otherwise the anti-roll bar will interfere with dismantling, pushing the suspension elements up. Remove the wheel, the brake pad guide together with the caliper and the brake disc (tie them so that they do not hang on the brake hose).
Checking the condition of the hub
The condition of the hub is checked for mechanical damage, cracks and wear. If defects are found, the hub will have to be replaced.
There are 2 main ways to check the hub, after which you should decide whether it needs to be changed or whether it is enough to change the bearing itself:
- Checking planes . We install the VAZ 2110 on a flat section of the road, grab the top of the wheel and swing it with strong jerks. If you hear metallic clicks, then the problem is in the bearing.
- Runout check . You need to remove the wheel, take a screwdriver and a wrench with a head. We rest the tip of the screwdriver on the caliper bracket, and use the wrench to turn the hub. If the sting leaves 2 arc scratches on the brake disc, then the hub needs to be replaced.
Stories from our readers
“Fucking basin. "
Hi all! My name is Mikhail, now I’ll tell you a story about how I managed to exchange my two-wheeler for a 2010 Camry. It all started with the fact that I began to be wildly irritated by the breakdowns of the two-wheeler, it seemed like nothing serious was broken, but damn it, there were so many little things that really started to irritate me. This is where the idea arose that it was time to change the car to a foreign car. The choice fell on the melting Camry of the tenth years.
Yes, I had matured morally, but financially I just couldn’t handle it. I’ll say right away that I am against loans and taking a car, especially not a new one, on credit is unreasonable. My salary is 24k a month, so collecting 600-700 thousand is almost impossible for me. I started looking for different ways to make money on the Internet. You can’t imagine how many scams there are, what I haven’t tried: sports betting, network marketing, and even the volcano casino, where I successfully lost about 10 thousand ((The only direction in which it seemed to me that I could make money was currency trading on the stock exchange, they call it Forex. But when I started delving into it, I realized that it was very difficult for me. I continued to dig further and came across binary options. The essence is the same as in Forex, but it’s much easier to understand. I started reading forums, studying trading strategies. I tried it on a demo account, then opened a real account. To be honest, I didn’t manage to start earning money right away, until I understood all the mechanics of options, I lost about 3,000 rubles, but as it turned out, it was a precious experience. Now I earn 5-7 thousand rubles a day. I managed to get the car buy after half a year, but in my opinion this is a good result, and it’s not about the car, my life has changed, I naturally quit my job, I have more free time for myself and my family. You’ll laugh, but I work directly on the phone)) If If you want to change your life like me, then here’s what I advise you to do right now: 1. Register on the site 2. Practice on a Demo account (it’s free). 3. As soon as you get something on the Demo account, top up your REAL ACCOUNT and go to REAL MONEY! I also advise you to download the application to your phone, it’s much more convenient to work from your phone. Download here.
- Remove the washer by unscrewing the wheel bearing nut all the way.
- Insert bolts (about 130mm long with M12x1.25mm thread) into the two holes of the brake disc. Screw the bolts into the hub holes to a depth equal to its thickness.
- We press out the hub by sharply hitting the bolt heads with the brake disc.
- Unscrew the fastening of the ball joint to the steering knuckle and remove the CV joint from the bearing hole.
Assembly
Clean and lubricate the inner surface of the steering knuckle. Use a puller to press the new bearing into the steering knuckle. In this case, the large puller washer rests on the steering knuckle from the inside so as not to damage its mud rings, and when pressing, the new bearing can be pressed through the old bearing, which will transmit force only through the outer ring. Install the retaining ring. Use a puller to press the hub into the bearing. Now the puller washers rest against the inner race of the bearing and the hub.
We carry out further assembly in the reverse order, tighten the bearing nut to the prescribed torque and be sure to lock it by jamming the collar.
In conclusion, I would like to note that replacing a hub bearing on a new car is not difficult, but if the suspension parts are many years old, then removing the hub and other elements will be very problematic. Replacing the wheel bearing is shown in the video:
By the way, do you know how to check the suspension yourself?
Replace the wheel bearing yourself...
Replacing rear wheel wheel bearings on a VAZ yourself
The rear wheel bearing of the VAZ 2110 is changed according to the instructions, but first consider the following points:
- The bearing cannot be reinstalled.
- It is recommended to replace the second bearing immediately, on the other hand.
We disassemble the hub assembly and dismantle the product
- First, loosen the bolts securing the wheel and the hub nut.
- Next, we jack up the car.
- The decorative wheel cap (boot) also needs to be removed.
- Now use a hexagon to unscrew the pins that hold the drum; you don’t need to remove the pads.
- Unscrew the hub nut using the wrench extension and remove the washer. If you are performing such work for the first time, in this case it is advisable to unscrew it before lifting the car with a jack.
- Dismantling the hub - we use a removable device.
- Using the puller, we install the device on the axle.
- We hook our paws onto the back surface of the hub part.
- We install and check the correct installation of the legs, now we tighten the threaded connection with a wrench.
- The hub can be easily removed, leaving the outer bearing ring with balls and a separator inside.
- The inner ring of the old wheel bearing will remain on the axle.
- We attach the puller, as shown in the photo, to the rear end. You may need sharper paws, or we can remove it with a different puller.
- Pull the inner ring off the axle shaft. It is recommended to perform this operation exclusively using a puller.
- Now we press the old parts out of the hub; first, use round pliers to remove the locking element.
- Next, we dismantle the protective casing (boot), clamp the hub in a vice and carefully knock off this cover with a chisel and hammer.
- All that remains is to press out the outer race. To do this, we select a head of the required outer diameter (slightly less than 60 mm), as well as special spacers that are needed so that the bearing comes out on the other side when pressed out.
- We clamp the structure and twist until the bearing comes out of the housing. This completes the dismantling, all that remains is to replace the old element.
Installing and replacing the wheel bearing
Before installing the ball bearings, clean the inner seating surface of the hub from dirt and rust.
During the pressing process, it is important to maintain a smooth force and ensure that there are no distortions.
- We fit the new bearing into the hole, evenly and without distortions, then clamp it in a vice as in the second photo.
- We tighten it in a vice and press it to the end.
- When replacing, we will use the old race and press the bearing in completely.
Important Recommendations:
1. It is not recommended to insert and remove the bearing using the impact method, since there are many non-impact, safe methods. 2. When pressing, the mandrel must rest strictly against the outer part of the holder.
- After pressing, install the locking ring.
- After we insert the ring, do not forget to put the casing on, this is done with a hammer through the spacer.
- The bearing has been replaced. We begin assembly, put the hub in place, tighten it to a torque of 19-23 kgf/m. Be sure to lock the shoulder of the locknut.
- Install the brake drum and then the wheel.
- Further assembly of the unit is performed using reverse technology. Replacement is complete.
MrPodshipnik
Bearing replacement, repair
Enter the marking or size (for example: 8*22*7) of the product and the country of sale
New instructions
- How to make your own repairs and replace the bearing on the steering column in a ZOOM bicycle 10/09/2019
- How to independently, at home, replace a bearing in an electric motor of a Philips food processor 10/05/2019
- We repair a DAB heating circulation pump and change the bearing ourselves 10/04/2019
- How to repair a Shimano fishing reel yourself and replace a faulty bearing 10/03/2019
- We replace the bearing and repair the SBR_ 132_A concrete mixer ourselves 10/02/2019
How to replace the bearing on the front hub of a VAZ 2110 (ten), VAZ 2111. VAZ 2112 with your own hands
A VAZ car of modifications: 2110, 2111, 2112 is a strong option for use. However, with mileage up to 60,000 km, some parts are subject to wear. This article will talk about the front hub of the “tens” and describe step-by-step do-it-yourself repairs.
Why does the front wheel bearing of a VAZ 2110 (ten) quickly fail?
The following factors play an important role in bearing failure:
— quality of domestic roads; — aggressive driving. First you accelerate and immediately brake. This is especially noticeable when turning;
— operation of the vehicle in unfavorable climatic conditions. In summer, on rough terrain with holes and potholes. In rural areas with dirt, sand and dust. In winter, driving on roads sprinkled with salt; — installation of a known defective part; — vehicle overload exceeding the norm specified in the technical passport.
It is especially necessary to pay attention to the front hub. It is quite possible to make the diagnosis yourself and does not require much experience and knowledge.
Wheel bearing selection
Please note that front wheel bearings should only be purchased in Russia and from domestic manufacturers..
Choose a domestic manufacturer
Chinese analogues, assembled from low-quality materials, have a short service life, and besides, the difference in price is not significant.
Determining the need to replace the bearing
To determine bearing failure, you need to perform simple steps yourself. I myself use the following diagnostics:
— after a long ride, carefully place your palm on the hub and check whether the metal part heats up; If so, this is the first sign of a breakdown;
— try accelerating to 40 km/h and listen to the sounds ahead with the windows open. Hear a whistle, hum, grinding or howling - another confirmation of the need to replace the part; - increase speed. As it increases, the howling will stop and then periodically appear with renewed vigor. Another bell rings; - Place your car on a jack and manually spin the wheel. The grinding and whistling will repeat. To be completely sure, rock the wheel perpendicular to the axle. If you find any play, the bearing definitely needs to be replaced.
Diagnostics of serviceability of VAZ 2112 wheel bearings
When operating a car, regular maintenance of all parts is necessary. An important role in extending the service life of the machine is replacing the grease in the bearings and periodically adjusting the clearances. The average service life of bearings is up to 60 thousand km. Poor quality of roads, jumps and jumps on pits also reduce the service life of the part.
To check the serviceability of the play, you need to hang the problem wheel and spin it well. The bearings should move freely along the axis, without jamming or noticeable friction. If the play cannot be eliminated by adjusting, and a distinct noise is heard when driving, the hub bearing has probably failed. We turn the wheel in all directions. Please note that two elements may fail at once.
Rings and rollers should not have scuffs or the slightest signs of wear. If any are found, replacing the wheel bearings cannot be avoided.
Preparation for repair of the front hub on VAZ 2110, 2111, 2112
You have made up your mind and decided to make repairs on your own in your garage.
To do this you need to prepare. Properly assemble tools and accessories.
I would recommend making a list like this:
- a jack is required; - hammer, chisel, pliers; - a set of keys and sockets. It is imperative that head No. 30 and key No. 17, No. 19 fit there; — mandrels; - vice; — liquid “Vedashka”; - torque wrench.
When you have everything assembled, it is advisable to look at a sketch or drawing diagram of the assembly you will be dealing with.
Selection of bearings for the “ten”, 2111, 2112
Now you need to decide on the choice of bearing. I advise you to buy parts only in a specialized automotive store.
If we turn to the manufacturer's catalog, we see that the original number for the front wheel bearing of the VAZ 2110 should be: No. 6-256907.
Orient by the dimensions of the part: - outer diameter - 64mm; — internal diameter – 34mm; — width 37mm.
Let's analyze which bearing manufacturers it is advisable to buy and use for repairs:
— the Vologda manufacturer of bearings is rightfully considered one of the best. Its distinctive feature is the low cost of the product. Not bad quality. It is almost never counterfeited. Popular among motorists.
This is the 23rd State Bearing Plant (23GPP);
— however, those who are professionally versed in spare parts for cars use the products of the Saratov Bearing Plant (SPZ);
- if you want to save money, you can purchase inexpensive, but not high-quality bearings from the Samara plant. They are almost half the price, and the mileage after replacing the part will be no more than 20,000 km.
VAZ 2110 wheel bearing dimensions, number and marking
Before buying a new spare part, make sure its exact dimensions. The dimensions of the VAZ 2110 front wheel bearing are usually standard, as are the markings. Keep in mind that this bearing is also used in VAZ 2108, 2109, 2111, 2112 models.
- Inner diameter (d): 34mm;
- Outer Diameter (D): 64mm;
- Width (H): 37 mm.
Front bearing number for VAZ 2110: 6-256907 (marking)
How to choose a ball bearing for a VAZ 2110 hub
When purchasing a front wheel hub bearing for a VAZ 2110, focus on three options:
- JSC Saratov Bearing Plant - professionals claim that the company produces the best wheel bearings. The plant's products are additionally marked "SPZ".
- The Samara Bearing Plant produces inexpensive products that are not of good quality. Suitable if you want to save money. The front wheel bearing will need to be replaced after 20,000 kilometers. The price of a VAZ 2110 wheel bearing from this brand is two times cheaper: 150-320 rubles.
- 23 GPP (VBF, Vologda) – this manufacturer is considered the best among its competitors. These products are rarely counterfeited, are of high quality, are inexpensive and are now in demand among domestic car owners.
The price of a part for a hub from these manufacturers: from 800 rubles.
Recommended bearing manufacturers
| No. | Manufacturer, country | Catalog number | Dimensions, mm | Price, rubles |
| 1 | VBF, Vologda | 2108-3103020-01 | 34*64*37 | 900 |
| 2 | LGR | LGR-4703 | 600 | |
| 3 | LGR | LGR-4721 | 850 | |
| 4 | SACHS | 34640037 | 800 | |
| 5 | SKF | 309726DA | 1250 |
It is important to know:
During the pressing process, the p/w will be completely destroyed. Therefore, pressing should be done if replacement is actually required.
Step-by-step instructions for replacing it yourself
Place the car on a flat surface. “Tear off” the bolts and nut of the hub with the wheel standing on the ground.
Raise the car with a jack. Don’t forget to install wheel chocks on both sides before doing this. For safety reasons, we fix the car on stands or adjust the spare wheel under the side member.
We remove the wheel. Using a screwdriver, disconnect the caliper. We take it to the side and secure it with wire.
Next, unscrew the brake disc fasteners. If necessary, remove the trunnion.
For easier removal of parts, use lubricating fluid VD40 (Vedashka). It is necessary to spray the dismantled parts. Wait 30 minutes and then continue working. They will be much easier to remove.
Let's consider several options for replacing the bearing:
Option #1
In this case, I use a puller and do not need to remove the steering knuckle and also remove the strut. In this case, the camber does not need to be weakened. Using a puller, we remove the bearing and install it.
Option No. 2
It is significantly more difficult. We use it if we want to carry out a complete repair of the car's chassis. We carry out the work in the following sequence: — it is necessary to remove the tip from the steering rod; — insert the stand into the yew; — Replace the front wheel hub bearing;
Option #3
You don't need a puller for this option. The downside is the wheel alignment adjustment. In this case, it is necessary to remove the fist and dismantle the hub.
Remove the retaining ring.
We clamp the hub in a vice and use a metal mandrel to knock out the bearing.
Clean the inside with sandpaper.
Wash with diesel fuel and wipe with a rag.
Again, using a mandrel with a hammer, carefully drive the part in 10mm. We make sure that there is no distortion. And then with stronger blows we put the bearing in place. You can use a puller for this purpose.
We carry out installation in the same way as dismantling, but in the reverse order. We adhere to the marks previously placed on the parts when dismantling them.
Wheel alignment
After replacing wheel rims, the dimensions and bolt patterns of which differ from those provided for by the design of the VAZ 2110, it is necessary to make all the necessary adjustments in order to ensure reliable protection of the entire chassis, as well as tires and arches.
Correct alignment angles are required for each front wheel. There are three parameters that require correct installation: wheel toe, caster angles of the steering axles, and camber angles of each wheel.
The rules by which the parameters of the front wheel are set are as follows:
- You won't go far if everything hangs out the way it wants, and the car is pulled to the side when it should be going straight. To ensure the stability of each front wheel, they are installed strictly at the required angles to the body and suspension elements. This is called the longitudinal inclination angles of the turning axis. Installation dimensions are indicated in the instruction manual;
- Camber is the angle between the plane in which the wheel rotates and the vertical. The camber bolt helps install it (it secures the telescopic strut and steering knuckle). If the camber is installed incorrectly, the car “steals” and the tire tread wears out more on one side;
- The angle between the longitudinal axis of the car and the plane of rotation of the wheel is called toe. It is toe that is responsible for the controllability of the front wheel when cornering and at different speeds. If the toe is set incorrectly, there is severe lateral tire wear, tires squeal when cornering, and even increased fuel consumption.
Advice from a practical master
I want to give you some practical tips when replacing your front wheel bearing:
- You can replace it at a specialized vehicle service station (service station). But it will cost you much more than if you did all the repairs in your garage yourself. You can partially use the services of a service station. When you need to quickly dismantle a bearing and there is no puller. Service stations usually have a press. By contacting them, you can change the part without effort for a reasonable fee;
— when replacing a part, try to do without unscrewing the camber bolts;
— regardless of the actual condition of the bearing, replace it after a mileage of 55,000 km;
— when changing a part on one side, it is advisable to replace it on the other;
— when dismantling parts, always use marks on them. This will make it easier to install;
- when you have removed the hub, pay attention to the condition of the nodes around it. If you notice rust, dirt or oil buildup, remove it all;
— if you don’t have a torque wrench, do this: tighten the mounting bolts and nuts until they stop. Then unscrew them 20 degrees. This way you will achieve your goal without a torque wrench.
So you were able to replace the bearing on your car yourself.
If you have any questions or difficulties with the repair during the repair process, do not hesitate to contact me, write in the comments. I will always be happy to give you practical advice. I think it will be useful to you.
List of required spare parts and tools
The domestic spare parts market offers a wide range of parts for replacing the rear wheel bearing on a VAZ 2115 and similar models, but when choosing, you should pay attention to those that have the approval of the automaker, thereby confirming their quality, namely:
- rear wheel bearing (original art. 2108 – 3104020 – 00);
- retaining rings 2 pcs (art. RG2108 – 3104800);
- hub nut with safety washer (art. art. RG2108 – 3104800);
Carry out the work of replacing the rear wheel bearing on a VAZ 2115 quickly, reliably and without damaging other suspension components, possibly using the following tools:
- open-end wrenches (available in sets from 8 to 21 mm);
- socket heads (set from 8 to 24 mm);
- car jack;
- 30 mm socket head and extended knob;
- torque wrench;
- thin round nose pliers for removing retaining rings;
- specialized bearing presser;
- specialized hub puller;
- hammer;
- Screwdriver Set;
- bottle WD 40;
- brush;
- gloves for hand safety.
The cost of fixing this problem at the sites of official dealers ranges from 3,500 to 4,000 rubles (at the end of 2022), small private garage-type workshops estimate it from 2,000 to 3,000 rubles. The presence of the above-mentioned parts and tools, as well as simple car mechanic skills, will allow the owner to carry out repairs with his own hands without much difficulty.
Changing the front wheel bearing on a VAZ-2112 with your own hands
A wheel bearing malfunction on a VAZ-2112 can be detected when an unpleasant noise or hum is heard while driving. Since this problem is quite common on those cars whose mileage exceeds 100,000 kilometers, today we will analyze in detail the step-by-step process of repairing (replacing - approx.) this front-wheel drive system.
The video shows the replacement of the front wheel bearing on a VAZ of the 2110-2112 family.
Necessary tool
Before you start work, you need to prepare all the tools and assemble them in one place:
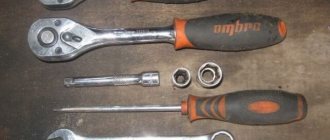
- Special puller for bearing removal.
The most “ordinary” puller
The tool is assembled and ready to use
Preparatory work
Make sure that the workplace is well lit, and it is best if it is on a viewing hole or a lift. Because this is the only way to talk about high convenience when carrying out such work. It would also be a good idea to familiarize yourself with the detailed diagram of the location of the bearing on the front hub of the VAZ-2112.
Thanks to this illustration, the diagram becomes very clear.
If work on replacing the hub bearings is also planned for the rear wheel, then the work should begin with replacing the front ones, since it is much more difficult to do them, and therefore it will take more time. How to properly replace rear wheel bearings is described in detail below in this article.
Step-by-step work order
First of all, we place the car in a stationary state, put on the handbrake, and, if desired, install wheel chocks. And while the car is on the surface, we tear off all the bolts on the front wheels.
- We unscrew the torn bolts and put them aside.
- We remove the wheel.
- Next, we need to use a “30” wrench to unscrew the hub nut. Please note that during its dismantling, you will have to press the brake pedal, and for this we will need an assistant.
Once the nut is broken, it will easily come out of its seat.
Wheel without hub nut
Please note that as a result of these actions, the caliper will not hold anything, and it will hang on only one brake hose, and in order to prevent it from breaking, we tie it with a rope.
For fixation, you must choose a strong rope.
- Carefully unscrew the brake disc from the hub.
- Then, making gentle blows, we release the hub.
The blows should not be strong, but accurate.
And then the CV joint from the bearing.
If during disassembly any of the parts do not give in, then it should be treated with WD-40.
Replacing the wheel bearing
Then, when access to the hub bearing is completely open, there are several ways to replace it.
First way
In this case, it is necessary to have a special puller to remove the bearing.
- First you need to take care of removing the stopper.
For dismantling it is better to use pliers or a small screwdriver.
You'll have to make an effort to get it out of there.
Before pressing in, the new bearing must be centered.
Second way
To carry out this work, it is necessary to carefully dismantle the steering knuckle and completely remove the hub.
- Moving to the workbench, we replace the wheel bearing.
This is what the steering knuckle looks like when dismantled.
The blows must be applied not strong, but stable.
The bearing is ready for installation.
The application of this method is much simpler compared to the first. However, this affects the alignment position, and subsequent adjustment cannot be avoided.
Advice! Before you begin removing the alignment bolts, mark their position with a marker or chalk. In this case, the marks should indicate the current position of the bolt on the rack and the previous location of the knuckles. Thanks to such marks, during assembly it will be much easier to navigate the position of these bolts. Although it will not be possible to return to the previous state, it will still be possible to minimize it.
Putting marks
- We put marks.
- We knock out all the bolts from the fist.
- Remove the mounting bolts on the lower ball joint.
- This will knock the bearing out of the hub.
- Remove the retaining rings.
- Press out the bearing.
- We mount a new bearing, having previously cleaned the space of the hub and generously coated its surface.
This repair method will be very effective when not only the wheel bearing is subject to repair, but also most of the VAZ-2112 chassis. Such elements include the replacement of steering tips, silent blocks of levers and ball joints.
Third way
To perform work using this method, it is necessary to remove the entire rack completely.
- Next, using a vice, we replace the wheel bearing.
- Because this is how the replacement will happen quickly and efficiently.
Although this method is the most difficult, because after dismantling the strut, you need to take care of dismantling the steering ends and mounting nuts, it is quite useful when replacing those same front shock absorbers.
After dismantling the bearings, we install everything in the reverse order, assemble the rack and mount it on the car.
Do we make the puller ourselves or buy it?
If you do not want to knock out the bearing, you can purchase a special puller in stores, since the entire process of working with such a device becomes easier and the time required for work is reduced . This also applies to bearing installation work.
Or you can make your own. It will look like this.
Hand-made hub puller
Tools and spare parts
The fact is that the VAZ 2110 wheel bearing is a small part, and in order to work with it, you need sufficient lighting and some convenience. Therefore, a car prepared for repair should be driven into an inspection hole and sufficient light access should be created to the repair unit.
Before going down into the pit, you need to prepare all the tools and materials. It should also be noted that replacing the front wheel bearings is much more difficult than doing the same work on the rear components.
Therefore, you need to start work from the front node.
Front wheel hub diagram
A list of required tools should be provided:
- A special puller to remove the bearing;
- The so-called mandrel, that is, a pipe cut of the required size. This device is used to knock out hubs;
- Head 30, equipped with a high-quality wrench;
- Socket wrenches 19 and 17 sizes.
In addition, you need to purchase new suitable bearings that will be needed for replacement. For a VAZ 2110 car, you should choose Russian-made bearing parts rather than giving preference to Chinese analogues. The difference in price for these products is small, so there is no need to experiment.
VAZ 2112: when the bearing on the front hub needs to be replaced
- 1 Diagnosis of a knock that occurs in the front suspension of a VAZ 2112 car 1.1 How to replace the front wheel bearing on a VAZ 2112 car
General view of the front suspension
The front hub bearing is designed to allow free rotation of the wheel on the axle. The element is mounted inside the hub body, and is put on the axle using an internal race. Plastic plugs are fixed between the clips, which reliably protect the ball mechanism from moisture and dust getting into it. On the VAZ 2112, the front hub bearing ensures long-term operation of the unit under significant loads. This article offers instructions on how to replace the bearing on the front hub on a VAZ 2112 car with your own hands.
Diagnosis of a knock that occurs in the front suspension of a VAZ 2112 car
The VAZ 2112 car is equipped with a telescopic, independent front suspension with coil springs (see We do our own replacement of the front springs of the VAZ 2110), with hydraulic shock absorbers on the struts. In order to determine if there is a knock in the front suspension on a VAZ 2112, it is necessary to perform the following work:
- Make a trip by car, which will make it possible to identify the presence of a defect and determine the mode of its manifestation.
- Determine the tightening torque of the nuts that secure: the upper support of the strut to the body, the upper support of the strut to its rod.
- Make an exit by car.
- If the defect is not eliminated, you need to check the play of the ball joint on the front suspension.
- If necessary, adjust the gap between the steering rack and the stop.
- Departure by car again.
- The defect has not been eliminated, so the play of the bearing, which is located in the upper support and in the bearing of this strut support itself, is checked.
- If deviations are detected, the front wheel bearing of the VAZ 2112 or other damaged part is replaced.
- Check out the car, the knocking noise remains.
- The telescopic stand is being replaced. Depending on the malfunction, left or right.
- After all operations on the VAZ 2112, knocking in the front suspension will be eliminated, which is checked when driving the car.
How to adjust the differential preload of a VAZ 2114
It happens that the blocking begins to lag or does not work at all. The reason is that the preload decreases or disappears altogether. In this case, you should not rush to change the entire assembly; it is recommended to try to increase its value (preload) yourself. To do this, you need to select the required thickness of the adjusting ring and install it in the gearbox housing socket. The whole procedure is quite labor-intensive, so it is recommended to use the vehicle’s operating instructions.
Causes of malfunctions
Due to the design features of the differential and its operational purpose, destructive processes occur due to friction, force loads and other reasons. As a result, active wear of the unit and its elements occurs. The main causes of malfunctions are as follows:
- Bearing wear and damage to their integrity;
- Damage or wear of oil seals;
- Insufficient amount of oil in the transmission, as well as its poor quality;
- Other reasons.
The first signs of problems in the operation of the VAZ 2114 differential:
- Increased noise in the bridge or box;
- Oil leaks;
- Bridge jamming;
- Plays and knocks during inspection;
- And other non-standard operation of the unit and its components.
If you observe abnormal operation of the differential mechanisms, the first thing that is recommended to do is to check all the connections of the unit for tightness and no oil leakage. If the integrity of connections and fastenings is not broken, and signs (noise or disruption of functionality) are present, dismantling and disassembling of the unit is required to identify and eliminate the causes.