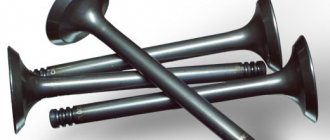
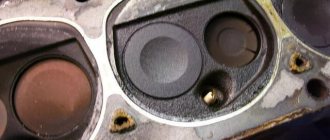
During engine operation, all parts change their geometric dimensions due to thermal expansion, which is not always precisely predictable. This problem also concerns the valve drive of the gas distribution mechanism in four-stroke engines. Here it is important to very accurately and timely open and close the intake and exhaust channels, acting on the end of the valve stem, which is difficult in conditions of expansion of both the stems themselves and the entire head of the block.
Designers are forced to leave thermal gaps in the joints or resort to installing units for their mechanical compensation.
Misregulation and consequences
When the thermal clearance of the valve changes during long-term operation or when individual elements of the system break down, the efficiency of the engine and the service life of the parts are significantly reduced. This is also accompanied by increased fuel consumption and a characteristic knocking noise in the engine compartment. If, for example, the gap is larger than normal, the element cannot open completely, and this contributes to a drop in power characteristics. Burning of the valve and its seat is possible if the gap is very small. In any case, these faults have a bad effect on the engine's response when you press the accelerator pedal.
Preparation
Before starting work, it is better to thoroughly wash the car body and clean the engine compartment from dust and dirt, so that nothing unnecessary gets into the engine after removing the cylinder head cover. Then it is very advisable to place the car on the most flat surface possible, tighten the parking brake and place chocks under the wheels. It would be useful to have good and uniform lighting. If the latter is not enough, get additional light sources.
It is not at all necessary to buy such stops; you can easily make them yourself
Next, you need to wait until the engine cools down to the recommended temperature (usually 15–25 °C) so that the measurements are as accurate as possible. Sometimes experienced craftsmen undertake “hot” adjustments, taking into account certain corrections for the increased engine temperature. But engines are different, with their own nuances and amendments, so it’s better to wait. Free time can be used to replace filters, check optics, etc.
The thermal clearances of the valves can also be adjusted with the cylinder head removed. Here, for whomever which scheme of work is more convenient, this method cannot be considered wrong. Just remember that when installing the cylinder head on the machine and broaching, the gaps may shift either to the plus or minus of the required values. Therefore, it is better to play it safe and double-check.
Gap function
There are at least 2 valves in a car engine cylinder (maybe more depending on the car model). Through the inlet valve the combustible mixture enters the cylinder, and through the outlet valve the gases are removed. The part is driven by a gas distribution mechanism.
During operation, the motor heats up, resulting in expansion of all its elements. Therefore, when the motor is not running (in a cold state), there must be a gap between some parts sufficient for thermal expansion of the metal.
The role of valves and valve timing in an engine
One of the most important characteristics of an engine when it comes to its maximum power output with acceptable fuel consumption is filling the cylinders with fresh mixture. It enters the working volume through the valve system, and they release the exhaust gases.
When the engine operates at significant speeds, and with some assumption they can be considered both maximum and minimum idle speeds, the masses of gas passing through the cylinders begin to manifest their aerodynamic properties, inert and others related to the efficiency of combustion and thermal expansion.
The accuracy and optimality of selecting fuel energy and converting it into mechanical energy depend on the timely supply of the mixture to the working area, followed by its equally prompt removal.
On the subject: PCV valve or how crankcase ventilation works
The moments of opening and closing of the valves are determined by the phase of movement of the piston. Hence the concept of valve timing.
At any time, and for a motor this means the angle of rotation of the crankshaft and a specific stroke of the engine within the cycle, the state of the valve is determined quite clearly. It can only depend on the speed and load within strictly standardized limits set by the phase adjustment system (phase regulators). They are equipped with the most modern and advanced engines.
How should the elements work?
The operation of a 4-stroke engine includes 4 cycles.
Each cycle has its own purpose:
- Intake - the intake valve opens and the fuel mixture is supplied to the cylinder.
- Compression - the valves are closed, the fuel mixture is compressed.
- Power stroke - the valves are closed, the burning mixture expands, its energy is directed to move the pistons.
- Exhaust - the exhaust valve opens, exhaust gases are removed.
For the motor to operate efficiently, the clearances must be properly adjusted.
The importance of adjusting engine valve clearances
After the start, the engine and all its parts begin to heat up, and therefore expand. At the same time, we should not forget about the natural wear and tear of rubbing and contacting parts. This necessitates strictly defined gaps between certain components. And the thermal valve clearances (between the camshaft cam and the valve stem) are among the most important.
If the gap is too small, the engine will not be able to fully realize its potential, which will immediately affect the dynamic and speed characteristics of the car. At the same time, the exhaust valves will overheat and their edges will melt.
If the gap is larger than required, the car owner will be alerted to the characteristic “clatter” of the engine, which can sometimes go away as the car warms up. With increased clearance, the camshaft lobe begins to "knock" against the rocker of the valve stem instead of pushing through it.
Valve mechanism in section using the example of an engine with two camshafts
The need to adjust the valves is ripe if the following signs are visible:
- there is an extraneous, slightly ringing sound in the area of the cylinder head cover;
- the gas distribution mechanism was repaired;
- the last adjustment of the valve thermal clearances was carried out more than 20 thousand km ago;
- engine output has dropped noticeably;
- As a consequence, high fuel consumption is possible.
Most modern engines use hydraulic compensators to adjust thermal clearances. It is convenient and does not require third-party intervention, although there is an opinion that components still wear out a little faster. The engines of many cars, in particular VAZ classics, require manual adjustment of thermal clearances. Some people consider this a simple matter, others, on the contrary, consider it a responsible and serious job. It all depends on experience, variations of techniques, dexterity and patience. It is recommended to carry out work after approximately 20 thousand km since the last adjustment.
Also, there is not much difference whether you have to deal with a gasoline or diesel engine. There are no significant or fundamental differences in the valve adjustment process.
It’s even better to combine adjusting the valve clearance with changing the engine oil. And exactly in this sequence. This will allow dirt, dust and sand that may get into the engine during adjustment to then leave along with the old oil and oil filter.
Valve adjustment: what it is, why it is needed, and what will happen if it is not done
What is valve adjustment?
The operation of a conventional piston engine involves supplying a fuel-air mixture to the cylinders and removing exhaust gases from them. Both functions are performed by valves - inlet and outlet, respectively, alternately opening at the right time to fill and empty the cylinder. Their operation is controlled by a camshaft, which has special cams that act on the upper part of the valve, opening it into the cylinder. There are several designs of the drive mechanism - the camshaft can act on the valves almost directly, pressing the cam on the pushrods, or, for example, through special rocker arms, pushing one end of them, while the other presses on the valve. But in any of the cases, the design has a feature that interests us: the thermal gap between the camshaft cam and the valve mechanism part that opens the valve. After all, the operating temperature of engine parts, especially the valve mechanism and the valves themselves, is very high, and when heated, the metal tends to expand, which leads, in particular, to elongation of the valve. It is to compensate for this expansion that a thermal gap is needed, and adjusting this gap is called “valve adjustment”
Yes, from a logical point of view, the wording “valve adjustment” is not entirely correct. The valve under normal conditions, when the camshaft cam does not press on it, is closed: the valve plate is tightly pressed by a spring to the seat in the cylinder head, and proper tightness is ensured by chamfers on both elements. Accordingly, no adjustment of the valve is required here - but the thermal gap must be correct. That is, it is more correct to say not “adjusting the valves”, but “adjusting the thermal clearance of the valve drive.”
Why is valve adjustment necessary?
If you imagine a combination of “valve - tappet - camshaft” without a thermal gap - that is, tightly adjacent to each other when the engine is not running, then it is easy to understand that when reaching operating temperature, the elongated valve is “pulled by a spring from the cylinder” towards the camshaft , due to thermal expansion, this same camshaft will begin to constantly press, leading to a slight compression of the spring and loose closure of the valve. That is, when the operating temperature is reached, the valve will actually cease to fully perform one of its functions: to close tightly to seal the combustion chamber and isolate it from the intake or exhaust tract.
This can happen, for example, due to wear of valve seats and discs. Accordingly, in this case, adjustment of the valves is necessary to ensure the required thermal clearance to ensure complete closure of the valves.
— Kolesa.Ru (@Kolesa_Ru) June 3, 2022
The second option is to increase the thermal gap: for example, due to wear on the surfaces of the camshaft cams and valve drive elements. In this case, even after the engine reaches operating temperature, there will be a gap between the camshaft and the valve mechanism, and they will touch with shock and only at the moment of impact of the cam. This already has a detrimental effect on the life of the valve mechanism, but there are other consequences: the valve will open a little later and not completely, which means that the filling of the cylinder with the air-fuel mixture will deteriorate.
What happens if you don't adjust the valves?
If the valves are not adjusted in a timely manner, this will lead to a change in the thermal gap. At the same time, both an increase and a decrease in the thermal gap, as we have already understood, negatively affects the service life and operation of the engine. Reducing the clearance means incomplete closing of the valves, which leads to a number of consequences. Leakage of the combustion chamber due to a slightly open valve leads to a drop in compression and the breakthrough of hot gases into the intake or exhaust tract (depending on whether the intake or exhaust valve is slightly open).
In addition, it is worth noting the significantly increasing thermal load on the valves. After all, tight contact of a closed valve with the seat is one of the important conditions for its cooling, and if the valve does not fit tightly to the seat, cooling noticeably deteriorates. This is especially true for exhaust valves: the intake valves are additionally cooled by the air-fuel mixture entering the cylinders, but the exhaust valves ensure the exit of exhaust gases at extremely high temperatures, and for them, cooling in the contact area with the seat is of critical importance. In extreme cases, poor cooling of the valve due to a small thermal gap can lead to its overheating and destruction - the so-called burnout. In addition, the breakthrough of the burning air-fuel mixture into the exhaust tract increases the load on the catalyst (and if it is destroyed, abrasive dust can damage the cylinders).
The consequences of increasing the thermal gap are somewhat different. As mentioned above, it leads to the impact of the camshaft on the valve mechanism, which negatively affects its service life, as well as to untimely and incomplete opening of the valve. Deterioration in the filling of the cylinder with the air-fuel mixture means a violation of the valve timing and a decrease in engine output: that is, it will pull worse.
How do you know what the thermal gap should be?
The size of the thermal gap is determined by the manufacturer for a specific engine: if the motor design provides for valve adjustment, the indicators are usually indicated in the operating manual. — Kolesa.Ru (@Kolesa_Ru) June 3, 2019
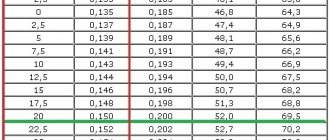
In general, the thermal gap is, of course, very small; it is tenths of a millimeter - approximately 0.1-0.4 mm. In this case, it is usually determined using a set of probes in increments of 0.05 mm or less - that is, accuracy to the hundredth is maintained. It is worth noting that the thermal clearance for the intake and exhaust valves is different: as we already know, the exhaust valves heat up more - and therefore increase in size more and require a larger thermal clearance.
In practice, you only need to know the specific values of the thermal gap for adjustment - that is, if you do not do it yourself, these numbers will not be very useful to you.
How to Know When to Adjust Valves
The frequency of valve adjustment, if provided for by the engine design, is indicated in the vehicle’s operating manual. In general, this procedure is not performed so often - usually every 50-80 thousand kilometers. However, more frequent checking will not hurt - especially if the machine is equipped with gas equipment, since gas fuel increases the thermal load on the engine.
The second way to find out about the need to adjust the valves is a characteristic sound: a knocking or clattering sound when the engine is running, which does not go away as it warms up.
— Kolesa.Ru (@Kolesa_Ru) June 3, 2022
Well, if the car was not purchased new, and its mileage is already quite high, then adjusting the thermal gap will definitely not be superfluous - you just need to find out whether it is provided for by the design.
How to adjust valves?
There are several design options for adjusting the thermal gap. For example, one option is to select washers of the required thickness, which are inserted between the valve tappet and the camshaft cam. To adjust the gap, it is first measured with the existing washer, and then, if necessary, the washer is replaced with another one of greater or less thickness. An alternative option with a similar design is to select not adjusting washers of the required thickness, but the pushers themselves with the required parameters.
Another variation is to adjust the thermal gap using a screw mechanism. In this case, there is no need to select anything: the gap is measured with a feeler gauge and then, if necessary, adjusted by screwing in or unscrewing the adjusting bolt, which is then fixed with locknuts - Kolesa.Ru (@Kolesa_Ru) June 3, 2022
We clearly demonstrated this adjustment method in a separate material using the Renault Logan as an example.
Why do valves not need to be adjusted on some engines?
The repeated clarification that valve adjustment must be provided for by the engine design is very important: after all, many engines do not require this procedure. This depends on whether the motor is equipped with hydraulic compensators: these are devices designed to automatically adjust the thermal gap. They work due to the oil supplied to them from the engine (which is why, in fact, they are called “ hydraulic”
compensators") and completely eliminate the need for periodic manual adjustment of the valves. They themselves, of course, also do not last forever - the need to check and replace them is indicated by the same clicking knock, which does not disappear soon after starting, and sometimes even after the engine warms up. However, the main thing you need to know in the context of this material is that engines equipped with hydraulic compensators do not need valve adjustment.
Why are valve clearances necessary?
Answering the question why engine clearances are needed, it can be noted that for normal operation of the motor, the thermal gap is quite important. Due to it, the closing and opening times of the valves are observed, and the preservation of the optimal level of tightness when closed is ensured.
If the gaps are set in accordance with the rules, after warming up their parameters are reduced to minimum values. This ensures regulation of gas distribution phases and long service life of parts.
During the operation of the car, the gap changes up or down. Depending on such deviations, certain problems appear. In most cases, this leads to a decrease in the service life of the valves, a decrease in the engine power level, the filling of the cylinders with the fuel and air mixture becomes worse, the overall combustion efficiency decreases, and so on. It is for this reason that it is so important to adjust the gaps from time to time.
It is necessary to check and, if necessary, adjust the gaps every 20 - 30 thousand kilometers. You need to rely on the standards prescribed in the repair manual for a car of a particular brand.
Gap measurement
Determining and checking which valve clearances are present should be carried out exclusively on a cold engine.
To carry out this operation, you will need to prepare a dipstick and other additional tools, the choice of which depends on the category of the valve pusher. This can be a spanner or open-end wrench, a hammer, a micrometer or a puller. The processes involved in measuring gaps are carried out in different ways.
To measure the thermal clearance on a pushrod with a special screw adjustment, the crankshaft must be rotated so that its cam is directed in the opposite direction from the pushrod. Next, you need to lightly hit the pusher with a hammer and swing it slightly to the sides with your hands. Using a feeler gauge, the gap between the valve and the pusher is measured, and then checked with the value specified in the car’s operating instructions.
To measure the thermal gap on a motor with shim adjustment, the crankshaft must be rotated so that the cam of the selected valve points upward. Using a probe, measurements are taken and also compared with the indicators in the car’s instructions.
If, as a result of the measurements taken, it becomes clear that the indicators are deviated from the norm, adjustment will be required.
Valve clearance adjuster
A more effective and efficient way to adjust the valve mechanisms of the power unit is to adjust them using a device, which is a special rail with an indicator attached to it. This adjustment is much more accurate manually, since when using the device, it detects and takes into account all defects on the surface of the adjustable parts.
For mechanical adjustment, in addition to dismantling the cylinder head cover, you will additionally have to remove the accelerator drive, the protective shield on the ignition distributor, the exhaust hose from the crankcase, and for carburetor cars, the carburetor “pan”.
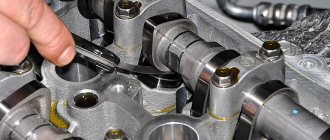
Using a special wrench, you need to rotate the crankshaft until the marks on the camshaft sprocket align (this is described above). To make this process easier, you can use a bright marker to mark the camshaft sprocket every 90 degrees. After that, we install the device rail on the valve being tested and fix it in a stationary state. We put an indicator on it and place its foot on the edge of the adjustable valve. To correctly perform this procedure, you will need a special grip, with which you need to clamp the cam and pull it up (a simple wrench will do). As a result, the indicator readings should deviate by 52 divisions. If they are slightly too low or too high, the valve needs to be adjusted. And then everything is extremely simple:
- using a 17mm wrench, loosen the locknut on the adjusting screw;
- the gap is adjusted with a key of 13, and all readings are clearly reflected on the indicator scale;
- the adjustment is checked and the locknut is tightened;
- At the end of the stage, it is again necessary to check the correct settings of the valve mechanism.
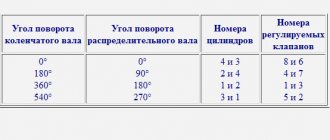
As you can see, this adjustment is much more accurate and simpler. But we should not forget that a highly qualified specialist will perform it at a high level and using a standard set of probes. In conclusion, it is worth emphasizing that most sets of feeler gauges contain an adjustment diagram that contains data on the angles of rotation of the camshaft and crankshaft, indicating the numbers of cylinders and valves.
How to adjust using the rack and indicator
To adjust the thermal clearance of the valves, a special rail paired with an indicator can be used. This set helps achieve greater accuracy than using a feeler gauge or washers.
Set with rail and indicator for adjusting valve thermal clearances
The work order is as follows:
- After the preparatory procedures and removal of the valve covers, the engine is cranked until the mark on the camshaft gear matches the body mark.
- Using a marker on the back side of the gear relative to the factory mark, you can put your marks every 90 degrees.
- Using three bolts, fix the rack on the protrusion of the bearing block.
- A dial indicator with a scale set to “0” is placed in a special slot on the bar.
- A special device is used to take the cam and pull it upward, after which the indicator needle moves by 50–52 divisions. If the numbers obtained are different, then the valve is adjusted according to the scenario described when working with the dipstick.
Video about the sequence of work
How to ensure the required clearance
The required clearance can only be obtained through properly carried out adjustment work. When carrying out this process, the main gas distribution mechanism is adjusted, especially the gap located between the camshaft cams and the valve lever.
There are special instructions on how to make the adjustment. It is not enough to ensure that the valves are pressed more tightly, since as the temperature rises, all parts become larger in size. Such an expansion automatically leads to various negative consequences.
The intake and exhaust valves should close the seat tightly, but with a small gap. It is necessary to ensure that the valve stem does not rest rigidly on the top of the device.
In the process of self-regulating gaps, you need to strive for strictly established values. They should not be more than 0.15 mm. The maximum permissible error level is 0.05 mm. These parameters should be checked only with a cold engine.
By ensuring the correct clearances during the adjustment process, the driver will receive stable engine operation, significant fuel savings, and increased service life.
Adjusting valves on the GA16 Nissan engine
Adjusting the valves on a 1.6 liter Nissan GA16 engine is quite simple; all you need is:
- set of probes;
- flat powerful screwdriver;
- tweezers;
- keys for removing the valve cover.
But there is one nuance in this process - since shims usually have to be ordered, you should first simply measure the gaps in all valves, and only based on the data obtained, order washers of the required size. With VAZ “eights” and “nines” it is much easier - all the washers of the required sizes are sold in car dealerships.
We carry out the work in the following order:
- dismantle the valve cover;
- set the TDC of the first cylinder, rotate the crankshaft so that both cams point upward;
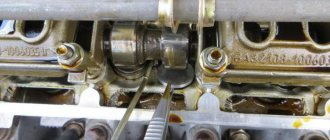
- press the pusher with a screwdriver and remove the adjusting washer. The gap is usually set at 0.35 mm on exhaust valves, and 0.2 mm on intake valves;
For example, when measuring the exhaust valve, the gap turned out to be 0.5 mm, and the removed adjusting washer has a thickness of 2.4 mm (240). The mathematics here is simple - the gap is 0.5 - 0.35 = 0.15 mm larger than the permissible one, which means the washer should be thicker by this amount. 2.4 + 0.15 = 2.55 mm, it turns out that you need to order a washer with a nominal value of 255.
Further regulation is carried out in the same way as on any other engine - by turning the crankshaft and adjusting for each cylinder, in the order of their operation 1342.
When to adjust valves
If your engine does not have devices to maintain the required clearance automatically, then you need to be prepared for the fact that every 30-35 thousand km. the indicated gaps must be checked.
Let us add that many car enthusiasts, especially owners of domestic VAZ models, determine the need for adjustment based on the appearance of noise during operation of the valve mechanism.
On foreign-made cars, the need to adjust the valves may arise after 60-80 or even 100 thousand km. mileage, since the engines have a longer service life and the set gaps on such internal combustion engines remain more stable.
Which engines need valve adjustment and when?
It should be noted that not all internal combustion engines require periodic valve adjustment. The fact is that now in many modern internal combustion engines that are equipped with passenger cars, so-called hydraulic compensators are installed in the systems of their gas distribution mechanisms. These devices independently adjust the gaps in real time, and therefore their value is always optimal.
If the vehicle engine does not have hydraulic compensators, then the valves must be adjusted manually. It’s quite easy to know that it’s time to do this by looking at some of the symptoms. One of them is the characteristic “clicking” of the valves, which was already mentioned above, and the other is that the engine begins to “trouble,” and compression in its cylinders either drops significantly or completely disappears. As soon as at least one of these symptoms appears, it is necessary to check the size of the gaps in the valve mechanism.
This should also be done without waiting for “alarm bells”, as part of routine vehicle maintenance activities. The frequency of checking valve clearances is indicated in the technical documentation for each vehicle, and, as a rule, is once every 25,000 - 30,000 kilometers. It is usually carried out at service stations, but, with certain skills, you can check the valve clearances yourself.
Signs and consequences of improper clearance
After starting the engine, it itself and all its parts begin to heat up significantly and automatically expand. It is also worth taking into account the natural wear and tear of the elements in contact with each other. All this is the basis for ensuring strictly established gaps between certain parts. Deviations from the norm can lead to certain problems. The list of them depends on which direction the gaps have changed - more or less.
Gap too big
If the gap is larger than the required size, the driver will begin to hear the characteristic clatter of the engine, which gradually goes away as the car warms up. With increased clearance, the camshaft fist does not push through the rocker of the valve stem, but simply begins to knock on it.
Such long-term shock load leads to such unpleasant consequences as:
- significant reduction in valve life;
- riveting;
- chipping of the end, which further increases the gap;
- increased noise during engine operation.
At the same time, engine power decreases due to serious disruption of gas distribution processes.
Gap too small
With a very small gap, the car engine will not be able to fully realize its functionality. This will automatically affect the overall speed and dynamic characteristics of the vehicle. At the same time, there will be significant overheating of all exhaust valves with melting of their edges. Among the main consequences of a reduced gap size are the following factors, based on the loss of combustion chamber tightness:
- Reducing compression due to the release of the air-fuel mixture.
- During the working stroke, exhaust and hot gases break through and lead to severe burnout of the valves.
- The plates no longer touch the seats, which disrupts heat transfer.
- The valves are heated to temperatures that significantly increase corrosion and oxidation.
- Increased load on timing belts.
Based on everything said above, we can conclude that adjusting the gaps must be done without fail. The process must be carried out if the following signs are present:
The engines of modern cars are designed in such a way that thermal clearances must be adjusted manually. For some it may seem simple, while others consider this process serious and responsible. It all depends on the driver’s experience, the availability of certain skills and tools. Moreover, there is no difference between diesel and gasoline engines. The adjustment process is carried out here according to the same scheme.
General information
The thermal gap ensures a tight fit of the valve on the seat during thermal expansion of the parts during engine operation. For each engine model, the optimal value of the thermal gap in the valve mechanisms has been established (Table 1).
Table 1
Thermal clearances in valve mechanisms
| Engines. | Inlet valve. | Exhaust valve. |
| VAZ-2101 – VAZ-2107, 412E. | ||
| ZMZ-2401. | 0.35-0.4 – for exhaust valves of cylinders 1 and 4; 0.4-0.45 – for the rest. | |
| ZMZ-53, ZIL-130, YaMZ-236, YaMZ-238. | ||
| KamAZ-740, KamAZ-741. | ||
| SLAVE-MAN. |
During operation, due to wear or improper adjustment, the value of the thermal gap may change, deviating from the optimal values. Both an increase and a decrease in thermal clearances negatively affect the operation of the gas distribution mechanism and the engine as a whole. If the gaps are too large, shock loads increase and wear on valve drive parts increases.
With very small gaps, the tightness of the combustion chamber is not ensured, the engine loses compression and does not develop full power, the valves overheat, which can lead to burnout of the chamfers. Thus, adjusting the thermal valve clearances eliminates premature wear of the gas distribution mechanism parts, allows you to restore valve timing, increase cylinder filling, their compression and, ultimately, engine power.
Clearances are checked and, if necessary, adjusted periodically during maintenance. Thermal clearances in the gas distribution mechanism are adjusted on a cold (15 – 25 ͦC) engine with the intake and exhaust valves completely closed. The gap is measured with a flat feeler gauge. The feeler gauge plates, equal in thickness to the required gap, should fit into the gap when lightly pressed. If the gap is specified by the permissible limit, a feeler gauge whose thickness is equal to the lower value of the limit should enter the gap easily, and one equal to the upper value of the limit - with a slight force. Before adjusting the valves, it is necessary to check the fastening of the block head and the nuts securing the rocker arms.
Figure 1 – Gas distribution mechanism of the KamAZ-740 engine:
A
– mechanism design: A – thermal gap; 1 – camshaft; 2 – pusher; 3 – pusher guide; 4 – rod; 5 – cover gasket; 6 – rocker arm; 7 – nut; 8 – adjusting screw; 9 – head cover fastening bolt; 10 – cracker; 11 – plate bushing; 12 – spring plate; 13 and 14 – valve springs; 15 – valve guide; 16 – thrust washer; 17 – valve; b – adjustment of thermal clearances in the valve mechanism.
Figure 2 – Gas distribution mechanism of the VAZ-2101a engine – mechanism structure: 1 – valve; 2 – valve guide bushing; 3 – sealing cap; 4 and 5 – valve springs; 6 – cracker; 7 – spring plate; 8 – lever pin spring; 9 – lever; 10 – camshaft housing; 11 – cam; 12 – valve mechanism cover; 13 – spherical support of the lever; 14 – adjusting bolt; 15 – lock nut of the adjusting bolt; 16 – steel bushing; 17 – lower support washer; 18 – retaining ring; b – sequence of adjusting the thermal clearances of the valves: A and B – marks, when combined, the piston in the fourth cylinder reaches TDC. on the compression stroke; B – adjusting bolt; G – lock nut; 1 – 4 – sequence of valve adjustment.
Adjusting the valves involves setting the required thermal clearance and is a mandatory procedure on engines without hydraulic compensators. If the specified gap is not adjusted, then as the mileage increases the valves begin to knock. Valve knocking can occur either due to increased clearance or as a result of pinched valves (for example, after incorrect adjustment). In both cases, if the clearance is damaged, the life of the valve mechanism is significantly reduced, the engine starts to run noisily, etc.
At first glance, it may seem that the use of hydraulic compensators on modern engines should completely solve this problem, since the design ensures automatic maintenance of the required clearance. Unfortunately, the increasing complexity of the system and increased requirements for the quality of engine oil do not allow us to talk about high timing reliability on units with hydraulic valve supports compared to analogues that do not have such supports, that is, they require adjustment. In other words, hydraulic compensators make operation more comfortable, but the reliability of the mechanism is reduced. For this reason, many automakers (both domestic and foreign) have not used compensators on their engines for a long time. Next, we will look at how to adjust the valves yourself, since today there are still a lot of cars on the roads without hydraulic compensators.
[custom_ads_shortcode2]
Operating principle of internal combustion engine timing valves
An ordinary ordinary driver, when it is necessary to adjust the valves, does not do it himself, but goes to a car service center. Because this requires certain skills and time. To teach yourself how to adjust valve clearances, you need to know the principle of their operation. An internal combustion engine has two shafts: the crankshaft (crankshaft) and the camshaft (camshaft). They are connected to each other through pulleys and a belt, through sprockets and a chain. The most common option is a timing belt driven engine. The crankshaft to camshaft transmission ratio is 2:1 (two to one).
The cams have a special irregular smooth shape that closes and opens the valves so that they correspond to the position of the crankshaft and camshaft, the engine stroke and valve timing.
When the internal combustion engine is running, it heats up accordingly, its parts heat up and expand due to high temperature. Because of this, the distance between the camshaft and the valve tappet changes slightly.
Question: why does the engine run differently when cold and when hot? Answer: because when the engine warms up to operating temperature, the valve tappet is pressed tightly against the valve and camshaft. This ensures efficient operation of the internal combustion engine.
And, if the valve end stops above the pusher, then a gap appears between the seat and the plate, and this leads to a decrease in compression in the cylinder.
It’s easy to check the compression: turn off the engine, unscrew the spark plug, screw in a special pressure gauge instead, turn the ignition key, get out and see what pressure the pressure gauge of a given cylinder shows.
And, if the end of a closed valve is located below the pusher, then during a certain valve timing phase, the valve will not open to the full distance it should. And this leads to a loss of power due to the slow removal of exhaust gases.
Preparatory work
So, the engine is cooled down, and the car itself is placed on a flat surface and immobilized. You can start working:
- Remove the carburetor air filter cover and remove the filter;
- We unscrew the filter mounting bolts and remove it, having first disconnected the pipes going to it;
- We remove the cable for manual control of the air damper (choke) and disconnect the throttle linkage;
- Unscrew the bolts securing the valve cover and dismantle it;
- Check the chain tension (it must be normal, otherwise you will have to adjust the tension first);
- Remove the distributor cap.
Now you need to set the TDC of the piston in the 4th cylinder and the marks on the knees will help with this. camshaft drive shaft and cover. shaft, as well as on the camshaft gear and its cover.
To do this, you can use a key of appropriate size, which you need to rotate the knees. shaft for the drive pulley bolt. Or use one of the drive wheels. To do this, you need to hang it with a jack, engage 4th gear and slowly turn the raised wheel. In this case, the transmission will ensure rotation of the crankshaft. But with the second method, you will need an assistant, since it will be difficult to check the coincidence of the marks.
What are valve clearances for?
In order for the engine to work at its best and develop all its performance characteristics to the maximum, the valves must move clearly and synchronously. The valves should fit tightly into their seats and open to the maximum.
With correctly set valve clearances, a hot engine works almost the same as a cold one, that is, the loss of power is minimal.
When the car is used a lot, for example, working in a taxi around the clock, the valves quickly lose their settings. Many people have probably heard, they say that the valves are knocking. This is just the time to adjust the valves.
Advice from auto experts: It is necessary to check and adjust the valves every 25 thousand kilometers of actual mileage. Of course, there are many modifications and brands of engines. It would be better to read the operating manual for the specific engine. Maybe there's no need to adjust at all.
How often should I adjust?
On VAZ cars, the thermal valve clearances, according to the manufacturer’s regulations, must be adjusted every 45 thousand kilometers. But often the need for customization appears much earlier. Experts recommend adjusting the timing elements at least every 20 thousand kilometers. And if the engine operates under maximum load conditions, then 15. This figure is also determined by the quality of spare parts for domestic cars, which wear out quickly even under ideal operating conditions.
Sequence for adjusting engine valve clearances
Before making adjustments, set the cylinder piston to TDC (top dead center) on the compression stroke. In this position, both valves of the adjustable cylinder must be closed, and the rocker arms of these valves must swing freely within the clearance.
After this, slowly loosen the locknut on the adjusting screw or bolt. Use a feeler gauge and adjusting screw to adjust the required clearance, then tighten the locknut.
“Be careful not to change the set clearance when tightening the locknut.”
After tightening the locknut, the thermal clearance must be checked again. Use a feeler gauge to check the gap. The feeler gauge should fit into it with little effort; if this feeling does not occur, but it passes very easily or very hard, you need to adjust the gap again.
To adjust the thermal clearance in the remaining valves, it is necessary to turn the crankshaft half a turn. During adjustment, the operating order of the engine cylinders (1-3-4-2) should be taken into account. Turn the crankshaft by the bolt securing the generator drive pulley.
What's the result?
It is worth noting once again that for measurement accuracy, it is optimal to cool the engine to 20 ° C, and then take measurements. It is necessary to measure the gaps at least twice. The camshaft must be rotated taking into account a full revolution.
If the gaps do not match, then the measurements must be repeated. For an accurate determination, it is optimal to have several probes of different thicknesses on hand.
We would like to add that the use of larger or smaller shims is not recommended at all. This should be understood as both the installation of small washers and minor turning of elements of larger diameter before installation. In such cases, a reasonable way out of the situation may be the usual rearrangement of the washers already on the motor.
The fact is that these parts are heavily loaded. An initial discrepancy with the required dimensions to a smaller extent and any third-party adjustment manipulations can lead to accelerated wear of the washers, engine malfunctions, or failure of the internal combustion engine itself.
The thermal clearance of the valve ensures its tight fit on the seat during thermal expansion of parts during engine operation. For each engine model, the optimal value of the thermal clearance in the valve mechanisms is established.
During operation, due to wear or improper adjustment, the size of the thermal gap may change and deviate from the optimal dimensions. Both an increase and a decrease in the thermal gap negatively affects the operation of the timing belt and the engine as a whole.
With a very large thermal gap, shock loads increase, and wear of valve drive parts also increases. The valve timing is disrupted (the moment of the beginning and end of the opening and closing of the valve), which leads to a loss of engine power and efficiency.
Small thermal gaps do not ensure the tightness of the combustion chamber, causing the engine to lose compression, not develop full power, and the valves overheat, which leads to valve burnout.
The gaps are checked and, if necessary, adjusted during maintenance. Adjustment of valve clearances in the timing belt is carried out on a cold engine - 15-25 degrees Celsius. The clearance is adjusted using a feeler gauge, the thickness of which must correspond to the required clearance in the valves of the car engine being adjusted. The feeler plate, the thickness of which is equal to the required gap, should fit into the gap when pressed lightly.
Sequence of work when adjusting the thermal clearance of valves.
Remove the valve covers. We install the piston of the first cylinder at TDC during the compression stroke; for this it is necessary that the mark on the pulley coincides with the mark on the timing gear cover. The compression stroke can be determined in this way: unscrew the spark plug and insert a paper plug into the hole for the spark plug. Rotate the crankshaft with the crank until the paper plug comes out.
Using a feeler gauge, check the size of the thermal gap in the valves between the valve stem and the toe of the rocker arm. If the gap is not within the acceptable range, it must be adjusted. To do this, you need to loosen the lock nut of the adjusting screw; if the gap is small, unscrew the screw; if it is large, screw it in so that the feeler gauge of the required thickness can pass freely. While holding the screw, tighten the locknut. The dipstick that corresponds to the lower value should pass freely with little effort.
Rotating the crankshaft through an angle of 720/i, where “and” is the number of cylinders, adjust the valves in other cylinders in the order of engine operation. Reinstall the valve cover.
Start the engine, warm it up to 80-90 degrees Celsius and listen to its operation. If the thermal clearance of the valves is adjusted correctly, there should be no knocking in the valves.
In this article we will look at the method of adjusting valve clearances and learn how to adjust engine valves yourself.
[custom_ads_shortcode1]
Adjustment of valves
First of all, on a carburetor car we remove the carburetor and air filter, and on an injection car only the pipes, which will prevent you from removing the valve cover.
Then we unscrew all the nuts around the perimeter by 10 using a socket wrench, be sure to collect the washers in containers so as not to lose them, since they are quite specific. Of course, you can later purchase them in the store, but this can significantly delay the work process.
Now we take a crooked starter or key, then rotate the crankshaft clockwise until the mark on the pulley coincides with the last ebb on the front cover along the way. With this action we set the pistons of the first and fourth cylinders to top dead center. It is at this very moment that the valves in these cylinders should be completely closed; accordingly, it is in this position that the adjustment is carried out.
The VAZ 2106 engine works according to the 1-3-4-2 scheme. That is, when the pistons of the first and fourth cylinders are at top dead centers, the pistons of the third and second are at the bottom.
So, after we have aligned the pistons as needed, we proceed to adjusting the valves. We can determine the ones we need by simply shaking the rocker arms - a light tapping sound will be heard. We need valves 8 and 6, counting from the front of the car.
To adjust, insert a feeler gauge between the camshaft cam and the rocker arm. If the probe enters with tension and comes out the same way, then nothing needs to be adjusted. If it passes easily, then you need to unscrew the locknut and unscrew the adjusting bolt. At this time, while we are unscrewing, we fidget with the feeler gauge to find the optimal position.
Once it is determined, tighten the locknut. It is very important to ensure that the adjusting screw does not turn even a degree. In any case, we need to check. To do this, we fidget with the probe again. If this is not possible, or vice versa, the probe moves without effort, repeat the procedure.
At this moment, if you look at the camshaft gear, the mark on it coincides with the cast on the camshaft housing. So, this is the best guide, because the crankshaft will need to be turned exactly 180 degrees, while the camshaft will turn 90 degrees. We adjust valves 4 and 7. Next, we turn the crankshaft again and adjust the valves in accordance with the table.
There is no point in discussing the assembly. The only thing worth paying attention to is the flatness of the valve cover plate. Over time, it is pushed through by washers, so it requires editing. If indentations are visible in the tightening areas, then it must be corrected on an anvil.
Valve clearances VAZ-2108-09-099
On front-wheel drive VAZ cars, unlike the “classic” Zhiguli, the adjustment is carried out by selecting the thickness of the adjusting washers; washers with sizes from 3.0 to 4.5 mm are available for sale. In some cases, smaller washers are required, for example, 2.5 or 2.8 mm, but they are needed mainly when the valve seats in the cylinder head wear out.
TZ 2108-09 are adjusted on a cold engine, the gap is set:
- for exhaust valves - 0.35 mm (plus or minus 0.05 mm);
- for intake – 0.20 mm (plus or minus 0.05 mm).
Practice shows that a gap of 0.35 mm or more is too large, the valves knock, so the best option is to set 0.25-0.3 mm in a circle.
According to the factory instructions of the Republic of Kazakhstan on 8-valve engines 2108 and 21083, it is carried out as follows:
- we install the shafts according to the marks of the first cylinder (crankshaft and camshaft) and scroll another clockwise 40-50 degrees, adjust the 3rd and 1st valves (counting from the front of the internal combustion engine);
- we turn the shaft 180 degrees, adjust the 5th and 2nd valves;
- after another 180 – 8th and 6th;
- after another 180 – 7th and 4th.
In practice, technical specifications do not regulate everything this way; the simpler adjustment is done as follows:
- at TDC of the first cylinder - 1, 2, 3, 5 valves;
- at TDC of the 4th cylinder (when the crankshaft is rotated 360 degrees) - 4, 6, 7 and 8 (all others).
If you set the valve clearances incorrectly
After 5-10 minutes of operation, the motor reaches operating temperature (this is about 90-100 degrees). According to the law of physics, all parts begin to expand. Engine wear will vary depending on whether the valve clearances are too large or too small.
Gap too big
If the gap is larger than the nominal one, the sound of the engine will be different. As the engine gradually warms up, this unusual sound (clunking) will disappear.
If the valve clearance is large, then the camshaft fist does not press on the valve drain rocker, but knocks on it.
If the engine runs in this mode for a long time, then:
- valve service life is reduced;
- the end of the valve stem may break off;
- riveting;
- there will be an increased noise level of the internal combustion engine.
Since the gas distribution phases are disrupted, engine power may drop by half.
Gap too small
In this case, the valve does not open completely, the exhaust gases do not have time to escape completely, hence the loss of engine power. Valve plates will burn out due to increased overheating.
Consequences of low valve clearance:
- Low compression in cylinders.
- The exhaust gases do not have time to escape through the small gap and the edges of the valves burn out.
- The valve plates do not fit tightly into their seats.
- High load on the timing belt or chain drive.
It is necessary to adjust the valve clearances as soon as possible if the following symptoms appear:
- A ringing sound appeared in the upper part of the cylinder head (cylinder head).
- If the timing belt has been repaired.
- If you have driven more than 25,000 km since the last adjustment.
- If the engine does not pull. Neither uphill nor in a straight line.
- If gasoline consumption has increased.
Adjusting the thermal clearances of the valve mechanism
Let's start with the fact that although different engines may have certain differences, the general principles of gap adjustment are similar for the vast majority of engines.
- The first nuance is that adjustments must be made at the internal combustion engine temperature specified for a specific engine type in the maintenance and repair manual. The average is about 20°C. This requirement must be carefully observed by those who do not have sufficient experience and strive to achieve maximum measurement accuracy. As for a qualified craftsman, it is no secret to a specialist that at a higher temperature of the unit, the gaps will initially increase. For this reason, valve adjustment on a warm engine is possible, but is carried out taking into account a number of amendments. It is worth adding to this that different motors may have parts made of different alloys and materials. As a result, thermal gaps may differ, and the cooling process may proceed faster or slower. For this reason, corrections for each internal combustion engine are individual.
- Now about the gap itself. The indicated gap on many motors is measured under the adjusting screw. You need to measure the gap using a set of special feeler gauges; the main one is the feeler gauge, which has a width of 10 millimeters. A number of nuances should also be taken into account. For example, consider VAZ cars. When making adjustments on classic models, there is a need for a wide feeler gauge. The fact is that the use of standard narrow probes leads to an error. This error is caused by the fact that the valve lever on such units is slightly beveled. Let us add that the optimal gaps on the “classic” are 0.15 mm. This clearance is the same for both intake and exhaust valves. It is quite obvious that it is quite difficult to accurately determine the indicated gap with one simple feeler gauge. The task is even more complicated, since it is not always possible to purchase a complete set of probes. In such cases, the experience of the master plays an important role, who actually tactilely determines the gap. To do this, take a 0.15 mm probe, after which its passage in the gap is assessed. If the indicated probe goes too “tight”, then the valve is clamped. Free passage of the feeler gauge will indicate increased clearance.
- It should be understood that it is not possible to set the gap perfectly right away, since after tightening the locknut it still gets a little off. For this reason, an amendment is made, the gap increases slightly. As for reducing the gap, such manipulation is not recommended. Note that there is a so-called table that contains various corrections in the case of valve adjustments on a hot engine. If you look at such data, then you can see the dependence of the increase in gaps on the degree of heating of the motor. In other words, the gaps should be larger when the engine is warmer. In this case, one should take into account the fact that the gaps are indicated for an idle internal combustion engine. After starting the unit, they will decrease, since the valves themselves will heat up the most and will be increased in length compared to other timing structural elements.
- Many people strive to minimize the noise from the operation of the timing belt. For this reason, there is a misconception that a slight reduction in clearances has a positive effect without harm to the engine. Actually this is not true. Indeed, if the valves are “clamped”, then the engine can run quieter when “cold” and/or “hot”. But reduced noise does not mean minimized wear due to the absence of audible impacts. The fact is that under certain conditions the valve stops closing completely. A loose fit of the plate disrupts heat transfer; the valve does not transfer excess heat to the cylinder head. The result is overheating and burnout of the valve. It turns out that incorrect valve adjustment with a decrease in clearance can lead to engine failure and the need for further repair. A clear sign of “pinched” valves is the condition of the camshaft, as the back of the camshaft cams will have noticeable wear.
Adjustment using a feeler gauge
- Remove the cover and ignition coil. We unscrew the soured bolts without serious effort so as not to strip the threads.
- The adjustment should begin with the least tightened one. Its cam will be in the “away from the rocker” position. Place the head of the key on the bolt holding the crankshaft pulley and turn it 180 away from the rocker arm, if possible. If it is not possible to take such an angle, then we turn to the largest possible.
Remember that the bottom valves (those closest to you) are exhaust valves. The gap in them should be within 0.20-0.25 mm.
- You should loosen the nut, take a 0.20 mm feeler gauge and tighten it by screwing in the rod. Put on the locknut, pull out the dipstick and tighten the nut completely. Check the gap by comparing how the feeler gauge passes 0.20 and 0.25. The latter will not go in completely. We mark the adjusted mechanism with a marker. We alternately adjust all the exhaust valves in the same way.
- Now we’ll find out how to adjust the intake valves on our own. This is done according to the same principle as the bottom row, only the gap size is smaller - from 0.10 to 0.15 mm.
- We check the dimensions of the set gaps with feeler gauges again and tighten the nuts tightly.
- We clean the valve box, armed with a utility knife and No. 0 sandpaper. Perform all movements from the valve to the edge to avoid litter getting into the box. We also first rough clean the lid with a blade, then carefully clean it with sandpaper.
- We change the gasket and, in a strictly defined order, following the manufacturer’s instructions, tighten the cover bolts.
- All that remains is to connect all the wires, hoses and pipes, and reinstall the air filter housing.
Adjustment using rack and indicator
To adjust the automotive thermal gap, a special rail is often used, along with an indicator. These devices allow you to achieve maximum accuracy, which cannot be obtained with the method described above. The order of work here is as follows:
- after carrying out the preparatory work and removing the valve covers, the engine must be turned until the marks on the camshaft gear and the marks on the housing coincide;
- You need to put your icons on the back of the built-in gear with a marker. This must be done every 90 degrees, relative to the mark set by the manufacturer;
- using three bolts you need to fix the rack on the protrusion of the block of installed bearings;
- You need to insert a dial indicator into a special slot on the bar. In this case, the scale should be set to zero;
- Using a special device, take the cam and pull it up a little. In a normal situation, the indicator needle will move by approximately 50 - 52 divisions.
If, as a result of the measures taken, the obtained parameters are slightly different, you will need to make adjustments using the method described above.
At the end of the adjustment process associated with setting the clearances in the valve mechanism, you need to start the engine and listen to how it operates in different modes. If the manipulation was carried out after the head was restored, it is necessary to ensure that the valves are properly ground in.
An example of valve adjustment on a VAZ 2108–2115
How to adjust a 6-cylinder in-line engine: video
Useful tips
To avoid “pinched” valves on classic VAZ models, you need to take into account that the back surface of the camshaft cams may not be ideal. This shaft runout is sometimes about 0.04 mm. For this reason, it is necessary to additionally check the gap. This is done when the cam is in the following positions
- before the valve opens;
- after the moment of its closure;
To solve the problem, you will need to install the camshaft in a position where the mark on the gear is in the upper direction. Then the clearances at valves 4, 6, 7 and 8 are checked. Then you need to rotate the crankshaft 180 degrees, that is, the camshaft will rotate 90 degrees. After turning, you can check valves 7, 4, 3 and 1. The 3rd, 1st, 2nd and 5th valves are checked in the same way, and then the 2nd, 5th, 6th and 8th. Please note that all valve measurements must have the same end result. If the results differ, then when setting the gap it is necessary to take as a basis the place where the gap is minimal (the most “squeezed”).
I would also like to know that VAZ has a special device with a dial indicator for adjusting the valves. It is assumed that such a tool makes it possible to achieve higher accuracy compared to using a feeler gauge, and also allows you to easily adjust the valves “hot”. Unfortunately, in practice such solutions have certain disadvantages and errors. As a result, the measurement accuracy is often far from ideal and may even be inferior to the usual method using a probe.
Some craftsmen can easily adjust valves on imported cars using special tools for VAZ, making certain changes to the design of the device. It is also common practice to use only one pusher clamp, which is selected according to size. The procedure boils down to cranking the crankshaft until the pusher “sinks” the camshaft cam.
Then the clamp is inserted, after which the camshaft rotates until the cam comes off the washer. After removing the old washer and checking/replacing it with a new one, the camshaft rotates back again. Note that the camshaft must be rotated using a wrench that turns the camshaft gear. The crankshaft should not be turned, since the timing belt must be properly loaded when rotating.
How to adjust valve clearances on foreign cars
First of all, using the repair and maintenance instructions for your car, we determine the engine type. The fact is that some foreign cars can have up to ten types of engines on one car model. The tool required for adjusting and installing timing marks is also indicated there. However, in most cases a set of wrenches and feeler gauges is sufficient. Let's look at the features of adjusting clearances on a Mitsubishu ASX 1.6 with a gasoline and diesel engine.
Gas engine
This is what a Mitsubishu ASX 1.6 engine with a gasoline engine looks like
To do this, follow these steps:
- Remove the plastic engine casing (held on by rubber latches).
- We remove the ignition coils and valve cover.
- We set both camshafts according to the marks (the nominal clearances of the intake and exhaust valves are also indicated here).
We set the engine camshaft marks - Using feeler gauges, we measure the gaps “Second and fourth cylinder - intake valves”, “First and third cylinder - exhaust valves”. We record the measurement results.
- Rotate the crankshaft 360 degrees. Then we align the marks on the camshafts and measure the gaps of the other valves.
Checking the size of the engine valve clearances - We remove both camshafts, take out the adjusting cups and use the given formula to calculate the size of the new cups.
Adjusting valve clearances - We install new cups and install the camshafts in the cylinder head.
- Apply sealant to the indicated places and tighten the valve cover.
Apply sealant and tighten the engine valve cover
Diesel engine
Sometimes Mitsubishu ASX 1.6 can be equipped with a diesel engine. In this case, the valves are adjusted using bolts in the pushers.
This is how valve clearances are adjusted on a Mitsubishu ASX 1.6 with a diesel engine
The main signs of incorrect work
If the valve clearances are set correctly, the engine will run quietly and smoothly. With increased intervals, it will make extraneous knocks and noises; with decreased intervals, it will work unevenly. Further operation of such a vehicle is impossible; you must carry out repairs yourself or contact a service center. Otherwise, you may lose your car.
The trouble-free operation of your car is largely determined by regular operations to adjust the valve clearances. The frequency of these operations is set by the manufacturer, and the adjustment technology is quite simple and does not require special knowledge and skills. Good luck on the roads!
Sources
- https://FB.ru/article/226876/zazor-klapana-kakim-on-doljen-byit-instruktsiya-po-pravilnoy-regulirovke-klapanov-vaz-i-inomarok
- https://autochainik.ru/regulirovka-zazorov-klapanov.html
- https://pol-z.ru/regulirovka-teplovyih-zazorov-klapanov-v-pomoshh-avtolyubitelyu/
- https://mtz-80.ru/bez-rubriki/regulirovka-zazorov-klapanov-dvigatelya
- https://scart-avto.ru/remont/kak-otregulirovat-zazory-klapanov-priznaki-i-simptomy/
- https://KrutiMotor.ru/regulirovka-klapanov/
- https://VmyatynNet.ru/avto-rf/nastrojka-klapanov.html
- https://gp-prsmah.ru/tyuning-remont/na-chto-vliyaet-regulirovka-klapanov.html
- https://delis-avto.ru/obzory/proverka-zazorov-klapanov.html
- https://autostuk.ru/regulirovka-zazorov-klapanov-2-varianta.html
- https://4x4privod.ru/regulirovka-klapanov-poryadok-proved/
- https://auto-gl.ru/regulirovka-klapanov-dvigatelya-sovremennogo-avtomobilya/
[collapse]
Why is changing the thermal gap of the motor dangerous?
If the valve is clamped, then the hot gases formed during fuel combustion heat not only the lower, but also the upper part of the plate, then the temperature of the valve increases, which can lead to its burnout. This is especially dangerous if the engine is running under heavy load or the ignition timing is incorrectly set.
Burnout of the valve will lead to a sharp drop in engine power, increased fuel consumption and engine overheating. If the valves start knocking, then there is no threat to the engine. The problem is that at an early stage, turning the crankshaft liner manifests itself with a similar knocking sound, so it is easy to confuse them.
