Appearance
Currently, tuning for VAZ cars has a wide range of choices. Since Russian-made cars are quite inexpensive, this attracts their buyers. Tuning for Lada cars is also available and can be found in almost any city.
Tinted glass
To give your car a beautiful appearance, the first step is to tint it. Car tinting is relatively inexpensive, ranging from 2,000 to 3,000 rubles. But after tinting, your car will shine with new colors. It is legally possible to tint car windows only from the rear. Since the light transmittance of the film is not so high, viewing in the evening will be difficult.
Lip installation
To give the car a stylish look, you can install a lip on the front instead of the standard fangs under the bumper. There are several types of lips. The rubber lip “Samurai” and the plastic lip from the Chevrolet Cruze fit perfectly on the Priora bumper. The lip should be secured under the bumper with self-tapping screws. The price of the lip is from 500 to 1000 rubles.
Guba Cruz
Lip Samurai
Lipspoiler
In the days of the nines, when our fathers raised the rear of the car by installing spacers under the rear shock absorbers and installing huge spoilers like in Need For Speed. Nowadays, it is stylish to lower a car; by the way, you can read how to properly lower a car on our website, and install a small spoiler that is glued to double-sided tape. The price of such a spoiler varies within 1000 rubles.
Alloy wheels
Everyone knows that the wheels of a car are the floor of the car, so the wheels of your car should be beautiful and you like them. On the Lada Priora you can install wheels with a radius ranging from R14 to R17. When installing R16 and R17 wheels, you will have to buy low-profile tires, which is very expensive and not practical, but at least beautiful. When installing disks with a large radius, comfort is lost and the chassis begins to work rougher since the rubber does not “eat up” minor road irregularities.
It is best to install R14 and R15 wheels. Such wheels are relatively inexpensive and the tires for such a radius are high profile. It follows that the comfort of driving a car will not be lost.
SE caps and mirror repeaters
In order to give your car a little luxury, you can install turn signal indicators in the prior mirrors and turn signal plugs in the wings on the SE. This modification is relatively expensive, but it significantly changes the appearance of the car and gives it a certain “richness”.
Sabers and bars
This is an amateur modification and is most often suitable for cars with a dark body color. The rear chrome-plated trunk saber and the front chrome-plated hood saber are painted matte black. This modification is very cheap and simple, but it has its own zest and is relevant when the chrome on sabers begins to swell, which is very common on Priors.
Antishildik
This modification consists of removing all nameplates from the car, but it also falls under the category of amateurs. Some car enthusiasts like their cars to look like they came from the factory. The nameplates must be removed using a hairdryer; they are glued with double-sided tape. After removing the nameplate, the remaining tape must be removed with gasoline or solvent.
The value of tuning
Tuning is a modification of a car that allows you to improve its appearance and change its factory characteristics. With the help of tuning, engine efficiency and power are increased, suspensions and braking system performance are improved.
Tuning the grille allows you to improve the appearance of the car, as well as increase the protection of the radiator. Refinishing can hide damage and defects.
Main options
Before starting work, you need to determine the final type of grating. There are several types of modifications. The chosen type determines what materials and tools will be used in the work.
Most often, the radiator grille is replaced with a metal fine mesh. ABS or fiberglass construction is also used. Using silicone glue, various decorative elements (for example, brand labels, letters and even drawings) can be attached to the part.
When doing tuning yourself, you must avoid partially or completely blocking the air flow through the grille. Otherwise, due to a decrease in the efficiency of the cooling system, overheating of the lower part of the body is possible.
How to tune it yourself?
Independent modification of the radiator grille is carried out in several stages.
Removing the factory radiator element
To carry out work, the part must be removed. Usually the grille is fixed with bolts and self-tapping screws. But modern models are equipped with plastic latches. Dismantling is carried out carefully so as not to damage the fasteners and grooves intended for them. You can remove the grill in about 20 minutes.
This is interesting: Review of small cars for women with automatic transmission
Making LED lighting
LED lighting is placed around the perimeter of the removed part. To install it, you should think about the connection in advance. It cannot be attached to parts that heat up during movement. It is best to install diodes on the grille ribs. You can securely fix the tape using silicone or quick-drying glue.
We equip chrome protection
The chrome plate on the radiator protection will give the old design a mirror-metallic shine. When creating it, special binders are applied to the surface of the product. They are dried at a temperature of +65 °C.
The work involves performing the following actions:
- a layer of activator is applied using a spray gun (for example, ST. 2516);
- then the grate is washed with distilled water;
- using a double gun, “Metachrome” and a reducing agent are then applied.
A pre-purchased radiator protection cover can greatly simplify the work.
Improvements in the interior
Lux salon
If your car is not luxury, then you can give it this manually by purchasing an additional interior lamp from Priora Luxury, installing heated seats, sun visors from Luxury with a mirror. All these spare parts and accessories are sold in any car spare parts for Lada Priora.
Cases
Every car owner would like his car to remain in new condition for as long as possible. During use, seats are subject to a lot of wear and tear. In order to preserve the original appearance of the seats, it is best to put covers on them. There are a large number of different covers for taste and color. The cost of covers for a Priora varies from 1,500 rubles to 5,000 rubles, depending on the quality of the materials.
Steering wheel cover
With active driving, by 100,000 km, the steering wheel of the Priora begins to wear out. In order to protect it from wear and tear and an unsightly appearance, it is best to put a braid on the steering wheel. There are two types of braids that are put on the steering wheel and that need to be sewn together. Slip-on braids are easy to install, but do not completely cover the steering wheel. Stitched braids completely cover the steering wheel and protect it from damage, but are quite difficult to install.
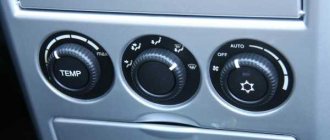
Replacing Heater Switches
The interior heater switches in the Prior are not very nicely designed. In order to give them a more modern and beautiful look, they can be replaced with switches from Ford Focus. Such switches are not expensive and fit into the place of the standard Prior ones without any modifications. You can order them on AliExpress.
Rugs
Most of the time a person is inside a car. Therefore, it is important to maintain the frequency there. To do this, we will be helped by special EVA mats that perfectly retain moisture, unlike standard ones, and do not allow it to spill outside the mat. This is very important in winter, since snow that gets into the car with your feet begins to melt and form puddles in the cabin that can spill and an unpleasant smell of dampness in the cabin cannot be avoided.
Side mats
You can also install side mats between the door and the seat to protect your carpet from dirt. Such rugs are not expensive, around 400 rubles.
Removing the front bumper upper grille
You will need: pliers, long and short straight screwdrivers.
- Remove the 6 screws of the upper bumper mounting;
- Bend the upper part of the bumper along with the grill towards you;
- Remove the fixing washers (on Priora SE, remove the screws) of the upper bumper grille by inserting your hand with a short screwdriver through the resulting hole;
- Remove the upper bumper grille by pulling it towards you.
It is worth noting that those with large hands may not be able to get their hand through or may break the upper part of the bumper. Mounting diagram for the upper and lower bumper grille:
Technical improvements
Firmware or chip tuning
In order to improve the speed and agility of your car, you can flash the ECU of the Lada Priora for not very much money. This is done by qualified specialists. Using the firmware, you can customize the car as you wish, whether it is an economical car or a fast car.
Exhaust installation
As you know, a catalyst was installed on the Lada Priora. On cars with high mileage, it often gets clogged and fails, which slows down and slows down the car; replacing it is quite expensive. But there is a way out: replacing the exhaust with a spider without a catalyst. After replacing the catalyst with a spider. The Priora ECU will need to be re-flashed. For a more complete tuning of the Lada Priora exhaust, you can lay out the entire exhaust route. Which is not a cheap activity.
Replacing camshafts
Replacing camshafts with sports ones will increase the speed of the car and make it easier to accelerate and improve dynamics. Such work should be carried out in trusted service stations with subsequent adjustment of the electronic engine control unit.
Lightweight flywheel
Installing a lightweight flywheel will allow the engine to spin faster, thereby gaining speed faster. It was noted that when installing a lightweight one, the car has to move away at higher speeds.
Perforated brake discs
When replacing brake discs, it is best to immediately install perforated brake discs for the Lada Priora. These discs are very well ventilated, which allows them to heat up less and protects the pads from rapid wear.
Self-locking differential
A self-locking differential is installed in the gearbox, which allows both front wheels to spin simultaneously. As a result, a more reliable start from a place is ensured. Installing such a differential is quite difficult; the difficulty lies in adjusting it.
Installing the deflector on the hood
To make the process easier, many parts come with installation instructions. Using the instructions, you can install the deflector yourself. Moreover, this operation will not require a lot of time.
Installation of deflectors, which do not come with instructions, is carried out according to the diagrams described below.
Manufacturer's modifications
Air intake mesh in frill
To ensure the supply of clean and fresh air to the interior of the Priora, the manufacturer has provided a cabin air purification filter. But since the holes in the frill for air intake are very large, which contributes to the fact that foreign objects and debris get into the filter and render it unusable. In order to correct this ailment, it is necessary to solder a metal mesh into the frill, which will protect the filter from debris. This will extend the life of the cabin filter.
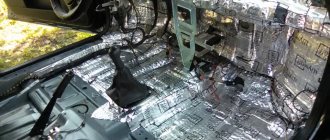
Interior noise insulation
As you know, Russian cars are not famous for sound insulation, so domestic Kulibins do the sound insulation of their cars themselves. In order to make sound insulation in the Lada Priora, it is necessary to completely disassemble the interior and glue all the necessary places such as the floor, ceiling, doors, trunk and engine compartment. Sound insulation is glued in. several layers such as vibration, heat, noise. After which the car will be unrecognizable
Acoustic shelf
In a hatchback body on a Lada Priora, it is best to replace the rear parcel shelf with an acoustic one made of wood. Since the original shelf simply loses its shape and bends at extreme summer temperatures. In addition, a standard shelf creaks quite often.
Installation of the 5th gearbox support
On 16 valve engines, 4 engine mounts are installed from the factory. Two guitars and two props. On 8 valve engines there are 3 supports. Two supports and one gearbox cushion. Most owners of 16-valve cars prefer to install such a support on their engines. This support allows you to reduce the rattling of the gear shift lever, its jerking when moving and simply helps to securely secure the engine in the engine compartment. It should be noted that after installation, some vehicles experience increased vibration at idle.
Masses
On modern cars, it is becoming more and more common that manufacturers reduce the cost of the production process. Also in Priora, the plant saved on the cross-section of ground wires. Experienced prior engineers advise transferring redundant masses from the generator to the ECU. This is necessary to ensure reliable voltage on the on-board network without sags.
Step by step guide
1. Unscrew 3 screws on both sides in the wheel arch.
2. Unscrew the top plastic covers on both sides near the headlights and remove. They are secured with four screws each.
3. Unscrew 2 more screws securing the bumper in the area of the hood lock.
4. If you have built-in fog lights, then disconnect the power connectors from them.
5. Next, in the engine protection area, unscrew five nuts by ten.
6. At the corners of the bumper, unscrew three screws on each side.
7. Pull the bumper off the latches starting from the arch.
After all the latches have opened, remove the bumper.
When replacing a bumper, you need to replace the radiator grille, lower plastic grille and fog lights (if equipped) with a new one from the old one.
The radiator grille is secured with eleven metal latches. The latches are removed using a screwdriver.
The lower plastic grille is secured to twelve metal latches, the same as those on the grille mount.
The fog lights are secured with Phillips screws.
When removing the bumper, it is advisable that you have an assistant.
Video lesson
Bottom line
Obviously, the process of replacing a bumper on a Priora will not cause difficulties even for a person who has never done anything like this. However, it is important, upon completion of installation work, to check how tightly it fits and whether there are any gaps between it and the front fenders.
If they are present, loosen the fasteners and adjust the bumper. If this is not done, moisture and dirt in these crevices will manifest themselves as corrosion over time.
Sources
- https://avtoskill.ru/remont-obsluzhivaniye/kak-snyat-peredniy-i-zadniy-bamper-na-lada-priora-hatchback-sedan-universal.html
- https://mylada.net/remont/kak-snyat-perednij-bamper-na-priore.html
- https://oshipovka-service.ru/remont/snyatie-perednego-bampera-priora.html
- https://kalina-2.ru/remont-vaz/kak-snjat-perednij-bamper-na-lada-priora
- https://ladaautos.ru/lada-priora/kak-poshagovo-snyat-perednij-bamper-na-lada-priora.html
- https://umelyeruki.info/avto/snyatie-perednego-bampera-lada-priora/
- https://1ladapriora.ru/raznoe/kak-snyat-i-zamenit-perednij-i-zadnij-bamper-na-lada-priora.html
- https://enginehack.ru/kak-snyat-perednij-bamper-priory/