Why put a mesh on the radiator grille?
In the vast majority of passenger cars, the radiator of the engine cooling system is installed at the front, where it is intensively blown by the oncoming air flow. But, in addition to the air stream, various foreign objects inevitably enter the heat exchanger:
- insects of various sizes;
- poplar fluff and foliage;
- road dust, fine sand and dirt;
- gravel, pebbles from under the wheels of oncoming cars.
Radiator honeycomb clogged with insects and dust
Cooling of the liquid in the radiator occurs due to its heat exchange with the air flow passing between the metal fins. When these openings become clogged with debris and insects, their flow area decreases and eventually becomes completely clogged. The intensity of heat exchange decreases, the radiator ceases to perform its function, and the engine begins to overheat.
Standard grilles installed by manufacturers protect the unit only from large stones, letting everything else through. That is why installing an additional protective mesh brings considerable benefits, increasing the service life of the radiator and the engine, which is not subject to overheating. A dirty mesh can always be cleaned and washed; this is more difficult to do with radiator honeycombs.
Car with intercooler for turbocharging
Is it possible to do it yourself?
YES of course you can. And it will be many times cheaper than buying from a dealer. To do this, we need to buy either a metal mesh at the nearest store (as I wrote above, the best is aluminum, because it is easy to work with). Or take a plastic one, preferably made of fiberglass, but which bends easily.
Then we simply remove the radiator grille (or two, upper and lower, if any), cut the protective mesh to size and fasten it with screws and ties. I would like to note that on many cars the grille needs to be removed along with the bumpers, because there is no way to get through.
For those who do not want to mount it rigidly, but want to make it removable, you need to make a frame onto which we stretch the mesh fabric (a rigid wire is suitable for this, or you can use a PVC pipe). And then insert it between the bumper and the cooling element. I repeat once again - THE MAIN THING IS NOT TO RUB ANYWHERE.
The cost of both elements will be about 300 - 500 rubles, plus your time.
Now we are watching the video version
I’ll finish this, I think it was useful. Sincerely yours, AUTOBLOGGER
(13 votes, average: 4.31 out of 5)
Similar news
Composition of antifreeze. Let's look at the red, green and blue options
Is it possible to mix antifreezes? Various colors and manufacturers.
Anti-fog for car windows. DIY recipe
The question of how to make a mesh for the radiator grill yourself does not arise without reason. Of course, you can purchase an additional protective mesh for the radiator, but it is not cheap and you will have to tinker with delivery and installation.
There is only one way out - to make a protective mesh for the radiator grille with your own hands. This solution to the problem, by the way, is much cheaper than purchasing the cheapest radiator grilles available for sale (from 6,000 rubles).
Everything about airbrushing on a car is here. Are you planning to cover your car with carbon film? Useful information here.
Tuning using a utility net
Tuning the front part of a Lada Granta car using a Chain-link mesh is very common. Such a mesh can be bought at any hardware store - it can be metal or plastic.
We choose the option with medium-sized cells. This is important to avoid excess dust getting under the hood of the car.
Fine mesh netting for making radiator grilles
Next you need to follow a simple algorithm:
- using one of the methods described above to remove the radiator grille;
- cut off all horizontal and vertical jumpers, leaving only the outer frame;
- using cold welding, seal all the holes that were created after the jumpers were cut off;
- clean the surface from all irregularities and burrs;
- Cut the mesh to size and attach it to the frame. If the mesh is plastic, you can simply glue it. If it is made of metal, heat the frame so that it does not burst, and screw the mesh with self-tapping screws;
- paint and wait for it to dry. At this point the tuning can be considered complete.
Radiator grille for Granta
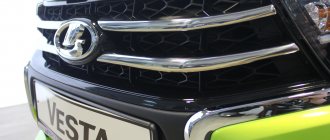
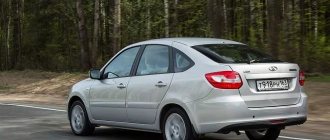
The Lada Granta is attractive in every way, because in addition to its economical price and great demand, it looks more than decent in appearance. The designers did a good job not only on the body, but also on its additional elements, in particular I would like to highlight the modern Grant radiator grille.
However, it doesn’t stop there, because tuning fans are increasingly resorting to modernizing the interior of the car and its exterior to their own taste. Moreover, the potential for creativity is inexhaustible.
Based on the reviews of the owners, we can conclude that the Lada Granta contains defects that can be redone and corrected.
Lada Granta, relevance of tuning
Styling or the more popular word tuning can be heard more and more often from the mouths of car enthusiasts. This is the name given to the process or result of modernizing the appearance of a car.
It is possible to change your car almost beyond recognition. In addition, now this can be done much easier than before, because there are more and more tuning centers and specialized online stores. There are even ready-made body kits available that allow you to change the car body to suit a certain style. Lada Granta was no exception.
However, for sure, installing a ready-made body kit purchased in a store is not as interesting as doing it yourself. After all, tuning is a creative process.
Many will agree that the most spectacular external components of the body, by which it becomes clear what kind of car is in front of us, are headlights, wheels, all kinds of optics and a radiator grille.
In the Lada Granta, at first glance, the grille is not such a significant body detail, but it provides many opportunities for tuning. In addition, in the Lada Granta, tuning the radiator grille can be done without much difficulty. In addition, this spare part can be made manually.
It is not necessary to have special skills for this. To perform this operation we will need standard tools and consumables.
Installation of chain-link mesh on the radiator grille
If you want to give your Lada Granta a brutal look, you don’t have to look for a special body kit at a tuning studio. Correct this situation yourself. Let's start with the radiator grille on the Grant.
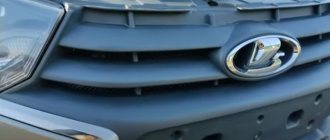
Granta radiator grille
Content
Types of gratings
Tuning and protection
Proper grate removal
Production: we do it ourselves
Lada GRANTA was released as a budget car in 2011. The queue for it was huge, and this is understandable. For the people of our country, such a car is an excellent alternative to expensive foreign cars. But some shortcomings were made during development. One of them is the unprotected Granta radiator grille. For some reason, it does not have a mesh to protect it from dust, midges and flying pebbles when moving. Car enthusiasts have always found a way out of such situations. There are already several ways to improve both the protective properties and appearance of vehicles.
Types of gratings
Several types of front grille have been developed for this Lada model. For car owners, there are a variety of configurations with which you can change your car beyond recognition. Changing the appearance is nothing more than a stylish tuning that attracts attention and glances. A variety of fashionable “clothes” for your favorite car are presented in online stores and car markets. It’s not difficult to choose the option you like and install a new grille on the front.
There are several popular types that have proven themselves on the positive side, and with these grilles the car looks new.
The most popular option is “Hulk”. Three wide ribs create powerful, imposing front features. The car looks bigger and more massive. Adherents of the classics will also like the Phoenix - it does not violate the concept of the car and protects the radiator well. Owners of cars participating in racing tend to buy sports pads. A special hole prevents overheating.
The many options for radiator grilles for the “Gad Grant” provide a huge choice available to every car enthusiast. By purchasing such a body kit, you can install it by entrusting the car to the specialists at the service station. But for true connoisseurs, this process becomes creative, and installation yourself is a matter of honor. Moreover, every owner wants to spend an extra hour with his “iron horse”.
Radiator grille "Hulk"
Tuning and protection
It’s quite easy to create protection and a “new face” for vehicles with your own hands. It is not necessary to run to the store and buy a grille of a different configuration. To make a grant radiator grille and tune it, you don’t need any super-expensive and fashionable materials. A regular mesh with a fine mesh is perfect for this process. It can be either plastic or steel. It can be purchased at a regular hardware or hardware store. The price will be minimal, because not so much mesh will be needed. It is necessary to measure the distance that you plan to close and buy as much as you need.
In addition to the mesh itself, a certain tool is required:
- hacksaw for metal;
- file;
- needle file;
- sandpaper of different grain sizes;
- fastening screws or bolts;
- cold welding.
When all the tools and material are ready, you need to dismantle the factory body kit directly.
Flat file 16mm
Proper grate removal
How to remove the radiator grille on a grant? There are two options for this. The first is classic and requires no effort on the part of the car owner:
- remove the front bumper along with the grille;
- after that, unscrew 9 fasteners from the inside of the bumper;
- then unclip the grille latches.
The second option will allow you to remove the body kit without removing the bumper itself:
- lift the hood and fix it on the rack;
- Using a 10mm wrench, unscrew the 6 fastening nuts on the grille from above;
- then carefully bend the grille, stick your hand into the gap formed and unscrew the 4 bolts at the top;
- then also unscrew the 5 nuts at the bottom using a size 8 wrench;
- then all that remains is to unclip the latches that hold the grille in place.
Removing the front grille on Grant
Production: we do it ourselves
After dismantling has been completed, you can proceed directly to manufacturing. The jumpers are cut off using a hacksaw. On the Lada Granta, the radiator grilles have a standard arrangement of fins, and only horizontal ones will have to be cut. You need to act carefully, otherwise any damage will lead to irreparable consequences. After removing the jumpers, the frame itself loses its rigidity, and all subsequent manipulations are carried out with extreme caution. The places where there were jumpers must be leveled using a needle file or file and sanded. The frame itself is sanded with fine sandpaper and prepared for further painting or filming.
The chain-link is measured according to the shape of the resulting frame, and fastened with self-tapping screws, which need to be heated before screwing. This will prevent the plastic from cracking. If the mesh was purchased from plastic, this simplifies the process. It is simply glued along the contour with a glue gun and that’s it. Some craftsmen advise securing them with clamps for reliability, but this is everyone’s business.
The main work has been completed, and now you can begin the final processing of the resulting product. The entire structure can be painted with the paint you like or covered with film to better protect the plastic.
The Lada Granta radiator grille is tuned not only for beauty, but also to protect against the adhesion of dirt, dust and midges. With such contamination, overheating can occur and the car will simply “boil.” Therefore, the size of the mesh cells is chosen at the discretion of the owner. There are ready-made and fitted radiator nets that can be purchased at car markets and stores. The actions that need to be carried out if you have a ready-made protective mesh are practically no different from the previous method.
Radiator grille "Riviera"
Installation method may vary. To do this, you need to make a frame to fit the radiator and attach the mesh to it in the standard way. Then the entire structure is attached directly to the air heat exchanger. This technique serves specifically as protection and does not require modification of the grilles. This also makes cleaning easier and does not bring problems with how to remove the radiator grille on the Grant.
With such a disadvantage in the Grant configuration, you need to think about replacing and installing a protective jumper right away. If you leave this point without attention, not only the radiator, but also the car’s stove may suffer. It also attracts small dust particles, which over time clog it and lead to breakdown. Installing a net is not only a new “face” of the car, but also insurance against unwanted breakdowns. And if an unforeseen situation occurs, the amount that will have to be paid for repairs will be much higher.
Manufacturing and installation
Now, you need to take a fine mesh and fold it in half, so that the edge fits under the edge and it folds more tightly. The edges of the galvanized mesh are incredibly sharp and tenacious, so protect your hands with gloves. After the mesh is folded as tightly as possible, we temporarily fix it with ties in the four corners. Next, we put the same layout on this grid and cut out the future grid. The most convenient way to cut such a mesh is with metal scissors.
The second step is to place the mesh on the frame. To use as a base, a mesh with larger cells will serve. According to the layout, you should cut out the desired outline from it. Then we place a piece of fine-mesh mesh on top of it, and align the edges so that they match perfectly. If you use a model when cutting out parts, be careful and attentive, then all three parts will be the same size and, when placed on top of each other, will give a smooth, perfect, three-layer edge. If everything is correct, we fix our parts in this position, tightly tightening them together with ties
It is important to place the ties in compliance with a certain pattern - either in a checkerboard pattern, or every even row, with distances of three cells. The accuracy of geometric shapes is always fascinating and after final decoration, the view will be even more transformed
Our hand-made mesh for the radiator grille turned out to be much stronger than the factory one and much denser, however, it is perfectly ventilated and does not create any obstacles to the air flow. Now you need to process the edges of the finished lattice. To do this, we take the car door seal, and carefully, slowly - so as not to tear it by accidentally catching on the sharp edge of the mesh, “put it on” it. Starting from the bottom right corner, millimeter by millimeter, it isolates the sharp edges of the grille edge, plunging them into the depth of the seal. Having completed a full circle, we will return to the starting point, now we can trim off the excess.
In fact, the grille is already ready for use, but it would be nice to give it a more presentable look. Tuning the radiator grille with your own hands is also a completely feasible task, and you need very little to do it. First of all, you should cut off all the hanging “tails” of the ties - not remove them completely, but rather cut off the excess, hanging part. Now place the grid on a clean sheet of paper, face up. Shake the can of paint well and start painting.
First, standing on the right, then, after waiting a little (an hour or an hour and a half), standing on the left of the grate. Such a coloring that “crosses” the directions of the jet will more thoroughly cover the entire surface of the craft.
If you approach the question of how to make a radiator grill with your own hands, you can get a high-quality and reliable grille within just a few hours.
Simple mesh Chainlink and brutal Granta
To make your Lada Granta look a little more brutal, you don’t need to look for a special body kit from a tuning studio. You can try to change this situation yourself. Let's start with Grant's radiator grille.
Using chain-link mesh for tuning the grille
One of the most common materials used to create a new part to replace a factory one is a fine-mesh Chainlink mesh. Such a mesh can be made of any materials, even plastic or steel. You can easily purchase it in many stores, and the cost will be very low. In addition, a self-made radiator grill on a Grant is always interesting.
An instrument will be needed for the operation. This includes a hacksaw, a file and a needle file, sanding or sandpaper, fasteners, and cold welding.
Before the grille can be customized to your personal taste, the factory grille must be removed. It is very simple and can be done completely independently. For everything to go well, you need to be careful and follow a certain order of operations. To dismantle you will need an “8” key, a Phillips screwdriver, a “10” socket and a T20 TORX key.
Now you can proceed directly to dismantling. To do this, you need to lift and fix the Granta hood, then you need to dismantle the bumper. Inside the bumper you can see 9 nuts. They need to be unscrewed. Then you need to pull the fasteners from the sides of the grille. Next, the radiator grille is simply removed. If necessary, you can also unscrew 3 nuts.
After removal, you need to cut off the horizontal or vertical jumpers as carefully as possible with a hacksaw or file. Don't be alarmed if the frame is no longer as rigid as before. This is a common effect of such tuning.
Examples of how the front grille can be changed
All burrs must be carefully sanded with a needle file. In order to hide the holes that appeared as a result of cutting off the stiffeners and jumpers, you can use cold welding. It dries very quickly once applied. Now you can continue the process again. You need to thoroughly sand the resulting frame with fine-grained sandpaper.
The next step is to prepare the grid. This is done according to our frame. You can secure the mesh with self-tapping screws or clamps, if possible. It is recommended to heat the self-tapping screws so that the material of our frame does not crack. If the Chainlink mesh is made of plastic, then it can easily be glued to the frame.
Next we need to carry out decorative processing of our lattice. To do this, you can use paint or self-adhesive film. As for colors, for Grant, tuning gives you the opportunity to fully realize your creative abilities. If you decide to do tuning, the grille can be painted according to your choice.
Grant's radiator grille: how to remove and tuning methods
In any car, the radiator grille is one of those elements that catches your eye when you first look at the car. It is located on the front of the car and is therefore so noticeable. The “facial expression” of a car also very much depends on how the radiator grill looks.
It is for this reason that many car owners change it or perform tuning to give their car some individuality. The Lada Granta radiator grill is no exception. You can see many attempts to improve it in various ways.
Many owners complain that this model has virtually no protection for the radiator from dust and dirt entering from the outside. Proper tuning helps eliminate this problem.
Tuning the radiator grille of Lada Granta
How to remove the radiator grille of a Lada Granta
Before tuning this element, let's figure out how it can be removed from the car.
The Lada Granta radiator grill can be removed in 2 ways. According to the classical method, you need to proceed as follows:
- remove the front bumper;
- on its inner side, unscrew the nuts securing the grille, there are 9 of them;
- Click to open 2 locks under the headlights.
Removing the radiator grille along with the bumper on the Lada Granta
The second method makes it possible to do without dismantling the front bumper. The algorithm looks like this:
- Unscrew 6 bolts from the top of the grille;
- bend it, stick your hand in, find by touch 4 bolts at the top and 5 nuts at the bottom - for this you will need a figure eight wrench;
- Under the headlights, use a screwdriver to open the 2 clamps.
After dismantling, you can begin tuning. After this, installation is performed in reverse order.
Tuning using a utility net
Tuning the front part of a Lada Granta car using a Chain-link mesh is very common. Such a mesh can be bought at any hardware store - it can be metal or plastic.
We choose the option with medium-sized cells. This is important to avoid excess dust getting under the hood of the car.
Next you need to follow a simple algorithm:
- using one of the methods described above to remove the radiator grille;
- cut off all horizontal and vertical jumpers, leaving only the outer frame;
- using cold welding, seal all the holes that were created after the jumpers were cut off;
- clean the surface from all irregularities and burrs;
- Cut the mesh to size and attach it to the frame. If the mesh is plastic, you can simply glue it. If it is made of metal, heat the frame so that it does not burst, and screw the mesh with self-tapping screws;
- paint and wait for it to dry. At this point the tuning can be considered complete.
Tuning the radiator grill using mesh on the Lada Granta
Installing a radiator grille on a Lada Granta car
After tuning is completed, the Lada Granta radiator grill is installed back. To do this, the finished part is placed in the standard opening in front of the radiator and secured with nuts, bolts and clamps.
Next, you need to check how correctly the fit is made and inspect the front part of the machine for irregularities, burrs and protrusions.
If any are found, clean them with a file or fine sandpaper.
Installing a bumper with a radiator grill for Lada Granta
Conclusion
Tuning the radiator grille is a good way to make the appearance of a car more attractive, make it stand out from the crowd, and add originality. This can significantly change the visual perception of your car when looking at it from the front.
The car will acquire a more modern, stylish and attractive exterior. It is precisely these considerations that drive those car owners who decide on tuning.
In the case of the Lada Granta car, the argument in favor of alterations of this type is the actual lack of protection of the engine compartment from particles of dirt, dust and moisture entering from the front. This is unlikely to benefit the car. Therefore, many car enthusiasts resort to making radiator protection with their own hands.
Send reply
2 Comments on “Lada Granta radiator grille”
What can be done to make the radiator grille allow less dust and dirt into the engine compartment?
The simplest and most cost-effective way to tune a radiator grille is to replace the standard product with household fine-mesh “Chain-link” mesh, which can be purchased at any market or building materials store.
Then everything is extremely simple:
• Remove the standard radiator grille;
• Cut off all the lintels so that only the frame remains;
• After this, there will be holes in the frame - they need to be sealed using cold welding;
• Remove nicks and burrs from the surface;
• Cut the mesh to size and attach it to the frame - the plastic one can be attached with glue, the metal one is better fixed with self-tapping screws, after preheating the frame so that it does not burst;
• Cover with paint, wait for it to dry and install in place.
More tuning for Grants
Please note that for the Lada Granta in our hypermarket there are more than 100 interesting accessories and parts, for example the following:
- Eco-leather central armrest
- Soft door armrests - front and rear
- Rear window frill without stitching
- Trunk lid upholstery for sedan
- Roof rails Grants
- Organizer for spare wheel niche on Granta
- Towbar (removable American square)
- Gas hood struts for Granta and Granta FL
- Carpet covers (front, rear, tunnel) to protect the interior from dirt
- Covers for door openings and rear bumper
and many more useful tunings! Call or write to us and we will help you select the necessary elements for your Grant!
Tuning Lada Granta
External tuning or styling is distinguished. This is nothing more than changing the appearance of the car. So, you can change your car almost beyond recognition. Moreover, now everything for this is available and it can all be easily purchased in online stores or tuning centers. Nowadays they even produce entire sets of body kits that allow you to change the car body in certain styles. Such body kits are also offered for the Lada Granta.
But it’s probably not interesting to simply install a body kit bought in a store. Some people like to do everything with their own hands. After all, tuning is a creative process.
Everyone can agree that the most impressive elements of the body, by which it immediately becomes clear what kind of car is in front of us and what its character is, are wheels, headlights and other optics, as well as the radiator grille. Such a seemingly insignificant body detail, like a grille, provides very wide opportunities for tuning. In addition, you can replace the grille with a tuned one without much difficulty. You can also make this part yourself. You don't need any special skills for this. All the tools for this operation are quite standard, and the materials are consumables.
Fiberglass repair
Bumpers made of material that cannot be welded or soldered (for example, fiberglass) require special restoration techniques. Of course, reinforcing mesh, a hot air gun and repairs with electrodes are inappropriate here. How does fiberglass crack repair work?
- We clean the paintwork and chamfer the edges of the cracks (we make them wider in order to subsequently fill them with fiberglass cloth). A grinding machine (grinder, orbital sander) is perfect for such work;
- Holes must be made around the perimeter of the damage. In this way we will improve the adhesion of the two layers;
- fill the groove with sandpaper (p80 grit), and then degrease the surface;
- Apply glue (epoxy resin diluted with a hardener) and apply pre-prepared pieces of fiberglass (the size should be several centimeters larger than the fracture site). Using a brush dipped in glue, smooth the fiber so that there is no air left at the contact point. We carry out the procedure on both sides of the damaged element;
- After drying, the repair area must be sanded.
How to make and install an outdoor version with your own hands?
To manufacture a protective element designed for external installation, you should purchase the following materials:
- aluminum fine mesh;
- universal glue;
- a piece of thick electrical cable 2-3 m long;
- tape and clothespins;
- a sheet of cardboard (mesh packaging works well);
- plastic clamps, preferably transparent or black, to match the color of the grille.
Materials and tools for DIY
To make a mesh frame and place it on the car, prepare a set of tools:
- stationery knife;
- regular scissors and for cutting metal;
- tape measure, ruler;
- marker.
A device for safely cutting the cable is made from a knife and a strip
Since this simple design is attached to the radiator grille from the outside with clamps, no tools are required to disassemble the bumper.
The cable is cut lengthwise to remove the insulation
The production and installation of the outer mesh is carried out in the following sequence:
- Take a sheet of cardboard, apply it to the car grille and carefully cut out a template that exactly repeats its shape. If necessary, modify the template with scissors, achieving maximum coincidence of the contours.
- Place the template on the mesh and trace with a marker, then cut out the workpiece with metal scissors. Try it on the radiator on your car.
- Tape a utility knife to a wooden plank as shown in the photo. Using this tool, make a longitudinal cut in the cable insulation and pull out all the conductors from inside.
- Form the edging of the element by placing the cut and gutted insulation on the ends of the previously made workpiece. Fill it from the inside with glue at several points and clamp tightly with clothespins.
This is what a homemade external mesh looks like on a car
When the glue has completely dried, the clothespins can be removed and the mesh can be installed on the car. If you did everything correctly, it will fit tightly to the grille from the outside. All that remains is to tighten and secure the resulting element with plastic clamps. After tightening, cut off their ends and turn them so that the clamp clamps are inside and do not stick out in plain sight. When you need to remove the protective element, just cut the puffs with wire cutters.
Toyota Vitz bumper soldering by split
Well, we will focus on a more accurate method - soldering, because the thickness of the Toyota Vitz plastic allows this procedure to be carried out quite successfully. It is possible to solder metal bases into a plastic mass. Take a soldering iron and a metal mesh. It is specifically designed for repairing plastic. Cut the pieces to size with scissors. The mesh is inexpensive.
Please note: you can use paper clips instead of metal mesh! Staples for construction stapler. They are heated with a soldering iron, but then not pierced through, but laid flat on the plastic from the inside
They successfully fuse into plastic and serve as an excellent fixative.
So let's continue. The soldering iron has become hot. Our task is to place the bumper straight when starting soldering. To begin with, even without a mesh, we begin soldering. This will help us assemble the bumper together at the seam using soldered points. And then we will secure it with a mesh for strength. Try to join the pieces of the bumper evenly so that it eventually takes on its original shape. And note: you don’t need to press into the plastic with a soldering iron, just do it as in this photo to simply join the bumper at the seam. Wait a minute after this to cool down.
Now let's take the grid. Place a piece along the seam. See photo. And with a well-heated soldering iron we heat the mesh, starting from its edges. Timing balance is important here: your goal is to warm up the mesh, but not solder it too deep! The plastic itself shows through well through the heated mesh. So wait while the mesh warms up. But don't overdo it.
After that, be sure to smooth out the soldering area with at least the same soldering iron for accuracy and reliability.
Bumper repair advice
It is quite possible to do without a grid. However, then you should not expect high strength. The mesh will “hold” the crack in the bumper. The split area will now be held together not only by the thin surface layer of plastic that we fused at the tear site, but we will also additionally fasten it together with metal pieces of mesh.
And here is the result of our work. Undoubtedly, this is not a professional repair; it cannot be called cosmetic. But for do-it-yourself soldering in your garage, the result is excellent. The parts do not touch each other and stay in place. Nothing is bulging. And it's free! By giving this work to someone, you will pay at least 5 thousand rubles.
The entire soldering process was captured on video. From it you will learn some more tricks.
FakeHeader
Comments 21
Gentlemen! By the way: Stopping at a crossing (RAILS) is strictly prohibited and is punishable by DEprivation of rights! Where are the moderators looking? ) PS And you want a like? )))
I already answered below that I work as a railway worker, this is a fire crossing, so there were no trains there)))
thank you, I agree. Not all cars are decorated with chrome...)
I looked, and didn’t see a single like from you, sir?! As a result, you don’t watch the FEED at all!
Accordingly, what kind of likes are you waiting for?!
Are you saying that I didn’t like any of your posts? That’s strange...
I affirm that you are unlikely to watch the TAPE!
If you don’t know, then you shouldn’t make such conclusions! I look through absolutely all the posts about elevators! There are just times when I can’t come here... I go to the tab about elevators, return to the posts where I left off and continue... although not right away, but I’m still I’m watching the recordings like this... so there’s no need to shout so loudly here. although there is no point in proving something to me
Nevertheless, I made conclusions!
If you don’t know, then you shouldn’t make such conclusions! I look through absolutely all the posts about elevators! There are just times when I can’t come here... I go to the tab about elevators, return to the posts where I left off and continue... although not right away, but I’m still I’m watching the recordings like this... so there’s no need to shout so loudly here. although there is no point in proving something to me
Yes, we didn’t switch to “you”, I ask you to respect it, although what I’m talking about, it’s unlikely that you understand the meaning of this word!
Sorry Sir...just next time you shouldn’t make such loud statements! Analyze your posts and look for fun where I clicked “like” for you
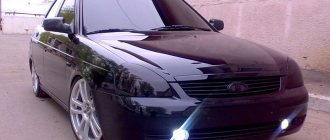
It turned out great) Blue headlights are debatable, but the car stands out from the crowd. And for the black saber plus) I did it myself, only I painted it and didn’t cover it with film
Every car enthusiast tries to pay as much attention as possible to his swallow. We have to change consumables on time and deal with broken parts. If there are suspicions that the silent blocks of the grant have served their purpose, then you need to quickly drive the car into the pit
It is worth paying attention to the harbingers
Often there is an incomprehensible dull knock in the suspension either on the right or left. There can be knocking for various reasons, but the silent block of the grant is one of the popular ones. Speaking about the reasons, you can go through the options for a long time, because it could be a support, a rod in a rack, or a box bracket
It is worth paying attention to such a detail as stretching, it is often the cause
How to remove the radiator grille of a Lada Granta without removing the bumper?
» Other »
Question for experts: Is it possible to remove the radiator grill of a Lada Granta without removing the bumper??
Answers from experts
First unscrew the bumper, then unscrew the grille
Gorbunov Alexander Sergeevich:
As promised, I am writing based on the results of how to remove the grilles (there are two halves on top) of the Pajero Sport radiator from the 12th year. I am writing in great detail, both for blondes and for people like me (apparently “without hands”, which are advised to remove here..) The purpose of removing the grilles was to screw decorative and at the same time protective linings from stainless steel tubes onto them. So :Open the hood lock - the lever is in the cabin, to the left of the steering wheel below you need to pull.
Lifting the hood itself, I felt under it in the middle for a latch, which I pressed and then completely opened the hood and secured it in the open state with a special spacer, which “is snapped in from below. In the middle I saw two halves of the radiator grille, connected at the top by an elastic seal. Each half is attached to the body with two “ "pistons" made of plastic, into which screws are screwed in for a Phillips screwdriver. You need to very carefully select a screwdriver for them or, as I did, a screwdriver attachment.
Of the four cross attachments, different in size, only this one fit, somewhere in the middle
I especially draw attention to this because these screws are made of aluminum, simply painted black, and unscrewing them with an unsuitable screwdriver will cause them to deteriorate! When you manage to unscrew and pull out this screw, you need to remove the piston from which it was unscrewed by prying it either with your nails, or with a nail file. You can cut it with a knife, but that's the same thing.
spoil.
Having taken out the screw and piston, looking carefully, we see empty holes on the body very close to each other, into which it is very convenient to temporarily insert them so as not to drop or lose them. I was shooting the grille in the snow and it was very relevant. But even on the asphalt it’s not fun to crawl and look. We remove all 4 screws with caps according to this scheme. Now the top of both halves of the grate will move freely. But as I already wrote, they are connected by an elastic band glued on top.
At first it seemed to me that these halves were also screwed on from the bottom from the inside. They can be seen by shining a flashlight and “theoretically you can reach them with a very long screwdriver. But I didn’t have one, and while I was trying to find it, I read on the Internet that it was not so. But the grilles are actually fastened with latches and these screws have nothing to do with it. Therefore, the next step is to grab one half of the grille with both hands closer to each edge and pull it towards you.
On the second attempt, the latch, first one, and then the second, clicked and one half separated from the machine and I hold it in my hands, and the elastic band “connects it with the second “not yet removed” half. At this stage, so as not to inadvertently tear it off It’s better to ask for the help of an elastic band, even if it’s a child or mother-in-law, who has someone on hand, to hold the first half while you disconnect the second half in the same way..
So I managed it myself and I hope I explained it to you.
pipe insulation s new-granta /delaem-pravilnoe-zimnee-uteplenie-na-lada-granta/
A working car does not need this tripper. I had a Lada like this when I was 30, without any cortons in my shirt, I drove in it
If it heats up before the working one and does not reset while driving, then there is no need to close it, otherwise, immediately after the radiator, at least hang a cardboard
What's the point? So that the radiator doesn't freeze? So for this you need to fill in a non-freezing liquid, “antifreeze” is called. Or to make it warmer in the cabin? This is unlikely to happen. In the engine cooling system there is such a tricky piece of hardware called a “thermostat”. It is designed to maintain a stable engine temperature.
When starting, even in summer, the coolant is driven by the pump in a small circle, without going to the radiator. And only when the temperature reaches 80° the thermostat opens the pipe valve to the radiator. That is, no matter what you cover, if the interior heating stove is powered by the engine, then the temperature in it will be the same as the engine, i.e.
e 80° stable.
If you really get too confused, they sell plastic radiator grilles (solid)
I drove Zhiguli and Moskvich cars in the far north for 20 years and did not install any cardboard or flaps, even in the 70-80s. And modern cars don’t even need this if the engine is working properly.
Granta seems to be a modern car. Why does she need cardboard? If it does not heat up to operating temperature, most likely the thermostat is closed. I covered the inside of my Volga with cardboard in front of the radiator so that Carlson wouldn’t blow. It began to warm up faster. But, this is the Volga! Moreover, she is 18 years old. So she's forgiven)
if there is not enough heat, then you just need to change the thermostat insert to a higher temperature one
Sew a curtain and tie it with strings from the outside to the radiator grille.
s otvet.mail /question/203902741
How to remove the radiator grille of a Lada Granta
Before tuning this element, let's figure out how it can be removed from the car.
The Lada Granta radiator grill can be removed in 2 ways. According to the classical method, you need to proceed as follows:
- remove the front bumper;
- on its inner side, unscrew the nuts securing the grille, there are 9 of them;
- Click to open 2 locks under the headlights.
Removing the radiator grille along with the bumper on the Lada Granta
The second method makes it possible to do without dismantling the front bumper. The algorithm looks like this:
- Unscrew 6 bolts from the top of the grille;
- bend it, stick your hand in, find by touch 4 bolts at the top and 5 nuts at the bottom - for this you will need a figure eight wrench;
- Under the headlights, use a screwdriver to open the 2 clamps.
After dismantling, you can begin tuning. After this, installation is performed in reverse order.
Radiator grill mesh for Lada Granta Lada Granta naperedok
Radiator protection for Lada Granta (designed specifically and taking into account the characteristics of a specific car model) - will reliably protect the radiator from fluff, midges, stones, reagents in winter and other objects that can cause damage to the radiator of your car. BUY: https://naperedok.ru/product/item/zaschita-radiatora-lada-granta
The radiator protective mesh has been developed taking into account the specific features and is exactly the size for each car model; it is installed without removing the bumper, without the participation of specialists.
The fastenings along the perimeter of the protective mesh are located at a minimum of 10 points, which ensures maximum fit of the mesh, repeating all the bends of the factory grille and securely and efficiently fixes the mesh in place.
Material: Mesh - Aluminum with powder-polymer coating + wear-resistant varnish. (coating is resistant to chips and pressure washes and touchless washes)
Edging - rubberized PVC (eliminates vibration of the mesh, will not damage the paintwork in places of contact with the bumper) Fastenings - durable plastic in the form of L-shaped latches for attaching the mesh to the inside of the bumper without removing it.
VKONTAKTE group: https://vk.com/club_in_move
ORDER BY PHONE HOTLINE, FREE CALL FROM ANY PHONE IN RF 8-800-7000-356
Radiator Lada Granta device, removal and installation of radiator Lada Granta
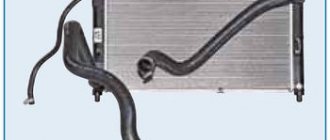
The Lada Granta radiator is the main element of the engine cooling and heating system of the car.
The radiator of the Lada Granta cooling system consists of two vertically located plastic tanks connected by aluminum tubes (arranged in one row) with cooling plates. The liquid enters the radiator through the upper pipe of the right tank, and is discharged from the radiator through the lower pipe of the left tank.
On top of the left radiator tank there is a fitting for a steam exhaust hose, which drains excess coolant during expansion into the expansion tank. At the bottom of the right tank there is a drain hole closed with a plug.
Below is a photo of the Granta radiator with all the symbols.
- 1 – steam outlet hose fitting
- 2 – supply hose pipe
- 3 – right tank
- 4 – drain plug
- 5 – lower radiator mounting cushion
- 6 – outlet hose pipe
- 7 – left tank
Removing the Lada Granta radiator
If the radiator of the Lada Grnat is damaged and begins to leak, it must be replaced. And to do this you will need to drain all the coolant and remove the radiator from the car. To avoid accidents, remove the radiator when it is cold. The sequence of actions is as follows -
1 – drain the liquid from the cooling system 2 – remove the radiator fan 3 – disconnect the radiator inlet and outlet hoses from the thermostat housing pipes and the pump inlet pipe, respectively, and disconnect the radiator steam hose from the expansion tank fitting 4 – unscrew the two nuts with a “10” head attaching the radiator to the upper cross member of the radiator frame. We tilt the radiator towards the engine so that it comes out from under the upper cross member of the radiator frame, lift the radiator and remove it complete with hoses from the engine compartment 5 - to remove the radiator supply hose, use pliers to compress the ends of the clamp and, by sliding the clamp along the hose, remove the hose from the pipe of the right radiator tank In the same way, disconnect the radiator outlet hose from the fitting of the left radiator tank, and the steam exhaust hose from the fitting of the left tank (when removing the hose from the fitting, be careful not to break off the fragile fitting)
6 – then using a 12mm head, unscrew the two bolts securing the radiator bar to its tanks and remove the bar.
We install the Lada Granta radiator in the reverse order. If, when removing the radiator, its lower mounting pads remain in the holes in the lower cross member of the radiator frame, then remove the pads from the holes and put them on the radiator pins. If the radiator cushions have lost their elasticity, are cracked or crushed, it is better to replace them with new ones.
Source: https://blaginin.net/2016/03/15/radiator-lada-granta-ustrojstvo-snyatie-i-ustanovka-radiatora-lada-granta/
| Anyone who has at least once seen the latest car model from the VAZ concern will say that a new radiator grille for the Grant is an extremely necessary thing. Don’t worry, the item fully complies with all standards and has a modern appearance. |