01/26/2022 47,866 Renault
Author: Ivan Baranov
The device that the Renault Logan dashboard has is quite standard. However, it is not always possible to understand the indicators that are on it. Also, the process of dismantling and installation has certain nuances. You can find out all about this in our article.
[Hide]
Typical malfunctions and methods for their elimination
Like any other electronic device, over time the control panel may begin to fail.
In order to recognize the problem in time, we recommend that you familiarize yourself with the main malfunctions of instrument panels:
One of the most common problems that Scenic owners encounter is the failure of the IRF3710 transistor. Of course, it is simply impossible to determine such a malfunction by eye; only a specialist can identify it after dismantling the device. Due to the breakdown of this transistor, the panel may periodically turn off and the backlight will disappear. If this happened at the initial stage, then the problem can be solved by replacing the transistor or resoldering it. If you tighten it, the shield may simply “cover itself.” If the tidy is really “covered,” then this is a more serious problem. When the dashboard fails, there can be many symptoms, ranging from the bulbs burning out and their periodic blinking to the failure of all devices at once. In this case, if you do not have knowledge in the field of electrical engineering, then it is better to immediately turn to professionals with such a malfunction, since soldering the board is quite a serious matter. Usually every technician can resolder and replace failed elements, but there are situations when repairs are simply impossible
For example, in practice, we have encountered cases where, due to negligence, the driver poured coffee or another drink onto the shield, dried it from the outside, but the liquid got inside through the cracks, onto the microcircuit itself. At first, the device works normally, even correctly, all indicators turn on on time
But after a few days or even weeks, the shield may begin to “glitch.” As a result of the diagnostics, it turns out that due to water getting on the board and constant humidity in the interior, mold began to accumulate on the circuit. The fungus completely destroys the structural elements of the board, so repairing such a device is pointless, of course, this happens rarely, but still, you need to be careful. The speedometer does not show driving speed. This malfunction can also be caused by a breakdown of the speed sensor, but if it is in working order, then most likely the problem lies with the board itself. The backlight has stopped working - completely or partially. In this case, the reason may also lie in the board or in the burnout of the light source itself, that is, the light bulb. If the lamp burns out, there is nothing complicated about it - you just need to remove the shield, disassemble it and replace the indicator. We will tell you more about dismantling below. It happens that the reason is a poor fit of the contacts of the indicator socket to the microcircuit. The problem can be solved by bending the contacts. Flashing indicators are usually due to poor soldering. Pointer gauges do not work - fuel level sensor, antifreeze temperature sensor, oil level sensor. In the event of such a malfunction, the first thing to do is diagnose the sensors themselves installed on the units - in the fuel tank, cooling system and engine. The problem may be a faulty electrical circuit or oxidation of the contacts. If the controller itself fails, then it is replaced with a new one; if the electrical circuit is damaged, then the damaged section of the wire must be replaced. The problem of oxidation or burning of contacts is solved by cleaning or replacing them. Pointer instruments work, but display information incorrectly. If the problem lies in only one sensor - for example, the fuel level or antifreeze temperature, then you need to check the controller itself. If all the devices immediately stop showing the correct data, then most likely the reason needs to be looked for in the microcircuit. The lighting on the dashboard on the right or left side blinks partially. Malfunctions of this kind are usually caused by the inoperability of resistances - structural elements of the board. As in the case of a transistor, the problem can be solved by resoldering the resistance contacts. All devices work fine, but the backlight does not turn on. It is less likely that the problem is caused by the burnout of the lamps themselves; most likely, the reason lies in the fuse block or one of the wires connected to the device. If the wire is damaged, it is better to replace this section of the electrical circuit in order to prevent similar problems in the future (the collective farm option of repairing with electrical tape is not suitable). The video below shows the procedure for testing the tidy using the example of a Renault Megane car (the author of the video is Alexander Platonov).
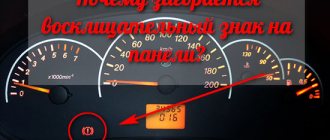
Renault Logan dashboard description of indicators
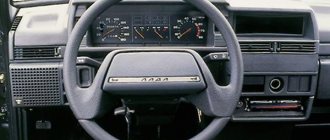
The design of the ventilation system nozzles is unusual, but at the same time practical, since this design has an increased ability to correctly distribute air flows inside the cabin, thereby facilitating the operation of the air conditioning unit. Among the main control elements present on the panel and causing some complaints from demanding Renault Logan owners are the regulators: After starting the engine, the warning light should go off.
If the warning light remains on, let the engine idle for one or two minutes - the temperature should drop. If the indicator continues to light, check the cooling system; 10 - not used; 11 — indicator for turning on the parking brake and insufficient fluid level Renault Logan instrument cluster in the hydraulic reservoir of the brake system lights up red when the parking brake is applied and the level of brake fluid in the reservoir decreases; 12 - the turn signal indicator lights up with a flashing green light when the left or right turn indicators are turned on; Renault Logan instrument cluster is turned on when the hazard lights are turned on; 13 - the engine management system malfunction indicator lights up orange when the ignition is turned on and then goes out.
If the lamp is constantly on, you need to contact a service station. Some vehicles do not use a signaling device; 14 - the immobilizer status indicator lights up red.
It not only has space for installing a radio with a radio in cars with basic equipment, in others they are already installed and two air vents with deflectors. Under the radio on the center console there is its own instrument panel with controls. There is a button for turning on the heated rear window, control buttons for the left and right electric windows, and knobs for adjusting the direction of the air blowing. There is also an air temperature regulator and an air conditioning control knob if one is installed.
The center console instrument panel has a hazard warning button. Over the past couple of years, the Renault Logan car has undergone a number of changes for the better. Renault Logan instrument cluster also touched the interior.
To remove them from memory and leave the self-diagnosis mode, press the Renault Logan instrument cluster button located on the instrument panel for a few seconds.
This mode allows you to find out the momentary consumption even when the car is standing still. Controls and instrument panel 1.
Side deflector. Side air nozzle. Dashboard.
Renault Logan dashboard description of indicators
The space reserved for installing the driver's airbag. Central deflectors. Central air nozzle. Space reserved for installation of a passenger airbag. Glove box.
Hazard switch. Control of electronic door locks. Space for installing an audio system or storage compartment. Air conditioner control panel. Switch for heated rear window and exterior mirrors.
Rear window control button. Power window switch. Rear window lock switch.
Space reserved for installing an ashtray or glass holder. Cigarette lighter or socket for additional equipment. Parking brake.
LPG button. Gear shift lever. Egnition lock.
Audio system remote control. Regulator of the direction of light beams in height.
Hood release lever. ECO mode switch. Adjuster for exterior rear view mirrors.
Throttle sensor
To determine the opening angle of the valve inside the throttle, a special sensor is used, called a throttle position sensor (TPS). The sensor is necessary to calculate the opening angle of the damper. This is necessary for the correct preparation of the fuel mixture.
Location
The throttle position sensor is located on the throttle body.
Signs of malfunction:
- Idle speed jumps;
- The engine stalls when the gas pedal is released;
- Spontaneous engine stop;
- Increased fuel consumption;
Possible malfunctions and ways to eliminate them
The dashboard on Renault Logan and Sandero is quite reliable. Problems with devices occur relatively rarely. In some cases, malfunctions of other vehicle components are mistaken for problems with indicators.
Thus, for adequate operation of the speedometer, tachometer and other elements, stable operation of the corresponding vehicle sensors is necessary. If they display incorrect information, a breakdown is possible with the sensors.
Also, a common problem with these and other cars is a violation of the integrity of the wiring, which could occur during the repair of other components of the car. You can check the wiring using standard instruments.
If one of the panel elements has really become unusable for you, you can replace it either separately or as a whole. Lamps are especially easy to replace, while the speedometer and tachometer will be more difficult to replace.
The video below demonstrates the process of replacing some light bulbs (the author of the video is Aleksei Suchkov).
Also, you can completely dismantle the old panel and install a new one.
Knock sensor
To reduce engine detonations resulting from low fuel quality, a special knock sensor is used. This sensor detects detonation in the engine and sends signals to the ECU. The engine block, based on readings from the DD, changes the ignition timing, thereby reducing detonation in the engine. The sensor operates on the principle of a piezoelectric element, that is, it produces a small voltage when detonation is detected.
Location
The Renault Logan knock sensor is located on the cylinder block, namely between the 2nd and 3rd cylinders.
Signs of malfunction:
Instruments on the center console
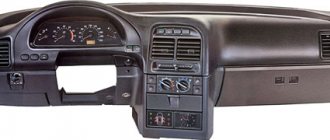
The dashboard also includes a center console. It not only has space for installing a radio with a radio (in cars with basic equipment, in others they are already installed), but also two air vents with deflectors. Under the radio on the center console there is its own instrument panel with controls. There is a button for turning on the heated rear window, control buttons for the left and right electric windows, and knobs for adjusting the direction of the air blowing. There is also an air temperature regulator and an air conditioning control knob (if one is installed). The center console instrument panel has a hazard warning button.
Over the past couple of years, the Renault Logan car has undergone a number of changes for the better. They affected not only the body, making it more stylish and a little more “aggressive” thanks to a new radiator grille and a modified front bumper. The changes also affected the interior. The front panel, on which the instruments and their controls are located, has also changed somewhat. The display moved from its center to the right, into the same chrome ring as the tachometer and speedometer. This has made the instrument panel more stylish and possibly more convenient - now the steering wheel in any position does not block the view of the display screen.
The center console has also changed somewhat. The power window buttons disappeared from it. They moved to the front doors (two for the driver and one for the passenger), which made controlling the windows much more convenient. Some skilled amateurs install indicators for unfastened seat belts and open doors on their cars, which makes driving safer.
The dashboard of a budget car Renault Logan is an integral part of the image of this car as a practical and inexpensive car. The process of removing and installing it is also not a big problem.
Vanguard S&P 500 ETF ticker VOO.
VOO is good at capturing a large space and charging a small fee. It is also large and liquid, with a huge asset base and millions of shares changing hands in most cases. The fund also tracks its index very well.
The VOO ETF offers excellent US large-cap coverage. The fund competes directly with SPY and IVV, which track the same index. While all 3 funds have minimal holding costs, VOO often holds a subtle edge.
The fund reinvests bridge money, unlike SPY. The ETF is technically part of Vanguard's larger portfolio, which includes S&P 500 mutual fund classes, with little impact on VOO investors. For 2022, the fund brought its investors a solid profit of more than 18% with a meager commission of 0.03%.
Possible faults
If the car’s operation is disrupted, the dashboard warns about this, and quite often this is associated with the failure of such system elements as:
- Temperature sensor
- Speed sensor
- Circuit breakers
This problem can be solved by simply replacing these sensors. Particular attention should be paid to the indicator in the form of an engine, it is also called a check, it is responsible for the engine system, during the start of the power unit it should light up and immediately go out, if it continues to light, this warns that there is a malfunction in the engine system. If this indicator starts flashing, this may be due to an unstable spark supply, so it is advisable to reduce the speed. As you can see, the panel is quite informative, and if you know what each element is responsible for, you can quickly determine the cause of the malfunction, and to understand the designation, below is a list of icons with descriptions:
Speed sensor
To accurately determine the speed of the car, a special speed sensor is used, which reads readings from the rotation of the gearbox gears. The sensor has a magnetic part that reads the rotation from the gear and transmits the readings to the ECU, and then to the speedometer. DS operates on the principle of the Hall effect.
Location
The Renault Logan speed sensor is installed on the gearbox housing.
Signs of malfunction:
Video about replacing the dashboard
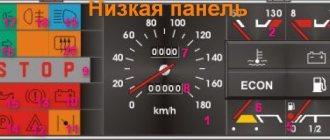
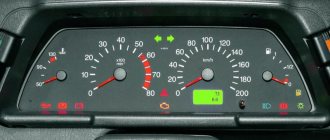
1 - Tachometer (scale division unit - 100 rpm).
2 - Fuel level indicator.
3 - Multifunction display: odometer, trip odometer, time setting or on-board computer.
4 - Coolant temperature gauge.
5 — Speedometer.
6.— Signal light for turning on the rear fog lights.
— Signal light for turning on the front fog lights.
— Warning light for door not closed.
7 - Multifunction button:
Controlling data output to the display. When you briefly press the button, you switch from the total mileage/time display to the trip mileage/time display or vice versa. Resetting the trip odometer to zero. Display the trip odometer readings, press the button and hold it down for a while. Setting the exact time.
— Signal light for minimum fuel level in the tank.
— Signal light for turning on the direction indicators.
— Coolant temperature warning light.
— Warning light for low engine oil pressure.
— Warning light for electronic engine immobilizer.
— Signal light for electronic system malfunction/signal light for preheating (diesel engine).
— Warning light for low battery.
— Warning light for the exhaust gas emissions reduction system.
— Signal light for parking brake activation and brake system malfunction.
— Signal light for low beam headlights.
— Signal light for turning on the high beam headlights.
— Signal light for anti-lock braking system malfunction.
— Airbag warning light.
— Warning light for unfastened driver's seat belt.
— Signal light for disabling the front passenger airbag.
— Signal light for turning on the heated rear window.
Renault Logan is a budget, but practical and multifunctional car. This is clearly evidenced by the ergonomic instrument panel, which is equipped with a considerable number of sensors, indicators and various lights. They participate in the management and control of transport, monitor the condition of vehicle systems and mechanisms, and regulate various processes in them. But even highly practical elements eventually become unusable, and sensors and fuses burn out. In this case, you will need to replace the light bulbs in the dashboard, which, if you know the features, you can do it yourself.
All models (with 1.4 and 1.6 l engines) and generations (2005-2009, restyling 2009-2016, 2014-2017) were created with special attention to a modern, sophisticated and optional type of tidy.
You can find many photos online that show the designations of all the indicators, lamps and torpedo icons, as well as a video with a detailed description of the functions.
On-board computer Renault Logan 2
On-board computer Logan 2 It is easy to activate the on-board computer (BC) of Renault Logan 2 by pressing the button located at the end of the lever responsible for the washing machine and windshield wiper. If you press again, the operating modes of the Renault Logan 2 BC will be displayed on the instrument panel display.
To reset the readings (except the odometer), press and hold the same button for at least 3 seconds.
Trip computer information
Odometer. Data on the total mileage of Renault Logan 2 is automatically displayed on the instrument cluster after starting the internal combustion engine and does not work to reset it.
What does the on-board computer show?
- Day running. Shows total daily mileage since last reset. The limit is 999.9 km.
- Time is displayed in 24-hour format.
- Total fuel cost. Represents the total offset since the last reset.
- Average fuel cost. As is already clear, they show how much fuel is consumed on average. The number displayed on the Renault Logan 2 dashboard display is calculated based on fuel consumption and kilometers traveled since the battery was turned on or since the last reset. Immediately after updating the meter data, the driver will see the following message on the display: “—L / 100.” The jurisdictional limit is 999.9 liters. However, to get accurate information about the average cost of a Renault Logan 2, you will need to drive at least 500 km.
- Distance to fuel outlet. The approximate mileage is calculated based on the average speed and current fuel consumption. The distance before running out of fuel is automatically calculated and updated while driving.
- Mileage after rebooting the computer. The dashboard displays the total mileage of the Renault Logan 2 after resetting absolutely all computer readings. The ripening limit is 999.9 km.
- Average speed. This dashboard mode displays the average driving speed since the information was last reset.
Sources
- https://maslo-5w30.ru/avto/raspinovka-shhitka-priborov-reno-logan
- https://nd-avtodrom.ru/raznoe/panel-priborov-reno-logan-opisanie.html
- https://soloserv.ru/avto/panel-priborov-reno-logan-opisanie-indikatorov-oboznacheniya-znachok-kardiogrammy
- https://loganlogan.ru/articles/panel-priborov-reno-logan-opisanie-indikatorov.html
- https://aeroche.ru/obzory/opisanie-indikatorov-na-paneli-priborov-renault-logan-i-sandero-oboznacheniya-i-remont-schitka
- https://NewLogan.ru/panel-priborov-reno-logan-opisanie-indikatorov-oboznacheniya-znachok-kardiogrammy.html
- https://r-ro.ru/sistema-tormozov/znachki-na-pribornoj-paneli-reno-logan.html
- https://rsc-53.ru/pro-rul/reno-logan-panel-priborov-opisanie.html
Installation instructions
New standard trim
To dismantle the old part and install a new one, you need to perform the following procedure:
- first disconnect the wires from the battery, negative first;
- partially remove the door seal;
- remove the decorative panel from the left front pillar;
- Unscrew the bolts on both sides of the panel;
- then remove the small covers located at the bottom edges of the instrument panel;
- there are bolts under them, unscrew them, then remove the headlight range control knob;
- Unscrew the bolts that are located under the corrector handle;
- remove the upper steering column cover;
- unscrew the bolt, disconnect the wiring connectors, and then remove the steering column switches;
- now unscrew the bolts above the column;
- remove the visor of the shield;
- Unscrew the shield bolts, disconnect the wiring connectors and remove it;
- remove the radio;
- now unhook from below and completely remove the central decorative wiring, disconnect the wires;
- remove heating and air conditioning system regulators;
- now dismantle the heating and air conditioning regulator, unscrew one bolt at the top and two at the bottom;
- then disconnect the diagnostic connector;
- completely remove the instrument panel, disconnect the wiring block;
- unscrew the bolts securing the front passenger airbag, remove the wiring connector to it;
- then remove the rivets from the glove box and the cover;
- Installing a new panel is done in the reverse order.
Indicator color codes
The dashboard of your current or future car, as mentioned above, has special indicators.
The dashboard will not stop warning you until you fix the problem in your car. It should also be noted that red does not always indicate a serious malfunction. The instructions say that this color is often used as a reminder to the vehicle owner, for example, if the parking brake is not turned off. In this case, driving the older model will simply be impossible, but in modern models, like the Renault Duster, this does not interfere with movement.
The description of the lights on the dashboard also includes yellow or orange colors. They indicate that a specific mechanism of the machine needs repair work or maintenance.
For the most part, according to practice and description, if the yellow light begins to flash, then the driver is obliged to pay attention to this and promptly contact a service center with specialists to carry out diagnostics and eliminate the malfunction, so that nothing interferes with driving the vehicle in the future
The dashboard can also display blue or green symbols, which, as the description says, turn on to inform the car owner that the vehicle is operating normally.
Having examined the colors of the indicator lights and understood what they signal, you can safely move on to the next point - deciphering the icons. You need to start with the most serious and important designations and indicators.
Scheme for decoding error codes Logan 2
As for the error codes that are displayed on the dashboard screen by the on-board computer, the list of them, which, as they say, is endless. Therefore, we suggest that newly-minted Logonologists, as well as all auto users, familiarize themselves with the scheme for deciphering error codes:
Important! Regarding how to remove (reset) certain error codes, as well as reset service intervals, these procedures relate to serious computer diagnostics, for which you need to contact specialized service centers.
And don’t forget to subscribe to our Telegram channel to receive news
Advantages and disadvantages of the front instrument panel
The front instrument panel of this car is a symbiosis of practicality and efficiency in production. The controls on the front instrument panel are located quite logically and do not require much time to get used to. The layout of the main controls is chosen quite well, in comparison with competitors, it has a number of pros and cons in its structure:
- the presence of a sufficiently deep “glove compartment” is one of the positive aspects of Renault Logan, however, the lack of finishing materials, “bare plastic”, is at the same time a negative factor;
- The layout of the instrument panel on the front panel is quite logical and predictable; these elements are clear and easy to read under any lighting level and weather conditions;
- The ventilation nozzles have an unusual, but at the same time, very practical shape in the form of circles with an adjustable airflow plane. This ventilation scheme, carried out through the instrument panel, allows for the most efficient distribution of air flows, which contributes to more efficient operation of the heating and air conditioning system;
A feature of Renault Logan, in this case, is the negative angle of inclination relative to the driver. This significantly reduces the visibility of the control keys, which can affect not only control comfort, but also driving safety. This scheme in the second generation of Renault Logan received a number of changes, and this negative point was eliminated;
Also, the disadvantages often include the poor quality of the panel plastic, but in the budget car segment this cannot be considered any disadvantage.
Crankshaft position sensor
The sensor that determines what position the crankshaft is in at a certain period of time is called a crankshaft position sensor (CPS). The sensor serves to determine the top dead center of the piston, that is, it makes it clear to the ECU at what point in time to supply a spark to the desired cylinder.
Location
The Renault Logan crankshaft position sensor is located under the air filter housing and is attached to the gearbox housing with a plate with two bolts. Reads DPKV readings from the flywheel.
Signs of malfunction:
Replacing light bulbs
Instructions for pinout the board and connection diagram, as well as the location of elements on the dashboard for Logan depend on the year of manufacture. You should only disassemble the panel, change indicators, and replace lamps if you have experience and knowledge of the technical features of the car. Firmware and wire layout may vary depending on the configuration.
To replace faulty light bulbs and indicators, you must remove the panel. The disassembly procedure is as follows:
- Remove the casing on the steering column; to do this, remove the bolts from its body;
- Take out the cladding, the fastenings of which are the clamps;
- Remove the screws securing the casing from the bottom;
- After removing the cover, unscrew the screws located on both sides;
After replacing non-functioning elements with new ones, assembly is performed in the reverse order.
Changing indicators and lamps yourself, disassembling the instrument panel and changing the colors of light bulbs does not cause any difficulties for the average driver. On the Internet you can find a large number of step-by-step instructions and guides to action, which describe in sufficient detail disassembling the panel, removing faulty elements, changing the color of the lamps from red to any other, removing plugs and other parts of the torpedo.
Do not forget that when carrying out any repair work, before you start using the car, you should test the panel and set the correct characteristics. Failure to perform a performance test may affect driving safety.
Today, not a single civilian car can do without an instrument panel. The practical Renault Logan is no exception. If the owner needs to dismantle or install this integral attribute of the interior, then performing the procedure will not cause any particular difficulties. In this article you will learn everything about the instrument panel description and symbols, including a description of the indicators.
Oxygen concentration sensor
To reduce emissions of harmful substances into the environment during the operation of the internal combustion engine, a special sensor is used that checks the exhaust gases for the concentration of carbon dioxide. If the parameters exceed the permissible values, it transmits the readings to the ECU, which in turn adjusts the fuel mixture to reduce harmful emissions.
Location
The oxygen concentration sensor (lambda probe) is located in the exhaust manifold.
Signs of malfunction:
Color designations
When driving a car, the main thing is to understand what the signal that appears warns about, for example, a red color indicates a serious malfunction, so you need to be as careful as possible in eliminating this problem, and until it is resolved, the signal will not disappear. In addition to the red indicator, there are orange and yellow ones, they warn that a certain element requires repair or maintenance. Therefore, if a yellow light comes on, it is advisable to eliminate the reason why it came on as soon as possible; you can do this yourself, or contact a specialist.
The Renault Duster dashboard also has green and blue indicators, which signal to the driver that the vehicle is working properly.
How to dismantle the panel and install it in place in Logan?
To complete the removal procedure, you need to follow several specific steps (given below).
- First, we dismantle the entire list of easily fixed elements, namely:
- instrument panel;
- steering column housing, etc.
- We begin removing the panel from the left side in the area where the air deflector is located. Here the assembly is held in place by plastic clips. They are quite fragile, so we perform the indicated manipulation with extreme care.
- Now we will implement similar actions with the right side of the panel.
- The next step is to remove the instrument panel. It is secured with several screws. Removing it itself may bring some difficulties due to the peculiarities of how this element fits in its place.
- Now we proceed to dismantling the center console.
- The radio and frame are held together with latches. Prompt removal will require some skill, otherwise the process may be delayed.
- The console itself is fixed with special plastic clips, after carefully removing which it is possible to remove the entire element (console).
- Let's move on to the central deflectors of the heating system. The first phase is characterized by the rounded outlines of the nozzles, and in the second they turned into rectangular components.
Only now is it becoming possible to remove the entire panel.
The installation procedure of the unit we are considering implies a strictly reverse sequence in relation to the dismantling process.
