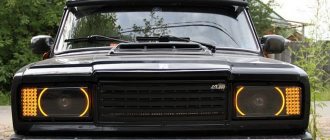
Nissan Tiida how to change low beam light bulb
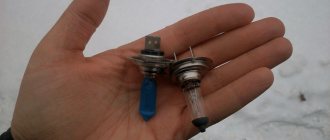
The first generation Nissan Tiida, produced from 2004 to 2014, had h5 12v/60/55w lamps installed in the low beam. The next generation of the model is equipped with lensed optics and other low-beam lamps. The replacement process is not complicated, even a novice car enthusiast can handle it; follow our instructions and you will not have any problems when replacing lamps.
Which lamp to choose
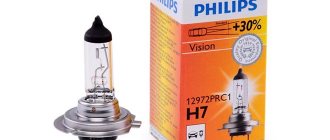
So, we have already found out above that the h5 lamp is installed in the low/high beam. For replacement, you can choose ordinary standard lamps, with increased brightness or extended service life, which are installed from the factory.
- PHILIPS h5-12-60/55 +30% Vision P-12342PR from 140 RUR Germany
- OSRAM h5-12-60/55 64193 from 140 RUR Germany
- NARVA h5-12-60/55 48881C1 from 100 RUR Germany
- BOSCH h5-12-60/55 Pure Light 1987302041 from 130 RUR Germany
- KOITO h5-12-60/55 W 0456E from 220 RUR Japan
- General Electric h5-12-60/55 50440U from 120 RUR Hungary
- AYWIparts h5-12-60/55 AW1910002 from 90 RUR Korea
- MTF h5-12-60/55 +30% Standard Long Life x4 HS1204 from 150 RUR Korea
These are standard bulbs that can be purchased at any automotive store. Lamps of standard power and the same luminous flux. If you need brighter lamps, then you should pay attention to lamps with increased brightness +100 +150% of light at the same power.
- OSRAM h5-12-60/55 +130% NIGHT BREAKER LASER set from 1300 RUR Germany
- PHILIPS h5-12-60/55 +130% X-TREME VISION 3700K set 12342XV+S2 from 1000 RUR Germany
- DiaLUCH h5-12- 60/55 +90% Megalight Ultra PRIME set 12604 PRMU from 600 RUR Korea
- AVS h5-12-60/55 +110% 3700K Sirius Night Way set A78949S from 500 RUR China
- BOSCH h5-12-60/55 +90% 1987301074 set from 900 RUR Germany
The above lamps have excellent light characteristics compared to standard lamps, however, at high brightness, these lamps have a shorter service life due to the design of the lamp.
Instructions for replacing lamps
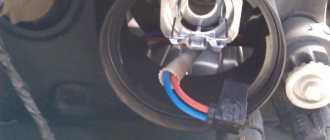
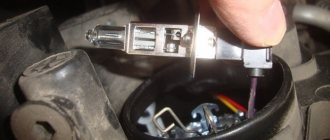
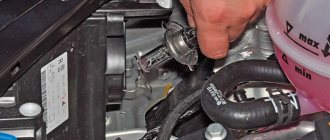
So, to remove the lamp from the base, first remove the plastic block from the lamp and remove the rubber boot.
Now carefully squeeze out the lamp fastenings, lower them down and take out the old lamp.
When installing a new lamp, you must not touch its bulb, otherwise the lamp will not last long.
Having installed a new lamp, first we put the rubber boot on, and then the block on the lamp.
We check the result, if after replacing the lamp it does not light up, the fuse on this headlight may have blown. Nissan Tiida has its own fuse for each headlight.
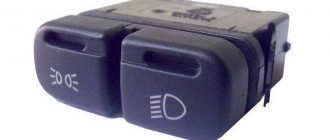
Low beam fuse Nissan Tiida
The fuses responsible for the low/high beam are located in the mounting block located under the hood. Each headlight has its own fuse. On the diagram these are numbers 10 and 12. The type of fuse used is flag fuse, power 15 A.
These instructions were written specifically for the site https://1remontauto.ru.
Nissan lamps
Owners of Nissan cars, like other car enthusiasts, are periodically forced to select lighting lamps for their cars. In addition to original light sources, there are a large number of other expensive or cheap, but no less high-quality light bulbs on the market. Lamps for Nissan, both for headlights and interior, are installed depending on the specific model.
They can be produced by a variety of well-known manufacturers, often PHILIPS or OSRAM; the original number of the same lamp in the catalog will depend on this. You may also come across a car on a conveyor belt whose headlights are equipped with KOITO, Clearlight, Omegalight or other bulbs.
Let's consider this question using the examples of three popular cars in our country - Qashqai, Almera, Tiida.
Lamps installed in Nissan
Despite all the variety of configurations and types of headlights (with a reflector or lens), these cars can have such lamps.
| Purpose of the lamp | Lamp type | Power | Original numbers | ||
| Qashqai | Almera | Tiida | |||
| Low beam and High beam (halogen) | H7/H4 | 55/60 W | 26295-BR00A | — | 26294-89911 |
| High/low beam (xenon) | D2S | 35 W | 26297-AU310 | — | 26297-89912 |
| Separately high beam | HB3 | 60 W | — | 26296-89912 | — |
| Separately low beam | H11 | 55 W | — | 26296-89946 | — |
| Dimensions | W5W (Fish) | 5 W | 26261-BM400 | 26261-5F005 | 26261-89968 |
| Fog lights | H8 or H11 depending on configuration | 35 W or 55 W | 26296-89946 | 26296-89941;B6296-4A001 | 26296-89941 |
| Direction indicators | PY21W | 21 W | 26717-BH00A | 26717-5F008 | 26717-BH00A |
| Side direction indicators | WY5W | 5 W | 26261-BM400 | 26261-89968 | 26261-89968 |
| Brake light/side light | P21/5W | 21/5 W | 26717-2F000 | 26717-2F000 | 26717-2F000 |
| Combined stop/gauge | W21/5W | 21/5 W | 26717-4AA0B | 26717-4AA0B | 26717-4AA0B |
Now a few words about the lamps installed in the interior of the mentioned cars.
| Purpose of the lamp | Lamp type | Original numbers | ||
| Qashqai | Almera | Tiida | ||
| Interior lighting | HB | 26282-AX600; 26447-EN000 | 26282-AX600 | 26282-EL00A |
Analogs of used original headlight lamps
Lamps of type h7 have a socket marked PX26d. The design stipulates that its maximum power is 55 W, and this is the value that most sold samples are designed for. The lamp can be used for both low and high beam.
| Popular manufacturers | Article number |
| Bosch | 1987301012 |
| Osram | 64210 |
| General Electric | 17123 |
| Philips | 12972 PR |
| General Motors | 94536018 |
| Valeo | 032009 |
In h8 the base type is H27W/1. Such bulbs are usually used in fog lights of various cars, including Nissan Qashqai, Almera and Tiida, as well as other models. It is distinguished by a yellowish glow, small geometric dimensions and low power consumption.
| Popular manufacturers | Article number |
| Osram | 880 |
| Philips | 12059C1 |
| General Motors | 94535555 |
Single-filament halogen lamp with H11 socket can be used in both regular and fog lamps. The cartridge designation is PGJ19-2. Due to design features, its maximum electrical power is limited to 55 W.
| Popular manufacturers | Article number |
| MTF Light PALLADIUM | 31262031 |
| PHILIPS | H11 |
| AUTO-GUR | AG12362LSC1 |
| AUTO-GUR | AGH11XV |
| XENITE | 1007011 |
The H4 type lamp is a double-filament halogen lamp. The cartridge designation is P43t. Can be used for both low and high beam. Power consumption is limited to 60/55 W. It is produced by many well-known global manufacturers.
| Manufacturer | Catalog number |
| Bosch | 1987302042 |
| Osram | 64193SUP |
| General Electric | 50440U |
| Philips | 12342 PRC1 |
| Valeo | 032007 |
Headlight bulb HB3. Cartridge type - P20d. It is a classic single-filament halogen lamp. In the American standard it is designated 9005. The lamp power is 60 W.
| Popular manufacturers | Article number |
| PHILIPS | HB3 |
| BOSCH | 1987302154 |
| AUTO GUR | AG9005LSC1 |
Lamp type D2S. This is a xenon gas discharge lamp designed to operate at a voltage of 85 V. Its power is 35 W. Cartridge type - P32d-2. The color temperature is 5500 K. Can be used as a low and high beam lamp.
| Manufacturer | Order number |
| WAGNER | D2S |
| Philips | 85122XV2C1 |
| Osram | 66240CLC |
Lamp WY5W. It is a baseless single-filament automobile lamp used as a signal lamp (usually in turn signals with a transparent lens or to illuminate license plates). Lamp power - 5 W. Cartridge designation: W2.1×9.5d.
| Popular manufacturers | Article number |
| Bosch | 1987302241 |
| Osram | 2827 |
| General Electric | 90199 |
| Philips | 12396 CP |
| Valeo | 032213 |
Baseless white light bulb W5W (FISH). Used in the front dimensions of many Nissan cars (in particular Almera, Micra, Note, Primera and Tino). An LED bulb that is analogue with a filament is designated as T10.
| Manufacturer | Order number |
| Philips | 12961NBVB2 |
| Hella | 8GP003594121 |
| Osram | 2825HCBI-02B |
Auto lamp W21/5W. It is a baseless two-filament automotive warning lamp. The cartridge designation is W3x16q. As a rule, it is used in a combined brake light with a clearance. In the rear brake lights (21 W filament) and side lights (5 W filament). Instead, LED T20 is often installed.
| Popular manufacturers | Article number |
| Bosch | 1987302252 |
| Osram | 7515 |
| General Electric | 7443 |
| Philips | 12066 CP |
| Narva | 17919 |
Car lamp P21/5W with BAY15d socket. This is a classic double-filament automotive lamp, widely used mainly in car taillights. A 21 W filament is used for the brake lights, and a 5 W filament is used for the side lights.
| Manufacturer | Order number |
| Philips | 12499VPB2 |
| BOSCH | 1 987 301 016 |
| General Electric | 1077 |
| Koito | P4524 |
Lamp PY21W, socket designation - BAU15S. This is a classic single-filament lamp, widely used in car turn signals and similar places. It differs from the regular P21W lamp in the amber color of the bulb.
| Manufacturer | Order number |
| Philips | 12496NAB2 |
| BOSCH | 1987302213 |
| AYWIPARTS | AW1920011Y |
Source: https://blog.partreview.ru/article/lampy-nissan/
Replacing a low beam bulb on a Nissan Tiida – Car Lover's Blog
Low beam lamp for Nissan X Trail T31, Tiida, Note, Beetle, Pathfinder and Primera The serviceability of the lighting system directly affects the safety of movement at night and in conditions of insufficient visibility, therefore all elements must be in working order. In this review we will tell you how to change lamps in some Nissan models; the work is almost identical in everything, and they have their own characteristics depending on the modification. How to replace a low beam lamp, how to change a lamp, change it. In an Opel Astra. Uh, low beam or dimensions described how to change a light bulb, like a Nissan? Me: yes! He. In any case, this operation can be done by any car owner, and it does not require special tools or equipment. In the photo: working light is a guarantee of safety and comfortable movement
VESKO-TRANS.RU
AutoNews / Reviews / Tests
Replacing Low Beam Bulbs Nissan Tiida Video
Short beam on Nissan X Trail T31, Tiida, Nout, Beetle, Pathfinder and Primera
The performance of the lighting system directly affects driving safety in the dark and poor visibility criteria, so all elements must be in working order.
In this review we will explain how to change lamps in some Nissan models, the work is almost the same for almost all, and they have their own characteristics depending on the modification. In any case, this operation can be done by at least some car owners, and no special tools or equipment are required.
In the photo: good light is the key to safety and comfortable movement
General recommendations for work
No matter what machine is running, there is a certain list of operations that always remain constant, we will study them:
Do not touch the glass surface of the lamp under any circumstances, as it will contain grease particles that will burn off under extreme heat, creating a darkening on the surface that will significantly reduce the life of the device.
When replacing, always keep the product database.
Features of operation in some models
We'll look at how to make replacements without assistance, and hope that a brief summary of each of the following types will help you.
X follows
Replacing a headlight on a Nissan X Trail is done as follows:
- After completing all the above steps, you can move on to the first step - after disconnecting the electronic connector from the base of the lamp, gently press it on both sides to release the latches, after which the assembly will detach from the contacts.
- Then grab the tab by the rubber retainer and remove it from the housing by simply pulling it away from the structure. From time to time this element dries out, in this case loosen it around the perimeter with a screwdriver.
- Under the cover you will see the clip that you want to remove; to do this, you need to press on the antennas and disconnect them from the protrusions on the body.
This diagram shows the entire process.
Replacement of rear dimensions
- Open the plugs (as in the photo)
- Unscrew the fasteners (2 nuts) + Remove the wire block
- We take out the headlight (pull it horizontally towards us, from the street side)
- We take out the worn light bulb and put a new one in its place. If you count from left to right, then the first light bulb is our size (for the left headlight).
- We reassemble the headlight in the reverse order
Experts recommend changing the dimensions of the Nissan Tiida hatchback immediately and on the opposite side.
By the way, here is a video review of how to change the rear dimensions yourself:
Replacement instructions
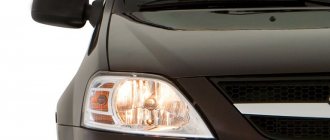
Front lights illuminate the road and allow the driver to see road signs and markings, ensuring safety. In many ways, the quality of lighting depends on the condition of the lamps installed in the optics. During operation, light bulbs can fail for various reasons. In this case, they need to be replaced with working ones.
The procedure for replacing light bulbs on a Nissan Note is simple and can be done by any car enthusiast.
When replacing, lamps of the same power as were installed before are installed.
You can change lighting sources on a Nissan Note without removing the headlights. They are changed from the engine compartment.
Adjustment features
Adjusting Nissan Note headlights is done in the same way as on other cars. To do this, the machine should be placed on a flat horizontal platform in front of a vertical wall at a distance of 5 meters. Markings are applied to the wall or stand according to which the headlights are adjusted.
Adjusting the light according to the markings
Before starting the setup, you need to check the tire pressure, place a load weighing about 75 kg on the driver’s seat, or have an assistant sit on it. The weight of the vehicle should be approximately the same as during daily use. Adjustment is carried out one by one for each headlight. A properly adjusted light illuminates the entire road and does not blind oncoming drivers.
Car front optics
Optics selection criteria
You have to change the optics on your car if they are out of order, or if you are not satisfied with the standard lighting. Headlights on Nissan models are one of the elements of the car's exterior. You can improve the appearance by purchasing tuned headlights or adding eyelashes to the headlights. To improve the quality of daylight, DRLs with xenon are installed (video author: Denis Skibin).
For high-quality lighting at night, halogen lamps are installed. They are most often used as low and high beams. For DRL lights, LED lights are used, in this case the daylight is brighter. Drivers are replacing brake light bulbs with LEDs. The LED brake light can be made dynamic, for example, in the form of a running light. Xenon and halogen bulbs are installed in the fog lamp.
General recommendations for carrying out work
Regardless of which car the work is carried out on, there is a certain list of operations that always remain the same, and we will consider them:
| Removing the terminal from the battery | Many people believe that this is not necessary, they say, the lights are turned off anyway and there is no danger. In fact, this recommendation is given by manufacturers due to the fact that problems may still arise, and if the battery is disconnected, then no short circuits or electric shock will occur |
| Lamp selection | Under no circumstances purchase lighting elements with higher power than those provided by the manufacturer, as this will overload the machine’s wiring and other system elements. In addition, when carrying out work with your own hands, it is important to purchase high-quality products, although their price is higher, but the characteristics are much better |
| Comfortable working conditions | It is important that the car is located on a level surface in a well-lit place, this can be a street if the weather is good. In addition, we recommend working with gloves, as the design has many protruding elements that can easily scratch your hands. |
| Accuracy | This applies to the entire process - do not pull the wires so as not to damage the contacts. It is important to remove the connection block correctly so as not to damage it. This can be said about every stage of work - never rush and do everything as it should be |
Important! Never touch the glass surface of the lamp with your fingers, as there will be particles of fat on it, which, under the influence of high temperatures, burn, forming dark spots on the surface, which will significantly reduce the service life of the unit.
When replacing, always hold the base of the product
Replacing Low Beam Bulbs Nissan Tiida Video
I will share, so to speak, my general impressions of the manipulations. Firstly, I would sincerely like to “thank” Nissan engineers for such a “convenient” location of the engine compartment when manipulating light bulbs.
I read a review where one person removed the bumper in order to replace this lamp. Perhaps only the front dimensions can be changed without problems.
Low beam Nissan Tiida. Replacing the PTF lamp Nissan Tiida
Here, for example, is the right headlight. As you can see, the place is easy to get wrapped up in and the wiring never gets in the way. In short, the procedure is as follows: Then pull off the rubber sealing cap. It’s not really possible to catch on to the pinch on it, which is apparently intended for removing the rubber band; in any case, it didn’t work out for me, so I recommend immediately grabbing the lower edge of the seal and pulling.
Here's the seal and here's the grippy pimp on it: After which comes the most interesting thing, in my opinion - to remove the springs of the lamp holder. And here, even despite the bright sunny day, I needed to replace the Nissan Tiida low beam lamp - the spring can be easily removed, but in order to understand where it is located and in which direction to remove it, you need to highlight it.
If it works, then there should be no further difficulties - the lamp can be easily and simply removed. Everything is put together in reverse order.
For replacement, you can choose ordinary standard lamps, with increased brightness or extended service life, which are installed from the factory. Lamps of standard power and the same luminous flux.
Instructions for replacing lamps So, to remove the lamp from the base, first remove the plastic block from the lamp and remove the rubber boot. Next, a plug is pulled off, which protects the case from dust and moisture, under it you will see a latch that is released like this: Lastly, the failed element is removed and a new one is installed in its place. The entire process is shown in the diagram below.
Features of work in some models
Let's look at how to carry out the replacement without outside help; we hope the brief instructions for each of the types described below will help you.
X Trail
Replacing the low beam lamp on a Nissan X Trail is done as follows:
- After completing all the preparatory measures described above, you can proceed to the first stage - removing the electrical connector from the lamp base, to do this, gently press it on both sides to release the latches, after which the unit will be disconnected from the contacts.
- Next, grab the tab on the rubber plug and pull it off the body by simply pulling it away from the structure. Sometimes this element dries out, in which case you use a screwdriver to free it around the perimeter.
- Under the cover you will see a clamp that needs to be released. This is done by pressing the antennae and disengaging them from the protrusions on the body.
- After this, nothing prevents you from removing the old lamp and putting a new one in its place; this model uses the H4 type with a power of 55 Watts.
Tiida
Replacing the low beam lamp on a Nissan Tiida occurs in the following order:
- Due to poor access to the structure, you will have to do additional work; first of all, using a screwdriver, you need to dismantle the trim located above the radiator; be careful not to damage the plastic clips.
- Next, you can begin to unscrew the bolts that hold the bumper, after which it can be moved so that it rests only on the lower apron.
- Now that access to the headlight housing is open, you can unscrew the bolts securing them, after which the headlight is carefully removed. Do not pull too hard, as the plastic clips may break, but to ensure high-quality low beam on the Nissan Tiida, ensure that the headlights are firmly fixed, as in the KIA Sportage.
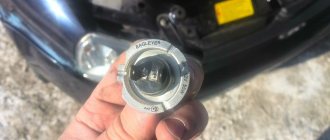
- After removal, the connecting block is disconnected from the body, after which the plug is removed. Under it you will see a spring clip that needs to be released, after which you can remove the faulty element. Next, the low beam bulb on the Nissan Tiida is replaced; assembly is performed in the reverse order.
Replacing the low beam light bulb on a Nissan Note takes 5-10 minutes, even if you have never performed such operations:
- You must have new lamps, it is better to change two at once, as the light may differ.
- There is no need to disassemble anything, since access to the case is excellent; first you need to disconnect the block.
- Next, the plug is pulled off, which protects the case from dust and moisture, under it you will see a latch that is released like this: lightly press the antennae and bring them out from under the protrusions of the case.
- Lastly, the failed element is removed and a new one is installed in its place. The entire process is shown in the diagram below.
Replacing the low beam lamp on a Nissan Beetle is also very simple:
- First, find the connector that connects the wiring to the lamp, carefully disconnect it and move it to the side so that it does not interfere.
- Next, remove the rubber cover, which protects the system from dust and moisture; to do this, simply pull this element away from the body.
- Lastly, you need to release the metal lock, to do this, press on the protrusions, press on them and release this unit, the photo below shows how to do this.
- Assembly is carried out in reverse order.
Pathfinder
Let's look at how to replace the low beam light bulb on a Nissan Pathfinder:
- First, see if you have enough space to reach the housing. Most often, removing the battery is required, but some car owners do without it.
- First of all, remove the rubber plug from the body.
- Next, the clamp is released, which presses the base to the reflector body.
- The freed light element can now be retrieved without any problems.
- Assembly is done in reverse order, everything is very simple and fast.
Primera
We will figure out how to change low beam lamps on a Nissan Primera P12; the work is performed as follows:
- First, you need to provide access to the body; you may need to remove the neck of the windshield washer reservoir; to do this, you need to turn it 30 degrees counterclockwise and pull it out.
Important! There are two latches on the sides; it is better to lubricate them with WD-40 to make it easier to get the element out.
- The housing cover can be plastic or rubber, in the first case the element is rotated, in the second it is simply removed.
- The connector also rotates 30 degrees and is removed, the lamp is fixed tightly, and you need to pull it hard to pull it out of the seat. After this, a new element is installed and assembly is carried out.