Many motorists face the problem of removing the radio in their car. Some people cannot remove the standard device installed at the factory, others inherited the music along with the car, and others simply lost special keys. There are also plenty of reasons for dismantling - from repairing wiring to buying a new stereo system. Hence the demand for information arose on how and with what help you can carefully remove the car radio without damaging the plastic of the front panel. And although the operation is primitively simple and can be easily performed with improvised means, there are pitfalls in it that you need to be aware of.
What kinds of mounts are there for radio tape recorders?
Different manufacturers use different types of fasteners:
- Using fixing elements on the side of the device;
- Using elastic latches;
- Using bolts or screws.
With clamps, a frame is used that is inserted into the “shaft”. The side walls of the car radio have special recesses, and there are tongues on the frame.
To dismantle the head unit you need keys. With them you can easily straighten the tabs or bend them. But this type of fastening has a drawback - the frame can become deformed.
The second type of fastening is more reliable - it involves the use of elastic latches. They can be seen on the side and top walls. These latches fit into special seats in the frame, the simplest and most reliable way to mount the radio.
In some car models, in order to ensure reliable fastening of the multimedia system and to eliminate the risk of failure due to vibrations, installation is carried out to the dashboard, or rather to the power elements. The dashboard is held on the pipe using metal corners. Such fasteners are used in premium cars Mazda and Toyota.
The option of installing a radio in this way is considered additional, but car audio installers often remove the corners, and installation is carried out without fixing elements. This option is not reliable.
Single- or double-din radios are mounted in the dashboard tunnel without any additional fixation. It is customary to mount the device on the center console.
The media system is latched with ordinary plastic latches. This is a screwless fitting - you can see this even on the Lacetti.
With this installation, the radio simply hangs and is not able to withstand even minor shock loads. There are holes on the sides of the device, but most motorists do not know what they are for.
It turns out that these holes are made for reliable installation of the device to the dashboard using corners.
This is a factory fastener that complements the standard fastener.
Method No. 1
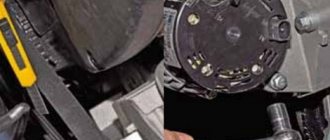
So, this option involves the use of mounting keys. These tools are supplied with the vehicle. They need to be inserted into special places along the edges of the device and pressed firmly on them. If you insert the keys correctly, then they will be firmly fixed. All you have to do is pull them and the device will easily pull out.
If the car is not new, then there may not be mounting keys. And how to remove the radio in this case? Here you can dismantle it by disassembling the panel. This operation can be performed using a simple screwdriver, which everyone has in their arsenal. To disassemble the panel, simply release the special latches that hold the frame using a screwdriver.
When you succeed, you can begin to unscrew the bolts that secure the radio to the body. That's all, now the device can be easily removed. Before removing the radio frame, it is better to check everything carefully so as not to break anything. This is necessary because the panel on each car model is individual, and each of them is disassembled in its own way. That is why you need to familiarize yourself with its diagram in advance.
Let's see how to remove the radio on different brands of cars. Each model has its own removal scheme, so this will not be superfluous at all.
Removing the device using standard keys according to the instructions
So, there is a radio and standard keys. But that's not all, you will need an additional tool in the process.
Required Tools
To work you will need:
- Keys for dismantling. Depending on the specific model and key manufacturer, there may be 2 or 4;
- Knife.
Sequence of removing the car radio from the niche
First of all, remove the front panel, and if necessary, then the decorative parts. On older models, this frame covers the key connectors. This is no longer the case with the new ones.
Then the holes for the keys become visible and easy access to them is provided. The holes can be seen on the side walls of the head unit.
Then the keys are inserted into special grooves - they need to be inserted until they click. In some cases, it may be necessary to force or rock the fixture from side to side. If a click occurs. You can safely pull the radio out of the mine.
If the head unit cannot be removed, it can be screwed to the panel with an additional pin. In this case, it is necessary to remove the dashboard to access the device from the back side.
Video
The video shows in detail the entire process of dismantling the car radio using standard keys.
"Toyota"
Let's see how to remove a Toyota radio using a Camry as an example. These cars have been produced since 1982. Production is established in five countries of the world, and the car is classified as a middle business class. Today we can see the seventh reincarnation of this model, but despite this, owners are changing radios.
Before starting dismantling work, disconnect the ground terminal from the battery. This is for your safety. Then remove the decorative washers and control selectors. The Japanese installed springs on the axes of these handles. They can be easily pressed out using a thin screwdriver. Now remove the front panel. Next to the axles you will find screws. They unscrew easily and release the staples. Then you can remove the standard radio and insert another one.
How to remove a radio without keys
A popular option for dismantling standard radios is keys to other devices. You can also remove using plates, rods, mounting tape.
What tools will you need?
To work, you will need two pieces of steel strip 30 cm long and 1 cm wide. You should also use protective gloves. You may need a knife.
Removal process
In case of using steel plates, the steps will be as follows:
- First of all, insert the first plate into the key slot on the radio;
- Next, insert the second plate;
- Two plates are brought towards the center of the device and pull the car radio towards you.
It often happens that an inexperienced car owner cannot pick up the latches the first time. If it doesn’t work, then the procedure should be repeated.
Another popular method is removal with incomplete keys from other devices.
This is done as follows:
- They take keys from other devices;
- Push it into the hole until it stops;
- Move the keys in different directions;
- Calmly take out the device.
If you couldn’t find the plates or keys, you can use fountain pen refills—you need four refills.
This method is well suited for foreign cars:
- Look for four ballpoint pen refills;
- They are inserted around the perimeter of the head unit;
- After this manipulation, the radio can be pulled out.
The rods are installed one by one, but the most important thing is that the rods need to be inserted not into the gaps between the dashboard and the device, but into special holes.
It is in these holes that there are latches that will work when you insert any object into them.
You can try the original technology. This method is more applicable for radios with navigators:
- Two strips are cut from the mounting tape - width 8 mm, length 10 mm. Tape thickness – no more than 1 mm;
- The strips are inserted into the holes until they stop;
- Carefully move apart and release the fastening clips;
- They take out the radio from their mine, but they can’t let it go.
Important points
Any actions, especially with the use of steel strips and other non-standard tools, should be carried out as carefully as possible.
If the radio is encoded, then there is no need to disconnect the battery terminals before work. When removing a device, it is important not only to get it out, but also not to damage the connectors.
Video
In the video, the author shows popular methods for removing radio tape recorders without special tools. You can see in detail how this is done.
Progress
How to remove a radio without keys? The question is quite complicated. If you still don’t have the keys at hand, you will have to improvise and make the tool yourself:
- First you need to take care of the device's cover, which looks like a plastic front panel. Remove the component carefully so as not to damage the casing and the gadget itself.
- Now we arm ourselves with a screwdriver and unscrew the bolts that secure our device.
- In order to remove the device, you need to carefully pull the blue stoppers and press the opened petal, thereby separating the parts and pulling the connector out of the device.
- The antenna can simply be pulled out of the socket.
All steps are very simple, but do not forget to be careful when performing them. As you understand, removing factory equipment is not that difficult.
- Often the holes are protected by special screws, which can only be removed with a hex screwdriver. We simply move the freed grooves in different directions and pull the equipment towards us.
- Rectangular holes have a slightly different mechanism for dismantling. You need to insert two keys on the sides, rest them to the very end. You need to move them until they click, which will tell you that the protective mechanism has opened. After this, you can pull the device towards you.
- There are cases when a standard radio requires as many as four keys in stock, but if you show ingenuity and perseverance, you can cope with two. We simply place both instruments on one side, slightly pull out one part of the structure, then do the same on the other side and get our sound.
- Many car owners complain that there is no visual contact with the keyhole. The solution to the problem lies on the surface: just remove the volume control and you will immediately find the ill-fated hole. Next, take a six-sided screwdriver and turn it counterclockwise, thereby removing the panel. There you will easily notice two fixing screws that can be removed with the same screwdriver.
So how to remove the radio without keys? Everything is very easy and simple. Replace the keys with thin strips of steel with a width of 7 to 14 mm and do all the same steps as described above.
Before removing the standard radio in the Ford Focus 2, prepare the necessary set of tools. This is an asterisk and hex screwdriver. Different modifications are secured with different fasteners. Also pick up a plastic card and an ordinary stationery knife.
The manufacturer has released a special tool for this purpose, with the help of which this task is solved in two, maximum three minutes, but its price is about $10, which is quite a lot today. This key in appearance resembles one half of scissors with special holes. Another difficulty with this key is that it is difficult to find.
And you need not one, not two, but 4 of them. But we will try to do without it. If desired, you can disassemble two pairs of scissors. You can make your own keys. A pre-prepared card will be useful for this. Cut it into slices 2 cm wide. You need four of these records. Cut a 45 degree angle at one end of each slab. Now the tool is ready, and you have saved $40 or more.
Decoding problems
Some manufacturers equip their head units with special protective mechanisms. They operate approximately 10 minutes after the voltage in the on-board network is lost. This is a protective measure designed to protect the radio from being used after theft.
The next time you turn it on, the device will ask the user for a code. If the kit includes a card with a code, then it can be easily entered; if there is no documentation, then decoding is possible using software for a computer or mobile devices. The serial number will be useful for this.
Manufacturers allow you to make a mistake when entering your PIN code only three times. If you enter it incorrectly three times, all functions will be blocked, and this blocking can only be removed in specialized centers. You should also contact these centers if you do not have a serial number.
To prevent such situations from happening, it is not recommended to disconnect the battery for a long period of time. You can make an additional source of energy if the main battery runs out. For this purpose, a battery from a screwdriver is suitable, which is connected directly to the radio.
How to properly remove a radio without special keys
Many motorists are faced with the problem of removing the radio in their car. Some people cannot remove the standard device installed at the factory, others inherited music along with their car, and others simply lost special keys. There are also plenty of reasons for dismantling - from repairing wiring to purchasing the latest stereo system. Hence the demand for information on how and with what help you can carefully remove the car radio without damaging the plastic of the front panel. And although the operation is primitively ordinary and carried out in a relaxed manner using the means at hand, there are pitfalls in it, which
Installing speakers in the standard places of the front doors on the Lada Granta
In addition to the radio, for its normal operation, it will also be necessary to install speakers and acoustics in the car door.
To cut holes in the door trim, it is better to remove it from the car. To do this, you need to dismantle the door handle, the plastic casing in which the door opening lever is installed, and the glass position adjustment handle (if you have a standard package). See the article “Removing and installing door trim on the Lada Granta.” The door trim and metal frame of the front doors provide a size for 16 cm speakers.
Depending on the variation of the speakers you have chosen, the following problems may arise: - if you have chosen 13 cm speakers, then you need to cut out a corresponding hole in the center of the plug on the door trim according to the template supplied with the speakers. In this case, the hole in the door frame is slightly larger and you will have to increase the plane from the mounting “ears” of the speaker to the mounting holes in the door;— If you decide to install 16 cm speakers, then you may have to modify the door frame here, since the speaker basket can It definitely won’t fit into the standard hole in the door hardware. You will need a grinder or a jigsaw with metal files. We cut a hole of the required diameter and try on the speaker. We connect the speaker and install it in place. We install door trim. We mount the frame for the metal grille of the speaker and, accordingly, firmly fasten the speaker to the door with 4 self-tapping screws. We install the speaker grille.
This is, in principle, the entire algorithm for installing a radio and speakers in the front doors on a Lada Granta car. In addition, you may find the material from the article “Wiring diagrams of the Lada Granta” useful, which shows the blocks for connecting the power supply of the radio and connecting the speaker wires to it, blocks 17 and 18. The “standard” configuration also includes wires going to the front door speakers car. So, the connection of the radio speakers in the doors is carried out through the rear harness, see the article “Wiring diagram of the rear wiring harness of the Lada Granta”, contacts on the block 16,17,18,19.
Additional information when installing speakers in the front doors of a Lada Granta car: When choosing speakers for installation, choose acoustic sets with minimal protrusion of the plastic frame and metal grille. The fact is that some speakers, after installation, may interfere with the opening of the glove compartment. Not all speakers, but some. As a result, you will crawl into the glove box of the Lada Grant through a small gap, or only after you open the right front door
Safety warnings when installing and connecting the radio in a Lada Granta car. All installation work should be carried out with the negative terminal of the battery disconnected. After installing the radio, you must carefully check all connections and that they are connected correctly.
Types of radio mounts
To choose a method for removing a car player, you need to understand how it is fixed inside the panel. There are the following types of fastenings:
- on 2 side clamps;
- on 4 latches located on the side and top of the case;
- screwed to the brackets with screws.
Example of mounting a standard head unit
Note. The last method of fixation is typical for standard devices that are supplied to the car by the manufacturer.
Latch on mounting frame
The principle of fastening with latches (clamps) is that the body of the radio is enclosed in an iron mounting frame, and is not directly built into the panel niche. This intermediate part, which has special petals with protrusions or grooves (depending on the brand and model of the device), is securely fixed in the niche. The player body is equipped with mating latches that engage when the player is inserted into the socket.
The counterpart of the latch on the body
To unlock the latches and remove the car radio, keys of various shapes are used, supplied by the manufacturer complete with music for the car. They are lost over the years of use of the car, as they are used very occasionally. Typically, the key is a shaped strip of metal or a handle inserted into 2 pairs of holes located on the front panel of the device.
This is what most car radio removal keys look like
In most cases, fastenings are made with bolts, screwed to the brackets and hidden under the front plastic panel. You can’t do without a small set of tools to dismantle this panel and unscrew the mounting screws or bolts.
Handle key
Reference. All of the listed intricacies with hidden fasteners and special keys were invented by manufacturers with one purpose: to make it very difficult for thieves to steal the car radio when the car is broken into.
Location of key holes
Start your own blog
Today I installed a 2din radio on my grant (liftback, normal). Soundmax radio (audio, video, navigation (no GPS receiver included), radio and TV, usb, sd, hdmi, aux, camera output, touch screen, bluetooth for mobile) - 4500 rub. I ordered mvideo from an online store (at first I traveled all over the city, but only expensive ones were on store shelves, and even then they did not have all the listed functions). Previously, I installed Hertz speakers in the front doors (I took 2t.r. from the shelf in mvideo). What problems did I have to face: - the colors of the wires do not match the car manual, and on the speakers both contacts were the same width, and on the audio preparation one terminal is wide, the other is narrow. It turned out that wide is a plus, narrow is a minus. I filed the negative plate on the speakers with a file, the terminal sat down and was there. — I screwed the column on, checked it, it turns out that now it interferes when lowering the window. I had to install washers about 8mm. I screwed it on, clamped it, and the speakers fit perfectly. Now about the space for the net. Here I can’t help but draw a parallel with both my former Priora and a friend’s Viburnum. On the Prior there was a mesh in the body of the skin - nothing else is needed. Cut it out if you want, leave it like that (I liked my dear one, I don’t like to interfere). On viburnum - the mesh is attached to the casing - if you want, take it off - put on what you like. There is no need to cut anything. Granta (like a new model). There is a place to install a mesh (couldn’t this place be perforated, like on the Prior?), you either need to perforate it yourself, or cut it out and install the mesh. Without a mesh, the sound is not bad, but the casing rattles in the bass (in short, it’s nowhere without a mesh). - for the radio - they made an opening for 1din - convenient. Couldn’t it have been possible to make this stupid shelf also removable for 2 din? I sawed it out. Then the radio tape recorder rested against its rear. I had to saw off the rear plastic (why is it there anyway?). There was nowhere to stick the original radio mounts (sadness). It's good that the plastic of the panel is hard. I cut the opening close to the height and pushed the radio through. She stood up rigidly. I'll go like this, maybe I'll have to fix it after all. The width of the opening in the panel is larger than the width of the radio, and it was possible to do without a frame. — there were no prepared wires for connecting to the car’s systems (prohibition on watching video while driving, auto-muting the sound when driving backwards and something else), I just put the plug in the box with the radio. (I haven’t installed a TV antenna and GPS yet) - and about the frame (which I was looking for, so I ended up on this site). How do you even put a frame on this non-flat panel? Unless such craftsmen as the author of the topic can do it. Does anyone have any advice on how to glue the cracks so that it looks civilized?
Removing the device according to the instructions
The method of removing the radio if you have the keys is simple to the point of outrage. It is worth looking at it in order to understand how to act if they are lost. The order is as follows:
- Remove the front panel of the player and the decorative plastic frame, prying it up as necessary with a flat-head screwdriver.
- Insert the first key into the gap between the housing and the mounting frame, located at the end. With all this, you should feel a slight resistance when the tool bends the latch.
- Repeat the same action with the second key.
- Take the radio with your hands by the protruding parts along the edges of the case and carefully remove it from the niche.
To remove the radio, 2 keys are used
Advice. There is no need to put in a lot of effort; the device should be removed quite easily. At the end, act carefully so as not to pull the wires again and break the contact.
Special keys must be inserted into the side openings
When the radio is equipped with 4 latches, access to them is through 2 pairs of round holes. You need to insert 2 U-shaped keys into them and pull them out by the body, as described above.
How to get a radio without keys
It turned out that taking out the radio
from the nest, easier than usual. The main thing is to find what you can use to do this.
Quickly and easily remove the radio from the car.
This video shows how to remove the radio
from the standard mount of the VAZ Kalina 2 car. From the standard one.
Using keys, the music center is simply removed
"Nissan"
As with other cars, you will need a flathead and Phillips head screwdriver for the Nissan. The multimedia system on cars from this manufacturer is fixed from the inside. The fastenings are located on the center console. It should be removed, and the console is attached using four self-tapping screws. The first two you can find under the rubber carpet. Then two more are located under the decorative plate. It can be removed using a thin screwdriver. The latches will release very easily.
Now that the screws are unscrewed, you can proceed to unsnapping the seals. Work very carefully, and you need to pull up. Don't put in any serious effort. All latches must be removed very carefully. Now it's time to disconnect the wires. Each wire has its own lock, and it is quite inconvenient to release them. That's all. Now all that remains is to unscrew the radio from the console. So you have learned how to remove the radio on a Nissan.
How to remove the radio without keys?
If standard keys are lost, you need to make homemade ones, focusing on the shape of the slots. To see them, remove the removable panel of the device and the plastic frame. Here is a list of tools at hand, with whose help owners of different cars manage to unlock the latches:
- thin iron strips 6-15 mm wide;
- stationery knives;
- plastic clamps for wiring;
- nails and straight wire - for round holes;
- thin screwdrivers and other similar items that fit the shape of the cracks.
These iron strips can be used instead of keys
Reference. In almost all radios, the mounting slots are visible from the outside, so there is no need to remove the front panel and plastic frame.
First, remove the front panel of the radio.
To remove the car radio, use the same method:
- Stick first one, and then a second strip of narrow metal (or a stationery knife, a narrow screwdriver) into the technological opening. Feel that any latch is unlocked.
- If the turntable is supported by 4 clamps, insert four tools.
- Slowly pull the radio out of the niche immediately with the improvised keys.
The strips must be inserted into the side slots
Advice. When using iron strips to open latches, be sure to wear cloth gloves to avoid cutting your hands on the sharp edges.
The music center is removed along with the bands
Important points
- When removing the device from the niche, under no circumstances should you apply great force, as you can damage the wires located behind the radio.
- If steel strips are used to remove the device, they must be used only with protective gloves, otherwise it will not be possible to avoid cuts.
- Steel strips are far from the only handy tool that can be used to remove a radio. Very often, car enthusiasts use old ATM cards or thin plastic rulers, from which “keys” are cut out using ordinary scissors. And sometimes even barbecue skewers are used to remove the radio.
So, you can remove the radio from the niche without keys. This can be done using available materials; fortunately, there is no shortage of them. If we are talking about modern radio tape recorders, then preference should be given to “keys” made of plastic, since the cases of these devices in most cases are also plastic, and metal tools can leave deep scratches on them.
Before replacing an installed car radio with a new one, you must first remove the old device.
To remove it, you need to prepare a small set of tools and materials:
- a set of keys for the car radio that it comes with from the factory;
- Phillips and hex screwdrivers;
- stationery knife;
- small box;
- tweezers for removing cladding;
- insulating tape;
- pencil.
It is important to remove the device correctly so as not to disturb the wiring (the author of the video is Kirill Zbruenko).
Preparation
Before removing the radio from the car, you need to do the following preparatory work:
- Before starting work, you need to turn off the engine and de-energize the car by disconnecting the negative terminal from the battery.
- When removing the plugs from the connectors, do not pull them so as not to break them. All wires from the sockets in the rear should be disconnected as carefully as possible.
- If during dismantling there will be a lot of wires, you should prepare electrical tape and a pencil to then deal with the wiring. Wires must be insulated and labeled.
- Next, you need to prepare the keys for the radio. Each manufacturer uses hidden mounts for their devices. You should understand what fastening material is used and select the appropriate tool. Usually keys are included.
- When dismantling, it should be taken into account that some models have slides that help remove the device from its seat.
Car radios differ in design and mounting. There are usually two rectangular and four round mounts.
If there are standard keys, then dismantling should be done with their help.
Dismantling a standard music center
Often standard head units (aka radios) are removed using the method described above, since they are attached to 2 or 4 clips. For example, the factory player on a Priora is held on by two latches, and to unlock them, thin steel strips need to be inserted between pairs of buttons for switching radio channels “2” - “3” and “5” - “6”.
Advice. Before you start disassembling the factory radio, find out about the method of its fastening, so as not to poke pieces of iron at random in this case if you do not find technological openings.
In Priora, stripes need to be inserted between the keys
To remove car radios that are fastened with screws, you need to prepare the following set of tools:
- a narrow flat screwdriver or knife;
- Phillips screwdriver;
- set of small sockets (from 6 to 10 mm).
With this mounting option, the factory turntable must be unscrewed using the heads
On different brands of cars, standard players can be mounted in different ways, but the principle is approximately the same: the device is screwed to brackets that are covered from the outside with a plastic lining. As an example, it is proposed to consider the removal of the radio on a Korean Hyundai Solaris car, performed in the following order:
- Use a flathead screwdriver or knife to pry up the bottom corner of the plastic decorative panel framing the stereo. Pull the edge and grab it with your hand.
- Gently pull it towards you and release the first latch, and then move in a circle and unlock the others.
- Holding the panel with both hands, remove it and, if necessary, disconnect the connectors located at the bottom.
- Use a Phillips screwdriver to unscrew the 4 mounting screws and remove the radio.
Factory car radio Hyundai Solaris
Advice. When dismantling any player, do not rush to disconnect the battery from the on-board network, since the device will power down in 10-15 minutes. It may become blocked and, when you turn it on again, require you to enter a security code that you do not have.
"Chevrolet"
You will need a Phillips screwdriver and something to hook the plastic trim from the inside. Perhaps thin tweezers will work for this. Slide this hook under the trim, and after you have hooked the trim, pull it towards you. It is held on by four clamps. Using a screwdriver, unscrew the screws and pull out the device.
It may be that on some models, before removing the radio on a Chevrolet, you will need to remove the panel with deflectors. You can simply pull it towards you and it will come off. For some reason it wasn't screwed in. The cover, which is located behind the deflectors, is secured with two screws. Next, unscrew the ashtray and pull the plastic latch. You can now remove the climate control. Next, insert the new radio and reassemble everything in reverse order.
Now you can replace everything yourself, and you don’t need to spend money on a car service for this work.
Sometimes car owners are not satisfied with the standard car radio. Replacing it is not difficult at all. An article will help with this, which describes how to remove the radio correctly in order to install a new device.
Decoding problems
The main pitfall of the described procedure lies in the security code embedded in the memory of most radio tape recorders. The bottom line is this: disconnecting the music center from the external power supply for 10-15 minutes will lead to the fact that the next time you turn on the car radio, you will be asked to enter a security code (usually a four-digit one), without which it will not work.
Advice. Removing the device to replace it with a new one does not pose a problem, unless you plan to use the old player on another machine. In any case, try not to disconnect the battery for a long time.
The device requests a code after connecting to the on-board network
If the card with the code is lost or missing, the issue can be resolved in several ways:
- when we are talking about a standard device, then for a certain fee they will help you find the code at a dealership that sells cars of your brand;
- there are offices and individual specialists who specialize in these problems;
- the free way is to search for code using different programs.
Serial number location
Regardless of the method you choose, you will have to remove the radio from the socket to find out the serial number. It is printed together with a barcode on a tag glued to the side or top of the case. After taking out the device, rewrite these numbers, then try to calculate the PIN code using them using various online calculators on the Internet. If it was not possible to find a suitable cipher in this way, then rent a music center and take it to specialists in this field and get ready to pay for their services.
Fundamental point. If the PIN code of the radio is unknown to you, then when searching on your own, do not enter combinations of numbers more than 3 times! Otherwise, the device will be blocked, and in this state, decoding it will cost significantly more.
The issue of removing a car radio from its socket is not very difficult and will not require much time. But the consequences can be sudden for an unprepared motorist. Hence the last piece of advice: find the lost pin code before turning off and removing the player, in order to save your time and nerves.
Many motorists face the problem of removing the radio in their car. Some people cannot remove the standard device installed at the factory, others inherited the music along with the car, and others simply lost special keys. There are also plenty of reasons for dismantling - from repairing wiring to buying a new stereo system. Hence the demand for information arose on how and with what help you can carefully remove the car radio without damaging the plastic of the front panel. And although the operation is primitively simple and can be easily performed with improvised means, there are pitfalls in it that you need to be aware of.
Torpedo Granta dorestayl
The panel from Kalina began to be installed on the pre-restyling Granta immediately before the release of the updated Lada Granta FL family.
If the dashboard of your car is like in the left photo, then you will need to replace a number of parts of the instrument panel (dashboard) with parts from the Lada Kalina dashboard:
- 21925-5325011-00 Instrument panel VAZ-21925 Lux with air duct SB AvtoVAZ OJSC
- 21920-7905020-00 USB cable 2192
- 21925-5326014-00 Overlay for the instrument panel console LUX
- 21920-5326014-00 Instrument panel console trim NORMAL - lower, depending on the climate unit
- 21920-5303014-00 Glove box body 2192
- 21920-3710010-00 Hazard switch
- 21920-5303016-00 Cover of the glove box of the instrument panel
- 21920-5325322-00 Fuse box cover
This is a global alteration of the car interior, which cannot be called rational.
After this, you can begin installing the center console according to the instructions below.
Types of radio mounts
To choose a method for removing a car player, you need to understand how it is fixed inside the panel. The following types of fastenings exist:
- on 2 side clamps;
- on 4 latches located on the side and top of the case;
- fastened with self-tapping screws or screws to the brackets.
Example of mounting a standard head unit
Note. The last method of fixation is typical for standard devices that are supplied to the car by the manufacturer.
Latch on mounting frame
The principle of fastening with latches (clamps) is that the body of the radio is enclosed in a metal mounting frame, and is not directly built into the panel niche. This intermediate part, which has special petals with protrusions or grooves (depending on the brand and model of the device), is securely fixed in the niche. The player body is equipped with mating latches that engage when the player is inserted into the socket.
The counterpart of the latch on the body
To unlock the latches and remove the car radio, keys of various shapes are used, supplied by the manufacturer complete with music for the car. They are lost over the years of car operation, since they are used extremely rarely. As a rule, the key is a shaped strip of metal or a handle inserted into 2 pairs of holes located on the front panel of the device.
This is what most car radio removal keys look like
The mountings of standard radios are most often made with bolts, screwed to brackets and hidden under the front plastic panel. Here you cannot do without a minimum set of tools to dismantle this panel and unscrew the mounting screws or bolts.
Handle key for unlocking 4 latches
Reference. All of the listed intricacies with hidden latches and special keys were invented by manufacturers with one goal: to make it as difficult as possible for thieves to steal the car radio when the car is broken into.
Location of key holes
Installing speakers in Granta rear doors
The procedure for working with the rear doors is identical to the front ones.
An important difference: homemade spacers are not required here. The plant produces a set of special mounts for installing 13 cm speakers in the rear doors
Articles for ordering online:
| Speaker Mount - Rear Left | 21907901033 |
| Speaker Mount - Rear Right | 21907901032 |
| Rear left column trim | 21906202095 |
| Rear right column trim | 21906202094 |
| Trim for front left door | 21906102097 |
| Trim for front right door | 21906102096 |
Installation sequence:
- Disassemble the door;
- Cut a hole in the door card for the lining;
- Install the speaker mount on the door;
- Replace the standard audio terminals with normal ones;
- Connect the wires to the column, secure it;
- Install the trim and assemble the door.
You can replace the fastening with improvised materials, but factory production takes into account all bends.
Removing the device according to the instructions
The algorithm for removing the radio if you have the keys is outrageously simple. It is worth considering in order to understand how to act if they are lost. The order is as follows:
- Remove the front panel of the player and the decorative plastic frame, prying it up with a flathead screwdriver if necessary.
- Insert the first key into the gap between the housing and the mounting frame, located at the end. You should feel slight resistance as the tool bends the latch.
- Repeat the same action with the second key.
- Grasp the radio with your hands by the protruding parts on the sides of the case and carefully remove it from the niche.
To remove the radio, 2 keys are used
Advice. There is no need to apply much effort; the device should be removed quite easily. At the end, act carefully so as not to pull the wires again and break the contact.
Special keys must be inserted into the side openings
When the radio is equipped with four latches, access to them is through 2 pairs of round holes. You need to insert 2 U-shaped keys into them and pull them out by the body, as described above.
The music center can be easily removed using keys
Installation of Lada Granta car radio
Tools:
- Open-end wrench 10 mm
- Small flat screwdriver
- Knife (if necessary)
- Soldering iron (if necessary)
Parts and consumables:
Notes:
Initially, in this car model, the calculation is made for a 1-DIN radio. If the owner wants to install another type, a newer one, for example 2-DIN, he will need to start sawing the partitions in the console itself. And if the size is not suitable, then a suitable cantilever frame will have to be cut into the panel. This is much more complex than the first type of installation listed. In the second option, it is better to entrust the installation to a specialist, because there is a high risk of damaging the interior trim.
Here is a description of how to install a 1-DIN radio.
1. Remove the negative terminal from the battery.
2. Remove the plastic pocket installed in place of the future radio using a flat-head screwdriver.
3. Having taken out the pocket, on the back of it you will find slots where ISO connectors will be inserted to connect the radio. Disconnect the connectors to completely remove the pocket.
4. Now remove the metal frame from the radio and install it in the place where the plastic pocket was. Unbend the frame's tendrils to lock it securely in place.
Note:
There should be a click to confirm that the frame installation was successful.
5. Connect the connectors to the radio.
Note:
If you connect the radio to the connectors incorrectly, all car systems may fail, including, of course, the sound system.
Some radio manufacturers make custom connectors. Most of them come with an ISO plug. But there are times when none of the types are suitable, then the last option remains - cutting the wires. You remove the original plugs of the radio and the plugs of the car wiring and solder them together, but be sure to match the color.
A mistake many car enthusiasts make is twisting the wires and wrapping them with adhesive-backed insulating tape. In winter, the same electrical tape cracks due to frost. As a result, a short circuit may occur in the wiring, which will lead to the failure of all electrical systems of the car.
6. Insert the car radio into the previously installed frame.
How to remove the radio without keys?
If standard keys are lost, you need to make homemade ones, focusing on the shape of the slots. To see them, remove the device’s removable panel and plastic frame. Here is a list of available tools with the help of which owners of various cars manage to unlock the latches:
- thin steel strips 6-15 mm wide;
- stationery knives;
- plastic clamps for electrical wiring;
- nails and straight wire - for round holes;
- thin screwdrivers and other similar items that fit the shape of the cracks.
These steel strips can be used instead of keys
Reference. In many radios, the mounting slots are visible from the outside, so there is no need to remove the front panel and plastic frame.
The first step is to remove the front panel of the radio.
To remove the car radio, use the same algorithm:
- Insert first one and then a second strip of thin metal (or a utility knife, thin screwdriver) into the technological opening. Feel each latch unlock.
- If the turntable is supported by 4 clips, insert four instruments.
- Slowly remove the radio from the niche at the same time as the improvised keys.
The strips need to be inserted into the side slots
Advice. When using steel strips to open latches, be sure to wear cloth gloves to avoid cutting your hands on the sharp edges.
The music center is removed along with the strips
How to install a head unit on a car with basic equipment?
Since the Lada Granta base is not equipped with musical equipment, and only a push-button radio is installed on board, the question justifiably arises: how is the standard radio installed in the cabin? In reality, this is a simpler procedure than it might seem at first. The occurrence of problems during installation is excluded, since a seat is already provided for the standard device on the Lada Granta panel, regardless of the level of equipment.
You can purchase the device in a retail chain or on an Internet site, where you can actually find an improved version, equipped with a navigation system with a detailed map of the Russian Federation. Don't forget to buy an additional luxury panel. Although multimedia will fit into the standard panel without any problems, the appearance will not be so beautiful. The price for this device reaches 2.5 thousand rubles.
Next comes the installation of the radio. The design feature of the landing niche in the Grants panel does not provide for the need for additional wiring.
- The first step is to remove the plastic pocket in the audio system opening. This is done using a flat-profile screwdriver. There is access to several connectors that involve connecting a radio.
- We remove the frame from the head unit and fix it at the location of the pocket.
- Next we move on to the connection. To do this, connect a couple of connectors and install the device in the landing niche.
- After this, you can install the speakers in the front door cards. The procedure involves the need to dismantle door trims with unlocking handles and adjust the position of the glass. Using a special template, we begin cutting out the mounting holes.
We attach the speakers to the cards using self-tapping screws. We insert the cables from the speakers into the input connectors intended for this on the rear panel of the car radio. We install the decorative door panels in their original places and evaluate the sound provided by the standard head unit. Thus, the radio is connected.
Dismantling a standard music center
Often, standard head units (aka radios) are removed using the method described above, since they are attached to 2 or 4 clips. For example, the factory player on a Lada Priora car is held on by two latches, and to unlock them, thin steel strips must be inserted between pairs of radio channel switching buttons “2” - “3” and “5” - “6”.
Advice. Before you start disassembling the factory radio, find out about the method of its fastening, so as not to poke the pieces of hardware at random if you do not find technological openings.
In Priora, stripes must be inserted between the buttons
To remove car radios that are fastened with screws, you need to prepare a simple set of tools:
- thin flat screwdriver or knife;
- Phillips screwdriver;
- set of small sockets (from 6 to 10 mm).
With this mounting option, the factory turntable must be unscrewed using the heads
On different brands of cars, standard players can be mounted in different ways, but the principle is approximately the same: the device is screwed to brackets that are covered from the outside with a plastic lining. As an example, we propose to consider removing the radio on a Korean Hyundai Solaris car, performed in the following order:
- Use a flat-head screwdriver or knife to pry up the lower corner of the plastic decorative panel framing the stereo. Pull the edge and grab it with your hand.
- Gently pull it towards you and release the first latch, and then move around and unlock the rest.
- Holding the panel with both hands, remove it and, if necessary, disconnect the connectors located at the bottom.
- Unscrew the 4 mounting screws with a Phillips screwdriver and pull out the radio.
Factory car radio Hyundai Solaris
Advice. When dismantling any player, do not rush to disconnect the battery from the on-board network, since the device will power down in 10-15 minutes. It may be blocked and the next time you turn it on, it will require you to enter a security code that you do not have.
What do we need?
Before you get to work, you need to prepare well:
- Get a set of keys of different types that can be used to remove factory equipment.
- You will also need a set of screwdrivers that are equipped with tips in the shape of stars and hexagons.
- An ordinary stationery knife will also come in handy.
- You will need a flat object to remove some components. A plastic card copes with this task perfectly.
- Well, don’t forget to find tweezers that are suitable for removing cladding in some cases.
If you want to remove the radio yourself, then you need to be aware of some tricks, which we will talk about. Let's start with the fact that in each car the tape recorder has its own configuration, but most often it has four round holes and two rectangular ones.
Don’t forget that different devices need to be removed in different ways, but if you have a full set of keys and screwdrivers at hand, which should come with the equipment, then there’s definitely nothing to be afraid of.
Important! It often happens that you need to somehow improve the equipment in your own car. Accordingly, it is worth understanding some of the subtleties that will help you set up the necessary equipment without the help of specialists, for example.