Installing a tunnel from Granta to Kalina with your own hands - step-by-step instructions
Many of you are already aware that the floor tunnel lining from Granta is perfectly installed in the Kalina’s interior, and at the same time solves a lot of problems at once. Firstly, it looks more solid, secondly it covers more of what shouldn’t be visible, thirdly it adds the necessary elements to the interior, such as cup holders, as well as additional ones. shelf for various small items.
It’s inexpensive, why not install one for yourself, especially since there are already plenty of installation instructions. Before installation, it is important to remember some points that need to be agreed upon.
- It is necessary to move the ECU under the glove compartment for access after installing the new tunnel. By the way, this should be done even by those who do not intend to install such cladding for themselves. The reason is due to the fact that, as a result of design miscalculations, Kalin ECUs are often filled with antifreeze in case of problems with the stove. To prevent this from happening, it is better to move the “brains” to a more reliable and dry place.
- The cigarette lighter needs to be moved. Well, I think there are no problems here, all that is needed is to make a hole in the tunnel on the passenger side.
- Painting. The lining of Granta's floor tunnel does not match Kalina's color scheme, so this issue needs to be resolved. You need to either cover the plastic with film, paint it, or leave it as is.
To work you need to prepare:
- Lada Granta floor tunnel lining assembly (code: 21900-5109154-00);
- Decorative cover for gear shift lever (code: 21900-5109070-00).
Full cup holder, cabin filter adapter and all the little things
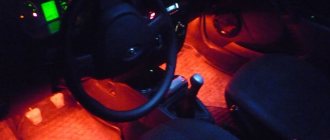
Greetings everyone, in the entry before last TYTS wrote about changes in the cabin, but it was more about aesthetics, and I also wanted comfort, and I was sitting one evening, thinking about what I was missing, and I realized! Cup holder! It would seem like a trifle that is now available even in the poorest configurations of modern cars, but in the 2000s VAZ didn’t think about it yet... Having scoured the Internet, I came to the sad conclusion - there is either a bare consumer goods collective farm, or an unreliable bady from the Middle Kingdom , which is attached to the air ducts (and below is the story of how this device broke and stained the interior and passengers, yeah). I had to figure it out myself and looking at the photo with the center console disassembled, it dawned on me where I could plug it in! On the recess in front of the gearshift knob! Under it, on the left side there is emptiness (there is an air duct on the right at the feet of the passengers), so we have a plan, let's go:
We cut a hole, the parameters of the cup holders are usually from 8 cm, I first cut out the bottom of a 0.5 liter bottle, you will always have time to expand it.
Please note that there is no space on the right; the rubber boot from the wings will not interfere.
Next, I began to think about what I should use to make the cup holder itself, the first thing that came to mind was a plug-in ashtray for the cup holder:
And everything would be fine, bottles and small glasses would fit in, but they were too tight, and the bottle did not fit with every bottom...
And then I came across an ashtray from the BEEMVE TYTS type on Alika. Its funny thing is that it consists of 2 parts, I don’t know what it’s for, but most importantly, the lower part is ideal for our purposes!
Pay attention to how much free space there is, the bottle easily goes in and out like a warm-up) As well as a thermal mug, a 0.5 thermos, a sports flask, etc. evil spirits. In general, order it right away, the grants are garbage...
impregnation or primer for walls
But so that it doesn’t disappear, I pinned it here:
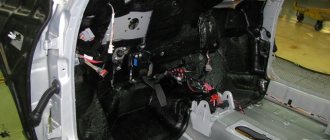
Cabin filter adapter
I wanted it for a long time and finally decided to order it from the office. the manufacturer, if I may say so, because cooperatives and self-propelled guns were not interested in principle. The installation was simple, the only difficulty was that the front part did not go through completely until I bent the piece of iron where the “frill” or “comb” was attached.
For comparison, I changed the old KST filter about 2 years ago, it could still stop the leaves (no), but the dust passed through it at once, it actually reminded me of a rag in the back of a vacuum cleaner, not a filter...
The new one is coal, and due to its larger size, the stove began to blow much stronger, at speed 1 almost like at speed 2 before, 2=3, and the 3rd is actually a turbine... You can use it as a hair dryer to dry your hair)
Knowing that they could leak, I coated them with scary white sealant.