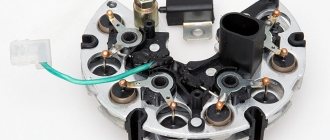
Hello everybody! I propose to discuss with me how to check the diode bridge of the generator. The topic is quite relevant, since it is not so rare for motorists to encounter generator malfunctions.
The diode bridge (DM) plays a big role in the performance of all electrical equipment in the vehicle. The key feature of DM is the ability to rectify current.
There are situations when the bridge cannot cope with its assigned tasks and signs of malfunctions appear. But how can you tell if there are problems with it without removing the generator? This is exactly what we will talk about today.
Common causes of breakdowns
Failure of the diode bridge is caused by:
- Moisture getting inside the circuit. This happens due to a leak in the generator housing. Oil, soot, moisture and dirt accelerate corrosion, which can ultimately lead to failure of electronic components.
- Battery malfunctions. A faulty battery can also cause rectifier failure. If you mistakenly mix up the positive terminal of the battery and the negative terminal of the battery, then prepare to replace the component.
- Incorrect “lighting” of the car. If you light a car from another car in violation of the rules of this procedure, you can easily damage the rectifier bridge.
A short circuit in the on-board network wiring and excessive load on it (during the simultaneous operation of devices and electrical equipment of the car with high power consumption) can also cause a “breakdown” of the diodes.
Useful tips
As practice shows, the diode bridge of the generator often burns out precisely as a result of the carelessness of the car owner himself. If there is an incorrect connection of the battery terminals, the load on the generator is prohibitively high, then the diodes burn quickly.
It is also important to understand that active use of the car, as a result of which dirt and water gets on the generator, does not add resource to the diode bridge. As a result, in order to increase service life, you need to properly wash the engine, follow the rules for connecting terminals to the battery, know how to light a car, etc.
We also recommend reading the article on how to quickly check the functionality of the generator. From this article you will learn what signs indicate that the generator is faulty, as well as how to check the generator with a multimeter without removing it.
In the case where there is no new diode bridge, then the solution is to replace the failed individual elements. To replace, you need a powerful soldering iron, as well as known-good diodes in stock.
Please note that replacing the entire diode bridge at once is also not always advisable. If the generator has been in service for a long time, then it is optimal to change the diode bridge assembly, but this will be a more expensive solution.
In cases where the generator is not old, and the breakdown occurred due to an accidental mistake by the owner (for example, after lighting the car), you can limit yourself to only repairing the generator. Often, in this case, there is no need to fear that other diodes will also begin to burn out quickly (provided that the rules are followed during further operation).
"Symptoms" of malfunctions
A bridge test should be performed if the following signs are present:
- Incorrect operation of vehicle current consumers. Dim light from the headlights, spontaneous turning off of the audio system, air conditioning - these are clear “symptoms”. If you measure the voltage from the output of the device, the measuring device will show less than the required 13.6 V.
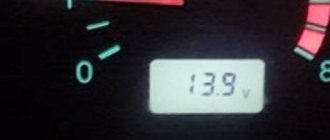
- The "Check Battery" light does not turn off after starting the engine. The voltmeter needle on the dashboard is in the “red” zone or close to it.
Replacing the Lada Kalina generator
The article provides general information about Lada Kalina generators and explains how to replace the regulator relay and the entire generator itself.
The generator must always be in good working order
Any modern car is equipped with electrical equipment that is absolutely necessary for the vehicle:
- without a starter it is impossible to start the engine;
- a car cannot be driven without lighting at night;
- The heater motor creates heat in the cabin;
- The wiper motor clears the windshield of rain and snow;
- FM radio makes it possible for the driver not to get bored on the road.
But all these devices cannot work without electricity, so the car must have a power source.
The current from which all consumers in the car are powered is produced by the generator, and the performance of the entire electrical circuit of the vehicle depends on its condition.
Therefore, the generator must always be in good working order, and if any breakdowns occur with it, they must be eliminated in a short time.
Generator Lada Kalina
Lada Kalina cars are equipped with three-phase generators that produce alternating current; to produce direct current, a rectifier unit is included in the generator circuit.
AvtoVAZ equips VAZ 1118 cars with generators of the type 5132.3771
or9402.3701-06
, there are many different manufacturers producing spare parts for VAZ cars.
The generator for the Lada Kalina can be of different power; the industry produces current sources of 85, 100, 90, 115, 120, 135 Amperes.
Among the most famous manufacturers of VAZ parts are:
- Pramo;
- StartVOLT;
- KZATE;
- LKD (China);
- Eldix (Bulgaria);
- ISKRA (Slovenia);
- BATE (Belarus);
- Bosch.
How to check a diode bridge: known methods
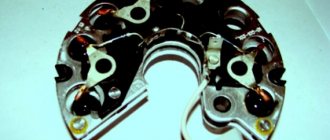
Before checking the diode bridge with a multimeter or autotester, familiarize yourself with the principle of operation of the circuit. A modern diode bridge has 3 positive, negative and additional diodes. The working element passes current in one direction. If the current does not pass or passes in both directions, then a break or “breakdown” has occurred.
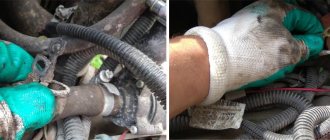
The diode bridge is tested using a tester (called a multimeter). First you need to disconnect all wires from the generator. The check does not require dismantling the device itself unless you check the integrity of each diode individually.
Next, the diode bridge is analyzed with a multimeter in accordance with the data given in the table:
If the multimeter shows infinite resistance, then the device or group of diodes being tested is working. Otherwise, the check indicates a breakdown.
Checking a car diode bridge with a multimeter is not the only possible diagnostic method. You can also use a test light or check the bridge with a self-assembled analogue.
Using a test lamp, we make calls in the same way as with a multimeter. The unit is fully checked by connecting the “plus” through the lamp to pin 30, the “minus” - to the generator housing. For groups of diodes:
- Positive: “plus” with a test lamp is supplied to pin 30, “minus” - to one of the mounting bolts.
- Negative: “plus” with a light bulb - on the mounting bolt of the electrical component, “minus” - on the generator housing.
- Additional: a light bulb with a “positive” wire is connected to pin 61, a “minus” wire is connected to the mounting bolt.
If the control light comes on when the circuit is closed, then there is a malfunction; If it doesn’t light up, the circuit is OK.
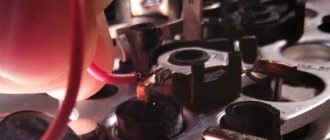
If necessary, you can, of course, test all diodes individually, but this will require unsoldering each diode.
Replacing the voltage regulator and checking it on viburnum
Welcome! Voltage regulator - it is installed on the generator and is directly connected to it, thanks to it, the entire current that the generator gives out changes and flows more evenly, for example, the more you turn the engine of a car (increase the speed, that is), the generator will work stronger and much more give out current, all this happens because the generator is connected to the engine (namely, it is connected to the crankshaft), but the voltage in the on-board network will also change from this (The more current the generator gives, the stronger this current increases in the entire on-board network car), therefore, when the speed increases, the light will constantly burn stronger, and when it decreases, it will dim because the current strength will decrease, so no matter what happened, a voltage regulator was invented, thanks to which the current strength in the on-board network always remains the same, but it changes when you turn on additional devices that need more current, that is, for example, you turn on the high beam headlights of a car and the current supply increases through the regulator so that there is enough power for these headlights, in addition, the current supply flowing through The regulator is constant and does not jump higher or lower, so the headlights work in the same mode and do not shine either stronger or weaker.
Note! In order to change or check the voltage regulator, you will need: Two different types of screwdrivers, as well as two wrenches that will be “12” in size, and you will also need a DC voltmeter thanks to which you can clearly determine what voltage you have in your on-board network and whether it is jumping, and among electrical appliances, a megohm meter is also useful, thanks to which you can check the regulator’s capacitor for serviceability, thanks to which the current strength remains constant when supplied to the on-board network!
Where is the voltage regulator located? It is located on the generator itself, as was already said a little earlier, a plus wire and a wire block are also suitable for it, so that the regulator does not become dirty; for this purpose it is also closed with a plastic cover, in more detail the pin that comes out of the regulator you can look at photo which is located below, in this photo you can just see the same plastic cover that closes the regulator, and in the other photo (Small) you can see that the cover has already been removed and only one pin sticks out, which comes from the regulator (This pin is on both indicated by a red arrow in the pictures).
When should you change the voltage regulator? It needs to be changed when it begins to pass alternating current into the on-board network (Alternating current is the current that rises or falls under the condition that the circuit leaves its direction unchanged), in other words, if the current strength fluctuates (And this should not happen), then the regulator must be replaced, if the current fluctuates, for example, the headlights may burn either worse or more intensely (Depending on the engine speed, at high speeds the headlights will burn stronger), and the regulator must also be replaced if it begins to produce either less current than necessary (In this case, you will have an undercharge of the battery), or more (With a stronger current, you may burn out the main part of the wiring in the car that will not withstand the heavy load, or if you have fuses, then at best they will have time to open the circuit and nothing bad will happen to the wiring).
How is the replacement performed?
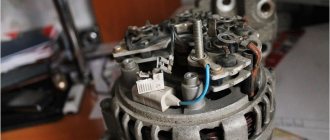
Let's say checking the diode bridge shows that there is a problem. It is necessary to disconnect all wires from the generator, remove and disassemble the device. In some models, the part is attached directly to the unit with bolts, but there are devices in which the housing must be removed to access the rectifier.
Next, as part of the repair, faulty diodes are replaced - if this is economically feasible and it is difficult to find the required generator model on sale. Or they change the component entirely. Upon completion of work on the stand, the serviceability of the component and the electrical system as a whole is checked using a multimeter, and the part is assembled and installed on the car.
You can check the diode bridge yourself if you have the time and skills to disassemble the generator. But even after checking and detecting faulty diodes, you will need to select and correctly install a new element instead of the faulty one. Remember that a faulty generator can cause failure of expensive electrical equipment, short circuits and spontaneous combustion of the car. Therefore, it is better to trust repairs and diagnostics to car service technicians, who will definitely be able to call you correctly!
Manual winch: lever or drum - which is better to choose?
- the bridge is dismantled from the generator (no other way);
- each diode will need to be checked separately;
- the beeper mode is selected on the measuring device;
- This setting will allow you to hear a signal when the probe is shorted;
- if this mode is not available, select the 1kOhm position;
- the probes are brought to the edges of the diode;
- a measurement is made;
- the probes are swapped.
Now regarding the measurement results. Everything is fine with the diode, if in one position you see an infinity sign on the screen, in the second it gives a value in the range from 500 to 700 Ohms.
If the device shows a lower resistance value, or there is an infinity sign in two positions, you have found a faulty diode.
Bulb
Now let's see how the procedure is carried out using a regular light bulb. This is a good alternative for those cases when you don’t have a multimeter.
The most ordinary 12 V lamp will do the job.
Preliminary checks
The phenomena listed above are external manifestations of malfunctions. For example, a car behaves this way when the battery has expired or is faulty. Primary diagnostics of serviceability is carried out by the corresponding icon on the on-board computer display (a stylized battery with terminals), which does not light up or flashes when the engine is running. Its shutdown indicates that the power supply to consumers has been transferred from the battery to the generator.
Restoring the normal technical condition of the vehicle's electrical equipment begins with localizing the location of the fault. Taking this feature into account, before testing the bridge, the tension of the generator belt, the serviceability of the relay regulator, the voltage on the battery and the absence of oxidation of the electrical circuit terminals are first checked.
Multimeter
Testing with a tester allows you to determine the serviceability of the diode or confirm its failure. The most commonly used measuring instrument in this area is the multimeter. It is used to measure all the main parameters of electrical circuit components: current, voltage, resistance, capacitance. More expensive models are able to measure the temperature of an object, find out the gain, the capacitance of capacitors, and test the circuit for a short circuit.
Almost all modern types of multimeter can work with both constant and sinusoidal types of electric current. Among the devices on the market, digital and analog types are the most in demand. And although the first type is more popular, the second is still actively used by professionals in their work.
The main advantages of classic analog multimeters are their reliability and low cost (compared to digital ones). However, the minus manifests itself in less accuracy, allowing an error of 1.5-2%.
Digital devices are often used at home. They are more accurate (accuracy up to 0.5%), easy to operate and have greater measurement resolution.
These testers do not require calibration before each measurement and are resistant to vibration.
There is a third type whose device includes both a pointer and a digital indicator.
In addition to the main body, the tester comes with 2 probes with red and black wires.
At the bottom of the instrument panel you can see several connectors:
- “COM” - common, grounded (for black probe);
- “VΩmA” - a connector that allows you to ring the contacts, measure the current strength and frequency (for the red probe);
- “10 A” is a socket for a wire that allows you to measure current up to 10A.
The fourth “°C mA Lx” socket, present on some models, measures additional parameters (temperature, gain and capacitance).
Also on the front panel you can see a rotary disk surrounded by a scale with digital values and marks. Using this dial, you can set the required values, configure them to the desired modes or perform certain functions.
