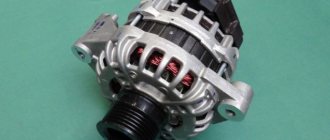
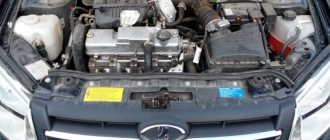
Lada Kalina cars are equipped with generators of two brands - 5132.3771 or 9402.3701-06. The standard Kalina generator is a three-phase alternating current device, which has a built-in rectifier unit and an electronic voltage regulator.
There are very different reviews regarding the quality and reliability of the devices with which these cars are equipped during factory assembly. If the unit fails, you can replace or repair it yourself.
Why did it happen so?
Perhaps the automatic requests do not belong to you, but to another user accessing the network from the same IP address as you.
You need to enter the characters into the form once, after which we will remember you and be able to distinguish you from other users exiting from this IP. In this case, the page with the captcha will not bother you for quite a long time. You may have add-ons installed in your browser that can make automatic search requests. In this case, we recommend that you disable them.
It is also possible that your computer is infected with a virus program that is using it to collect information. Maybe you should check your system for viruses.
If you have any problems or would like our support team, please use the feedback form.
Replacing the alternator belt
Domestic cars have been and remain popular among car enthusiasts. Therefore, current issues relating to spare parts and their replacement in case of wear and breakdown require detailed consideration and study. One of these spare parts is the Kalina generator belt. Usually it is changed every 30-60 thousand km of the car.
A car generator is a device that recharges the battery and maintains the voltage necessary for the system to function. After starting the engine, the battery partially consumes its charge, but due to engine operation, energy is returned through transmission through the generator.
It is noted that the professionalism of the driver directly affects the power of the generator. Also, in the process of converting the mechanical energy received from the engine into electrical energy by the generator, the operation of all electronic devices of the car is ensured.
Kalina has a lot of devices and systems that require electrical energy. It is required to turn on the ignition system, operate both low and high beam headlights, to be able to use air conditioning, which is indispensable in the warm season, and, of course, to maintain the battery charge at the required level.
Description and location
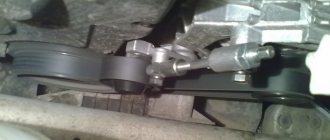
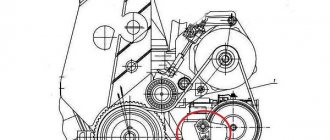
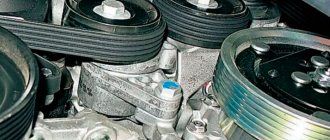
The generator's job is to provide power to the vehicle's electrical equipment. Like other components in a car, the generator is powered by a motor; to ensure constant rotation of the rotor, pulleys are installed on the generator shaft and the crankshaft of the power plant. A belt is pulled between them. After starting the engine, the crankshaft begins to rotate, and the movement is transmitted through the belt to the rotor.
On the latest Priora models, this element activates the air conditioning and hydraulic booster. This material examines the replacement and tensioning of the belt in a new standard car, where additional equipment is installed.
The belt is a consumable item that requires replacement after 45-60 thousand kilometers. The size of the standard belt on a Priora with air conditioning is one thousand one hundred twenty five mm.
Replacing the generator yourself - Lada Kalina blog
Usually, even factory generators on Kalina serve for quite a long time and do not require replacement, of course, unless you come across a car with a factory defect of this device. If this electrical equipment unit fails, it will have to be replaced. Although this is not difficult to do, it will take at least an hour, especially if this is your first time doing this procedure. So, we will need the following tools:
- Open-end or ring wrenches for 8, 13 and 19
- Small and large ratchets and heads for 8, 13 and 19 for more convenient and faster work
- Wrench with extension
So, let's proceed to a very detailed description of all the types of work that need to be performed. First of all, we need to loosen and release the belt tensioner and then remove it. So be sure to check out this Alternator Belt Replacement Guide first. After this, you can proceed directly to removing the device from the car.
First, we disconnect the plug, which is secured with a plastic latch, just lightly press it and pull it to the side, it will come out without any problems:
And the wire terminals that are under the rubber protective cap, pry it off and unscrew the nut:
Then we unscrew the nut securing the upper part of the Kalina generator, this is clearly shown in the photo below. You can first move it with a knob, and then work with a ratchet handle:
And tapping the protruding bolt a little so that it moves, remove it from the back side, as shown in the photo below:
Next, we proceed to the lower fastening bolt, and proceed by analogy, only if necessary, hold the nut on the reverse side, since it can scroll:
Be careful when removing this rod as there are bushings there. Hold them immediately so that they do not fall and get lost. And holding the generator body with one hand so that it does not fall, we remove this bolt with the other hand:
Now almost everything is ready and you can safely remove this device from the engine compartment, turning it slightly from side to side, finding the most convenient position for its removal.
To replace the generator on the Lada Kalina, we purchase a new one and install it in the reverse order of removal, putting all the bushings in place in the same places as they were. The price of a new generator ranges from 4000-5000 rubles, so you will have to fork out a little.
Which generator is better to put on a VAZ 2110
VAZ 2110 factories install KATEK generators with a current of 80 A. The service life is 140,000 km, which is approximately 10 years of vehicle operation. Answering the question of which generator is better to install on the VAZ 2110, experts recommend products from Russian manufacturers.
What to consider when choosing
- Russian manufacturer or foreign? Of course, first of all, Russian manufacturers are preferable. If only because it is easier to find spare parts in the event of a minor breakdown. If you purchase a generator for a VAZ 2010 from a not so popular company, it may be difficult to find spare parts, and they will not cost you so much.
- Current strength. Factory models for VAZ 2010 - 3771 or 94.3701 - are designed for 80 A, this current is enough, even if there are additional devices that consume it. More powerful ones - 120 A - are installed in the presence of powerful acoustics, no harm is done to the battery, and you will provide all energy consumers with uninterrupted current.
- It is better to purchase a generator if there is a warranty on it. There may well be a defective product, and the warranty will provide the opportunity to replace it with a new one.
Replacing the generator bracket with tensioner on the Lada Granta from the Lada Kalina
Bracket from Lada Kalina
Despite the fact that the previous method is the most economical, it is time-consuming.
Many drivers prefer to pay an additional 350-450 rubles and purchase a ready-made kit for installing a bracket from the Lada Kalina to the Lada Granta.
The sequence of actions is as follows:
- After dismantling the converter from its standard place in the engine compartment, we proceed to install the bracket from the Lada Kalina.
Original equipment of the modernized mount:
- belt;
- tensioner roller;
- bracket;
- axis to “10”;
- tensioner
- We unscrew the three mounting screws from the old converter, remove the old bracket, install and screw the new one.
- We fix the structure in its regular place, screw the three nuts to “13”.
- We activate the rocker to the third gear position.
- We put on the generator belt, turn the generator pulley by hand until the belt fits into the groove grooves.
We start the engine, check the charging and the LED indication on the dashboard.
Generators for VAZ 2114
The generator initially built into the 2114 is low-power, and if it also breaks down and you decide to purchase a new one, the question arises: which generator is better to install on the VAZ 2114? It is important here that the unit is more powerful, but there is no need to change the fastenings.
- The most successful replacement option for a VAZ 2014 is a generator from a Priora or Kalina with air conditioning. This installation has a power of 115 A, which is 35 A more than the characteristics of the units.
Installing these generators for 2014 usually does not cause problems, however, it will be necessary to replace the pulley, but it only costs about a hundred rubles and is not difficult to find.
- The Eldix brand generator also has a power of 115 A and works well. The disadvantage is that it is almost impossible to find spare parts, and even if there is a minor breakdown, you will have to replace the entire generator instead of repairing it.
Please note that a lack of charging voltage can occur simply due to oxidation of the battery terminals; keep an eye on them by cleaning them regularly.
When is it time to change?
On Lada Kalina cars, the manufacturer does not regulate the replacement of this part. However, its failure is a common problem. In particular, we are talking about Lada Kalina cars. This applies to both 16-cl and 8-cl engines.
This is what a deformed element of a Kalina generator with an 8-cyl internal combustion engine looks like
Therefore, let’s look at the signs that indicate that the belt may fail in the near future:
- Whistle when moving. As a rule, this whistle appears when the electrical appliances of the vehicle begin to load. For example, if you start the car, and when you press the gas, a loud whistle is heard from the engine compartment, this indicates that the belt is loose. In this case, it must be tightened using a tensioner or replaced.
- Cracks on the strap. If you open the hood, look at the belt and see cracks on it, then you know that it’s time to change the element. Neither tensioning nor adjusting the rollers will help here. The component can be tightened, but this will not be enough for a long time. The only option left is replacement.
- Deformation. As in the previous case, neither tightening the tensioner nor adjusting the rollers will give much effect. You just need to change the element.
- Noise when the engine is running. If the element has already served its service life, this can be understood by the noise that appears when the motor is running. For example, some Lad Kalin car owners report loud knocking and even impacts when the engine is running.
The assembly is disassembled: this is what the strap looks like on the shafts
If the vehicle is equipped with a generator sensor that determines its performance, then it will be easier to identify the malfunction. For example, if you heard a whistle from under the hood, and at this time the indicator on the sensor came on, then you need to pay attention to the strap. This indicates that the belt needs to be tightened, since it may be in a weak state or that its service life has been exhausted.
New Lada: Grant knock sensor for 8 and 16 valves: signs of malfunction - Portal - auto parts
One way or another, if the slipping and whistling of the strap cannot be eliminated by adjusting the belt or rollers, it needs to be changed.
Let's sum it up
As it turned out, repairing or replacing the generator in a LADA Kalina car does not require much effort, so such manipulations are accessible even to inexperienced owners; a connection diagram is used to make the task easier. An important point in operation is periodic diagnosis of the condition of both the unit itself and its component elements, including the tension system. Timely prevention will significantly extend the life of the unit, and the owner of LADA Kalina will have considerable savings.
Changing bearings in Lada Kalina
The rectifier units present in the designs of generator sets of the AvtoVAZ model range have received a considerable number of negative reviews during operation. This statement is also true for the Lada Kalina we are considering. These modules can break down even after a mileage of 10 thousand km, which requires repair or replacement of the device.
It has also been revealed in practice that the cause of most malfunctions is the generator set bracket. However, bearings can also fail prematurely. It is gratifying that the owners are able to cope with such a problem on their own.
To repair the generator module, it will require preliminary disassembly. For this purpose, we “grab” the tips of the stator cables with a screwdriver and slightly pull them out of the springs present in the diode bridge. Next, you need to unscrew the bolts holding the bridge itself. In addition, unscrew the connecting bolt.
Having disassembled the body of the LADA Kalina generator set, we resorted to checking the integrity of the rear bearing. Here you will need to twist its outer ring. If it rotates without noticeable difficulties or sounds, and is not inclined to emit play, then we ascertain the serviceability of the bearing. When the slightest signs of wear are evident, we change it without hesitation.
The next step is to dismantle the generator unit bracket. Using the same screwdriver, we pry up the stator and remove it from the casing. The bracket design contains a bearing, which is also subject to inspection and replacement (if necessary).
The bearing of the front part of the LADA Kalina generator is rolled inside the casing. The manufacturer does not recommend replacing it. However, experts still advise performing this procedure, since if it breaks down, you will have to replace the entire generator, which is very expensive.
Replacing rear pads Kalina
Idle air control Kalina
Kalina torpedo
This bearing can be removed, but you will first have to remove the pulley and the plug present here. Next, using a hammer with a rubber striker, we excavate the rotor. Note that the front lining of the product will have to be clamped with a vice. We remove the bearing with special care.
How long does it take to change the timing belt?
- According to the Lada Priora maintenance regulations, the condition of the timing belt should be checked after one hundred five thousand km, and replacement - after two hundred thousand km. But cutting off the teeth or breaking the timing belt can lead to valves sticking (valve bending) into the pistons, which leads to expensive engine repairs. Therefore, we advise you to inspect the condition of the timing belt more often - every forty five thousand kilometers.
- On Lada Granta and Lada Kalina two cars, the timing belt is checked every maintenance (every fifteen thousand km), and a replacement is done after seventy five thousand km. mileage
- On Lada Vesta and XRAY, the condition of the timing belt should be checked after fifteen thousand kilometers, and replacement every one hundred eighty thousand kilometers.
About the principle of operation of a car generator
The operation of the Lada Kalina generator unit is based on the following principle: an alternating current is induced in the stator winding, which is subsequently transformed into direct current through a rectifier module located on the body of the unit.
The basic characteristics of the generator set include the following parameters:
- maximum generated current – 85-90 Amperes;
- operating range of on-board voltage – 14.4-15.1 Volts;
- rotation ratio of the motor and rotor – 1:2.4;
- right-hand direction of rotation.
The housing of the unit is held together by pins that tighten the stator with the covers. The mounting sockets of the indicated covers contain bearings, which ensure the ability of the rotor to rotate. The rear bearing is installed inside the cover with a minimum gap.
Let's move on to the switching diagram of the generator with the on-board network. The connection diagram is very simple. After turning on the ignition, power begins to flow to the voltage regulator through the battery discharge lamp circuit. When the motor starts, the excitation winding is supplied with supply voltage from three diodes mounted in the rectifier unit.
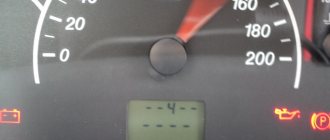
Using the indicated signal lamp, the generator unit can be checked. If the device is working properly, the lamp lights up when the ignition is on. It goes out when the engine starts. When this phenomenon is not observed and the lamp continues to shine, the generator set should be diagnosed for the presence of malfunctions. In some cases, replacement is required, and many are interested in how to remove the generator?
Generator check
To check the generator set, start the engine and increase the speed to approximately 3000 rpm-1.
We turn on all consumers: – external lighting, high beam headlights, heater fan, heated rear window, windshield wiper, etc.
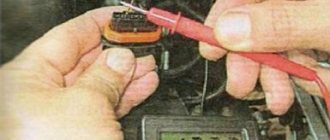
We take a voltmeter and measure the voltage on the battery, this needs to be done together. One maintains engine speed, and the second assistant measures the voltage.
The voltage must be at least 13 V. If the voltage at the battery terminals is less than 13 volts, then the generator windings are faulty (open or shorted). The voltage regulator may be faulty or the rotor slip rings may be oxidized.
To make sure that the voltage regulator is working properly, turn off all consumers except the high beam headlights and measure the voltage on the battery again.
The voltage must be at least 14 volts. If the voltage is less, the regulator should be replaced. The regulator can be changed without removing the generator.
For removal of the voltage regulator, see the article “Generator Repair”.
To check the valves of the rectifier unit, it is necessary to disconnect the wires from the battery, generator and the “+” terminal of the voltage regulator.
We take a conductor, connect it to the “+” of the battery, and through a light bulb (1-5 W, 12 V) connect it to the “B+” terminal of the generator, and connect the “minus” to the generator housing.
If the light is on, then there is a short circuit in both the block of positive and negative terminals of the valves.
To check the short circuit in the positive valves “+” of the battery, we connect it through a light bulb to the “B+” terminal of the generator, and connect the “minus” valve to the terminal of one of the phase windings of the stator.
If the lamp is on, one or more positive diodes are broken.
To check the short circuit in the negative valves, “+” of the battery is connected through a light bulb to the output of one of the phase windings of the stator, and “minus” to the generator housing.
If the light is on, one or more negative valves are broken or the stator windings are shorted to the generator housing.
In order to prevent short-circuiting of the windings, remove the generator from the car and, having disconnected the windings from the voltage regulator and rectifier unit, check them for short-circuits using a lamp or ohmmeter.
To check for an open circuit in the stator windings, connect the tester probes (in ohmmeter mode) to the terminals of the stator winding.
If the ohmmeter shows infinity, then there is a break in the winding. We also check the other two windings.
To check for a short circuit between the stator windings, connect the tester probes between the terminals of the two windings.
The ohmmeter should show infinity, otherwise the windings are short-circuited.
Check the other two windings in the same way.
To check whether the stator winding is shorted to ground, connect the tester probes to the winding terminal and the generator housing.
The ohmmeter must show infinity, otherwise the winding shorts to ground. Check the other two windings in the same way.
Inspect the stator windings. There should be no signs of overheating on the winding insulation, which is a consequence of a short circuit in the valves of the rectifier unit.
If there are signs of overheating on the windings, the stator must be replaced
To check for a break in the rotor winding, connect the tester probes to the slip rings. If the ohmmeter shows infinity, then there is a break in the winding.
To check the short circuit of the rotor winding to ground, connect the tester probes to the slip ring and to the rotor shaft (or pulley).
The ohmmeter should show infinity, otherwise the winding is shorted to ground
1200 rub. for the photo report
We pay for photo reports on car repairs. Earnings from 10,000 rubles/month.
Write:
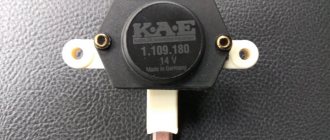
Checking the generator voltage regulator may be necessary when problems with the battery begin to occur. In particular, it began to undercharge or overcharge. When such a malfunction occurs, it’s time to check the generator voltage regulator relay.
The task of this simple device is to regulate the voltage of the electric current that is supplied from the generator to the battery. When it fails, the battery is either not charged enough or, on the contrary, overcharged, which is also dangerous, since this significantly reduces the battery life.
Agree that this prospect is not very good because of one small detail.
This is why it is so important to monitor the operating condition of the voltage regulator (it can also be called a pill or a chocolate bar). But in order to properly check the voltage regulator, you need to know its type and several important features.
Sequence of actions when modifying the generator bracket with your own hands on the Lada Granta
- We grind 2 - 3 cm on each side of the generator mount. It is better to do this in a stationary vice using drilling equipment. Due to the lack of equipment, we use a grinding machine, which is known as a “grinder”.
Sew 2-3cm on each side
- Using a drill with a metal drill (at “8”), we drill out the standard hole on the mount, making the stroke length for the bolt 1.5 - 2.0 cm.
Drill out the standard ring
- Using a grinder, we partially grind down the stiffening rib on the mount so that it does not interfere with the free movement of the converter.
- We cut out a corner of metal 40 mm long and 30 - 40 mm thick, and bend the edge. It turned out to be something like the letter “G”. One end is attached to the bracket, on the other we weld a nut to “10”.
Corner letter G
- We assemble the structural elements, screw in the bolt to tension the generator drive belt.
- We install the converter and the bracket without tensioner in its original place.
- We move the rocker to the third gear position, put on the drive belt, and turn the crankshaft pulley by hand.
- Check the degree of belt tension.
Belt tension level
Note to the driver!
At home, we check the tension level of the generator drive belt as follows. Using your finger, press on the section of the belt between the crankshaft pulley and the tensioner. The belt bends by 10 - 12 mm, no more. Tighten the fastening (tension) as necessary.
Finally, we start the engine and check the functionality of the system.
Auto Private
Process and result verification
- We clamp the clip with a wrench and loosen the roller fastening nut;
- Now we need to clamp the eccentric clip and start scrolling. The rotation of the tool should be minimal - this will allow you to better tension the component;
You see, the process consists of only 3 steps, but the main step is checking the tension on a Priora with air conditioning and power steering (or with these components separately). In this case, the tension should be stronger, if we associate with the basic version of the VAZ two thousand one hundred seventy with sixteen valves. In the longer section between the shaft and the pulleys, the material should bend by approximately 5-6 mm.
Step-by-step instructions for removing the generator from a Lada Granta car
Before altering the mount, we remove the converter from its standard place in the engine compartment. To do this, perform the following steps:
- We place the car within the perimeter of the repair area, provide safety measures, and secure the rear row of wheels with wheel chocks. Additionally, squeeze the parking brake lever.
- Open the hood and disconnect the terminals from the battery to prevent a short circuit in the circuit.
Accumulator battery
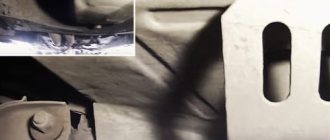
- We unscrew 6 bolts under the bottom of the car and temporarily remove the oil pan protection.
- Remove the protective cap and terminals from the contact board on the converter.
Removes clamps
- We unscrew the nut of the upper fastening (key set to “13”), and use the mounting tool to move the converter to the side. Unscrew the lower mounting bolt.
Unscrew the nut and bolt
- We remove the generator belt from the pulleys.
- We remove the converter assembly and fix it on the surface of the workbench.
Removing the converter
Symptoms of malfunction and their elimination
You can find out whether a replacement is needed or whether you can simply tighten the power steering belt with air conditioner on the Priora sixteen valves only after inspecting this component. To do this, just open the hood and examine the belt; it is located next to the right front wheel. There are signs that indicate it's time to check the alternator belt: something whistling and squeaking from under the hood.
The prerequisites may be the following:
- Antifreeze, oil or other working water has come into contact with the generator pulley or belt.
- The belt is worn out - you can tell by its appearance.
- The tension has dropped - in this case the component needs to be tightened.
- The bearing in the generator is worn out.
When the belt whistles at the sixteen valve in a Priora, it’s time to carry out diagnostics. If there are cracks, tears or other severe damage on its surface, it means replacement is required. If the generator component with hydraulic booster and air conditioner looks normal, you should check its tension; the best level of deflection is 6-8 mm - you need to press on the component in the middle between the generator and the pulleys.
Are there visible stains from cooling water or engine oil on the surface? If the contamination is not significant, they can be cleaned. If the liquid has penetrated into the material, cleaning will not bring any results; a replacement is needed. If the component is perfectly tensioned and no damage or stains are visible, then you should move on to checking the bearings. They may have to be changed.
READ What Oil to Use in Gur Ford Fusion
Replacement process
During the work process you need to perform the following actions:
- Raise the car on a jack and remove the right wheel, as well as the protective wheel arch liner and the support boot.
- Install a safety support under the bottom of the machine.
- Remove the protective shield under the engine.
- Raise the engine under the crankcase with a jack. A wooden stand must be placed between the lifting part of the jack and the engine oil sump.
- Remove two TORX E14 bolts securing the power unit support to the bracket. If the screws are tight, you need to vary the position of the motor with a jack, achieving easy rotation.
- Unscrew the three TORX E14 bolts securing the support to the side members of the car body.
- To loosen the belt tension, to do this you need to unscrew the fixing nut.
- Rotate the nut 8 mm clockwise until the belt is completely loosened. Then you need to remove the strap and thread a new element through the place where the support was removed.
- If necessary, you can replace the grease in the tension roller. The scheme is completely identical to that described above.
- Tension the belt by turning the nut 8 mm counterclockwise. The tension should be controlled by hand - the element should bend when pressed.
- Secure the tension with a 19 mm nut.
- Install all removed parts in reverse order.
- Start the engine and check the operation of the drive. To do this, you need to load the belt as much as possible - turn on all electricity consumers and the air conditioner.
- If a whistle occurs during operation, you must tighten the strap. To do this, with the engine running, you need to loosen the lock and carefully tighten the tensioner rod until the whistle disappears.
- Tighten the lock nut.
- If a whistling noise occurs during operation, the belt must be tightened further.
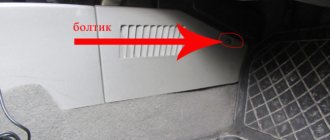
The engine mount is circled in red.
Loosening the tensioner
Arch locker and support boot
The engine mount is highlighted with a red oval.
Location of five TORX E14 bolts
Engine mounting location
How to tension a timing belt
- Insert the tips of the snap ring pliers into the grooves of the outer race of the tension roller.
- Tension the belt by turning the tension roller counterclockwise.
- We combine cutout one of the outer race of the roller with the rectangular protrusion two of its inner sleeve. Tighten the roller mounting bolt with a wrench.
After installing the generator drive pulley, turn the crankshaft by the pulley mounting bolt two turns clockwise. We check the alignment of the installation marks on the crankshaft and camshaft, and also the alignment of the cutout with the protrusion on the tension roller.
The process of replacing the timing belt is also shown in:
Assembling the Lada Kalina generator
Complete unit
Before you begin to fit the bearing into the front cover of the generator, you will need to inspect its seat for deformed areas. If they are found, you need to straighten the wrinkled areas using a knife or scraper. When seating the front bearing inside the casing, do not press on the central part; the part should be inserted by pressing on the edges of the outer ring.
Having selected the desired frame from the cup puller set, fit the bearing tightly onto the front casing of the generator. Using gentle blows of a rubber hammer, you need to correct the rolling of the bearing inside the casing. Using a small tube (18 mm), slide the rear bearing onto the rotor shaft.
Before you begin mounting the rear bearing, you need to make sure that the shaft is well clamped in the vise. You can put a small wood chip under it. This will help secure the front rotor wing during the bearing installation process. In order not to damage the bearing, you need to hit only its central part with a hammer.
The rest of the generator assembly is carried out in the reverse order of disassembly. Here the marked marks that were applied during the dismantling of the generator will help you. The fastening of the unit should be tightened in the mode of a car wheel, that is, crosswise.
In this case, you need to tighten the bolts gradually, without tightening them all the way right away. After successful tightening, the rotor should spin without unnecessary effort or stopping. If it sticks, it means that the generator casing is assembled incorrectly. Before attaching the plastic casing, you need to make sure that the stator winding is securely fastened.
Repairing a Lada Kalina generator is not a very labor-intensive process, but it requires care and some experience working with electrical appliances. If you encounter difficulties in servicing the unit, you must entrust this matter to qualified specialists at dealer service stations.
LadaKalina
LadaGranta LadaKalina 2
LadaKalina Sport
Lada Granta Sport
AR 0301 / AR18-1041034
Installing the timing belt
Before installing the rollers, apply thread sealant to the threads. We do not tighten the tension roller bolt at all. Before installing the timing belt, check the alignment of the timing marks. It is convenient to keep the position of the crankshaft under control by aligning mark one on the crankshaft toothed pulley with mark two (rib) on the oil pump cover.
We put the timing belt on the crankshaft pulley, tensioning both branches of the belt, we put the front branch behind the support roller, and the rear branch, putting it on the pulley of the cooling water pump, behind the tension roller. Then we put the timing belt on the camshaft pulleys.
Removal, disassembly and installation of the generator VAZ (lada) kalina 1117 2004-2021
Tool:
- Driver for socket attachment
- 7mm wrench attachment
- 8mm wrench attachment
- Knob attachment 13 mm
- Knob attachment 17 mm
- High nozzle on the wrench 24 mm
- Hex key 8 mm
- Pipe wrench
- Medium flat screwdriver
- Marker
- Mandrel
- Large hammer
- Double jaw puller
- Soldering iron
- Electrical tester
- Rear bearing diameter guide
New Lada: LADA Largus station wagon from RUB 536,310. – Prices and configurations – Yakhroma-Lada: LADA dealer in Moscow (Moscow and Moscow Region)
Parts and consumables:
Removing the generator
1. Disconnect the wire terminal from the negative terminal of the battery. Remove the generator belt. By pressing the lock of the block of the generator pre-excitation wire, disconnect the block from the voltage regulator connector.
2. Using a “13” socket, unscrew the nut securing the wire lugs to terminal “B” and remove them from the terminal.
3. Using a 17mm socket, unscrew the bolt of the lower mounting of the generator and remove it. Remove the nut from the generator bracket.
4. Using a 13mm socket, unscrew the nut of the bolt for the upper mounting of the generator.
5. Remove the generator.
Disassembling the generator
1. We disassemble the generator 5132. 3771 to replace the voltage regulator, rectifier unit, rotor, stator and bearings. Using the “8” socket, unscrew the three nuts securing the casing.
2. Remove the casing.
3. Remove three metal washers from the casing mounting studs.
4. Using a slotted screwdriver, unscrew the two screws securing the voltage regulator terminals.
5. Using the “8” socket, unscrew the two nuts securing the voltage regulator.
6. Remove the regulator.
7. Use a marker to mark the relative positions of the generator covers.
8. Using a “7” head, unscrew the four bolts holding the covers together.
9. Remove the back cover with the stator assembly.
10. If the stator does not come out of the front cover, pry it off with a screwdriver from different sides relative to the front cover. We put a high “24” head on the pulley fastening nut and through its hole insert a “8” hexagon into the hole of the rotor shaft.
11. Unscrew the pulley fastening nut, holding the tool head with a pipe wrench or in a vice. Remove the spring washer. We remove the pulley.
12. Remove the spacer washer.
13. Push the rotor shaft out of the front cover.
14. Remove the cover.
15. To replace the front bearing, use a slotted screwdriver to unscrew the four screws securing the bearing pressure plate.
16. Remove the pressure plate.
17. Use your hands to push the bearing out of its seat.
18. Remove its bearing. If it is not possible to push out the bearing, we knock it out using a mandrel or tool head of a suitable diameter.
19. To replace the rear bearing, use a two-jaw puller to press the bearing off the rotor shaft.
Warning:
When performing this operation, the puller screw should be pressed exactly into the center of the shaft so as not to damage the plastic insulator of the rotor slip rings. To install the puller grips, two flats are made on the plastic rotor bushing.
20. If it is necessary to remove the rectifier block or stator, unsolder the six terminals of the stator winding from the terminals of the rectifier block.
21. Having unscrewed the three fastening nuts with a “8” wrench, remove the rectifier unit and stator. Using a tester, we check the stator and rotor windings for open circuits and short circuits to the housing.
22. We assemble the generator in the reverse order. To install the rear bearing, we support the front end of the rotor shaft on a wooden block, and press the bearing onto the rear end of the shaft with a mandrel or a piece of pipe of a suitable diameter, applying force only to the inner ring of the bearing.
23. If the front bearing cannot be inserted into the generator cover, press it with a suitable tool head, applying force to the outer ring of the bearing.
The article is missing:
- High-quality photos of repairs
Source
Rotor and stator repair
First of all, you will need to examine the stator and rotor windings for breaks. To do this, you do not need to remove the generator from the car. It will be necessary to dismantle only its diode bridge. This will require a two- or three-jaw puller, as well as an artificial frame borrowed from a cup puller.
Replacing unit parts
Carefully straighten the wires in the winding and remove the diode bridge. To avoid getting confused during reassembly, you need to mark with a marker the placement points of the front and rear casing of the generator. Using a size 8 socket wrench, unscrew the 4 bolts that hold both trims in place. Carefully remove the front trim using a flathead screwdriver. After this, slide the rear casing and remove the connecting bolt along with the insulating washer, as well as the plastic plug from the bearing.
To check you will need an ohmmeter tester. Having connected its plugs to the rotor rings, check the winding for breaks. In this case, the winding resistance should be 5-10 Ohms. After this, connect the tester plugs to any of the slip rings and to the rotor. Now you need to check the winding for short breaks to ground. If the winding has no breaks and is working correctly, the tester will show the highest resistance value.
In the same way, it is necessary to connect the plugs to the stator and check the winding for breaks. If they are absent and the part is working properly, the tester will show extremely low electrical resistance. When checking for short-term ground breaks, the tester should also show the highest electrical resistance value.
To ensure proper operation of the rectifier unit, its diodes must transmit electric current in only one direction. If they conduct electricity in 2 directions or do not conduct it at all, then the diodes have become unusable and need to be replaced.
Attach the tester plug with a negative value to the diode itself, and the plug with a positive value to the part body or plate in which it is located. A functioning diode will not conduct electric current, and the tester will show the highest resistance value. After this, you will need to swap the plugs and perform the test again. If the diode is working correctly, the tester will show electrical resistance. In the same way, it is necessary to test the remaining diodes in the diode bridge circuit.
Stages of work
To adjust the degree of belt tension on Kalina engines, a mechanical tensioner is used, in contrast to the timing drive, which uses a hydraulic tensioner. When changing an element, it is recommended to carry out preventive maintenance of the roller by adding fresh lubricant.
To complete the work you need to do the following:
- Loosen the roller bolt. The thread on it is reversed.
- Use a screwdriver to pry up the plastic plug on the roller and carefully remove it.
- Unscrew the fixing nut on the tensioner rod a few turns.
- Loosen the belt tension by rotating the rod nut clockwise. The nut must be unscrewed until the rod begins to move freely in the seat.
- Unscrew the side bolt securing the rod end, located next to the tension roller.
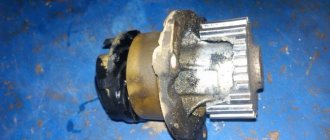
- Remove the tensioner and set it aside.
- Proceed to dismantle the strap. The procedure must begin with the generator pulley, while overcoming the slight resistance of the belt.
- Remove the element from the crankshaft pulley and remove it completely.
- Unscrew the roller bolt and remove it.
- Using a needle, carefully pry up and remove the protective caps on the bearing. Wash the bearing with white spirit or gasoline.
- Refill with fresh grease and install protective rubber caps.
- Assemble all the parts and mount the roller in place. When assembling, you must remember that the bushing is in the bearing on the side of the bracket.
- Change the belt by installing it in the reverse order - from the crankshaft pulley to the generator pulley.
- Install the tensioner and begin tightening the belt by turning the nut counterclockwise. The nut must be tightened until the resistance increases. A well-tensioned strap should be slightly pressed when pressed by hand.
- Tighten the nut securing the tensioner rod.
- Check the operation of the mechanism; if a whistle occurs, tighten the strap.
Loosening the 17mm left nut
Removing the cover on the roller
Disassembled tension roller
Bearing with caps removed
Washed roller
Reassembling the unit
Belt tension
Tightening the control nut
Replacing the roller and brushes
If you hear a rustling noise coming from the tension roller of the Lada Kalina generator belt, then you need to check its serviceability and replace it.
To perform this procedure, you need to use a set of wrenches and a flat-blade screwdriver. Replacing the roller is a very simple procedure. To perform this, you must first loosen the belt tension by unscrewing the rod. Then use a flat-head screwdriver to pry off the protective cap of the roller and unscrew the bolt securing the bearing to the bracket.
Replacing the timing belt without special tools
The method can be used if there is no need to change the rollers.
Procedure
:
- Cut off half of the old timing belt with a utility knife.
- Remove half of the old timing belt.
- We put a new timing belt on the crankshaft pulleys.
- We cut the second half of the old timing belt and remove it.
- Pull the new timing belt onto the crankshaft pulleys until the end.
Sources:
https://autoprivat.ru/remont_avto/kak_snyat_generator_na_kaline_16_klapanov_s_kondicionerom.html https://remontvazov.com/remen-generatora-zamena-natyazhka https://xn80aal0a.xn80asehdb/do-my-self/repair/repair-lada-vesta/ 626-zamena-remnya-grm-lada-priora-granta-kalina-2-16-klapanov.html