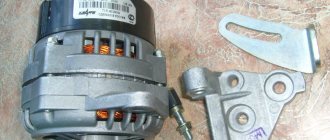
Every grant driver knows about the problems of the standard generator on the Lada Grant. However, they are in no hurry to eliminate the defect in mass production. Support (rolling) bearings often fail. While driving, extraneous noise appears, a metallic grinding sound.
To eliminate the defect, it is necessary to dismantle the generator, carry out an inspection, and replace worn elements. Most often, the causes of failure are associated with an electrical or mechanical component.
Replacing the generator on Lada Granta 16 valves
At the preparatory stage, we will need the same tools and materials as in the case of the 8-valve Granta.
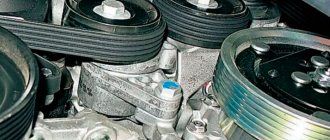
The design of the 16-valve modification of the Lada Granta has an alternator belt tensioner installed. This must be taken into account during repairs.
- The car is in the perimeter of the repair area, the battery terminal has been removed, the oil pan is protected.
- By analogy, we disconnect the power terminals from the converter and the protective cap.
- The key is set to “13”, release the upper lock of the generator, move it to the right until it stops.
- Remove the belt from the pulley.
- Unscrew the lower fastening and remove the bushing.
- We remove the generator from its regular place.
Preparation and necessary tools
It is more convenient to remove the generator on a Lada Priora on an overpass or inspection hole. Before you begin dismantling, prepare the following tools:
- locksmith's crank;
- extension;
- cardan from the tool kit;
- heads for 10, 12, 13, 17;
- spanners for 10, 12, 13, 17.
- WD-40 product.
When driving onto a pit or overpass, do not forget to install chocks under the wheels so that the car does not roll spontaneously. Then disconnect the negative terminal from the battery. Apply WD-40 to the mounting areas of the generator and air conditioning compressor. Wait 10-15 minutes for the product to take effect.
Overrunning clutch
An overrunning clutch is a mechanism that prevents the transmission of torque from the driven shaft to the drive shaft when the first one rotates too quickly. Does Grant need to be equipped with such a device? Let's try to figure it out.
As you know, the engine produces torque in jerks - when the fuel mixture is burned, the crankshaft begins to rotate rapidly, after which it slows down. Also, accelerated wear is caused by the generator itself, which is caused by the inert rotation of the armature. As a result, the belt is exposed to constant pulling forces, which significantly reduces its service life. To prevent such phenomena, overrunning clutches are installed. Its advantages include the ability to significantly reduce the negative inertial influence and ensure silence and a minimum of vibrations during engine operation.
The installation process is simple. First, remove the generator itself (according to the instructions above), after which the generator pulley is removed. To do this, fix the pulley with an adjustable wrench, and then unscrew the nut with a 24mm wrench.
Then install the coupling, having previously treated the threads and seat with graphite lubricant. Having installed the part in its proper place, tighten the nut with a special wrench. The installation of the generator completes the work. The entire replacement process takes approximately one and a half hours.
Replacing a generator on a Lada Granta with air conditioning
At the preparatory stage we will need the above tools and materials.
- After unscrewing the converter mounts, hang up the front of the car, unscrew the bolts, and remove the right wheel.
- Through the opening in the wheel arch we unscrew the tension roller and the engine mount mount.
- We lower the car with a jack until access to the generator opens.
- The further dismantling algorithm is no different from that described above.
We carry out preventive maintenance, replace the unit with a new one, and assemble the structure in the reverse order.
Where is the generator located on the Lada Grant?
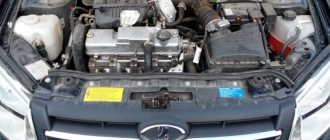
On cars of the Lada Granta family, the current converter is located in the engine compartment, on the left side.
Engine compartment When carrying out repairs, you may experience difficulties with access to the converter mounts. For convenience, remove the oil pan protection and hang the front of the car.
If the belt breaks on the way
We need to wait for the car to cool down. Next, remove the right side of the mudguard. Then the belt scraps are removed. After this, put on a new belt in stages, first on the crankshaft pulley, then put the other part of the belt behind the pulley, pressing it against it, and begin rotating the crankshaft clockwise. But if you don’t have a spare timing belt at hand, you can replace it with improvised materials.
In cases where tights don’t work out, elements from a men’s wardrobe are perfect. Leather belt of trousers or bags or a tie. In this case, the length of the future product is measured in proportion to the worn-out belt. This approach is due to the fact that leather and fabric products can be overtightened, which can cause damage to the mechanism. In this case, repairs will be much more serious than just replacing the alternator belt.
Many Lada Grant owners are faced with the problem of a generator that fails after several thousand kilometers (some earlier, others later). The case is under warranty, but you will have to wait about 2-3 weeks for a new part, and during this period the dealer may prohibit the use of the car.
If the belt tension is excessive, this can lead to destruction of the generator bearings (unfortunately, bearings are most often installed in China, the quality of which leaves much to be desired). If you find that the belt on your Grant is too tight, there are several ways to loosen the tension a little.
To everyone who has a problem with the generator, redo the mount, and everything will be fine for you, like me. Now I will show you what the generator looks like on Kalina and Grant. The grant has a bracket with number 2190 without holes for the tensioner and tensioner pulley, so you need to unscrew it and install bracket 1118-1041034, tensioner pulley, tensioner bracket, bushings, belt from 1118 instead. The issue price is 1,700 rubles.
Sources
- https://www.granta-service.ru/news/generator_snjatie_ustanovka_i_remont/2012-09-07-132
- https://1ladagranta.ru/harakteristiki/natyazhitel-remnya-generatora.html
- https://www.lada-granta-club.ru/reshenie-problemy-s-generatorom-na-lada-granta/
DIY generator replacement
Usually, even factory generators on Kalina serve for quite a long time and do not require replacement, of course, unless you come across a car with a factory defect of this device. If this electrical equipment unit fails, it will have to be replaced. Although this is not difficult to do, it will take at least an hour, especially if this is your first time doing this procedure. So, we will need the following tools:
- Open-end or ring wrenches for 8, 13 and 19
- Small and large ratchets and heads for 8, 13 and 19 for more convenient and faster work
- Wrench with extension
Guide to replacing the Kalina generator yourself
So, let's proceed to a very detailed description of all the types of work that need to be performed. First of all, we need to loosen and release the belt tensioner and then remove it. So be sure to check out this Alternator Belt Replacement Guide first. After this, you can proceed directly to removing the device from the car.
Before carrying out any repairs related to electrical equipment, be sure to disconnect the battery by removing the negative terminal from it.
First, we disconnect the plug, which is secured with a plastic latch, just lightly press it and pull it to the side, it will come out without any problems:
And the wire terminals that are under the rubber protective cap, pry it off and unscrew the nut:
Then we unscrew the nut securing the upper part of the Kalina generator, this is clearly shown in the photo below. You can first move it with a knob, and then work with a ratchet handle:
And tapping the protruding bolt a little so that it moves, remove it from the back side, as shown in the photo below:
Next, we proceed to the lower fastening bolt, and proceed by analogy, only if necessary, hold the nut on the reverse side, since it can scroll:
Be careful when removing this rod as there are bushings there. Hold them immediately so that they do not fall and get lost. And holding the generator body with one hand so that it does not fall, we remove this bolt with the other hand:
Lada Granta repair and operation manual (VAZ 2190)
New alternator belt for Granta with article marking. So, if you decide to replace the cylinder head on an 8-valve engine yourself, below you will find instructions on how to complete this process. In order to do everything yourself, prepare the strap itself.
Article on the topic: How to care for your air conditioner at home
There is one more point here - the purchase of all parts and consumables for repairing an 8- or valve engine must be carried out from representatives of an official dealer. Today, the cost of removing a Lada Granta generator is around dollars or rubles. Naturally, you can always go to the market and buy a strap at a lower price, but think about it - is this a fret grant generator?
Today, even parts for domestic cars are counterfeited, this is no secret. Are you sure that the rubles you save are worth it? If you are making a purchase from an official, please note that the article number of the new RG is Key 13 2. Long screwdriver 3.
How to remove the generator on Lada Priora, Kalina, Granta
Metal knife. Loosen the nut. Press the generator with a wire to the cylinder head. Put on the new RG. As you can see, in general, the process of replacing the alternator strap on the Lada Grant is not particularly complicated, but this procedure requires a competent approach and certain skills. Therefore, the only requirement that must be observed is to be as careful and attentive as possible. And if possible, ask someone to help you - at one stage you will need an assistant.
Most modern cars have a tensioner on the alternator belt, which requires some special features during repair work or when replacing the belt itself.
But, removal of the Lada Granta generator for Lada Granta models that operate an engine with eight valves, the belt tensioner is not provided by the manufacturer. So replacing the alternator belt requires removing the Lada Granta alternator several times.
Removing the Lada Granta generator with VAZ, VAZ and VAZ engines. Required tools: socket head “13”, mounting blade. Disconnect the negative wire from pr-people.ru Estimated reading time: 2 min.
If you rely on the manufacturer’s technical regulations, then the belt should be checked at least once every 15 km of the route. And every thirty thousand kilometers, this belt needs to be replaced.
Article on the topic: How much does it cost to install air conditioning on a Renault Duster
That is, it turns out to be a cycle with an interval of fifteen thousand kilometers, in which the alternator belt is alternately checked and replaced. And, given that the removal of the fret grant generator, as such, is not used, the belt is designed exclusively for one-time stretching during installation. To make sure that the belt is in good condition, you need to perform simple steps. Initially, fifth gear is engaged.
On it, leaning on the front bumper, we try to push the car.
Signs of generator malfunction, ways to eliminate them
| Sign | Cause/remedy |
| The warning light on the dashboard does not light up | Open circuit in the power supply from the converter to the battery. Check the integrity of the electrical circuit |
| The warning light does not go out after the engine starts | Insufficient belt tension, insufficient tension in the chain. Measure the voltage in the circuit. |
| —/— | Worn brushes, faulty diode bridge. Measure the voltage with a multimeter and replace worn elements with new ones. |
| Short to ground | The insulation of the power cable is damaged. Check the condition of the insulating coating. |
| The converter does not produce the proper voltage of 14 V | Oxidation of terminals, cleaning with a metal brush, replacement |
| —/— | The battery is worn out, replace the battery |
| —/— | Loose belt tension. Adjust the tension. |
| —/— | Diode (rectifier) bridge is unusable, replace with a new one |
| The battery is not receiving a charge | Replacing the diode bridge with a new one |
| —/— | Rectifier failure. Replacement of components |
| Voltage drop in the network (circuit) | Checking the quality of connections of terminals and clamps. Tightening, replacing with new ones |
Sequence of actions when replacing Lada Granta bearings
- We place the converter on the surface of the workbench, unscrew the three mounting bolts on the rectifier block (key set to “14”).
- Using a screwdriver, release the spring clamp and hold the winding with your hand.
- We bring out six winding ends.
- Unscrew the nut on the power block.
- We remove the rectifier from the generator housing.
- We use a multimeter to determine the negative diodes. To do this, connect the positive terminal of the multimeter to the negative plate. We connect one by one to the other diodes. In good condition, the diodes have a resistance value of 550 - 640 Ohms. Deviation from the norm is a sign of a malfunction.
- If the arrow tends to infinity, the diode is broken; if the needle tends to “zero,” the diode is broken.
- By analogy, we check the positive diodes, only in this case we reconnect the terminals to the “B+” terminal.
- Additionally, we check the converter housing with a multimeter for open circuits or short circuits.
- We fix the generator in a vice, unscrew the nut from the back, and remove the pulley. We first apply markers to the relative placement of the lids.
- We unscrew the four coupling bolts, pry them up with a screwdriver, and remove the generator cover.
- Remove the rotor shaft from the bearing.
Note to the driver! If necessary, use a wooden spacer to press the rotor shaft out of the bearing race. Often, during work and rotation, parts become stuck.
- We inspect the stator and its surface. In good condition, there should be no traces of the armature touching the stator. Otherwise, replace the bearings.
- Using a multimeter we check the integrity of the converter winding.
- We inspect the cover from the drive side. When rotating the axis, you will feel some play between the rings. The latter must be replaced with new ones due to wear.
- There should be no cracks on the inside of the generator cover. We replace with new ones as needed.
- Unlock the bearing and lightly hit the spacer with a hammer to press the part out of the cover seat.
- We carry out troubleshooting of parts and the converter cover. We replace components with new ones if there are signs of wear or defect.
- Use a wooden spacer to press the new bearing into the seat of the cover. Be sure to check that the winding leads do not come into contact with the converter cover.
- Check the condition of the slip rings. If there are burrs, scratches, or signs of wear, replace them with new ones.
Note to the driver! Some craftsmen practice not replacing the rings with new ones, but grinding them with sandpaper or turning them on a lathe. We remove the minimum layer of metal and then sand it with sandpaper.
- Using a tester, we check the winding resistance by applying the terminals to the slip rings. Gravity towards infinity is unacceptable, as this indicates a break in the rotor winding. The latter requires replacement.
- Finally, we check that the housing is not shorted to the rotor. The tester's arrow goes to infinity.
- Use a three-fingered puller to press out the rotor shaft bearing.
- Using a frame we press a new, serviceable bearing onto the rotor shaft. The main force is directed to the inner ring of the bearing.
- We assemble the structure in the reverse order, having previously lubricated the bearings with graphite grease. We tighten the generator cover with a force of 39-62 Nm.
Do-it-yourself replacement of generator bearings on the Lada Grant is completed.
Maintenance and repair work
In conclusion, we will consider some effective measures for prevention and self-repair of the generator, because if you have the desire, you can implement them without much difficulty.
Article on the topic: Which machine to put on the air conditioner
Repair and preventive measures are as follows:
- First, unscrew the mounting bolts, then pull out the lock and remove the stator winding terminal. The remaining terminals are undocked in the same way, after which the nut of the power bolt is unscrewed, and the rectifier unit is disconnected from the generator;
- Visually inspect the stator, paying special attention to signs of wear or mechanical damage;
- Do not forget to monitor the rotor and stator windings for open circuits or short circuits to the housing;
- It is also recommended to periodically check the health of the diodes using a multimeter.
- Any deviation from the norm indicates a malfunction of the rectifier unit and the need to replace it;
- Inspect the bearing periodically, making sure it rotates easily. If you find any grease leaks or damage on it, replace the part.
The measures listed above will significantly increase the service life of your car’s generator.
Kalina, removing the generator from the 16v internal combustion engine. Garage at . Replacing the alternator belt on a viburnum with air conditioning - Duration: 5:35. Alexander .
Reviews
| № | Positive |
| 1. | Victor: This is my second year driving a Lada Granta, there are no comments, the mechanisms work properly. At 35,000 km I tightened the converter belt. I didn’t contact the service, I did everything on my own. |
| 2. | Vitaly: I’ve been actively using the car for three years now, I haven’t made any special investments, only the purchase of consumables, oils, filters. I think it is important to comply with technical inspection deadlines and buy original parts. |
| 3. | Ivan: I bought a car at the dealership, the managers recommended strictly observing the maintenance deadlines. I don’t break rules, I always put down marks on time. I take care of my equipment and treat it with care. |
| 4. | Kirill: at 45,000 km I tightened the converter belt and visited the service center. The master assured that the old one was still worth several tens of thousands. |
| 5. | Valentin: during the year of using the car, the converter creaked once, I thought about changing it, but the creaking disappeared on its own. There are no complaints about quality, all mechanisms work properly. |
| 6. | Ignat: at 97,000 km I replaced the converter belt. I consider the resource quite worthy of a domestic car. |
| 7. | Vladislav: I’ve heard negative criticism of the Lada Grant, but I can’t confirm it, since the car works like a watch. I systematically carry out inspections, fill in high-quality oils, and do not exceed the speed limit. |
| Negative | |
| 1. | Gennady: for the first time the converter flew 40,000 km. I visited the service center and they replaced it under warranty. We'll see how long the new one lasts. |
| 2. | Vasily: despite the manufacturer’s warranty of 100,000 km, my generator lasted only 60,000 km. The workmanship is low. The Granta model is raw, not run-in. |
| 3. | Ignat: I do not recommend the Lada Granta, since during the year of use I visited the service station twice unscheduled for diagnostics and replacement. In addition, the generator failed ahead of schedule. |
Conclusion
The service life of a standard generator is 95 – 100 thousand km. In rare cases, the resource is reduced by 15 - 20%. The main reasons for premature wear:
Review of prices of generator manufacturers for the Lada Granta
| 2. | "ZenitAuto" | Moscow, Perovo metro station, Kuskovskaya st., 20A (near Enthusiasts Highway) |
| 3. | "RemZone" | St. Petersburg, Vasilievsky Island, st. Uralskaya 17A |
| 4. | "Autopoints" | St. Petersburg, Lesnoy prospect, 78 |
| 5. | "Dzigora Complex" | m. Darnitsa, st. City Shalet 1A |
| 6. | "VseSTO" | Kyiv, st. Kikvidze 43 |
| Manufacturer article number | Price, rub.) | Resource (thousand km) |
| KZATE 9402.3701-14 | From 4900 | 90 — 110 |
| BOSCH 21700-3701010-13 | From 5300 – 5500 | 90 — 110 |
List of online stores providing goods (Moscow, St. Petersburg, Kyiv region)
| № | Name | Address |
| 1. | "Autopasker" | https://avtopasker.ru/ |
| 2. | "TopDetail" | https://topdetal.ru/ |
| 3. | "Close" | https://spb.blizko.ru/ |
| 4. | "Avtosklad" | https://www.avtostore.spb.ru/ |
| 5. | "Almaz-Auto" | https://almaz-auto.com.ua/ |
| 6. | "Doka-Market" | https://doka-market.prom.ua/ |
