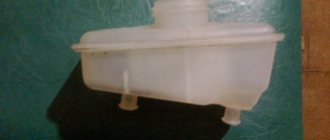
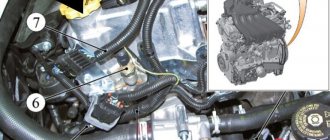
The Lada Largus washer reservoir is one of the components of the glass cleaner system of a domestic station wagon, which plays an important role, but often goes unnoticed in everyday use.
The Lada Largus washer reservoir acts as a battery, which stores a supply of windshield washer fluid for the windshield and rear door glass.
On older cars, the washer reservoir was made in the form of a rubber bag. This significantly reduced the cost of production and simplified the design. Only in more modern cars did they begin to use a plastic tank for washer fluid.
Fuse
The protective elements of the washer system are located on the left side of the dashboard, under the plastic cover, see photo:
Fuses numbered F01(20A) and F27(20A) are responsible for the operation of the windshield wipers and washers of the windshield window and tailgate, respectively. They need to be removed one by one and the condition assessed. Burnt out elements should be replaced with new ones.
Article number of the Lada Largus rear door washer tube
As I said above, the most common failure of the rear door washer is the breaking of the tube running between the body and the door. This is a completely natural failure associated with the design of the tube itself, which I would hardly dare to call successful.
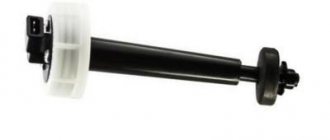
You can order the handset using the following article number: 8200766091 It looks like this:
Window washer pump Lada Largus
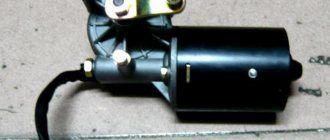
Pump part number: 6001549443 It looks like this:
Switch
The steering column switch can also cause washer failure. Over time, its contacts wear out and oxidize. If all previous checks have failed, you should look for a solution to the problem in the power lever. A new part is quite expensive, so it makes sense to revive the original switch.
To do this, you need to disassemble the steering column casing, disconnect the terminal and, unscrewing the retaining fasteners, remove the lever. Next, bend the latches, open the case and assess the condition of the contacts. Worn parts can be slightly bent to restore contact elements, and oxidized parts can be cleaned. Reassemble the switch in reverse order.
In order to encounter washer failure as little as possible in the future, it is recommended to follow simple rules. Before the trip, check the level of washer fluid, do not fill it with ordinary water in the cold season, and avoid getting debris and dust into the tank. After all, caring for any car is the key to its trouble-free operation.
Share this article with your friends:
Lada Largus washer reservoir where is it located
Note: Part numbers for the front washer can be found here and the rear washer can be found here Please note that the windshield washer pump (motor) differs depending on whether the rear washer is installed, i.e. may have one or two fittings.
Washer pump with two fittings: 1 – fitting for supplying liquid to the glass of the tailgate; 2 – electric motor; 3 – electrical connector; 4 – fluid supply fitting to the windshield
We carry out work when the pump fails and the washer reservoir is damaged (leaky). Disconnect the wire terminal from the negative terminal of the battery.
Remove the seal from the bulkhead of the front panel.
Using a screwdriver, pry off the piston pin and remove the piston fastening the right windshield trim
Remove the hose from the holder on the windshield trim.
Remove the right windshield trim.
Having released the clamp of the wire block, disconnect the block from the washer pump.
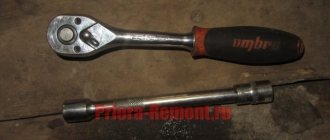
Using a 10mm socket, unscrew the bolt securing the washer fluid reservoir.
We remove the hose seal from the recess in the bulkhead of the bulkhead.
By turning the tank, we remove the hose from the recess of the bulkhead of the bulkhead (the arrow indicates the recess).
We remove the tank from the drainage box.
. and, prying the pump with a screwdriver, remove it from the tank.
Remove the washer reservoir.
Remove the pump seal from the reservoir.
There is a strainer at the bottom of the sealing sleeve. If the bushing is torn, cracked or has lost elasticity, replace it with a new one.
Remove the fluid supply hoses to the washer nozzles from the pump fittings and remove the pump.
Install the washer pump and reservoir in reverse order. We connect the hoses to the pump fittings: to the white fitting – the liquid supply hose to the nozzle on the tailgate (with an L-shaped fitting, see position A in the previous photo); to the black fitting - a hose for supplying fluid to the injectors on the hood.
Video
How to choose the right antifreeze liquid
Antifreeze is a liquid based on water and alcohol, and the higher the content of the latter in the solution, the lower temperature it becomes (at 50% content it can withstand temperatures down to -30C). In severe frosts, therefore, liquid concentrate should be poured into the washer reservoir, and at -5-10C you can dilute the anti-freeze with water.
Today there are many windshield washer fluids on the market from various foreign and domestic manufacturers, with different chemical compositions and conditions of use. How not to make a mistake with your choice, buy an anti-freeze product with the required crystallization limit (freezing temperature) and not stumble upon a counterfeit product?
Read the labels on windshield washer fluid containers! It should indicate:
- crystallization (freezing) temperature – from trusted manufacturers on the packaging it is indicated for the concentrate with a margin of several degrees;
- kinematic viscosity - fluid fluidity and thickening conditions (thickened antifreeze clogs the nozzles);
- surface tension coefficient - the ability of a liquid to wet surfaces and impregnate dirt (the higher the better);
- surfactant content (surfactants) – the less, the better.
A separate and very important characteristic is the type of alcohol used in the solution. Ethyl alcohol is considered the highest quality and most expensive, the most popular is inexpensive and effective isopropyl alcohol, the most dangerous to human health and prohibited in legal production is methyl (methanol).
Using windshield wipers and washers, replacing blades, adding water
The right lever of the steering column switch (Fig. 3.9.6) combines the functions of controlling washing and cleaning the windows, as well as controlling the on-board computer (see the “On-board computer” section).
Rice. 3.9.6. Right steering column stalk
Windshield wipers and glass washers function only when the ignition is on.
Rice. 3.9.7. Rings and control buttons on the right lever of the steering column switch (optional)
Rice. 3.9.8. Rings and control buttons on the right lever of the steering column switch (optional)
On the right lever of the steering column switch there are rings for controlling the rear window washer and wiper, and a ring for adjusting the pause duration of the intermittent mode. as well as on-board computer control buttons (Fig. 3.9.7 and 3.9.8): 1 — On-board computer control buttons (see the “On-board computer” section). 2 - The control ring for cleaning and washing the rear window has the following positions: “ 0 ” - off. Fixed position.
— The rear windshield wiper is on. Fixed position. — The rear wiper and rear window washer are turned on. The position is not fixed. 3 — Ring for adjusting the pause duration of the intermittent operation of the windshield wiper. In a variant for the automatic “ AUTO ” mode of windshield wiper control, there is a ring for adjusting the sensitivity of the windshield wiper activation sensor.
Positions of the right lever of the steering column switch (Fig. 3.9.9):
Rice. 3.9.9. Positions of the right lever of the steering column switch (optional)
I - neutral position. The windshield wiper and washer are off. Fixed position. II — the intermittent operation of the windshield wiper is turned on. In the variant version, the automatic “ AUTO ” mode of operation of the windshield wiper is enabled. Fixed position. Ill - low speed windshield wiper is activated. Fixed position. IV - high speed windshield wiper is turned on. Fixed position. V - towards you, windshield washer is on. When pressed briefly, the windshield wiper makes one stroke and turns off, when pressed for a long time - several strokes, after a short pause, another one to finally eliminate possible residual water. The position is not fixed.
Note. It is possible to activate the function of automatic activation of the rear windshield wiper: if during operation or within 30 seconds after operation of the windshield wiper, the reverse gear of the transmission is engaged, the rear wiper will automatically turn on. Once reverse gear is engaged, the rear wiper will automatically turn off. To activate/deactivate the function of automatically turning on the rear windshield wiper, contact your LADA dealer.
• During snow or frost, before turning on the windshield wipers, make sure that the windshield and rear windows are clean and that the blades are not frozen to the glass (to prevent damage to the rubber tape of the wipers and overheating of the wiper motor). • When starting a trip, make sure that the windshield and rear window wiper controls are in the neutral position (the wipers are off). • Replace damaged windshield wiper blades or blades that smear dirt on the windshield. • Foreign matter on the windshield or windshield wiper blades will reduce the effectiveness of the windshield wipers.
• It is not recommended to operate the windshield wipers on dry glass, as the glass may be damaged. • It is not recommended to turn on the windshield wipers (including the automatic windshield wiper control mode) if there is an ice crust on the glass, since the rubber band of the blades can be damaged. • After the supply of washer fluid from the jets has been stopped and the washer reservoir is empty, the washer pump must not be turned on again. You can reuse the glass washer system after filling the reservoir with washer fluid.
Automatic windshield wiper control system
In a variant, the car is equipped with a rain sensor. The rain sensor is combined with a light sensor and is located on the windshield behind the rear view mirror (see Fig. 3.9.5).
Rice. 3.9.5. Light sensor and rain sensor (optional)
The automatic windshield wiper control system is activated by the right lever in position II “ AUTO ”. The speed of the windshield wiper is controlled automatically and depends on the level of sensitivity of the sensor (adjustable by a ring on the lever, an increase in the size of the drop on the pictogram indicates an increase in sensitivity), the intensity of precipitation and vehicle speed (as the vehicle speed increases, the wiper speed changes in the following sequence: intermittent mode, low speed, high speed).
Note. If there is an automatic windshield wiper control system, operation in low speed mode in position III is possible in any position of the ignition key, as well as for some time after it is removed, provided that the driver's door has not been opened. Mode III is switched off either using the steering column lever or when opening the driver's door. Operation of modes II and IV is possible only with the engine running. At negative ambient temperatures, the automatic windshield wiper function is activated only after the vehicle starts moving.
In the event of fog or snowfall, the windshield wiper may not turn on automatically, but manual wiper control must be used.
Service position of the wiper blades
When the engine is not running, when the right lever of the steering column switch is moved to position IV , the windshield wiper blades take a vertical position on the glass. The service position can be used, for example, during long-term parking in summer or winter to fix heat-insulating material on the outside of the glass (to reduce heating of the interior or icing of the windshield). Exit from the service position is carried out by moving the right lever to position I.
Replacing brushes
Replacing windshield wiper blades (Fig. 6.8.2):
Rice. 6.8.2. Replacing windshield wiper blades (optional)
• With the ignition off, lift the windshield wiper lever 3. • Turn the blade 1 to a horizontal position (in the direction of arrow A). • Press lock 2 and slide blade 1 down until hook 4 of the windshield wiper arm is released (in the direction of arrow D). • Move brush 1 (in the direction of arrow C), then lift it (in the direction of arrow B) and remove it. • Install a new brush in the reverse order. • Check that the blade is securely attached to the windshield wiper arm.
Replacing the rear window wiper blade (Fig. 6.8.3):
Rice. 6.8.3. Replacing the rear window wiper blade (optional)
• With the ignition off, lift the windshield wiper lever 1. • Turn the blade 2 until it stops. • Remove brush 2 by pulling it (in the direction of arrow A). • Install a new brush in the reverse order. • Check that the blade is securely attached to the windshield wiper arm.
It is impossible to remove traces of silicone from glass. Therefore, do not apply silicone or wax polishes to your car windshield, otherwise streaks and stains may appear that impair visibility.
• Wash your blades, windshield and rear window regularly with soapy water. • Do not use solvents, benzine, kerosene, or paint thinner to clean the windshield wipers. They are aggressive substances and can damage brushes and painted surfaces. • It is recommended to change the brushes if there is a visual deterioration in the quality of cleaning (for example, streaks on the glass, squeaking, crushing) approximately once a year. • When replacing the brush, when you disconnect it, make sure that the lever does not fall on the glass, because. glass may break.
Washers
The windshield and rear window flushing system uses a common tank (Fig. 6.8.1). which must always contain windshield washer fluid. It is recommended to fill the washer system reservoir with special windshield washer fluids approved by AVTOVAZ. You can get more detailed information from your LADA dealer.
Rice. 6.8.1. Washer reservoir cover
Add fluid through the hole in the washer system reservoir, closed with cap 1 . Fill the liquid to the visible level and close the lid tightly. The volume of the tank is 4.7 liters.
In the cold season, when the ambient temperature drops below 0 'C, it is necessary to use special windshield washer fluids for low temperatures. Otherwise, freezing of the fluid may cause damage to the pump, reservoir or fluid supply tubes.
Adjusting the direction of liquid jets from the jets (nozzles) of the windshield and tailgate glass is done with a thin, sharp object (for example, a pin).
Be careful when adjusting the jets to avoid damaging them, or contact your LADA dealer.
Video
Largus rear window washer reservoir
I remembered my former love (VAZ 2112). There were two tanks, both in the engine compartment. I decided to do something similar here too. You can, of course, put another tank in the engine compartment, on the right in the direction of travel, there is a little space there. A washer reservoir from a VAZ 2104 is suitable for this. But on many cars with a rear windshield wiper, the reservoir is placed at the back, for example a VAZ 2104, or even in the door (Chevrolet Niva). After much thought and fitting in the car shop window, I decided to buy a reservoir from Shniva, it is flatter, and install an additional reservoir for the rear window washer.
Rear window washer reservoir, fan nozzles and valves
Well, I also bought a pump motor, terminals with chips and wires. There were three installation options. The first and main thing, it seemed, was the door. But after removing the door trim, I realized that this was a bad idea. Firstly, there is not enough space in the door, and to accommodate the tank (which also has large walls that are not parallel), you will have to cut out a decent piece of the casing in the area of the recess. However, there was no desire to shred and disfigure the casing. And I have an electric pump lying very conveniently in my niche.
There were two options left, in the right or left trunk pockets. Where the nets are. In the right pocket, the tank sits a little lower due to the slanted bottom and is not so noticeable. But then there is no room for standard tools and the hose needs to be dragged far. Therefore, we put the tank in the left pocket. Moreover, both the hose and the ground connection point are conveniently and close located there. At the same time, I cut off the mounting brackets; they do not extend along the length. All that remains is to stretch the power wire (mine is green, like the one for the front washer). We run the wire parallel to the standard harness; I already have the power wire to the cigarette lighter socket in the trunk and the cable from the rear view camera laid there, so my hand is already full. I connected the hose with one side to the pump, the other to the green adapter, you can install a check valve in the gap.
How to replace windshield washer fluid in the reservoir
In winter, driving conditions become more difficult - strong temperature changes, snow, ice, slippery road surfaces, freezing of technical fluids, etc.
A separate issue is the deterioration of road visibility due to ice or dirt freezing on the windshield. To clean the glass, the car has a glass washing system: an electric pump that supplies windshield cleaning fluid from the washer reservoir through rubber lines and nozzles directly to the windshield. In summer, ordinary water is sufficient in the windshield washer system, but in winter frosts (especially at temperatures from -25C) it is necessary to fill the washer reservoir with a special low-temperature windshield washer fluid (water + alcohol), which does not thicken and does not freeze in severe frosts, wets the glass surface well and quickly removes ice and dirt from it.
How is such an “anti-freeze” chosen? How to drain and fill the fluid into the reservoir? What should you be aware of when changing windshield washer solutions?
What you need to know when replacing a windshield washer
Maintaining the windshield washer system does not require much effort, but it is better to monitor and service it regularly to prevent blockages, traffic jams or ice from appearing in the winter. Important to remember:
- The system should be pumped periodically to remove air and water from it. This should be done before each new anti-freeze fill.
- There should always be a container with 3-4 liters of windshield washer fluid in the trunk to top it up if the reservoir is empty in the middle of the road.
- There is no need to fill the washer reservoir to the top. If the anti-freeze suddenly freezes, you should have room in the tank to add hot water, alcohol or anti-freeze concentrate to melt the ice.
- Antifreeze concentrate can be diluted if there is no serious frost or thaw outside, but the liquid and water should be mixed not in a tank, but in a separate container. This way you will protect the system from accidental incompatibility of components and will be able to control the concentration of the finished solution.
- If you accidentally poured low-quality anti-freeze into the tank, you should drain it completely. If you poured in a liquid with an inappropriate freezing point, you can simply add concentrate.
When should you add anti-freeze?
In modern cars, the glass washing system is designed not only to clean the windshield, but also to wash the headlight optics of the car. Therefore, only clean water is poured into the washer reservoir in summer, and non-freezing liquid with high cleaning capabilities in winter - in winter highway conditions you should have a good view of the road and clean headlights.
When should such a liquid, which is called “anti-freeze”, replace water in the washer reservoir? First of all, at the end of the warm summer-autumn season, when cold weather sets in and frosts approach. Do not wait until the water in the windshield washer system freezes one morning - this can lead to ruptured lines, broken pump impellers and damage to the washer reservoir. If you don’t want to repair the entire system, drain the water and fill it with anti-freeze before negative air temperatures appear outside.
In addition, it is necessary to fill in anti-freeze in several other situations:
- as the liquid in the tank is consumed (topping up);
- if necessary, replace the liquid with a more frost-resistant anti-freeze (concentrated liquid with a high alcohol content is more resistant to severe frosts);
- when the windshield washing system freezes (completely drain and replace or add hot water);
- when filling with low-quality anti-freeze (also complete drainage).
Another option: adding a more concentrated liquid to a diluted anti-freeze solution (withstands frosts down to -5C) when it gets colder.

