Note! To replace this pump you will need to stock up on: A small wrench and a screwdriver!
Where is the fuel pump located?
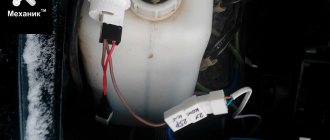
In all cars of the Samara family, this unit is located in the inside of the gas tank, and the gas tank in this turn is installed on the car in the lower part of the car, popularly called the bottom, and this same gas tank is located in the rear of the car, that is, approximately somewhere under the rear cushion seats and therefore, after reclining this pillow, it will be very easy to see the location of the fuel pump, in this case it is indicated by an arrow in the photo:
When should you change the fuel pump?
It is replaced if it fails, or if its mesh is clogged, which in turn can be simply removed and replaced with a new one, or simply removed and washed, and as a result it will be clean and will allow fuel to flow into the car engine much better .
Replacing the fuel pump and mesh on a VAZ 2114
It's no secret that you can't get far in a car without gasoline.
Therefore, for the engine to operate, it is simply necessary that the entire fuel system functions in optimal mode. In many ways, the fuel pump is responsible for supplying fuel to the engine, which the VAZ 2114 model is not without, of course. To solve a problem with a faulty fuel pump, you need to make sure it is at fault.
The cause of the problem, its external manifestation
Replacing the fuel pump mesh on a VAZ 2114. When is it necessary? The main “symptom” is noticeable jerking of the car in first gear. In particularly advanced cases, the car simply stalls out of the blue. Of course, there is a possibility that the reason is different, but the simplest action is to replace the mesh ( or at least clean it
). Only after eliminating this cause from the list of possible problems can you begin to search for the rest. The fuel pump grid ceases to perform its functions at the proper level in two cases: when the car owner abuses cheap gasoline (purchased at random gas stations) or if repairs and maintenance have not been carried out for quite a long time. Alas, the quality of gasoline, even at official gas stations, is sometimes far from ideal; the procedure for replacing the mesh must be carried out at certain intervals - as a necessary preventive measure.
{banner_content}
Signs of breakdown
There are several situations in which the pump or its components can be at fault. This will definitely have to be checked. Otherwise, you can spend a lot of money buying and installing a new fuel pump, but in the end it turns out that the problem is completely different.
New and old coarse filter
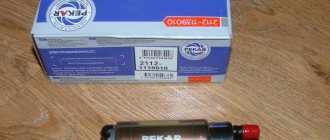
Many people purchase the entire fuel module assembly at once, which includes a filter, sensor, float, intake chamber and the pump itself. Such a purchase will cost approximately 3,000 rubles. It is much more profitable and practical to buy a separate pump, which costs up to 1000 rubles. This is due to the fact that when the pump fails, the remaining elements almost always remain intact and are fully suitable for further use.
Popular breakdowns
Problems with the fuel pump can occur for several reasons. Therefore, your first priority is to determine the source of the problem. These may be:
If one of these elements fails, it can stop the normal functionality of the entire module.
Let us consider the situations with each of the specified elements of the fuel module in more detail.
Pressure
What exactly is a fuel pump? This is an element of the fuel system that allows fuel to pass through due to pressure. Therefore, if you take pressure measurements, you can get answers to many questions.
Let's give an example of normal pressure readings when checking in certain modes.
Check mode
Normal indicator
At idle
Without pressure regulator tube
When the drain is pinched
When you press the gas pedal
We recommend measuring with a small range of atmospheres on a pressure gauge (up to 7 atm). This will reduce errors to a minimum. Having a pressure gauge at hand will allow you to significantly save on professional diagnostics.
Contacts
The fuel pump includes three wiring:
So, failure of the pump may occur due to a simple violation of the integrity of the wires. So if the pressure check shows normal, then we definitely examine the condition of the wiring.
To check, you will need a 12V lamp, which is attached to the external connectors of the pump with positive and negative contacts. Turn the ignition key. If the lamp blinks, contact is present. In this case, you will have to check the condition of the internal contacts.
Checking contacts
Motor
If the pressure and wiring are normal, let's try to check the serviceability of the motor. It is this element that is responsible for moving fuel through the system.
Don't jump to conclusions. Before checking, look at the condition of the terminals and motor wiring.
Fuel pump weight
The contacts are fine, but the fuel level sensor may provide incorrect information. In this case, you definitely need to check the weight of the pump responsible for dispersing the fuel.
It often turns out that after prolonged use or driving on difficult road sections, the mass simply loses its fastening strength. Accordingly, if the mass falls off, the pump will not be able to work.
The mass is attached to the pump under the dashboard in the area of the hand brake. Therefore, when the driver turns on the handbrake, there is a possibility of hitting the ground contact, which is why it will fall off.
Putting the mass back in place is not that difficult. The problem is caused by the path to it. You'll have to:
The fuel pump relay is located exactly where the ground is. Therefore, there should be no problems with the search.
With an ideally working fuel supply system, when the ignition is turned on, the relay instantly creates pressure inside the system, and then turns off.
If this process is disrupted, you will have to:
Fuse
All that remains is to check the condition of the fuse. This stage will make sure who the real culprit of the problems is - the pump itself or its fuse.
Fuse location
Wiring
If the fuel pump fails, first of all, you need to make sure that the circuit was installed correctly. Three wires lead to its electric drive:
- one - to the fuel sensor;
- two - to the contacts of the motor itself.
A regular 12 volt light bulb will help you figure this out. It is connected to the power wires. When you turn on the ignition, it will light up - this means that the electrics are supplied correctly.
The lamp also checks the performance of the motor itself. In this case, it is connected to the protruding terminals of the drive, and its short-term flashing will indicate in this case a malfunction of this element.
Pump replacement
Most modern cars are equipped with fuel pumps, which are located inside the fuel tank itself. Because of this, getting to it is quite difficult and such placement raises a lot of questions.
In the case of the VAZ 2114, you can raise the rear seat, under which there is a rectangular hatch. By opening it, you will have access to the pump, a sensor with a float and a coarse filter - a mesh. That is, if necessary, you can easily replace a filter or other element.
There are two fuel wires going to the fuel pump:
Now let's talk directly about how to remove and replace a failed fuel pump.
Pay attention to the type of pump installed. On the new pumps, the mounting system is slightly different. Therefore, for work you will need a ratchet and a 10 mm socket. With their help, the ring is dismantled in a circle and the clamps provided on the fuel line are pressed out.
The procedure for replacing the fuel pump should not cause serious problems. But still be careful, careful and consistent. You work with fuel, and therefore must follow all safety precautions.
Source
Checking the electrical circuit
In case of inoperability (lack of fuel supply), the electrical circuit of the VAZ 2114 fuel pump requires checking. The algorithm of actions is as follows:
- When you turn on the ignition, you should hear a click from the relay; if there is none, then either the relay is faulty or the contact is broken;
- During normal operation, check the integrity of the fuse, and if it blows, replace it with a serviceable one with a rating of 15 A;
- The serviceability of the relay can be checked by connecting a piece of wire to the sockets to which gray and pink wires fit.
During normal operation, the sound of the pump motor should be clearly audible in the cabin. If the problem persists, you must provide access to the pump unit, which is located under the rear seat on the right side. Lifting the seat and bending the trim, you can see the hatch, which is secured with two self-tapping screws. After removing the hatch, we gain access to the fuel pump. Next we check this way:
- Disconnect the chip from the block;
- Use an ohmmeter to check the continuity of the black wire with the gray stripe. Its resistance should be close to zero.
- Connect the voltmeter to the gray and black wires with a gray stripe. When the ignition is turned on, the voltmeter should show the battery voltage.
If the voltage is greatly underestimated, then there are two reasons for the ground wire being in good working order:
- Burning of the relay contact group;
- Broken power cable.
The relay is checked by installing a jumper, and the wire is tested with an ohmmeter with the ignition off. To do this, you will need a piece of any conductor about two meters long. The additional wire is connected to the relay socket to the terminal with the gray wire. The second end of the wire is connected to one of the voltmeter probes. The second probe touches the socket with the gray wire on the pump harness chip. As with the ground wire, the resistance should be close to zero. Practice shows that the most common cause of failure is unreliable fastening of the ground wire to the car body. To access the mount, you need to remove the console trim near the parking brake handle. The wire terminal is screwed to the housing using a self-tapping screw. As a result of incomplete tightening, the contact weakens and burns. You should unscrew the screw, thoroughly clean the contact area and securely fasten the terminal.
Replacing the fuel pump VAZ 2113, 2114, 2115
The fuel pump is designed to ensure a continuous supply of fuel to the engine when it is running. The fuel pump in modern cars is most often located inside the tank. On VAZ 2113, 2114, 2115 cars, the fuel pump is located in the tank under the rear seat. After removing the seat, you can find a square hatch, which is secured with two screws. A fuel pump module is installed directly under the hatch. The module contains the pump itself, a pressure regulator, a fuel level sensor and a mesh filter. The module has a power connector, as well as fuel supply and return lines.
In this article we will analyze the process of replacing a fuel pump using the example of a VAZ 2114. It is worth noting that replacing a pump on an injection VAZ 2113, 2115 is similar.
Pressure
First of all, you will need to measure the pressure in the fuel supply system. If the pump works as it should, it is about seven atmospheres. To check, the pressure gauge is connected to the ramp through the fitting there. Remove the cap from it and screw on the measuring device.
If everything is in order, then the readings will be as follows:
- 2.5 kPa (idle);
- 3 (ignition on);
- 7 (if you pinch the fuel outflow hose);
- 2.5-3 (increase in speed).
In the same situation, if after the ignition is triggered the pressure gauge does not show anything, then most likely the pressure regulator has failed.
When no changes occur even after gaining speed, then the issue here is clearly in the fuel pump. A slow change in readings indicates a clogged filter mesh.
Replacing the fuel pump mesh on VAZ 2113, VAZ 2114, VAZ 2115
Welcome! The fuel pump mesh - it acts as a filter as such, that is, when the fuel in the gas tank is pumped into the car engine, it first passes through this very mesh, which in turn is the fuel, or, more simply, cleans the gasoline from dirt and small specks that are very harmful will affect if it gets into the car engine, but this mesh needs to be changed from time to time, because when it is clogged, fuel does not pump into the engine as it should, that is, it passes very poorly through the clogged mesh and therefore the car drives jerkily and sometimes even doesn't start well.
Note! To replace the mesh that is located in the fuel pump, you will need to stock up on: A basic set of wrenches, as well as screwdrivers; for convenience, you can also stock up on a tubular wrench and gasoline, but you only need to stock up on them if you are not going to replace the fuel pump mesh , but just rinse and put the old one in its place!
Summary:
What causes the fuel pump screen to become clogged? One of the main reasons is the poor quality of the fuel poured into the car, because if you have already read the text that was written earlier (Above), then you understood from it that the mesh serves to clean gasoline from various contaminants and thus it is, as it were, serves as a filter, which, if clogged, will need to be replaced with a new one, but this filter, that is, the mesh is clogged only from one thing, from low-quality fuel in which there are particles of debris, various kinds of deposits, etc. This is why this mesh gets clogged. Where is the fuel pump screen located? It is located right in it, that is, it is located at the bottom of the pump, so that you can see it in more detail, then in this case, remove this pump from the car and look at its very bottom part, this is where this mesh will be installed on it, For more details, see the photo below:
When do you need to change the fuel pump grid? It needs to be replaced if your car starts to run worse, it starts to drive in some jerks, and especially if the grid is clogged, if you immediately get into the car and start it right away, then most likely it will not start at all, because the grid is clogged and the fuel it goes through it very poorly.
Note! In fact, if you immediately turn the key and start the car without waiting for the gas pump to pump gasoline, it will be very incorrect, and even most likely the pump with a new mesh may not start the car the first time either!
How to replace the fuel pump mesh, also known as the fuel pump, on a VAZ 2113-VAZ 2115?
Note! Before we start a few words about this mesh, in fact, you don’t have to replace it with a new one, but you can first remove it and then wash it in gasoline; some dirt from such washing will come off the mesh and fall off, but still not all the dirt will fall off, so the best option, of course, would be to replace this mesh with a new one, and besides, it only costs around 50-130 rubles.
But still, if you find yourself in a situation where your mesh is very clogged and the car is moving jerkily, and you don’t have this mesh at hand, then you can really remove the clogged mesh and wash it in gasoline, and after all that it would be good to blow it out compressed air under pressure, for example a compressor, pump, etc.
Removal: 1) At the very beginning of the operation, remove the fuel pump itself from the car. (For information on how to remove the fuel pump, see the article: “Replacing the fuel pump on a VAZ”)
2) Then, when you remove the pump, take it in your hands or continue to hold it in your hand (Depending on the situation), and then turn the pump over so that it is directed from the bottom to the top, in general, so that the mesh is in front of your eyes, and after that, grab this mesh with your hand and simply pull it up, thereby it will move away and disengage, that is, it will be removed from the fuel pump.
Installation: The new mesh is installed in the same way as it is removed, but only in the reverse order, that is, you take the new mesh in your hands and simply put it on the place where the old mesh stood, but only put it on until it completely fits and rests, and when it is put on, check whether it sits well on the fuel pump or whether it is wobbly, and after checking, install the fuel pump in its place.
Note! When everything is in place, check how the fuel pump works with a new mesh, to do this, start it first, it should start perfectly (First time), but only if the engine is working properly, and after it starts, drive a little on it, when driving, pay attention to how the car moves, that is, it should not twitch and its movement should be smooth!
Additional video clip: You can see in more detail about how to replace the mesh on a fuel pump using the example of replacing the same mesh on a VAZ 2110 car, they are replaced there absolutely identically, so watch the video and you’ll understand everything right away:
Source
Replacing the fuel filter VAZ 2114 video instructions
Probably everyone knows that proper care of the VAZ-2114 1.6 car, inspection of its technical condition and timely replacement of worn parts reduce the likelihood of breakdowns.
In vehicles, all parts and systems are important, but the fuel system is considered the most capricious, since any malfunction can damage the entire operation of the engine. Its main component is the filter. Its purpose is to eliminate any impurities or rust that may be observed in low-quality fuel. Cleaning is carried out thanks to the presence of special filter paper; as a result, high-quality gasoline that does not contain any impurities enters the car engine. For normal operation of the high-pressure fuel pump, only clean fuel is required so that it does not fail for a long time.
Due to prolonged use, an important component can become heavily contaminated, so a quick replacement of the VAZ-2114 fuel filter will be required. It is worth noting that an injector requires higher quality gasoline than a carburetor, so the fuel filters of an injection engine must be changed more often.
What may indicate a clogged element?
Since cleaning paper allows many impurities to pass through, its cells become clogged over time, which will certainly affect the operation of the motor. A car enthusiast will be able to understand for himself when it is necessary to replace the fuel filter based on the following signs:
The above signs are the main ones, so if they are detected, you should replace the clogged fuel filter as quickly as possible. This process is not very difficult, so the car enthusiast can make the replacement himself.
Diagnostics
A malfunction of the VAZ 2114/2115 fuel pump can be caused by:
- malfunctions in the device’s power supply circuit;
- failure of starting and protection elements (relay and fuse);
- wear of electric motor parts.
Checking the electrical circuit
At the beginning of the diagnosis, you should check the electrical circuit of the fuel pump. To do this you will need:
- car tester (multimeter);
- crosshead screwdriver;
- two pieces of wire about 2 m long.
Checking the electrical circuit is carried out in the following order:
- Turn on the ignition without starting the engine. When the key is in the first position, a click should be heard, characteristic of turning on the relay, followed by a slight whirring of the pump electric motor. If there is no click, the relay is faulty or is not receiving power. If there is a click, but no buzzing, the wiring coming from the relay or the pump motor itself is faulty.
- Under the glove compartment, find an additional mounting block consisting of three relays and three fuses. The pump relay is located in the middle, and the fuse is located to the left of it. Remove the fuse from its socket, test it with a multimeter, and if the result is negative, replace it. When replacing the fuse, please note that it is rated for a maximum of 15 A.
- Set your multimeter to voltmeter mode. Connect one probe of the device to the relay terminal to which the pink wire fits, and the second to the car body. Turn on the ignition. The device should show the on-board network voltage in the range of 11.7–12.4 V. If there is no voltage, the problem may be a broken wiring or a malfunction of the ignition contact group. In this case, it is better to contact an auto electrician. If power is supplied, check that the relay is working. With the ignition on, use a screwdriver or a piece of wire to close the contacts to which the pink and gray wires go. This closes the circuit bypassing the relay. If the fuel pump works, replace the relay.
- Be sure to check the connection of the pump's negative wire to ground. Often it is the lack of “ground” that causes interruptions in the operation of the fuel pump. Remove the plastic trim from the center console near the parking brake handle. Under it there is a “negative” wire of the pump, screwed to the body with a self-tapping screw. Unscrew it, clean the contacts, screw it back and repeat the test.
- Then check the fuel module. Remove the rear seat, peel back the carpet and sound insulation. Unscrew the two screws securing the gas tank flap and disconnect the electrical connector on the fuel module cover. Using two wires, supply power to the pump directly from the battery. If the pump works, the wiring is faulty; if it doesn’t work, the pump itself is faulty.
Pressure check
If the pump is working properly, but the engine begins to operate intermittently, you should check the fuel pressure in the system. For this you will need:
- pressure gauge (can be a tire gauge with a measurement limit of 5–7 kPa);
- petrol-resistant hose with a diameter of 10–12 mm and a length of 50–80 cm;
- two clamps for a hose of the appropriate diameter;
- Phillips screwdriver;
- nipple cap;
- dry rag.
The verification procedure is as follows:
- In the engine compartment on the engine fuel rail, locate the pressure measuring fitting (on the right side).
- Remove the plastic cap (plug) from the fitting.
- Using the nipple cap, unscrew the spool valve from the fitting. When unscrewing the spool valve, fuel may spray out of the fitting. To remove it, use a dry cloth.
- Place one end of a gas-resistant hose onto the fitting and secure the connection with a clamp. Connect the other end of the hose to the pressure gauge fitting and also tighten the clamp.
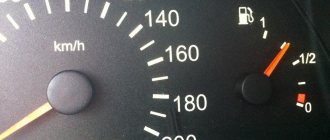
- Ask an assistant to turn on the ignition. Wait a few seconds and watch the meter readings. With a working pump, the pressure gauge should show a pressure of 2.8–3.2 kPa for engines with a volume of 1.5 cm3 and 3.7–3.9 kPa for engines of 1.6 cm3. If the pressure is noticeably higher, the pump is faulty.
Replacing the fuel pump and coarse filter on VAZ 2113, 2114, 2115 cars
The fuel pump and coarse filter are changed in the same way as described in the article on all VAZ cars with an engine capacity of 1.5 liters.
The fuel pump is located in the tank on all VAZ cars. It is installed in the housing, along with a mesh (coarse filter) and a fuel level indicator. It's easy to get to - just remove the back seat and find the hatch. Having unscrewed the fastening, under it there will be a pump housing with all the auxiliary units.
The pump is changed after diagnostics. It is described in more detail here: checking the pressure in the fuel rail on a VAZ car. It is not recommended to change based on “feelings” and mileage, since without diagnostics it is impossible to understand whether the problem has arisen with the pump or with the mesh (except in cases of complete pump failure). It is also difficult to determine service life. For the most part, it depends on the quality of gasoline. If you are a fan of driving “in steam”, when the tank is almost empty, the pump will have to be changed more often. This is due to air entering the fuel intake, as a result of which the pump begins to operate at high speeds and ceases to be cooled by gasoline. With this driving style, do not be surprised that you will have to change the pump every year (15 thousand kilometers).
If the diagnostics reveal a pump malfunction, then it is advisable to change the coarse filter. It is installed in the pump housing. If problems are found only with the mesh, then the pump does not need to be changed.
To replace, we will need - from the main tool:
From the additional tool:
So, the procedure for replacing the pump and coarse filter.
1. It is better to carry out all work with a practically empty tank. It is prohibited to carry out work on a tank filled “under the neck”!
2. First, relieve the pressure in the fuel line. In this case, it is better to do this by disconnecting the terminal from the pump. Remove the seat and unscrew the hatch:
3. Disconnect the terminal:
4. Start the car and let it run until it stalls.
5. Unscrew the fittings with a 17mm wrench (new tubes go to 14mm). It is better to pre-fill all connections with WD-40.
6. Apply WD-40 to the pump housing mounting nuts. Then unscrew the 8 nuts with a “7” wrench
Please note that the pump ground is screwed onto one of them:
7. Remove the metal clamping ring.
8. Pull out the pump housing. Be careful! It has a fuel level sensor installed. When removing the pump, do not bend the pointer. Otherwise the readings will be incorrect.
9. Remove the rubber seal:
10. Disconnect the lower glass. It just snaps off. Typically there will be a lot of dirt in it. We remove it with a rag and wash it. Sometimes this glass cannot be pulled out through the hole along with the pump housing. It just falls into the tank. There is nothing wrong with this (if the tank is not filled to capacity). It can be easily reached by hand and pulled out after dismantling the rubber seal.
11. Remove the coarse filter. We just pull it up. If the task is to change only the mesh, then we put it back together.
12. Remove the locking pin from the guide. We pull it out with pliers:
13. Disconnect the fuel pump and fuel level terminal:
14. Remove the pump housing with the level sensor from the guides.
15. Disconnect the hose from the fuel pump:
16. If the operation has not been performed for a long time, the rubber will lose its elasticity. You can heat it with a hair dryer, but it is better to change the tube. To quickly remove it, cut it off with a knife from the fitting in the upper part:
17. Unscrew the fuel level sensor with a Phillips screwdriver (2 screws). Remove it from the pump housing:
18. Remove the terminal from the fuel pump:
19. Disassemble the fuel pump housing. To do this, press on the 3 latches on the side wall:
20. We take out the fuel pump and replace it with a new one. If necessary, change the tube:
21. Reassemble in reverse order.
Cleaning the mesh in the non-collapsible fuel pump of the Skoda Octavia A5
My car is a late 12-year model and most of these Skodas have a dismountable fuel pump. The Czechs were helpful to me - I do NOT have a collapsible one. Well, okay. Doesn't really float. I did everything according to the reports from the drive. There is nothing particularly complicated.
In the article I will write what is needed to clean the mesh, steps with nuances and the photo report itself with explanations. Cat. I will post the numbers of the mesh for the collapsible pump in a separate article.
So, to work you need:
- hammer, - screwdriver, - plastic cup 2-3 pcs. - rags, - carburetor cleaner, - a toothbrush for cleaning, - a vacuum cleaner, - well, and cardboard where to put the fuel pump
STEPS:
1. I pulled back the sofa, see photo on how to do it correctly. We lift the sofa up and pull it towards the chair. We lift the carpet and see a round plug.
2. The plug contains a rubber plug with wires, which can be easily removed. Let's take it off. We put our finger in there and take out the completely round plug, we are not afraid of anything, nothing will break, it comes out easily.
3. Cover with rags around the gas pump so that gasoline does not accidentally get on the carpet, and so that it does not stink later.
4. Next, disconnect the plug with the wires. It was difficult for me to remove it. There is a little red thing, like a latch, lift it up and pull the plug up. I didn’t want to act, but then I did. Then I took the compartment back and took it off again and broke the little thing, now the plug can be removed without problems and is not fixed. Here, the main thing is to remove it carefully.
5. Next. Let's go get behind the wheel. We start the car and remove the pressure in the system, run the engine for 20-30 seconds and stall on its own, start it again and it stalls immediately.
6. Now let's go remove the blue hose first. How can I remove it without breaking anything? The blue and black hoses have chips that hold the hose. In the chip itself there is a button, like a stopper, small buttons, difficult to see but possible. We press the button and pull the piece with the hose up. That's it, she's in her hands.
7
Black hose, ATTENTION! We remove it in the same way and substitute a plastic cup, because gasoline will flow out of it under pressure. No gasoline flows from the blue hose
8. Place the glass under the gasoline and drain. It drains a little, 150 grams.
8.a. We make a mark where the arrow is.
9. Then take a hammer and screwdriver, and tapping counterclockwise, unscrew the ring. Don’t forget, there is an arrow where the pump was originally located, let’s mark it so that we can put everything in the same place later. Marked with a screwdriver, see photo.
10. The ring was removed. The pump slowly rises up, about 2-3 cm. There’s nothing wrong with that. Yes, I almost forgot. When we hit the ring with a hammer to unscrew it, dirt and dust still fly from the sides onto the pump itself. There is nothing terrible, you can immediately wipe it after removing the ring so that nothing gets inside the tank.
11. Remove the ring, carefully remove the pump, lift it up
It is important that the gas tank is almost at minimum, it’s easier this way
12. Raise the fuel pump carefully. Do not touch the fuel level float; it is located in the direction of the passenger seat behind the driver.
13. As soon as the float rests against the upper wall of the tank, bend the pump in the opposite direction and remove the pump without touching the float. Along the way, anyone with straight arms, without rushing, will understand the meaning of the matter.
14. I removed the pump, poured gasoline into the machine from the glass of the pump itself. We look inside the glass, everything is clean, except for a light coating on the walls of the glass, like pollen sediment. The filter itself is dark in color. No clogging or soot was found during disassembly. Cleaned the fuel pump with carburetor cleaner. Under pressure, I cleaned the mesh inside with a cleaner - the walls, all the mechanisms, wiped it with a rag where I could reach. The filter itself became visually cleaner, it drained all the dirty slurry into a glass, see photo. Then I put everything back in its place, in reverse order. The condition of the fuel pump mesh is good. Although I found threads where people generally tore off these nets and don’t worry, they drive without nets at all.
Actually, that’s all - use it for your health).
Collections on the topic:
Skoda 1.6 bse stalls while driving and does not start immediately - treatment The steering wheel icon on the Skoda panel is constantly on - what is it and how to fix it
The Skoda started to warm up - what could happen?
Lost idle speed - reasons and how to restore it yourself (from the manual)
Fuel pump malfunction on Skoda or another global scam!
It blows cold from the air duct - Skoda Octavia 2011, 1.6 MPI
Speed jumps on Skoda
The central locking button is faulty
Fuel filter VAZ 2114. Where is it located and how to replace it
This article is simultaneously relevant for the following VAZ models: 2108i, 2109i, 21099i, 2114i, 2115i, 2110, 2112, 2111, Kalina, Priora. On each of these models there are two fuel filters, one for coarse cleaning (fuel pump mesh) located in the fuel module . Another fine filter is located under the car between the gas tank and the spare wheel niche (trough).
Before replacing filters, you first need to relieve the pressure in the system. There are several ways to do this. The first is to remove the fuel pump fuse (f1), located in the fuse box behind the center console.
To access it, you need to unscrew several screws securing the cover at the passenger's feet.
On Kalina, the fuse for the fuel pump is located under a plastic cover in the center console.
Or disconnect the fuel pump power supply, having first unscrewed the screws securing the hatch to access the fuel pump under the rear seat.
After this, start the car, and when it stalls, turn the starter a little.
A simpler option for relieving pressure would be to remove the protective cap from the end of the fuel rail and press the spool. It is better to place some small container under it, because... A small amount of gasoline will leak out.
The coarse filter (fuel pump mesh) is changed as needed, the fine filter every 30,000 miles.
To replace the coarse filter, you will need to unscrew the fuel pipes coming to the pump, and then unscrew the pump mounting nuts (head 10) and remove the pump from the tank. Remove the plastic flask at the bottom of the pump and remove the screen by moving downwards.
To replace the fine filter, you will need to unscrew the nut securing the filter to the car body, and then disconnect the fuel pipes from the filter.
There are two types of fastening of fuel pipes to the filter: classic threaded and snap-on. The first option will need to be unscrewed using two keys, one holding the nut on the filter, the other tightening the fuel pipe nut.
The second option simply snaps off by pressing the bracket.
Don't forget about the rubber O-rings at the ends of the fuel pipes. It would be better to buy at least 4 pieces in advance, and even better, instead of rubber rings, use copper washers.
Assembly is carried out in reverse order.
A coarse filter (fuel pump mesh) and a fine filter depend on the engine size. For the 1.5 engine there is a coarse filter with article number 2112-1139200, for 1.6 there is a filter with article number 1118-1139010. The fine filter for 1.5 (before 2005-2006 onwards) comes with threaded connections, for 1.6 (after 2005 onwards) with fittings for latches, but before replacing it is better to separately look at the connections of the fuel pipes to the filter. The catalog number of the original filter on nut connections is 2112-1117010-82, and the filter on snap connections is 2123-1117010-82
Checking the electrical circuit
At the beginning of the diagnosis, you should check the electrical circuit of the fuel pump. To do this you will need:
- car tester (multimeter);
- crosshead screwdriver;
- two pieces of wire about 2 m long.
Checking the electrical circuit is carried out in the following order:
- Turn on the ignition without starting the engine. When the key is in the first position, a click should be heard, characteristic of turning on the relay, followed by a slight whirring of the pump electric motor. If there is no click, the relay is faulty or is not receiving power. If there is a click, but no buzzing, the wiring coming from the relay or the pump motor itself is faulty.
- Under the glove compartment, find an additional mounting block consisting of three relays and three fuses. The pump relay is located in the middle, and the fuse is located to the left of it. Remove the fuse from its socket, test it with a multimeter, and if the result is negative, replace it. When replacing the fuse, please note that it is rated for a maximum of 15 A.
The relay and fuse for the fuel pump on the VAZ 2114/2115 are located in the mounting block under the glove compartment.
- Set your multimeter to voltmeter mode. Connect one probe of the device to the relay terminal to which the pink wire fits, and the second to the car body. Turn on the ignition. The device should show the on-board network voltage in the range of 11.7–12.4 V. If there is no voltage, the problem may be a broken wiring or a malfunction of the ignition contact group. In this case, it is better to contact an auto electrician. If power is supplied, check that the relay is working. With the ignition on, use a screwdriver or a piece of wire to close the contacts to which the pink and gray wires go. This closes the circuit bypassing the relay. If the fuel pump works, replace the relay.
- Be sure to check the connection of the pump's negative wire to ground. Often it is the lack of “ground” that causes interruptions in the operation of the fuel pump. Remove the plastic trim from the center console near the parking brake handle. Under it there is a “negative” wire of the pump, screwed to the body with a self-tapping screw. Unscrew it, clean the contacts, screw it back and repeat the test.
The ground wires of the fuel pump are attached to the body with a self-tapping screw
Then check the fuel module. Remove the rear seat, peel back the carpet and sound insulation. Unscrew the two screws securing the gas tank flap and disconnect the electrical connector on the fuel module cover. Using two wires, supply power to the pump directly from the battery. If the pump works, the wiring is faulty; if it doesn’t work, the pump itself is faulty.
How to change a fuel pump
Further in our photo report there are more detailed instructions.
The fuel pump on this vehicle is located in the tank. To replace it, we will crawl under the back seat.
To recline the seat, you need to pull the part of the seat that is located on the side of the seat back.
The hatch for access to the fuel tank is located in the direction of the arrow. There are cuts in the silencer for free access to the tank.
We move the silencer aside and use a screwdriver to unscrew the two screws securing the gas tank flap cover.
Now we need to remove all the dirt around the fuel flask. We used air from the compressor and blew it out under low pressure, trying not to create dust in the car interior.
Now we can disconnect the fuel pipes and electrical connector. The tubes are removed by pressing on the plastic clips on the sides.
Unscrew the eight nuts securing the fuel flask.
We take the wires and tubes aside and pull out the fuel flask. It is necessary to prepare a cut canister or other similar container in advance, since the fuel flask will be filled with gasoline.
Now on the table we begin to disassemble the fuel flask and replace the fuel pump. First of all, use a screwdriver to pry up and remove the retaining ring shown in the photo.
We simultaneously press the three latches shown in the photo. and pull the top of the flask trying to disconnect it.
Disconnect all wires and electrical connectors shown in the photo. and pull out the inner part in which the fuel pump is located.
Now that the flask is disconnected we have access to the pump. Use a screwdriver to pry up and disconnect the coarse filter.
We bend the two fuel pump clamps with our hands and pull them out of the plastic.
To replace the pump, we need to disconnect the hose indicated by the arrow. To make removing the hose easier, you can use a hairdryer, heat the hose, softening it, and then use a screwdriver to pry and remove the hose.
Compare the removed pump with the new one.
We put the hose on the pump and secure it with a regular clamp. For better crimping of the clamp, we also recommend using a hair dryer.
We put a plastic casing and filter on the new pump.
Before reassembling, it is necessary to clean the housing from dirt, wash it with gasoline and blow out all debris with air.
We assemble the flask in the reverse order of disassembly.
Don't forget to reinstall the retaining ring.
We lower the assembled fuel flask into the tank.
In order not to confuse the correct position for installation, there is a special flag on the body of the flask that must fall into place.
We install the pressure plate and tighten all the fastening nuts, not forgetting to connect the ground wires.
Reconnect the tubes and connector.
Close the hatch and lower the seat.