Checking injectors at home with an ear and a screwdriver!
- Start the engine and let it warm up.
- Then take the largest long screwdriver and place it in the base of the fuel injector.
- Be careful! When checking the injectors using this method, your clothes, hair, etc. should not hang over the moving parts!
- We put our ear to the handle of the screwdriver and listen carefully to the sound.
If, when listening to the fuel injector, you hear a continuous series of clicks that are uniform and not very loud, then you can assume that the injector is working properly and is working as it should.
If the clicks are intermittent, irregular and with pauses, most likely the injector is stuck or jammed and requires flushing or even replacement. At a minimum, such an injector should be removed for further diagnostics.
We carry out the described procedure for each injector, after which we decide whether there is any point in visiting a service station or not. This method does not provide 100% confidence, but a preliminary conclusion can be made. Moreover, it is free and available to everyone. If there are errors indicating problems with the injectors, then this method will, at a minimum, help verify that there really is a problem.
After such a diagnosis, you can try to restore the operation of the injector using flushing fluid, or you can stop by the station and carry out a full cleaning of the injectors on an ultrasonic stand.
Symptoms of a problem
If there are problems with the injectors, a small amount of fuel enters the cylinders. In some cases, powering the engine becomes completely impossible. There are several signs by which you can determine that the problem is in the injectors:
- Problems starting the engine. This is due to insufficient fuel entering the cylinders;
- The engine is unstable at idle and low speed;
- Significant reduction in power and failures in operation;
- Increased fuel consumption;
- The engine may trip.
Injectors do not work on VAZ 2110
Injectors on a VAZ-2110 passenger car must provide, depending on the engine operating mode, the required portion of well-atomized gasoline to the engine cylinders at the end of the compression stroke. If gasoline stops flowing into the cylinders, the engine will stall and then refuse to start. But a similar picture will occur in the absence of a spark on the spark plugs.
Therefore, in order to find out what was the real reason for the engine stopping, you will have to unscrew the spark plug and turn the engine crankshaft with the starter. If fuel injection is not heard from the well where the spark plug hole is located, and gasoline vapors are not emitted, then the injectors are the culprit for stopping the engine.
The first cause of this malfunction may be a lack of gasoline pressure in the fuel rail. You can check this assumption by measuring the pressure in the rail with a fuel pressure gauge with an adapter and a drain, and if you do not have such a device, you will have to contact a service station. A harbinger of a drop in pressure can be failures in engine operation at high speeds and the inability of the car to accelerate quickly when the gas pedal is sharply pressed.
Considering that for the injector to operate, the shut-off needle must open, which rises upward with the help of an electromagnet, then in the absence of a control signal, voltage is not supplied to the electromagnet winding and fuel will not be injected into the engine cylinder even if there is normal pressure in the fuel rail.
The control signal is generated by an electronic control unit, so you will have to check both the ECU itself and the wiring from it to the plug on the injector itself. It is advisable to check the operation of the electronic unit at a diagnostic point for injection engines, since the on-board computer cannot always show the necessary error codes, as a result of which the injectors malfunctioned.
guys, help me, I went through all the injectors on the VAZ 2110, the 8th valve is not working, I removed the ramp, I turn the engine with the starter, but the injectors finally don’t respond, they are closed and that’s the reason, please help.
Need more information. Is the signal to the injectors ok? If yes, you need to make sure that sufficient pressure is created in the fuel rail. If there is no signal, it is cheaper and faster to make a diagnosis. By the way, the cable can be ordered from China, the programs are free. If you are interested, we can make a short diagnostic instruction.
I have the same problem. The spark plugs are dry, I installed the ECU on another car - it works, there is a spark, I checked all the sensors on a working car. The injectors do not open (although I see 12 V at the connector) and the car does not start. The gasoline pressure in the rail is normal. But sometimes I come in the morning and it starts without problems, although the speed must be maintained with the pedal itself. Tell me what's wrong.
It happens that the power switches for controlling the injectors fly out.
You have 5A, there is one key for all the injectors, that’s why they all turned off (on 4A the controls are in pairs)
or look at the EFI fuse. I found this on the forum. Where are these keys.
Good afternoon. help in any way you can. VAZ 2110 2004 8 valve. the engine was jammed. compression 12. spark plugs and wires are new. 2 the boiler does not react when the tip is removed from the spark plug. after swapping the chips of the first and second injector, the second injector works. I measured the voltage at the contacts of the second injector with the ignition on and it shows 6.5 volts
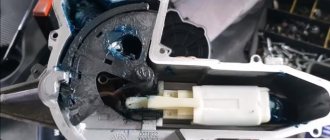
Cleaning the fuel pump mesh
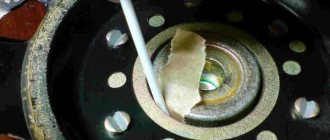
We take the fuel pump out of the tank, remove the screen and wash it. Before installing the fuel pump, it would be a good idea to check it for leaks and the reliability of the connection of its tube (arrow in photo 5) to the fuel line.
%rtb-4%
You will certainly ask what to do if the supply line is clean, the pump is humming, and the pressure is still below normal. In this case, you need to change the pump itself - it has exhausted its service life! Or it may happen that the pump seems to be functioning normally, but there is no pressure in the rail! This can happen in winter if there is a lot of water at the bottom of the fuel tank. When the grid freezes, it interrupts the flow of fuel to it. What should I do? Lighting a fire under a gas tank, heating it with a blowtorch or some other source of fire - this should not be done under any circumstances. It is preferable to remove the fuel pump and clear it of ice. The second option is for those in no hurry: roll the car into a warm room and wait... Then it would be a good idea to drain the water from the fuel tank. It's a troublesome task, but a rewarding one.
Ultrasonic cleaning
A modern way to clean an injector is to use ultrasound. Here you will need to remove the injectors from the engine and place them in an ultrasonic bath. Cleaning is carried out using micro-explosions of ultrasonic waves capable of reaching thousands of atmospheres (cavitation effect). At the bottom of the bath there is an ultrasonic generator. The nozzles are lowered into it and, due to cavitation, the maximum effect of peeling off blockages in the nozzle channels and sediments in the nozzle channels is achieved.
Thanks to the use of an ultrasonic bath, the surface of the nozzle and its internal working cavities are cleaned. Varnish and carbon deposits are also possible on the inner surface, since it is located in a working area of high pressure and high temperatures. The internal surface of the device is cleaned exclusively in the active cleaning mode. This mode assumes that the nozzles open and close while being in the working solution with the part that directly sprays the fuel - the spray hole, during ultrasonic cleaning.
Ultrasonic cleaning is considered more effective, since it can also be used to clean those nozzles that cannot be cleaned with flushing liquid. Flushing the injector using this method will cost a little more.
Ultrasonic cleaning steps:
- Removal and inspection of injectors.
- Installation on a stand.
- Initial test on the stand (spray, performance).
- Washing with a special solution in a gentle mode in an ultrasonic bath.
- Intermediate testing of devices on the stand (spray, productivity).
- Additional rinsing if necessary.
- Final test on the bench (spray, performance).
- Install new filters and O-rings if necessary.
- Installation of injectors in the engine.
Bench testing is an advantage of this method. It is recommended to use an ultrasonic bath after 100 thousand km or more often if engine diagnostics have shown the need for this. The main disadvantage of the method is its high cost and the need to resort to the help of specialists. Injectors may be damaged due to improper ultrasonic cleaning. Of course, first make sure that the interruptions in engine operation are due to dirty injectors.
Diagnostics
Almost every car enthusiast can check the injectors on their own. Some work can be carried out without removing these parts from the engine. For a more detailed examination of the reasons, it is better to remove the problematic injector from the engine. Self-diagnosis should occur in the following order:
- The integrity of the wires supplying power to the injector is checked. To do this, you can measure the resistance on them;
- Find out which injector has the problem. They do this as follows: start the engine and take turns removing the wires from the injector terminals. If it works in this cylinder, then you can hear changes in the operation of the engine; a broken injector does not cause changes;
- Check the winding resistance. To do this, multimeter probes are connected to the terminals. For serviceable injectors, the resistance should be in the range of 11-16 ohms. If the indicator is higher, then the part must be replaced;
- For the next check, the fuel rail must be removed. Cups are placed under the injectors and the starter is turned for 10-15 seconds (longer operation can damage it). At the same time, observe the fuel spray cone. The amount of gasoline collected in the cups is also compared. This way you can definitely identify the faulty injector.
If after all the steps you have not decided on the cause of the malfunction. That is, the injectors are working properly. Pay attention to the gasket on it. If it is deformed or damaged, then it is likely that the problem is air leakage through it.
Injectors
Nozzles or “injector” are the main part of the body. It is a solenoid valve and atomizer, it is activated by a signal. Hence, which comes from the block. First of all, collecting information from meters. Due to this, a combustible mixture is created, but due to the poor quality of gasoline, the nozzle often fails. That is, it gets clogged with dirt.
If it fails, the operation of the machine becomes incorrect. That is, there are jerks and dips when starting and moving, detonation, difficult starting and a decrease in dynamics. Therefore, cleaning the injector is the first priority in repairs.
And due attention must be paid to this process.
Firstly, the easiest way to clean it is to pour liquid into the tank and mix it with gasoline. Secondly, you need to dismantle the fuel rail
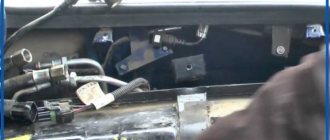
I would like to draw your attention to the fact that on 8 valve engines the ramp is located in the rear of the engine, but on 16 valve engines it is in the front. When removing the ramp, you will have to dismantle the air manifold
Because he just gets in the way. Then disconnect the injectors from the ramp. Next, apply 12 volts to the nozzle to open the valve and blow it out with a cleaning spray.
Prevention is better and cheaper than treatment!
It should be noted that, as with most technical issues. vehicle maintenance, prevention is always better and cheaper than treatment (repair). One of the simplest, cheapest and most effective ways to prevent fuel injection problems is to maintain a healthy ignition system. One of the most important conditions for the “health” of injectors is cleanliness! It is important to refuel with high-quality fuel and change filters on time. Also, to prevent contamination of injectors, as well as combat deposits, experts recommend using a special liquid to clean fuel injectors. In addition, there is a “flush” that allows you not only to prevent the accumulation of dirt and deposits, but also to completely clean the fuel injector system.
Fuel injector cleaner is a fuel additive that is easy to use and great for preventive maintenance. At the same time, it is relatively inexpensive, especially when compared with engine repair or replacement of injectors. Some mechanics recommend using flushing fluid every time you fill up, but if you are confident in the quality of your fuel, this is unlikely to be necessary. In all other cases, if you notice any of the above symptoms, use a flush to prevent more serious problems. It is also a good habit that many motorists have - using injector flushing additives every time they change the engine oil.
If your problem is more serious, then you will most likely need to consider having your fuel injectors professionally cleaned. Of course, this will cost much more than flushing liquid, but the result will be much better. And besides, it is much cheaper than replacing injectors or repairing the engine.
Injectors for VAZ 2110–2112 cars
Cars of the “tenth” family are equipped with various injection engines, each of which is designed to work with a specific model of injectors. Despite the fact that they have their own “names,” motorists usually use a “folk” classification based on color and thickness. For example: black thin ones.
This simplification usually works, but does not fully guarantee the compatibility of the injector with the engine. To avoid having to contact the chip tuner once again to correct the firmware of the electronic injection control unit, check the part number before purchasing.
Table: compatibility of injectors and engines of VAZ 2110–2112 cars
| Engine | Volume (l) | Number of valves | Controller (ECU) | Firmware | Injectors | |
| Siemens | Bosch | |||||
| VAZ-2111 | 1,5 | 8 | M1.5.4 | January-5.1 | VAZ6238 (thick gray) | 0 280 150 996 (turquoise thick) |
| VAZ-2111 | 1,5 | 8 | M7.9.7 | January-7.2 | VAZ6393 (beige thick) | 0 280 158 502 (black thin) |
| VAZ-21114 | 1,6 | 8 | M7.9.7 | January-7.2 | VAZ20734 (orange thin) VAZ20734 (yellow thick) | 0 280 158 017 (black thin) |
| VAZ-2112 | 1,5 | 16 | M1.5.4 | January-5.1 | VAZ6238 (thick gray) | 0 280 150 996 (turquoise thick) |
| VAZ-21124 | 1,6 | 16 | M7.9.7 | January-7.2 | VAZ20735 (blue thin) VAZ20735 (pink thick) | 0 280 158 022 (black thin) |
Photo gallery: injectors for VAZ 2110–2112 cars
Differences between injectors for eight and sixteen valve engines
Among some motorists there is an opinion that the injectors for the “ten” differ depending on the number of engine valves. Others believe that the determining factor is the volume of the cylinders.
In reality, neither one nor the other is wrong. The parts must match the engine design, model and firmware of the electronic control unit.
When replacing, it is best to install the same ones that were installed previously. Otherwise, there may be difficulties with startup and operation in transient conditions. To eliminate the shortcomings, you will have to adjust the firmware, which is almost impossible in a garage environment.
Step-by-step procedure for dismantling injectors
Despite the fact that many advise carrying out such work in the company of an assistant, it is difficult, but it is quite possible to do it alone, with your own hands.
- First of all, put the car on a flat surface and turn on the handbrake.
- We relieve the pressure in the fuel system: to do this, disconnect the terminal from the fuel pump and start the engine. When it has used up all the remaining gasoline, crank the engine with the starter a couple more times, thereby finally relieving the pressure in the fuel line.
Unscrew the gasoline supply pipes
Use a screwdriver to unscrew the bracket on which the fuel pipes are attached.
Removing the fuel rail
Removing the injector from the VAZ-2114 fuel rail
Depending on which of the injectors has failed, the replacement process is absolutely identical.
- When the injector is on the ramp, press the spring retainer and remove the block.
As a rule, nothing prevents you from removing the lock.
The bracket will come out of place if you pry it with a screwdriver.
How to check fuel injectors on a fuel injection engine
There are several methods for checking the performance of an injector. Let us list them in order with a detailed indication of the algorithm of actions.
Check using resistance measurement
You can check the injectors without removing them using a multimeter. First, check which injectors are installed on your car - high or low impedance (electrical resistance). This data will be necessary to perform an accurate diagnosis. In order to check the injectors with a tester without removing them from the engine, you must adhere to the following plan:
Measuring the resistance of the injector winding
- remove the high-voltage wires from the injectors;
- set the multimeter to the mode for measuring insulation resistance (ohmmeter) in the range from 0 to 200 Ohms (depending on the technical parameters of the device, the upper limit may differ, the main thing is that the ohmmeter can show a resistance value of several tens of Ohms);
- turn off the ignition and remove the negative terminal from the battery;
- disconnect the electrical connector on the injector being diagnosed (as a rule, to do this, unclip the fastening clip located on the block body);
- connect the tester's measuring probes to the injector terminals and take measurements.
High impedance injectors have an insulation resistance of 11.17 ohms, and low impedance injectors have an insulation resistance of 2.5 ohms.
If the measured insulation resistance value differs significantly from the specified value, this indicates that the injector is faulty. Accordingly, the injector must be dismantled and detailed diagnostics performed.
It is important to know that the voltage to the injectors from the ECU is supplied in pulsed and not constant form. Therefore, it is recommended to measure resistance not only using an ohmmeter, but also an oscilloscope, so you can see what peak values the resistance and voltage take
And the tester shows the average value.
How to check power to injectors
Checking the power supply to the fuel rail of VAZ 2110-2112
Let's look at checking the availability of power to the ramp using the example of VAZ 2110, 2111, 2112 cars, as some of the most popular. But first, let us recall that in the block with contacts, four of them supply power to the injectors, and one (pink wire with a black stripe) is the common ground. You need to act according to the following algorithm:
- disconnect the power plug;
- on the multimeter, set the upper limit of the measured resistance to around 200 Ohms (this value depends on the specific model of the tester);
- measure each of the four contacts from the injectors with a common connector in pairs.
The resistance value should be within 11.5. 15.5 ohms. Remember that this way you will only measure the power supply on the ramp to each injector.
You can check the injector simply for vibration. When the engine is running, a working injector should vibrate slightly. If there is no shaking, it means it is out of order.
Checking the power supply from the car's electrical circuit is quite simple, you just need:
- it is necessary to disconnect the supply wire block from each injector one by one;
- After this, use two pieces of wire to connect the injector directly to the battery;
- turn on the ignition.
If the injector starts spraying fuel, then the problem must be looked for in the wiring.
How to check the starting injector
First, let's say a few words about the monoinjector. Today, such units are becoming less and less common, since the system is outdated. Its essence lies in installing only one injector - in front of the throttle valve. They can be found on old models of foreign cars from VW, Audi, Skoda, Seat and others.
conclusions
As you can see for yourself, in order to check the condition of the injectors on a VAZ-2114 with your own hands, there is nothing difficult. You just need to carefully read our article and strictly follow the order of actions.
Every driver would like to know how to check the injectors without removing them from the engine. After all, all modern cars are equipped with injection systems. And given the low quality of fuel that is often found at our gas stations, it is not surprising that every driver has encountered problems with the car’s power system. In this regard, the skill of determining the exact location of a breakdown is extremely important.
This will significantly save time on service visits and diagnostics. Once you have identified the problem, you can immediately begin to fix it. The sooner the breakdown is repaired, the better.
Method for replacing injectors on 8- and 16-valve engines
Car owners cannot always diagnose faults in the fuel system. Often, failures in engine operation or unstable idle speed can be explained by completely different reasons, and not just interruptions in the fuel supply.
Symptoms of a problem
If all car systems are operating normally, then the following symptoms will directly indicate injector problems:
- failures in engine operation;
- increased fuel consumption;
- instability of idle speed;
- loss of power;
- black exhaust gas, etc.
Video: how to replace oil nozzles if they leak
Is it possible to determine the cause of the malfunction yourself?
Failure of injectors is often caused by clogged injectors. When using low-quality fuel, the injector nozzle becomes clogged with gasoline deposits over time, which is why its throughput gradually decreases. Accordingly, the engine no longer receives enough fuel, so the engine power sharply decreases and the car’s dynamics deteriorate.
In addition, the rubber seal or ring may lose its tightness. In this case, the nozzle will leak, due to which the necessary pressure will not form in the system.
It should be noted that the service life of injectors on the VAZ 2110–2112, set by the manufacturer, does not exceed 150 thousand kilometers.
Most common reasons
There are three main factors that can lead to unstable operation of the fuel injection system:
- Low quality fuel is a common problem in all post-Soviet countries.
- A long service life can equally be attributed to both advantages and disadvantages.
- Unprofessional repair work.
It should be noted that unqualified repairs are the most dangerous factor that can affect the normal operation of the injector. In the absence of certain theoretical and practical knowledge, it is not recommended to try to repair or clean the injector yourself. It is best to entrust such work to professionals who are well aware of all the nuances and features of carrying out work of this kind.
There can be a great many reasons for a malfunctioning injector, so in this article we will analyze only the most typical signs of an injector malfunction inherent in engines of various types, and give recommendations for eliminating them.
Injectors for VAZ 2110–2112 cars
Cars of the “tenth” family are equipped with various injection engines, each of which is designed to work with a specific model of injectors. Despite the fact that they have their own “names,” motorists usually use a “folk” classification based on color and thickness. For example: black thin ones.
This simplification usually works, but does not fully guarantee the compatibility of the injector with the engine. To avoid having to contact the chip tuner once again to correct the firmware of the electronic injection control unit, check the part number before purchasing.
Table: compatibility of injectors and engines of VAZ 2110–2112 cars
| Engine | Volume (l) | Number of valves | Controller (ECU) | Firmware | Injectors | |
| Siemens | Bosch | |||||
| VAZ-2111 | 1,5 | 8 | M1.5.4 | January-5.1 | VAZ6238 (thick gray) | 0 280 150 996 (turquoise thick) |
| VAZ-2111 | 1,5 | 8 | M7.9.7 | January-7.2 | VAZ6393 (beige thick) | 0 280 158 502 (black thin) |
| VAZ-21114 | 1,6 | 8 | M7.9.7 | January-7.2 | VAZ20734 (orange thin) VAZ20734 (yellow thick) | 0 280 158 017 (black thin) |
| VAZ-2112 | 1,5 | 16 | M1.5.4 | January-5.1 | VAZ6238 (thick gray) | 0 280 150 996 (turquoise thick) |
| VAZ-21124 | 1,6 | 16 | M7.9.7 | January-7.2 | VAZ20735 (blue thin) VAZ20735 (pink thick) | 0 280 158 022 (black thin) |
Photo gallery: injectors for VAZ 2110–2112 cars
Differences between injectors for eight and sixteen valve engines
Among some motorists there is an opinion that the injectors for the “ten” differ depending on the number of engine valves. Others believe that the determining factor is the volume of the cylinders.
In reality, neither one nor the other is wrong. The parts must match the engine design, model and firmware of the electronic control unit.
When replacing, it is best to install the same ones that were installed previously. Otherwise, there may be difficulties with startup and operation in transient conditions. To eliminate the shortcomings, you will have to adjust the firmware, which is almost impossible in a garage environment.
Cleaning the nozzle without removing it
In this case, cleaning can be carried out using several methods:
- Using special cleaning additives that are added to the fuel. They contain special cleaning agents that gently clean the injector openings.
- Cleaning using pressure. To do this, you need to accelerate the car to a speed of 110.130 km/h, and drive for 10.15 km (about 5.6 minutes) at high engine speeds. Due to the high load, natural cleaning will occur in the nozzles.
- Idling. This method is similar to the previous one. It is necessary to start the engine while the car is stationary and maintain the speed at 4.5 thousand for 3.4 minutes. This will also clean the injectors. However, the previous cleaning method is better because the load under its conditions is higher.
conclusions
Problems with the operation of the injectors are not a critical failure, but if they occur, we recommend that you do not delay checking and eliminating the malfunction. In most cases, repair work can be carried out independently using the methods described above. Timely checking and diagnostics of injectors will allow you to avoid problems with the operation of the machine. Prevention will cost you less than repair work on injectors or other engine components. We recommend that you clean the injectors every 30.35 thousand kilometers of your car, regardless of their condition.
A faulty injector (nozzle) has a negative impact on the operation of the vehicle engine. The sooner the car owner finds out the cause of the malfunction, the sooner he will eliminate it, saving a significant amount of time, nerves and money. Listed below are signs of an injector malfunction that indicate the need for repair and maintenance work.
Repair
Before removing the injectors from the disassembled rack, it is advisable to check their functionality. To check you will need:
- four identical containers,
- tester
- wires.
Functionality check
- Connect the fuel supply and exhaust lines and the fuel fitting to the fuel rail.
- Place the staff on the measuring cups.
Place personnel on top of measuring containers
The shape of the cloud for all nozzles should be approximately the same
After the war, Germany was banned from developing injectors for aircraft engines. And engineers began adapting direct injection systems for passenger cars, discovering another important advantage over carburetors: efficiency.
Vladimir Berestenev
bvy.su
Replacement or flushing?
Some defects can be corrected by cleaning and rinsing. The rest are “treated” only by replacement.
Table: problems with injectors
| Malfunction | Means |
| decreased productivity | rinsing, replacement if rinsing fails |
| dripping | rinsing, replacement if rinsing fails |
| increased productivity | replacement |
| valve blocked | replacement |
| unstable valve blocked | rinsing, replacement if rinsing fails |
| winding resistance is too high or too low | replacement |
In these cases, redness is not a panacea. This method should be used taking into account the mileage and quality of service during operation.
During operation, the nozzles inevitably become coked and clogged with resinous deposits. The picture is aggravated by low-quality fuel, which can introduce additional pollutants.
Fuel injectors continue to operate for a while without noticeable change, but sooner or later contaminants accumulate, changing the shape of the burner and reducing performance.
Injector life is limited even when using the cleanest fuel. Manufacturers recommend changing them every 100-120 thousand kilometers. Due to the fact that motorists use imperfect gasoline, and that which can be bought at gas stations, the part must be changed after 80-100 thousand km.
There is an opinion among motorists that “you don’t need to get in if everything is fine.” This opinion is justified, but only if the owner is ready to replace the injectors with new ones approximately every 50 thousand kilometers.
The fact is that by eliminating small deposits as they accumulate, the owner extends the life of the consumable material, since pollutants do not have time to cause irreparable damage.
Clogged injectors begin to interfere with normal operation after 30-50 thousand km. Initially, negative processes manifest themselves only in increased fuel consumption. Owners do not always associate the increased “appetite” of the engine with injectors, since there are many reasons for this phenomenon.
In the range of 50-80 thousand km, pollution accumulates and can cause interruptions in engine operation, which cannot be neglected. It becomes clear that “you have to get into the injectors,” but cleaning them at this stage may be useless. With prolonged use of a clogged part, the diameter of the nozzle often increases. Washing removes dirt, but cannot restore the original settings.
To extend the period of trouble-free operation and postpone replacement, it is necessary to regularly fill the tank with injector cleaning fluid after approximately 3-5 thousand kilometers or use it in another way recommended by the manufacturer.
Motorists' opinions about the effectiveness and safety of injection chemicals are contradictory. Many people fear that washing without removing it from the engine will clog the cylinders.
After all, if the owner of the car has not touched the injectors for a long time, it is impossible to do without removing the tracks. Chemicals in an aquarium can do more harm than good. If you use cleaners regularly, without waiting for typical malfunctions to appear, there will be no damage to the engine from chemicals.
Although the injection chemistry has a beneficial effect on slightly dirty nozzles, its use does not guarantee that the sprayers will comfortably survive the full manufacturer's holiday period. At most gas stations it is impossible to fill the tank with “left” gasoline.
To minimize the accumulation of deposits, manufacturers recommend additional preventive cleaning with special products every 30 thousand kilometers.
Preventing problems with injectors
Cleaning injectors with dismantling or replacing them is a rather expensive procedure that significantly increases the car owner’s expenses. It is much easier to prevent such malfunctions than to try to repair the car and clean the injectors. First of all, the car owner will need to use high-quality fuel, refueling exclusively at proven gas stations. Visits to dubious gas stations, where they often sell low-quality fuel, should be avoided.
In specialized stores you can find high-quality auto chemicals and various fuel additives that clean the fuel system and remove possible contamination from the injector nozzles. Experts recommend carrying out such preventive work every 50 thousand mileage, which will allow car owners to eliminate any problems with injection, while avoiding the need for expensive and complex repairs. Also remember that by promptly contacting service at the first signs of a malfunction, you can clean the injectors without removing them from the car.
Let's sum it up
An increase in fuel consumption, problems with engine operation and a noticeable deterioration in car dynamics may indicate contamination of the car's injectors. In such a case, it is necessary to contact a service center as soon as possible and perform engine diagnostics, if necessary, clean the injectors or replace them. For preventive purposes, car owners should use only high-quality fuel, and once every 50 thousand mileage, fill the gas tank with special auto chemicals designed to eliminate such contaminants in the fuel system.
Main symptoms
Lack of fuel mixture in the injector. Often, the presence of this symptom does not indicate a malfunction of the injector itself, but a failure of the fuel pump, or its incorrect installation after repair work. In some cases, the reason may be a clogged fuel mixture inlet into the fuel pump.
The fuel pump has failed
Significant increase in fuel consumption. A fairly common phenomenon that indicates a clogged injector. Due to the small diameter of the injector nozzle, even slight contamination can significantly disrupt the mixture formation process, reducing the percentage of engine efficiency. This is explained by the fact that a clogged nozzle no longer forms a cone-shaped cloud of gasoline, which means that a significant amount of fuel begins to burn out in the exhaust manifold. The consequence of these processes is a deterioration in the dynamic characteristics of the vehicle and an increasing load on various electronic equipment of the car: coil, spark plugs, wiring, etc.
Renault Megane Turkish › Logbook › Fuel injectors no longer hold pressure
This is exactly the topic. One day in the winter I came to the garage (in February), calmly started the car and without warming up (I forgot about warming up on this car) I was about to leave. BUT! After lightly pressing the gas, the car collapses, reduces the speed to a minimum and stalls. WTF?! Okay... It happens. I’m trying to start it again and I only succeed 3-4 times! “Shit gasoline!” I thought, but the horseradish was floating there. I rode around all day and didn’t blow my mind, and the next day it all happened again. What an ambush! I started reading Driver's and forum's murzilkas. Everyone is shouting vyingly that it is the DPKV (crankshaft position sensor), coolant pressure sensor, coolant temperature sensor, intake pressure sensor, intake temperature sensor, lambda probes, coils, fuel pump, filter, spark plugs. And most of all I like the topic about the fact that you need to clean the throttle assembly (that’s some kind of motherfucking panacea for everyone) =)) Hmm... hmm... And God bless them, because... everyone has their own truth. I slowly went through all the sensors and even a couple of coils... I also changed the pump (let the other one be in the zipper). I’m generally silent about candles and filters. Actually, everything is not expensive and such replacements are not affordable. As a result, having weeded out most of the electronic hat, only the injectors remained... It was decided to simply wash them without any ultrasounds or services. I made a homemade stand a long time ago, bought Khaigirovskaya e-juice and went into battle! I cleaned each injector several times (of course, in my conditions I did not intend to see a difference in performance, but I was quite capable of simply cleaning it). The spray is even to the eye and there are no problems (like BE). The next day I come, and the problem with starting has not gone away, but has even worsened, because... From the exhaust pipe I get a fair dose of soot from unburned gasoline. AHA! I got a French bun in the dark! This is where the French bulldog laid down his face!
I let the car cool down and think, and the next morning I decide to pull the ramp again with the force and I’m freaking out, because. the sprayers are wet in some places, damp in others... Holy crap! Now it’s clear that the car simply cannot start normally if gasoline moisture forms in your boilers overnight... Beat it! In order to check everything again, I sculpt a stand out of shit and syringes.
Spark Plug Inspection
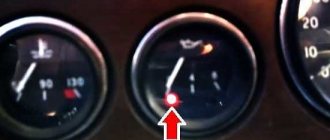
If the spark plugs are wet, then gasoline flows. Dry? In this case, you need to check the signal at the harness connector of the mechanical liquid or gas atomizer (injector) with a probe (as shown in photo 6).
Did you do it, but the spark plugs are still dry? Then you will have to unscrew the screws securing the ramp and lift it under the intake manifold so that the injector nozzles can be seen. We turn on the ignition and turn the engine crankshaft with the starter. If there are no streams of fuel, you need to remove the injectors and most likely replace them with new ones. True, almost every serious service will recommend that you wash them.
If the price of a new set of injectors is slightly higher than flushing, then you should choose a replacement. Injectors also experience age-related problems. Also read:
Why is a lambda probe needed in a car?
How to clean injectors
Most often, the problem with the operation of injectors is their banal contamination. Therefore, to restore their functionality and return the injector to its nominal performance, it is enough to clean it. This can be done in two ways - without removing it from the engine (by adding a special cleaner to the fuel) and in the removed state (passing the cleaner through a separate nozzle or using ultrasound). The following methods are used for cleaning:
- mechanical;
- ultrasonic;
- using chemical compounds.
In this article we will talk about only a few, since cleaning injectors often requires additional professional equipment. You will find detailed information about self-cleaning in another material. Here we will briefly touch on these methods.
Cleaning the nozzle at home
A separate nozzle can be cleaned using special chemical compounds. For example, the same additives that are added to fuel to clean the system or the so-called “Carburetor Cleaner”. In this case, it is necessary to act according to the following algorithm:
- prepare in advance “Carburetor Cleaner” (or its equivalent in the form of a spray can), a contact button without locking the closed position, a syringe with a volume of 5 ml or more, a tube to extend the neck of the syringe with a seal, an empty container, preferably of large volume (5-10 liters ), a mobile phone charger with a cut plug, contact wires with terminals;
- Next, you need to insert the test nozzle into the back of the syringe (as tightly as possible, with or without a rubber band);
- after that, connect the terminals through the button to the charger and plug it into the outlet;
- insert the tube into the cleaning agent sprayer, and unfold the back of the nozzle into the prepared empty container;
- after that, press the sprayer so that a certain amount of the substance enters the nozzle;
- press the contact button to activate the nozzle.
If the nozzle is working properly, detergent should come out from its reverse side under pressure. The purging procedure must be repeated several times to achieve the required degree of cleanliness.
In addition to the check methods listed above, you can also mention checking the toxicity of gases and smoke - a low level of CO during gas release is a sign of poor injector performance. This method is practiced at some service stations as a way to monitor engine operation. Since both certain knowledge and equipment are needed, we will not consider it as one of the options for self-diagnosis.
You also cannot ignore and not pay attention to checking the injectors for fuel supply correction and lambda, but here the situation is the same as with toxicity, you will need not only diagnostic equipment, but also be able to understand all the numbers that the diagnostics will show you
Debugg
There are several main reasons for injector failure; in each case, the repair methods are slightly different:
- No current;
- Winding fault;
- Blockage.
The first reason can be eliminated by replacing the wires or bringing the contacts into working condition. If the winding is broken, the only option is to replace the faulty injector. If clogged, you should rinse it. You can do this yourself or in a service. When cleaning yourself, you should not pour solvent into the car tank; this can lead to complete failure of the fuel system. It is much easier to make a temporary tank from any bottle and power the injector from it.
Conclusion
. Self-diagnosis of the engine is quite a feasible task even for a novice driver. In this regard, many people ask how to check the injectors without removing them from the engine. It's actually quite easy to do. To diagnose problems with motor power supply, you do not need a special stand. Most of the actions can be performed directly on the car.
Source
Errors during diagnostics
Most car owners, due to ignorance of the VAZ 2112 injector structure, often make mistakes in the process of identifying problems. Let's look at some of them:
- Seeing that there is no spark, the “masters” want to check it for breaks. For this purpose, they place the wire close to the ground of the machine. But when performing such actions, the ignition module may break, so under no circumstances should you do this;
- Errors when checking spark discharge. If you place spark plugs on the engine body, a large induction current may appear. This occurs even due to slight contact of the spark plug with the ground, as a result of which the controller can also be damaged. Therefore, it is necessary to use a spark gap that will not allow the distribution of ignition with the same supply of high voltage to two spark plugs at once.
Symptoms of a faulty injector
To begin with, it should be noted that such a complex mechanism as a car engine (especially in modern models) requires accuracy in definition. It often turns out that with absolutely similar symptoms characteristic of malfunctioning injectors, for example, difficult starting of the engine on “cold traction” or increased fuel consumption, the reason is not in them, but in the spark plugs that need to be replaced. Before establishing the exact cause and taking any action to eliminate them, you should very carefully check and make sure that the “diagnosis” is correct.
The following factors are the most common symptoms of faulty engine injectors:
- there are jerks when driving;
- loss of dynamics during acceleration;
- the engine vibrates and trembles when switching, or when decelerating;
- fuel consumption increases;
- Due to uneven fuel consumption on diesel engines, black smoke may be observed from the exhaust pipe
If you notice any of the problems just mentioned, you need to do a spot check of the injectors as soon as possible. Otherwise, the car may fail at the most unnecessary moment (for example, when overtaking, or in other situations).
Replacement or cleaning?
In order to understand what needs to be done with the nozzle, change it or simply clean it, it is better to diagnose them on a special stand. Under such conditions, you can test it in operation under different pressures, and also visually see how tightly it closes, and whether it is “snotty.”
If any of the injectors needs to be replaced, then you should buy a new one with exactly the same part number as the old one. Also, during installation of cleaned injectors, all O-rings should be replaced (2 pieces on each injector - approx.).
Installation is carried out strictly in the reverse order, similar to the removal procedure.
Step-by-step procedure for checking injectors
When nothing interferes with the operation of the dismantled ramp, we reconnect the power supply and gasoline supply pipes to it. Don't forget about the negative terminal of the battery.
- When everything is connected and ready for testing, we fix the ramp with the injectors so that four measuring containers of the same volume can be placed under them. This is necessary to ensure that the measurements are made as accurately as possible.
- Next, it is best to ask an assistant to sit in the driver’s seat, and if this is not possible, secure the ramp motionless and start the engine yourself.
- While the starter is “spinning” the engine, make sure that the injectors work in the same rhythm and the fuel is sprayed evenly. When carrying out such diagnostics, it is very clearly visible which of the four injectors is “snotty” or does not work at all.
It is noticeable how one of the injectors works differently than the other.
The check ends some time after the injectors are turned off.
The latter should be given special attention if any of the pads does not work at all, because damage to the wiring becomes the reason for this. If damage is present, then it is necessary to replace the nozzle with a new one (see “more about choosing nozzles”).
Procedure for checking injector power supply
- First of all, disconnect all the pads from the injectors.
- Then, we connect two wires to the pre-working block, the other end of which we bring to the “non-working” injector.
- Next, turn on the ignition and if the injector starts working, this means it is necessary to replace the non-working element of the electrical circuit - the block, and if not, then only the injector needs to be replaced.
Comprehensive diagnostics of the operation of injectors on the ramp
For such a check, the fuel rail will need to be removed from the engine along with the injectors attached to it. After this, you need to connect all electrical contacts to the ramp and injectors if they were disconnected before removal. It is also necessary to return the negative terminal of the battery to its place.
- The ramp must be placed in the engine compartment so that a measuring container with a scale can be placed under each of the injectors.
- It is necessary to connect the fuel supply pipes to the ramp and additionally check the reliability of their fastening.
- The next step is to turn on the ignition, after which you need to crank the engine a little with the starter. This operation is best performed with an assistant.
- While an assistant rotates the engine, check the efficiency of all injectors. The fuel supply must be the same on all injectors.
- The final step will be to turn off the ignition and check the fuel level in the containers. The specified level must be equal in each container.
In addition to self-checking, you can use the injector diagnostic service at a car service center. This operation is performed on a special testing stand. Testing an injector on a bench allows you to accurately determine not only the efficiency of fuel supply, but also the shape of the torch during fuel spraying.
Dismantling the fuel rail of the VAZ-2112 engine
- Disconnect the battery.
- Remove the engine protective shield.
- Disconnect the high-voltage wires from the spark plugs.
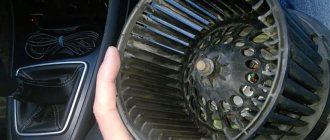
- Loosen the air and crankcase hose clamps. Remove the air hose assembly
- Disconnect the crankcase primary circuit ventilation hose from the throttle body
- Loosen the fastening, remove the damper cable from the bracket
- Unscrew the throttle assembly fasteners. Remove the assembly from the studs along with the hoses, move it to the side and secure with improvised means. Disconnect the electro-pneumatic valve hose from the receiver.
- Disconnect the vacuum booster hose.
- Unscrew the receiver mounts.
- Loosen the intake manifold clamps.
- Remove the receiver, close the manifold holes with rag plugs.
Disconnect the crankcase ventilation hose from the cylinder head cover.
- Unscrew the fastener and remove the oil level indicator guide tube.
- Disconnect the fuel rail electrical connector.
- Unscrew the fittings, disconnect the fuel supply and drain hoses. Remember their position.
- Unscrew the fastening, remove the bracket for the fuel supply and drain pipes.
- Unscrew the fastening screws with a hexagon.
- Remove the fuel rail assembly.
What functions does an injector perform in a car?
Absolutely all modern internal combustion engines, both diesel and gasoline, have a fuel injection mechanism. The nozzle in this system plays the role of a pump, supplying a very thin stream of fuel under high pressure and being one of the main elements of the injection system.
An engine injector is an electromagnetic valve that operates in accordance with a special program embedded in the engine control unit. This valve ensures a dosed supply of fuel to the cylinders. And today an injector means precisely an organized system of nozzles.
By purpose, these elements can be:
- for distributed injection;
- for central injection;
- for direct injection.
Fuel is supplied to each injector under a certain pressure due to the supply of electrical impulses from the control unit to the electromagnet. These pulses respectively open and close the needle valve at the right moments and thus regulate the flow of fuel through the nozzle channel into the cylinder. The longer the pulse lasts, the longer the valve will be open and the more fuel will flow into the injection element. The duration is regulated by the engine control unit. In addition to the duration of fuel supply, the nozzle mechanism allows you to create different shapes of the fuel torch and produce a jet at different angles. These variable parameters have a significant impact on the creation of the fuel mixture in the engine.
Not all car owners can immediately find an injection system in the engine. The location of the injectors depends on the type of injection used in a particular case:
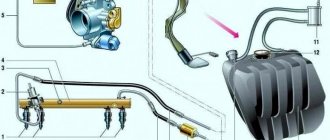
- With a central injection scheme, 1-2 nozzles are located in the intake manifold near the throttle, completely replacing the carburetor.
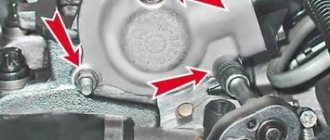
- In a distributed scheme, each cylinder is equipped with a separate injector. In this case, the injector is located near the base of the intake manifold, where fuel is injected.
- In the direct scheme, the injector is placed on the cylinder walls in the upper part. Injection is carried out directly into the combustion chamber.
Thus, injection elements are an important component of a modern engine, the uninterrupted operation of which completely depends on these elements. Therefore, the injector needs periodic inspection and flushing.
Operating principle
How to check injectors without removing them from the engine? Before starting diagnostics, you should study the operating features of the injectors on an injection engine. Then it will become clear how this structural element should be checked. Modern cars use electromagnetic injectors. They are a solenoid valve that is regulated by a control unit.
When a signal is received, the valve opens and injects a certain dose of fuel into the cylinder. There are 2 ways to supply fuel in this way:
- Central injection, with this method there is only 1 nozzle. It is installed in front of the throttle valve;
- Distributed injection, an injector is located in each cylinder.
Central injection can only be found on fairly old cars. On newer models, a distributed injection system is widely used.