Owners of used cars often encounter problems with the gearbox. More specifically, due to wear on the gears and shafts, some gears may “pop out” while driving. It doesn’t matter which gear it “knocks out” and at what speed, this is the first sign of a malfunction in the manual transmission.
Even a completely inexperienced driver will understand that the gear has jumped out. Let's look at this moment: You are driving, confidently picking up speed, when suddenly the car suddenly loses power, and the roar of the engine becomes stronger. This means that the gear you were moving in simply jumped out. Depress the clutch and engage the desired gear again.
Is the gearbox humming - a serious problem or a design feature?
A manual transmission is a simple design, reliable in operation, economical in maintenance and repair. In addition, the list of advantages of manual transmissions can be supplemented by a relatively low cost compared to analogues, as well as maintainability: almost any problem can be fixed either independently or with the help of specialists, without making a complete replacement.
All of the above advantages begin to fade as soon as an incomprehensible hum, howl, or creaking appears in the gearbox. It’s immediately worth noting that extraneous noise in a manual transmission is a common phenomenon. It affects not only representatives of the domestic automobile industry, but also foreign cars completely assembled abroad.
When assembled well, any manual transmission should operate smoothly without creating noise. If a squeak or hum appears, then you need to look for the cause in a small, or maybe serious, problem with the system. There is no point in postponing diagnostics and repairs, since a manual transmission is one of the main components and assemblies of a modern car.
Why doesn't reverse gear engage on the VAZ 2109? Learning to repair a gearbox
There are several reasons why the reverse gear on a VAZ 2109 does not engage. You can deal with a certain number of them yourself, some only if you are a professional auto mechanic or a recognized self-taught person. However, the problem will have to be solved in any case: driving “only forward, not a step back” is possible, but in certain cases - for example, when leaving a parking lot - it is extremely difficult.
However, we had one friend who had a watchman help him push his car out of the parking lot for a low price. He began repairs only six months later, when the watchman was fired. However, if you do not have such an assistant or you have to park the car in different places during the day, you will have to start looking for the reason for the partial failure of the box without jokes and immediately.
How to replace gears and synchronizers
The gearbox on the VAZ 2107 is a complex device. Therefore, if you do not have confidence in your abilities, it is better not to start replacing gears, but to turn to specialists for this service.
However, if you decide to replace worn out gears and synchronizers yourself, you will need to prepare the necessary tools in advance and buy a repair kit for replacement.
The standard repair kit for gearbox shafts 2107 usually includes gears, synchronizers, washers, a pin, nuts and bolts.
To work you will need:
- vice;
- puller;
- screwdriver with a thin flat blade;
Replacing gears and synchronizers on the primary, secondary or intermediate shafts is generally carried out according to the same scheme:
- Remove the shaft from the box.
- Clamp the shaft in a vice (it is important to wrap the jaws of the vice with a soft cloth so that they do not damage the surface of the shaft during operation).
- Use a screwdriver to pry up the shaft retaining ring and remove it.
- Press out all bearings.
- Unclench the vice and rest the first gear on two supports.
- Compress the gear by gently hitting it with a hammer.
- Perform the same actions for all subsequent gears and synchronizers.
Video: instructions for removing gears from the shaft
During operation, it is necessary to carefully inspect the shaft. Between the gears there may be clamps, retaining rings and other small parts. They must be removed without fail, otherwise it will be impossible to remove the gear.
Accordingly, the installation of new elements occurs in the reverse order.
Thus, repairing a gearbox on a VAZ 2107 cannot be called a simple task. The driver needs not only to exert maximum physical effort, but also to act extremely carefully so as not to damage the shaft and its elements. If you are unsure of your abilities, it is better to contact a car service specialist.
The VAZ 2107 is not scolded except by the lazy. However, there are fewer complaints about its gearbox.
The most important disadvantage of the VAZ 2107 gearbox is its noise. We will look at the reasons for this phenomenon below. I would just like to say: no matter what you do, no matter what new parts you install, the noise will constantly return (with rare exceptions).
Many owners are accustomed to this and do not pay attention to the noise. They keep driving until the gearbox needs major repairs.
The VAZ 2107 was equipped with one of two types of gearbox: 4 and 5 speed.
Which model should you choose? See for yourself. If you constantly move in heavy traffic, that is, not at high speeds, then you don’t need a lot of gears. Therefore, in this case, a VAZ 2107 with a 4-speed gearbox is suitable.
If the situation is different: you will be moving along roads where there are no special obstacles for movement, then a five-speed will be just right for you.
- what malfunctions may occur;
- why they happen;
- how to eliminate them.
Reverse gear does not engage on VAZ 2114: reasons, repairs
The situation when reverse gear does not engage on a VAZ 2109 is one of the most common problems with this car model. In addition, the VAZ 2108/09/099 “Samara” and VAZ 2113/14/15 “Samara-2” cars were equipped with the same type of gearbox (gearbox), so this transmission malfunction is typical not only for “Nines”.
Often, an attempt to engage a gear is accompanied by a strong crunch of gears, and if the gear is able to be engaged, the gearbox makes noise when moving in reverse. Other owners are faced with a situation where the gear shift lever moves forward all the way, but reverse gear does not work. At the same time, there are no complaints about shifting forward gears.
For rear-wheel drive models (VAZ 2101 - 2107), the gears are engaged hydraulically. That is, when you press the clutch, the fluid pushes the piston, which in turn pushes the clutch fork, which retracts the disc. For front-wheel drive models (VAZ 2108 - 2115), there is no hydraulic connection; everything is done here by mechanics, or rather by the clutch cable, which is connected to the pedals. If your slave cylinder leaks on a rear-wheel drive car or the cable breaks on a front-wheel drive car, the car will not engage in gear. The “fork” simply won’t work. We just check and replace damaged parts.
Wear of release bearing, springs, forks, gears, synchronizers, shafts
As a rule, all these breakdowns are accompanied by extraneous noise during operation, which is difficult to ignore. Repairs will require dismantling the gearbox and the participation of specialists. Your task is not to delay your visit to the service station. This will save you money and possibly prevent irreversible damage.
We deliberately did not touch upon the problems with engaging reverse gear in an automatic transmission, for the simple reason that automatic transmissions are foolproof from birth - it is very difficult to break them yourself. But the most important thing is that the automatic transmission signals the driver about its problems with characteristic jolts when operating in normal mode. It is impossible not to notice them.
Text belongs to: https://vopros-avto.ru/
Repair and replacement
It is quite difficult for novice motorists to even simply determine why their gearbox is not working. What can we say about replacing the gearbox seal on a VAZ 2114, which requires a certain skill and knowledge in the field of car repair.
Unfortunately, if you ignore the initial signs of a gearbox malfunction, this may result in a full-fledged need to replace the entire unit. Many are even afraid to ask the current cost of a new gearbox for the “fourteenth” model. But we will say. Today such a unit will cost you at least 15 thousand rubles. Moreover, this price does not include installation services. Changing an entire gearbox yourself is not an easy task.
Let's be frank. Situations in which a car is rendered unsuitable for transmission repair are very rare. Most often, something like replacing the gear selector rod seal on a VAZ 2114, gears, levers and other components is required.
It is difficult to carry out diagnostics on your own in a garage environment. To correctly identify a breakdown, you will need at least a lift and a driver’s extensive experience in car repair. But it is best to carry out diagnostics at a car service center with the appropriate equipment. Whether you entrust them with the repairs or handle this stage yourself is up to you.
The cost of repairing a gearbox on a VAZ 2114 is influenced by several factors:
- Location;
- Skill level of the craftsmen;
- Clauses of the concluded contract for the replacement or repair of the gearbox;
- Level of car service (regular garage-type service station or full-fledged car service with a large staff and new equipment).
When and how often do you need to repair the gearbox on a VAZ 2107?
(“Volzhsky Automobile Plant”) provides comprehensive information on when and how often the gearbox needs to be repaired. It turns out that this mechanism does not have a service life as such. The only thing AvtoVAZ engineers insist on is the timely replacement of transmission oil:
- After the first 2 thousand kilometers on a new car.
- After 60 thousand kilometers.
- Further, as necessary, depending on the care of the owner and the frequency of use of the car.
Accordingly, the plant does not have any specific wishes or requirements for preventive or repair work. However, in any case, regardless of the mileage, it is necessary to carefully monitor all the nuances in the “behavior” of the box, since repairs will be necessary if the slightest malfunction occurs.
How to repair a VAZ 2109 gearbox?
Second gear is not detected.
When you start the car, noise comes from the gearbox and you hear crunching noises.
- the fifth gear or reverse gear has failed;
- The release bearing or the input shaft bearing is faulty.
Any transmission fails.
When driving at 9, there is a hum, when I press the clutch the hum does not stop. What's humming, bearings?
Hello everyone, help me, on 09, speed 2 stuck and won’t let go, what should I do? but we already sorted it out, now it’s set to 3 speed again, what should I do?
Possibly a bearing. Soon he’s still walking freely along the shaft. The shaft must be together with the internal part of the bearing. spin, and he rotates freely in it. It is also likely that this is the reason for the rumble.
I have a similar situation. I went through the box twice. I changed all the bearings, but the noise never went away. I'm already starting to get used to it.
The situation is exactly like this, it’s like my car in the video. Most likely you need to make a mistake in 5th gear, the only question is how to check. But one idea has appeared, you can remove the 5th gear cover, open two nuts, remove the 5th gear gears, close the cover, add oil, and then everything will be clear. I’m thinking about doing this one of these days. Report the results.
I checked the gearbox twice, but the second speed doesn’t turn on, I don’t know what to do. Please tell me!
Do not remove the 3.4 gear synchronizer hub. What to do? I read somewhere that you just have to film. And she sits there like a cast woman.
Sergey, check the release and clutch
The rear one flies out, I can’t figure out what’s wrong
The speed slips due to wear of the synchronizer (teeth on bronze gears).
I have this problem: there are 2 washers on the secondary shaft, one is a little thicker, the other is thinner, can someone tell me - which one comes first in order during assembly?
the thin one is placed under the bearing, the thick one is on top, there is a bushing and a needle on it
Why does the second speed turn on poorly? The rest work well and don’t make noise.
The situation is this: you squeeze the clutch, the noise disappears, the reverse speed does not work as well, when driving the noise does not disappear, what could be the reasons?
The third and fourth gears are poorly engaged
Tell me. Impact at start, as if there were huge gaps between the gears. The grenades are ok, I replaced the airbags, I also changed the satellite axle along with them and the six-pole axle, I replaced the clutch assembly. They say: sampling of backlashes and the box on metal. Can the problem be solved somehow?
This situation occurred when there was a blow to the gearbox body of the VAZ 2109. The 2nd and 4th gears stopped turning on and the idle speed stopped. What could happen? With the car turned off, all gears are switched on
Help! There is no neutral gear, what's the fun?
The problem is this: 2nd gear slips out when you let off the gas on the VAZ 21101, what could it be? Can I change the gear shift rod lock balls?
I can’t turn on the rear, the lever on the shaft turns, what can I do?
Mikhail, this is a disease, this is synchronicity!
I switched from first gear to second and can’t turn it off, what could be wrong?
Release bearing or input shaft bearing. Check the reverse gear
In the VAZ 2109, the second gear shifts into gear all the time with a crunch, you can only turn it on slowly, what should you do about it? And the clutch began to disappear.
There is a noise in the transmission as if the high-speed sprockets are hitting each other when driving in neutral and when pressing the clutch, what could be?
At first the rear one turned on poorly, but now only the third and fourth ones turn on. What should I do?
Guys, I ran into this problem. 2nd speed went out, changed the primary and secondary shafts along with gears. Everything worked well until the gearbox was removed and the release was replaced. I collected everything, drove about 300 kilometers, and the noise started. It looked like it was on the release side, he figured it out okay. Tell me what this could be? And yet, the right CV joint begins to rotate at increased speeds.
There is no reverse gear, tell me what to do and how much does it cost?
We've gone through the gearbox and the gears won't turn on!
Second gear does not engage
How to change gearbox oil
If you need to change your oil, then first of all, buy it. A four-speed gearbox will require three liters of transmission fluid. You will need to pour 3.3 liters into a five-speed gearbox. If you are changing the oil for the first time, then buy 80W-85 class fluid. It is perfect for use in the VAZ-2109 gearbox. Car owners prefer to purchase Lukoil brand products.
The work of changing the oil in the box is carried out as follows:
- Place the car on an overpass or over a pit, warm it up slightly so that the liquid is not viscous. Locate the oil drain plug on the bottom of the box.
- The unit has a rubber cap that needs to be cleaned along with the breather. After cleaning these parts from dirt, return them to their place.
- As soon as the preparatory work is completed, place the container, twist the plug with a wrench, and begin draining the transmission oil.
- The waste liquid will drain completely within half an hour.
- Screw on the plug, tighten it well, but do not strip the thread.
- Under the hood, find the transmission dipstick and remove it. In place of the probe, stretch a hose, at the other end of which a regular watering can or funnel is installed. Pour transmission oil into the box through the hose. On older units, the fill plug is located next to the drain plug.
After the work is completed, check the lubricant level with a dipstick and take a control measurement after 2-3 days. If necessary, add oil; if it becomes critically low, inspect the box for leaks.
Replacing and adjusting the gearbox driveshaft
So, if only reverse does not work, and all other modes do not fail, then you will need to replace the universal joint and adjust it. To do this, prepare a new spare part, a gear selector shaft seal, a set of keys, a hammer and several screwdrivers of different sizes.
Carry out the work according to the instructions:
- Place the machine on an overpass or over a pit. Find the gearbox from below and loosen the clamp bolts on its drive rod. Remove the actuator completely from the stem.
- Using a screwdriver, pull the boot towards the unit. Often during this step the boot is completely damaged, in which case it can be removed and then a new one installed. Unscrew the fixing screw on the universal joint.
- Carefully tap the driveshaft off the assist shaft with a hammer. Remove the boot if you have not damaged it previously. Install a new oil seal on the speed shaft.
- Install a new boot, place the cardan on the shaft so that the position of the fixing screw coincides with the recess on the shaft.
- Tighten the retaining screw and place the rod on the rod, but do not tighten the clamp.
- To make the adjustment, ask an assistant to move the gearshift lever to the neutral position and a short distance to the right. He should hold it in this position while you tighten the clamp.
If the reason for the failure of the reverse gear was hidden in the cardan of the carriage, then you will no longer have problems after this repair.
Wear of the rocker bushing
This malfunction may be indicated by some looseness of the lever. However, if the wear proceeded evenly - it ran its course - you could get used to the free movements of the scenes and not notice the impending troubles. The problem is solved by replacing the bushing - remove the lever cover, then remove the rocker itself, replace the plastic bushing with a new one and put everything in place. The procedure is carried out in the car interior.
A slightly worse option
Often, reverse gear is lost due to problems with the solenoids in the gear locking mechanism. This is how you should proceed for verification purposes.
- Find the correct one in the fuse box, marked F21. He is 8th from the left; if it is burnt out, replace it;
- Raise the cover on the gearshift knob. There is a connector that is connected to the switch, you need to carefully disconnect it;
- The connector contacts are closed directly. If the missing gear appears, we change the switch, if not, we dig further;
- The connector is removed from the solenoid and the voltage is measured. It should be 12 V, you can throw in a 5-watt light bulb to control it.
If everything is in order, things are worse than you thought - the cause has not been found. If there is no voltage, check the wires and look for an open.
Troubleshooting
Many transmission malfunctions that cause the reverse gear to disappear or fall out can be eliminated without removing the unit from the car.
If the cause is a loosening of the bolt securing the clamp on the rod, then to correct the defect it is necessary:
- Place the car on a lift.
- Completely loosen the clamp nut.
- Place the gearshift lever in the fully engaged reverse gear position.
- Fully engage reverse gear at the gearbox using the shift rod on the crankcase.
- Tighten the clamp mounting bolt.
Backstage adjustment
If tightening the clamp does not help get rid of the problem, then you need to check the condition of the shift drive parts. One of the reasons why the reverse gear does not engage may be a poorly adjusted rocker.
To make adjustments to the mechanism, you may need the following tools:
- two wrenches with a size of 13 mm, preferably a socket design;
- any wrench or 10 mm socket;
- small hammer;
- slotted screwdriver.
Since the cause of malfunction of the link can be wear of parts, spare parts may be needed:
- universal joint of the rocker;
- Sometimes the shift rod seal may need to be replaced.
Two people are required to adjust the rocker or replace parts of its drive. One person must change gears from the passenger compartment, and the second must adjust the travel of the shift rods.
The order of work is as follows:
- Provide access to the bottom of the car by placing it on a pit or a lift.
- Using a 13 mm wrench, loosen the clamp installed on the gear shift rod.
- Remove the rod from the box rod.
- Using a screwdriver, carefully remove the boot.
- Using a 10 mm wrench, unscrew the fixing bolt on the cardan shaft.
- Knock off the cardan shaft with light blows of a hammer. It is important not to damage the shaft.
- Remove the universal joint seal boot.
- If there is an oil leak, the sealing gland on the box rod must be replaced.
- Install a new boot (or leave the old one if it is intact) and install the universal joint on the shaft.
- Align the hole on the cardan with the notch on the shaft.
- Tighten the 10 mm clamp and install the boot completely in place.
- Install the rod on the cardan rod and adjust the gearshift lever travel.
- The second person should sit in the driver's seat, set the gear shift lever to neutral, move it slightly to the right and hold it in that position.
- After this, you need to tighten the 13 mm clamp nut.
Typically, after such a repair, the reverse gear starts to engage without problems. In addition, the operation of the entire gear selection mechanism on the VAZ-2109 becomes clearer.
The video from the author MegaMeyhem shows the process of replacing the backstage.
Changing the gearbox oil
If the oil seal on the rod is damaged, oil leaks out of the gearbox housing, and dirt can get into the box itself. These factors may be the reason why reverse gear stops engaging. In addition, the oil in the box loses its properties during operation, so it must be replaced preventively at least once every 35–40 thousand kilometers. Before replacing, you need to check the condition of the oil in the box. To do this, you need to remove the oil dipstick installed in the gearbox housing and visually assess the quality of the oil. The presence of metal and dirt particles in the oil on the dipstick is unacceptable. The oil itself should be quite liquid and not stick to your hands in a thick layer.
Dipstick with oil level marks
To replace, you will need the following materials and tools:
- New oil. When purchasing oil, you need to consider the type of gearbox. For fairly rare four-speed gearboxes, three liters of oil are required, for newer five-speed ones - 3.3 liters. The oil itself must have a tolerance of 80W-85, the manufacturer does not matter.
- A container for draining old oil with a volume of at least 4 liters.
- A funnel with a hose for pouring new oil or a syringe.
- Wrenches 12 and 17 mm of any type.
- Rags and cleaning solvent.
The actual work order is as follows:
- Place the car with the heated gearbox on the pit.
- Remove the rubber plug from the gearbox ventilation valve installed on the top of the crankcase.
- Clean the valve and plug from dust and dirt. It is convenient to clean parts with thin wire and a rag.
- Reinstall clean parts.
- Wipe off dirt from the bottom of the box. Unscrew the plug on the bottom of the box housing.
- Place a container under the drain hole and drain the oil. It will completely merge in at least 20-25 minutes.
- After this, screw the drain plug back into place and carefully tighten it with a wrench. First, the plug and hole must be thoroughly wiped with a rag.
- Pour fresh oil through the oil level dipstick hole in the box.
- During filling, it is necessary to check the oil level, which normally should be between o and “MAX” on the dipstick rod.
- If there is an overflow, the oil can be pumped out with a large medical syringe with a tube on the spout.
- Within a few days after the change, it is advisable to check the level and appearance of the oil. You also need to make sure that there are no leaks through the plug and box seals.
Rubber cap for crankcase ventilation
Drain hole on the crankcase
Dipstick at the top of the crankcase
A funnel for filling oil installed in the dipstick hole.
Early versions of front-wheel drive VAZ gearboxes do not have a hole for the dipstick. To fill the oil in the crankcase of such boxes there is a control hole closed with a threaded plug. Filling is carried out using an oil syringe. The oil level is considered normal when it reaches the lower edge of the inspection hole.
The arrow indicates the inspection hole on the side of the box housing
Filling oil with a transmission syringe
Replacing the gear selection mechanism
One of the common reasons why the reverse gear of a VAZ 2109 does not engage is the breakdown of spring 2 installed in a separate mechanism.
Gear selection mechanism
To access it, it is necessary to remove and repair the mechanism itself, located inside the box.
A short list of necessary actions:
- Disconnect the car.
- Remove the air filter completely.
- Remove the left wheel and loosen the CV joint hub nut.
- Drain the oil from the gearbox crankcase.
- Remove the two bolts securing the left ball joint to the steering knuckle.
- Unlock and remove the steering tip.
- Remove the fist from the CV joint splines.
- Completely remove the left drive.
- Remove the starter and negative wire from the gearbox housing.
- Remove the gear shift rods from the gearbox and clutch.
- Unscrew the speedometer drive cable.
- Place a support under the box housing and remove the box support fastening
- Remove the gearbox from the vehicle and disassemble it.
When disassembling the gearbox, it is necessary to check the condition of the gear locks, since wear is the main reason why the reverse gear spontaneously jumps out of gear. You can get to the lock without removing and disassembling the box; it is located on the side of the crankcase and is closed with a screw plug. Disassembling the gearbox and inspecting the gear selection mechanism will also help solve the problem in which the reverse gear on the VAZ-2109 does not turn off.
Spring replacement
Often, owners change the entire mechanism assembly, which costs on average about 2 thousand rubles. But you can disassemble the mechanism and get by with replacing the spring, which costs up to 50 rubles.
You need to do the following:
- Remove the stopper from the blocker axle and remove the axle itself.
- Unscrew the lever axle nut.
- Remove the axle and replace the spring.
- Reassemble in reverse order.
Replacing oil seals
Most often, gaskets and seals are subject to wear. And if the gasket can be changed even by an inexperienced driver, then the replacement of oil seals should be treated with the utmost care.
By its design, the oil seal is a rubber gasket that acts as a sealant. That is, if the oil seal breaks or wears out, the box ceases to be sealed, which, in turn, leads to oil leaks and breakdowns.
The oil seal in the VAZ 2107 gearbox is not made of rubber alloys, as most drivers think. In fact, the product is made of special composite materials, which are much more durable than rubber and less susceptible to tearing. In its working condition (that is, constantly), the oil seal is in the transmission oil, so its elasticity remains for a very long time.
In order to restore the tightness of the gearbox, you will need to change this gasket. To work you will need:
- new oil seal from the same manufacturer;
- spanners;
- hammer;
- screwdriver with a flat thin blade;
- sealant.
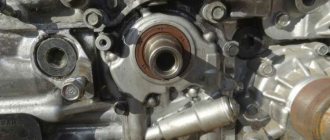
Input shaft oil seal
The VAZ 2107 gearbox input shaft oil seal has the following performance characteristics:
- weight - 0.020 kg;
- dimensions - 28x47x8 mm;
- location - on the input shaft in the clutch housing.
Accordingly, in order to replace the gearbox input shaft oil seal, you will need to remove the gearbox from the car and disassemble the casing:
- Remove the bell (casing) from the box; it is secured with four bolts.
- Remove the fork and release bearing from the box (the fork is secured with screws, the bearing will have to either be knocked out with a hammer or pressed out with a vice).
- Access to the input shaft and its oil seal is provided.
- Using the blade of a knife or screwdriver, pry up the old ring and remove it from the shaft.
- It is good to clean the seal area from dust and dirt.
- Install a new oil seal.
- Reassemble the gearbox in reverse order.
The bell can be easily removed, as it is attached with only 4 bolts. It is important to very carefully pick up the oil seal without scratching adjacent surfaces. Even if the old oil seal does not have cracks or deformations, when disassembling the gearbox, it still needs to be replaced with a new one.
The work of replacing the input shaft oil seal is not particularly hassle.
Secondary shaft oil seal
The secondary shaft oil seal differs slightly in its characteristics from the input shaft gasket:
- weight - 0.028 kg;
- dimensions - 55x55x10 mm;
- operating temperature range - from -45 to +130 degrees;
- location - on the secondary shaft at the flange junction.
The oil seal is replaced with the gearbox removed:
- The first step is to firmly fix the flange of the box; you can insert a bolt or a thick screwdriver into it.
- Turn the flange fastening nut with a wrench.
- Using a screwdriver, pry up the centering metal ring and pull it out from the secondary shaft.
- Remove the bolt from the hole.
- Place the puller against the end of the secondary shaft.
- Remove the flange along with the washer.
- Using screwdrivers or pliers, remove the old oil seal from the box.
- Clean the joint and install a new oil seal.
Thus, replacing the secondary shaft oil seal is somewhat more difficult than doing the same job on the input shaft. The difference is due to the location of the seals and their dimensions.
Photo gallery: main stages of work
For work, you need to choose the thickest and most powerful screwdriver or bolt so that they do not bend The flange can only be removed using a puller The landing site must be cleaned of dust and dirt
Features of replacing transmission fluid
Transmission oil must be changed at regular intervals, usually every 15-20 thousand kilometers. However, it may exhaust its resource earlier. This can be determined using a probe. Take a piece of white cloth and use a dipstick to transfer a drop of oil onto it. It is necessary to change the lubricant in cases where a drop of oil:
- colorless or has a black tint;
- contains metal particles or grains of dust;
- opaque and viscous;
- sticky to the touch;
- absorbs into fabric for a long time;
- cloudy or foamy.
Most often, reverse gear is difficult to engage if the oil has become cloudy. This is a sure sign that it has entered the engine. If the problem is not detected in a timely manner, you will soon need to carry out a complete gearbox repair or even an expensive transmission replacement.
Simple reasons for the lack of reverse gear
Before you climb deep inside the box, you need to go through the primitive, but more common options.
Elementary thing:
For some reason the oil seal was not in the right position, and oil leaked out of the gearbox through the rod. It is checked by the presence of an oil puddle in the appropriate place. Adding fluid and installing the oil seal in its normal position solves the problem in half an hour.
Repairing the rocker or replacing it is another reason for disabling the reverse gear. By the way, it may remain, but it will be the 5th abyss.
Needs adjustment. There are 2 ways.
- the car is running), the clamp on the rocker is loosened, and the lever is moved to where it should be according to the schedule. The clamp is tightened, the success of the adjustment is checked with the engine running;
- If the knob is not set to reverse speed, the adjustment is made in first gear. The lever is moved to position 1, the clamp is loosened again, the rocker drive rotates against the clock until the gear shift lever hits the reverse speed lock.
In both cases, the neutral is adjusted to the desired depth of seating of the link on the box driveshaft. All the described procedures will also help in the case when the clamp spontaneously loosens over time.
Box faults
The design of the “Seven” gearbox is designed for many years of service.
Usually the driver carries out the first and even the second major overhaul of the engine, and only after that does the need to repair the gearbox arise.
In addition, the “seven” itself has acquired a reputation as a “workhorse” throughout its long history. The machine really serves faithfully for many years, but this does not mean that each of its mechanisms will not wear out over time.
If we talk about malfunctions of the VAZ 2107 gearbox, then most often drivers complain about three defects: the inability to engage the desired gear while driving, the gear being knocked out and a strong crunch in the box.
The transmission does not start
It is very difficult to drive a vehicle if the driver cannot change gear. On the one hand, the shift lever moves to the desired position, but, on the other hand, switching as such does not occur. Or the lever cannot be set at all to the desired speed switching position.
In any case, the problem lies precisely in the box:
- Some of the moving (hinge) elements of the shafts are very worn out - it is recommended to carry out a major overhaul of the gearbox;
- wear of the blocking rings on the synchronizer - replace the rings with new ones;
- the synchronizer spring is stretched or broken - replace the spring;
- severe wear of the gear splines - only complete replacement of the gear will help.
Knocks out gear when driving
Another common problem with the gearbox is the transmission slipping out of gear immediately after turning it on. The lever simply throws back, and the engine begins to experience overloads, since at high speeds it does not receive the required distribution number.
The malfunction may be associated with different elements of the box:
- jamming of the hinge on the gear shift lever - it is necessary to remove the lever skirt, clean all connections and lubricate them;
- breakage of the lever - it is impractical to carry out repairs; it is easier to immediately replace the lever with a new one;
- the clutch does not work correctly - in this case, the entire blame cannot be placed on the box; it is quite possible that after adjusting the main elements of the clutch, the gear will not be knocked out;
- The forks in the box are bent - it is recommended to replace the entire set of forks.
Crunching and grinding in the box while driving
The driver may not experience problems with shifting gears, but while driving, hear a loud knocking, crunching and grinding sound in the gearbox cavity:
- the bearings on the shafts are broken - replacement is recommended;
- The gear splines are badly worn - the entire gear needs to be replaced;
- minimum oil level in the cavity of the box - you need to add lubricant and make sure that there is no leak;
- malfunction of the shafts (they began to move along another axis) - replacement of bearings on both shafts.
It should be emphasized that some types of work with the gearbox are available to the driver himself. It won't be difficult to knock the old bearing out of the shaft and press the new one in. If it comes to major repairs of the box, it is better to turn to professionals.
Inspection and subsequent repair of the synchronizer
Removing the synchronizer involves removing the gearbox itself. This is hard work and quite dirty, so be prepared with gloves and rags. Since you have to remove the unit, it is worth carrying out cleaning work. Here's how to remove the gearbox synchronizer:
- Remove the gearbox;
- Remove the clutch cable bracket (by unscrewing the bolts and removing the cover);
- Unscrew the fork mounting bolt;
- Move the synchronizer clutch down;
- Unscrew the nuts securing the primary and secondary shafts;
- Lift the gear from the transmission, the fork and remove the synchronizer.
Please note that the algorithm may differ slightly depending on which transmission model is installed in your vehicle. Here it is worth turning to the manuals and looking for information on thematic forums. This kind of work is easiest to do in pairs rather than alone. Once the gearbox has been removed and you have been able to remove the synchronizer, it is worth starting to inspect and service it. Here's what to do:
- Mark the position of the coupling with a marker or chalk relative to the hub, then carefully remove the coupling;
- Wash the removed parts in kerosene;
- Inspect the hub, coupling, splines. There should be no burrs or chips on the parts. Also pay attention to each of the crackers and springs;
- Replace defective parts with new ones. Individual synchronizer components are rarely on sale, but they can be found at disassemblers. Every part should be lubricated with engine oil;
- Assemble the synchronizer, taking into account the position of the mark. If everything matches, then the grooves on its coupling will immediately align with the grooves of the hub. It is better to insert crackers with balls using a screwdriver;
- Install the synchronizer and assemble the gearbox.
As you can see, the work is quite complicated - you need to remember the location of each element of the synchronizer, and to be sure, even mark it with chalk or a marker. Be extremely careful. Since restoring a worn synchronizer requires skill and special tools, we do not recommend trying to troubleshoot it yourself. As for the mechanism that is not too worn out, it only needs to replace individual components, clean and apply lubricant. Otherwise, it does not require specific maintenance. Many craftsmen classify this mechanism as conditionally unrepairable, advising immediate replacement if problems arise with the gearbox.
VAZ 2107 gearbox malfunctions
Let's start with the noise mentioned above.
It can be generated by:
a) bearings, worn gears or synchronizers - in this case, the situation can only be corrected by replacing faulty parts.
b) axial movement of the shafts - in this case, it is necessary to replace the parts that hold the bearings in place, or the bearings themselves (depending on what causes the displacement).
The box may also make noise due to the fact that there is little oil in it. It is clear that the oil will need to be added. But first, find the reason why the oil level has dropped and eliminate it.
Gears are difficult to engage.
- The spherical joint of the gear shift lever is stuck - you need to clean the entire surface of the joint that is in contact with other parts.
- The gearshift lever or forks are deformed - you can try to straighten them, but it is better to buy new ones.
- the fork rods or the sliding clutch move tightly - carefully inspect the unit, clean the parts and replace the faulty ones.
The transmission gets knocked out when driving.
- worn balls and rod sockets, locking rings, coupling or synchronizer ring gear;
- the clamp springs are no longer elastic;
- The synchronizer spring is broken.
In all cases, you can get rid of the problem by replacing the faulty parts.
Oil is leaking.
a) The oil seals of the primary and secondary shafts have served their purpose - they need to be replaced.
b) The crankcase cover fastenings are loose - tighten them.
c) The sealing gasket is damaged - replace it.
Signs of gearbox wear
The driver must pay attention to possible failure of vehicle components, including knowing the characteristic signs of wear on the gearbox linkage in order to take timely action to replace it. Despite the fact that the mechanism is quite reliable, you should be aware of the following “symptoms” of its imminent breakdown:
Increased play at the gearshift knob. This can be noticeable both when the handle is in neutral and in one of the gears;
- Difficulty shifting gears. For example, one or more gears are difficult to “stick”, or maybe a crunching noise occurs when the lever moves in their direction;
- It feels like changing gears has become more difficult, as if the lever has become much heavier;
- Gears are engaged incorrectly, for example, instead of fifth, third is engaged or vice versa.
Drivers often ignore the appearance of play in the gearbox, believing that this is a normal situation. In fact, if backlash occurs, it is imperative to diagnose the gearbox, and, if necessary, adjust or replace the linkage. The fact is that a slight play is already a fairly serious symptom of a faulty gearbox linkage. If it “breaks” while the car is moving, this can lead to serious consequences for both the car and the driver, since in such a situation there is a high risk of getting into an accident. That is why, if you notice problems with gear shifting, be sure to contact a service center for diagnosis and repair of the linkage, if necessary.
Replacing bearings
Most often, problems with the gearbox begin with the bearings breaking. Therefore, the bulk of all breakdowns lead to the driver needing to disassemble the gearbox and change the bearings.
Bearings cannot be repaired, since their design does not allow replacement of parts (rollers). Therefore, if the product fails, it is completely replaced.
Main shaft bearing
To change the input shaft bearing, you need to have the same tools as when disassembling the gearbox. The work is not difficult, but it can take a lot of time (depending on the physical fitness of the performer and his skill).
The operating procedure is as follows:
- Clamp the input shaft with a vice. It is better to line the jaws of the vice with a soft cloth so that they do not deform the surface of the shaft.
- Use a puller to clamp the bearing and begin to slowly pull it off the shaft.
- Periodically you need to tap the bearing with a hammer and rotate the shaft between hits, otherwise misalignment may occur in the rollers and it will be very difficult to remove the bearing.
- Gradual knocking out will cause the bearing to jump off the shaft.
- Press a new bearing onto the shaft using the same method.
- It is important to hit only the inner ring of the bearing with a hammer and do it carefully.
The input shaft bearing can be replaced on an unassembled box using the same method. Only in this case it will be impossible to use a vice.
Video: replacement instructions
Secondary shaft bearing
Replacing the secondary shaft bearing is carried out according to the same principle as the primary one. The only difference is that different types of bearings are used for different shafts.
According to GOST, closed (6–180502K1US9) and open (6–50706AU) type bearings are used to equip the input shaft of the VAZ 2107 gearbox. An open type bearing (2107–1701033) is used to equip the secondary shaft.
Tough: how to break manual transmission gears, and what it entails
The gearbox is one of the most important components of a car, but, paradoxically, it is often one of the most ignored. The engine oil is changed every 10 thousand, they take care of the cleanliness of the oil filter, monitor the operating temperature, oil pressure... In a manual transmission, the oil sometimes lasts for hundreds of thousands of kilometers, and the style of gear shifting and clutch operation adds problems to the box. The result can be quite predictable - so a manual gearbox from a Skoda Octavia came to our workbench, from which, according to the owner, “some kind of crunching noise was heard” when engaging first gear.
Gearbox: why and how
We will not analyze the structure of a manual transmission in detail: we have already talked about it. However, let’s go over the top to understand the processes that influence our repairs.
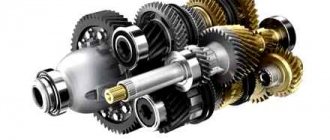
And so, globally, a gearbox is needed in order to transmit torque and power from the engine in a variable speed range. To change this range, pairs of gears with different gear ratios are used - it is thanks to them that those one and a half thousand revolutions will “turn” into several dozen revolutions of the drive wheels with a simultaneous increase in torque. The principle is similar to a bicycle: start off on a small sprocket, accelerate to 40 km/h - and switch to the next pair of gears with a smaller gear ratio to go faster. There can be 4 or 5 such shifts - modern manual transmissions are usually five or six speed.
The transmission of torque to the gearbox occurs directly by the meshing of these same gears. Gears are located on shafts - there are two-shaft and three-shaft gearboxes. The former have a primary (drive) and secondary (driven) shaft, while the latter transmit torque from the primary shaft to the secondary through an additional, intermediate one. The gears located on the shafts are in constant mesh, but all pairs, except the one selected as working at a particular moment, rotate freely. To select a pair - that is, to engage one or another gear by rigidly connecting the gear and the driven shaft - they came up with a special coupling and called it a synchronizer - we will talk more about the design and problems of synchronizers in the next material. Operating the gear shift lever from the passenger compartment, you connect one or another gear to the driven shaft through the shift forks and synchronizers and finally transmit torque from the engine to it (and therefore to the wheels).
Breakdowns and diagnostics
In general, anything in a gearbox can fail and wear out - and fixing it, as we know, can be very expensive and difficult. At the same time, the manual transmission is much more “secretive” than the engine: sometimes you can find out about a serious breakdown only after opening it. Therefore, when driving and changing gears, you must always listen to all sounds coming from the gearbox - and visit a service center when the first concerns arise.
Having excluded the clutch from the diagnostic list (we will also talk about it separately), you can only hear crunching or knocking noises from the box, and see only the lever randomly returning from the working position to neutral (in other words, “the gear flies out”). The latter is usually due to loose clamps or problems with the synchronizer. In the first case, this is wear of the synchronizers, excessive wear of the shaft bearings or breakage of the gear teeth. And it’s gears that we’ll talk about today.
They have several potential problems: excessive tooth wear, chipped or broken teeth, worn gear needle bearings, or worn circlips that can cause the gear bushings to become misaligned. In general, chipping or damage to teeth is a fairly rare occurrence, since they are designed with a large margin of safety. But it also happens that the box is simply overloaded, the clutch does not slip - and the teeth cannot withstand it.
This can also happen if the box overheats - for example, due to incorrectly selected transmission oil or due to its low level. Particular attention should be paid to the manual transmission in winter, in severe frosts. The oil in the transmission crankcase turns into something resembling honey, so you shouldn’t start driving right away - it’s advisable to stand a little and wait until the oil warms up at least a little. You can feel and understand this by the easier movement of the lever from position to position.
Returning to the diagnosis of the manual transmission, let’s remember the sounds coming from it. The knocking or crunching noise can be either constant or only appear when changing gears. In the first case, this most likely means a global disaster - the gears are destroyed or the shaft bearings have come to an end. Although this is rare, it does happen. If the knock is heard only when switching, then there is a possibility that this is either wear of the synchronizers or the notorious shaft bearings.
You can try to find out this while driving by shifting the box to the next gear with double clutch release: having squeezed the clutch, move the lever to neutral, release the clutch, squeeze it again and, engaging the next gear, release it. If during this “dance” the knocking noise disappears, then there is a high probability of excessive wear of the synchronizer.
We repair the gearbox
So, today on the “operating table” is a manual gearbox 02J produced by the Volkswagen concern, which was installed on the Skoda Octavia. According to the owner, the only problem was some kind of knocking noise when driving in first gear. The knocking was annoying, so the box was brought in for “treatment.”
The box was delivered separately from the car; our master did not drain the oil, and therefore did not see its condition. Having prepared the tools and, to the best of our ability and capabilities, cleaned the manual transmission housing from dirt, dust and other foreign objects, we began disassembling.
After unscrewing the mounting bolts, we removed the rear cover of the gearbox housing, under which the 5th gear gears are located. At the same time, the master gave the first assessment of the condition of the oil. This assessment was expressed in a wrinkled grimace, which gave the owner the first reason to get excited.
What are the features of the UAZ transfer case?
This is the unit
Almost all UAZ cars have a transfer case in their design. The UAZ transfer case is designed to distribute torque to all drive mechanisms of the vehicle. As a rule, the unit is installed on off-road vehicles, that is, on SUVs. It simplifies vehicle movement in off-road conditions.
Basically, the UAZ transfer case is installed on those vehicles that have two drive axles. It distributes torque to these axles according to a specific principle, allowing the front axle to be turned on and off when necessary.
The transfer case is located next to the gearbox and is additional; sometimes a device is attached to it that increases torque. The transfer case is two-stage, its presence makes it possible to double the total number of gears and thereby operate the car in the most difficult road conditions. The unit is installed on UAZ Hunter, UAZ Patriot, UAZ “Bukhanka” and other models of this car plant.
Dispenser device
Transfer case and gearbox levers
The transfer case on an UAZ consists of the following main elements: drive shaft, differential, differential locking device, rear axle drive, gear transmission, reduction gear and front axle drive. The device is shown in Fig. 1. For the convenience of switching the transfer case, there are special levers inside the car that allow you to turn on or off the rear or front axles, or turn on both axles at the same time.