Windows 10, like any operating system, may not work correctly. When the number of errors exceeds all acceptable standards, and the computer begins to slow down, there is a logical desire to reset Windows 10 to factory settings. Fortunately, you don’t have to reinstall the system to do this – you can simply use a special recovery tool.
! Attention. Some site users wrote in the comments that when performing the reset procedure they encountered errors and the system stopped loading.
I tested the factory reset tool several times on test systems and came to the conclusion that this problem occurs on certain builds of Windows 10. For example, I got similar errors when testing build 10240, and on build 10586 everything worked without problems. The assembly version can be checked by running the winver through the Run window (Windows key combination + R).
Based on the above, I strongly recommend that before carrying out the factory reset procedure, you make a backup copy of Windows by creating a system image, a restore point, etc.
Reset Windows 7 to factory settings
You can reset your personal computer (PC) to factory settings in Windows 7 using a special option in the settings. In this case, the user will lose all data located on the C drive.
Step by step guide:
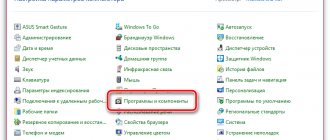
- Open “Start” and go to “Control Panel”.
- Having set the display mode of elements to “Category”, click on the item “Archiving computer data”.
- Click on the “Restore system settings or computer” hyperlink.
- Click on the line “Advanced recovery methods”.
- Select the "Reinstall Windows" option.
Next, the system will ask you to insert the distribution installer disc to continue the operation. The rollback process will start, after which all settings will return to their original state.
Important! When using a laptop, at the last stage of the instructions you will need to select the option “Return the computer to the state specified by the manufacturer” to return the system parameters to their original ones.
If you reset the computer and restore it to its original state, all programs on the computer will be deleted. But a special directory will be created with lost data that can be recovered.
Battery
In addition, you can reset the settings physically. First of all, and this is much easier, you should remove the battery that powers the memory for storing settings. This same battery allows the computer to show the correct time. You can read more about this in the material “How a computer determines the correct time.”
It is located on the motherboard of both a desktop computer and a laptop. In the latter case, you will have to disassemble the laptop, which may void your warranty. The same applies to branded desktops; if the warranty seal is on the case, then it cannot be opened.
Before removing the battery, you need to turn off the power to the system unit and remove the laptop battery. You need to remove the battery and wait a few minutes before replacing it. Please note that the battery may not be removable.
Using breakpoints
You can roll back Windows 7 Ultimate without a boot disk - using checkpoints that must be created during the operation of the computer. Otherwise, you will not be able to use this method.
Step by step guide:
- Enter the “Start” menu, go to the “All Programs” directory.
- Open the “Standard” folder, then go to the “Service” directory.
- Click on the “System Restore” utility.
- A program window will open, in which you need to click Next on the title screen.
- In the list of checkpoints, select the one you need, based on the date of creation and a brief description. Click Next.
- Start the recovery process by clicking Finish.
The computer may restart several times during the operation. Once completed, all settings will be rolled back. The system is ready for use when the desktop appears on the screen.
Method 2: Restore Point
The second method involves using a system restore point. In this case, only system settings will be changed, and downloaded files and programs will remain intact. But the main problem is that if you want to reset the settings exactly to factory settings, then in order to do this, you need to create a restore point as soon as you purchased the laptop or installed the OS on the PC. But not all users do this.
- So, if you have a restore point created before you started using your computer, then go to the Start menu. Select "All Programs".
- Next, go to the “Standard” directory.
- Go to the "Service" folder.
- In the directory that appears, look for the “System Restore” position and click on it.
- The selected system utility is launched. The OS recovery window opens. Here just click “Next”.
- Then a list of restore points opens. Be sure to check the box next to “Show other restore points.” If there is more than one option, and you do not know which one to choose, although you are firmly convinced that you created the point with factory settings, then in this case, select the earliest date point. Its value is displayed in the “Date and Time” column. Having selected the appropriate item, click “Next”.
- In the next window, all you have to do is confirm that you want to roll back the OS to the selected recovery point. If you are confident in your actions, then click “Done”.
- After this, the system reboots. It will probably happen several times. After completing the procedure, you will receive a functioning OS on your computer with factory settings.
As you can see, there are two options to reset the operating system to factory settings: by reinstalling the OS and returning the settings to a previously created restore point. In the first case, all installed programs will be removed, and in the second, only system parameters will be changed. Which method to use depends on a number of reasons. For example, if you did not create a restore point immediately after installing the OS, then you only have the option that was described in the first method of this guide. In addition, if you want to clean your computer from viruses, then only this method will do. If the user does not want to reinstall all the programs that are on the PC, then you need to use the second method.
We are glad that we were able to help you solve the problem. In addition to this article, there are 12,619 more instructions on the site. Add the Lumpics.ru website to your bookmarks (CTRL+D) and we will definitely be useful to you. Thank the author and share the article on social networks.
Describe what didn't work for you. Our specialists will try to answer as quickly as possible.
Recovery using a bootable USB flash drive
If the PC does not start and the previous methods cannot be used, you need to make a bootable drive and drop the OS installer files there. The rollback process begins from the moment the computer starts from the flash drive through the BIOS.
Important! When creating an installation disk, the flash drive must be cleaned, so it is recommended that you first transfer important files to another medium.
Step by step guide:
- Select the interface language, time format and layout used, click Next. The entered data does not affect further actions in any way.
- Follow the “System Restore” hyperlink.
- When the menu appears, select “System Restore”.
A Wizard window will appear in which you must select a checkpoint to perform a rollback. Further actions are similar to those described earlier in the article.
Note! In the menu of the installation flash drive, you can select the “Restore system image” option, but to perform a return to the original state, you must have a disk with a previously created backup.
Why do you need a factory reset?
A settings reset is required if you did something wrong and the computer does not start or is unstable. This often happens when components are overclocked incorrectly. For example, you can try resetting the BIOS if your computer won't boot after changing any settings. And even when the system starts normally, errors and blue screens may occur under load.
Moreover, by resetting the BIOS, you can remove the previously set password if you have forgotten it. This refers to the password set specifically in the BIOS, and not in Windows.
Quick steps
How to reset Windows 10 and keep personal files:
- The first thing you need to do is open the Settings app. A quick way to do this is to press Windows+I on your keyboard.
- In the Settings app, open the Update & Security category.
- On the left side of the window, click or tap the Recovery section.
- On the right side of the Settings window, Windows 10 displays a section called “Reset this PC.” Click or tap the Get Started button.
- Since you want to keep your personal files, select "Keep my files (removes apps and settings but keeps your personal files)."
- Windows 10 will then ask you, “How would you like to reinstall Windows?” Select the option you want by clicking or tapping on it.
- Once you have chosen how to reinstall Windows 10, you will be taken to the Advanced Settings step. If you agree with your previous selection, click Next.
- If you are sure you want to reset Windows 10, click the Reset button. Please note that this is the last moment when you can change your mind and cancel the reset! Windows 10 takes another minute or two to get ready. When it's done, it will automatically restart your computer.
Reset BIOS settings to factory defaults, reset BIOS password
Those who like to delve into the BIOS Setup settings sometimes find themselves in a situation where, after changing the BIOS settings, something does not work as it should (or does not work at all). If you are sure that computer problems are caused by changes in the BIOS, the easiest way to solve the problem is to reset the BIOS settings .
After performing this operation, the configuration of the Basic I/O System will return to factory settings , which will allow you to eliminate any problems that may arise.
to reset the BIOS configuration in the following cases:
- If the computer is not stable;
- If the computer does not load the operating system;
- If you have changed the configuration of BIOS Setup settings, but are not sure if you have performed your actions correctly.
Resetting the BIOS settings involves resetting the contents of the CMOS memory to zero (destroying the CMOS checksum) to standard values (factory settings).
There are several ways to reset the BIOS to factory settings. Let's look at them in detail.
Method No. 1: Reset BIOS Setup using the CLRTC jumper on the motherboard.
The jumper is located on the system board next to the battery that powers the CMOS memory. By default it is in position 1-2. To reset BIOS Setup, you need to move the jumper to position 2-3 for about 15 seconds. The operation must be performed with the computer completely turned off (you must even unplug the electrical outlet).
Figure 1. CLRTC jumper
Note 1. The jumper for resetting BIOS settings may also have other names: Clear CMOS, CCMOS, Clear RTC, CRTC...
Note 2. If there are only two contacts for resetting the BIOS settings (near the Clear CMOS inscription on the motherboard), then to reset the configuration you need to close these contacts with any conductive element when the computer is turned off.
Note 3: Detailed information on how to use the jumper to reset BIOS Setup settings can be found in the documentation for the motherboard.
I note that premium motherboards often have a special button (CLR CMOS) to perform this operation.
Figure 2. CLR CMOS button
Method No. 2. Remove the battery.
Turn off the computer. We remove the cover of the system unit and look for a battery on the motherboard that powers the CMOS memory. Carefully remove the battery from the socket and after some time (10-15 minutes) install it back. Factory settings should be installed.
Figure 3. CMOS battery.
Method number 3. Using BIOS Setup options.
If you have the opportunity to go into BIOS Setup, then you can set the factory settings using the Load Defaults BIOS (the name may be different: Load BIOS Setup Defaults, Load Safe-Fail Defaults...) .
Method No. 4. Reset BIOS Setup settings using the Debug utility.
This utility is part of the Windows family of operating systems. To run it, go to the Start menu, click Run and enter the command debug . In the window that opens, enter the following commands AWARD and AMI BIOS
- O 70 17
- O 73 17
- Q
For Phoenix BIOS :
- O 70 FF
- O 71 FF
- Q
Method No. 4. Jumper contacts with any metal conductor
At the request of readers, we provide the location of the contacts that need to be closed to reset the BIOS of a Toshiba laptop:
Comments
Hello. After replacing the cooler, the computer stopped turning on (BIOS does not start) and the peripherals do not turn on (the diodes do not light up). I tried to remove the RAM sticks and swapped them, took out the battery, disconnected all drives, the DVD drive, tried to turn on the PC with a different processor. None of the above helped. The processor is heating up (working). Externally, I didn’t notice any cracks or anything else wrong on the motherboard. The monitor works: it displays “cable not connected” when the cable is disconnected from the video card. I wiped the contacts with a rubber band.
And here's another thing. When you remove all (two) RAM sticks, the motherboard does not beep and everything starts as well (peripherals and the monitor also do not work)
Good afternoon. Your hard drive has fallen off, or the media sequence is out of order. 1) Check the status - is your hard drive in Bios? — nastrojkabios.ru/ostalnie-optsii/system-information-informatsiya-o-sisteme-s-foto.html
2) If it is, then set this disk first when loading nastrojkabios.ru/parametri-zagruzki/1st-hard-disk-drive.html nastrojkabios.ru/parametri-zagruzki/first-boot-device.html If the system is both does not work, try resetting the BIOS to default settings - “Method No. 3. Using BIOS Setup options. If you have the opportunity to go into BIOS Setup, then you can set the factory settings using the Load Defaults BIOS item (the name may be different: Load BIOS Setup Defaults, Load Safe-Fail Defaults...)"[/
Thank you very much. Everything worked out, good luck.
Good afternoon. Your hard drive has fallen off, or the media sequence is out of order. 1) Check the status - is your hard drive in Bios? — nastrojkabios.ru/ostalnie-optsii/system-information-informatsiya-o-sisteme-s-foto.html
2) If it is, then set this disk first when loading nastrojkabios.ru/parametri-zagruzki/1st-hard-disk-drive.html nastrojkabios.ru/parametri-zagruzki/first-boot-device.html If the system is both does not work, try resetting the BIOS to default settings - “Method No. 3. Using BIOS Setup options. If you have the opportunity to go into BIOS Setup, then you can set the factory settings using the Load Defaults BIOS item (the name may be different: Load BIOS Setup Defaults, Load Safe-Fail Defaults...)"
Good afternoon. You are confusing updating the BIOS (motherboard firmware - see the item in the left menu - “How to update the BIOS of the motherboard”) and resetting the parameters to factory settings. When updating, you eliminate identified errors in the operation of the firmware, and when resetting, you simply bring the settings to the default values (if, for example, you have several hard drives, then it may happen that after the reset, the first one to boot will not be the one that you previously made bootable and Windows will simply will stop loading, etc. i.e. the parameter values simply change).
Theoretically, new BIOS may contain fixes for some hardware problems, but to make sure of this you need to read the descriptions of changes in different releases.
Generally, compatibility and support for different hardware is increasing, not decreasing. But in any case, you need to familiarize yourself with the differences between the old current firmware and (usually) the current one - the latest.
Why do you need to restart your Windows 10 PC?
You've done all the possible troubleshooting steps, but there are still problems with your Windows 10 PC. Is it good to restart your computer in Windows 10? If you have no other ideas on how to get it to behave and fix the issues that are bothering you, then yes, resetting Windows 10 could be the answer.
Does rebooting my PC speed up? Another reason is the performance of your Windows 10 device. If Windows 10 is moving slower than when you started using it, there may be too many apps or services running in the background, some faulty drivers, etc. Sometimes the only way to get things in order is this is to reset the settings.
So, what happens if you choose Reset this PC in Windows 10? Before you continue, there are a few questions you should know the answers to:
- Does Windows 10 Reset this PC remove drivers? Yes : Resetting your Windows 10 PC means all system files and drivers will be removed and then restored to their original values.
- Does resetting your computer erase all drives? The answer is no , not by default. However, during the reset process you can also delete everything from all your drives if you wish.
- Will I lose my apps when I reset Windows 10? Unfortunately, all of your desktop apps will be removed from your PC, so you'll have to reinstall and reconfigure each one after the reset process is complete.
- Does resetting this computer delete my personal files? You can save your personal files, you won't lose them in the process. What are personal files in Windows 10? These are files stored in your user folders: Desktop, Downloads, Documents, Pictures, Music and Videos. Files stored on disk partitions other than the “C:” drive also remain intact. However, documents stored in applications are lost.
- Will restarting my PC remove viruses? It depends. This usually happens if the viruses on your computer are not very dangerous. But if we're talking about specific types of malware like rootkits, resetting won't help unless you also decide to lose your personal files and wipe all drives. Otherwise, viruses may also be on your other drives, partitions, or even your OneDrive cloud space, and as soon as Windows 10 is rebooted, they will infect it again, probably almost instantly. Regarding bloatware, we recommend doing a clean install of Windows 10 rather than just doing a reset.
If you agree with all of the above, there are two ways to initiate a Windows 10 reset. The first method is using the Settings app. The second method starts the reset process from the login screen. This second method may be useful if you are having trouble logging into Windows.
If your Windows 10 installation is severely damaged and you can't even get to the login screen, you may want to consider a few other options:
- Boot into Safe Mode. Read how to start Windows 10 in safe mode.
- Troubleshoot Windows 10 using recovery media.
How to fix reset error via command line
This problem can be solved as follows:
- Launch the system recovery window by going to the advanced boot options menu before starting Windows.
- Click on the “Command Line Parameter” section with the left mouse button.
- If necessary, enter the password for your Microsoft account and click on the “Continue” button located at the bottom of the window.
- The classic application of the system will open, where under the blinking cursor you will need to enter the commands “cd %windir%system32config”, “ren system system.001”, “ren software software.001” one by one, pressing “Enter” after entering each one.
- After performing the manipulations described above, the user will again find himself in the additional options menu. Here you can try resetting the settings again.
Note! If the above steps did not help solve the Windows 7 Home Basic operating system rollback error, then you should reinstall it using a bootable USB flash drive or CD.
Before reinstalling the operating system, it is recommended to save all important information to an external USB drive to avoid losing it if the information on the system drive is important to the user.
Read also: Which bearing is better for a cooler?
Command line in Windows 7
Thus, there are several common methods that allow you to erase the current Windows seven settings and roll them back to the factory default level. Each method has individual characteristics and execution algorithm. The information presented in this article will allow everyone to figure out how to reset settings on a Windows 7 computer.
Reset jumper
Another method is associated with a special jumper located on the motherboard. Before performing the operation, be sure to turn off the power supply using the switch on its body. In addition, the battery should also be removed.
Typically, the jumper is located next to the battery. There is no standard name for it. The designations can be: CLRTC, Clear CMOS, Reset CMOS, as well as various combinations and abbreviations of these words. Physically, a jumper looks like two or three pins. In the first case, you just need to close them, for example, with a screwdriver. However, it is better to do this with a so-called jumper. It can be taken from another location on the motherboard and put back after use. In the second case, the jumper is already present and connects two of the three contacts. It needs to be moved to the second position.
Keep the contacts closed for 10-15 seconds and then return everything back. If this option does not work, then try holding the power button on the case with the contacts closed and holding it for the same 10-15 seconds. After this, you may need to leave the board in this state for 15 minutes.
There may also be a separate reset button on the motherboard. If it is present, then there is no need to bother with jumpers. It will be enough to hold it for 5-10 seconds with the power off.
Source
How to remove the application list during the reset process
When you start the reset process from the Settings app, Windows 10 allows you to see a list of apps that will be removed before starting the reset. If you don't save the list beforehand or start the reset from the login screen, you will still be able to find the list after the process is complete. It is saved on your desktop as an HTML file called "Deleted Applications".
Opening the HTML file gives you a list of applications that were removed when you restarted your computer. Now you can decide which ones you need and reinstall them one by one.
Applications removed when computer restarts
That's all!
