If you find problems with charging the battery from the generator, you need to check the regulator relay. This device is directly responsible for the normal operation and efficiency of battery charging. Moreover, the overall service life of the battery will depend on the health of the regulator relay.
We also recommend reading the article on how to properly store a car battery. From this article you will learn how to prepare a battery for long-term storage.
The job of the regulator relay is to accurately maintain the voltage produced by the vehicle's alternator. In other words, the relay regulator functions as a voltage stabilizer. The device keeps the voltage within strictly specified limits, limiting the possible decrease or increase in the value. This regulation occurs constantly and does not depend in any way on the speed of the crankshaft and generator, as well as on the degree of load created by various consumers in the on-board network. It turns out that the relay regulator controls the “plus” of the battery, supplying or stopping the supply of electricity depending on the voltage reading at the battery terminal.
Which generator should you choose?
Before we get to the story about which VAZ 2114 generator is better, it’s worth saying - why shouldn’t you buy a battery native to the 14th model?
The fact is that it is designed for a fairly low current - only 80 A. Considering that while the car is running, the generator has to not only charge the battery, but also power electronic devices, this current is simply not enough to fully charge the battery ( Here we should also add, albeit small, current losses in the circuit). That is why it is advisable to install a more powerful generator.
So, what devices can be installed on the VAZ 2114?
Firstly, without any modifications you can install 37.3701 from the 15th model. It is completely interchangeable with the original 14th generator, but the problem is that its amperage is even less - only 55 A. Therefore, it should be installed only as a last resort.
New generator VAZ 2114
The second acceptable option is a generator from Priora or Kalina - it creates a current of 115 A, which is enough to charge the battery and operate all on-board electronics. True, you will have to replace the device pulley with a more suitable one.
The third option is a generator from PRAMO, which has an amperage of 120 A. This is the most optimal option of all for 2114.
Generator from PRAMO
And finally, generators from Eldix with a current of 80 or 115 A - they are completely identical to the 14th model generator in terms of external dimensions and pulley parameters. The only thing worth remembering is that they are practically not repairable. Even if there is a minor breakdown, the entire device will have to be replaced.
What was the result?
Of course, it is impossible to say unequivocally that the factory generator is very bad. It fails only in the case of active use, for example, music, headlights and air conditioning. The 3-level pH is suitable for precisely such motorists. After installing this device, you can select 3 modes:
- 13.4 V – like a standard generator;
- 14.3 V – medium mode;
- 14.8 V – suitable for use in the cold season.
It is also worth noting that although the three-level regulator is much better, it is not an ideal replacement for the factory one. The fact is that both the first and second LVs have one significant drawback - they cannot regulate the voltage depending on the ambient temperature.
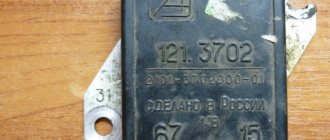
Do not forget that a new voltage regulator must be looked for solely by the markings of the old one. For example, for marking 4302.3771, TRN with mark 67.3702-02 is suitable.
Checking with a tester
The easiest way to check the generator voltage regulator with a multimeter on the Priora is to measure the voltage on the battery.
To do this, you need to perform the following sequence of actions:
- set the multimeter to measure DC voltage with a limit of at least 20 V;
- start the engine;
- at idle speed (1000-1500 rpm) the tester should show 13.2-14 V;
- when the number of revolutions increases to 2000-2500, the voltage should increase to 14.2 V;
- at maximum speed the tester should show no more than 14.5 V.
If the voltage differs greatly from the specified one, drops below 13.5 V or rises above 14.5 V, we can conclude that the unit is faulty.
We assemble a simple circuit: connect the light bulb to the brushes, the negative terminal of the power source to the ground terminal, the positive terminal to terminal “B” of the regulator. When 12.7 V is supplied, the light should light. When raised to 14-14.5 V, the control should go out. If the light goes out earlier or does not go out at all, the control device is faulty.
Disadvantages of electrical equipment of the VAZ 2110
Where, exactly, do all the complaints about the battery come from? A good well-maintained battery will last five to seven long winters and no questions will arise about it if you charge it correctly, discharge it correctly and at least slightly monitor its condition. In the case when the battery is charged directly on board the car, which most often happens, the charging current strongly depends on the number of consumers on board.
The more of them, the stingier the generator becomes and pays less and less attention to the battery. He also needs to feed the voracious fog lights, a powerful audio system, additional comfort equipment, refrigerators, glass, mirror and seat heaters, and you never know what else the tuners come up with. And the generator is designed taking into account the rated charging current, without taking into account the additional load. As a result, the battery sits on starvation rations, is constantly undercharged, especially in winter, the plates crumble and after two years of grueling work asks to be thrown into a landfill. We blame the battery, of course. Only in vain.
Replacing the voltage regulator on a Priora
How to repair a voltage regulator? On modern cars - no way. It is simply irreparable and a failed part is simply replaced with a new one. Theoretically, even an electronic non-contact voltage regulator can be repaired - but few people do this - there is no point.
So, how is the voltage regulator replaced on a Priora? First, you should turn off the ignition and disconnect the negative terminal from the battery for reasons of electrical equipment and your safety.
Be careful not to mix up the wires going to the voltage regulator of the Priora generator - otherwise you can ruin both the relay-regulator and the generator itself.
On a Lada Priora car, the voltage regulator is installed separately from the generator. To remove the relay-regulator, you need to unscrew the nuts that secure the device to the body. Before this, you need to mark with electrical tape, tape or a marker the relative positions of the wires leading to the contacts of the regulator, and the contacts themselves.
Now you can install a new voltage regulator on the Priora to replace the old one. It is imperative to check the contacts where the relay-regulator is connected to the generator, as well as the tension of the generator belt. That's it, connect the battery, tighten the terminals and check the operation. And, of course, we make sure that on the Lada Priora the on-board voltage does not jump, but is even.
If the relay-regulator is installed in the same housing with the generator, then the algorithm is slightly different. After removing the negative terminal from the battery, disconnect the wires going to the generator (there is no need to remove it itself).
We open the plugs or unscrew the fastenings of the relay-regulator, depending on the design of the unit. We remove the plastic casing of the generator and find the relay regulator. We unscrew the fastening nuts and disconnect the screw fastening to the tire. Let's extract it. All that remains is to install a new relay-regulator - we perform this procedure in the reverse order of removal.
To check the operation of a new device, in this case, you need to fully charge the battery, connect it as expected, and start the engine at about 2500-3000 rpm. Using a universal tester or a special voltmeter, you need to measure the voltage at the battery terminals.
If you replaced the relay regulator correctly, the number on the display will be equal to that indicated in the vehicle’s operating instructions. If not, the relay regulator should be replaced again. It is forbidden to check the serviceability of the relay-regulator by short-circuiting its terminals - this can lead to the “death” of the rectifier unit.
No recharging of Lada Priora battery (VAZ 2170, 2171, 2172)
Checking electrical equipment
| 1. Check if the alternator drive belt is broken. If a break occurs, replace the belt and adjust its tension (see “Replacing the alternator belt”). |
| 2. If the belt is intact, check and, if necessary, adjust its tension (see “Generator belt tension”). |
| 3. If the belt tension is normal, check to see if fuse F1 in the fuse and relay mounting block has blown. The location of the fuses and their ratings are indicated in this manual (see “Electrical faults”), in the vehicle repair manual, in the electrical diagram, on the housing of the mounting block and on the fuses themselves. If the fuse is blown, replace it, start the engine and check to see if the low battery light goes out. If the light goes out, you can continue driving. |
5....to the starter...
| 4. If the battery discharge lamp does not go out, check the wires connected to the positive terminal of the battery... |
| 6. ...and to the generator. Wires may be broken, broken inside the insulation, or have oxidized or unreliable contacts. Correct the problem and start the engine. If charging current appears, you can continue driving. |
| If, after taking the measures, the charging lamp continues to light up while the engine is running, then the possible cause of the malfunction lies in the generator itself. There may be several reasons, and it is better to eliminate them in a car service center or garage, and you just have to hope that the energy reserve in the battery is enough to get to them. |
| Recommendation |
| In order to reduce current consumption when driving a car with a faulty generator, if possible, turn off the radio, unnecessary lights, heater fan, window defroster, etc. |
| You will need: flat-blade and Phillips-blade screwdrivers, a 12" wrench (two), a DC voltmeter, a megohmmeter. |
| 1. Remove the rubber boot and connect the “+” wire to the “B+” terminal of the generator, and the “–” wire to the generator housing. |
| 2. Start the engine and turn on the car's headlights. |
| 3. After 15 minutes of engine operation at medium speed, measure the voltage; it should be in the range of 14.4–15.1 V. If undercharging or overcharging is observed (the voltage does not fall within the specified limits), replace the voltage regulator. |
Description Identification numbers Keys Dashboard Instruments Trip computer Heating and ventilation Ventilation control Lock control Control of power windows Using seat belts Airbags Child seat Adjusting seats Adjusting the steering column Using mirrors How to shift gears What to carry Starting the engine Malfunctions when starting the engine Checking the ignition Checking the fuel supply Injection faults Lost idle If the engine runs unevenly Inspect the spark plugs Jerks while driving Does not accelerate Stalls while driving Loss of oil pressure Engine overheats No battery recharging Engine knocks Suspension knocks Gearbox knocks Causes of knocks and noises Steering wheel vibration Brake problems Replacing a wheel
priora-vaz.ru
Regulator replacement
If the diagnostics confirm that the relay is “replaceable,” you can install a working one yourself. For this you will need:
- New launch vehicle with brush assembly. Good samples are made in Russia, their price is low and they are highly reliable;
- Set of tools: keys for 13 and 8, a head with a knob for 10, a slotted screwdriver.
“Priors” 2012-2013 and younger are often equipped with a new type of multifunctional voltage regulator, for example, 844.3702, with a smooth response function to the connected load. On older machines there are components of the old one, but in their case it is also possible to install the updated one. The specific type depends on the model of the generator on board, its power (115A, 90A, etc.), the version of the car (sedan, hatchback) and year of manufacture.
Progress
There are two replacement methods:
- with removal of the generator;
- without removal.
The first method simplifies the process, but on Priors with air conditioning, access to the required areas can be difficult. Actions after dismantling the device:
- Remove the plastic cover of the Lada Priora regulator.
- Remove the power plug.
- Unscrew a couple of fasteners.
- Use a wrench to remove the retaining bolt.
- Remove the old LV, install the new one, connect and reassemble everything in reverse order.
https://youtube.com/watch?v=bIYBtxKdhgI%3F
There is a way without removal - you can get to the block through the headlight or bypass the air filter by sliding it by hand. There are many video reviews dedicated to this operation on YouTube and thematic forums.
How to change the device without removing the generator
Replacing the voltage regulator on a Priora can be done without removing the generator.
Difficulties may arise due to poor access to the generator on cars with air conditioning. It is necessary to remove the air filter and the fastenings of the air conditioning pipes, you can also dismantle the right headlight.
Replacement sequence:
- remove the negative terminal of the battery;
- disconnect the main positive terminal of the generator;
- remove the generator cover by unscrewing 3 bolts;
- unscrew the 2 mounting screws and remove the regulator.
We install the new device by performing the operations in reverse order.
What signs will indicate that the generator brushes are faulty?
The following external signs will help you understand that the generator brushes have become unusable on a Priora with power steering or air conditioning:
- length of the element being inspected;
- if upon inspection it is discovered that the length of the brushes is less than 5 mm, they must be replaced;
- Replacement will also be required if the appearance of the brushes indicates uneven wear, that is, one element is heavily worn out, and the second is brand new. Uneven wear of these elements will certainly negatively affect the operation of the generator, so experts recommend replacing them without fail.
Once high-quality brushes have been purchased (it is advisable to give your choice to well-known manufacturers), you can begin assembling the entire element and installing the generator in its original place. But as was said earlier, such a process can be carried out without removing it, which, of course, must be decided by each car owner independently. These operations, as many understand, are performed in reverse order, and after the final stage it is necessary to check whether the entire generator is working efficiently.
If the replacement of worn brushes is carried out correctly, and the problem with charging the battery was precisely the wear of these components, then the car owner will solve this issue, and without the help of service station employees, which will save a lot of his own money. The replacement process itself is quite simple, but if difficulties arise during the work, you can watch the training video on the Internet resource at any time, which is provided by professionals, choosing the most suitable time for viewing.
How to repair a voltage regulator? On modern cars - no way. It is simply irreparable and a failed part is simply replaced with a new one. Theoretically, even an electronic non-contact voltage regulator can be repaired - but few people do this - there is no point.
So, how is the voltage regulator replaced on a Priora? First, you should turn off the ignition and disconnect the negative terminal from the battery for reasons of electrical equipment and your safety.
Be careful not to mix up the wires going to the voltage regulator of the Priora generator - otherwise you can ruin both the relay-regulator and the generator itself.
On a Lada Priora car, the voltage regulator is installed separately from the generator. To remove the relay-regulator, you need to unscrew the nuts that secure the device to the body. Before this, you need to mark with electrical tape, tape or a marker the relative positions of the wires leading to the contacts of the regulator, and the contacts themselves.
Now you can install a new voltage regulator on the Priora to replace the old one. It is imperative to check the contacts where the relay-regulator is connected to the generator, as well as the tension of the generator belt. That's it, connect the battery, tighten the terminals and check the operation. And, of course, we make sure that on the Lada Priora the on-board voltage does not jump, but is even.
If the relay-regulator is installed in the same housing with the generator, then the algorithm is slightly different. After removing the negative terminal from the battery, disconnect the wires going to the generator (there is no need to remove it itself).
We open the plugs or unscrew the fastenings of the relay-regulator, depending on the design of the unit. We remove the plastic casing of the generator and find the relay regulator. We unscrew the fastening nuts and disconnect the screw fastening to the tire. Let's extract it. All that remains is to install a new relay-regulator - we perform this procedure in the reverse order of removal.
To check the operation of a new device, in this case, you need to fully charge the battery, connect it as expected, and start the engine at about 2500-3000 rpm. Using a universal tester or a special voltmeter, you need to measure the voltage at the battery terminals.
What else could it be?
Often, the culprit for charging problems may not be the regulator itself, but its terminals; over time, like many on a car, they oxidize - which prevents the generator from working normally and recharging our battery, so first, before changing this unit, try to clean it, remove oxides and other deposits. By the way, this also applies to the battery terminals; they need to be cleaned and protected at least once a season.
Therefore, first of all, if the multimeter gives you 11 or slightly below 12V at the terminals of the machine, try cleaning the terminals and contacts first, then measure again. It is quite possible that this is the reason.
This is where I end the article, I think it was useful, read our AUTOBLOG.
Similar news
- Is there an automatic clutch? Let's look at the technical details...
- DIY brake caliper repair. Plus detailed video
- Spark plug gap. What should it be and what does it affect?
Add a comment Cancel reply
Which TRN is suitable for LADA
| Generator, article number | Automobile | TRG, article number |
| 26.3701, 37.3701, 371.3701, 372.3701 | VAZ-2107, -2108, -2109, -2110, OKA | 67.3702-01 |
| 3002.3771, 332.3771, 3202.3771, 3212.3771, 4302.3771, 94.3701, 9402.3701, 9422.3701, 3740.3771-38, 3743.3771-61, 3747.3771- 93, eld-a-21214, LG01214 | VAZ, GAZ | 67.3702-02 |
| 4052.3701, 409.3701, PRAMO “ISKRA” 5102.3771, -10, 5112.3771, -10, 5122.3771, -10, -30, 5142.3771, AAK 5727 | VAZ, GAZ, UAZ with generators PRAMO “ISKRA” 5102.3771, 5122.3771 | 67.3702-04 |
| G222 | VAZ-2104, -2105, -2107 | 67.3702-09 |
| 26.3701, 37.3701, 371.3701, 372.3701 | VAZ-2107, -2108, -2109, -2110, OKA | 67.3702-11 |
| 3002.3771, 332.3771, 3202.3771, 3212.3771, 4302.3771, 94.3701, 9402.3701, 9422.3701, 3740.3771-38, 3743.3771-61, 3747.3771- 93, eld-a-21214, LG01214 | VAZ, GAZ | 67.3702-12 |
| generators with an additional three diodes, the excitation winding of which is connected to the positive circuit | 673.3702 |
Signs of faulty generator brushes
The following signs indicate node failure:
- weak headlights in the dark, their frequent blinking;
- interruptions in the supply of current to the on-board network;
- unexpected shutdowns of the radio and other consumers;
- poor charging of the car battery, electrical work begins to quickly drain it;
- indication of problems with the generator on the panel.
These symptoms do not always indicate a malfunction of the voltage regulator itself. For reliable diagnostics, it is worth analyzing the serviceability of other components: test the circuits with a multimeter, check the fuses, read the errors recorded in the ECU memory.
Sometimes the block does not need replacement, but simply cleaning or turning so that the brushes can move freely again. But if the inspection reveals wear to less than 5 mm in length, it is strictly necessary to change them. The same applies to uneven wear.
Scheme for Priora
The amount of electrical voltage generated by the generator depends on two physical characteristics: the speed of rotation of the rotor and the magnitude of the magnetic field created by the stator. The regulator changes the second value.
In older designs, a resistance was connected in series with the stator winding. The main disadvantage of this method is the additional load on the on-board network.
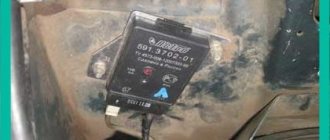
Generator relay. Photo source: https://avtoarsenal54.ru/raznoe/generator-ot-kaliny-na-prioru.html
The Priora 115A generator voltage regulator relay periodically cuts off the current supply to the generator excitation winding. The higher the engine speed, the more often the shutdown occurs, and the amount of generated voltage decreases.
Installation and connection instructions
For Lada cars (except Vesta, XRAY)
, photo author:
1.
Remove the generator.
2.
Remove the plastic casing of the generator. To do this, first disconnect the generator excitation wire. Then unscrew the nut from the stud (10mm wrench) and move the power wire to the side. Next, 3 latches on the plastic casing are unfastened.
3.
Remove the standard voltage regulator from the generator. To do this, unscrew two screws ("8" key) and disconnect the wire.
4.
Install a three-level voltage regulator on the generator instead of the standard one.
5.
Output 2 wires for the control module. The module itself should be mounted in conditions of reliable contact with the “ground” and as far as possible from the possibility of moisture ingress. For example, on a hairpin near the right headlight.
For Lada Vesta, XRAY cars (with Valeo TG12C209 generator).
This generator is no different from the previous ones, the only difference is in the voltage regulator. It communicates with the engine ECU via a “lin” interface. The task of this “lin” is to avoid loss of throttle response at power modes. By installing the TRN, we cut off the ability to control the regulator using the ECU!
For this generator there is no ready-made solution in the form of a TRN yet, so the design will have to be modified.
Required:
- three-level voltage regulator (article 67.3702-01)
- 2-pin block 904576 NORD YADA
- generator voltage regulator (leave the standard one (if the brushes are live) or ARV1103AD)
- wire for powering the regulator (2 meters)
Procedure (author of modification):
1.
Remove the generator (instructions for Lada Vesta/XRAY).
2.
Remove the voltage regulator, open the cover and clean everything under it. Reinstall the cover.
3.
Isolate the negative brush from ground (for example, drill out the negative outlet, place washers). It is necessary to completely eliminate contact between the regulator and the generator.
4.
Solder the female connector to the brushes.
5.
Solder the male connector to the 3-level regulator. Also, connect an additional wire to the positive output, which is needed to power the regulator and rotor.
Connection diagram:
- Output “Ш” on the regulator goes to the negative brush.
- Output “+” - to the positive brush.
The “+” output needs to be supplied with 12V, which appears when the ignition is turned on:
Symptoms of a problem
Signs, when they appear, you need to check the voltage regulator relay of the Priora 115A generator:
- after turning on the ignition, the control light does not light up;
- The battery indicator is constantly on, indicating a lack of charging;
- The brightness of the headlights depends on the engine speed;
- the car does not start well;
- At high speeds the dashboard indicators go out.
If the voltage regulator of a Priora generator with air conditioning fails, the battery may not be charged at all or may not be recharged. Both options are bad for battery life.
Standard generator on Priora - article number and price, where it is
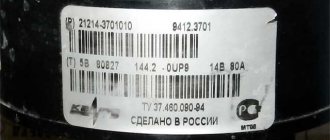
The installation location may vary for different car brands and models. You should look for it in the engine compartment, near the rubber cushion on which the engine is mounted. 90A article 3282.3771, is a source of energy in the electronic equipment system of 2170-72 Priora cars.
Generator for Priora produced by BATE price from 4120 rubles
Characteristics:
- Weight 5.5 kg
- LxHxW 200x170x200 mm
- Rectified current 90 A
- Power 0.98 kW
- Voltage 14 V 100 A
It has article number 5132.3771 and is a source of energy in the electronic equipment system of 2170-72 Priora cars.
Generator for Lada Priora with air conditioning manufactured by Pramo price from 4200 rub.
Characteristics:
- Maximum rectifier current 100 A
- Weight 5.3 kg
- Voltage 14 V
- Power 233 W/kg
- Internal cooling
- Stator diameter 125 mm
- 115 A
It has article number 9402.3701-14 and is a source of energy in the electronic equipment system of 2170-72 Priora cars.
Article number - 2170-3701010-10 has a KZATE generator for the Lada Priora car, its price starts from 5300 rubles, and Bosch - 2170 3701010 13
Device manufactured by LKD - price from 4400 RUR
Characteristics:
- Maximum rectifier current 115 A
- Weight 5.2 kg
- Nominal voltage 14 V
- Power 1610 W
- Stator diameter 125 mm
- Length 188 mm
- 115 A
It has article number 9402-14 and is a source of energy in the electronic equipment system of 2170-72 Priora cars.
120 A Has article number 9402-3701-14P, is a source of energy in the electronic equipment system of 2170-72 Priora cars.
Characteristics:
- Maximum rectifier current 120 A
- Weight 6 kg
- Nominal voltage 14 V
Manufacturer ATE-1 cost from 4000 rub.
The generator tension roller 2170 serves to tension the belt. One of the important tips for beginners: if you unscrew any bolt when changing a part, lubricate it with graphite grease, this will greatly facilitate repairs in the future.
Selection of components
The original generator, installed on a car with a 16-valve engine at the factory, is marked with article number 5102.377. Its cost, as a rule, fluctuates around six to seven thousand.
Carefully check the generator itself and its packaging before purchasing so as not to encounter a counterfeit. It is important that the part is free of unevenness, chips and paint runs, as well as extraneous markings.
To avoid overpayments, you can purchase a similar original spare part. The following devices are suitable for installation on Lada Priora:
- VAZ (power 120/115a);
- KZATE (115a);
- BATE (90a);
- BOSCH (120a).
The price of analogues can be either higher or lower than that of the original. As a rule, it is in the region of 3500-6000 rubles. We choose a generator device with a large power reserve so that it lasts longer.
Keep in mind that installing less powerful generators is unacceptable, especially if you connect several different devices to the vehicle’s on-board network (when connecting a large number of electronics, it is generally recommended to increase the current). Before purchasing, we carefully check for damage to the case and the integrity of the unit.
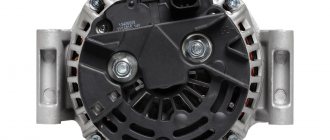
Generator device
The pulley transmits energy from the motor to the shaft using a belt.
Covers on the housing are needed to accommodate the rotor supports, install the unit on the motor and secure the stator. The back cover is needed for the brush assembly and outputs for powering electrical equipment. The stator produces power through a three-phase winding. The rotor is a steel shaft with two bushings. The terminals of this winding are connected to copper rings. The regulator stabilizes the voltage under various factors:
rotor speed delta;
temperature changes in nature.
The brush assembly is a plastic element with brushes attached to it that interact with the rotor rings. The electric generator also includes six diodes (three in “-” and three in “+” heat sinks).
Repairing a generator - VAZ features
To check the car's power supply, you need to take measurements at the battery terminals. To do this, you need to start the car and let it run for a few minutes. After this, take readings with a terminal tester. Next, turn on all possible car devices, dimensions, tape recorder, heating and repeat the measurements. With a properly functioning voltage generator, as well as its regulator, the average voltage in the network should be 12–13 Volts.
The most normal voltage in a VAZ 2109 car is 14.1 Volts. If your readings are more or less than the acceptable average, then you need to start repairing your generator. First of all, you need to check the ground on the generator block. It often happens that it oxidizes under the influence of moisture. Because of this, it may not carry enough current to the vehicle. This terminal is located on the generator block; it needs to be cleaned and lubricated.
Another reason for a lack of vehicle current is a sufficiently worn or loose alternator belt. Using a belt, the generator is driven by the operation of the car engine. If the belt is not tensioned enough, it will slip while driving. Thus, the car generator will not perform the required number of revolutions, and accordingly, the required amount of current will not flow.
If the generator does not produce enough voltage, the battery is not fully charged, which significantly affects its service life. To fix the problem, you need to replace the belt or tighten it. It is very important not to overtighten it, as during movement it will stretch much faster or may even burst. You should not buy belts of dubious production - a low-quality belt wears out very quickly, dries out and stretches.
Where is the voltage regulator located on the Priora?
Surely, many prior leaders have encountered such a problem. I'll outline the situation. I was driving late one evening and noticed that when I changed gears the low beam dimmed. Not for long, after a second or two it levels out. I switched to the voltmeter readings on the instrument panel. Everything is in order, 14.2V, I accelerated to 3000 rpm and I observe the picture: when the rpm drops to idle, the voltage drops to 12.4V, the headlights dim, then gradually becomes brighter, the voltage is again 14.2V. After driving like this for a couple of days, reading the Murzilka, I found out what the problem might be. In brushes. My generator is KZATE 115A. I looked at the catalog number of the relay regulator and went to buy it.
Next is replacement. This is where I seized upon grief, tearing my hands bloody and cursing AvtoVAZ... It turned out to be difficult to get to the generator, and it was also -14 outside, it was cold. Well, okay, let's get started, then. I removed the terminal from the battery, removed the air cooler housing, unscrewed the fastening of the air conditioner tube, this was enough, as it seemed to me, to stick my hand in there.
The voltage regulator and generator brush holder on the Lada Priora are removed for replacement in case of failure. Repair work can be carried out without dismantling the generator, but for clarity, the process will be shown with it removed. Prepare a standard set of tools and perform the following sequence of actions:
First of all, you need to de-energize the car by disconnecting the minus terminal from the battery.
- Disconnect the connector with the wire from the D+ terminal of the generator.
- Then remove the rubber protective cover from the contact pin.
- Having removed the cover, unscrew the nut and remove the wire terminal from the stud.
- Now unscrew the nut securing the generator excitation circuit terminal.
- Remove the excitation circuit terminal from the stud.
- Unscrew the nuts securing the protective cover of the generator.
- We remove the casing.
- Unscrew the three nuts securing the voltage regulator housing.
- Now unscrew the screw securing terminal D+ to the regulator bus.
- And remove the rectifier unit from the generator.
Before installing a new one, check the ease of movement of the brushes in the brush holder, as well as the amount of their protrusion, which should be at least 5 mm.
Welcome! Voltage regulator - it is installed on the generator and is directly connected to it, thanks to it, the entire current that the generator gives out changes and flows more evenly, for example, the more you turn the engine of a car (increase the speed, that is), the generator will work stronger and much more give out current, all this happens because the generator is connected to the engine (namely, it is connected to the crankshaft), but the voltage in the on-board network will also change from this (The more current the generator gives, the stronger this current increases in the entire on-board network car), therefore, when the speed increases, the light will constantly burn stronger, and when it decreases, it will dim because the current strength will decrease, so no matter what happened, a voltage regulator was invented, thanks to which the current strength in the on-board network always remains the same, but it changes when you turn on additional devices that need more current, that is, for example, you turn on the high beam headlights of a car and the current supply increases through the regulator so that there is enough power for these headlights, in addition, the current supply flowing through The regulator is constant and does not jump higher or lower, so the headlights work in the same mode and do not shine either stronger or weaker.
Note! In order to change or check the voltage regulator, you will need: Two different types of screwdrivers, as well as two wrenches that will be “12” in size, and you will also need a DC voltmeter thanks to which you can clearly determine what voltage you have in your on-board network and whether it is jumping, and among electrical appliances, a megohm meter is also useful, thanks to which you can check the regulator’s capacitor for serviceability, thanks to which the current strength remains constant when supplied to the on-board network!
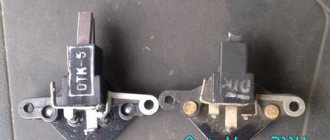
Where is the voltage regulator located? It is located on the generator itself, as was already said a little earlier, a plus wire and a wire block are also suitable for it, so that the regulator does not become dirty; for this purpose it is also closed with a plastic cover, in more detail the pin that comes out of the regulator you can look at photo which is located below, in this photo you can just see the same plastic cover that closes the regulator, and in the other photo (Small) you can see that the cover has already been removed and only one pin sticks out, which comes from the regulator (This pin is on both indicated by a red arrow in the pictures).
When should you change the voltage regulator?
Replacing a relay in a VAZ 2109 generator - couldn’t be easier
All car enthusiasts are very familiar with the problem when their favorite car suddenly won’t start in the morning, and the reason is completely banal, a dead battery, and the most annoying thing is that it is completely new. This nuisance is associated with a problem in the operation of the generator and its parts, the most important of which and requiring regular checking is the relay-regulator. As a rule, replacing the VAZ 2109 generator relay solves this problem for a long time, since charging the battery, the operation of the electric generator and the car’s power supply system, and the operation of all electrical appliances depend on its operation. Our instructions will help you cope with this task yourself.
Purpose of the generator and relays in it
The electric generator in the car is designed to:
- To obtain electrical energy from which the battery is powered
- When the normal operation of a car's electric generator is disrupted, the battery begins to discharge, and you won't be able to drive for long after that.
- It happens when the battery is powerful enough to drive you home, but in the morning the car won’t start.
- The electric generator is located under the hood of your car and is powered by a belt drive.
- There are a number of reasons for the breakdown of an electric generator, including worn out brushes, a faulty charging relay, a broken diode bridge and jammed bearings, as well as a break in the circuit of one of the windings
The voltage regulator (relay - regulator) serves:
- To maintain the voltage in the on-board network of the machine within the required limits under any operating modes, such as changes in the rotor speed of the electric generator, surges in electrical load, changes in ambient temperature
- In addition, it performs such additional functions as protecting the elements of the generating set from operation in emergency modes and from overloads, and ensures automatic inclusion of the power circuit of the electric generator or the excitation winding in the on-board network of the machine
Generator check
It is necessary to check the car generator for the VAZ 2109 to find out the cause of the malfunction:
- If there is extraneous noise in its operation, the bearings of the electric generator shaft are most likely worn out.
- Reduced voltage at the “output” of the electric generator means wear of the brushes (see VAZ 2109: replacing the generator brushes yourself) or low tension of the drive belt
- An increase or decrease in voltage at the “output” may be the consequence of a malfunction of the diode bridge of the electric generator
To perform initial diagnostics of faults, you just need to follow these simple procedures:
- Using a voltmeter, we check the voltage at the battery terminals. When the engine is running and the electric generator is working, the voltage at the battery terminals should range from 13.8 volts to 14.5 volts
- Turn on the engine and place your palm against the body of the electric generator to detect vibration. When the wear of the bearings increases, the vibration that is transmitted to the housing of the electric generator will be easily perceptible, and it is simply impossible to confuse it with other extraneous vibration
- We check the tension of the electric generator belt: with the engine stopped, press the belt with your finger - the deflection under the influence of your finger should not be more than 1 - 1.5 centimeters
Before removing the electric generator itself, in order to avoid unnecessary and unnecessary work, first remove the relay located on the body of the electric generator with your own hands and check the condition of the brushes and the relay itself in particular:
- Removing the relay does not require removing the generator from the engine; it is located in the rear part and is attached to it with just two bolts
- To unscrew them you will need a Phillips screwdriver.
- The bolts should be unscrewed carefully, otherwise you will drop their crankcase protection, and getting them out will become an additional problem
- To finally remove the relay you will need to disconnect the wiring with the “female” contact
Checking the relay status
After removal, you must immediately check the functionality of the relay - the voltage regulator, as well as the brush holder and, just in case, the capacitor removed from the generator:
- To carry out the test, you will need a power source with the ability to switch (change the value) of the voltage
- For example, a charger for your battery will do
- A standard voltage test light will also come in handy.
- We connect the control light to the brushes of the relay-regulator
- Then we connect the voltage to 12V, connecting the minus to ground, and the plus to the terminal of the relay - voltage regulator, as in the photo below
- The indicator light should light up
- Now we increase the supplied voltage to 15-16 Volts
- The indicator light should then go out
Replacing generator brushes with removing the converter on the Lada Grant (engine 11183, 21116, 11186)
Tools and materials are similar to previous repairs.
- The car is placed within the perimeter of the repair area, basic safety measures are taken, and the parking brake is released.
- Open the hood and remove the terminals from the battery to avoid a short circuit.
- Unscrew the six bolts around the perimeter and remove the engine protection.
- Disconnect the wire block from the converter.
- Remove the protective cap for securing the power cable.
- Unscrew the bolt of the lower mounting of the generator.
- Use the mounting tool to move the converter forward towards the radiator and remove the bolt.
- Remove the belt from the pulley.
- We remove the generator from under the car.
We carry out troubleshooting, inspect the physical condition of adjacent mechanisms and parts. We replace with new ones as necessary.
general description
In principle, the Priora generator is not bad. But its power is not enough on luxury models with installed air conditioning. You may hear advice to install an additional diode bridge. But, unfortunately, this option is suitable for those who understand electrical circuits and are comfortable with a soldering iron. The easiest way is to install a three-level voltage regulator.
First you need to check the operation of the generator. Measure the voltage at the positive terminal of the generator and the battery terminals. Without load, the voltage should be at least 13.8 volts, under load - at least 13.5. An ideal option at low temperatures in winter is 14.8-14.3 volts. If there is a difference in the readings, then the contact at the generator output should be cleaned. This can be done with a wire brush or sandpaper. If the parameters are below acceptable values, then you should check the condition of the brushes on the generator and think about replacing the voltage regulator.
Priora generator brushes: how to replace them correctly and do it yourself
If the owner of the Priora notices that the charge from the battery is disappearing, first of all, he needs to check the condition of the generator brushes. Of course, at first the charge decreases insignificantly, but if the problem is not corrected in time, the charge will very soon disappear altogether. Replacing the brushes of the Priora generator, which are clearly worn out, will help correct this problem.
Important! The brush mechanism of the generator on the Priora cannot be repaired. If any breakdown occurs, only a replacement along with the brushes will be required. Since this process is not so complicated, you can do everything yourself
You just need to take into account the recommendations of professionals
Since this process is not so complicated, you can do everything yourself. You just need to take into account the recommendations of professionals.
What tools are needed for work?
Before changing the brushes on the generator, prepare the tools you will need for the job:
- flat screwdriver;
- wrench – it’s better if it’s an open-end wrench (size 13);
- car head with wrench (size 10).
Changing the generator brushes, process sequence
It is quite possible to replace the alternator brushes on a Priora that have worn out without removing it. But, according to experts in their field, the process is simplified if replacing the generator is preceded by removing it from its usual location.
Important! When carrying out any work on the generator (replacement, repair, etc.), be sure to disconnect the battery. https://www.youtube.com/embed/gh7P7zWPOOc. After removing the generator on the Priora, replacement is carried out as follows:
After removing the generator on the Priora, replacement is carried out as follows:
- Use a screwdriver to remove the plastic cover, which is designed to protect the device. Having done this, you gain access to the brushes;
- disconnect the connecting plug from them;
- slowly unscrew both fasteners (they are located along the edges of the elements that are inspected);
- Take the above key and unscrew the locking bolt. Do this in the center of the element;
- Having unscrewed all the fasteners, remove the brushes, inspect them, assess their condition and replace them with new ones, connect the wires.
What are the signs that indicate that the generator brushes have become unusable?
The following external “signs” will help with this:
- if, upon examining this element, you find that its length is less than 5 mm, it certainly requires replacement;
- if the brushes are worn unevenly, this will also negatively affect the functioning of the generator, so they need to be replaced.
There is no need to skimp on buying new brushes. If you find a cheap option, it is highly doubtful that they will last long. It is more likely that such savings will lead to the need to re-replace the above-mentioned components.
Reassembly
After purchasing high-quality brushes (it is advisable that your choice falls on a well-established manufacturer), you can begin the general assembly of the element, and then install the generator itself in its place.
However, as mentioned above, the last procedure can be performed without removing the generator. Which, however, is something every car owner decides independently. All operations performed should be performed in reverse order.
After completing the work, the operating efficiency of the entire generator must be checked.
If the replacement of failed brushes was carried out correctly, and the battery was discharged precisely because the main elements of the car’s electrical system were worn out, the car owner will solve this problem without the help of service station workers.
And in this case, you will save a lot on such a service. The replacement process is really quite simple. However, if you encounter any difficulties during the repair work, you can watch the help video. It is provided by specialists.
On the Internet resource you can, among other things, find out:
about design features - generator 2170; how to check the generator for operability, what you should pay special attention to; how to change wipers on a Priora and so on; what other possible problems with the energy generator
How to connect
When replacing the Priora generator voltage regulator relay with a standard one, there are no connection difficulties. It is simply installed in its regular place.
We attach the temperature sensor of the thermally optimized model to the positive terminal of the battery, lay the connecting wires along the body and secure them with the ties included in the kit.
We fix the remote device in a free place, thereby connecting it to the ground of the car, and connect the wires from the brush assembly to it.
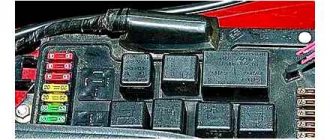
Even such a small thing as replacing fuses on a car puts drivers into a certain stupor. This is especially true for owners of Lada Priora cars. In today's article I will tell you in detail about how to change fuses on a Priora and give a detailed description of what each of the fuses is responsible for.
Most of the vehicle's electrical circuits are protected by fuses installed in the mounting block. The mounting block is located in the instrument panel on the lower left side and is closed with a lid.
Before replacing a blown fuse, find out the cause of its blown and eliminate it. When troubleshooting, it is recommended to look at the circuits that are protected by this fuse.
Alternator belt: how to tension, what tension should be and how to check
How to tension the alternator belt
Many car owners are interested in the question: how to tighten the alternator belt? After all, the battery charge level and the voltage in the car’s electrical network depend on this. Also, the condition of the belt itself, as well as the condition of the crankshaft bearings and the generator shaft, depend on how the generator belt is tensioned. Next, we will analyze in detail how to properly tension the alternator belt with a specific example.
The importance of tension level and checking it
Let's consider what unpleasant consequences an incorrect level of tension will lead to. If it is weakened, then there is a high probability of slippage. That is, the generator drive will not operate at rated speed, which in turn will lead to the level of voltage generated by it being below normal.
The result is an insufficient level of battery charging, insufficient electricity to power the vehicle systems, and operation of the electrical system under increased load.
If the belt is too tight, this can also cause excessive wear on the belt itself. And in the worst case, even to its breakage. Also, excessive tension has a detrimental effect on the bearings of the crankshaft and generator shaft, because they have to work under conditions of increased mechanical load. This leads to excessive wear and speeds up their failure.
Tension check
Tension checking process
Now let's look at the issue of checking tension. It’s worth mentioning right away that the force values are unique and depend not only on the make and model of the machine, but also on the generators and belts used. Therefore, look for the relevant information in the manuals for your car or in the operating instructions for the alternator or belt.
This will also be influenced by the presence of additional equipment installed in the car - power steering and air conditioning.
In general terms, we can say that if you press the belt on the longest section between the pulleys with a force of about 10 kg, then it should deviate by approximately 1 cm
What does it look like and where is it installed?
Now let's find out where the VAZ-2107 charging relay (carburetor) is located. Initially, this device was placed away from the generator on the arch under the hood (on the left side). On newer “sevens” equipped with an injection system, the voltage regulator was combined with a brush assembly.
The first voltage regulators were based on electromagnetic relays; they worked quite slowly and required constant intervention. The problem is that mechanical elements wear out very quickly. In addition, it was constantly necessary to adjust the gaps in the relay. Modern semiconductor devices operate silently, quickly, without electromagnetic relays. One silicon crystal can perform the functions of several mechanical relays.
( 2 ratings, average 4.5 out of 5 )