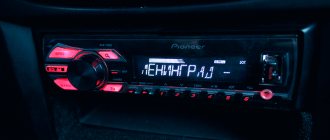
Quite a lot of people have been faced with the question of how to turn off the Pioneer radio. Owners of standard radios especially often face this need. In this case, when you turn off the radio, you will see a transition to the “clock” mode. In this case, the button backlight will work. Drivers usually blame this on the incompetent technicians who connected the device. But, in fact, the reason here is different. This is a technical feature of many radios of this brand. This problem can be solved quite simply. You just need to know how to do it. In fact, this is not the biggest problem, and there is no point in going to the dealership to fix it.
How to turn off the Pioneer radio? This question can be heard quite often in places where car enthusiasts gather. The thing is that the instruction manual does not cover this issue. If you read it, you might think that this behavior of the stereo head unit is quite normal. But then bad thoughts pop up. The main one is the possibility of battery discharge during long-term parking. Therefore, you still need to learn how to turn off the radio.
Shutdown
This is done in the following order:
- Press button 2 and enter MENU. Then select SISTEM, at the next stage press PW SAVE
, all that remains is to turn off the radio with the OFF button. This is how we switch to energy saving mode; - Turn off the radio with button 1. At the same time, a clock indication should appear;
- We press button 4, eventually the display goes out.
Having completed this procedure once, you can subsequently turn off and turn off the radio with the standard button 1. Sometimes, resetting the settings can occur after disconnecting the speaker system from the power supply. In this case, you should repeat the steps described above.
Operating manual CD RDS RECEIVER DEH.
- Outline placeholder bk_page_10
- bk_page_11
- bk_page_12
- bk_page_13
- bk_page_14
- bk_page_15
- bk_page_16
- bk_page_17
- bk_page_18
- bk_page_19
- bk_page_2
- bk_page_20
- bk_page_21
- bk_page_22
- bk_page_23
- bk_page_24
- bk_page_25
- bk_page_26
- bk_page_27
- bk_page_28
- bk_page_29
- bk_page_3
- bk_page_30
- bk_page_31
- bk_page_32
- bk_page_33
- bk_page_34
- bk_page_35
- bk_page_36
- bk_page_37
- bk_page_38
- bk_page_39
- bk_page_4
- bk_page_40
- bk_page_41
- bk_page_42
- bk_page_43
- bk_page_44
- bk_page_45
- bk_page_46
- bk_page_47
- bk_page_48
- bk_page_49
- bk_page_5
- bk_page_50
- bk_page_51
- bk_page_52
- bk_page_53
- bk_page_54
- bk_page_55
- bk_page_56
- bk_page_57
- bk_page_58
- bk_page_59
- bk_page_6
- bk_page_60
- bk_page_61
- bk_page_62
- bk_page_63
- bk_page_64
- bk_page_7
- bk_page_8
- bk_page_9
Clicking noises when the engine is running
Many owners of standard radios are faced with the appearance of periodic clicks when the motor is running. To begin with, you need to understand the reason for the appearance of such a not entirely pleasant phenomenon. It's all about the car's energy system. When the power unit operates, small voltage surges regularly occur. This results in interference.
In principle, the radio tape recorder has protection against this. But the standard noise suppressor does not always cope with the problem. Sometimes this happens due to its failure, which is not a rare occurrence. You can fix the problem by simply connecting power to the radio through a noise filter. This is guaranteed to save you from clicking acoustics.
Device Positioning
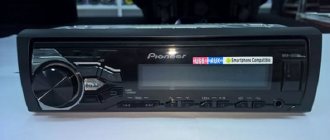
Who might be interested in this car radio? First of all, those who need very high-quality sound. It can be provided by the Pioneer DEH-80PRS. The price, of course, is a little steep (about 20,000 rubles), but we must remember that this is a multifunctional and high-quality device from a legendary manufacturer. Many are willing to pay for quality. And the last characteristic is the calling card of the Pioneers. There has never been a case where a car radio from this company had any kind of manufacturing defect. Such quality and exceptional reliability are worth a lot.
It is also necessary to take into account that this head unit is a budget (entry) level device. So it's still inexpensive. In addition, setting up the Pioneer DEH-80PRS will not cause any problems for anyone. This process is fully described in the user manual on the CD that comes with the kit.
Speaker wheezing
Some drivers encountered a situation where the speakers began to wheeze. At the same time, this does not happen all the time, but only from time to time. Of course, the problem could be a faulty speaker. But, often the reason turns out to be unsuccessful configuration of the system itself. Therefore, troubleshooting should begin by viewing the settings. You are interested in the balance menu. Here you can evaluate how the sound is distributed between the speakers. Pay attention to the uniformity of its distribution. Most often, unbalanced low frequencies cause wheezing.
If everything is correct in the settings, then it makes sense to pay attention to the wire connections. There may be a bad connection somewhere. That is why the speaker wheezes. This may be indirectly indicated by the irregularity of wheezing. Especially if the speakers are in the doors. When you open the door, you move the wire, one time the contact may be normal, another time, not so much. The cause of wheezing may be a broken capacitor.
. In this case, you need to check it.
Take a radio component with the same capacity. You need to connect it in parallel with the standard one. After that, turn on the radio and check the result. The absence of wheezing indicates a problem with the capacitor. In this case, the current passed through the additionally installed part. Unsolder the faulty air conditioner and install a new one in its place.
Joystick positions
First, let's characterize all possible movements of the joystick. The positions of its handle can be as follows:
- up;
- down;
- left;
- right;
- recessed position.
So, let's begin. We set the volume to about 30 units, not paying attention to possible wheezing during playback. After that, press down the joystick and go to the list of settings.
You'll see a lot of options here, but don't let that scare you: for now you'll only need one setting. Start turning the joystick to the left or right until you find the “Audio” item. Found it? Now you need to press the joystick again and enter “Audio”, and there you will look for the item where the balance and fader are indicated. It looks like this: FADER / BALANCE.
Press the joystick again so that the words FAD 0, BAL 0 are displayed. If instead of zeros there are other numbers, it’s okay. It just means that adjustments have already been made here before.
If you tilt the joystick to the right, you will go from the fader settings to the balance settings. Rotating the joystick will allow you to adjust these settings. At such moments, the current menu will flash.
Set the fader to position + 15. In this case, the sound must be passed only to the front speakers so that the rear speakers do not interfere with the setup of the front speakers.
Subwoofer doesn't work
In standard installed stereo systems with a Pioneer head unit, the sound from the subwoofer sometimes disappears. The problem is an unsuccessful output to the low-frequency speaker. The problem is treated in 2 ways. If the radio is new and under warranty, you can try to exchange it. But this does not always happen; more often it is repaired and returned.
Another option is to re-solder the output yourself. Perhaps the second option is the most optimal. Self-made repairs are much more reliable than warranty repairs. Moreover, no difficulties should arise there.
Compatibility with other devices
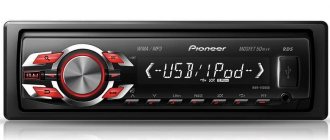
The radio can read information from CDs, USB and microSD drives.
Connection diagram
USB ports are installed on the back of the device. The connectors are routed to any convenient location by connecting adapters (extensions). When you turn off the radio, power will still be supplied to the USB connectors. To access the microSD slot, you need to remove the front panel. One AUX port is installed on the front side, the other is on the rear. If desired, these connectors can be disabled or made high-level.
Streaming audio can be transmitted wirelessly via Bluetooth. With support for iPod and iPhone, these mobile devices can be used as remote controls. In addition to MP3, the player works with WMA and AAC formats, and also supports the WAV extension, which is superior in quality to compressed files.
Why tune a Pioneer radio?
The audio system in a car consists of several components. The first versions were equipped with the minimum - a pair of speakers on the rear shelf and a radio on the front dashboard. But progress does not stand still - the receiver was replaced with a radio, and the number of speakers increased several times. If the radio is installed in the car at the factory, you usually do not need to configure anything. But the equipment of several companies (among which the leader in audio equipment is Pioneer), as a rule, is purchased by the owner separately. At the same time, the speakers in a car are different. In order to optimally adjust the sound quality and “make friends” between the existing speakers and the new radio, you need to make several adjustments in the latter.
Hyundai Getz cheerful GLS › Logbook › Channel-by-channel inclusion of Pioneer DEH-80PRS or “network mode”
They gave me an amplifier Sony xm-gtx6041, it took a long time to mature, I thought and thought, I was sorry for the time... In general, today I’m ready to connect a channel or whatever it’s called. I still don’t understand why it’s called “network mode,” but that’s not the point. So, the initial data: Pioneer DEH-80PRS, DLS R6A and PIONEER TS-W307F in conjunction with a blaupunkt gta 275 amplifier.
Since, when installing the front speakers, the crosses and tweeters ended up on the door, so as not to drag an extra bunch of wires into the door, I decided to transplant the tweeters to the panel. I disassembled the door, twisted the crosses, reconnected the mid, assembled the door. For a more beautiful twitter layout, I had to disassemble the entire bottom of the panel, the glove compartment and the panel under the driver’s feet, I also unscrewed the middle console, but I was too lazy to pull it out completely)))) I decided to install the amplifier itself under the front passenger seat. Power plus, after much cerebral sayings and fantasies, it was decided to pull a new one from the battery, now I have two capsules there))) for one under the sub and one for the acoustic. I took the earth from the bolt under the seat fastener. All the wires went under the middle console, under the carpet and came out under the passenger seat, where the carpet was cut for the VIN code. Cross tulips from Kicx. Strength - fatty, copper, Art sound capsule. We connect tweeters to the front, mid to back, sub to sub.
Switch the Mayfun to online mode, press the reset button and launch for the first time! It’s not worth listening without tuning, but you can, and besides all this, even at this stage you can already hear the difference! Which immediately made me happy. I spent about half an hour fiddling around with the settings on the radio and amplifiers, but over the course of the week I’ll be adjusting them more than once to my liking.
Even a crappy system sounds much nicer than a classic connection. My doubts about the fact that the rear speakers are lost from the system and that they will not be enough for the music scene were not completely justified. Their absence is, in principle, not noticeable, as they wrote to me in one of the blogs, “it’s worth sacrificing the rear speakers for the sake of pooping.” This is true. I sense that I will soon be selling them because they are no longer needed.
In general, I’m happy with everything, there aren’t really any photos, and there’s really no need, I didn’t take anything particularly new or original! and I don’t want to embarrass myself by bragging about connecting the amplifier))) I did everything very shamefully, in the near future I will connect it more correctly, with terminals, everything is as it should be. Unless, of course, it shortens first))))
source
What can be improved
Speaking of settings, it is worth clarifying that Pioneer regards the concept of a radio tape recorder not just as a device for listening to radio or recordings. In this device you can see the date, time and much more if they are configured. Information can be presented in several languages - either Japanese (since the brand is Japanese in origin), or, more often, English.
Whether there will be Russian on the menu depends on many factors, but even the English menu is easier to understand than the Japanese one. Some additional features, such as USB ports, will also need to be enabled through the menu. Not to mention the above problem of connecting specific speakers.
Specifications
The list of technical characteristics of the Pioneer DEH-80PRS car radio is as follows:
- LCD class display with LED backlight;
- output power - 50×4 W;
- The capacity of the central audio processor is 24 bit;
- reading data from CD, USB and microSD media;
- support for MP3, WMA, WAV and AAC audio formats;
- reception of radio frequencies FM, MW and LW;
- 18 presets for FM and 6 for other frequencies;
- RDS technology support;
- automatic search and storage of radio stations in memory;
- To control using devices based on the iOS operating system, you will need an additional cable;
App Mode for iOS supported; displays tags according to iTunes and CD Text standards; Bluetooth wireless module supporting HFP, A2DP, AVRCP and SSP profiles; The delivery set includes an external microphone and an infrared remote control; dual 16-band equalizer with the ability to separately adjust the sound for each channel; time delays are adjusted manually or automatically; automatic equalizer only works with an additional microphone; the device recognizes Russian-language characters; The radio can restore the quality of compressed sound; tone compensation with 3 modes; the ability to control a subwoofer, high and low pass filters; 5 RCA outputs for subwoofer, front and rear speakers; 2 USB ports; microSD memory card slot; AUX input; Supports control using buttons on the steering wheel; button illumination (RGB); removable front panel.
Settings for basic functions on Pioneer
Disable "Demo"
Before making changes to the radio settings, turn off the “Demo” mode. The Pioneer radio and a number of other modern car audio systems have a functionality demonstration mode. Until it is turned off, any setting will be saved exactly until it is turned off. If you don’t want to set your preferences again every time you turn it on, you need to turn off the mode.
The main control knob on Pioneer radios with the signatures of the main control buttons
This is done as follows:
- Turn off the radio (press and hold the SRC key until the display goes out).
- Press the same key again and hold it until the start menu appears.
- Use the volume control to select the “System” option in the menu, and then “Demo”. The On position will be indicated to the right of it.
- Any of the arrows on the sides of the volume knob switches the position to Off.
- To save the settings, press the Band key. The mode is off, saved in memory, the radio turns off. You can move on to other settings.
Possible problems and their solutions
Modern car players developed by Pioneer are multimedia centers with advanced capabilities and a large number of settings, which will take time to learn. Demo mode is always enabled by default on Pioneer devices. It is intended to demonstrate the capabilities of the radio when selling it.
If you ask the company employees for help, they will answer that the solution to this problem can be found in the instructions.
The user manual contains step-by-step instructions on how to properly set up the radio, but sometimes it happens that the instructions are lost or are not at hand.
Some users experience that the demo mode is activated again after turning the ignition off and on. This is due to the fact that the player's power passes through the ignition circuit.
When installing a player, a service station employee always asks how best to connect it - directly to the on-board network, or so that it turns off when the engine stops. If you choose the first option, the device will constantly receive energy from the battery, regardless of engine operation. In this case, all settings will be saved in memory. If you are not satisfied with the power option that you chose the first time, you need to contact the service station staff again so that they can change the connection type of the player.
If the player is not directly connected to the on-board network, then problems arise with other functions. For example, the date and time settings on the player, as well as the radio station presets, will be constantly lost. But the direct connection also has a disadvantage, since the player will drain the battery when the engine is idle.
Radio in the car
Stations in the radio can be tuned in three ways. Depending on the model, 18 or more stations can be memorized.
For convenience, we assume that the receiver is already turned on - switching to it is done by pressing the Band button once.
Method one is the easiest
- Knowing the frequency of the station, briefly press the left and right buttons to dial it on the display.
- Then hold one of the six buttons (1–6) below the display. The dialed station will be stored in memory, and a corresponding indication will appear on the screen in the form of a number repeating the button number.
- Dial the next frequency and press the next free button.
- Wait for indication on the display.
This is repeated 6 times - for six different stations.
Stations 7 to 12 and 13 to 18 are stored in the following memory banks. Switching between them is done by pressing Band once.
Method two
- While in receiver mode, hold down the right button for one second.
- The radio will begin searching for a station.
- Having found the first one, it will go into playback mode.
- If you are satisfied with the station, save it by pressing the buttons below the display.
- Then repeat steps 1–4 to select further stations
Storing the station and selecting banks is the same as in the first option.
Method three
- From the main menu you go to the functions menu.
- Scrolling through it, you find the BSM parameter.
- Select by pressing the up or right arrow.
- They wait for a while.
- The radio will check the entire range, find stations and arrange them according to signal strength.
- Then it will play the first one.
- You can save stations in the same way as in other methods. You can scroll through the selected ones by single short presses of the buttons under the display.
There is one thing about this method - not all domestic radio stations are included in the list of those found for various reasons. If you have gone through the entire list, but have not found the desired station, you can proceed as follows:
- Exit to the main menu of the radio receiver (exit is carried out in the same way as to the main menu of the entire device - see above).
- Having looked through it with the volume knob, they find an inscription like FM:... Instead of dots there will be some numbers, usually 100.
- After playing with the left and right buttons, select FM:50 and confirm the choice.
- After exiting the menu, start the search again.
- Since the frequency step has just been halved, you need to be patient here.
- Maybe this option will find the right station.
You can experiment with the search step, but if there is still no station, it will be faster to select it using the first of the described methods.
A few words on the topic of memory banks - there is no need to overwrite any stations to free up cells. If you want to replace the selection, just write the new frequency in the selected cell. The old frequency will be deleted automatically.
Setting up a radio receiver for video
Equalizer
An equalizer allows you to make the sound more even - raise or lower the bass, mid and high frequencies. This is a rather fine adjustment of the audio system. It is not the entire sound range that is regulated at once, as in other menu items, but specific frequency bands. Different models have different numbers of them, depending on the class of equipment. There are five of them in Pioneer radios: 80 Hz, 250 Hz, 800 Hz, 2.5 kHz and 8 kHz.
The equalizer is located in the “Audio” section of the settings menu, EQ item. In it you can select one of the preset standard settings. For those who are not satisfied with these options, there are two sets of user settings (Custom). You can switch between them both from the menu and the EQ button next to the joystick. To make changes to frequency parameters in a custom setting, you need to select it with the wheel and press the joystick. Then turn the wheel to select one of the equalizer frequency bands. Press the joystick again and set the position from -6 (attenuate frequency) to +6 (increase). By doing this you can make some frequencies louder and others quieter.
We can only give rough recommendations:
- if heavy music is played, it is worth increasing the bass - 80 Hz (but not too much, +2–+3 is enough). Percussion instruments sound around 250 Hz;
- for music with vocals, frequencies of approximately 250-800+ Hz are needed (male voices are lower, female voices are higher);
- for electronic music you will need high frequencies - 2.5-5 kHz.
Setting the equalizer is a very important step. Using this tool, you can improve the sound quality many times over. Even if the acoustics are not very expensive and of high quality.
External ports
- In addition to the radio, the radio can play music from external devices or CDs (older versions).
- To be able to connect external devices, you will need the same “System” menu described earlier in setting the time.
- Go to the menu as described above.
- Scrolling through the menu, select the AUX, USB or Bluetooth option (if this feature is supported).
- Use the arrows on the sides (or tilt the handle itself) to switch the position. There are two options available - enabled (On) or disabled (Off).
- Choose to enable the desired port.
- Press the joystick once to confirm.
- In the same way as in setting the time, exit the menu.
- Further connection depends on the models of the radio and the connected device.
Bluetooth connection
It should be remembered that for the connection via Bluetooth to work correctly, like most other devices that support this function, pairing will be required. The PIN code is entered on the radio and repeated on the device (sometimes, especially if the device has already been connected via Bluetooth, you will only need to enter it on the radio).
How to complete the demo
When supplied by the Pioneer manufacturer, the device is set to DEMO ON. Immediately after purchasing and connecting the car radio, it is important to understand and disable the demonstration, designed to advertise the device when selling. It is possible to use the Pioneer car radio in this state, but it does not seem comfortable, since when the device is turned off, the backlight does not go out and the creeping line does not disappear from the display.
Disabling Demo on the Pioneer radio is very simple:
- If long pressing on mute does not help, then you need to turn off the Pioneer radio, go to the engineering menu and long press the SRC (Source) key.
- In the settings, turn the wheel to reach the DEMO line.
- Switch from ON to OFF indication.
- Close the settings by pressing BAND.
Pioneer car radio engineering menu
Important: if the red wire (ACC) of the Pioneer radio is not connected to the contact that turns the ignition on/off, the car’s battery will be discharged.
Thus, after purchasing a modern Pioneer car radio, setting up the device is quite accessible for independent actions.
Demo mode disabled
Audio
Front speakers
Having configured the radio receiver, as well as connecting sound sources, you can focus on sound quality.
The recommended volume for proper settings is no more than 30 units.
- After adjusting the volume, press the knob to get to the settings menu.
- Here they look for the “Audio” item.
- By pressing the handle, you enter this menu.
- After looking through it, they find the Fader instruction.
Very often it is combined with the balance menu, then the desired menu will sound like Fader/Balance
In the factory setting, these indicators are zero.
It has been empirically proven that here you can bet 100 - 125.
Rear speakers
The front speakers work cleanly, now it’s time to switch the rear speakers on the shelf into subwoofer mode - fortunately Pioneer can do this too.
- Turn off the radio.
- Press and hold the power button (as if you were going to set up the “demo” mode).
- Once in the menu, look for the inscription in the form of SW Kontrol.
- By pushing down the handle, you enter this menu.
- By rotating it, the parameter is set to SW.
- Confirm by pressing the handle again.
- Press the power button to save parameters and exit the menu.
- Then they return to the “Audio” menu (press the volume knob and rotate to select).
- By pressing the handle, you enter the menu.
- Here they look for the inscription SW SETTING1. Click on the handle to enter.
- Of the three options presented in the menu, you need to choose one of two - Normal or Rev.
In most cars, it is the second mode that will give the best sound.
The optimal solution would be to set 50 HZ.
Before moving on to the next settings, check at different volumes how the selected settings work. If you don’t like something, repeat the steps described, trying other values.
Loudness compensation
This option is hidden in the same “Audio” menu.
- Enter the menu, find the Loudness parameter.
- Select by pressing the knob.
- There are three values available here - High, Middle, Low (respectively high, medium, low).
- This parameter is responsible for adjusting frequencies at low volume levels. It is also impossible to give optimal settings here - they are set experimentally.
- Swing the knob to the left to go to “Audio” or from settings by pressing Band.
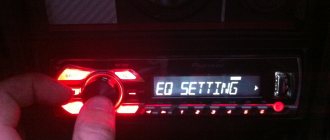
Equalizer settings
For advanced music lovers, here are a few more equalizer settings. They are hidden in the same “Audio” menu.
- Once in the menu, rotate the knob to select the EQ SETTING parameter.
- Enter this menu (depending on the model, you may need to enter another menu here). The three parameters offered in this menu are responsible separately for the settings of the low, mid, and high frequencies.
- Set according to your preferences. On some models, you can select several preset settings here. Depending on the speakers and your own preferences, adjust these parameters.
The settings here are no different from others - select by pressing, change by rotating, going to a higher level by swinging the knob to the left.
Step-by-step instruction
To find out how to disable demo mode, follow these steps:
- press the Mute button and hold it for several seconds;
- if the demo program does not turn off, it is recommended to turn off the player, open the service menu and hold down the SRC key for a few seconds;
- turn the volume control wheel until the cursor selects Demo;
- turn off demo mode by selecting Off instead of On;
- close the settings menu by pressing the Band button.
Please note that if the red AAC cable from the player is not connected to the terminal that turns on the ignition, the car's battery may be discharged.