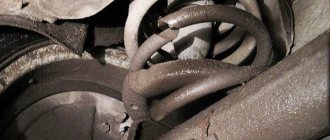
How to choose and buy?
If the bumper is broken or the bumper amplifier cannot be restored, then there are two solutions: buy and install original spare parts or give preference to parts from third-party brands.
The consumer will be able to choose an option that suits their budget. Original parts are components produced by the OEM manufacturer. Such body parts are characterized by several features:
- high price;
- Full compatibility with vehicle components;
- high-quality execution;
- branded packaging.
To choose the right bumper amplifier, you should use the spare parts catalog by entering the vehicle data: VIN, make, model, year of manufacture.
When you need to save money without compromising the quality of parts, purchasing a third-party brand bumper booster is a suitable option. Non-original spare parts attract consumers due to three properties:
- affordable cost;
- minimal difference from the OEM manufacturer's products;
- fast deliveries.
Manufacturers of duplicates produce all kinds of parts for different brands of cars, including bumper reinforcements for Renault, Nissan, Toyota, so buyers have long appreciated the opportunity to save money without sacrificing quality. Non-original parts are selected according to the characteristics of the vehicle: model, year of manufacture, body type. In most cases, analogues are used during the post-warranty service period.
The bumper reinforcement is an important structural part of the car. If the support is deformed after an impact, the cross member must be repaired or replaced. When you don’t want to experiment, buy original parts. If you need to save money, the best option is to order a duplicate spare part.
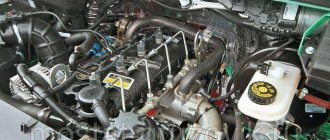
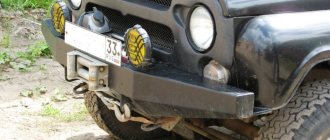
The power bumper, or “bumper”, as it is popularly called, is an important attribute for almost all SUVs. Car owners know that its main purpose is to protect vehicles from numerous obstacles that may be encountered during movement.
However, in addition to this, the power bumper adds a lot of convenience when operating the car, thanks to the presence of a special design designed for simple installation of a car winch.
Also, the bumper of this design includes a device for lifting the car called a “rack and pinion jack,” which makes the necessary manipulations much easier and, most importantly, safer for the driver. Using a winch in this design is much easier than in the standard version, since the power bumper is equipped with special holes for reliable fixation. This type of design is good for everyone, but many are interested in one question: is it possible to carry out a legal installation at this time, and is there a fine for using a “knuckle bar” for a car?
Features of making a bumper yourself
The drawing above serves as a sample; it can be modified in accordance with specific operational features (winch dimensions, kengurin configuration, UAZ model). The general principles in the manufacture of a power structure for an SUV are:
- cut; at home, an angle grinder (grinder), when buying metal on the construction market, it is better to use a guillotine;
- bending: in the absence of a bending machine, it is more rational to make cuts on the reverse side of the bend (the thickness of the disk is equal to the thickness of the sheet metal, the depth of the cut is 2/3 - ½ the thickness of the workpiece), if radius rounding is necessary, several cuts are created at an equal distance from the bend line;
- installation: it is recommended to periodically try on the manufactured body kit to the seats on the car body, the central part of the product should be pressed against the body of the UAZ 469;
- “kenguryatnik” - mounted locally, made of pipes.
Drawing of a bumper in the form of a sweep
A homemade power bumper on a UAZ will have a presentable appearance only if the welds are carefully processed, followed by putty, spray painting, spray painting or powder coating (if you have an induction furnace).
The drawing of the power bumper shown above has after the bend. A lower structure made of tubular arches is used to protect the crankcase. The upper part is designed at the discretion of the owner. An example could be the UAZ Patriot power bumper with one arch, reinforced in the central part with a pair of sheet steel elements.
Bumper for UAZ loaf of pipe
To make a bumper for a loaf of pipe, you will first need to think through the project and make a template. For example, a bumper may consist of the following parts: the bumper itself, 2 side panels, a kangaroo bar, 2 side bars.
Using a template, a blank of an expanded bumper is cut out of 4 mm metal. We bend the workpiece: along the inside of the bend you can cut the metal by 1.5 mm -2 mm, then bending will be much easier. The flanges are bent in a vice in 4 passes.
To give the product a semicircular shape, longitudinal cuts are made on the flanges after bending. We bend the gutter, mark and cut out both sides. We bend them, weld them, and try them on top of the standard bumper.
Then, after welding, we process all the seams and clean them. If the pipes are affected by rust, we treat the structure with a rust converter and prime it. We cut out the kengurin from a 40 mm galvanized pipe and weld it. All that remains is to measure the bumper mounts and install the product.
How to choose a power structure for a UAZ Hunter
Before purchasing or making a security device, you should seriously think about why it will be needed. If you want to improve the aesthetic appeal of the appearance, then you can choose any brand and design. Even if it is plastic, imitating expensive materials and coatings. When a power body kit is a necessity, because the car is often used for trips into nature, then a regular steel bumper will do, without additional attachments.
When asked whether a power body kit is needed, owners' opinions in most cases differ. Some believe that it is indispensable for off-road use, while others think that such designs have more disadvantages than advantages. Let's figure out who is right.
The advantages include:
- the ability to ram small trees and bushes without causing damage to the car;
- protection when driving through various obstacles, such as tree stumps;
- you can install a winch on them, and a gate on the rear bumper for attaching a spare wheel;
- the presence of kengurin provides additional protection for the headlights and radiator;
- allows you to jack up the car, not only relying on standard places;
- improving the attractiveness of appearance.
Undoubtedly, a high-quality steel power bumper will provide much more effective protection for the front and rear of the UAZ Hunter than flimsy plastic ones. That is why such powerful and durable products have become so widely used.
In addition to the high cost, such elements also have a number of disadvantages.
- A good power bumper cannot be light, and an increase in weight leads to an upgrade of the standard suspension. In addition, increased weight negatively affects cross-country ability.
- The structure is attached to the frame and in the event of serious collisions it can deform, which will entail expensive repairs.
- In certain cases, it will be necessary to modernize and strengthen not only the suspension, but also the frame.
Meanwhile, in some cases, weight gain can, on the contrary, have a positive effect. For example, when driving through mud, but this is rather an exception. Basically, the heavy weight hinders the Hunter's maneuverability. In the case of this particular model of the Ulyanovsk Automobile Plant, a power bumper may not be required, since it is possible to use the factory version of the design, which is quite strong and reliable. If you mean installing a winch and driving on severe off-road and rough terrain, in such cases you cannot do without a power body kit.
Tuning or modification
Modern modifications of UAZ are produced with various improvements and modifications. But the entire model range of these cars, from the oldest to the newest, has always been united by one thing - this is one of the most popular car brands for tuning and improvements aimed at adapting to certain operating conditions. To use a car in absolute off-road conditions, tuning the engine and suspension alone will not be enough. Adapting a car, for example, for fishing or hunting in harsh road conditions, also involves changing the appearance, namely the installation of additional attachments. The most popular of these additions are: power bumper, winch, body kits.
Why strengthen the bumper?
The power bumper on the UAZ can be considered from the point of view of several purposes. First of all, as befits an element of external tuning, this additional mounted element significantly modernizes the exterior, making the appearance of the car more attractive. But still, the UAZ is, first of all, an SUV, and the power bumper for this car is simply obliged to perform a practical function, namely to protect the body and suspension elements from damage. It is much stronger than the standard design. To absorb energy when colliding with an obstacle, a subframe is provided in the design of the power bumper. Using this element, the power bumper is attached to the frame. When colliding with an obstacle, the subframe absorbs the impact energy. To ensure that the deforming force is not transmitted further, the materials of the subframe elements, as a rule, are used weak. They have lower strength parameters compared to the frame and the bumper itself. In other words, if something bends during an impact, it will be the subframe.
Making a drawing
Before you make a power bumper with your own hands, you will need to carry out painstaking preparation.
It can be represented in the form of the following stages:
- First, the standard product is dismantled. Try to make it so that it is not damaged and can be used on another machine;
- Take measurements carefully. This is a responsible procedure. Accuracy is important here if you want the power bumper installation to be hassle-free once it's made;
Drawing of a power bumper for UAZ 469
- When making a power bumper with your own hands, drawings are necessary - you won’t be able to do without them. Therefore, scour the Internet - you will probably find something suitable there. Be sure to make sure that the dimensions on the found drawing correspond to those that you removed from your car;
- If you don’t find anything suitable on the Internet, you will have to draw your own drawings. This is a job that requires certain knowledge. If you don’t feel strong enough to handle it, try asking one of your friends who is good at drawing.
How did the power bumper come about?
Even judging by the name (“kenguryatnik”), one can understand that the power bumper was invented in the places where kangaroos live, and these animals, as is known, live on the Australian continent. The first design was supposed to protect the car from wild animals that ran out from everywhere and, when frightened, could get under the wheels of vehicles.
Initially, the bumper was made of metal grilles and complemented the design with a reinforced frame. After the positive characteristics of the protective element were assessed, the power bumper began to be used on other continents, and the installation was carried out on any car - both a sedan and a cargo vehicle.
How to make
A power bumper for a UAZ can be ordered or purchased at a tuning studio. But keep in mind that the price of a bumper for a UAZ “loaf” reaches a thousand dollars. The second way is to make a bumper for a UAZ 469, Patriot or Hunter with your own hands. More often, a bumper on an UAZ involves the presence of a sheet metal structure that covers the front part. An additional advantage is the presence of accessories for optics, protected by a wire grill, as well as fasteners for a boat or bicycle.
The most popular do-it-yourself kenguryatnik on UAZ is made from pipes. To make a power bumper for a UAZ with your own hands, you need:
- steel pipes with a diameter of 60 mm for making the frame;
- pipes having a diameter of 40 mm for small bends;
- corners for welding;
- Bulgarian;
- welding machine;
- pipe bender or 45 and 90 degree angles;
- bolts;
- stubs.
Choose pipes for the bumper on the UAZ “loaf” from stainless steel - they last longer and look more presentable than products made of ferrous metal. Even if you paint the pipes on the bumper of a UAZ Patriot with your own hands, after each trip you will be faced with the need to repaint them due to damage to the paint layer by road abrasives. Do-it-yourself caps, corners and other fasteners for the power bumper on a UAZ are sold by handrail manufacturing companies.
Drawings for making a do-it-yourself kenguryatnik
DIY bumper for UAZ loaf
5-6 free evenings and you can make a power bumper with your own hands. What stages of work will the master have to go through:
- Project development: you need to choose from a variety of power bumpers a model that suits you in terms of its functional and external characteristics. Measure the dimensions of the bumper seat and draw a drawing in accordance with it. Creating a mockup: Make a mockup of a bumper from cardboard or a sheet of tin and try it on your loaf.
- Materials: Prepare your starting materials. Typically, for the manufacture of power bumpers, stainless steel or steel pipes with a diameter of 60 mm for the frame and a diameter of 40 mm for bends are taken. You will need corners for welding.
- Making blanks: cut out the necessary blanks according to the template.
- Assembly: assemble the structure by welding (for stainless steel, argon welding will be required). First, the structure is tacked, then the symmetry of the product is checked, and only then the final welding is carried out.
- Preparation: sand the welds, prime the product and paint with anti-corrosion paint.
- Installation: bolt the finished bumper to the side members or to the beam.
Purpose of the bumper
This is essentially a protective device; sometimes drivers even call it a “buffer”. In the event of a car hitting an obstacle or being hit from behind by another car, the bumper protects, well, in theory, the load-bearing base from drastic damage. And here it all depends on the strength of the body and the design of the bumper. Cars of such a class as the UAZ Hunter require a strong rear bumper. After all, the main places where this machine is used are most often characterized by the lack of road surfaces and obstacles that can be caught. That is why this part, installed by the factory, is very durable, but not stylish.
Important! It must be remembered that this part is used very often to remove a car stuck in the mud!
What types of rear bumpers are there for UAZ Hunter?
It all depends on the imagination of the owner of the UAZ Hunter. Basically, 2 types of these parts are made:
- Corner or box-shaped.
- Tubular type.
These names themselves speak about the shape of this product. Corner ones are made in the form of a box, but with a more brutal and pleasant appearance than those installed by the factory. Well, as a bonus, various grooves and holes for attachments are added.
The second ones are usually made of pipes of the required diameter for strength, bent and welded as the owner of the car wishes. Each type of this product has its own disadvantages and advantages. Tubular is more durable, but at the same time it limits the possibility of using various attachments. More precisely, it makes their installation much more difficult. But you can attach anything to a box-shaped one without any problems, as long as you have enough imagination. However, they are slightly weaker in operation. Although in any case stronger than the factory ones.
What to make a new rear “buffer” from
Metal and only metal at its core. And only if you decide to make overlays - a little plastic. Well, the metal profile is as follows:
- sheet 3-4 mm thick;
- channel;
- pipe from 1 to 2 inches;
Well, the decorations are already to the taste of the owner. You can use either plywood or plastic of your choice.
How to make a rear bumper with your own hands
But this is already a versatile process. And it begins with making a drawing.
Attention! You can draw the drawing yourself, but it’s better to just download a ready-made version from the Internet and make your own additions. This is the best option
When the diagram is at hand, all that remains is to pick up a gas welding machine or an electric “Fortune”, whichever is more familiar, and cut the parts according to the “technical documentation”. When they are all ready to carefully check and try them on. Fold it figuratively into the future bumper. Measure again. And only after that, pick up the electric welding tool and begin the joining process. When the rear frame is assembled, use an electric drill to make the necessary holes. The draft is ready.
How to make overlays
Well, to decorate your creation, various overlays are made. Although, if the rear bumper of the UAZ Hunter is made quite competently, then ready-made linings can be quite freely purchased in the store. Well, if you want something special, then grab some plywood and a jigsaw and God help you! You need to measure the surfaces to be covered and simply cut out the elegant plywood parts. The main thing is not to forget to leave space for installing the rear lights. Apply varnish and dry with a hairdryer. Ready.
This is interesting: KGB TFX 5 alarm system with auto start: 7 main characteristics, installation and operating instructions
But honestly, if the UAZ Hunter is used for its intended purpose, that is, for extreme trips, then this is already extra trouble.
On a note! There are no pads placed on the tubular rear “buffers” at all!
Stages of work
It’s easy to make drawings for a “loaf” with your own hands - use blanks for similar cars or other cars from a domestic manufacturer. The bumper on the UAZ “loaf” involves making a frame from a channel and is the easiest to install among the power reinforcements. The UAZ “Patriot” bumper and the UAZ “Hunter” or “loaf” power bumper are manufactured according to the following algorithm:
The length of the pipes is calculated using a tape measure. The width and height of the products are measured and noted on the drawing of the power bumper for the UAZ.
- The pipe flow rate for the manufacture of jumpers for the power bumper of the UAZ “Hunter” is calculated.
- The products are cut using a grinder and, according to the drawing of the power bumper, they are joined together with a millimeter gap. You can use a trim tool for this job of installing the UAZ “Patriot” bumper.
- The drawing of the bumper is checked and its compliance with it, in particular, the symmetry of the design.
- A drawing of the bumper is used, and the places where welding work will be carried out are marked on the workpiece.
- The elements of the rear bumper on the Hunter are “tacked” using a welding machine. When sanding the seams, make sure that the elements are symmetrical and only then weld them again.
After completing the welding work, bolt the finished fixture to the beam or side members.
Manufacturing and installation process
Making a bumper for a UAZ Patriot or any other car, just as in the case of a model, should be done in stages, separately for each wing. For a master who has made such parts more than once, the whole process will take at most several hours. For a novice specialist who has not yet gotten his hands on this process, completion may take several days.
At the initial stage, the central part is mounted on the front or rear bumper. Its upper and lower parts are connected and welded using a welding machine. Most car enthusiasts prefer to choose rectangular profiles for making a bumper on a UAZ loaf, which are inferior to other options in price. In order to achieve the required lines, cuts are made in the profile, and then it is bent at the desired angle. It is important to take into account that the front and rear bumper angles will differ from each other.
Power bumper UAZ Bukhanka - Community "UAZovody" on DRIVE2
Good day. The other day we decided to cook a comrade a silovik for his loaf. We took materials, welding, beer and began to imagine the shape of the future bumper) We didn’t have a specific drawing, and we didn’t want to make a bumper with a protruding winch like everyone else, so we made it up as we went along, in the end we assembled an approximate frame on tacks, had a smoke break and made sure that the shape suits us, after which we removed it and began to boil and strengthen it. The next day, with sore eyes and faces burned from welding, we sat in the garage and argued about who would cut the metal and who would cook, but our argument was interrupted by Corifanus who came to visit and offered to cover the bumper with aluminum and boil it with argon! The idea hooked us, we immediately went and took out the remains of aluminum and began to sculpt patterns, after which we transferred them to metal and immediately cut them out and began riveting.
This is how we got the bumper in 2 days! Bumper weight is approximately 20-25kg)
Write your comments, we are very interested to know your opinion.
I will soon register this car on the website so that you can learn more about it.
Good luck to everyone on the roads)
www.drive2.ru
Purpose of the bumper
This is essentially a protective device; sometimes drivers even call it a “buffer”. In the event of a car hitting an obstacle or being hit from behind by another car, the bumper protects, well, in theory, the load-bearing base from drastic damage. And here it all depends on the strength of the body and the design of the bumper. Cars of such a class as the UAZ Hunter require a strong rear bumper. After all, the main places where this machine is used are most often characterized by the lack of road surfaces and obstacles that can be caught. That is why this part, installed by the factory, is very durable, but not stylish.
How to make a UAZ Hunter rear bumper yourself
Russian "jeep" - UAZ Hunter. His main feature is unpretentiousness in everything. And first of all in the design of the car. This is truly a “challenge-overcoming” machine. But how you want to turn your faithful “horse” into at least something similar to its imported counterparts. And such work begins with making bumpers with your own hands. For example, you can make a rear bumper for a UAZ Hunter with your own hands to replace the factory one.
Tools and materials
Manufacturing a power bumper for a UAZ 469 car does not require specialized education. The work can be performed by a person with minimal technical knowledge and experience in welding metal parts. During the manufacturing process, the following tools and materials may be required:
- A set of drawing tools or a specialized computer program for creating a drawing. A thin rod made of high-strength steel is well suited for drawing lines on the surface of a metal. The edge of the rod needs to be sharpened.
- Angle grinder or oxy-fuel torch. Essential for cutting metal parts. A torch may be needed to bend the metal at the desired angle if necessary. In some cases, you can cut out parts using hand tools.
- Welding machine. You can use both gas and electric welding. When welding with electric welding, the part must be removed from the vehicle or the terminals from the battery must be removed. Failure to comply with this rule may result in battery failure.
- Metal channel, profile or corner. Materials are selected based on the personal preferences of car owners.
- Drill. The product is suitable for both manual and electric drive.
- Pipe bender Necessary in the manufacture of a power bumper from a profile pipe. You can use both factory-made and home-made devices.
- Fastening elements. To fix the power bumper, bolts with a diameter of at least 10 mm are used. This is necessary for reliable fastening of the bumper to the car frame and resistance of the connection to varying degrees of mechanical damage.
- Paint and varnish products. To protect the power bumper of a UAZ 469 car, made by yourself, from the negative influence of the environment, it is necessary to apply paint to it.
- Consumables. You will need drills, a cutting wheel, sandpaper, etc. The diameter of the drills is selected based on the thickness of the bolts used.
- Personal protection elements. To avoid injury when performing work on the manufacture of a power bumper for a UAZ 469 vehicle, it is necessary to use personal protective equipment.
You can make a power bumper on a UAZ 469 car yourself. This will require technical skills and the availability of tools and materials. After completing the work, you will be able to obtain a unique product that meets the functionality of the car owner.
Benefits of working independently
It is generally accepted that a homemade reinforced bumper has a number of advantages over a purchased one. And the point is not that off-road equipment costs a lot of money - many motorists are interested in independently developing an original bumper design for the UAZ.
There is something to be proud of: a man creates a “kenguryatnik” on a UAZ 469 with his own hands, posts drawings and descriptions on the forum and studies the comments of his colleagues, taking into account the comments.
Power bumper design for UAZ
Let's see what are the advantages of the bumper on the UAZ, created by him:
- To save money. By making a reinforced bumper with your own hands, you don’t have to spend a lot of money.
- Opportunity to add your own ideas to a ready-made solution. Even using ready-made designs, you can do your own thing during production by improving other people's designs.
- The ability to take into account all the features of your car by installing a reinforced bumper on it.
- The prospect of making money by making a bumper for a UAZ 469 with your own hands, drawings, descriptions for friends or neighbors who cannot solve this problem alone.
Let the above list not be too long, but, firstly, it is incomplete, and secondly, each item in itself is a sufficient reason to spend time and effort on creating a bumper for the UAZ.
DIY front power bumper UAZ 469
Self-production of a power bumper requires a detailed drawing. You can make it yourself or find a ready-made version. Some motorists use specialized computer programs to create a drawing. When making a drawing, you must consider:
- Product width. Before creating a drawing, the car body is measured.
- Places where the power bumper is attached to the car. The product is attached to the UAZ 469 frame with bolts. To do this, you need to mark the location of the holes on the drawing.
- Availability of additional attachments. The location of fog lights, tow hooks, winch, etc. is noted on the drawing.
To manufacture a power bumper, welding will be required. You can use devices of any type designed for joining workpieces made of a specific metal. If you have no experience in welding metal parts, it is better to contact a specialized workshop. Specialists will manufacture a power bumper according to a pre-prepared drawing.
Before starting work, according to the created drawing, parts are cut out from thick cardboard. After this, they glue the model together and try it on the car. This procedure allows you to identify shortcomings and eliminate them as soon as possible, and prevents damage to the material if there are errors in the drawing. The car owner can evaluate the appearance of a car with a power bumper and, if necessary, make changes to the design of the product.
After preparation, they begin to manufacture the power bumper. For this, prepare the necessary materials. The power bumper can be made from a metal channel, profile pipe, or corner. The amount of material is selected according to the prepared drawing. Assembly of the front power bumper of the UAZ 469 car is carried out in the following sequence:
- Marking. Markings are applied to the material that exactly correspond to the drawn up drawing. To correctly apply markings, you can use measuring tools or transfer the necessary lines from an already made template.
- Preparing parts. The power bumper is divided into three parts. Each of them is made separately. The central part is equipped with brackets designed for fastening to the car frame. Standard fasteners will not withstand high loads. In this regard, it is necessary to strengthen them with pieces of metal plate, or to make new ones. Metal cutting is carried out with an angle grinder or using a gas cutter.
- Installation of the central part. The mounting brackets are fixed to the power bumper with bolts or by welding. After this, the central part of the bumper is installed in the seat. If the car owner plans to use a winch, at this stage it is necessary to provide a place for its installation and make mounting brackets. In the central part of the power bumper you will need to cut a hole for the winch cable to pass through.
- Installation of side parts. The parts are installed on the car according to the drawing and fixed to the central part by welding. If the bumper is made from a profile pipe, then it is necessary to bend the sections at the desired angle. To do this, you can use a specialized pipe bender or bend the sections in any other way.
- Cleaning welds. After connecting all parts of the power bumper of the UAZ 469 car, it is necessary to eliminate the welding seams on the front surface of the product. For this, an angle grinder is used.
- Preparing for painting. A layer of primer is applied to the surface of the product. It is better to choose an anti-corrosion compound. This will protect the metal parts of the bumper from corrosion and increase the service life of the product. The bumper is painted in several layers. The color of the product may be similar to the car or different. The color selection is based on the personal preferences of the car owner.
- Installation. The power bumper of the UAZ 469 car is attached to the car frame. This makes it possible to achieve high resistance to mechanical damage of varying degrees.
The instructions for manufacturing a power bumper for a UAZ 469 may differ. Depending on the personal preferences of the car owner, mounts for attachments are additionally manufactured.
Making a bumper yourself
In order to make a bumper for an UAZ with your own hands, you should decide on the material for its manufacture, draw a diagram, prepare tools and materials. Don't forget to remove the old bumper. The main thing is not to miss anything and do everything according to plan.
Preparatory work
To produce a homemade bumper you will need:
- paper, pencil, eraser, tape measure, scissors, cardboard, tape or a special computer program (for making drawings and cutting out a stencil from them);
- welding machine;
- metal plates, profiles, rectangular or round pipes for cutting out parts of the bumper and its edging (steel with a thickness of 3 mm or more is suitable);
- pipe bender (if you plan to use pipes);
- paint (for uniform coloring of the product, spray paint is more suitable);
- anti-rust and corrosion agent;
- file;
- screwdrivers, wrenches, hammer and other tools for dismantling the old bumper and installing a new one;
- a hacksaw (scissors) for metal, a drill or a gas torch (you need to choose a tool depending on the thickness of the material used);
- fasteners;
- pieces of rags (unnecessary fabric);
- grinding machine for sealing welded seams;
- sandpaper.
Having collected materials and tools, you can proceed to drawing a drawing on paper or making sketches using a computer. You should also get rid of the previous, old bumper in advance.
Drawing and layout
First of all, look at several options for making a homemade bumper and choose the shape that would suit the complexity of production and would appeal to you in appearance. Anyone who is strong in a discipline such as drawing can create bumper diagrams with his own hands, having first taken the dimensions of the car using a tape measure.
An alternative option is a symbiosis of other people's experience and your own thoughts about the design of the future bumper. If you are an adherent of modern computer technologies, use one of the programs for drawing and 3D layout: AutoCAD, Solid Works, Katina, Compass.
Manufacturing and installation process
You need to start making the bumper from the central part. Cut a piece of metal of a given shape and size according to the drawings. If metal profiles were chosen as the material, the following method should be used to bend them: you need to make slots at the places where the expected bends are, and then carry out manipulations to give the car bumper the desired shape.
At the second stage of manufacturing, you need to make each wing separately. If your car bumper will be made from pipes, bend each of them at the desired angle. After this, use a welding machine to weld the side parts to the central one. If sloppy seams are obtained, they should be additionally processed with a special grinding machine or any suitable available material to give the product an aesthetic appearance. To weld U-shaped components, for example, radiator protection, you must first burn holes of the required size in the base of the frame. Such work can be performed using a gas torch.
When the bumper product is ready, you should degrease it with an alcohol-containing liquid and let it dry. After this, immediately begin painting and polishing the product, not forgetting to pre-treat it with an anti-corrosion agent. If stainless steel was used, painting and polishing are skipped. At the installation stage, install the device on the car using welding, bolts, and screws.
Sequence of manufacturing power bumpers
The most common place where linings are assembled is a cottage or a garage. The base used is sheet metal (2-3 mm thick), a round pipe or a box beam (similar to the one that makes up the frame of a car).
In order to change the appearance of the body, it is necessary to carry out a number of measures.
Part 1. Preliminary preparation
1. Dismantling the front part of the car body.
All overhead elements belonging to the factory configuration are removed from the place intended for installation of the power bumper.
2. Making a layout.
In order to accurately develop a complex spatial structure, programmers can use the Solid Works complex (or simpler software: Katina, AutoCad or Compass). However, most car enthusiasts prefer to use the “scientific poke” method, that is, trying them on “by eye”.
To make a pattern, take a piece of cardboard of a suitable size and tape. The technology is not difficult: try it on, cut it, assemble it into pieces of tape, and apply it again to the intended place. Make the final version and expand the sketch. Especially carefully check the dimensions and coordinates of elements located symmetrically.
3. Strengthening the side members.
Please keep the following in mind in advance. Depending on the intended shape, a power bumper will weigh down the car’s structure by 15-25 kg (and sometimes more, it depends on the number of pipes). It’s worth asking about the durability of your car’s frame. For example, a Niva car needs to increase the rigidity of the power structure.
Special plates are attached to the protruding part of the side members, which are necessary to prevent deformation during screeding. They are pre-coated with an anti-corrosion compound, and drilled holes are also protected from destruction. The plates are used to hold the assembled power bumper on the car.
Example of a drawing of a power bumper:
Part 2. Installation work
1. Assembling the frame frame.
Using a pre-made paper pattern, a frame and grooves are cut out of a metal sheet, and the sides are bent. Depending on the thickness of the source material, metal scissors, a drill or a gas torch are used to make the slots and holes. The final shape of the overhead box is obtained after using a welding machine.
If the frame is assembled only from rectangular pipes, they are cut from the inside and bent to size according to the paper pattern. First, the parts of the central crossbar are connected, then the sides. Welded.
Subsequently, the frame is attached to the plates (see point No. 3 “Reinforcing the side members”).
2. Manufacturing of additional elements from pipes.
The best equipment for giving round metal a neat shape is a pipe bender. If there is none, the structure is carefully heated with a gas burner along the bend axis so as not to burn a hole. In this case, one of the ends of the pipe is gradually directed in the desired direction.
3. Welding the frame element by element and assembling it.
If there are U-shaped components protecting the radiator, holes are burned for them in the base of the frame. They are then welded in place.
Part 3. Degreasing and painting the finished product
In order to bring the power bumper to a presentable appearance, it is necessary to carry out a painting process (using traditional technology). Upon completion of the process, the power bumper, made by yourself, will take its rightful place on the front of the car.
It is worth keeping in mind that all places where holes are drilled in the factory structure must be properly treated with anti-corrosion compounds and then covered with paint, varnish, and a preservative. Otherwise, very soon the eyes of passers-by will be attracted not by the original power bumper, but by the rust spots corroding the structure.
Keep up with modern fashion trends and equip your car with fashion installations. Many car enthusiasts can make power bumpers!
Decorative design of bumpers
In fact, the craftsman is engaged in the decorative design of the car bumper even at the manufacturing stage. Painting the product in the desired color can be considered such “decor”. It can match the color of the car body tone-on-tone or be contrasting. Remember that the drying time of paint directly depends on its chemical properties and can be several hours or even several days. The same applies to anti-corrosion agents.
Pay attention to the always winning black color. It can even be suitable for decorating a car whose body is painted in light colors
This combination will emphasize the peculiarity and uniqueness of the car. If the color of the car itself is also dark, consider a color called metallic. It will even help hide minor defects and scratches.
One of the modification tools is covering the bumper with film. It's economical and beautiful. Another advantage of film is the ability to replace a boring background with another in a couple of hours: film is a thin and pliable material. At the same time, it is not recommended to consider covering only part of the bumper; special film should be used over its entire surface.
Making a car bumper for an UAZ, in addition to having the necessary material and tools, also requires some skill, several hours (at best) or days of free time. The design stage (production of drawings and models) cannot be neglected, since it is when creating a sketch that an error in calculations or measurements can be noticed and corrected in time.
Front bumper UAZ loaf
The front power bumper of a loaf - a vehicle used primarily off-road - is a very important and necessary accessory. An iron bumper will protect the body from stones and trees; when driving through the forest, it can be used to push aside bushes.
You can put a winch on the powerhouse.
RIF products can be considered an honorary leader in the family of front bumpers for UAZ. The manufacturer’s line includes several modifications of the front power bumpers for Bukhanka, including models with an integrated kengurin, with a platform for a winch, etc.
Read more: Change the backlight of the Priora dashboard
Universal bumpers are suitable for standard models and for lifted ones. For tuning and passive safety, models with crash bars are very popular.
Many models of power front bumpers are equipped with protective headlight grilles, slats for additional headlights, and a protective frame for the license plate.
RIF bumper for UAZ loaf
Manufacturer RIF is the most famous Russian brand, under which components for tuning SUVs, including loaves, are produced.
All RIF equipment is manufactured according to standards applicable to automotive components; safety, mutual strength of parts, weight - everything complies with modern technical regulations for Russian cars.
In the manufacture of bumpers, high-quality materials, pipes and steel are used. For UAZ loaves, the manufacturer offers several different models of front and rear power bumpers and fasteners for them.
Front:
- universal;
- universal reinforced;
- with high and low protective arc. Rear:
- with a square for a standard tow bar and a lift;
- with a platform for a standard winch and an elevator;
- with a gate and with a gate with a square for a tow bar;
- with a platform for a winch and a gate.
The bumper protects the body when hitting bumps, stumps, stones, garbage cans; used for installing a winch, equipped with a stop for HiJack. Kengurin reef protects the radiator, hood and headlights, allows you to install additional optics or LED panels.
The rear bumper RIF from a loaf is used for attaching a towbar, has one or 2 gates for fixing a spare wheel, HiJack or canister.
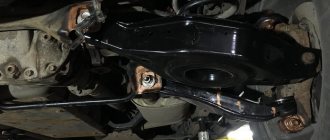
Body lift
The 2008 UAZ car can be improved starting with a body lift - installing inserts between the frame and the body, the width of which is 5 cm. The cushions must be preserved. Then the lift will become smaller, and the body will be rigidly attached to the frame.
After the elevator, you can install wheels of size 33, 285 by 75 by 16. They fit perfectly. The only drawback is that Hunter will scratch backwards. The problem can be solved with four-leaf reinforced springs. They:
- Durable.
- Wear-resistant.
- Soft.
- Good in terms of price/quality ratio.
Wheels with zero offset are considered optimal, but they slightly limit the angle of rotation of the wheel with a bolt. You can screw this same bolt in and out, but it is not advisable to greatly limit the angle of rotation.