Silencer in theory
A car muffler is an important part of a modern car, without which its normal operation is impossible. Car enthusiasts, especially beginners, are racking their brains about which muffler is best to install, how to take care of it, and what to do if it breaks. To answer all the questions, you need to go through the theory of the structure and operation of the car exhaust system.
The main purpose of a car muffler is to reduce the noise of an internal combustion engine. You will immediately understand whether a car passing by had a muffler or not, since without it the level of car noise increases exponentially. Considering the constant increase in the number of cars around the world, it would definitely be impossible to live without this part.
The fact is that sound is a pressure wave formed using air pulses of alternating low and high pressure. In a car engine, pressure waves occur when the exhaust valve opens repeatedly and releases gas at high pressure into the exhaust system.
As the engine speed increases, the pressure fluctuates and therefore the sound produced has a higher frequency.
However, not all the noise a car makes comes from the exhaust system. Other factors that influence noise levels include intake noise, mechanical noise, and vibration caused by engine and drive operation. And also, a car muffler should under no circumstances restrict the exit of exhaust gases from the pipe.
Muffler internals
There are many variations of the two main types of muffler designs: active and reactive. As a rule, car mufflers have both reactive and absorbent (active) properties. In modern cars, from two to five mufflers are installed, most often two are included in the configuration. The one located further from the engine is called the main or rear muffler, and the one closer is called the preliminary, or otherwise resonator.
A simplified diagram for a better understanding of the vehicle exhaust system
Jet muffler
Reactive or reflective mufflers use obstacles to reduce noise. They are designed in such a way that the remaining part of the sound waves created by the engine and passing through the resonator is damped in the muffler. A reactive muffler typically consists of a series of resonating chambers (two to four) that are designed to reduce the sound pressure level at certain frequencies.
Cutaway jet muffler
Muffler design:
- Front perforated pipe.
- Inlet pipe.
- Middle partition.
- Outlet pipe.
- Front partition.
- Rear perforated pipe.
- Rear partition.
- Frame.
The receiving and exhaust tubes inside the chambers are usually displaced and riddled with perforations (holes), through which sound pulses are scattered in different directions inside the chamber (the angle of rotation of the flow is in the range of 90–360°), which, in turn, leads to destructive interference ( a physical phenomenon when sounds with the same amplitude, but with divergent low and high points of the waves, neutralize each other).
Diagram of gas supply to the muffler
The downside of such mufflers is that they create more resistance (back pressure) and reduce the thrust of the car engine, however, for passenger cars, where low noise levels, and, therefore, passenger comfort is a priority, this type of mufflers is ideal.
Active muffler
To reduce sound energy, active or, in other words, dissipative mufflers operate on the principle of absorption. Sound waves are damped as their energy is converted into heat in the absorbent material (usually a layer of glass insulation). A typical active muffler consists of a straight, round, perforated pipe that is enclosed in a larger steel housing. Between the perforated pipe and the housing there is a layer of sound-absorbing material that dampens some impulse pressure. Although active mufflers create less back pressure than reactive ones, they reduce engine noise much worse.
The design of the active muffler is as follows:
Structure of the active muffler
- Sound-absorbing material.
- Frame.
- Straight-through outlet pipe.
- Steel mesh.
- Perforated pipe.
- Fully welded joints.
Typically, reactive mufflers use resonating chambers that target specific frequencies to reduce noise, while active mufflers reduce noise across the entire spectrum, especially at higher frequencies.
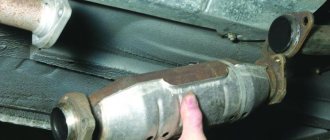
Flame arrestor, also known as pre-muffler, also known as resonator
Node design:
- Frame.
- Thermal insulation.
- Blind partition.
- Perforated pipe.
- Throttle.
Structure of a standard resonator
A resonator is an auxiliary exhaust system that allows you to make the most of all the hidden capabilities of the engine. There is a huge variety of resonators, in different shapes and sizes, but not all pre-silencers are created equal. A standard flame arrester is a pipe with many holes (perforated pipe) encased in a metal casing. And also, to more effectively neutralize vibrations, a throttle hole is drilled in the pipe.
The resonator operates according to the law of vibration damping. Its action is to cause the sound of frequencies unpleasant to the human ear to resonate. In sound wave theory, when low frequencies couple with reflected high frequencies, a net cancellation occurs. But if, during welding of this section, the parts are not welded to the place measured by it, the resonator will not work, or it will even increase the noise. Therefore, in industrial workshops, the production of resonators is robotic.
Shooting when starting up
If you hear popping noises from the muffler, this may indicate a variety of problems - from a clogged air filter to an incorrectly adjusted carburetor. Accordingly, different repairs are applied:
- Replacing the filter.
- Carburetor adjustment - checking the fuel level in the chamber, the integrity of the float, cleaning the jets.
- Normalization of ignition - it can “shoot” if it is too late.
- Adjusting the thermal clearance of the cylinder head valves.
- Tightening or replacing the timing belt, toothed pulley, grinding valves.
Experts determine causes and consequences by conducting computer diagnostics; this is the fastest way to understand which part of the car is the problem.
The muffler is broken
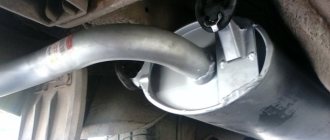
The exhaust system of a car is the most unprotected part of the car. It is exposed to external influences and car enthusiasts often have to repair it. A breakdown of the system is not just an unpleasant knocking sound and other “delights” such as a decrease in car power, jerking of the car, but also the danger that toxic fumes coming out of the engine can leak into the cabin and poison people. In order for your exhaust system to function properly, it, in particular, and the car in general, must be systematically checked and taken for maintenance. If you neglect this, you risk getting into an accident at the most inopportune moment. Don't forget that muffler damage is on the list of ten reasons why you have to call a tow truck.
Corrosion protection
The muffler often suffers from fading of paint, which is why corrosion quickly renders it inoperable. One of the effective ways to protect the surface of the exhaust system from corrosion is to paint it. It should always be remembered that the temperature of the gases leaving the exhaust pipe is usually 420–760 °C, and the surface temperature of the exhaust pipe is 200–540 °C. Therefore, only heat-resistant, silicone varnishes and enamels are suitable for painting.
To paint the “glushak”, you need to proceed like this:
- First, remove the muffler and prepare it for painting (to do this, you need to thoroughly clean it of all dirt and oil, degrease it and dry it well).
- Inspect the dried muffler, not missing any areas where the factory coating has peeled off or oil stains.
- If you do find oil stains, take a rag soaked in gasoline and wipe them thoroughly.
With peeling factory paint, proceed as follows:
- Take a strong knife or putty knife and remove the previous coating.
- If you notice rust on the exhaust system, remove it immediately using coarse sandpaper or a special rust remover.
- After these manipulations, apply a layer of primer.
- After the primer has completely dried, paint as stated in the instructions for the paint you purchased.
- Then let the muffler dry a little, install it back under the car body and let the engine run for a few minutes so that the muffler warms up and the paint dries.
There are times when the rust has penetrated too deeply and it is impossible to get rid of it. If this is your option, then you should treat the muffler with a rust converter.
There are alternative ways to protect the exhaust system:
- First you need, as for painting, to clean the muffler and exhaust pipe from dirt, oil and rust, and then apply a thin layer of graphite lubricant. You can do it as follows:
- Let's go to the nearest computer store.
- We ask them to process the powder from the printer.
- Mix it with a small amount of grease.
- Then you need to coat the surface with the mixture, place it on stands and start drying with a hair dryer, blowing from the side of the resonator.
Until the grease completely burns out, the coating will not stop emitting a pungent odor, so carry out all manipulations in a respirator and outside, or at least in a well-ventilated room (garage).
The muffler is leaking
You carried out an inspection and found no signs of corrosion on the muffler, but saw damage. Unfortunately, this happens, because the exhaust system is the most unprotected part of the car; it is affected by both mechanical influences (for example, a bouncing stone or unsuccessful parking of a car) and chemical ones, in the form of aggressive chemical compounds, salts and even the external environment. But there are also obvious reasons for the formation of a hole: perhaps the muffler is made of poor quality material.
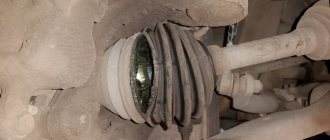
Muffler burnout
If you are faced with such a nuisance as a muffler burning out, then do not rush to think that the problem lies inside the car. Novice car enthusiasts believe that mufflers burn out due to too intense exhaust emissions created by the internal combustion engine. But often this is not the case. Today, many car manufacturers, even well-known brands, produce cars with low-quality parts, without normal processing, which are highly susceptible to chemicals and the environment.
Example of a burned out muffler
Obviously, the main reason for system burnout is various types of environmental influences on the part. If you treat your car irresponsibly, it is stored in rain, snow or scorching sun, then you should not be surprised that part of the exhaust system quickly burns out, because this is facilitated by a natural chemical process in this case - metal oxidation.
Another common reason for part damage is idling the car and driving short distances. Do not forget that sudden temperature changes are detrimental to the muffler. At low temperatures, condensation forms in the muffler, which has a destructive effect on all metal except stainless steel.
Kinds
Resonators or additional mufflers are classified depending on the type of engine they are used on.
Therefore, there are 2 main types of devices.
- Designed for installation on two-stroke engines. If the vehicle is equipped with such a motor, which is not so common these days, then the resonator becomes a mandatory element of the exhaust system layout. If the resonator is missing, this will immediately lead to an increase in the amount of fuel consumed. The operation of the motor will change for the worse, speed and power will decrease. This is due to the fact that not only exhaust gas will be removed, but also incompletely burned fuel. Hence the drop in speed parallels the increase in fuel consumption.
- Resonators installed on four-stroke power plants. In the case of such engines, the resonator may not be beneficial to the car, but may create certain additional problems. Removal allows you to increase the engine power level by approximately 15%. Experienced motorists believe that on four-stroke engines the resonator only interferes with the normal operation of the engine. Yes, if you remove it, the power will actually increase. But at the same time, the environmental friendliness of the vehicle will deteriorate, and the exhaust will begin to pollute the environment. Therefore, 4-stroke engines still have resonators that allow them to achieve the required environmental standards.
There is one more additional classification that distinguishes resonators according to their design features.
Some cars are equipped with standard monoblock type elements. But gradually, almost everyone is switching to combined devices.
The second type of resonators consists of two main parts. This is a classic design with a pipe and partitions, as well as a chamber filled with special materials with noise-absorbing properties. Often, materials based on basalt fiber are used in structures.
Combined devices are more efficient, modern and useful in the operation of automobile engines and exhaust systems. Therefore, these types of resonators are found on most vehicles.
Small mufflers or muffler resonators are divided by their size. The following subcategories are distinguished:
- short;
- average;
- long.
Resonators are also sometimes classified depending on their volume. This is a useful classification method, since volume largely determines how effective a resonator will be in the design of an automobile exhaust system. If there is a volume deficit in the resonator, then when the driver sharply presses the gas pedal, the noise level will be extremely high. Some people like this sound, and therefore resonators are specially installed. But for reasons of safety of the exhaust system, as well as out of respect for people around, it is better to install devices with sufficient displacement.
Resonators or small mufflers are made from various materials. The most cost-effective designs are created on the basis of aluminized steel. Although in reality it is the simplest steel, on top of which a small layer of aluminum is applied. They look like full aluminum, but in fact they are not able to withstand significant loads. Requires more frequent replacement. The aluminum layer only temporarily prevents corrosion from forming on the device.
Car muffler resonator
If a motorist wants to get a truly high-quality, durable and efficient resonator, when the standard factory element is not satisfactory or has worn out, it is optimal to choose designs based on stainless steel with a double casing.
The exhaust system is constantly subjected to heavy loads in the form of high temperatures. As a result, malfunctions periodically occur in the normal operation of the entire vehicle. To ensure that the breakdown of a resonator or other component does not come as a surprise to the car owner, it is strongly recommended to carry out a preventive check and diagnostics of the unit’s performance. Having noticed the primary signs of malfunctions, you can take timely measures, carry out repair and restoration work, or simply completely replace the failed resonator.
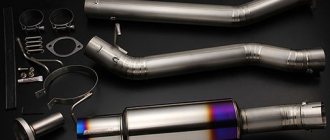
Making the exhaust quieter
If you want to forget about noise and make your exhaust system even quieter, you will need some tools:
- welding machine;
- angle grinder with a set of discs;
- a workbench equipped with a vice.
There are two ways to improve the exhaust system: insert a factory resonator between the muffler and the resonator, or make one yourself. And also do not forget that the thicker the walls of the part, the less noise there will be.
To weld an additional resonator you will need to perform the following manipulations:
- Make two halves of a barrel from a steel pipe with thin walls or from sheet metal.
- Weld and make holes in the pipe of the future resonator.
- Connect the body parts, place the perforated pipe inside the future barrel and weld it.
- Place sound insulation (glass wool or mineral wool) into the cavity between the pipe and the housing.
- Carefully weld the transverse edge of the muffler.
At the end of the work, treat the seams, clean and degrease the new device and cover it with heat-resistant paint.
After changing the design, its weight will increase, therefore, the pressure on the motor will increase. After all the work, be sure to carry out additional tests of the car to avoid trouble.
Video: how to replace the resonator
Basic moments
To replace the VAZ 2107 muffler as quickly as possible, you will need screwdrivers, a set of keys and sockets, as well as an inspection hole. If there is none, then you can raise the entire rear of the car as much as possible so that it is convenient to work under it. The main muffler is located at the rear of the car. Its edge is visible when looking at the car from behind. This element must be replaced either in case of severe deformation, as a result of which the ability to pass exhaust gases is greatly deteriorated, or if it is completely burned out, due to which exhaust gases escape from the muffler without being cleaned and noise reduced. Even if there are breakdowns or burnouts, the noise level increases many times. In this case, it is necessary to replace this element.
How much does a repair at a service station cost?
How much will it cost to replace the exhaust manifold gasket? The price for this type of work depends on the type of engine (carburetor, injection, 8-valve, 16-valve), the model of the seal itself, as well as the prices of the service station where you plan to repair your car.
On average, the work itself, together with the seal, costs somewhere around 1,500 rubles.
But you don’t have to spend money on work. Replacing the VAZ exhaust manifold gasket can be done on your own without much difficulty. Especially if you have a set of hand tools and you have even the slightest idea about the design of your car’s engine.
Prevention measures
The need to repair a muffler may not arise immediately. Usually, some prerequisites appear first, which can be prevented by proper prevention, the use of high-quality fuel and a balanced driving regimen.
The muffler must be mounted only on standard suspensions. If the suspensions are made in-house, they must meet certain standards specified for the given vehicle and muffler.
For preventive maintenance, some car enthusiasts fill the muffler with an anti-corrosion liquid, which pushes away moisture and prevents internal corrosion.
Installation
When installing, try to use new fasteners: bolts, nuts, hangers. Good results are obtained by using a special heat-resistant sealant, but do not allow it to get inside the system and do not overdo it with the amount. When tightening the nuts, make sure that there is no distortion of the clamps. As you can see, replacing a muffler with your own hands is not such a difficult task.
Purpose
As you know, the mixture ignites during operation in an engine. This fire is accompanied by a characteristic sound. During an explosion, colossal pushing energy is generated. It is so large that it can lift the piston to top dead center. In the last stroke of work, gases are released. They escape into the atmosphere under pressure. But what is the exhaust system for? It serves to dampen sound vibrations. After all, without it, the operation of even the most technologically advanced engine would be loud and unbearable. Thus, the exhaust system performs the following functions: Removing combustion products from the engine cylinders. Reduced gas toxicity levels. Preventing combustion products from entering the vehicle interior.
Instructions for replacing the resonator
Since the resonator on the VAZ 2107 is not attached to the body, it is necessary to hold it when replacing so as not to deform the exhaust pipe.
Resonator VAZ 2107
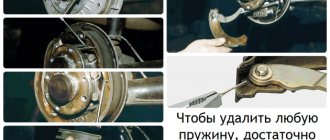
- Tap the pipe connections and clamps with a hammer, as in the previous case.
- First of all, we disconnect the resonator from the muffler, then from the “pants”. When connecting the resonator and the receiving pipe, we proceed according to the same scheme, bend the petals, use a “liquid key” or a grinder in the most extreme case, and very carefully.
- At the point where the resonator meets the muffler, the situation is more complicated. When the pipes have become stuck, we cut off a piece of pipe coming from the resonator, then remove the remaining part from the flare using a gas wrench or pliers. Usually in this place the pipes are stuck tightly, when it is impossible to separate them, we also change the muffler
- We install a new resonator, observing its original position. If the resonator is installed incorrectly, it will start knocking on the underbody or hitting uneven roads. It is desirable that the resonator pipe running from the receiving tube to the tank be parallel to the ground
- In the same way, we align the connection of the resonator with the silencer so that the tank is parallel to the ground and does not knock on the body
Changing the “pants” (reception pipe)
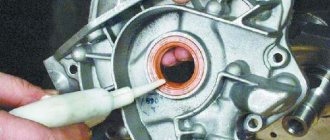
When replacing VAZ 2107 pants, be sure to stock up on a new gasket between the pants and the manifold, because it is destroyed when removed. It is also recommended to replace the nuts securing the pants to the manifold. So:
- First, disconnect the pants from the resonator. If problems arise, as in the case of the resonator, given the fact that the pants are replaced less often than other parts of the muffler, and the heating temperature of the connection during engine operation is quite high, we use an angle grinder.
Mounting for a carburetor engine. Nearby is the injector pants mount
- After removing the resonator, unscrew the four nuts securing the exhaust pipe to the manifold.
Unscrew the nuts securing the pants to the manifold, take out the gasket
- Be careful not to strip the studs to avoid unnecessary work replacing them. It is recommended to immediately treat them with a “liquid wrench”, otherwise we cut off the nuts using a grinder
- Working with a grinder, we cut the nut diagonally so as not to damage the thread of the stud. Then we simply knock it down using a chisel or flat screwdriver
- When installing the pants, replace the old gasket, then screw them to the exhaust manifold
- We connect the pants with the resonator and compress the flaring using a clamp.
If after replacement the exhaust system is raised under the bottom or sags:
- First, the receiving pipe and resonator are fixed at the wrong angle. We simply rotate the resonator and achieve the correct position of the system
- Second, the engine mount sagged. We change the engine mount.
Fasteners
Separately about fasteners - suspension pads and clamps. It is recommended to change them every time you change any part of the exhaust system. So:
- If the clamp looks like new at first glance, do not forget about metal fatigue. The thread “floats” over time, the clamp no longer holds the connection tightly, exhaust gases leak through and create additional noise. You will have to crawl under the car to change one clamp, and this, you see, is extra work.
- A simple inspection often fails to assess the level of wear on cushions and rubber belts. By installing old cushions with rubber belts in place, you risk losing the muffler as a result of their breakage. Considering that the price of a pillow or belt is much less than the price of a muffler, it is better to replace them immediately to avoid unnecessary costs.
What did you do
I removed the resonator and welded in a normal corrugation instead of the factory one. It will be inconvenient to weld in place, so it is better to remove the resonator. Some craftsmen say that you can carefully cut it with a grinder and weld it in place. But I advise you to take it off anyway.
The mounting bolts on this machine are already different, so they came off easily. Moreover, our Lada Granta has a low mileage.
When you install a new gasket, you need to pull it through 2 times. After the first time, given that there is no flame arrester, the gasket will burn out and cut. Therefore, you need to re-stretch it. This is the only disadvantage when removing the resonator.
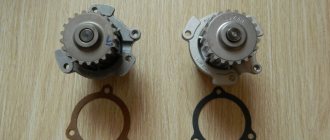
I decided to weld a 3-layer corrugation with internal reinforcement, size 150x45.
It is approximately the same size, but if necessary, you can trim it with a grinder. It can be seen that the layers of the mesh are made denser compared to the factory one.
Removal process
In the process of removing an element of the exhaust system from a VAZ 2107 (injector) for its subsequent replacement. The following tools will be useful to you:
- wrench 13 (open-end type);
- ratchet or crank;
- deep heads on 13 and 10;
- Bulgarian;
- flat screwdriver (can be replaced with a chisel);
- pliers;
- hammer.
To figure out how to remove the muffler from your VAZ correctly and replace it. Please read the following instructions carefully:
- install the car over an inspection hole or on an overpass;
- unscrew (cut with a grinder) the crimp coupling;
- using a screwdriver or thin chisel, bend the flared ends of the pipe;
- using a hammer, which you will use to knock on the pipe, separate the muffler from the resonator;
- Unfasten the hanging pillows.
After this, the product can be freely removed to be replaced with a new one, which is installed in the reverse order.
Please note that the connection between the muffler pipe and the resonator pipe is located in front of the rear axle. The ends of the pipe with slots and female-male fasteners are tightened using a coupling. Removal of the product can be complicated by corrosion, which develops under the influence of temperatures and lubrication.
For this reason, moisten corroded parts with an anti-corrosive agent in advance (motor oil or brake fluid will also work). If you are planning to install a new muffler, it would be a good idea to purchase new suspension rubber bands (1 for the rear and 2 for the center location).
Preparation
First, gather together all the necessary parts for direct replacement:
- The type of muffler you need
- Muffler sealant
- Two exhaust pipe clamps
- Penetrating lubricant
As well as all the necessary tools and protective equipment:
- Ratchet nut sockets
- Cutting tool
- Round hammer
- Box spanners
- Jack
- Car trestles
- Wheel chocks for supporting the rear wheels
- Safety glasses and gloves
Now that all the necessary equipment has been collected, we move on to the second stage