Everyone knows that in a car, a mechanical differential with manual or automatic gear shifting is used to connect the power unit with the chassis and change the traction force on the wheels.
A gearbox is a complex transmission mechanism for mobile vehicles, designed to expand the range of rotation speed and torque transmitted from the engine, the possibility of short-term or long-term disconnection of the internal combustion engine from the chassis, and regulation of the direction of movement of the vehicle.
Design and principle of operation
The Chevrolet Niva transmission includes the following components:
- A five-speed manual gearbox allows you to change not only the amount of torque, but also the direction of rotation.
- Split front axle with a gearbox mounted on the power elements of the body.
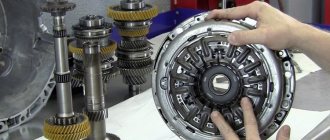
- Dry single-plate clutch, which, when the pedal is pressed, briefly disconnects the transmission from the engine.
- Solid rear axle, into which the gearbox and differential are integrated. This allows you to increase and distribute torque between the wheels of the same axle.
- The intermediate shaft through which torque is transmitted from the gearbox to the transfer case.
- Transfer case that distributes rotational energy between axles.
- Two cardan shafts transmitting power to the axles (front and rear).
- Constant velocity joints that drive the steering wheels.
It works like this: engine torque is transmitted to the manual transmission through the clutch, then through the intermediate shaft to the transfer case and a pair of drive axles.
Help: the transmission of SUVs often includes a winch drive. To do this, a power take-off shaft is built into it. However, this option is not provided in the factory configuration of the Chevrolet Niva.
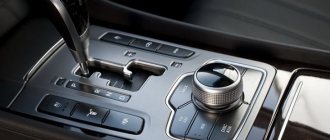
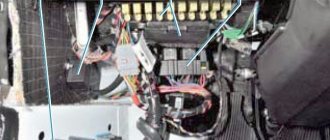
Location.
On Niva DS is installed on the gearbox. This allows data to be read only while driving, turning off when the engine is in neutral.
The device itself consists of a plastic case, inside of which electronic components are located. For proper operation, it is placed in close proximity to the shaft. There is a built-in magnetic bar inside the shaft that creates electrical signals when rotated.
The product is quite fragile, so when dismantling or installing you must be extremely careful not to damage its body.
Signs of trouble
The transmission is constantly subjected to high loads while driving, especially off-road. At the same time, the parts, despite the lubrication and the safety margin laid down by the designers, wear out intensively. Therefore, failure of the Chevrolet Niva transmission is not at all uncommon. And the point here is not in the quality of the parts, but in the level of loads and complexity of the mechanism.
Symptoms of malfunction depend on which component is experiencing problems:
- Clutch. In case of breakdowns, jerking occurs when starting to move, slipping under load, or “driving” when trying to stop or change gear. Sometimes the malfunction manifests itself in the form of noise when pressing the clutch pedal or in other conditions.
- Gear box. This unit is more complex, and accordingly, its breakdowns are more varied. They manifest themselves in unclear or difficult gear shifting. Oil leaks, crunching noises and extraneous noises are also possible.
- Cardans and intermediate shaft. Here, malfunctions manifest themselves in the form of knocking during acceleration, squeaking or vibration while driving.
- Main bridge. In the event of a breakdown, the mechanism begins to make noise, knocking noises occur when accelerating and oil leaks.
- Transfer case. Problems make themselves felt in the form of spontaneous shutdown of bridges, noise and knocking. There may also be an oil leak.
- Constant velocity joints. Worn parts begin to crunch and knock while driving. The crunch is especially noticeable when the steering wheel is turned hard.
In what cases is this procedure necessary?
Chevrolet Niva transfer case: device, connection diagram and how to use?
Before disassembling the gearbox, it is worth studying its structure, which will simplify the process of repairing it.
The checkpoint consists of:
- nuts that secure the support plate;
- gasket located in the hatch cover;
- gearbox control drive rods;
- lever handles that change gears;
- lever hatch covers;
- the gear shift lever itself;
- sealing cover;
- gear shift cover;
- the screw that secures the hatch;
- rear support;
- the lower and main bodies of the lever, which changes gears;
- washers on the rear support;
- nuts that secure the rear support;
- retaining ring;
- spacer ring;
- ball joint housing and slider;
- lever springs;
- nuts that secure the ball joint housing;
- rod end;
- protective cover;
- base plate;
- gearboxes
A manual transmission is a self-sufficient design element that does not require frequent maintenance. If the vehicle is used properly, the gearbox will last for several years. Thanks to the universal development of the mechanism, the off-road ambitions of the crossover are ensured. The transmission is characterized by resistance to increased loads.
It is necessary to dismantle the gearbox when the metal wears out and wears out. If the gearbox is subject to high loads, it overheats and expands, which causes wear.
It is recommended to remove the part:
- if necessary, replace the entire mechanism - this reason is rarely observed, since the part is subject to repair (replacement is recommended if the gearbox housing is damaged);
- for maintenance - if there is a need to clean components or replace consumables (links, gaskets, seals), then you need to remove the part;
- when carrying out repair work on other parts, to access which you need to remove the gearbox.
If transmission fluid leaks through the seals, it is recommended to remove the device. This procedure is carried out if the clutch needs to be replaced. Removal is carried out if the speeds begin to turn off on their own. They can turn on if the car owner makes an effort.
If problems arise when shifting the gear lever, it is recommended to dismantle the device. This procedure is necessary if new sounds and extraneous noises appear while driving a vehicle. This indicates wear of the bearings, input or axle shaft, and gears. The reason for the malfunction of the device can only be determined by disassembling it.
Removing the gearbox is not easy, so before carrying out the manipulation it is recommended to find out the feasibility. If you need to install a cylinder or oil seal or change the oil, then you do not need to remove the gearbox.
Resource of parts and assemblies
The service life of drive parts depends on compliance with maintenance regulations. The operating manual states that the mileage before transmission repair is 200 thousand kilometers. In practice, this does not apply only to CV joints, which often have to be changed even with less mileage. As for the gearbox and transfer case, according to the owners' reviews, they can withstand the required 200 thousand kilometers without any problems.
A sharp reduction in service life is observed only during extreme off-road use of the vehicle. For example, CV joints quickly break when the anthers are damaged.
Diagram of a 5-speed gear shift mechanism for VAZ-2123
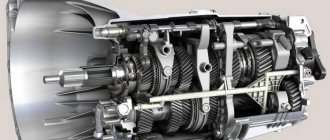
At the factory, modern Niva cars are equipped with a five-speed gearbox , made according to the three-shaft design.
Gearbox design:
The main elements of the box body are the clutch dome, the gearbox housing itself and the rear cover. The production of frame parts is carried out at the plant from a modern aluminum alloy with chemical additives.
Heat removal from heated rubbing parts is realized by manufacturing a multi-fin structure on the surface of the crankcase and also to protect the speed selection unit from overheating and exceeding excess pressure, a breather is present in the design.
The tightness of body connections is ensured through the use of pressed shaped gaskets. In case of repair of the gear selector assembly, it is also possible to use a liquid gasket former. The lower part of the gearbox housing is covered with a stamped steel protection with a gasket.
In a modern design, the gearbox housing and synchronizer clutches are reliable and adapted to operating conditions on Russian roads.
The factory crankcase protection on the Chevrolet Niva copes with its function quite well. For safe travel on rural roads and off-road, you can consider installing additional combined protection for the gearbox and transfer case. There are many different options and designs offered on the Internet, where you can choose the option you like, both in price and in terms of configuration and quality of metal.
Over time, any mechanism wears out, sooner or later it will be necessary to carry out maintenance and adjust the gear mechanism. There are quite a lot of companies on the spare parts market that produce any components, parts and related materials for both old and new Chevrolet modifications.
Interesting! According to reviews from the owners of these cars, you can carry out maintenance and repair of the gear shift mechanism on a Chevrolet with your own hands at home.
Location of control and drainage holes:
It is equipped with a screw-on magnetic plug to collect small metal shavings. Lubrication of rubbing surfaces is carried out by spraying. Domestic oil seals are installed in the housing at the output of the primary and secondary shafts. The axis of the gearbox speed gear is fixed on the rear cover of the gearbox housing.
The rotation of the input shaft is carried out through 2 ball bearings. For the industrial shaft, the design of the unit includes double-row ball roller bearings.
A breather is installed in the upper part of the housing (near the clutch). If the breather malfunctions (cap failure), transmission oil may be squeezed out through the seals and housing connections.
The gearbox uses a three-shaft system. At the moment of turning on any of the speeds, except the fifth, the intermediate shaft transmits torque to the secondary one.
The arrangement of the shaft gears is implemented in the following sequence:
Advice! The manual transmission of the VAZ 2123 is quite “gentle”; overloads should not be allowed; it is recommended to change the oil without waiting for a mileage of 45-50 thousand km.
How to remove engine and transmission protection?
The standard equipment of the Chevrolet Niva includes protection in the form of a curved steel plate. This part prevents damage to the engine crankcase and the most critical elements of the transmission. Below it is a mudguard that prevents road dirt from entering the engine compartment.
However, the protection prevents maintenance of the gearbox and front axle gearbox. Therefore, to change the oil or repair key transmission elements, the plate must be removed. To do this, you will need 8 and 10 socket wrenches.
Transmission of Chevrolet Niva and Lada 4x4: what is the difference
The first thing that catches the eye of the average user is that the Lada’s transmission is controlled by two levers, while the Chevrolet Niva has only one, not counting the gearbox control lever. This is due to the fact that Chevrolet’s upshift and downshift ranges, as well as the center differential lock, are implemented using a single-lever design. In addition, the Niva's front axle gearbox is not attached directly to the engine cylinder block, and the transfer case has three mounting points, unlike the Lada, which has two.
Nevertheless, both cars are absolutely identical in transmission design, have one engine for two, but due to the transfer case set back, the Niva’s intermediate shaft is longer than that of the Lada 4x4 by exactly 250 mm. Moreover, both cardan shafts driving the front and rear axles are completely interchangeable.
In what cases is this procedure necessary?
Before disassembling the gearbox, it is worth studying its structure, which will simplify the process of repairing it.
The checkpoint consists of:
- nuts that secure the support plate;
- gasket located in the hatch cover;
- gearbox control drive rods;
- lever handles that change gears;
- lever hatch covers;
- the gear shift lever itself;
- sealing cover;
- gear shift cover;
- the screw that secures the hatch;
- rear support;
- the lower and main bodies of the lever, which changes gears;
- washers on the rear support;
- nuts that secure the rear support;
- retaining ring;
- spacer ring;
- ball joint housing and slider;
- lever springs;
- nuts that secure the ball joint housing;
- rod end;
- protective cover;
- base plate;
- gearboxes
A manual transmission is a self-sufficient design element that does not require frequent maintenance. If the vehicle is used properly, the gearbox will last for several years. Thanks to the universal development of the mechanism, the off-road ambitions of the crossover are ensured. The transmission is characterized by resistance to increased loads.
It is necessary to dismantle the gearbox when the metal wears out and wears out. If the gearbox is subject to high loads, it overheats and expands, which causes wear.
It is recommended to remove the part:
- if necessary, replace the entire mechanism - this reason is rarely observed, since the part is subject to repair (replacement is recommended if the gearbox housing is damaged);
- for maintenance - if there is a need to clean components or replace consumables (links, gaskets, seals), then you need to remove the part;
- when carrying out repair work on other parts, to access which you need to remove the gearbox.
If transmission fluid leaks through the seals, it is recommended to remove the device. This procedure is carried out if the clutch needs to be replaced. Removal is carried out if the speeds begin to turn off on their own. They can turn on if the car owner makes an effort.
If problems arise when shifting the gear lever, it is recommended to dismantle the device. This procedure is necessary if new sounds and extraneous noises appear while driving a vehicle. This indicates wear of the bearings, input or axle shaft, and gears. The reason for the malfunction of the device can only be determined by disassembling it.
Removing the gearbox is not easy, so before carrying out the manipulation it is recommended to find out the feasibility. If you need to install a cylinder or oil seal or change the oil, then you do not need to remove the gearbox.
Design and diagram of the Chevrolet Niva transmission
The Chevrolet Niva transmission, in terms of operating principle and architecture, completely replicates the donor car, the VAZ 2121 and its modification, the VAZ 21213. This means that the drive is carried out to all four wheels constantly, without the possibility of disabling the front axle. The design provides a number of reduction gears, as well as a manually lockable center differential.
The main elements of the transmission are as follows:
- dry single-plate clutch;
- five-speed gearbox;
- intermediate shaft;
- transfer case;
- 2 cardan shafts driving the front and rear axles;
- front split axle with a gearbox separately mounted on the load-bearing frame;
- continuous, solid rear axle with integrated gearbox and differential, as in classic Tolyatti models.
The transmission structure is shown in the drawing and it is no different from most SUVs with permanent all-wheel drive, as well as the operating principle.
Torque is transmitted from the engine crankshaft through a dry single-plate clutch to the gearbox input shaft. Next, the torque enters through the reduction gears in the box and is transmitted through the output shaft to the transfer case, where it is evenly distributed between the drive axles. The stock Chevrolet Niva does not have a power take-off shaft, which can be used to transmit rotation to the winch.
Lubrication system.
The largest and most basic element is the fuel tank, but the total number reaches sixteen. Their volumes vary greatly.
- They are necessarily included in the engine cooling and lubrication systems.
- Axle housings and gearboxes are also extremely important for safety during travel.
- Chevrolet Niva filling tanks include power steering systems and hydraulic brake lines, front and rear shock absorbers.
- An integral part are tanks for windshield washer and air conditioning.
In addition to viscosity, gear oils are also classified according to the generally accepted API system. This system divides lubricants into groups depending on the conditions of use and type of design, and also assigns each a letter designation in the form GL and numbers from 1 to 5. The larger the number in the designation after the letter, the more stringent the conditions for using gear oils.
To summarize, let's conclude what kind of oil to fill in the Chevrolet Niva transmission
. First of all, the viscosity of the product must correspond to the temperature regime of the region where it will be used. According to the API system, oil for Chevrolet Niva is suitable with a marking of at least GL 4.
The procedure for filling a Chevrolet Niva transmission with oil is available even for novice drivers. The main condition is compliance with vehicle maintenance regulations, which guarantees the serviceability and uninterrupted operation of gearbox units. The choice of transmission oil for manual transmissions of the Chevrolet Niva, Niva 21213, VAZ 2131 is carried out in accordance with the manufacturers' recommendations. The necessary information about the most suitable brand of transmission oil is contained in the service books for a specific vehicle.
The cooling system here is liquid, closed type. This includes a radiator, pump, sensor. thermostat, fan, expansion tank, hoses, etc. The capacity is 8 liters.
The expansion tank is located next to the brake booster. Installed markers allow you to quickly determine the fluid level
It is important that everything is completely sealed, so the inlet and outlet valve monitor and regulate the pressure
The lubrication system itself is also combined. The oil pump supplies oil under pressure to the bearings, crankshaft, and drive helical gear. Some parts are lubricated by splashing.
- The engine lubrication capacity is 3.75 liters.
- It is better to use synthetic and semi-synthetic SUPER oil. Its viscosity class: from -25 to 30, 35 - 5W30, 5W40; from -15- 45 - 15W 40; from -10- 45 - 20W 40.
- Transmission oils from Lukoil TM-4 are made on a mineral (80W 85, 80W-90) and semi-synthetic base (75W-90) and are off-season, high-quality, as they use additives from the world's best manufacturers. They are needed for gearbox housings (1.6 l).
- The same oil is used for the transfer case (0.79 l).
- For the front (1.15 l) and rear (1.3 l) axles, 80W 90 and 85W 90 are used.
- The 1.7 liter power steering requires Pentosin Hydraulic Fluid CHF115.
- The hydraulic front shock absorber (0.15 l) and rear shock absorber (0.215) are filled with Slavol-AZh or GRZh-12 operating fluid.
The Chevrolet Niva has excellent technical equipment. The interior of the car is quite spacious, and it is easy to operate. Cars with a 5-speed manual transmission, which has a 3-shaft design, are widely used. The gearbox of this vehicle is characterized by a complex structure, as a result of which its repair can cause certain difficulties. The transmission system includes a transfer case, the function of which is that it affects the magnitude of the moment of force.
Checkpoint Chevrolet Niva
In order for this vehicle to remain operational for a long time, the motorist must undergo maintenance. During this procedure, you may need to change the gearbox oil in a Chevrolet Niva or transfer case. Technical characteristics: transfer case housing volume – 0.8 l.
Gearbox and clutch Niva Chevrolet
The Niva has virtually the same VAZ gearbox, but with minor changes designed to increase the durability of the unit. Firstly, this is the replacement of the VAZ rear bearings of the primary shafts and intermediate bearings on the secondary shafts with similar, but sealed types. This eliminates bearing malfunctions associated with contamination and premature wear. Secondly, the gear shift control drive has been changed. It is easy to notice that in a Chevrolet the gearbox control lever is closer to the driver, which makes control more convenient. This was achieved through the use of an extension with a 250 mm horizontal rod. Gear ratios remain the same, as does the gear shift pattern.
The clutch device in the Chevrolet Niva transmission has undergone some changes and received a number of improvements and more progressive parts from front-wheel drive VAZ cars.
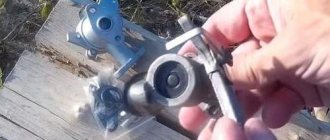
Backstage repair
In order to remove the knock of the box, you first need to remove it. To repair the box, you need to have keys (10, 13, 19), a 12 hex key, a screwdriver and pliers. So let's get started:
- Place your machine on a hill or in a hole.
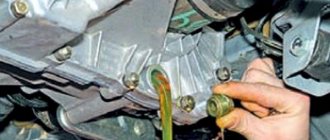
- Disconnect the battery terminal and pour out the oil.
- Get inside the car. Remove the handles from the levers, as well as the transfer cases, the element casing and the cover.
- Remove the casing, boot, lock sensor connector. Remove the gearbox lever itself.
- Set up a gear that reverses, remove the locking sleeve.
- Try to mark the cardan flanges and also the transfer case, so that later you can assemble everything in the correct order.
- Remove the cardan (which is the front one) and the washer (which is the oil deflector).
- Did you see the flange (look at the secondary shaft)? Unscrew the nuts of the elastic coupling from it (this is done with a size 19 wrench).
- Unscrew the nuts on the cushions to the very end of the studs and remove the transfer case.
- Now you need to unscrew the bolts from the cylinder and the starter itself, after first removing the cotter pin and the spring next to it. An extension cord is required for this action.
- And move the starter closer to the radiator.
- Disconnect the sensor that controls the lights (reverse), unscrew the muffler clamp, as well as the bolts from the crankcase and the yoke nuts.
- Unscrew the bolts that hold the box closer to the engine. Carefully disconnect it, just try not to let it hang with all its weight on the input shaft.
- Rock it a little from side to side and gradually move it back until you reach the stop.
- Lower the crankcase down and remove the link from the hole.
Also interesting: Buy auto parts 2121 transfer case cushion axle for foreign cars in the AUTOPITER online store
Installing the car in the inspection hole
Congratulations, you've removed the gearbox! In order to continue the repair, it needs to be disassembled. You should take your time to disassemble it; immediately prepare a work space for yourself. Advice, lay out all the removed parts exactly in the order in which you remove them, this will greatly simplify the reverse process. As you disassemble the device, observe how the bearings, gears, axles behave, whether there are any abrasions, how the input shaft behaves.
You may not have to completely disassemble the element, for example, identifying wear on the bearings is very simple, when you remove the bottom cover, move them a little, if any of the bearings move, it means it is worn out and needs to be replaced. So, let's continue the renovation. You need to do the following:
- First, unscrew the shank nut. Carefully remove the helicopter flange and the mechanism that selects the gear. Check the linkage for cracks.
- Now remove the cover from the back. If you suddenly cannot remove it, then push the bearing race down. It is by looking at the races that the condition and nature of the bearings are examined. If you decide to replace them, then you will need to pierce the bearing (now the secondary shaft) down, remove the clutch housing and check the spring washer.
- Now take out the clip, the bushing (which is remote), and the washer. You will have to disassemble the locking mechanism. To do this, unscrew the gear bolts, as well as the bolt (look at the secondary shaft). Lastly, remove the fungus and the ring.
- Remove fifth gear completely. Disassemble the gear. Take out the fixing ball; to do this, you need to push it inside. Unscrew the third and fourth speed fork bolt, extend the rod, remove it and the cracker. Remove the fixing ball and cracker. And by analogy, disassemble the first and second gears.
- Unscrew the fifth speed fork. Remove the rear gear. Don't forget to check the play.
- Take out the middle bearing, remove the front one, move the shaft back, and then pull it forward. The clip that is inside needs to be knocked down with a chisel.
- Remove the first, second, third and fourth gear forks. Also remove the input shaft, the locking ring needs to be removed, use a hammer or puller for this. Take pliers and remove the ring. Carefully inspect the needle bearing.
- Rocking from side to side, remove the bearing. The shaft needs to be removed. Remove the first and second speed gears, as well as the first, second, third and fourth hub couplings. If you find any malfunctions, you need to release the stopper and remove the third and fourth hub of the third speed. Replace the seals.
We disassemble the handle and lever in the cabin
Hooray, you're done, you've dismantled the box! In order to eliminate the knocking noise, you need to identify the part that has been damaged or worn out. After you find it, continue repairing the box, replace the damaged part, reassemble the device in the reverse order and put it in place.
Features and malfunctions of the transfer case
The Chevrolet Niva transfer case not only moved back by 250 mm, but also changed the installation angle by 4 degrees. Chevrolet engineers calculated that this angle would be optimal for the operation of driveshaft joints. The design of the transfer case uses small-module, low-noise gears, so the howling of the transfer case, as on the old Niva, is now completely eliminated.
Another common malfunction of the transfer case on old Nivas was vibration. On Chevrolet, this issue has been practically resolved by installing new pillows and the appearance of a third attachment point. This will eliminate not only operational vibrations and noise, but also the likelihood of incorrect installation of the transfer case after repair, prevention or troubleshooting.
There is another malfunction that few people think about, however, this problem is related to the resource and endurance of constant velocity joints. The fact is that a cermet valve is installed directly under the CV joint boot mounting clamp. Its task is to compensate for excess pressure inside the cover, thereby protecting it from rupture, and the CV joint itself from water and dirt. If you monitor the performance of the cermet valve during repairs or replacement of hinges, the boot will last a long time and will reliably protect the CV joint.
Removing and disassembling the Chevrolet Niva gear selection mechanism
But be careful not to damage the fasteners. The cover must be turned in the opposite direction, and then the fastening clamp must be cut.
Next, remove the cover from the lever. The front of the floor tunnel lining is removed. The latch is unfastened from the lever and the axle is removed. The shift lever is removed by holding it up. The remaining rubber cuff must be returned inside the removed lever.
Adjusting the rocker on a Chevrolet Niva, video tutorials
The bolts securing the lever housing are removed and the rocker is removed. You will need to remove the rubber bushing rod from the shaft.
Next, you need to inspect the rod for defects in order to determine what is required: Replacement is made if there is play in the hinges or severe wear of the hole for the gear shift handle axis.
Once assembly is complete, don't forget about the new clamp that had to be cut when removing the cover.
Video instructions: From this it follows that the transfer case rod has a much longer service life. If similar problems are noticed as in the gearbox, then it is worth replacing the transfer case, since its mechanism does not allow repair or replacement. Based on all that has been said, repairing the backstage on a Chevrolet Niva, the gearbox and transfer case are important elements of the Chevrolet Niva, without which it is impossible to engage gears.
We managed to switch on some gear, and, accordingly, it was liquefied. We move the lock to the extreme position on the right.
Then tighten the loosened bots securing the scenes from the pit. After such actions, the work of adjusting the scenes can be considered completed.
Transmission of Chevrolet Niva and Lada 4x4: what is the difference
The first thing that catches the eye of the average user is that the Lada’s transmission is controlled by two levers, while the Chevrolet Niva has only one, not counting the gearbox control lever. This is due to the fact that Chevrolet’s upshift and downshift ranges, as well as the center differential lock, are implemented using a single-lever design. In addition, the Niva's front axle gearbox is not attached directly to the engine cylinder block, and the transfer case has three mounting points, unlike the Lada, which has two.
Nevertheless, both cars are absolutely identical in transmission design, have one engine for two, but due to the transfer case set back, the Niva’s intermediate shaft is longer than that of the Lada 4x4 by exactly 250 mm. Moreover, both cardan shafts driving the front and rear axles are completely interchangeable.
We help with all our wheels
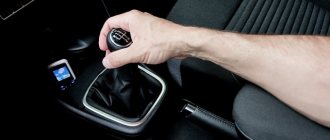
How to enable all-wheel drive on a Chevrolet Niva? There is an option to block the center differential of the Chevy Niva both when the car is stationary and when it is not moving.
This is done with the clutch pedal depressed using the transfer case control lever, which is located behind the huge gear selector. When the lever is in the neutral position, you need to pull it towards the driver. If you later press in the opposite direction, a lower gear will engage with the center differential locked at a ratio other than 3.5.1. If you pull towards yourself, a lower gear is put into effect (gear ratio 1.5).
When the lever is in this position, the corresponding yellowish pictogram lights up on the dashboard. Disabling the front axle on a Chevrolet Niva. four-wheel drive. How to disable. If you cannot follow these instructions, try repeating the procedure while driving the vehicle.
Design and diagram of the Chevrolet Niva transmission
The Chevrolet Niva transmission, in terms of operating principle and architecture, completely replicates the donor car, the VAZ 2121 and its modification, the VAZ 21213. This means that the drive is carried out to all four wheels constantly, without the possibility of disabling the front axle. The design provides a number of reduction gears, as well as a manually lockable center differential.
The main elements of the transmission are as follows:
- dry single-plate clutch;
- five-speed gearbox;
- intermediate shaft;
- transfer case;
- 2 cardan shafts driving the front and rear axles;
- front split axle with a gearbox separately mounted on the load-bearing frame;
- continuous, solid rear axle with integrated gearbox and differential, as in classic Tolyatti models.
The transmission structure is shown in the drawing and it is no different from most SUVs with permanent all-wheel drive, as well as the operating principle.
Torque is transmitted from the engine crankshaft through a dry single-plate clutch to the gearbox input shaft. Next, the torque enters through the reduction gears in the box and is transmitted through the output shaft to the transfer case, where it is evenly distributed between the drive axles. The stock Chevrolet Niva does not have a power take-off shaft, which can be used to transmit rotation to the winch.
Standard Design Vulnerability
As a rule, in order to improve the off-road characteristics of their car, car drivers install wheels with a size of 31'' and replace the engine and main pair. In this case, the load on the transfer case increases, and more specifically, on the pinion axis and differential gears.
The standard differential of the transfer case of VAZ 2121, 2123 and other Niva modifications has two gears mounted on the satellite axis. The axis, in turn, is fixed in the housing using locking rings installed on the outside:
If this scheme works in a stock car, then in a Niva car prepared for off-road, under conditions of extreme loads, one pair of satellites becomes insufficient to “digest” the increased torque, which leads to their sudden breakdown.
Gearbox and clutch Niva Chevrolet
The Niva has virtually the same VAZ gearbox, but with minor changes designed to increase the durability of the unit. Firstly, this is the replacement of the VAZ rear bearings of the primary shafts and intermediate bearings on the secondary shafts with similar, but sealed types. This eliminates bearing malfunctions associated with contamination and premature wear. Secondly, the gear shift control drive has been changed. It is easy to notice that in a Chevrolet the gearbox control lever is closer to the driver, which makes control more convenient. This was achieved through the use of an extension with a 250 mm horizontal rod. Gear ratios remain the same, as does the gear shift pattern.
The clutch device in the Chevrolet Niva transmission has undergone some changes and received a number of improvements and more progressive parts from front-wheel drive VAZ cars.
Problems with the box
The Niva Chevrolet car, and in particular its gearbox element, as they say, is good, but with its own “peculiarities”. Somewhere after the first 50 thousand km, the device begins to show its teeth. There may be a hum or unusual noise. Such “features” make it clear that the bearings or gears are worn out. If you watch the gearbox for some time, you can determine what exactly needs to be replaced. What other problems can occur with the gearbox?
- Noise, grinding or knocking when the car is moving, and sometimes when warming up.
- Shocks when changing gears.
- The gearbox may refuse to disengage a particular gear.
- Deformation of the lever, which promises complications during the gear shift process.
- Also, transmissions can simply be knocked out.
For each item listed above, there are reasons and ways to solve them. But today we will look at a specific problem - the knocking of the Niva Chevrolet gearbox and we will carry out the repair ourselves.
A knocking sound when the car is moving or when warming up indicates that the bearings, gears, shaft (primary) or axial ones in the gearbox have worn out. Actually, determining what exactly was the reason is sometimes very difficult. And if you do not have the opportunity to completely replace the gearbox, then your only option is to remove the device manually, disassemble it and carry out minor repairs.
Features and malfunctions of the transfer case
The Chevrolet Niva transfer case not only moved back by 250 mm, but also changed the installation angle by 4 degrees. Chevrolet engineers calculated that this angle would be optimal for the operation of driveshaft joints. The design of the transfer case uses small-module, low-noise gears, so the howling of the transfer case, as on the old Niva, is now completely eliminated.
Another common malfunction of the transfer case on old Nivas was vibration. On Chevrolet, this issue has been practically resolved by installing new pillows and the appearance of a third attachment point. This will eliminate not only operational vibrations and noise, but also the likelihood of incorrect installation of the transfer case after repair, prevention or troubleshooting.
There is another malfunction that few people think about, however, this problem is related to the resource and endurance of constant velocity joints. The fact is that a cermet valve is installed directly under the CV joint boot mounting clamp. Its task is to compensate for excess pressure inside the cover, thereby protecting it from rupture, and the CV joint itself from water and dirt. If you monitor the performance of the cermet valve during repairs or replacement of hinges, the boot will last a long time and will reliably protect the CV joint.
Chevrolet Niva gearbox: diagram and device
Remove the gear selection mechanism drive. Unscrew the two nuts securing the bracket to the support plate. Remove the bushing plate from the holes. Remove the spring. Inspect it and replace if necessary.
Assembly of the Niva Chevrolet gear selection mechanism drive is performed in the reverse order of removal. Assembling the Niva Chevrolet gearbox Assemble the gearbox in the reverse order of disassembly, taking into account the features given in this subsection.
Press the intermediate bearing of the secondary shaft using a mandrel resting on the inner race of the bearing. The fit of the inner bearing ring on the shaft is much tighter than the outer ring in the crankcase. In this regard, when pressing the bearing with force applied to the outer ring, it may be damaged. After tightening the screws securing the locking plate of the secondary shaft bearing, anchor the screws to prevent their spontaneous loosening. If there are traces of turning the bearing rings on the surfaces of the bearing bores, anchor these surfaces. For final installation of the input shaft assembly with how to assemble a Chevrolet Niva gearbox with the bearing of the front end of the secondary shaft, press the bearing assembly with the shaft until it stops with light blows of a hammer through a wooden block around the circumference of the outer ring of the bearing.
Having installed the retaining ring in the groove on the outer ring of the bearing, check the ease of rotation of the input shaft. Install the intermediate shaft into the gearbox housing, having first installed the shift forks I and II, III and IV, the rod clamps and the rods themselves.
Chevrolet Niva gearbox: diagram and device
Install the front how to assemble a Niva Chevrolet gearbox, the rear intermediate shaft bearings using a mandrel, how to assemble a Niva Chevrolet gearbox force to their inner rings. Do not forget to install the key in the groove of the secondary shaft if it was removed during disassembly. Tighten the bolt securing the front intermediate shaft bearing with a torque wrench, at the same time shifting into two gears. Lubricate the working surfaces of the gears and the annular grooves of the synchronizer clutches with transmission oil. Having installed the clutch housing on the assembled gearbox with the front and bottom covers installed, as well as the cross-member for mounting the power unit, tighten the nuts securing the clutch housing to the gearbox with a torque wrench.
Before installation, lubricate the inner surface of the clutch release bearing clutch with grease. After final assembly of the gearbox, place the driven clutch disc on the splines of the input shaft and check the ease of movement of the disc along the splines of the shaft.
After installing the gearbox on the car, do not forget to fill the crankcase with oil. Adjusting the mechanism drive, how to assemble a Niva Chevrolet gearbox, Chevrolet Niva gears To adjust the Niva Chevrolet rocker, you will need a wrench to Loosen the nut of the coupling bolt of the clamp securing the drive rod of the gear selection mechanism.
By moving the drive rod relative to the shaft of the gear selection mechanism in the longitudinal direction, ensure that all gears are clearly engaged.
Tighten the clamp bolt nut.
Tell your friends: To do this, remove the drive rod clamp 33 cm. Then, unscrew the fastening nuts 21 cm. Unscrew the six rear cover fastening nuts 36, and one of the rear cover fastening nuts is unscrewed from the inside of the gearbox housing when the lower cover is removed.
VAZ 2131 gearbox repair
Is your Niva's transmission starting to fail? The situation is not pleasant: it becomes uncomfortable to drive, and safety on the road remains in great doubt. We will talk about the reasons for the failure of transmission elements another time. Now let’s try to figure out what to do in fact: change the box or repair it.
- Repair of VAZ Niva and Niva Chevrolet gearboxes - 2000 rubles.
- Remove the box and put it on - 2000 rubles.
- Exchange of manual transmission Niva and Niva Chevrolet - 4,000 rubles. (if the body is intact)
- Repair with our spare parts and installation - 6,000 rubles. (if the body is intact)
- Buy a gearbox - 6,000 rubles.
Replacing Niva Chevrolet boxes is a service that is quite in demand. There are objective reasons for this. And not necessarily caused by breakdowns of the transmission unit. For example, a gearbox is often replaced from a 4-speed to a 5-speed, and the Niva gains a significant advantage in functionality.
If we are talking about a faulty box, there are two traditional options. The first is repair (professional, high-quality, performed in a workshop). The second is replacing the transmission unit. Prices for Niva Chevrolet gearboxes vary widely. This is due to the range of offers and the type of units sold. What is more profitable: repair or replacement?
Also interesting: Repair of transfer case on Niva 21213, how to center it, do-it-yourself adjustment
The cost of repairing a Niva gearbox directly depends on the specifics, quantity, location of faults, and the volume of work to be done. The same applies to the timing of order fulfillment in the workshop.
If we talk about profitability, then everything is simple: the fewer breakdowns the gearbox has, the cheaper the auto mechanic will cost. Accordingly, repairs will not hit your pocket. For example, replacing VAZ 2123 gearbox seals, the price of the service is affordable, carried out promptly, with a quality guarantee. Such a simple repair allows you to quickly return the SUV to service. Checking the level, changing the oil, tightening fasteners and other simple types of repairs are inexpensive.
If the gearbox is severely damaged (and this often occurs after accidents), has been worn out for a long time, has been operated in extreme mode, or in conditions of violation of the rules for working with the clutch, it is impossible to do without overhauling the transmission unit. Such repairs require time and serious financial costs. In this case, it will be faster and easier to replace the gearbox.
If you need a box for a VAZ 2131, the price of which is affordable, contact our workshop. Specialists will select the best option from a used assortment. You can save money and time.
It is not so rare that there are cases when replacing the gearbox is the only way to restore the functionality of the vehicle. First of all, we should note the cars that have been in an accident. If the box is severely damaged, it is hardly advisable to repair it. Replacing it allows you to get a reliable unit with standard technical characteristics and a safety margin.
If you need a gearbox for model 21213, you can buy a transmission unit in Moscow quickly and inexpensively. Our workshop offers a wide range of gearboxes. All components have been sorted out and restored by our specialists. Using our own resources (both human and technical) allows us to guarantee the quality of each unit.
It's up to you to repair a broken box damaged in an accident or replace it. In both cases, we can only recommend one thing: contact professional specialists. This will significantly save your time and money.
Failure of any vehicle component is a serious problem. Firstly, the vehicle becomes unsuitable for normal use. Secondly, the car owner should prepare for the costs. The latter may be different.
Are you looking for the best offer for the request “Chevy Niva gearbox, repair, price in Moscow”? We are waiting for you in our workshop. Car service specialists will select the optimal solution, taking into account the specifics of a particular situation and the budget allocated for repairs.
Every potential customer of repair services is concerned with the question: how much does a transmission cost on a Chevrolet Niva? Will the cost of restoration be at the same level as that of replacing the transmission unit or lower? We hasten to answer it: it all depends on the complexity of the damage to the unit. Sometimes it is more effective to replace the gearbox and not bother with the bulkhead. A used VAZ 21214 gearbox will be inexpensive; the price of the unit in this case is determined by its safety margin.
When replacing, the cost of the service consists of:
- diagnostics of the box in order to determine its actual condition and maintainability;
- selection of a unit for exchange;
- dismantling and installation works.
A high-quality used transmission on a Niva Chevrolet, the price of which in our service is affordable, can last for many years. We offer car owners our own bulkhead units with a guaranteed safety margin.
Pricing for the repair of transmission units also involves taking into account many factors, criteria and indicators. First of all, this is the current state of the unit. In other words, the more elements of the box that need to be replaced, the more expensive the repair will be.
The type and quantity of spare parts used also plays a role. In order to save money, used elements are often installed. As a rule, private craftsmen are guilty of this. Moreover, the status of the elements is not taken into account when determining the price of the service.
Professional repair of a VAZ 21213 (5-speed) gearbox involves the use of new original parts and high-quality lubricants recommended by the manufacturer of the transmission unit. This is one of the reasons to contact a specialized service, and not a private garage.
The cost of repair services includes unit diagnostics, dismantling, reassembly, installation, testing in operating modes. At the end of the day, the car owner receives a serviceable vehicle that provides comfort and driving safety. High-quality gearbox repairs also ensure that the Niva remains fully functional as an SUV.
When replacing or repairing a gearbox, you can save money. There are several ways. It is rational to cooperate with a specialized workshop. The services of specialists here may cost a little more than in a private garage. But the costs are more than compensated by the stable operation of the restored or replaced transmission unit. Contacting a car service can be considered not so much savings as cost optimization.
If the price of services is a priority for you, you can consider offers from private repairmen or try to troubleshoot the gearbox yourself. But be prepared for possible negative consequences. And take into account the fact that after a makeshift repair, a professional may be required. Instead of saving, the result is a doubling of costs.
To carry out a full diagnosis, the speed box must be removed. As a rule, there is a need for this if vibrations, extraneous noise, or oil leakage increase during movement.
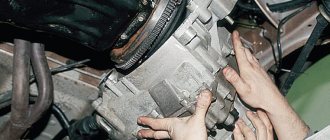
How to remove the box? Before you begin removing the gearbox, you must remove the transfer case. Without an inspection hole, it will be difficult to carry out repair work, for example, unscrewing the cardan shafts from the transfer case. The stabilizer can also be removed. The housing of the air filter element must be removed.
In order to remove the gearbox, you should disconnect the lever rod, the clutch housing cover fastenings, the driveshaft, bolts, nuts, and remove the bracket. The suspension of the power unit is adjacent to the body. To remove it you need to unscrew the fastening nuts.
To extend the service life of the VAZ 21213 gearbox, it is advisable to periodically check the level of transmission fluid and change it in a timely manner.
Mineral oil can be added to the machine. However, semi-synthetic and synthetic options have better performance. The advantage of the latest types of oils is that even in winter the gears will be easily engaged.
Timely maintenance of the Niva gearbox allows you to avoid a complete overhaul of the gearbox. Assembling all the dismantled parts is a painstaking task, so it should be trusted to professionals. Replacing the gearbox input shaft bearing is a common procedure that is ordered at a service center.
Also interesting: Do-it-yourself subframe for the field