Gas is cheaper than gasoline, but is it worth installing gas equipment on a carburetor car such as a VAZ-2106 or VAZ-2109? Cars are quite popular, so you need to figure out which LPG to choose and how to connect it.
HBO of the first generation is not much different from the second. The gas hose is connected to the carburetor through a spacer-mixer or directly through an insert into the carburetor. Under the influence of vacuum in the intake manifold, gas from the gearbox enters the carburetor through the dispenser.
What does the equipment consist of and how does it work?
2nd generation LPG (propane or methane) is used in cars with injection and carburetor engines. Such equipment is best suited for cars up to the 3rd environmental class (Euro 0,1,2). Starting from Euro 3, it is more rational to install the 4th generation of gas equipment.
Device on the carburetor
HBO 2 kit for carburetor
Second generation kit includes:
- filling valve;
- gas cylinder with multi-valve and level sensor;
- filling, consumable lines;
- reducer with a coarse filter (sometimes a remote filter with a solenoid gas supply valve);
- fuel type selection button;
- gas mixture dispenser (power register);
- device for mixing gas with air (mixer);
- an electromagnetic valve that blocks the access of gasoline to the power unit when switching it to gas.
The operating principle of 2nd generation equipment on a carburetor engine is as follows:
The engine starts and warms up using gasoline. Next, the key is moved to the neutral position to produce fuel from the carburetor float chamber. Thus, the solenoid valve is activated, which shuts off the gasoline supply.
After which the switch is set to the gas supply position, activating the gas valve. So the gas, which is in a liquid state in the cylinder, flows through the multivalve and the main pipeline to the reducer. At this stage, the mixture undergoes preliminary rough cleaning.
When the gearbox warms up from the engine coolant, the liquefied gas is converted into steam. In the vapor phase, the fuel, passing through the power register, mixes with air in the carburetor.
To do this, in the 2nd generation HBO system, an injection mixer (spacer) or gas inserts are installed on the carburetor.
Then the finished gas mixture, entering through the intake manifold and cylinder head valves, is ignited by a spark in the combustion chamber of the engine cylinder.
To switch back to base fuel, the LPG button is moved to the position of working on gasoline, bypassing the neutral position.
Diagram on engines with injector
Second generation gas equipment kit for injection internal combustion engines
Here the equipment differs in several components:
- the button is specifically for the injection system, but there are also universal ones;
- a mixer with an anti-popping mechanism is installed in front of the throttle valve;
- petrol injector emulator;
- lambda probe emulator (installation is not required on all machines).
There are no radical differences in the operating principles of both gas equipment schemes. Major changes have been made to the design of the gas equipment due to the presence in a car with an injector of injectors for supplying fuel (or a mono injector - one nozzle for all cylinders). Which are controlled by the standard engine control unit (ECU).
The engine can switch to gas in semi-automatic mode (middle position of the toggle switch). Until the engine reaches a given number of rpm (1500-2000), gasoline is supplied to the combustion chamber. Then the switch to gas occurs automatically.
An injector emulator is needed to turn off gasoline injectors; it also sends a signal to the controller (ECU) simulating their operation. Due to this, the control unit does not display an error (“check engine”) about non-working injectors through an alarm on the instrument panel.
The lambda probe emulator (oxygen sensor) blocks the engine control unit from outputting a false error about a lean fuel mixture. Sensor advantages:
- facilitates setting up HBO due to the display of an indication of the quality of the mixture (poor green, rich red);
- reduces gas consumption by an average of 7-10%;
- allows you to detect real errors in engine operation.
Due to possible malfunctions in the ignition system (missing sparks) or gas distribution mechanism, popping noises occur in the engine. The reason for this is the ignition of fuel in the intake manifold, which can lead to its rupture.
If the engine has a plastic manifold, it is recommended to install the 4th generation of equipment. Or replacing the intake with a metal one.
The second generation gas equipment is equipped with an “anti-pop” valve, which is installed in the gas mixer or may be additional in the air filter housing.
Operating principle of HBO2
The principle of operation of 2nd generation HBO on a carburetor engine is as follows.
The gas is contained in a cylinder equipped with a multi-valve. Fuel is supplied to the valve using the main pipeline. Gas filtration systems are installed there. This is where it can be cleaned of dirt, debris and other foreign elements. Then comes the gearbox. It is connected to a system that is needed to cool the engine. In it, the gas changes form from water to steam. This is achieved through temperature and pressure. The gas is supplied as steam to the engine to be mixed with air.
Now the fuel enters the mixer. There, gasoline and air are mixed to create a mixture. A power regulator is installed on the sleeve. It is needed to regulate the amount of gasoline in the engine. If the mode operates on gas, the gasoline supply will intersect with the valve located on the fuel line.
Note. To prevent the pump from constantly breaking down, a gasoline valve should be placed between the gasoline pump and the carburetor. This is necessary so that the first one contains gasoline necessary for lubrication.
The HBO button is responsible for controlling the system. If the ignition is turned off, the switch is de-energized and the fuel is shut off.
The connection diagram consists of three modes:
- Gaza. When the ignition is turned on, the switch receives energy, opening access to the fuel supply. This is necessary to improve the launch. Pulses will appear on the ignition coil. The switch will see them and open access to the valve. Fuel will flow until the wire stops receiving signals.
- Gasoline. No fuel will be supplied here. Power will be supplied to the gas valve, which will open the flow of gasoline to the engine.
- Transition. Here the supply of both fuel options will be turned off.
Equipment setup
Reducer-evaporator diagram
As an example, consider the configuration option for a popular gearbox from Tomasetto (Tomasetto AT-07 electronic). Adjustment of 2nd generation Lovato gearboxes and its full analogues, such as Atiker and Torelli, is performed in a similar manner.
Before starting work, make sure that all engine systems are in good condition. The air filter has been changed, the ignition has been adjusted, and the coolant level is normal. Drain the condensate from the gearbox, if it is not new, make sure it is in good condition.
In order to adjust second-generation gas equipment with your own hands, you need to warm up the engine to operating temperature on gasoline, switch to gas and turn off the engine. From now on, we will separate the tuning options for different types of engines.
Correct adjustment of 2nd generation HBO on a carburetor with your own hands
- Using a flat-head screwdriver, tighten the screws of the gearbox and dispenser until they stop (without much effort), and then unscrew:
- membrane sensitivity 2-3 turns;
- “greed screw” of the first chamber until fully open, the second by 1 turn.
- Start the engine on gas. Gradually tighten the sensitivity screw to find the moment the speed drops at a lean mixture. Attention! A drop may occur when the mixture is enriched. Therefore, if, when unscrewing the screw, the speed increases, and then falls again, it means that this is working on a rich mixture. Now, by screwing the screw back in clockwise, you need to set the peak of increased engine speed - this way the idle speed will be found (800-850 rpm). If higher, adjust the quantity screw on the carburetor itself to the desired readings.
- Use the accelerator to increase engine performance around 3000 rpm. Use the “greed screw” of the first chamber to set the moment when, when it is tightened, the drop begins, and when unscrewed, the speed increases. Release the accelerator and revoke the throttle; if the internal combustion engine develops low speed (there is a dip), unscrew the screw of the first chamber of the power register by 1/8. At the same time, adjust the sensitivity screw as indicated in point No. 2. Check by re-gasping again.
- The second chamber of the carburetor operates at increased engine speeds from 3000 rpm (depending on the engine brand). Therefore, the “greed screw” of the second camera must be set to approximately the same position as the first.
- Next, you need to carry out control tests on the move under different loads (lifts, sudden accelerations).
Setting up 2nd generation HBO on an injector
- Unscrew the screw of the power register and membrane by 2-3 turns, tighten it until it stops.
- Start the engine. Raise the engine speed to 3000-3500 rpm, by tightening and unscrewing the dispenser, find the peak of maximum engine speed. From this position, screw in the register screw 0.5 turns.
- Release the accelerator and revise the throttle. If the engine starts to choke, unscrew the metering bolt 1/8. And so on until finding the optimal speed set.
- Then, gradually tightening the membrane sensitivity screw, find the moment the speed drops, loosen the screw by 1/8.
In this case, it is convenient to use a lambda probe emulator. The setting can be considered correct when the indication on it (LED) glows red at idle. If this condition is not met, you can unscrew the x/x screw until the engine speed stabilizes. Also, if you have a device (gas analyzer), you can use it to adjust the gas equipment even more accurately.
5. Make further adjustments during sea trials. If the car does not develop enough power, slightly release the gas supply with the register screw.
Installation of HBO2
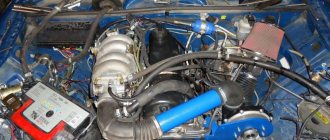
To install a carburetor in a VAZ 2106, we need to open the hood. The valve and reducer are located there. They are connected to each other. The high pressure fuel line must be connected to the valve. Such lines must be made of copper. If it has low pressure, it is necessary to use rubber hoses with gas.
A pipe from the cooling system must be connected to the corrector gearbox. The gearbox can be installed on the right, next to the stove.
For information on adjusting the 2nd generation Tomasetto LPG gearbox, please follow the link.
Note. If you install it near the stove, you will benefit, since the stove will help warm up the gearbox faster.
To establish a connection to the cooling system, you need:
- Disconnect the pipe that is connected to the stove radiator.
- Install it from the pump to the gearbox housing. This is necessary to supply hot antifreeze.
- Install another pipe from the stove tap to the gearbox.
After this, you need to adjust the regulator and start supplying gas to the carburetor. There are two ways to supply gas fuel:
- Using a mixing spacer.
- Using a carburetor insert.
For the second method, you need to make several holes in the carburetor chamber. Threads are cut into them and special fittings are screwed into them. The latter are needed to connect the gas pipe.
You can install HBO2 on the carburetor yourself.
At the dawn of HBO
1st generation LPG was created for cars with carburetors that did not have sensors and control units. The adjustment and tuning of the gas equipment was carried out mechanically, the fuel consumption was through a simple dispenser. The scheme is simplified and reliable, but the big disadvantage is that the exhaust parameters did not reach European standards.
The 2nd generation HBO was equipped with a lambda probe. It was built into a carburetor or injector with a primitive electronic system. Fuel was supplied using a dispenser; sensors helped monitor the composition of the gas mixture. The first step was taken towards injection systems. HBO 2 has one injector that performs single gas injection into the intake manifold based on a signal from the gas computer.
Installation of HBO 2nd generation
- After selecting the components, the connection diagram for the 2nd generation LPG to the injector and carburetor will consist of several stages: Preparation of the mounting location for the cylinder. Here you need to provide ventilation holes, you will have to drill the bottom for the tubes, as well as securely fasten the cylinder. In this case, you should stock up on a drill and a drill bit of the required size. Next comes the installation of the cylinder, then the multivalve.
Possible malfunctions on HBO2
The following is a table of possible HBO2 malfunctions, as well as methods for eliminating them.
| Problems | Cause | How to find? | How to fix it? |
| DSV doesn't want to run on gas. Doesn't start well or doesn't start | Gas is not flowing well | Check the output of the multivalve gas equipment to the gas supply | Carry out repair or replacement |
| Check the gas valve output | Blow out the line. The filter or valve may need to be replaced | ||
| Check the gearbox output. When checking the gas supply, note that it should be in the form of a white mist. | Carry out repair or replacement | ||
| Incorrect amount of gas supplied to engine | Adjustment problems | Correct the adjustment | |
| The gearbox is broken | Carry out repair or replacement | ||
| Problems with the tightness of the intake system | Remove the air leak | ||
| Gasoline comes with gas | Check the gasoline valve | Carry out repair or replacement | |
| The gas reducer constantly freezes | Coolant is not circulating well | Either the liquid is weak or there is not enough of it | Add more antifreeze |
| Valve sealing problems | Gas continues to escape when the gearbox stops | Repair or replace valves | |
| The engine does not warm up well | Find additional ways to warm up | ||
| The engine does not work during auxiliary strokes | The idle system has become unusable | Check auxiliary operation using gasoline | Repair carburetor |
| Poor adjustment | Fix adjustment problem | ||
| The reducer is filled with gas condensate | Remove condensation | ||
| The engine is unable to make revolutions after the auxiliary stroke, or it stops working altogether | Low gas | Excess debris has accumulated on the valve, filter or line | Clean everything from dirt |
| Fuel does not ignite | Ignition works intermittently | Check the spark plugs |
There are a lot of problems with the operation of HBO. Each breakdown is corrected individually.
HBO 2 is indispensable for monitoring the gasoline transfer process. That is why, at the slightest problem, it must either be repaired or replaced.
Cylinder selection
The first thing you will need to decide is the type and placement of the gas cylinder for your car. For example, for classic VAZ or Moskvich models in a 4-door version, it is better to use a “cigar” type cylinder, which is located behind the rear seats in the trunk.
For the front-wheel drive VAZ family of three or five door modifications, the optimal choice would be to use a “Thor” type cylinder instead of a spare wheel (which will allow you to easily use the entire trunk volume with the rear seat folded).
For “Tavriy” and “Slavuta” it is best and most optimal to use a small “cigar” type cylinder located outside the car, which will allow you to “save” the useful volume of the trunk and allow you to use all the advantages of LPG.
Self-installation of HBO 2
It is not difficult to install gas equipment on a car yourself if you follow safety precautions and have knowledge of installing such devices.
Stages of installation of gas equipment for 2nd generation gas:
- installation of a cylinder;
- gas main wiring;
- installation of a mixer and dispenser and control unit for gas equipment;
- testing work on the tightness and performance of gas equipment.
Before starting installation, check that all gas equipment is available:
- gas cylinder (cylindrical or toroidal);
- multivalve;
- gasoline and gas electric valves;
- filling valve;
- mixer;
- control panel and wires;
- gas hoses and tubes;
- tees;
- clamps.
Description of step-by-step instructions for installing gas equipment:
- Cylindrical cylinders are mounted in trunks. In hatchbacks, a good option for installing a toroidal cylinder is in the spare tire niche. It is better to install methane on large cars, for example, Gazelle, where there is room for a bulky container.
- Fix the filling valve on a bracket under the rear bumper, on one of the rear fenders or in the trunk of the car.
- Lay the gas line from the cylinder to the engine compartment along the bottom of the body. The fuel line must not pass through the passenger compartment. The hole for the gas line outlet is made with a larger diameter than the pipeline in order to insert a protective rubber or plastic seal into it. The edges are treated with anticorrosive.
- A gas line is fixed along the bottom. You can place the gas pipeline next to the gasoline pipeline in the niche provided for this.
- The next step is to install a mixer between the carburetor and the intake manifold of the car. Tightness is achieved using O-rings and sealant to prevent air leaks. If this is not done, traction will be lost and jerks and dips will occur when the engine is loaded. Typical for the Solex carburetor, its modification DaAZ 21073–1107010 is installed on the Niva.
- The next operation is to install a gasoline electric valve in the fuel pipeline between the gasoline pump and the carburetor.
- Install the gas valve.
- The gas line is connected to the valve.
- A gas reducer is mounted next to the carburetor.
- Connect the gearbox to the pipes that lead to the car's heater. The 2nd generation Lovato gearbox performed well in Russian winter conditions.
- The line from the shut-off valve is connected to the installed gearbox.
- A gas dispenser is installed between the reducer and the mixer.
- The LPG control panel is installed in the cabin and connected.
Important! All connections of elements of gas-cylinder equipment are securely secured with clamps. The tightness is checked only after filling the cylinder with gas.
To perform a test run of HBO, the cylinder needs to be filled with approximately 10 liters. The pipeline is blocked. A soap solution is applied to the line connections. Perform gas inlet and inspect the joints. Bubbles will appear in areas of leakage. If it is not possible to immediately eliminate the causes by tightening the clamps, the gas pipeline is shut off and the connections are redone.
Important! Only after making sure that the gas line is sealed throughout its entire length can you begin testing the LPG 2 in operation.
Before operating the LPG, it is necessary to check the effect of the anti-pops on the injector. If the gas pressure exceeds, the firecracker will prevent the gas mixture from exploding.
If the leaks are not eliminated, the consequences of such operation of the car are increased fuel consumption, engine shutdown, gas poisoning, and even an explosion. If in doubt, it is better to set up and service the gas equipment in a specialized service center. The address of the station where gas cylinder installations are serviced can be found on the Internet.
Gas-gasoline switching device
The difference between a gas complex mounted on a carburetor and equipment intended for installation on an injector lies initially in the fact that in power plants with separate injection, the supply of the gasoline mixture is turned off almost instantly. The fuel type switch on direct injection engines is equipped with three fixed positions: 1st position – operation on a gasoline mixture; 2 position – operation on gas engine fuel; 0 position – operation in automatic fuel type switching mode. The mode in position 0 creates additional convenience when operating and driving the car. When this mode is activated, the electronics, based on sensor readings, decide when to change the type of fuel supplied to the engine.
Gas-gasoline switching device
Before parking the car for a long time, the carburetor must be filled with gasoline, so you should switch the engine to a gasoline-air mixture in advance. There is no need to do this for an injection power plant, so manual switching is not required; the automation independently makes the necessary switches.
Scheme
The second generation system has the following design:
1. Cylinder 2. Multivalve + Ventilation unit 3. High pressure hoses and pipelines (gas line) 4. Filling device 5. Gas valve with filter (electromagnetic) 6. Reducer (gas evaporator) 7. Gas dispenser 8. Mixer (mixer) 9. Gasoline valve (solenoid) or Injector operation emulator 10. Fuel type switch (gas-gasoline)
The diagram also shows a gasoline valve, but in most cases on injection engines, its installation is practically impossible. It is much easier and more correct to turn off gasoline using an injector emulator.
What is included
The innovation of 2nd generation gas cylinder equipment is an electronic reducer-evaporator and an electronic fuel switch. The equipment for carburetor and injection cars differed.
2nd generation gas system for carburetor includes the following elements:
- cylinder with valve for refilling;
- multivalve;
- gas lines;
- coarse filter for gas purification;
- reducer-evaporator with electrical circuit;
- fuel switching panel with button and electrical wiring;
- mechanical type dispenser;
- gas and air mixer;
- gasoline electric valve to shut off the gasoline supply.
2nd generation LPG with injector has a slight difference from the carburetor version. There is no gasoline electric valve; emulators for the operation of injectors and a lambda probe have been added. When the car switches to gas, the devices perform emulation, “deceiving” the gasoline controller, telling it that the gasoline injectors are working.
The signal types may vary for each ECU. Yota emulators have the ability to customize the output signal.
In engines with a monoinjector, large-volume intake manifolds with air reserve receivers are installed; when operating on gas fuel, they are filled with a gas-air mixture, and there is a danger of its ignition. Therefore, when installing the second generation on the injector, it is necessary to provide protection against explosions (backfire pops).
For this purpose, an “anti-bang” is mounted on the injector. The plastic valve opens when the permissible pressure limits in the vehicle's intake manifold increase. When the indicators decrease, the anti-clap closes on its own. The anti-pop valve is most often placed on the air filter housing.
This problem was foreseen by well-known manufacturers of gas equipment Torelli, Lovato, Tomasetto, Atiker. Inexpensive but reliable HBO is produced by the Digitronic company.
Cylinder equipment
After choosing the type, size, and manufacturer of the cylinder, we look at what is included in the cylinder package
For a cylinder of the “Thor” type there must be:
- ventilation pipe (breather), which is led under the car;
- a cover with a seal to create a sealed chamber, which in emergency situations will not allow gas to flow into the cabin, but will allow it to escape through the ventilation tube outside the vehicle;
- clamps;
- fastening bolts with nuts and washers;
- original cover bolts that can be quickly unscrewed without tools and manually close the shut-off valve on the multivalve;
- passport for the cylinder.
Cylindrical cylinder (“Cigar”)
For a “cigar” there should be:
- ventilation box with gasket and lid;
- fastening tapes;
- two ventilation tubes (breathers);
- corrugation connecting the ventilation box with ventilation pipes;
- clamps for tightening corrugations;
- tapes for securing the cylinder;
- passport for the cylinder.
It is IMPORTANT that the lid itself and the seal of the lid of the torus cylinder are intact, just like in the ventilation box of a cigar, the sealing rubber must be intact exactly like the body and lid of the box. All ventilation hoses must be undamaged and clamped with clamps.
Fuel switch
Gas/gasoline switch is a device designed to switch the operating mode of a vehicle from one type of fuel to another at the moment when a certain number of vehicle engine revolutions is reached.
Switch K-5 Tamona All switches are divided into three main groups.
1. For injection engines. This type of switch has three positions: petrol, gas and automatic mode. 2. For carburetor engines with the installation of an electronic gearbox. In these switches, the “GAS” position is equipped with an automatic shutdown of power from the shut-off valves. 3. For carburetor engines with the installation of a vacuum reducer. And on this gas-gasoline switch there are two toggle switches. One for switching the type of fuel, the second for pumping gas before starting the engine.
The cost of switches usually does not exceed 1000 rubles.
Switches, options and costs All switches come with a wiring diagram and mounting kit.