Last updated April 2, 2022 at 07:30
A distinctive feature of the fourth generation gas equipment in relation to lower classes is the better preparation of the gas mixture, as well as its accurate, dosed supply into the combustion chambers of the car engine. Due to this, optimal fuel consumption and uniform engine operation in any mode are achieved.
Therefore, the electronics of such systems are equipped with a number of auxiliary parts, including a gas temperature sensor and a 4th generation LPG reducer.
The device, malfunctions, methods of checking and repairing sensors will be discussed in this article.
Functions of temperature elements in gas equipment
From the cylinder to the evaporator, gas fuel (propane-butane mixture) comes in a liquefied state. Passing through the channels of the reducer, the gas is heated by the energy of the car engine coolant and passes into the vapor phase suitable for mixture formation and combustion.
The 4th generation LPG device provides for automatic switching from gasoline to gas. Therefore, the system’s electronic control unit (ECU), based on a signal from the temperature sensor of the reducer-evaporator, sends a command to open the solenoid valve for gas supply to the injectors.
The normal temperature for a car to switch to gas is 35-55°C (set in the program when setting up LPG, depending on climatic conditions and time of year).
Note that this sensor does not measure the temperature of antifreeze/antifreeze; its purpose is to take readings specifically from the coolant housing (gearbox). This was done, among other things, to avoid damage to the evaporator membrane during a cold start.
The gas temperature during injection is not equal to the temperature of the reducer. The gas passes through filters, MAP sensor and injectors, and its condition is also influenced by external factors.
A gas temperature sensor is needed to additionally adjust the fuel supply time. The correction map is set in such a way that when the car switches from gasoline to gas, the gasoline injection time does not change.
The default temperature correction is zero.
Design
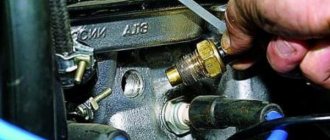
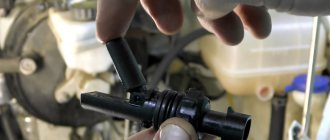
The appearance of the gas temperature sensor resembles a metal flask with a thread. Two wires come out of it to connect to the ECU system. The device is installed in a groove in the gearbox. The product is selected for a specific type of injection system, as well as the manufacturer of the gas equipment. Automatic switching to gas as the main fuel is performed after heating the coolant to 30 - 50 degrees (depending on the system settings).
Each device differs in its technical parameters and has different resistance. To save the obtained values, it is necessary to correctly select the appropriate type of device.
Types and device
At the heart of gas and gear temperature sensors is a thermistor. The thermistor has a negative characteristic with the designation NTC, i.e. When heated, its resistance decreases.
Thermistor
In 4th generation HBO systems, elements with a nominal value of 1.7 to 10 kilo-ohms are used. But the most common are 2.2 and 4.7 kOhm.
The gearbox temperature sensor has a brass body, differing only in the connector, length and size of the thread.
Gear and gas temperature sensors
Gas sensors can be of plastic or metal construction. The location may include:
- as part of the MAP sensor (we wrote about MAP repair here)
- on a separate tee (cuts into the line in front of the injectors)
- in the nozzle rail
Purpose and principle of operation
The flawless functioning of 4th generation HBO sensors ensures the stability of equipment performance. Strict control of temperature parameters minimizes the likelihood of hazardous situations that may arise as a result of increasing temperature values above the limit values.
The 4th generation HBO temperature sensor operates in conjunction with pressure sensors. This principle of collecting and transmitting information is necessary to ensure reliable and economical operation of gas-powered internal combustion engines.
These devices are installed in the following LPG units:
- directly in the reducer to control the gas temperature in the evaporator;
- in front of the reducer to analyze the pressure level in the gas tank.
Thanks to this conglomerate, the system can determine the amount of remaining fuel in the gas tank. A smart electronic control unit transmits this information to the control panel.
The information collected by the LPG gas temperature sensor allows the ECU to adjust economical fuel injection. If these steps are violated, you can not count on the correct functioning of gas equipment. This eliminates the possibility of cold gas entering the heated gearbox and maintains the temperature balance necessary for smooth operation of the machine.
In order for the 4th generation LPG gas temperature sensor to fulfill its important purpose, allowing the ECU to calculate the moment of injection of gas fuel as accurately as possible, it is configured individually for specific equipment. It is necessary to take into account the technical features of the car model. If this is not done, the values sent by the device will not correspond to the real ones.
Possible faults
Due to a breakdown of the reducer temperature sensor, the system will not switch to gas or the switch will occur at the wrong time. Due to failure or transmission of false parameters of the gas meter, failures in the operation of the internal combustion engine, as well as overestimation of gas consumption, are possible.
Causes of temperature sensor malfunctions:
- poor installation
- incompatibility of the device with the control unit of gas equipment
- manufacturing defects
- low quality of product components (fake)
- voltage drops in the vehicle's on-board system
When installing gas equipment, it is important not to use twisted wire connections. It is best to use a connector, soldering or connecting sleeves.
It is also worth paying attention to the fastening of the sensor wiring. Wires often break due to vibration directly near the base (this is not always noticeable).
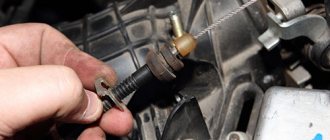
Broken sensor wiring on the gearbox
In addition, wires/contacts should be protected from moisture and corrosion. Carry out system maintenance in a timely manner, as well as buy components with a guarantee from well-known brands.
Map sensor repair
You can repair the gas pressure sensor either yourself or by trusting specialists. In any case, repairs will cost you much less than the cost of a new one.
With the help of specialists
If you contact specialists, repairing a map sensor will cost about half its cost, i.e. will fluctuate around $15. The cost of the repair includes the replacement of one sensor and labor.
If you need to replace two failed elements at once, most likely the repair will cost 5-7 dollars more.
With your own hands
Let's look at repairing a map sensor with our own hands using the example of the PS-02 sensor in a standard case.
The top cover is secured with latches and can be easily removed. By removing the top cover we get access to the board, which is held on by 4 screws.
Unscrew the 4 screws to remove the board.
The pressure sensor is covered with a plastic protective casing; to get to it, the casing will have to be removed. The casing itself is glued to the board, pry it with something and remove it. The casing also protects the temperature sensor, be careful. If the resolution sensor fails, the casing can be left untouched. Next, the non-working sensor needs to be unsoldered.
The markings of the soldered sensor can be seen in the figure below. Full marking of the pressure and vacuum sensor:
You can order it from the favorite Chinese online store “Ali”, or ask at the radio market. The average price ranges from 5-7 dollars.
If the temperature sensor fails, you need to unsolder it.
The installed temperature sensor looks like this:
After soldering, be sure to check the MAP by installing it on the car; if everything works as normal, and the car switches to gas and does not “twitch”, the sensor can be assembled and installed normally in its original place.
How to check the 4th generation HBO temperature sensor
There are two ways to determine the performance of temperature sensors.
- Connect the cable for setting up gas equipment. Compare the readings of the meters in the diagnostic program with the real parameters obtained using a pyrometer or thermocouple of a multimeter.
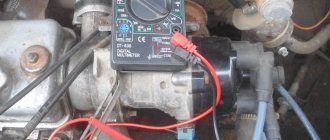
- Set the multimeter to the resistance measurement position and measure the resistance at the sensor contacts (polarity does not matter). At ambient temperature (25°C), the readings must correspond to the nominal value (indicated on the sensor body or in the documentation). If you heat the thermoelement, at least with your hands, its resistance should decrease.
Functions of HBO valves
Electromagnetic valves installed on gas equipment are called “multi-valves” because they perform several functions at once. To be more precise, the functional set of most nodes of this type includes:
- Possibility of refilling through a special fitting. Thus, the filling function of the valve allows you to fill the cylinder with fuel through it, if other methods for achieving this goal are not applicable for some reason;
- On the contrary, the possibility of emptying the cylinder through a special fitting;
- Blocking of filling and supply channels by using a valve mechanism;
- Blocking overfilling of the cylinder through the use of a special cut-off with a float;
- Blocking the gas supply through the line to the engine when its operation is stopped, which organizes the “anti-pop” function of the valve. This was especially true for equipment of the first generations, because the slightest problems with the gas supply to the internal combustion engine were accompanied by the sounds of pops and explosions. It was the multivalve - anti-clap that was the first to solve this problem;
- Determination of the gas level in the tank, thanks to a unique magnetic system for indicating its quantity;
- Filtration of gas in its liquefied state, which occurs due to the presence of a filter element in the structure of the unit;
- Organization of additional fuel replenishment of the engine.
Today, multivalves in their standard form with the set of functions noted above are practically not used, because such an LPG system is not absolutely safe. Despite this, such a giant in the field of universal gas valves as Lovato still produces a little of them for sale.
Troubleshooting options
Having identified a malfunction, you can buy a new gas temperature sensor or repair the existing one yourself, while saving money.
To do this, you need to warm up the device a little and remove the thermistor from its body. Then buy a thermistor at a radio store (price 30-70 rubles) with the same resistance and size (take a sample). Place a thin heat-shrink tube on the legs of the part.
After installing the thermistor, it is advisable to fill the sensor cavity with thermal paste, and apply epoxy glue or automotive sealant at the end of the hole.
In addition, after soldering the wires to the thermistor terminals, it is important to secure them in such a way as to prevent fracture from vibration during operation . Alternatively, you can make a loop and tighten the wire to the sensor with a clamp.
Video on how you can independently repair a 4th generation LPG temperature sensor:
Repair of pressure, vacuum and gas temperature sensor
Most motorists, if the pressure sensor malfunctions, immediately change it, and this is not strange, since the installers themselves claim that the sensors are not repairable. However, in practice everything is a little different. There are ways to resuscitate these sensors, after which they work successfully for quite a long time. The cost of a gas pressure sensor is about 2-3 thousand rubles, so the question, as you understand, is relevant and worth understanding.
For repairs we will need:
- Soldering iron and skills to work with it;
- New sensor, see photo (you can buy a pressure or vacuum sensor on the Internet on Ali or another site that specializes in chips);
- Thermal paste KPT-8 (preferably);
- TORX T10 screwdriver (asterisk).
- We dismantle the sensor, clean and purge it.
- Using something sharp, carefully pry off the plastic cover, under which there is a board with sensors. It is advisable not to break anything.
- We unscrew the board, it is secured with TORX “T10” bolts and take it out of the case.
- We unsolder the faulty sensor we need, remembering its location.
- We take the new sensor and carefully solder it into place, also do not forget to put on the O-ring.
- Just in case, we check the inlets of the pressure and vacuum sensor.
- If there is thermal paste, I would recommend replacing it on the temperature sensor.
Further assembly is carried out in reverse order. At this point, the repair of the gas pressure sensor is completed; all that remains is to install it in place and check the operation of the gas equipment. Thank you for your attention, I hope it helped!? Leave your comments and thoughts on this matter in the comments. Goodbye everyone and see you again at the HBO shop.
Source
DIY repair
Even a car enthusiast who is not very experienced in this matter can repair the MAP sensor on his own. In particular, the following procedure for replacing the pressure and/or vacuum sensor is proposed.
- The connector is disconnected, the MAP sensor is dismantled, it is inspected, cleaned, and purged.
- Use a sharp screwdriver to pry it up, then remove the plastic cover (or unscrew the screws), opening access to the board with sensors.
- The board is unscrewed and removed from the case.
- The faulty element is soldered off.
- A new sensor is soldered in its place, then an o-ring is put on (the cost of the sensor on aliexpress is 350-450 rubles).
PS-02 pressure sensor brand MPXHZ6400A
Map sensor from Stag PS-02 plus sensor marking - S030/bg9-15
After assembly, all that remains is to put the MAP sensor in its original place, connect the connector and check the functionality of the LPG.
Symptoms of malfunctions and solutions
As soon as the first signs of malfunctions of the 4th generation gas equipment appear, you should sound the alarm, find out the cause and carry out repairs. Each brand of HBO has its own weaknesses. For example, a table of faults for the 4th generation alpha LPG helps service technicians in their work.
There are not so many characteristic symptoms of breakdowns, and the solutions are not complicated if you understand the essence of the problem from the beginning.
Gas failures
If you feel dips during sudden gas changes, there may be several reasons:
The complexity of the repair depends on what needs to be done. Sometimes there can be several reasons at the same time.
The motor "troits"
The fourth generation LPG of any brand, brc, digitronic, tomasetto, lovato, alpha may malfunction. Possible malfunctions are also reported by 4th generation Tartarini HBO if the settings are incorrect. If, when switching the engine from gasoline to gas, the engine begins to stall, this indicates that the gas system is out of order; it is dangerous to continue operating it without repair.
It is necessary to switch the engine to standard automobile fuel and go to a car service center. It will not be possible to repair it yourself with such symptoms; serious diagnostics are needed.
Antifreeze leak
If a “puddle” appears under the car, the level of antifreeze in the tank has dropped to a critical state and topping up does not help, it is likely that the insertion of the LPG into the cooling system was unsuccessful (the sealing of the joints is broken), or the gearbox is faulty.
It is dangerous for antifreeze to get into the intake manifold, or gas may enter the cooling system. It is necessary to urgently contact a gas installation specialist.
The motor is overheating
When the temperature gauge goes beyond the red line and the coolant boils, this is due to a disruption in the flow of fluid through the system, its airing.
Repair costs at the initial stage are insignificant, it is necessary to remove air pockets, and sometimes replacement of clamps and pipes is required.
The car runs jerkily when switched to gas
An uneven increase in power on gas, the power plant is unstable, and when the vehicle is switched to gasoline, the situation stabilizes and does not always mean a breakdown.
The most harmless thing that can happen is that the gas fuel runs out. A more serious reason lies in the incorrect operation of the injectors. With the second option, you will have to change the set of injectors.
Gas fuel level indicator does not work
What should I do if, with any amount of gas filled, the indicator does not show the actual level?
The sensor, which is responsible for indicating the gas level, may not work correctly if the float is jammed. If there is no serious damage, then with a light tap on the body of the gas cylinder, the float can “come to life”. The second reason is an electrical malfunction. Anything can happen here: from broken wires to a short circuit.
Difficulties when refilling a gas cylinder
If everything is fine with the equipment at the gas station (and you need to make sure of this), you need to “sin” the solenoid valve of the filling device. Craftsmen usually change it or remove it and clean it. The second option is cheaper.
Car power drops
Symptoms appear gradually. The dynamics of the engine deteriorate over time, although before that everything was fine; the car functions normally on gasoline.
The least expensive activity is replacing the filters.
There was a smell of gas
Even with a minor leak, the smell of gas will be felt in the cabin or near the car.
Small leaks may occur at the junctions of gas equipment elements with gas mains. It is also necessary to check the exhaust system.
The check begins with the tightness of the gas pipeline.
The engine stalls
Malfunctions of gas equipment on cars with an injector can appear at the most crucial moment, for example, at an intersection, when the engine suddenly stalls.
Most likely, the culprit is an incorrect setting of the electronic control, or the gearbox is incorrectly mounted.
It is necessary to diagnose the HBO and perform adjustments.
Excessive gas consumption
According to the fuel consumption table, ideally the average gas consumption in liters should be 10-20% higher than gasoline. If the car “eats” 7 liters of gasoline per 100 km. along the highway, gas consumption will be 8-9 liters under the same conditions.
If the norm is exceeded, the reasons may be the following:
The problem must be solved, since LPG is installed to save fuel, otherwise it will not justify itself.
Does not automatically convert to gas fuel
In 4th generation LPG you do not need to switch fuel manually. If the automation does not work, this may mean:
This means a serious breakdown that cannot be ignored.
Installing gas equipment on a vehicle solves not only the problem of saving on fuel; the environmental component is also important. The gas-powered vehicle complies with Euro 4 emission standards. To maintain this level, you need to undergo maintenance on time and not ignore any symptoms of LPG malfunctions.
Some problems do not arise immediately, but after a year or two, depending on the conditions and intensity of the car’s operation. Operating broken equipment is unsafe and leads to damage not only to the gas system, but also to the machine’s engine.
Installation and connection
According to the type of location, gas valves are:
- Remote;
- built-in
A remote gas gas solenoid valve is usually mounted in the engine compartment of a car, or placed directly on the gas reducer through an adapter. Built-in, located in the evaporator housing.
Built-in and remote electrovalves
Sometimes, for greater safety, two valves are installed at once, after the multivalve (in the flow line before the evaporator) and on the gearbox.
The connection is made using gas equipment wiring, according to the diagram that is included in the gas equipment kit. When installing the 2nd generation, the harness is routed from the control button to the solenoid. During the 4th generation installation, the cable runs from the LPG control unit to the valve. There is no difference where to connect the terminals on the coil.
Maintenance of fourth generation gas equipment
1. Required to be performed weekly:
- external inspection of the system tightness, absence of gas leaks. A leak can be detected by the characteristic smell of an odorant and using a soap solution. Leakage can occur through cracks in the tubes, worn seals or loose tube clamps;
- removal of accumulated condensate in the gearbox through a special bottom plug. Untimely draining of condensate can lead to its coking and clogging of the drain hole, which subsequently, when condensate accumulates, leads to disruption of the normal operation of the evaporator reducer.
2. Required to be performed monthly: cleaning or replacing the filter. To do this, you need to disconnect the inlet tube from the filter and dismantle the filter. Clean or replace the filter element. There is a small magnet inside which should be replaced after cleaning the filter. 3. The gearbox should be disassembled and cleaned once every two years. In this case, care must be taken not to dent or tear the membrane. After cleaning and assembling the gearbox, be sure to check for leaks.
