Hello, dear friends! Objectively, there are quite a few reasons why a torpedo may need to be re-upholstered. Therefore, we will not focus on why to do this, but rather let’s talk about how to do it with your own hands.
I’ll say right away that if you are not good with threads and needles, don’t know how to take basic measurements, and don’t know anything about patterns, then it’s better not to take on such work. This is objectively easier to do than reupholstering the steering wheel with leather, but it is also about as difficult as reupholstering the interior of a car. The technology is not the most complex, but it has its own nuances. Moscow, St. Petersburg and a number of other cities are ready to offer dozens of salons where they will provide you with reupholstery services. Although prices will differ significantly from the costs that are possible when working independently.
The first step is to decide on the material. And then, based on the instructions and recommendations, preparatory measures will be carried out, and as a result, the interior of your car will sparkle with completely new colors.
Why do you need to reupholster your car dashboard?
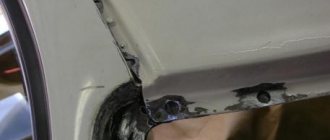
The front panel of the car is always open. Many drivers use it as a table. Therefore, the surface wears out over time, and the former gloss disappears. Ultraviolet rays do not spare plastic, which is why cracks appear. And after a strong frontal accident, holes gape in the panel from deployed airbags. To bring back aesthetics to the interior, you can reupholster the car dashboard with your own hands.
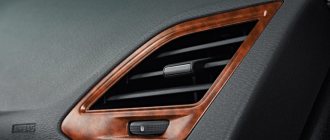
Even if the panel is in good condition, a change in style, i.e. tuning, will create a new atmosphere in the cabin. Here you can combine colors at your discretion. Emphasize the accents of the body color, or refer to the brand colors of the car brand. For example, black, white and blue BMW, yellow and red Ferrari, white and green Land Rover and others.
Interior tuning
It is considered fashionable to place inserts made of vinyl or chrome. They give the panel a special effect. There are hundreds of design options. But first, we recommend choosing a material, because reupholstering a car dashboard with genuine leather can only be done by very few people.
For reference. Don't be tempted to use the material for furniture. It's cheaper, but not suitable at all. For cars, a special structure of matter is used that can withstand severe temperature changes without any consequences.
Errors
You don't gain experience right away. Therefore, for the first time, you can get air bubbles, uneven seams, and unnoticed defects in the original surface.
There may also be errors when choosing the material. You should especially remember about the persistent odor in the cabin if substances not intended for this purpose are used.
Note to you: How long does alcohol last in a driver’s blood?
Cheap, widely used glue can take years to wear out, so it is better to purchase all consumables from a specialized supplier as a single package.
The importance of carefully performing assembly and disassembly operations has already been mentioned. At the installation stage, you may encounter a changed panel geometry; you need to think about this when marking the patterns.
The best materials for reupholstery
The Russian car accessories market offers an abundance of materials for reupholstering dashboards and car door panels. Here you can find modest styles with a rubber or synthetic base, which are identical to the previous coating. And there are luxurious canvases made of genuine leather. It is better to entrust working with such material to a specialist; cutting and sewing skills will be required. In any case, the car owner will have plenty to choose from. Here is a list of the most popular materials for car panel reupholstery:
- Genuine Leather;
- vinyl;
- eco leather;
- Alcantara;
- carpet;
- flock
Make your choice responsibly. After all, the front panel is visible. It says a lot about the owner of the car. About his character. About taste.
Genuine Leather
An ideal material for decorating the interior of luxury or premium cars. The fiber structure is strong. Temperature changes are absolutely indifferent to them. The surface is resistant to mechanical damage, but only if treated with care. Of course, you can scratch the skin with the same nail or other sharp object.
Covering the torpedo with leather
The material is easy to clean and retains its luxurious appearance for a long time. The sun's rays are not harmful to natural leather. To care for the surface, you will have to buy moisturizing compounds and various cleaners. If you are determined to reupholster your car's dashboard with leather, then experts recommend having it done in a specialized workshop. Then the appearance will really be chic.
Vinyl
A very interesting synthetic material. It includes:
- polymer rubber mixture;
- various resins;
- special glue;
- paints;
- plastic mass.
This is a modern tool that will allow you to qualitatively change your car's dashboard. Vinyl films can be plain or multi-colored.
Vinyl film for car interior wrapping
You can find an imitation of the coloring of animals, for example, python, leopard and others. Among others, there are materials that imitate chrome, carbon or nickel-plated metal.
The basic advantage of vinyl is its low maintenance requirements.
It is resistant to mechanical damage and retains its beautiful appearance for a long time. And most importantly, you can reupholster the car’s dashboard with your own hands.
Eco leather
Using natural leather is not always cost-effective or humane. But if you want to make the interior rich, then you can take eco-leather. This is not the leatherette that appeared in our country in the early 1990s. Now it is an advanced synthetic material without emissions of harmful substances. It is quite strong and retains a representative appearance for a long time.
Eco-leather samples
In terms of its characteristics, it is practically not inferior to natural leather. But to reupholster a car's dashboard, experts recommend looking for a professional studio. After all, it is impossible to do a beautiful job with your own hands without learning the stitching and long practice. This is the main disadvantage of eco-leather.
Alcantara
The material is better known as faux suede. Developed in the 1970s. Japanese chemist Miyoshi Okamoto. The soft velvety surface gives the car's interior a premium effect.
Alcantara does not require complex maintenance and is resistant to mechanical damage. Does not fade in the sun and is not afraid of temperature changes.
Sometimes the material is used in combination with eco-leather for a contrasting effect. The main advantage of artificial suede is that you can re-stretch the dashboard yourself.
Carpet
Non-woven synthetic material with various surface types. Often used for finishing cabinet subwoofers and interior parts. Carpet has good antistatic properties, does not fade in the sun, and is not afraid of moisture and mold. Well absorbs acoustic noise and knocks.
Automotive color carpet
It is environmentally safe, durable, does not require complex maintenance, and is inexpensive. The price depends on the structure, thickness, ductility and brand. Unanimously recognized by the owners of “nines”, “ten” and “fours”.
Flock
Velvety powder (powder). It is based on a pile made of cotton, viscose and polyamide. The material is sold in various colors. To apply the powder, a special tool is required - a flocator. The powder is sprayed onto the torpedo, previously lubricated with glue.
Suitable for processing complex panels with multiple corners and niches. Can be used for both full and partial coverage. Not suitable for torpedoes with cracks and holes from AirBag, as it repeats all surface defects.
Auto panel flocking
Before applying flock, careful preparation of the panel is required. It is almost impossible to make a high-quality suede cover yourself without experience.
Long experience required. Therefore, experts advise entrusting this type of tuning to professionals.
Where do the sounds come from?
The main reason for the occurrence of various noises emanating from a torpedo is the lack of integrity (strength) of the structure:
- Since a modern panel is completed (consists) of many plastic parts that are fastened together using various latches, clamps and screws
- Such fastenings weaken and break from time to time, and this leads to vibrations of the torpedo elements; when friction occurs, the elements begin to emit rebounds and squeaks
- General background noise is amplified by the dashboard fill
- Loosely attached interior heating elements, wiring, pads, electrical system, etc., when the car moves, especially on uneven sections of the road, begin to knock on the dashboard lining, producing an unpleasant clanging and buzzing sound.
- The quality of the car's dashboard finish also greatly influences the noise level.
- Such problems can be easily fixed with your own hands and without the help of specialists.
- You just need to study our article in advance, purchase the necessary materials, be patient and work carefully
- Everyone can disable the control panel themselves
- In addition, you can also turn the dashboard into additional noise protection, in other words, into an “acoustic shield”
- This will protect the car interior from noise from the engine compartment and engine.
Remedies
There are two ways to attach sound insulation to the dashboard:
- The first is dismantling the entire dashboard, followed by its complete disassembly and covering with sound insulation.
- The second is dismantling the lining and its partial sound insulation
- Of course, a much greater effect from this procedure can be achieved by performing the first method
- However, this method, unfortunately, is not always possible
- For example, in Russian models of inexpensive foreign cars and cars, the first method solves this problem
- And in imported luxury cars, which are filled with various electronic components, as well as airbags and other complex systems, you cannot complete the first path yourself
- Fortunately, soundproofing the dashboard of an expensive car is usually not necessary.
Self-rethreading of a torpedo
Many people think that re-upholstering a car dashboard with their own hands is very simple. But in reality, if you do everything well, it is a complex process.
For example, you have to remove a torpedo, disassemble it, and then prepare the surface. If there are cracks or holes from the AirBag, you will first have to seal them with epoxy resin. Then dry for 24-48 hours. And then treat the repair areas with plastic putty and prime them. Only the preparatory stage of technology can take up to 5-7 days.
Tools
Let's look at an example of reupholstering a torpedo with self-adhesive Alcantara (luxury). You will need material as well as:
- a well-lit, warm garage, a set of tools for dismantling/installing the panel;
- sandpaper P80 - P800 (depending on the condition of the surface);
- epoxy resin or repair kit for plastic (if there are AirBag holes);
- solvent, degreaser, aerosol primer for plastic;
- air gun (construction hair dryer);
- stationery tape (for fixing the edges if you work alone), sharp scissors, a stationery knife, a plastic spatula (smooth the surface).
Aerosol primer for plastic
The garage needs space so that, in addition to the car, there is enough space to place a table for a torpedo. At the same time, nothing should interfere with your ability to walk freely around the panel while covering it.
Preparatory stage
Wipe the panel thoroughly with degreaser and let it evaporate. Sand the entire surface with P180 - P240 sandpaper. Fill defects with putty and sand the surface. Then prime the repair areas with aerosol plastic primer. Clean the panel from dust and degrease it completely. The preparations are complete.
Process technology
Covering a car panel with self-adhesive film is similar to the process of tinting windows, only without water. Step by step the work looks like this:
- Cover the panel with material.
- Start removing the backing from one side.
- Smoothly smooth the Alcantara with a spatula.
- Make cuts in the holes (air ducts or glove compartment) and insert the material into the niches.
- Alcantara stretches well, but in difficult places it is better to use a hair dryer.
- Fold the edges.
- Cut off excess material.
Panel in Alcantara VAZ 2109
The torpedo can be assembled and placed on the vehicle.
How to navigate through an equivalent T-shaped intersection
- masking tape;
- scissors;
- brushes;
- fine-grained sandpaper;
- sewing machine;
- threads;
- paper for patterns;
- universal glue;
- primers;
- degreaser;
- marker;
- construction hair dryer.
When choosing a material, be sure to select the appropriate adhesive composition for it, and also learn about the key features of working with it. Not all materials can be heated too much.
What the experts say
Professional auto shop craftsmen have accumulated extensive experience in reupholstering car panels inside and out. Here is a short list of tips from experts:
- Practice first. Take a small piece of material and drag some object.
- Prepare the surface carefully, because any bump or grain of sand will definitely appear on the fabric (defects are not visible on dense fabrics).
- Take your time, otherwise you will have to tear everything off and start again.
- Remove the backing carefully to avoid the adhesive surface sticking together.
- Do not bring a hot hair dryer close to the material and do not hold it at one point for a long time, otherwise you can easily burn the material.
A cracked or shabby torpedo is not a death sentence. It is easy to put in order, capable of bringing joy to the car owner and arousing the interest of passengers. It is enough to select the appropriate material and allocate some free time for the event.
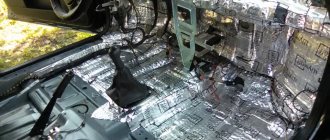
We start with vibration isolation
The best anti-vibration material is Vibroplast (Silver), with which we glue all flat areas of the plastic shell, as in the photo below:
- This increases the weight of the plastic, which significantly reduces its vibration
- About 50-60 percent of the total area is glued on flat areas
- However, it is not recommended to make the torpedo too heavy, since as the weight of the structure increases, we leave the fasteners unchanged
- Parts of the dashboard must be covered with vibration insulation, as well as air duct elements, a cabin stove and a metal frame for rigidity
- Simply put, all parts that, when touched, can produce various sounds and vibrations
- And after pasting the surface with a vibration isolator, the sound becomes much more muffled than before
How to update the appearance of your car's dashboard?
- The first method is to paint the car panel. This is one of the most common and simplest methods. But, despite the fact that it is the most common, it is fraught with a lot of complex nuances that should definitely be known and taken into account. First of all, this is due to the fact that the surface of the dashboard cannot be called absolutely hard and this introduces some difficulties into the process called painting the car panel. To be completely honest, paint often doesn’t look as chic as we would like. But this type of interior renovation can always be done in such a way that it will be very worthy.
- The second method is covering with vinyl film. This method has not yet gained as much popularity as the previous one, but it should not be discounted. As for the films themselves, they are quite diverse. They come in matte, glossy and carbon-fibre finishes. You can choose any color according to your taste and color that harmonizes with the interior trim and the car itself. This method has both its advantages and disadvantages.
Repair methods
There are three main approaches to repairing a dashboard after airbag deployment:
- Functional repair of instrument panels includes mechanical restoration. The dashboard and steering wheel are installed in place, and new airbags are mounted under them. After this, the program resets information about airbag deployment;
- A complete interior dashboard repair includes not only mechanical repairs, but also aesthetic ones. The console is dismantled, a complete reupholstery is carried out using selected materials, a new SRS complex is inserted under the steering wheel and covers and reprogramming is carried out. This method makes it possible not only to recreate the transport security system, but also to change its internal appearance;
- A rough repair is suitable for cases where the car has received minimal damage and does not require major restoration procedures. In this case, the holes where the pillows used to be are filled with polyurethane foam, and the covers are installed in their original place. This method is bad because in the event of a new accident, the SRS complex will not work, because there will be nothing to work. By resorting to the third type of repair, you endanger not only your life, but also the lives of your passengers.
Partial sound insulation
The second method of partial panel “noise” is used only if it is impossible to remove the entire torpedo:
- However, this method can also give tangible results and the price will be lower.
- To carry out partial soundproofing of the panel, it is necessary to remove all possible parts of the hinge and lining from it
- Removable elements include: glove box, center console, side trim, fuse box cover and others
- Then all parts of the panel are treated with anti-vibration and soundproofing materials, the instructions are described above
- And if you still doubt the need for soundproofing your dashboard, then it’s time to tell you about the additional benefit
- Many drivers note that in winter it is almost impossible to warm up the car interior to a temperature of about -15º so that the windows do not freeze
- And immediately after treating the panel with sound insulation, even at -20º, the car quickly becomes hot, because air begins to blow from all the nozzles (the flow goes both to the windshield and to the outer side windows)
- In addition, the noise in the engine compartment is significantly reduced; the jingling of wires and the creaking of moving panels are no longer heard
Therefore, watch the video, you can safely get down to business, we wish you success and enjoy the resulting effect.
Tuning techniques
To successfully complete any modification to a car or its dashboard, you need to know a few simple techniques that will allow you to perform the necessary actions. We have already talked about how to properly stick tint film, and these are the same techniques that are used when gluing translucent films to the back of the device display with slots so that the divisions and numbers glow with the right light. Another no less interesting technique is the use of fluorescent paints to paint the needle or scale divisions of the device. To apply this paint evenly, it is enough to use either a simple template over which you can safely paint, or simply carefully apply it with a thin brush. Also, do not forget about the need to correctly calibrate the pointer after removing it, because an incorrectly calibrated device is a very serious problem that can only be solved in a service center.
Sealing joints and eliminating squeaks
Sound-absorbing panels not only absorb sound, but are also a source of it, this occurs at the joints due to friction between the material and the material:
- After applying the sound insulation, you can begin installing the panel and simultaneously perform parallel gluing of the joints of the contact (rubbing) parts of the Torpedo
- Make sure that all joints of the parts are treated with sealant; here it would be better to use Madeleine
- Madeleine adheres primarily to all moving panel elements (for example, to the glove box lid), to the air ducts where they are attached to the deflectors, and to the fastening elements of the trim panels
Treatment of joints from scratches
- When installing the instrument panel, carefully check the condition of its fastenings to the body.
- If the fastener is missing or damaged, be sure to replace it
- And if there is such an opportunity, make a couple of additional fastenings to increase reliability, since after the “noise” the mass of the torpedo increases greatly
- Don't ignore wiring clutter, it's best to take them apart and compactly twist them into thicker bundles
- Bitoplast or Madeleine strips can be used to tie bundles of thread
- Try to keep them tightly together so that they do not have the opportunity to swing freely
Note: It has long been known that internal oven doors are an additional source of noise. Therefore, when completely removing the dashboard, you need to glue the heater frame and shock absorbers, which often do not fit tightly and have large gaps. This procedure will not only remove excess noise, but also reduce heat loss in the cabin.
Let's consider what tools are needed for this?
- Hand sanding will not be very effective, so we recommend using a sanding machine, or preferably two: a large one and a small one, which is more convenient for small parts
- Compressor and spray gun. The more professional models you choose, the better you will do, since cheap models require more skill.
- Dye. Two-component varnish, urethane
- Priming. You can use a not very expensive one - “for metal, wood and plastics.” You can take soil with filler. The main point is to prevent the primer from starting to bubble from the paint.
- Purchase acetone or white spirit, which are necessary for degreasing surfaces.
Preparing for painting
Any work to restore or repair a car requires careful preparation. Work on restoring the dashboard of a car is no exception.
On a note! To ensure that the interior remains not only clean, but also does not collect odors that will remain after painting the panel, it is better to dismantle the front panel from the car.
After removing the dashboard from the car, you need to process the plastic. This is done so that the paint does not begin to peel off after a certain period of time. First of all, the panel is thoroughly washed with soapy water or a special car shampoo. After drying, the surface must be treated with any degreasing agent. After this, you need to start sanding the car’s instrument panel. It is imperative to perform such an operation, since with the help of grinding it is possible to eliminate unnoticeable temporary irregularities. Dust from grinding is removed using sticky wipes or rags.
Beginner drivers should remember that sanding will be much better if the sandpaper is soaked in cold water for a quarter of an hour before work.
The next stage of preparatory work for painting will be priming the dashboard. It is best to use aerosol primers, as they not only adhere perfectly to the plastic, but also preserve its durability. After this, degreasing is carried out again.
Painting a car panel is the most common option!
Let's take a closer look at the first option, since painting a car panel is the most common among car enthusiasts. By the way, as one of the options, we recommend using rubber paint. This type of paint is commonly used on cell phones to prevent slipping in the hand. Compared to conventional spray paint, it has a number of advantages:
- the surface acquires a pleasant to the touch rough-rubber surface;
- absence of solar glare on such a surface;
- no seams or bubbles.
- acrylic-based rubber paint is quick-drying;
- moisture resistance;
- has no smell;
- the base bends without cracking;
There is a paint on the market that is specifically designed for painting bumpers; it comes in spray cans and has an acrylic base.
To carry out painting without removing the dashboard, you need to follow the following rules for organizing the work of this process.
- All small parts and those parts that cannot be painted should be sealed with masking tape or other material. Also seal the windshield and interior ceiling.
- Painting a car panel involves degreasing the surface. The solvent is applied to the fabric, the plastic is wiped, and then we wait for it to dry completely.
- Decide exactly on the paint color, as changing the color will be problematic. Matte black paint looks very good in this design. But, if the car is light, then you can consider light blue, white-violet or white-light green options
- Carry out painting following the instructions.
- If you decide to paint with regular paint, then you need to apply it in several layers, and then apply varnish.
Painting a car panel requires careful preparation.
VAZ car owners club
Initially, everything in my VAZ 2101 with the “door cards” was very sad, they were frayed, bent and barely stayed in their rightful places. It was decided to solve the problem radically - to make the door trims ourselves, and use thicker plywood as a base than in the stock version. Why thicker? - to create proper acoustic design for the speakers in the doors. And use leather as a material. (it is also called dermantine).
Once it’s planned, it must be implemented
Adjusting the brightness of the backlight
Most often, to adjust the brightness of the backlight located behind the device, you need to assemble it, but if something does not suit the brightness, the device will need to be disassembled and adjusted again. In order to avoid wasting time on such actions, we advise you to connect the backlight through a variable rheostat, which can be used to control the intensity of the glow by simply turning it up. Naturally, it is best to carry out the adjustment 3 times - during the day, at dusk and at night, to understand whether it is convenient to look at the devices.
How to tighten the front panel (dashboard) of a car with your own hands
If you are planning to change the interior design of your car, then you cannot do without reupholstering the front panel, or, as they call it in everyday life, the dashboard. You can choose a new color scheme and texture for it. Or you can use materials similar to the previous ones and only slightly refresh the scratched and worn-out coating. Many motorists do not risk re-tightening the panel with their own hands for fear of ruining the appearance of the interior. However, the biggest difficulty in this process is deciding to start work. In addition, if you already have experience in reupholstering other interior elements, this task will not cause you any difficulties either.
Difficulties of functional tuning
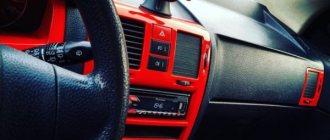
Often, functional tuning is limited only to replacing older or faulty car devices with newer and more modern ones. However, we should not forget that functional tuning also includes the installation of additional vehicle control elements such as an immobilizer, on-board computer or built-in additional devices. The main problem with such modification is not so much the choice of components as their proper installation. Most often, novice tuning enthusiasts who want to carry out such an installation at home will have to face such a problem as difficulties in calibrating devices. Imagine that the speedometer will show an inadequate speed of the car or the fuel gauge will deceive you at the most inopportune moment.
Separately, it is necessary to say about such a point as the legality of modifications. That is, if the design of the car provides for a speedometer or tachometer of the exact model that is installed at the factory, it will be quite difficult to explain its replacement during maintenance. Therefore, it is better to carry out aesthetic tuning of devices that have already been installed on the car, and place additional ones either on top of the dashboard or in those places that are still free. Aesthetic question
When carrying out aesthetic tuning, you need to carefully plan everything, because you will need no less skills than when carrying out a functional improvement of the dashboard, and in addition to it you will also need an excellent sense of taste. If you yourself know what you want, all that remains is to prepare the necessary materials and elements, and we’ll talk about this a little later, but if you don’t have a clear plan, then it’s worth developing it in advance.
First of all, look for inspiration on car forums or ask for advice from motorist friends who have tuned their cars. Naturally, each person has his own taste, but someone’s ready-made improvements may well lead you to an interesting solution that you can later implement. In addition, knowing what you want to achieve with your car, you can easily select the necessary materials and apply certain solutions related to the manufacture of elements necessary for tuning.
Cover technology
Interior upholstery always starts with the seats, as they are subject to wear and tear more often than other decorative elements. To do this, the old sheathing is cut along the seam and will act as a template for the pattern. When cutting new pieces, try to make a small supply. It will need to be folded when sewing, in addition, the bend will stretch the skin well and will have a fairly attractive appearance.
There will always be doors on the second line. To do this, the removable panel is disassembled into separate parts and sheathed individually. This approach will allow you to show creativity, for example, sheathing different elements with different materials. If the plastic is preserved normally, then it does not need to be sheathed. It also looks good compared to other materials.
The ceiling is the most difficult area of work. To begin with, the old casing is dismantled, lamps and everything that interferes with further work are dismantled. If you plan to cover the ceiling with a leather substitute, it is recommended to heat it first. As the temperature increases, its elastic properties will improve, and it will stretch quite nicely. The edges of this material are secured with glue. Then ceiling panels, handles, hooks are applied, cutouts are made for the lighting shades and their further installation occurs.
It is recommended to choose one color for the ceiling, doors and all other parts. This makes the car look more solid and attractive.
To cover the trunk, it is not necessary to use the above-mentioned materials. Typically, panels for such doors are made of plastic in compliance with the required dimensions. Fastening is carried out using self-tapping screws. However, there are models for which this panel is not provided. In this case, you will have to drill the holes for the screws yourself. As a last resort, you can use the above-mentioned materials and simply cover the trunk lid.
Important points
- If the folds of leather formed on the cover after putting it on the dashboard cannot be smoothed out with your hands, you should use a rag soaked in hot water. To avoid burning your hands, this operation should be performed only with thick rubber gloves;
- Care should be taken to ensure that drops of glue do not fall on the front side of the leather. If this happens, you need to let the drop dry and carefully cut it off with a knife. And the stain remaining on the skin can be erased with a regular eraser.
So, all a car enthusiast needs to re-tighten a dashboard is patience. The only difficulty may arise at the stage of stitching the fragments, especially if the car owner has little idea how to work with a sewing machine. If this is so, then before working with leather, it is worth practicing on ordinary matter.
Copywriter with five years of experience.
Step-by-step instruction
Car dashboard repair is carried out according to the following instructions:
- Removing the console. Carefully, without damaging the electronics, dismantle the front console and remove any old material from it, if any. After this, rinse the panel thoroughly using detergent and a brush.
- The new material will add extra size to the dashboard, which is why the panel runs the risk of not returning to its original place, and the instruments may not fit into the holes. To prevent this from happening, file the edges of the holes by 1–3 mm, taking into account the thickness of the covering material.
- Make patterns for the new panel. Remember that the seams should fall on the bends of the console. In addition, do not forget about the seam allowance (8-10 mm).
Comprehensive tuning
Quite often, motorists who improve their dashboard with their own hands modify several instruments at once or the overall lighting of the dashboard to make it look more stylish. In this case, it is better to prepare in advance the same templates for the instrument scales and the same color LED backlights. In the same case, if you do not have access to LEDs of the desired color, you can get by with ordinary white LEDs and simply stick a translucent film of the desired color to the desired places. This film will be a regular light filter, and you will achieve the same effect as when using LEDs of different colors.
This is interesting: We diagnose the brake system with our own hands
Removing and installing a torpedo on a VAZ 2110 with your own hands
The need to remove and replace the dashboard on a VAZ 2110 car may arise when repairing devices and parts located under its surface. In particular, it is with the removal of the dashboard that the car’s air intakes are inspected. Sometimes they can become clogged and prevent your heating or air conditioning systems from working properly. The process of removing and replacing the dashboard on a VAZ 2110 is not particularly simple. To carry it out, you will need to be patient and master the skills of masterly working with instruments.
In today's article we will tell you how to remove, replace, install, modify and improve the dashboard on a VAZ 2110 with your own hands. In addition to all this, we will give you a photo report of the work done and show you an interesting thematic video.